Adam Savage’s Custom Sewing Table
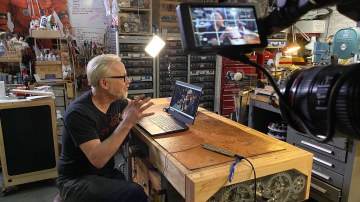
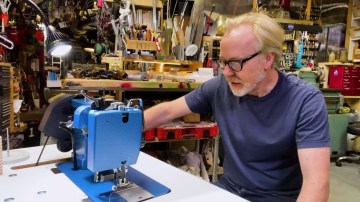
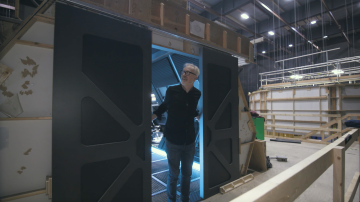
For his most recent One Day Build, Adam got to utilize his new sewing station he built from scratch. This cave infrastructure project also allowed Adam to experiment with a new kind of tabletop surface!
34 thoughts on “Adam Savage’s Custom Sewing Table”
Leave a Reply

One Day Builds
Adam Savage’s One Day Builds: Life-Size Velocirapt…
Adam embarks on one of his most ambitious builds yet: fulfil…

Show And Tell
Adam Savage’s King George Costume!
Adam recently completed a build of the royal St. Edwards cro…
All Eyes On Perserverance – This is Only a Test 58…
We get excited for the Perserverance rover Mars landing happening later today in this week's episode. Jeremy finally watches In and Of Itself, we get hyped for The Last of Us casting, and try to deciper the new Chevy Bolt announcements. Plus, Kishore gets a Pelaton and we wrack our brains around reverse engineering the source code to GTA …
Making
Adam Savage in Real Time: God of War Leviathan Axe…
Viewers often ask to see Adam working in real-time, so this …

One Day Builds
Mandalorian Blaster Prop Replica Kit Assembly!
Adam and Norm assemble a beautifully machined replica prop k…
House of MCU – This is Only a Test 586 – 2/11/21
The gang gets together to recap their favorite bits from this past weekend's Superb Owl, including the new camera tech used for the broadcast and the best chicken wing recipes. Kishore shares tips for streamlining your streaming services, and Will guests this week to dive into the mind-bending implications of the latest WandaVision episod…

One Day Builds
Adam Savage’s One Day Builds: Royal Crown of Engla…
One of the ways Adam has been getting through lockdown has b…

Making
Adam Savage Tests the AIR Active Filtration Helmet…
Adam unboxes and performs a quick test of this novel new hel…

Making
Weta Workshop’s 3D-Printed Giant Eyeballs!
When Adam visited Weta Workshop early last year, he stopped …

One Day Builds
Adam Savage’s One Day Builds: Wire Storage Solutio…
Adam tackles a shop shelf build that he's been putting off f…











Immediately spotted that fancy sewing table on the car seat video…
That’s really cool! I just did some sewing on a costume I’m working on for the 501st and man, would I like to have a table like that! It would be incredibly useful to have the sewing area be flush to the table.
I so like the foot pedal holder on it, I can see making one of those for my pendant motor pedal when I finally build a portable workspace for it.
That’s a great project. I love the illuminated freezer drawers. By the way, if you run the LED strip down the side you can illuminate all the drawers.
Brilliant. This is exactly what I need to build for myself. I have a vintage machine that came in a fugly table, so constructing something like this is absolutely perfect. Thanks for sharing Adam!!
Wonderful work Adam!
I love sewing and sewing machines.
When I was 5 or 6 my grandma’s sewing machine was my best toy.
Adams projects always inspiring. Thank you Adam and Tested
I’ve used laminate for a custom workbench. It’s not the most durable but when it gets too stained, scratched, burned, just glue another piece of laminate on top, trim it, and you’re good as new for a while.
I wonder if this and the one day build were shot on the same camera?
Wow, I just asked about this in the car cushion video, thanks Adam.
Awesome sewing table! The illuminated drawers are awesome, as is the lift. My $3 junkjard machine has to make do with the dining table at the moment…
don’t know if you saw my question last week on “ask me anything” here on tested about making custom tools vs. making stuff, and if you had some interesting tools/tweaks. Was hoping for some comments, but a show and tell like this is even better! I hope this is going to be a series – would love to hear about your lathe improvements!!
The next simple thing I’m going to make for my lathe is some adjustable stopper blocks to set hard limits on the x axis – this will allow me to turn down the diameter without having to look at the dial all the time. That, and eventually finish the CNC conversion once I find the time…
That’s awesome. I too love that Adam made the table top flush with the work surface of the machine.
I’d love to see Adam’s idea of for a mitre saw station. You’d want the side supports also flush with the deck of the saw. I’d be curious what other features he’d incorporate. This is a little selfish of me since I want to build one and I’d love some ideas.
Adam’s first pronunciation of Janome is correct. Jah-no-me.
I work in web development and my former employer built their previous site version and I used to maintain it. Me knowing nothing about sewing was still pretty interested. They had custom forum software that their users would share info, tips, tricks, etc on. I’d find myself reading it sometimes just out of curiosity.
I’m really surprised that Adam hasn’t worked with laminate before. I’ve built some projects with it in the past and it’s awesome. I built and laminated the counters in my office. They were the largest pieces I had ever done and learned a lot during the process. The completed counters were an L shape with the long side measuring 15′ x 3′ and the short side 6′ x 3′. I did the 15′ length using two pieces of laminate and even with the shorter length, putting down an 8′ piece by myself was a huge challenge but I was really happy with the result. Home depot carries large pieces in a few styles as well as the contact cement.
Here’s a really old picture of the first unit I made with laminate. The counter top pieces were pre-made and I bought the matching laminate to build the stand which was built with MDF as one piece and then laminated. I just used a router to cut the laminate to size after application.
Oh this got me inspired to finally sort out my crafting supplies station! I’ll get something from Ikea as a base and then hack it to fit my needs. I don’t mind drawers though 🙂
(Oh and the videos are still in SD with no volume controls.)
I’ve never said this to anyone before and I hope I don’t again but, I’m so glad you’re unemployed Adam xD
I noticed the sewing table right away, and though “that has to be custom made”. It’s looks great. One question though. Can you raise the sewing machine above the top in order to get to the bobbin?
ok Adam where is this place that sells laminate scraps? Don’t keep these resource secrets!
Hey Adam, if you read this….
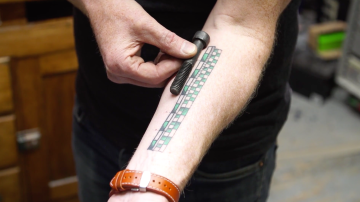
So my father was/is (among other things) a professional grade upholsterer. He still has one of his professional stations in the garage. I have to say your general design is basically spot on! His is a little longer and the machine looks more industrial but the retraction and and even goose neck light are there. His is also laminate top (grey/green) and has the measuring tape in the front. Only difference I can think of (from memory) is he has some removable rods sticking up from the table – I think for large spools – and….are you left handed? Because I could swear his machine is pointed the other way.
Anyways – great job – you obviously did a lot of home work. I have a machine but I don’t think I can remember how to even operate it! Thing always kinda scared me.
I’ve never done anything cosplay-ey before, but a month ago my oldest daughter suggested she wanted to do something cosplay-related. And, bam, I’m on it!
“I’ve always wanted to do something from 2001,” I say.
So I’m learning to sew now: follow a pattern, learning about fabric types, about interfacing…. And me an old(ish) man.
I’m rockin’ on your sewing table. I built one for my wife a dozen years or so ago — similar to yours actually (the smaller one from the Rockler plan … yeah with the lift and all that like yours, drawers stacked on one side). I did it in maple I believe though, and finished in tung oil.
Seeing your setup though — Daddy is kind of thinking about building his own. It just doesn’t feel like I can embrace the tool unless it is mine!
When (if) we get the cosplay thing looking good, I’d be happy to share photos of the finished product.
What is the reasoning behind making the machine lower below the table?
I have been wanting to sew for about 20 years and finally have a machine arriving this coming weekend. great timing and thanks for sharing. would love to have seen more of the building process
nice! I just started to sew last year and really enjoy the process.
An awesome design, but my wife and I both had the same question…. No dust cover? In a shop as busy as this one, dust has got to be a factor…..
Cheers, all!
Wow! I know a lot of friends who would kill for a sewing table like that! Thanks for showing us.
As a trick that is easier than clips. Use a stapler I have been doing upholstery for years and it is a life saver
Hey Adam, How about drawing up some plans for your sewing table? It looks to be a great design and I bet a lot of people would be interested in building one. I might add a gooseneck light also. To save money some people could build it without the lift but use a stationary inset for their sewing machine.
I would build it to give to my wife but she would see right through that ruse!
Using laminate is in fact very trivial. When I worked full time with my dad in his carpentry, we got regular orders for furniture with laminate top.
Applying laminate is fast and pretty easy. I used to apply pieces with about 3 x 1.5 meters (max) alone. Its just a matter of technique…
Now I am trying to figure out where adams shop is dammit adam why would you give us the 400 foot hint. I have no plans on ever trying to visit but it is cool to see the area around the shop. Or at least what I assume is the area.
That table is totally awesome! I’ve been eyeing those expensive sewing machine attachments that give you a bigger working area, but this is much, much better! I can’t wait to make something like this for myself. Though since I don’t have a workshop and like lots of different crafts, I’ll probably include a cover for the hole so I can use the table for other crafts as well.
Loving it 😀
the only sewing machine lifter I know of does, but it doesn’t look like Adam installed it that way, as he had a stop part way up. But I think he has a drop in bobbin, so
That doesn’t matter.
Adam, oh Adam, please give us more information about the installation of the lifter!
I made my boys happy and signed up for premium specifically to see how you installed the lifter! I know where to get them. I’ve looked at the directions. I’ve talked to the guys at the Rockler shop. No luck. We can’t figure out where it goes and how deep it’s shelf can be.
I see that yours stops partway up. Mine must stop level, then stop higher, to have front bobbin and free arm access. Does that mean the lifter must be placed higher up than yours is? The Rockler fancy sewing machine cabinet plans show it that way, I think.
How do you install it so it supports the weight of the machine? Even a heavy metal machine? Mine needs a table with a *much* deeper back than yours. Any large item that hangs over the edge or back *at all* affects the accuracy of stitching, which may have caused some your alignment trouble with the dog bed.
Building this may make me actually buy my son the table saw he wants so desperately.
I want to get a table with the rockler lift. Do you need to mount the lift higher than Adam did, to have the lower stop have the machine bed level, then have a second stop higher, for bobbin and free arm access? Does the lift mount on top of a block of wood, or to wood behind it? Does it need to be directly under the hole for the machine, or can it go further back with a larger/deeper shelf for the machine to sit near the front? My table needs to be quite deep, to support quilts behind the machine. Thank you!
I’m trying to visualize what you’re describing — forgive me if I am not following fully.
On the lift, there are three positions: all-the-way-up, a mid-height-stop, and all-the-way-down, I believe.
I mounted the lift such that all-the-way-up gets me close to how the machine would sit on a desk — that is I can sew sleeves and that sort of thing.
The mid-height-stop is adjustable. So I moved that stop such that the sewing foot and sewing surface are more or less flush with the top of the cabinet. This is how I do most of my sewing.
All-the-way-down is just all-the-way-down. For me that is enough to shove the machine all the way into the cabinet for storage.
Of course a piece of wood is mounted to the lift to act as the support for the machine — so you have to take that into account when mounting the lift.
And as for front to back depth — I think the further out your support on the lift is mounted the less stable it will be. That’s just physics of course. The Rocker lift is pretty rugged though and probably can handle the sewing machine hanging fairly far out if on a good solid wooden support. Still, if you can, you should certainly mount some wooden supports behind the lift to bring it a little further forward if that is possible. I think my lift has 3/4″ pieces behind it to bring it forward that much. I could have brought it even closer to me with larger blocks behind it but it was not necessary for my set up.