How I Built a Furiosa Cosplay Prosthetic Arm
Michelle Sleeper's Dragon*Con project building a real prosthetic arm for cosplayer Laura Vaughn.
This is a guest post by cosplayer and fabricator Michelle Sleeper, aka Overworld Designs. We previously shared Michelle’s Half-Life 2 Gravity Gun project.
Last year, I was talking with a friend of mine about some of our “holy grail” projects. I told him that it was one of my dream builds to make a T-800 Endo Arm, as an actual prosthetic for an amputee. You know the scene: in Terminator 2, Arnold cuts off the skin of his left arm to expose his robotic endoskeleton.
I told him how it would be a dream project to build an Endo Arm like in this scene, for someone who is missing a limb. I’ve met or been made aware of a few people over the years who used their unique body attributes in their costumes, but I never had the chance to connect with someone.
He said he wanted to introduce me to someone. This is Laura.
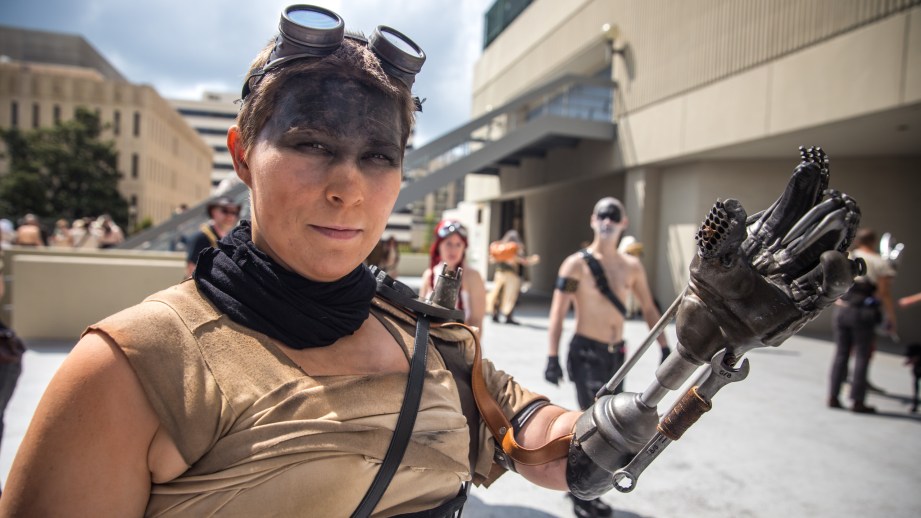
Laura is a left arm transradial amputee, meaning that she is missing her left arm below the elbow since birth. She’s also really into cosplay, and living in Atlanta, she has been a “featured zombie” on The Walking Dead. You’ve probably seen her in the shambling hordes.
We met and I told her about my idea and what we could do, and she was enthusiastic. I felt really lucky because this really was one of my dream projects! She said she had done a few costumes in the past that incorporated her arm, but nothing really to the scale of what we planned. The idea was to 3D print a CAD design for the Endo Arm and possibly wire it up to an Arduino and some sensors and servos to make the fingers open and close. It was going to be a fun and really challenging build, and I was really looking forward to getting it started.
And then, Mad Max: Fury Road came out and changed everything.
You might have read Laura’s blog post on her Tumblr that went viral a couple weeks after Fury Road hit theaters. To quote Laura’s blog post, “If I don’t cosplay this character immediately I’m pretty sure all my friends will riot.”
“If I don’t cosplay this character immediately I’m pretty sure all my friends will riot.”
We had a short conversation at MomoCon here in Atlanta and I asked her permission to build her the Furiosa arm as a real actual prosthetic, much like we were going to do for the T-800 Endo Arm and she couldn’t have been more thrilled. Our plan was to finish it for Dragon*Con 2015, and we both couldn’t wait to get started.
During our planning for the Terminator Endo Arm project, I took a 3D scan of her using an Xbox Kinnect and a software called Skanect. It allows you to easily get a rough 3D scan of a person or an object. It’s not high enough detail to look photo realistic, but it’s enough to get basic proportions. I use this myself to scale Pepakura files and do other digital sculpting where I need to have the proportions of a person or a thing. We tried getting a 3D scan of Laura’s arm and the results were all right. It was just enough to use for scaling and “subtracting” her arm from the Endo Arm model.
When we shifted gears to Furiosa, I decided the first thing to do was to get a plaster cast of her arm, because the prosthetic would have to actually fit her, and there was no way for me to “try on” the prop myself while building it. After an afternoon at the shop, I had one of the weirdest casts I’ve ever made, but it was exactly what we needed!
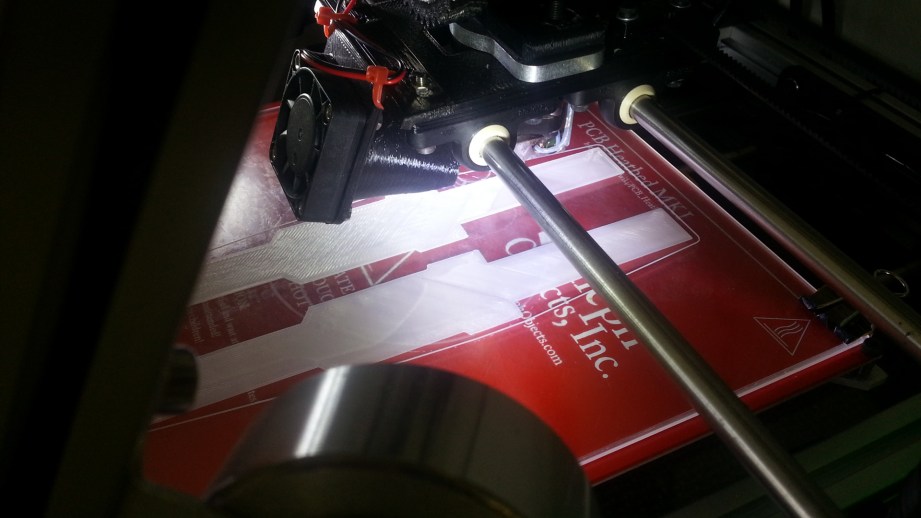
At this point I got a lot of help from Adam Greene of Pixelbash Props, who took a higher detail 3D scan of the plaster cast, and assisted by creating the 3D model used for the build. Laura and I agreed that we should 3D print the arm to cut down on as much weight as possible. I was worried that if it was too heavy that she wouldn’t be able to lift it, or she would become fatigued after wearing it for a short period.
The pieces were 3D printed on my home 3D printer, as well as the printers at Freeside Atlanta, the non-profit hackerspace that I work from. After a few long prints–a total of about 30 hours print time–everything was ready to be cleaned up and assembled.
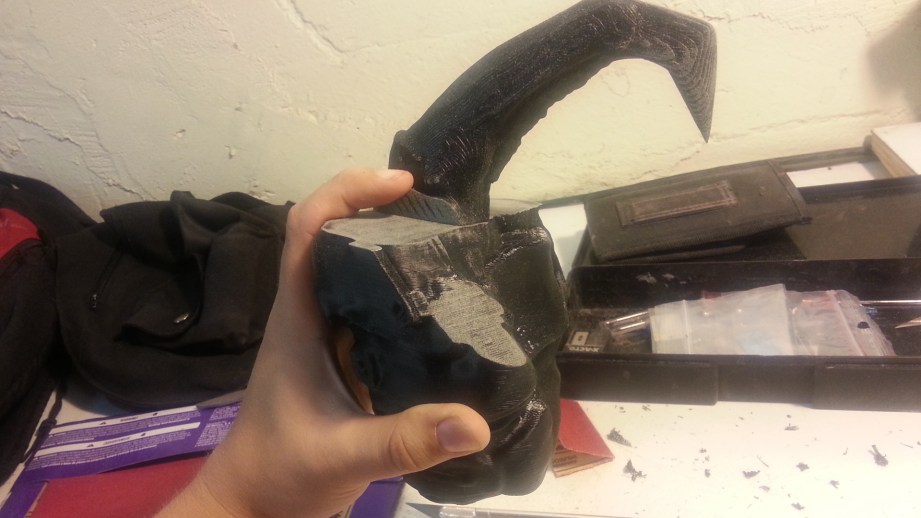
The process of cleaning up a 3D printed prop is pretty simple: Rough sand the surface to get rid of some of the print lines, then (in the case of an ABS print) use “ABS sludge”–a thick mixture of acetone and ABS–to coat the surface. This acts like a body filler and will help fill in the remaining gaps, but as the acetone evaporates, the ABS bonds to itself, so you have a single rigid object. The part is then sanded again with a finer grit sandpaper, and coated in a thin layer of spot putty to fill in any remaining pits or print lines. After that dries, the excess is sanded off, and then primed for painting.
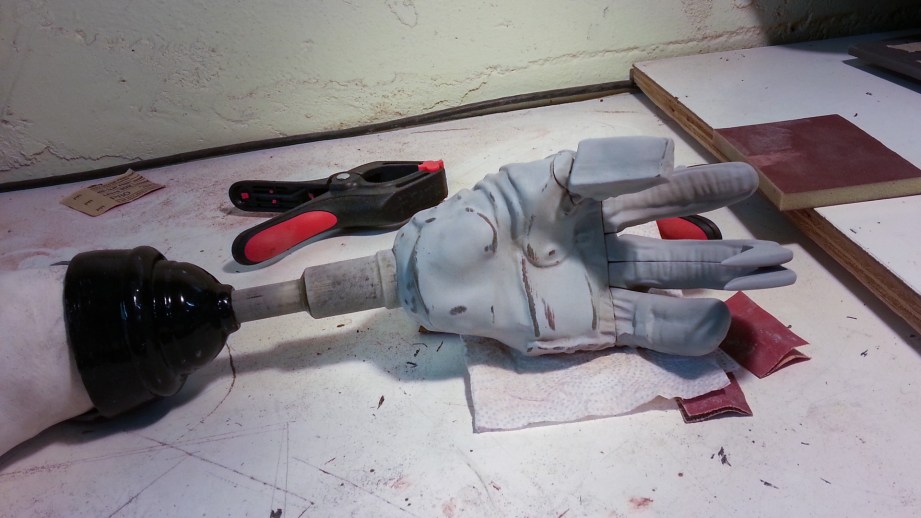
Once the 3D printed parts were cleaned and roughed together, I designed and laser cut the mesh screen for the fingers. It was cut out of 3mm acrylic and heated with a heat gun, and then bent to shape around the fingers. Since building this I’ve discovered the actual prop likely used a motorcycle exhaust baffle, but the acrylic worked out great for us as it was lightweight and readily accessible.
There are two wrenches in the arm, one attached to the “pinky” finger and one lashed to one of the forearm pistons, that needed to be fabricated. I rummaged through the autobay in the shop to find a couple of wrenches that were of suitable size, and then molded them in Mold Max 30, one of the molding silicones that Smooth-On produces. I wound up casting these out of Smooth Cast 320, but my original plan was to use a light and flexible foam. That turned out to be unnecessary since the resin ones were small and light enough to not cause issues.
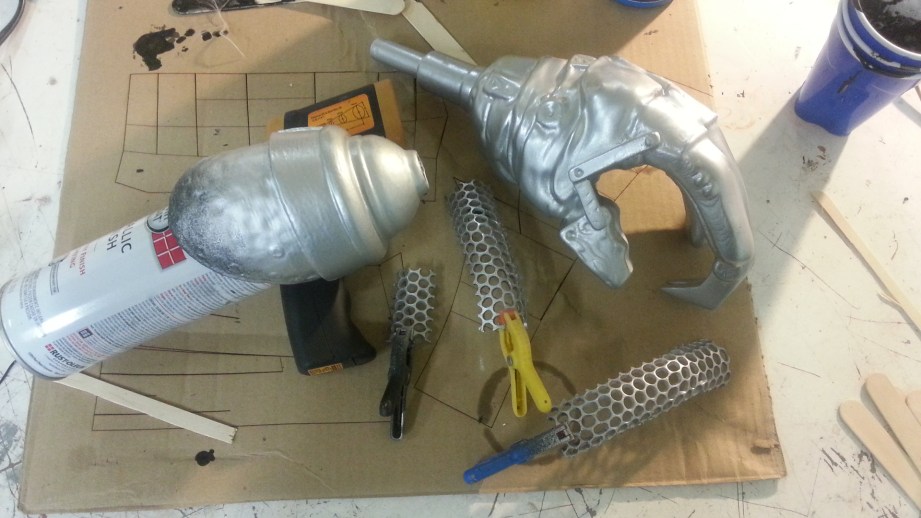
The hand and the finger grilles were hit with a primer, and then a base coat of matte silver. I then did a light dusting with a darker metallic paint for the the lowlights and to bring down the “shiny and chrome” factor. After all, Furiosa’s arm is a functional piece of equipment and has a lot of wear and tear from being out in the Wastelands!
Laura came in for a test fitting, and for us to size and finish the strapping system for the arm. Scrap leather and spare belts were cut down to size and riveted together for the harness. Laura sewed the shoulder pad which goes underneath the pauldron, and we attached those together.
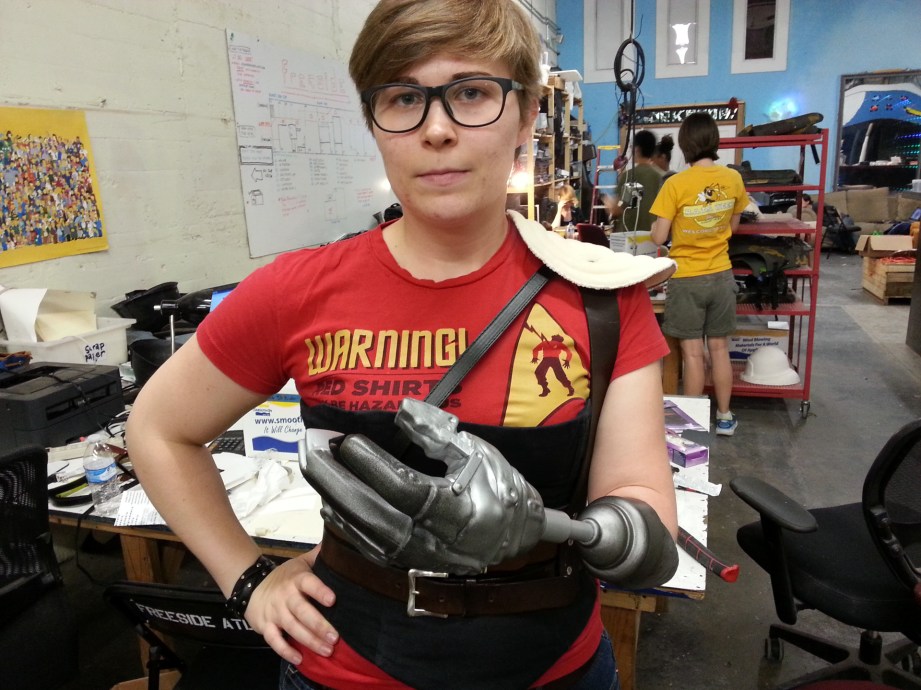
For the support pistons, I used some 6mm fiberglass rod laying around the shop, and 3D printed connecting joints for them. Those were then bolted on to the 3D printed arm, giving the wrist a range of motion. In other words, Laura will be able to pose the wrist.
The two wrenches came out really well. The small one was attached to the pinky finger, and the other was wrapped tightly to one of the support rods with some leather cord. Fun fact: I believe the leather cord is there to cover up the manufacturer of whatever wrench the prop crew cast off of, because it’s placement is exactly where you would expect to read “SNAP-ON” or something. So, I followed suit and covered up the name with the leather.
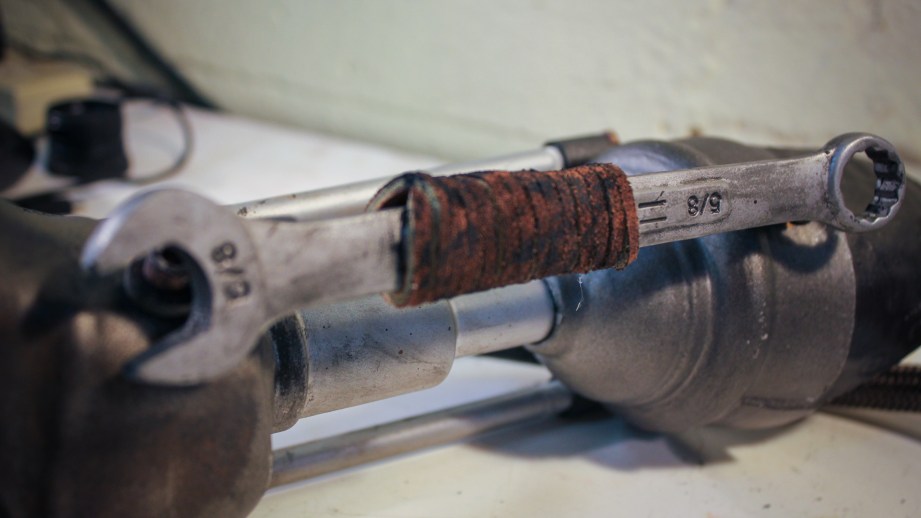
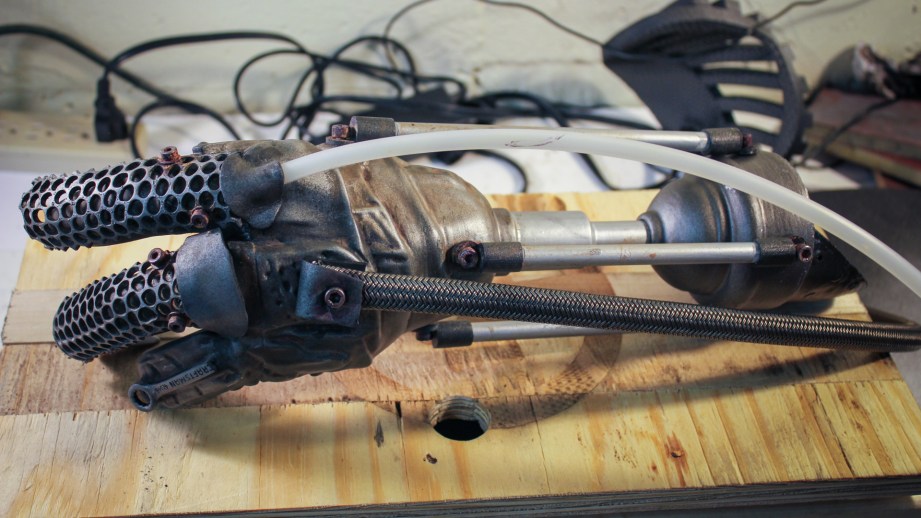
Then it was on to weathering, which is my favorite part of any project. I did a few light washes in black and various tones of yellow, orange, and brown, but I wiped most of it away to keep it looking metallic. The movie has an orange filter applied to most of it, so I relied on B-roll and behind the scenes photos for true to life colors. The arm isn’t rusted as much as it is worn down and dirty, but I did apply some light rust around the bolts that connect the finger grilles and the other hardware attachments.
The shoulder was designed in CAD from looking at stills from the film, then laser cut out of EVA foam. There is what appears to be a model plane engine on the front, so I grabbed a random DC motor from the shelf and glued that in. The pull strap I quickly 3D printed based off of product photos for a weed wacker. Then the whole pauldron was weathered as well.
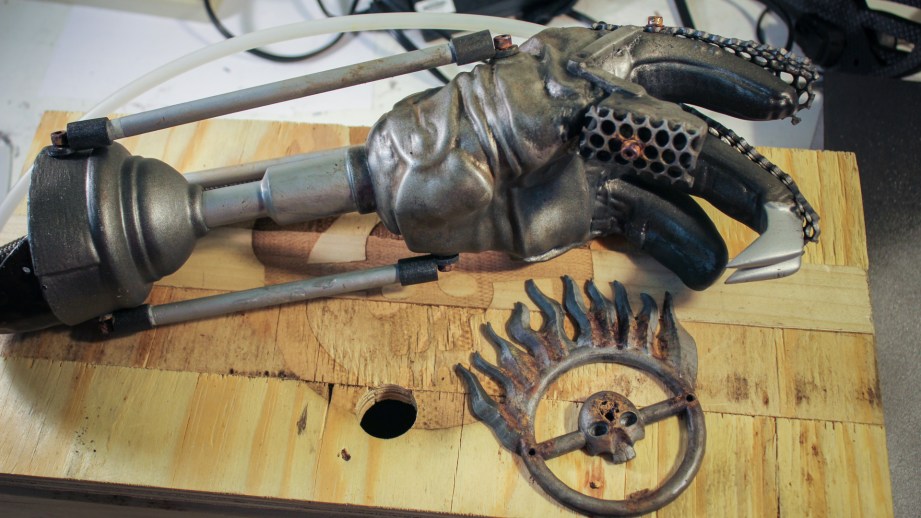
There are three cables connecting the shoulder to the arm: a braided metal hose, a clear/yellow tinted tube, and a brake cable. I got similar looking things of each and bolted them on to the arm, and attached them on to the shoulder end.
She also wanted me to make the belt buckle emblem, which I quickly 3D printed up, and cleaned and weathered. I grabbed this model off of Thingiverse, which you can download here.
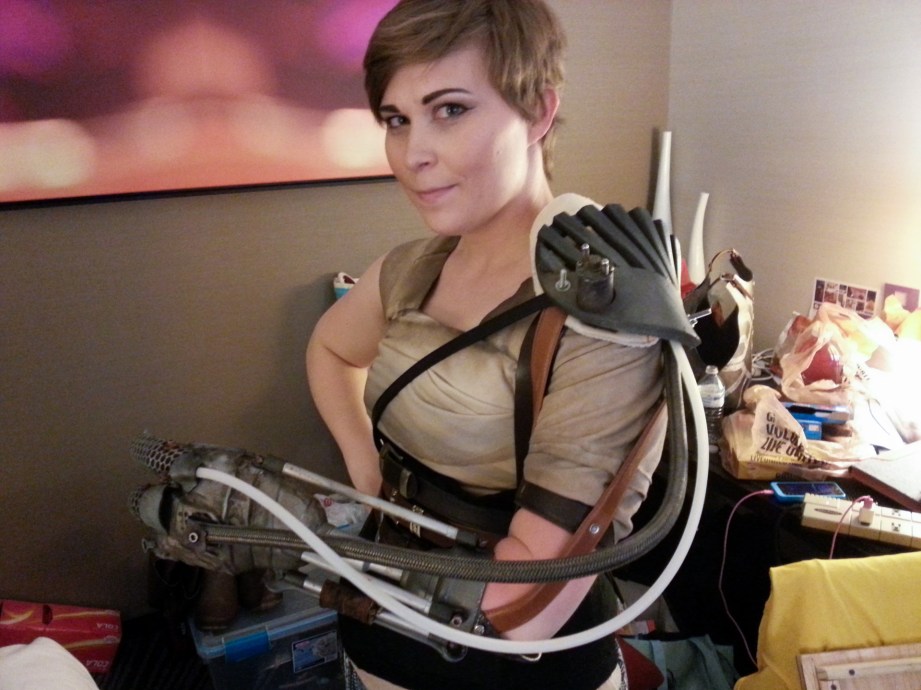
I met up with Laura at Dragon*Con and delivered the prop to her in her hotel room. We did some final fitting of the prop on Saturday so she could wear it to the costume contest, and to make sure everything was 100% for the big Fury Road photo shoot on Sunday afternoon.
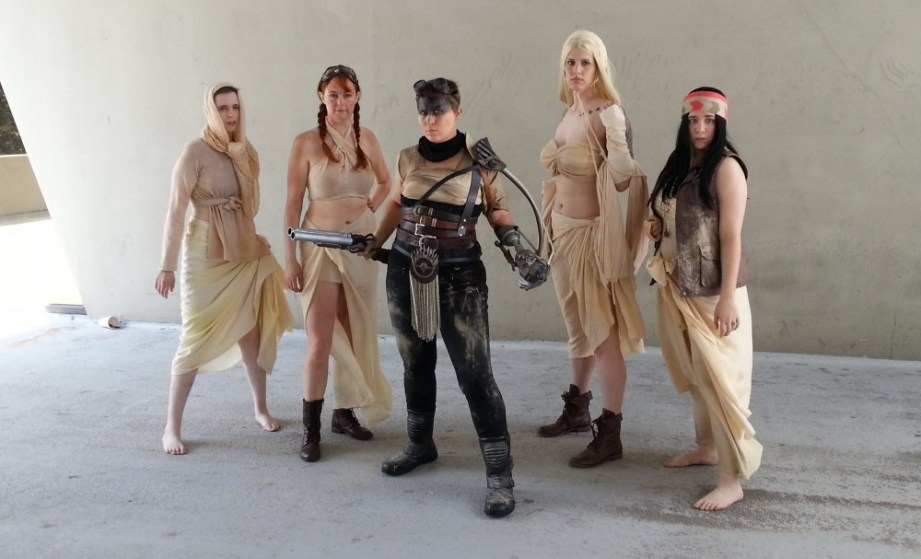
That about wraps it up! It was an incredibly fun and rewarding build and I’m happy I can scratch one of my dream projects off of my list.
Photos courtesy of Michelle Sleeper
Find more of Michelle’s projects at blog, Facebook, and Instagram!
5 thoughts on “How I Built a Furiosa Cosplay Prosthetic Arm”
Leave a Reply

One Day Builds
Adam Savage’s One Day Builds: Life-Size Velocirapt…
Adam embarks on one of his most ambitious builds yet: fulfil…

Show And Tell
Adam Savage’s King George Costume!
Adam recently completed a build of the royal St. Edwards cro…
All Eyes On Perserverance – This is Only a Test 58…
We get excited for the Perserverance rover Mars landing happening later today in this week's episode. Jeremy finally watches In and Of Itself, we get hyped for The Last of Us casting, and try to deciper the new Chevy Bolt announcements. Plus, Kishore gets a Pelaton and we wrack our brains around reverse engineering the source code to GTA …
Making
Adam Savage in Real Time: God of War Leviathan Axe…
Viewers often ask to see Adam working in real-time, so this …

One Day Builds
Mandalorian Blaster Prop Replica Kit Assembly!
Adam and Norm assemble a beautifully machined replica prop k…
House of MCU – This is Only a Test 586 – 2/11/21
The gang gets together to recap their favorite bits from this past weekend's Superb Owl, including the new camera tech used for the broadcast and the best chicken wing recipes. Kishore shares tips for streamlining your streaming services, and Will guests this week to dive into the mind-bending implications of the latest WandaVision episod…

One Day Builds
Adam Savage’s One Day Builds: Royal Crown of Engla…
One of the ways Adam has been getting through lockdown has b…

Making
Adam Savage Tests the AIR Active Filtration Helmet…
Adam unboxes and performs a quick test of this novel new hel…

Making
Weta Workshop’s 3D-Printed Giant Eyeballs!
When Adam visited Weta Workshop early last year, he stopped …

One Day Builds
Adam Savage’s One Day Builds: Wire Storage Solutio…
Adam tackles a shop shelf build that he's been putting off f…



Such a cool project – awesome job, looks great.
I read the writeup on the RPF and I must comment here to simply state: I love this project. It’s the perfect coming-together of situations. It reminds me of the Hiccup cosplay of the guy who was missing his lower left leg. I absolutely love this.
These are great projects…Would have loved to have seen Laura in Mad Max…
Very, very cool.
Thanks for sharing this! Bad ass!