


The Volpin Project, Part 3: Selecting Materials
Now that the prop blueprint is finished, it's time to mentally break the project down into its individual sub-components for building. Choosing the appropriate materials is also important, and today we figure out what materials make sense for each part of the Needler.
Last time, I covered the basics of making the blueprint plans for the Halo 4 Needler project. With that part complete, the next step is just as crucial: planning how to build the actual prop and selecting the proper materials. The Needler itself is a combination of many different elements–organic curves as well as geometric edges–and different materials and techniques will be suited to making its many components.
To give you an idea of how many materials can make up one of these replicas, I documented the entire process of a helmet project I did a little while ago. This used bondo, wood, foam, clay, metal rivets and a lot of filler putty to get the finished form before molding.
The Needler will actually be built twice for the purposes of this project. I’ll start off by making the various components as individual pieces, mostly solid, and comprised of various plastics, wood, clay, and resin. These parts, called “masters”, will be molded and later cast in urethane resin. This will mean lighter parts composed of one type of material, making them stronger as well. These “castings” will be what makes up the finished product. Additionally, castings can be made hollow, which makes running wiring for illumination and batteries much, much easier.
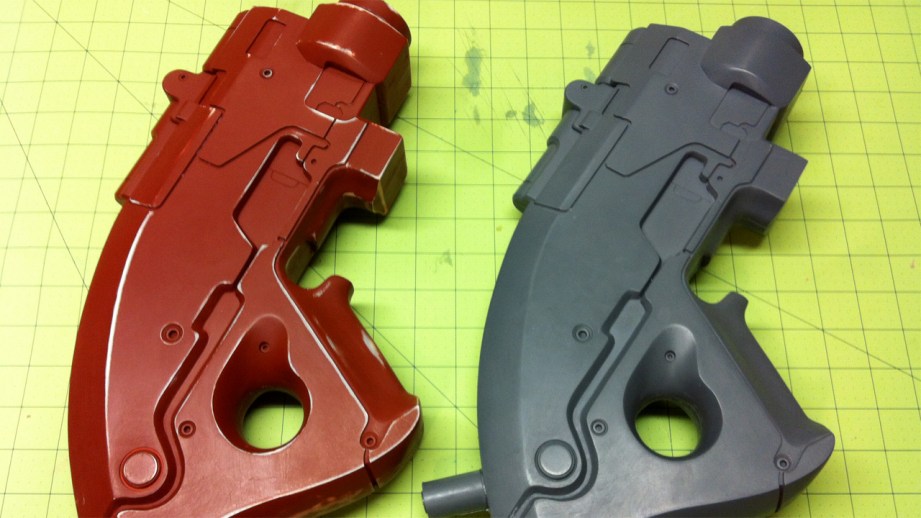
Most of the basic shapes will be made out of sturdy and inexpensive materials. Since finished Needler parts will be molded and cast in resin, I won’t be terribly concerned with weight or durability in the initial stages of building the master.
When making the master prop, it’s a good idea to consider the individual components of the piece as their own little projects. You’re not a renaissance sculptor carving your space gun out of a block of marble, and approaching a build in that way tends to get frustrating pretty quick. By breaking the project down into smaller components, you can concentrate on which piece requires what build technique without getting bogged down in making everything look perfect all at once.
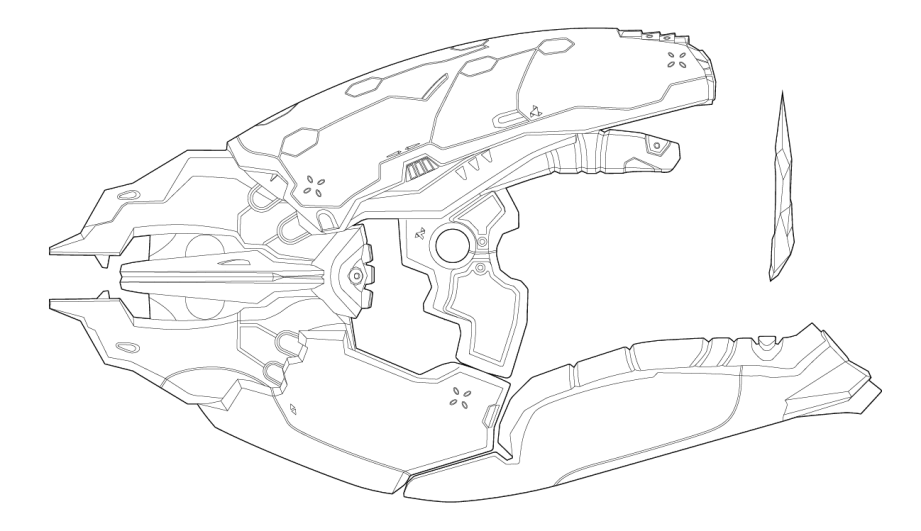
In short, don’t try to build this:
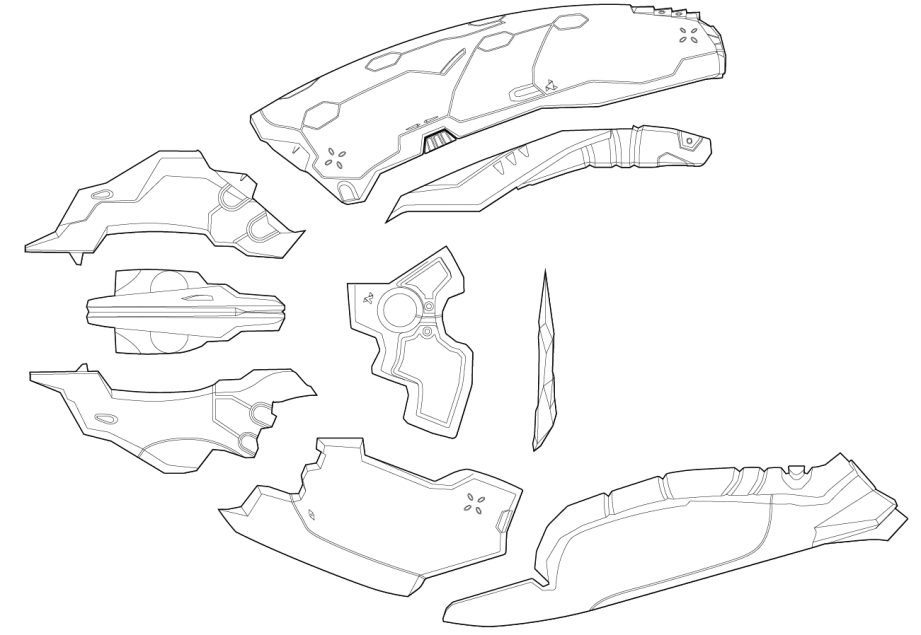
Try to build these:
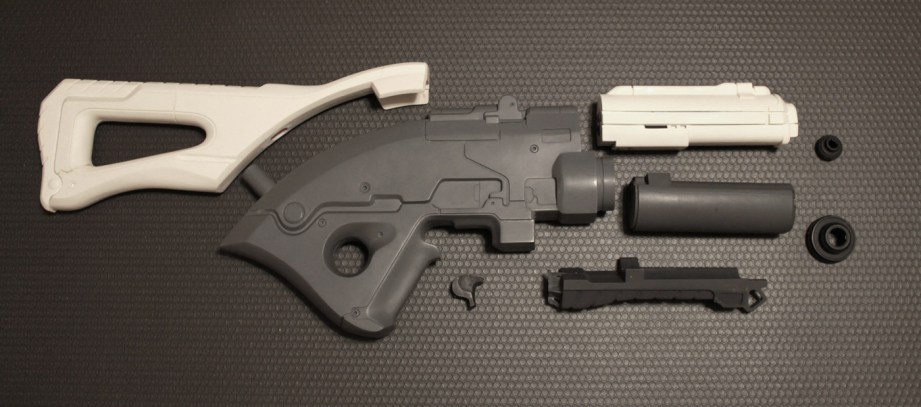
Here is a bit more of a tangible example in the form of one of my N7 rifles.
I’ll admit I’m not a sculptor of any sort, but I’ve figured out many ways to skirt that shortcoming and use a bit of mechanical engineering and drafting tools to get pretty solid results.
Building through Layering
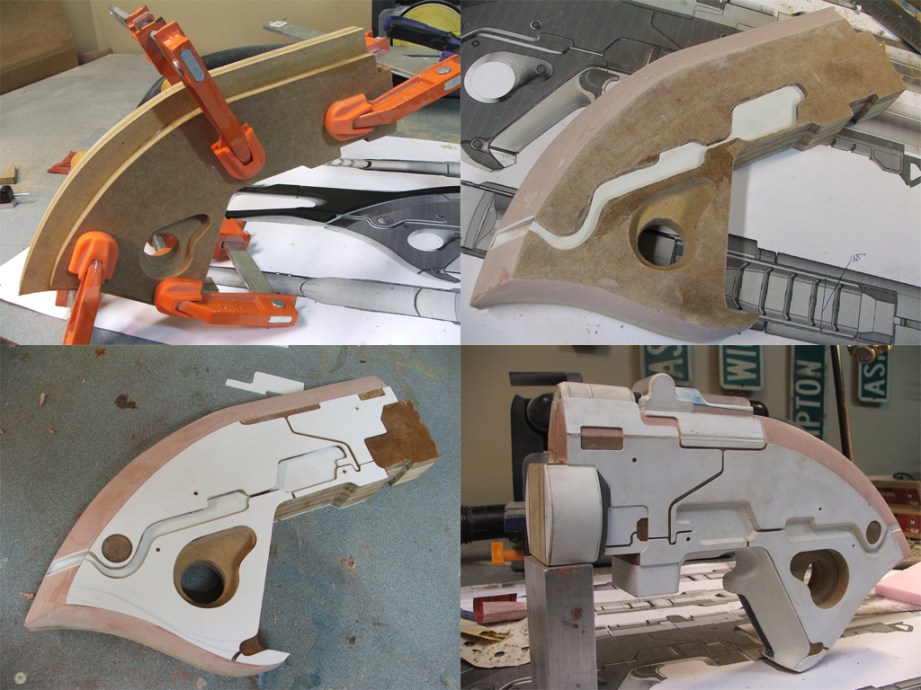
This technique is a pretty simple concept, but it might not immediate jump out as a solution for those starting on their first project. Essentially, you build an object by assembling it from sheets of material (sometimes referred to as “slicing”) from the inside out. This process is convenient when making large objects with flat sides that have a lot of intricate geometry. Beveled edges can be created by using clay or bondo to fill in the spaces between layers, like in the photos below. For the Needler project, this technique will come in handy for the handle as well as the front “emitter” areas of the prop.
Since layering works best with large sheets, there are a lot of material options to choose from. One of the biggest go-to’s in DIY prop making is a cheap and readily available wood called MDF (medium density fiberboard). Think IKEA furniture backing. Essentially just sawdust and glue, MDF isn’t the most archival material but it is inexpensive, versatile, and found at pretty much any home improvement store. It is a great starter material that can be shaped with simple tools like a jigsaw and dremel. MDF can go a very long way in a project if you want it to!
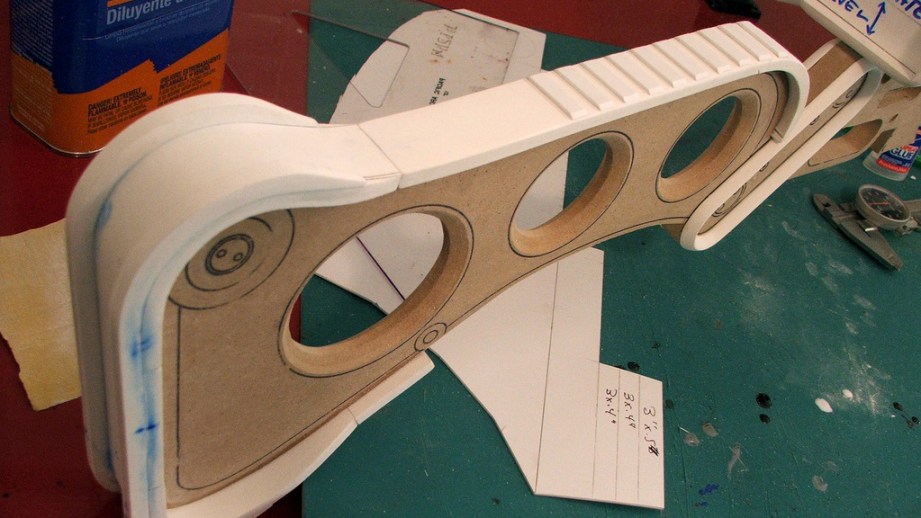
A step up from MDF in many aspects is a material called “sintra” or “PVC foam board.” Sintra is a foamed plastic sheet that is lighter, easier to glue and sand, and can take a little bit more detail than MDF. Unlike MDF, it can be heated to take simple curves, making accent details much easier to accomplish (like in the image below.) I’ll be using both of these in various areas of the Needler, with explanations to why as the project continues.
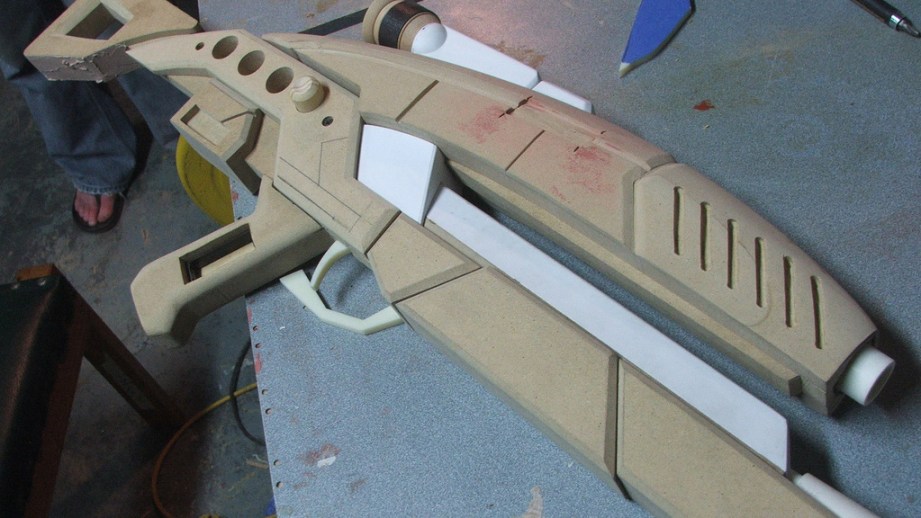
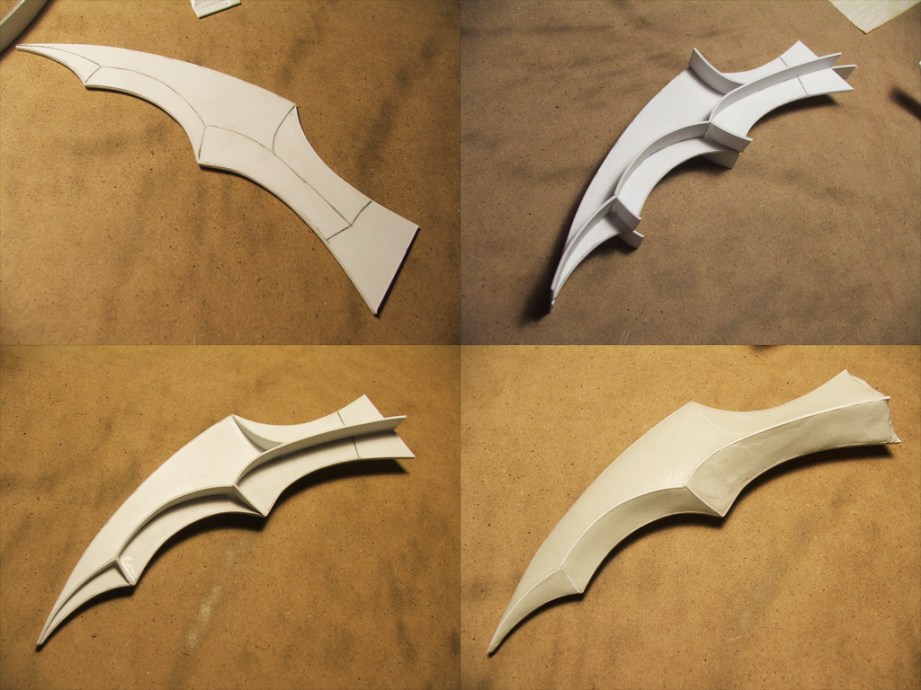
For more intricate details, I’ll be using plastics like acrylic and styrene. Both of these materials come in very thin sheets and can be laser cut, shaped with heat, and vacuumformed. The barrel part in the photo below may look complicated, but its really just seven sheets of acrylic stacked together.
Forming Organic Shapes
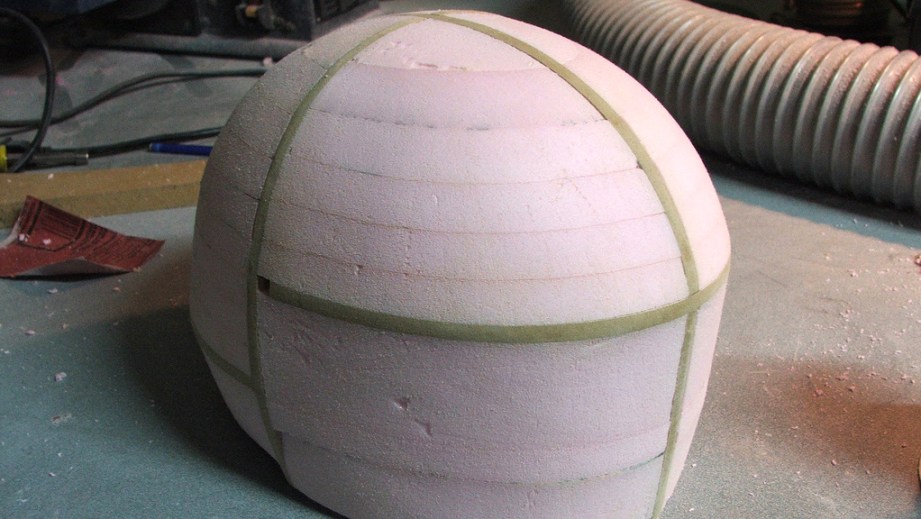
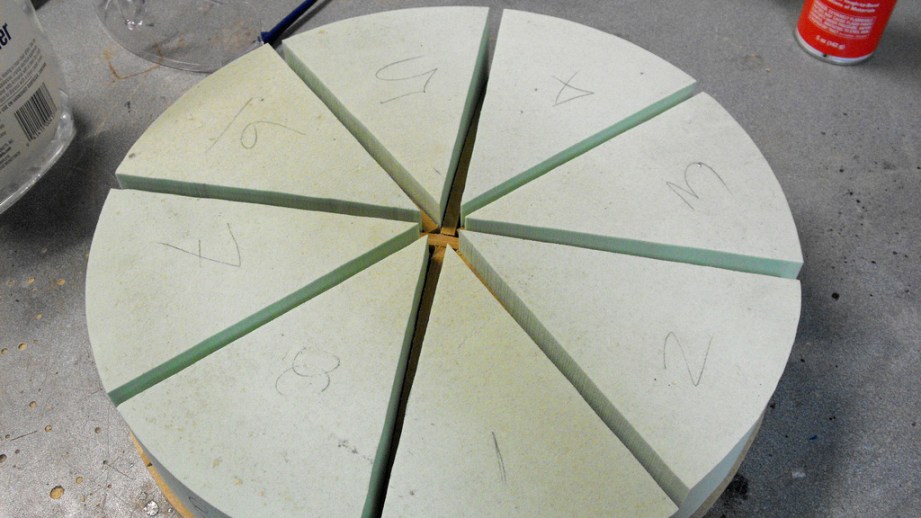
Domes and compound curves are a bit tricker than flat forms and geometric shapes. Many builders will scour hardware stores for similar shaped items and enlist them for parts, but we’re going for something a little more exact. My preferred method is to use the flat views built in the Illustrator blueprints to create an internal framework that defines the outer edges of a curved shape from all three dimensions. What I end up with is a skeleton that can be filled with a variety of materials–foam, clay, resin, or wood–and sanded down into the proper curved form. A little bit of artistic interpretation may be necessary to get the curved forms just right, and some extensive sanding and bondo work may be necessary. But the frame gives me a definite stopping point, which will go a long way towards getting the curves precise and to scale.
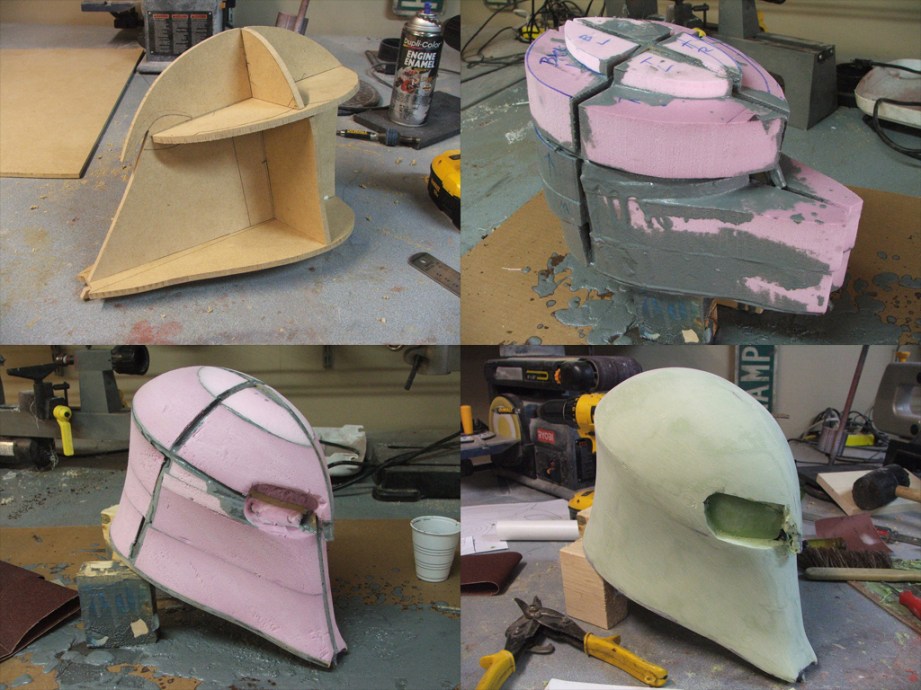
This technique will come in very handy for the upper and lower curved casings on the Needler. The frames on the interior will be made of MDF, while the cavities in the frames will be filled with insulation foam. Like MDF, insulation foam (extruded polystyrene foam) is cheap, available at nearly any home improvement store, and very easy to work with. It’s also quite fragile, but we’ll only be using it to fill in empty spaces on the master sculpt, so it doesn’t need to be indestructible.
The higher end version of insulation foam is urethane tooling board. It is much denser than polystyrene foam and can take far better detail, and it can also hold up to chemicals in paint and bondo that would otherwise melt polystyrene. Urethane board is most typically used in CNC milling and prototyping,
For smaller detailed shapes, I like to use a material called “Apoxie Sculpt” made by Aves. Apoxie is great for sculptors who, like me, kind of suck at sculpting. It’s even better for people who know what they’re doing, but the beauty of this material is how well it sands and smooths out. Apoxie can be drilled, tapped and machined and is incredibly dense and strong. It’s also quite heavy, but again this doesn’t matter with the master parts. I’ll be using apoxie, in a very similar process to the shot below, to make the masters for the needles before molding.
We’ve got scaled blueprints. We’ve got materials. We’ve got techniques and a plan to use those materials, too. So now it’s time to start building. I’ll do my best in these next few pieces not to be a TV chef and pull out a finished roast from the oven five minutes after telling you to start pre-heating. My plan is to work on the handle and emitter assemblies of the Needler first, then move on to the complex curved shapes, then finally finishing details before moldmaking.
Thanks for following along with all the exposition so far; in the next installment we’ll finally get around to making the shop messy!


4 thoughts on “The Volpin Project, Part 3: Selecting Materials”
Leave a Reply

One Day Builds
Adam Savage’s One Day Builds: Life-Size Velocirapt…
Adam embarks on one of his most ambitious builds yet: fulfil…

Show And Tell
Adam Savage’s King George Costume!
Adam recently completed a build of the royal St. Edwards cro…

All Eyes On Perserverance – This is Only a Test 58…
We get excited for the Perserverance rover Mars landing happening later today in this week's episode. Jeremy finally watches In and Of Itself, we get hyped for The Last of Us casting, and try to deciper the new Chevy Bolt announcements. Plus, Kishore gets a Pelaton and we wrack our brains around reverse engineering the source code to GTA …

One Day Builds
Mandalorian Blaster Prop Replica Kit Assembly!
Adam and Norm assemble a beautifully machined replica prop k…
House of MCU – This is Only a Test 586 – 2/11/21
The gang gets together to recap their favorite bits from this past weekend's Superb Owl, including the new camera tech used for the broadcast and the best chicken wing recipes. Kishore shares tips for streamlining your streaming services, and Will guests this week to dive into the mind-bending implications of the latest WandaVision episod…

One Day Builds
Adam Savage’s One Day Builds: Royal Crown of Engla…
One of the ways Adam has been getting through lockdown has b…

Making
Adam Savage Tests the AIR Active Filtration Helmet…
Adam unboxes and performs a quick test of this novel new hel…

Making
Weta Workshop’s 3D-Printed Giant Eyeballs!
When Adam visited Weta Workshop early last year, he stopped …

One Day Builds
Adam Savage’s One Day Builds: Wire Storage Solutio…
Adam tackles a shop shelf build that he's been putting off f…

Show And Tell
Mechanical Dragonfly Automata Kit Build and Review
Time for a model kit build! This steampunk-inspired mechanic…
Awesome!… and so much work goes into making a prop, never realised how time consuming it was, thanks to the Skyrim video, more vids please.
Awesome.
Haaaa! Dream job!
Great read, Harrison. Very informative.
Materials are important but the tools to alter them are equally important.
Any chance you’ll do a piece on that?