


The Zoidberg Project, Part 3: Making a Mold Jacket and Eye Blanks
The Body Double life cast mold we made last time can be used to make a replica of a model's head, but it's not going to be durable enough for long-term use. Today, we'll make a master mold jacket with better materials that we can pull multiple casts from, as well as make the rough eye forms for Zoidberg's bulging peepers.
The head cast I wrote about making last time is only the first step in making a core to sculpt on for The Zoidberg Project. While there is a way to cast a proper, useable core straight out of the Body Double mold, I want to make some alterations and have a longer-lasting master mold for future use.
Out of the Body Double life cast mold we discussed last time, I pull a hydrocal casting. There are two kinds of plaster stone that we primarily use in the effects industry for casting: Hydrocal and Ultracal. They differ in their dry hardness. Hydrocal is a bit more porous and fragile, but can be cast quickly for “waste” molds, while Ultracal is stronger and can be used for molds that need to be baked or repeatedly used. Hydrocal my choice for casting this first copy of the head because I can do it in one batch very quickly.
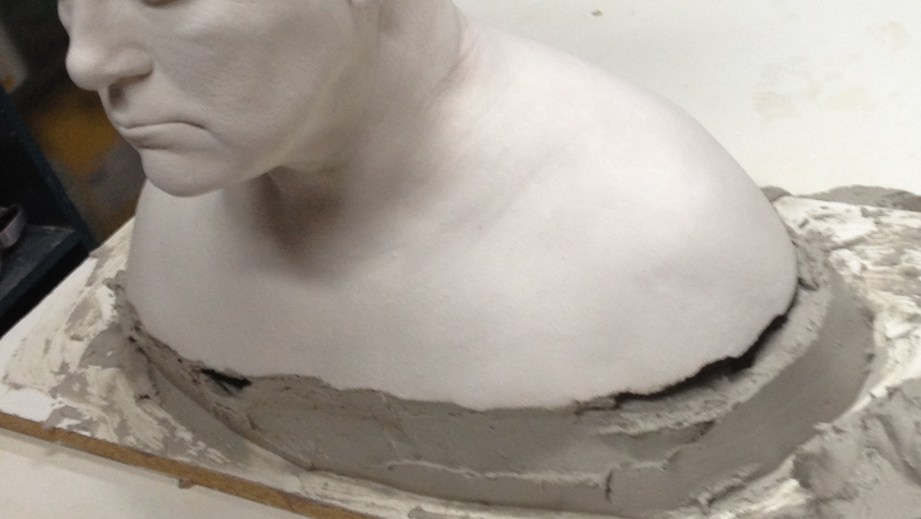
To make this first Body Double cast, I fill the mold at the ears first, one at a time while the life cast is on its side, so that I won’t get any air bubbles in that delicate area. Then once those are set up I’ll brush a layer of plaster throughout the entire mold and scrub it into the details, and then continue adding plaster until the cast has a decent thickness (about 1/2″ thick).
Next, I’ll prop this first cast up a little higher with wood blocks to build out a sturdier base. In making the Body Double mold, I only cast my model to just below the shoulders, but will need more of a base in future casts for sturdiness. To make this base, I simply spatualate some Ultracal below the cast to build a quick-hardened surface. I’m using Ultracal here because I have a little more work time to refine the surface and make it smooth.
Once that’s all set, I’ll need to make a silicone jacket mold, also known as a case mold. I want to make a new mold so that it will be easier to cast parts and make multiples. Because i know that I’ll be using this a lot in the future and for this project, I want a more long-term and durable mold. The Body Double mold that we made directly from the life cast is great for a few castings, but after a while, it will be more prone to ripping and wear-and-tear. I have some Body Double molds that have had dozens of castings out of them and are still fine, but I really just want this mold to be made a certain way for future steps. You can make a jacket mold a few different ways, but I know I’ll end up pulling multiple castings of this head, so I want a mold that will last a long time, so the following guide is my preference for making one. (The other way is to do a brush-up, which is a process that I will do later in the project and explain then).
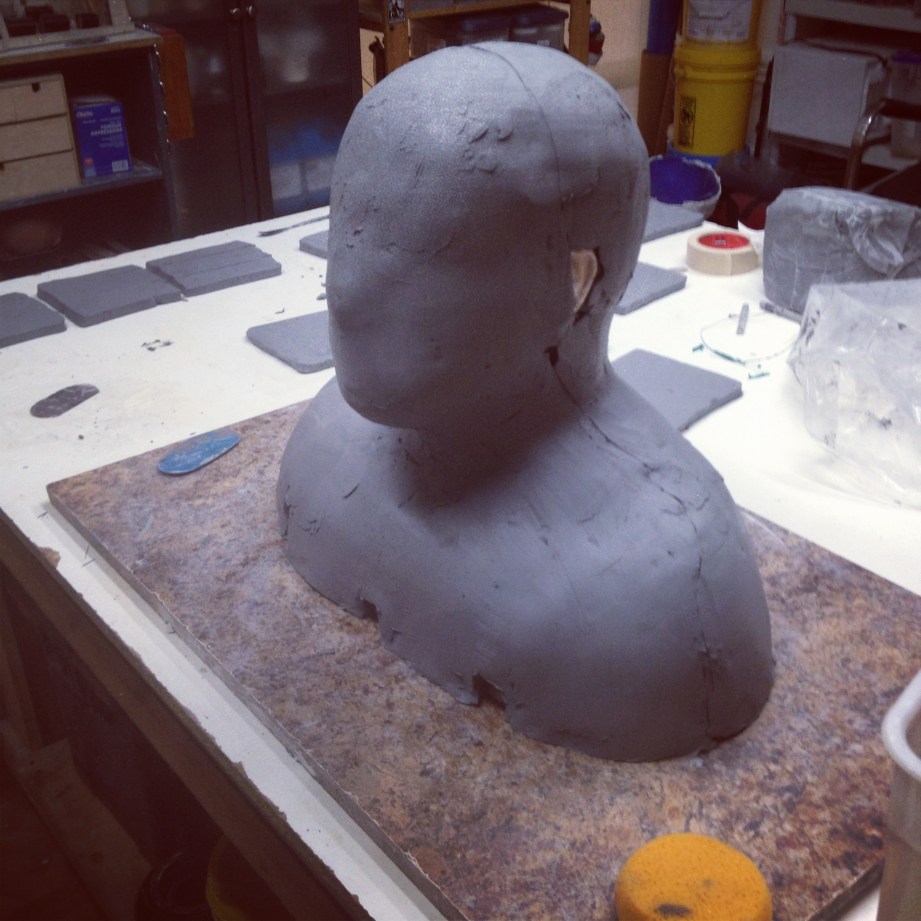
Making a jacket mold is a lot of making the life cast, but using a static head instead of a living model. We’re able to spend more time making this jacket and use longer-lasting materials. For this type of mold, I want a layer of silicone all around the head, which is then engulfed by a rigid epoxy jacket to hold it in shape. As a first step, I’ll wrap the head in plastic wrap (to ease cleanup) and put a half-inch layer of water coat white clay (Laguna EM210) all over the head.
Then I’ll lay a couple bars of clay about one inch wide (still half-inch thick) along the edge of the head. This is where I’ll separate the front and back of the jacket mold. I’ll lay another bar of clay going from ear to ear across the front of the face, and another from the forehead over the nose and down to the center of the chest. These bars will help the silicone register into the epoxy jacket.
There are a bunch of different configurations of registration that I have seen people use, and after you do a few of these molds, you’ll develop an opinion about what you like, and what each mold requires. I also take an empty paper towel roll and put it where the two sets of registration meet in the middle of the face. This will be for the pour spout later on. The same configuration is done for the back of the head, too. I’ll use a few coats of Crystal Clear Acrylic spray to seal this whole thing and when it’s dry, I can lay up a dividing wall to separate the front and back halves. This is done by putting a wall of the same clay along the center of the head. I’ll also add a couple trapezoid registration keys to this, and Crystal Clear the whole thing again.
To start on the jacket, I need to use another release over the Crystal Clear–a couple coats of Freecote Lifft or Mann Ease Release 400, then brush on a layer of Smooth-On Epoxacote Surface Epoxy coating (red or grey, itdoesn’t matter). Now here is where I’m going to cut some corners, because I know I can. Normally to make an epoxy mold, you want to include glass cloth reinforcement, but this mold isn’t going to necessarily need it. (It doesn’t hurt to have it, I just know I can move along faster and skip the step).
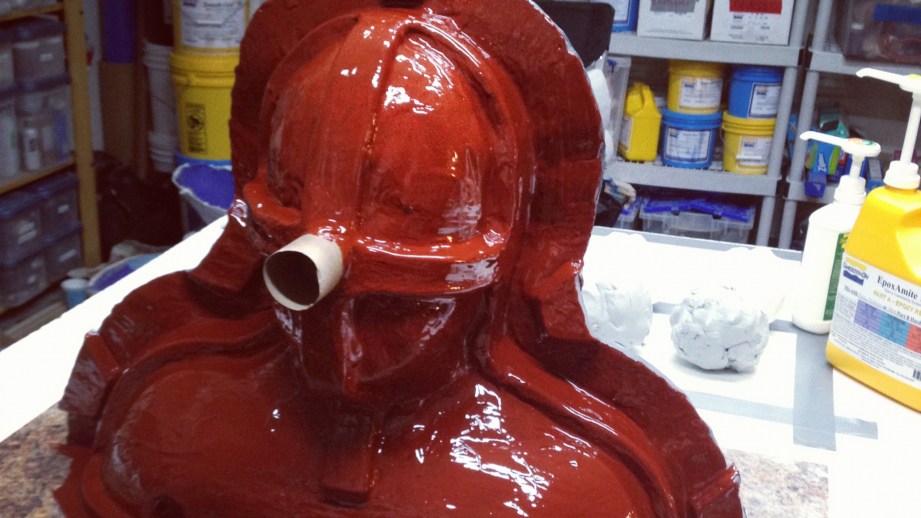
I’ll go ahead and press in about ¾-inch thick layer of Freeform Air Epoxy Putty. This is an easy-to-use 1-1 dough, meaning you combine two equal parts of the mixture to create your final material. I’ll pre-measure out about four or five softball-sized balls of each component and set them aside, then I knead the batches together until they’re a consistent material. To help with adhesion to the jacket, I brush on a coat of Epoxamite 102 (medium set) over the surface coat. Then, I pinch off a handful of the dough and press it out between my hands to about the thickness that I want and press it into the surface coat. (I’ll cover the epoxy dough more thoroughly in upcoming mold tutorials). And just because I want a nicer looking finish to my mold, I’ll take one big sheet of 10oz Fiberglass cloth and lay it on top and tap in a layer of Epoxamite 101 (the fast set).
Once the front side is done, you can pull off the clay separating wall, give it a couple coats of the release spray (lift or 400) and repeat the same process on the back.

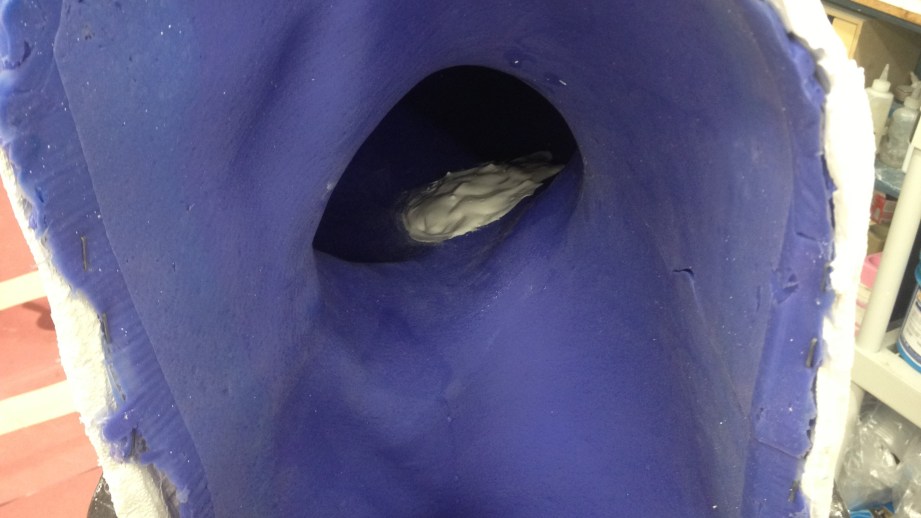
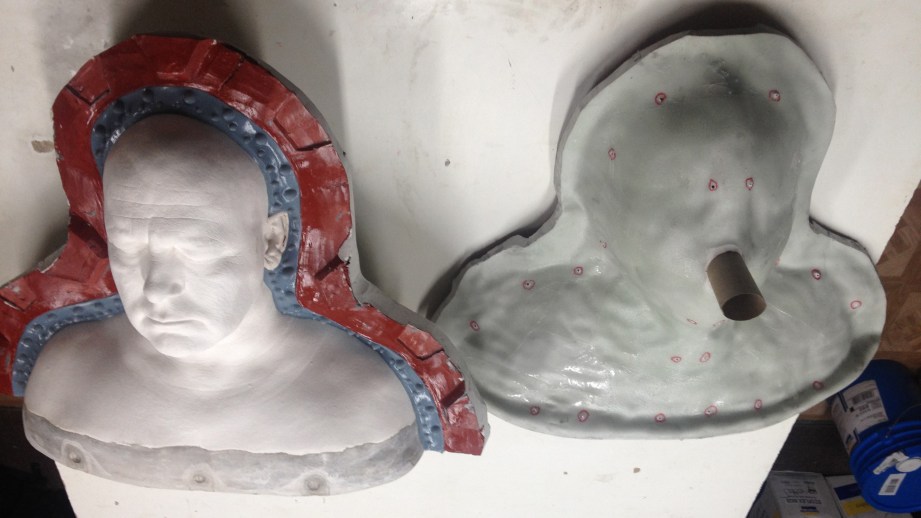
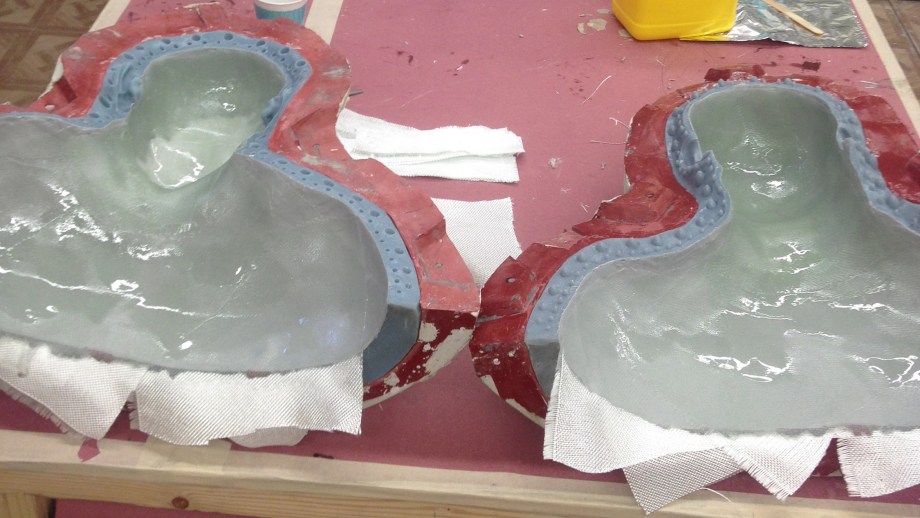
You can use a belt sander or reciprocating saw to clean up the edges of the mold. With the mold on its back or front, gently and evenly pry it open, leaving the head cast still in one of the sides. Clean the clay out of the empty side to create a void between the head and case that will be filled with silicone. Then fix the clay in the remaining side so it has a nice surface and some registration points. I usually do a row of small dots to help the edge of the silicone line up, then a row of larger shapes to help with more general registration (you can see this registration better in the picture below).
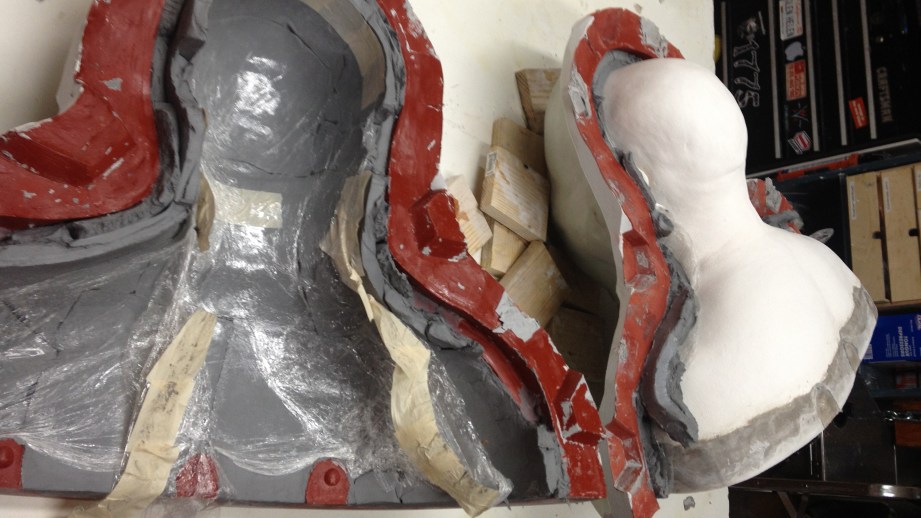
You will want to drill some bleeder holes in the case, to help air escape from the mold as it fills.
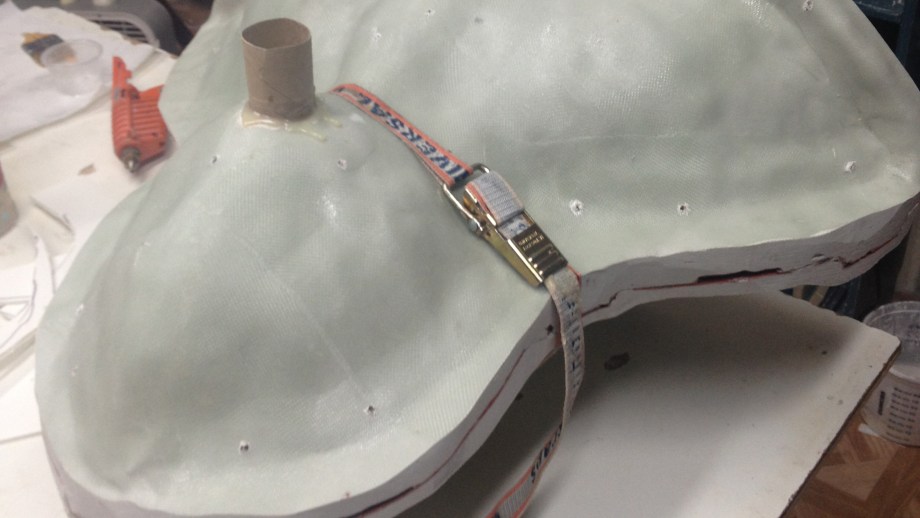
The hard shell of the jacket is now done, but it still needs a silicone interior so you can use it for casting. So now it’s time to add that. Spray a coat of Crystal Clear into the jacket, strap this all together and pour in the silicone! I made this mold about a year ago, so I’m trying to remember which silicone I used. I think it was Dragonskin30 with a little bit of pigment in it. For a cheaper option, Moldmax 30 works just fine too.
Once one side is all set, flip it over and remove the other side, clean it off, spray some more Crystal Clear, and poor the silicone in.
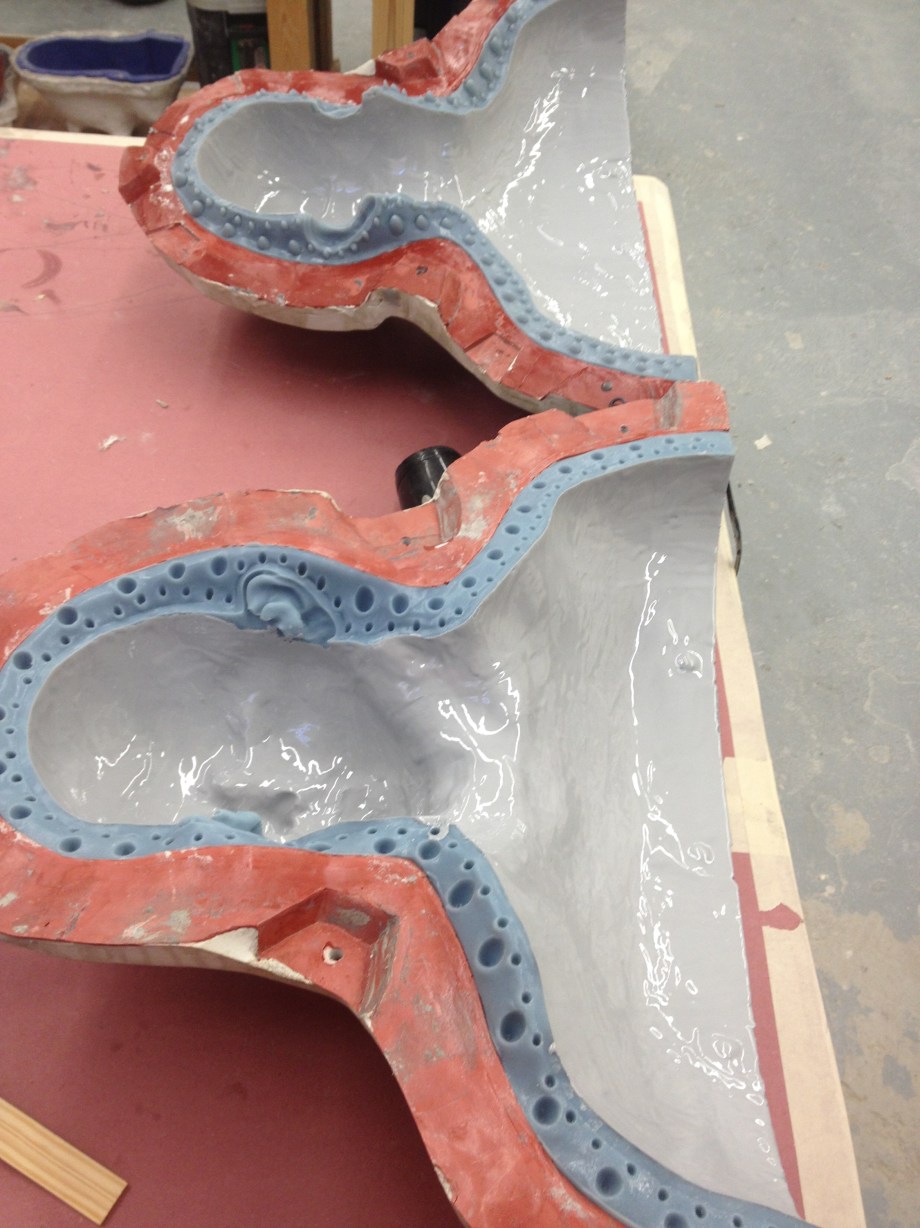
When that silicone is all set, you can pop it all open and pull the plaster out, and give it a wipe-down with some alcohol to clean off any residual Crystal Clear.
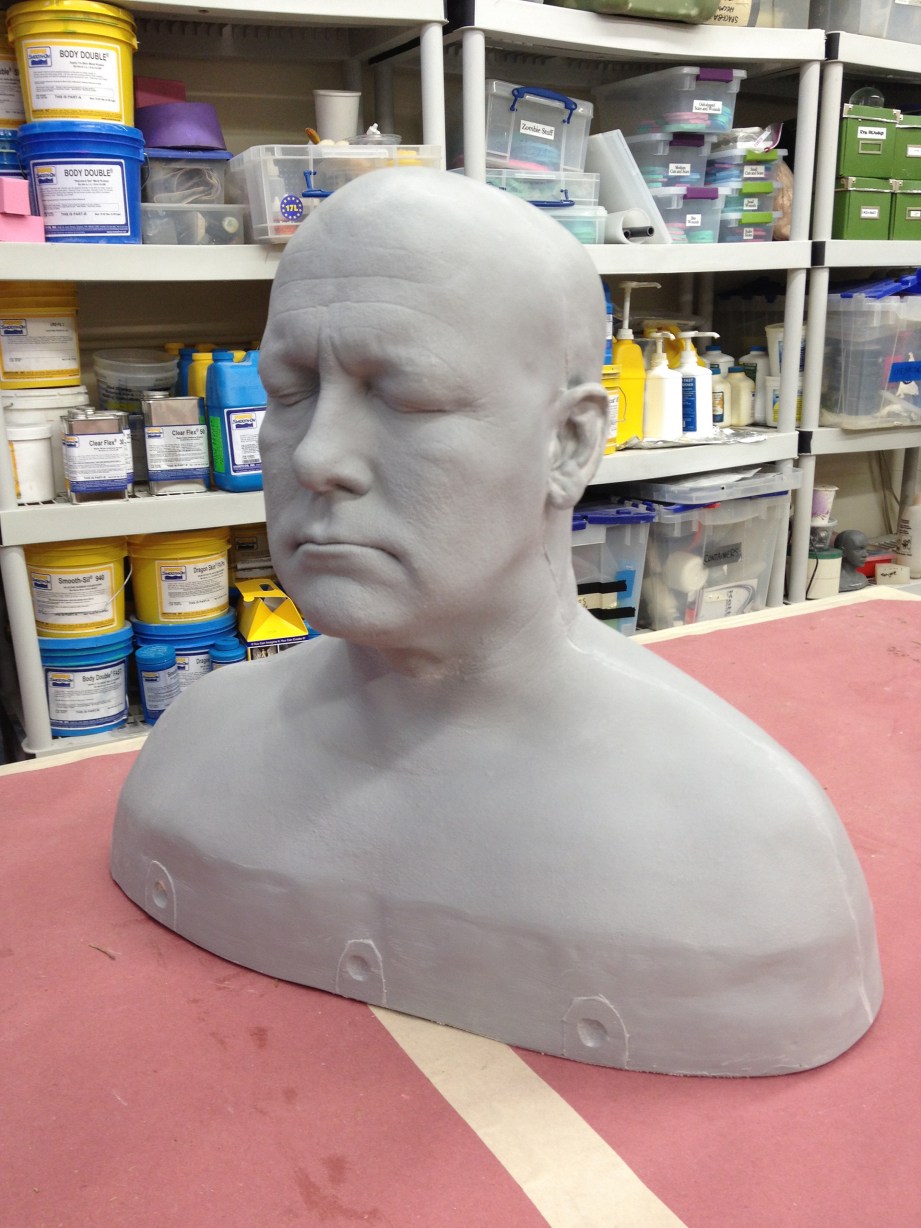
Now we can finally create a cast with the epoxy core to sculpt Zoidberg’s head on. Here’s how we’re going to do that with the mold jacket I just created. With the mold open and clean, spray a few cotes of release (lift or 400) inside (this merely helps the mold last longer). Just as before, brush in a layer of Epoxacote Grey and let it sit for about 45 minutes. For this cast, I’ll do a second coat of Epoxacote as soon as the first coat sets long enough to leave a fingerprint impression, but not stick to my finger.
Because this will be the primary core for the molds, I want it to be as strong and durable as possible. I’ll then laminate five layers of 10z Fiberglass cloth in with Epoxamite 102. I do this part with the molds open, and take care not to go over the edge–as a matter of fact, I go just a little shy of the edge where the molds will line up. I will let the glass overlap on the open bottom, though. After I apply the first three layers of cloth, I pack in some Freeform Air, then finish it off with the remaining two layers. This creates a sandwich construction and will be really strong. I’m not sure if I will be bolting the face into the mold, so that’s why I give the extra reinforcement in the face.
Once it has mostly set, I’ll close the mold and brush in a coat of Epocacote Grey into the seam, and back it with another five layers of glass cloth. Also, I add a little dough to this bottom area just like I did with the face. This just gives a little extra rigidity to this open end. When it’s all set up, I pop it open and trim the bottom with a sawmill or belt sander. Phiew—done!
At this point I’m almost ready to start sculpting. But I still need eye forms for Zoidberg. While I’ll be sculpting the Zoidberg mask out of clay, the spherical eyes will be a separate material, for which I need temporary forms to sculpt around. Remember that with the Ackbar mask I made for Adam, I used book magnifiers as the eye forms. Zoidberg’s eyes will have to be different. I want my mold to have a tight fit around the eyes, so I want to make forms that can be bolted into the mold. I have two different sizes to test out in the sculpture, so I’ll mold and prep them both, just in case. I got two different sized acrylic half domes that reflect a scaled-up size from the small Zoidberg maquettes that I sculpted, and dumped some Moldmax 30 on them.
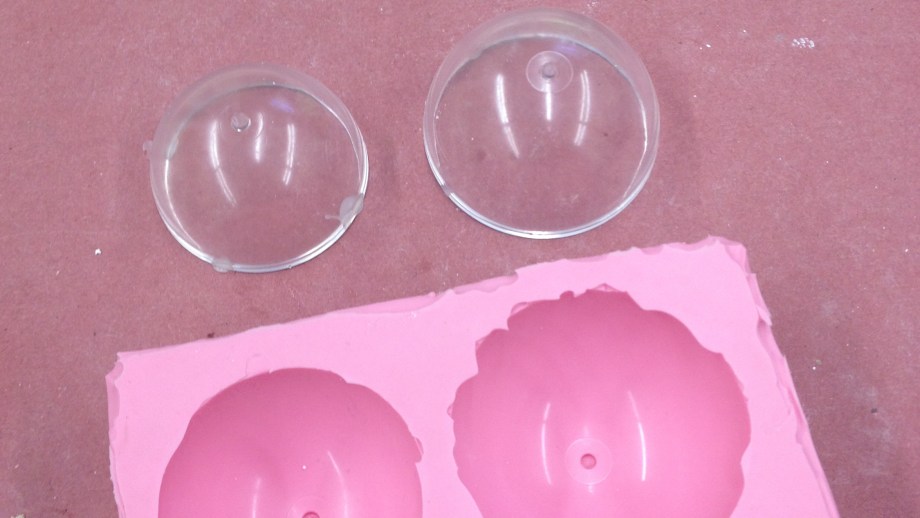
For these eye forms, I want to use a resin that will withstand baking for the foam latex step, so I use Smooth Cast 380. It settles out a bit, so I have two jiffy mixers (one for each component to avoid contamination). I mix parts A and B together, pull the new form out, and chuck the form in a lathe to drill and tap it for a bolt that can be used in the final mold.

All of these steps and re-molding and particular ways I cast things up will make sense in the long run. I was taught long ago by two of tmy favorite lab-techs in LA (Roland Blancaflor and Rob Freitas) that you have to think ahead to the next steps and make sure that you aren’t making the job more complicated for yourself (or someone else) in the future. Making good cores and good molds and doing clean lab work just makes it easier to do castings and get good parts. Stay thirsty, my friends. Next time, my hands get dirty with some sculpting.
Thanks to Iwata-Medea and Smooth-On for providing materials and sponsoring this project.


3 thoughts on “The Zoidberg Project, Part 3: Making a Mold Jacket and Eye Blanks”
Leave a Reply

One Day Builds
Adam Savage’s One Day Builds: Life-Size Velocirapt…
Adam embarks on one of his most ambitious builds yet: fulfil…

Show And Tell
Adam Savage’s King George Costume!
Adam recently completed a build of the royal St. Edwards cro…

All Eyes On Perserverance – This is Only a Test 58…
We get excited for the Perserverance rover Mars landing happening later today in this week's episode. Jeremy finally watches In and Of Itself, we get hyped for The Last of Us casting, and try to deciper the new Chevy Bolt announcements. Plus, Kishore gets a Pelaton and we wrack our brains around reverse engineering the source code to GTA …

One Day Builds
Mandalorian Blaster Prop Replica Kit Assembly!
Adam and Norm assemble a beautifully machined replica prop k…
House of MCU – This is Only a Test 586 – 2/11/21
The gang gets together to recap their favorite bits from this past weekend's Superb Owl, including the new camera tech used for the broadcast and the best chicken wing recipes. Kishore shares tips for streamlining your streaming services, and Will guests this week to dive into the mind-bending implications of the latest WandaVision episod…

One Day Builds
Adam Savage’s One Day Builds: Royal Crown of Engla…
One of the ways Adam has been getting through lockdown has b…

Making
Adam Savage Tests the AIR Active Filtration Helmet…
Adam unboxes and performs a quick test of this novel new hel…

Making
Weta Workshop’s 3D-Printed Giant Eyeballs!
When Adam visited Weta Workshop early last year, he stopped …

One Day Builds
Adam Savage’s One Day Builds: Wire Storage Solutio…
Adam tackles a shop shelf build that he's been putting off f…

Show And Tell
Mechanical Dragonfly Automata Kit Build and Review
Time for a model kit build! This steampunk-inspired mechanic…
It’s coming along great, !
I can’t wait to see how this turns out.. 🙂
Me mad my girlfriend like these updates– keep them coming!!!
This is an awesome series- there’s so much information to take in. I’m absolutely fascinated by all the different methods of mold making so it’s greatly appreciated.
Make-Up Artist magazine recently did a nice write up about Rob Freitas- a really interesting read. I bet it was awesome to work with him.