


Building a District 9 Alien Rifle Replica, Part 1
Announcing a new project, in collaboration with Punished Props and Smooth-On: building a 1:1 replica of the assault rifle from District 9 from scratch!
Norm’s note: We’re super excited to announce a new collaboration project with Bill Doran (aka Punished Props) and Smooth-On. Over the course of this month, Bill is building a 1:1 scale replica of the alien assault rifle from District 9 to unveil with us at Comic-Con. Bill’s build logs and videos will walk through his design and fabrication process, and his finished piece will be paired with a surprise at SDCC. Place your questions for Bill in the comments below!
It’s no secret that I love me some space guns, and District 9 had some of the most incredible weapon designs from the mad geniuses over at Weta! Ok enough gushing, let’s dive into this build!
Design and Reference Material
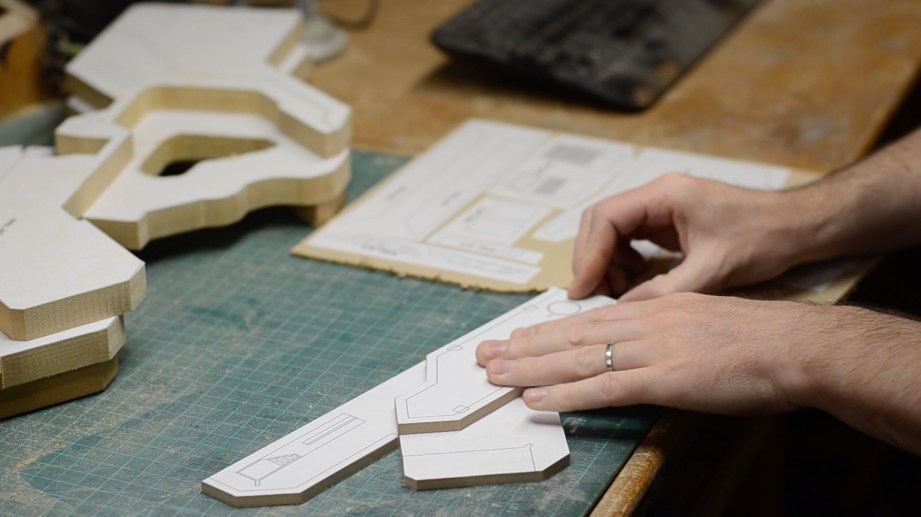
The design for this gun was mostly based on the 1:1 replica that Weta released a couple of years ago, but I also took a lot of inspiration from the 1:4 scale replica that I have sitting on my desk. I took measurements from these sources and laid out the gun in SketchUp. The 3D design was layout in flat layers, in the thicknesses that I knew I would be using from the MDF wood stock.
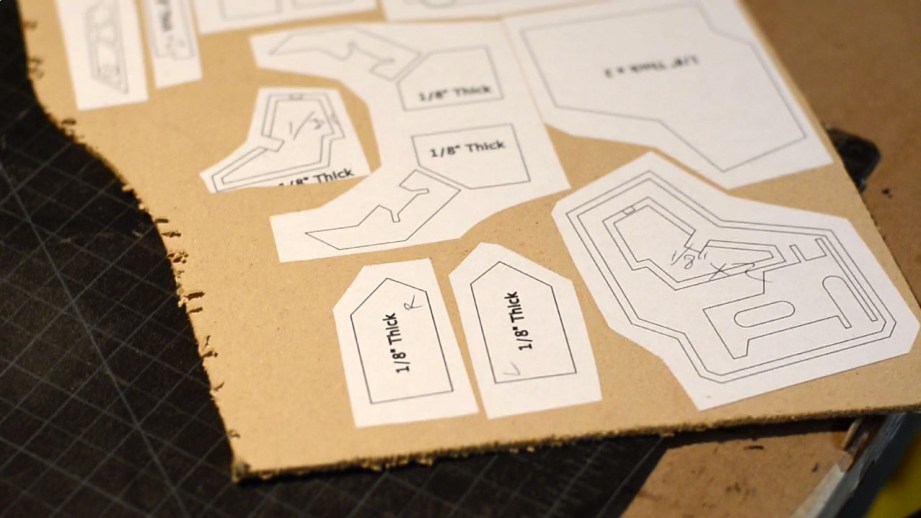
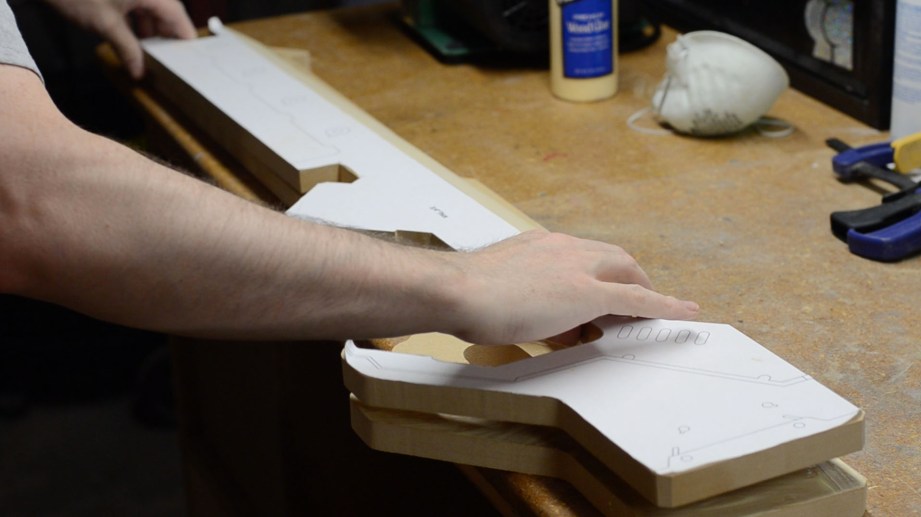
Once all of the layers were designed, I was able to have them printed out, full scale, as 2D blueprints for each piece. These shapes were then spray glue adhered to flat MDF stock to prepare for cutting and gluing. The idea is that I can build up a prototype of the gun in layers, clean it up, and then mold and cast pieces for finishing.
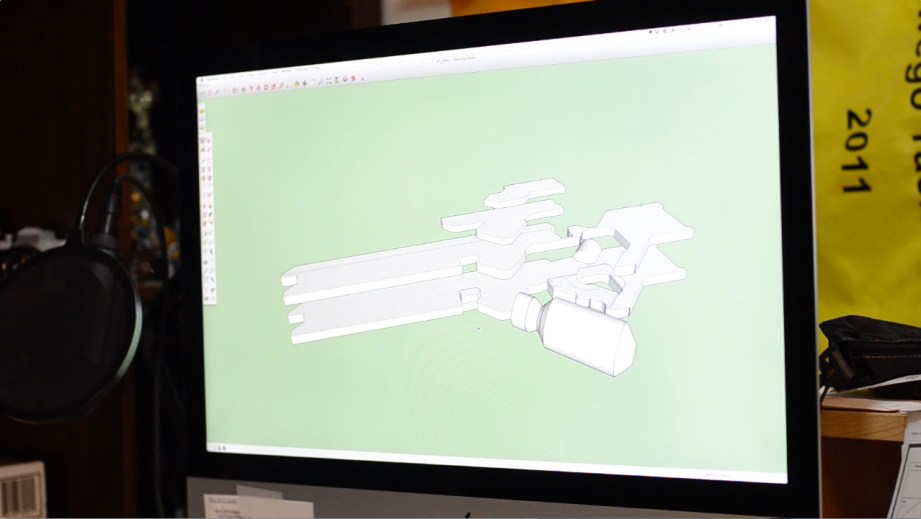
It took a lot of extra time to “build” the gun in SketchUp, but the effort was worth it. The blueprints I was able to print out made for a pretty fantastic kit, once all the parts were ready to be cut out. Also, I had already pretty much gone through the entire build once, planning it all out before even buying my material.
Build Materials: MDF and Styrene Plastic
MDF has been my go-to space gun building material for a long time. You can buy it from nearly any local hardware store, it’s fairly cheap, and it doesn’t have any pesky wood grain. It does get a bit fuzzy on the cut ends though, but we will deal with that in due time!
On a side note, I think it’s high time I graduated from MDF and use urethane tooling foam more often. Sure it’s more expensive, but it finishes so much nicer and you don’t have to deal with the fuzzy edges you get from MDF.
For this build, I also used some styrene plastic. Like the wood, you can get it in various thicknesses. I usually pick up a bunch from Tap Plastics here in Seattle, but you can also find it at your hardware stores disguised as “for sale” signs.
For adhesion I used your run of the mill wood glue for some of the larger MDF pieces, but my go-to adhesive for this kind of project is super glue.
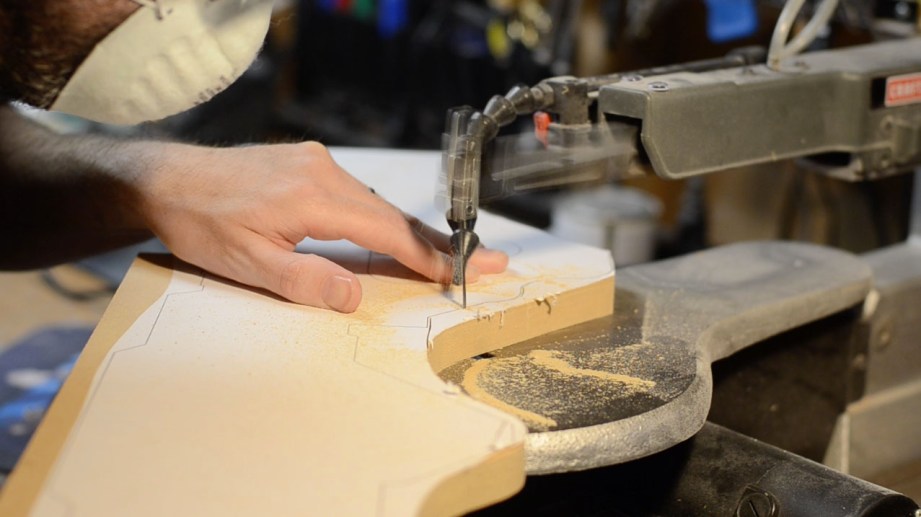
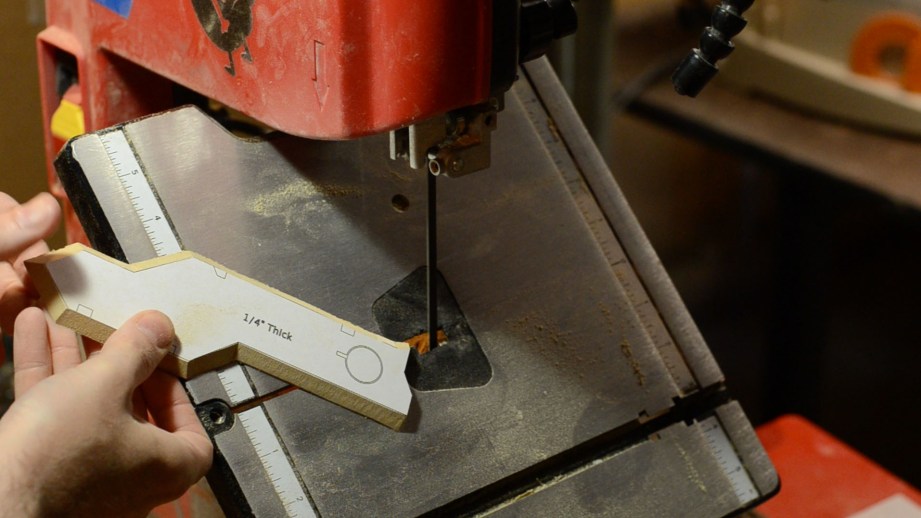
Cutting & Sanding the Wood
With all of my design pieces glued down to their respective thicknesses of MDF, I was ready to go on a wood cutting binge. There were a variety of cuts to be made, so it was extremely handy to have several types of saw on hand to tackle each job. My workhorses are my scroll saw, band saw, and jig saw. A lot of the larger cuts were made with the bandsaw, in a fairly rough fashion, and then cleaned up on the disc sander. The internal cuts (like around the handle) and some of the trickier bits were done with a bit more precision on the scroll saw, requiring less clean-up.
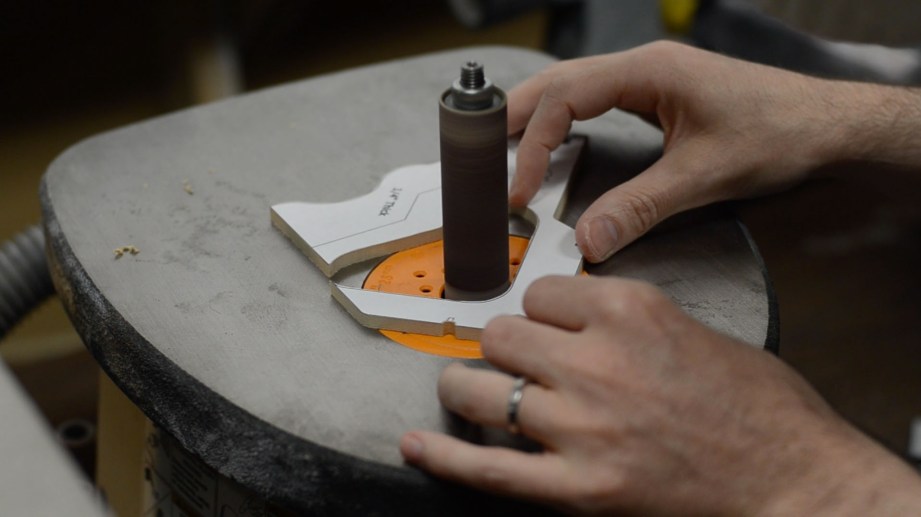
For sanding, I also have a plethora of power tools to tackle each particular challenge. It’s hard to beat an oscillating spindle sander for those pesky interior, rounded edges around the handle. I also have a 1″ wide belt sander to handle some spots that needed a lot of wood removed, but were too tucked away to be handled with the disc sander.
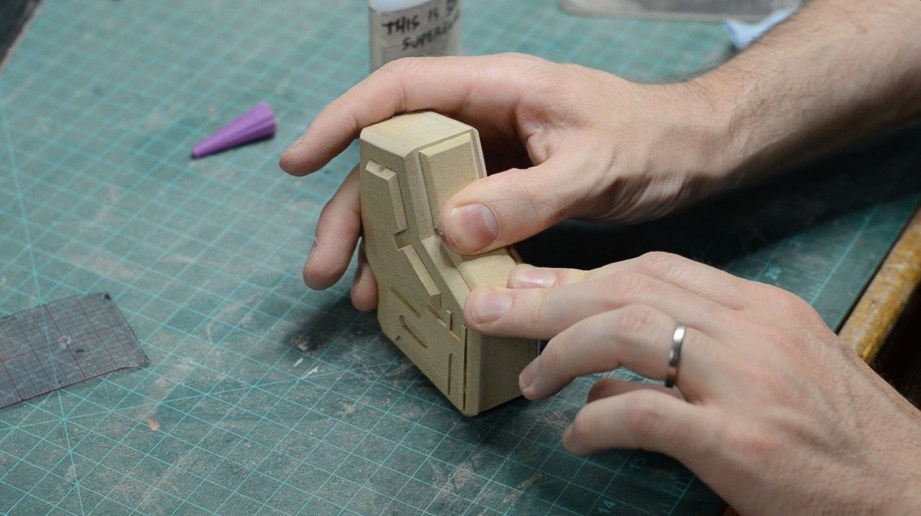
I spent a good day or two cutting out and cleaning up the many pieces on the rifle. This is the kind of project where it pays off to have invested in a wide range of power tools to make life a little more bearable.
Creating Bevelled Edges
This gun has a whole bunch of beveled edges. To tackle them, I applied a two step method. First was to trim away as much of the material as possible with a saw. Then I could finish the edge with a hand file and sanding stick.
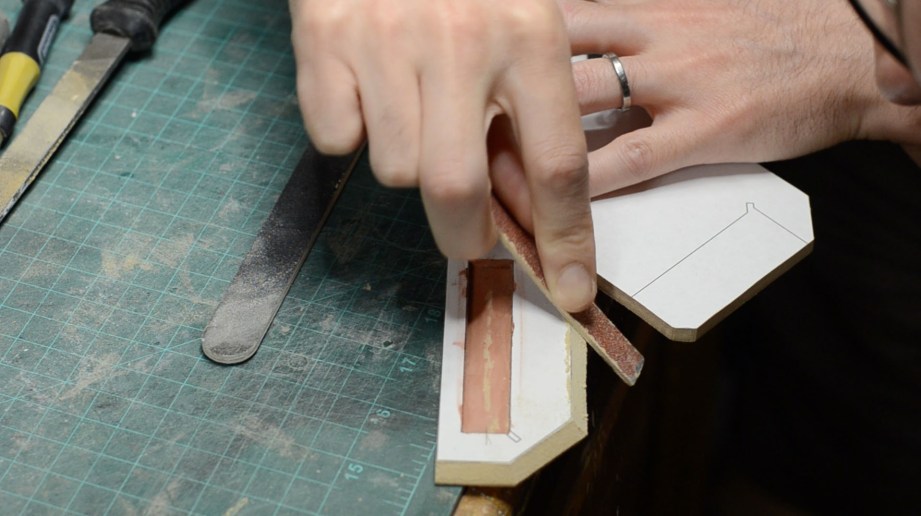
Trimming some of the bevels with the power saws was a little bit tricky. Fortunately my scroll saw and band saw each tilt to 45 degrees in opposite directions, so I was able to swap between the two to get the lion share of the material removed. The rest was done with elbow grease.
The very large bevels along the barrel (along the top of the gun where the row of tubes go) was different beast altogether. It was too big to fit in either of my saws, so it had to be trimmed with a hand saw. Time to invest in a bigger bandsaw!
Once they were glued together, some of the beveled edges required a bit of filling and sanding to get them looking right. I used a some body filler to get the job done. This is like a cure all finishing anything on a prop that didn’t get cut out perfectly!
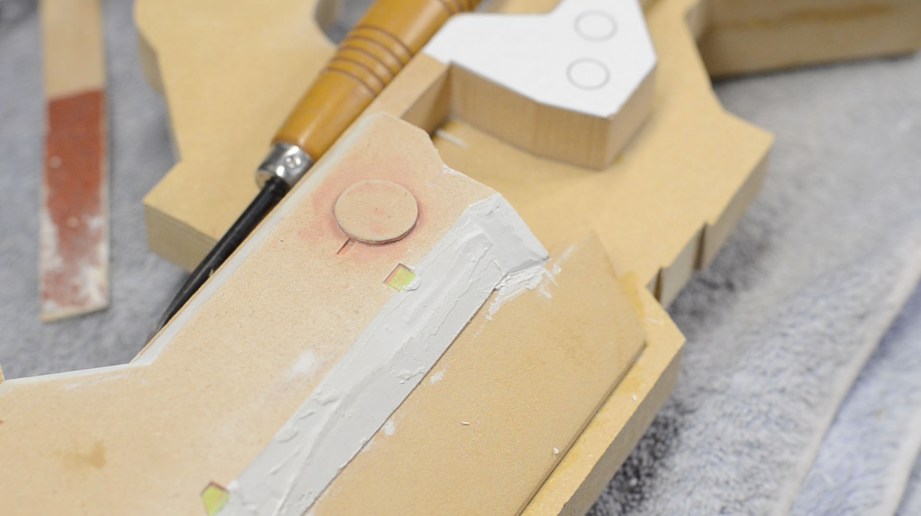
I also trimmed out some of the smaller detail pieces using my drill press for round bits and an X-Acto knife for anything that had small, straight edges. Any surfaces that looked fuzzy were covered with some of that really thin (and in this case green) styrene plastic.
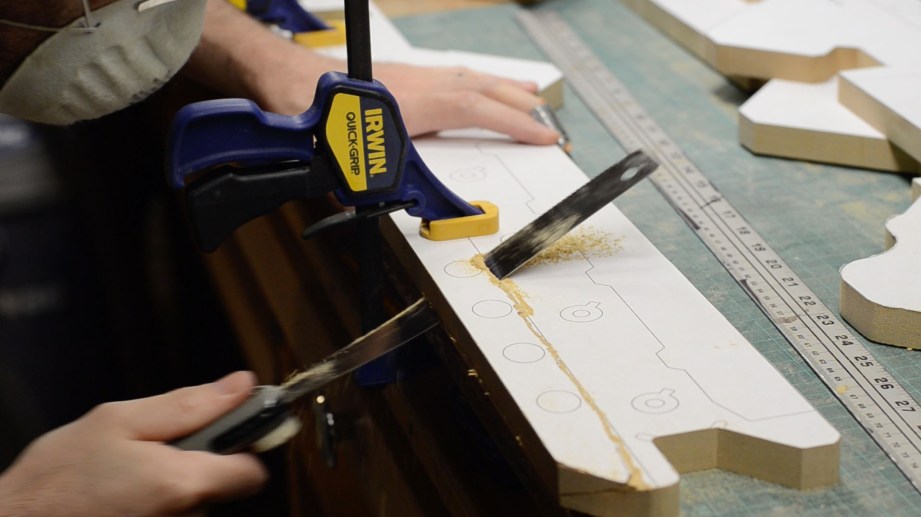
Gluing the Space Gun Sandwich
Finally after days of cutting and sanding, it was time to put this space gun sandwich together! The three big main pieces of MDF were wood glued together and served as a platform for the rest of the layers.
With the base shape prepped, I glued on the rest of the layers one at a time. These were tacked down with superglue. I really like super glue for this because it cures really fast and, if need be, can be sprayed with an accelerant to ensure that it will fully cure. This was one of the most fun parts of the build. It felt like putting together a model kit.
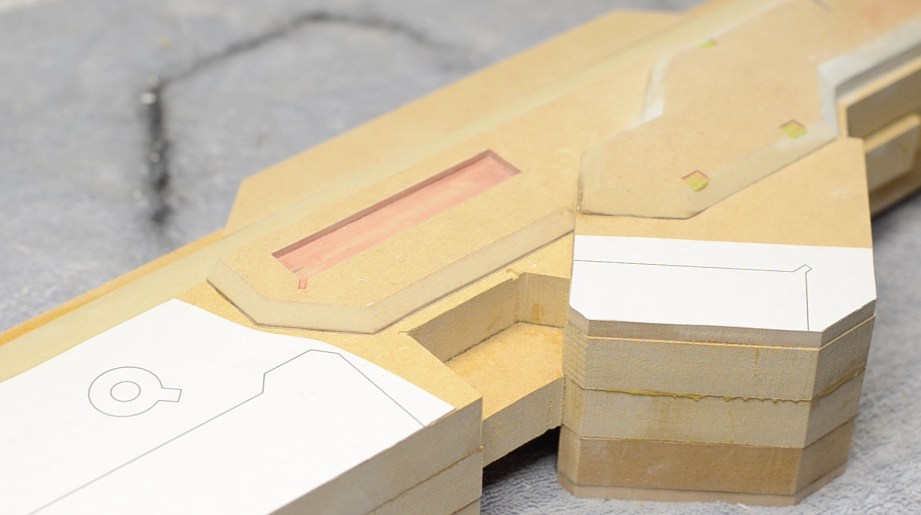
It’s impossible to line up these layers perfectly when gluing them together, so I ended up with some edges that had a bit of overlap. This is another instance where having several powered sanding tools saved the day. Sanding those surfaces flat by hand is possible, but sounds like a nightmare.
This entire process went on for a handful of days. Cut, cleanup, bevel, glue, repeat. The effort was worth it though, as the gun has made some significant progress! Next time, I’ll be showing you the process of lathing the cylindrical parts of the gun. I’ll also be prepping the pieces for mold making, so hold onto your butts, it’s gonna get crazy!
Find more of Bill’s work on his Punished Props website and YouTube channel.
Thanks to Smooth-On for providing materials for this build. Subscribe to their YouTube channel here.


13 thoughts on “Building a District 9 Alien Rifle Replica, Part 1”
Leave a Reply

One Day Builds
Adam Savage’s One Day Builds: Life-Size Velocirapt…
Adam embarks on one of his most ambitious builds yet: fulfil…

Show And Tell
Adam Savage’s King George Costume!
Adam recently completed a build of the royal St. Edwards cro…

All Eyes On Perserverance – This is Only a Test 58…
We get excited for the Perserverance rover Mars landing happening later today in this week's episode. Jeremy finally watches In and Of Itself, we get hyped for The Last of Us casting, and try to deciper the new Chevy Bolt announcements. Plus, Kishore gets a Pelaton and we wrack our brains around reverse engineering the source code to GTA …

One Day Builds
Mandalorian Blaster Prop Replica Kit Assembly!
Adam and Norm assemble a beautifully machined replica prop k…
House of MCU – This is Only a Test 586 – 2/11/21
The gang gets together to recap their favorite bits from this past weekend's Superb Owl, including the new camera tech used for the broadcast and the best chicken wing recipes. Kishore shares tips for streamlining your streaming services, and Will guests this week to dive into the mind-bending implications of the latest WandaVision episod…

One Day Builds
Adam Savage’s One Day Builds: Royal Crown of Engla…
One of the ways Adam has been getting through lockdown has b…

Making
Adam Savage Tests the AIR Active Filtration Helmet…
Adam unboxes and performs a quick test of this novel new hel…

Making
Weta Workshop’s 3D-Printed Giant Eyeballs!
When Adam visited Weta Workshop early last year, he stopped …

One Day Builds
Adam Savage’s One Day Builds: Wire Storage Solutio…
Adam tackles a shop shelf build that he's been putting off f…

Show And Tell
Mechanical Dragonfly Automata Kit Build and Review
Time for a model kit build! This steampunk-inspired mechanic…
This is great! Love to see more building and this is the kind of project that I have been wanting to do since Half Life 2 came out. Love that pulse rifle. Will follow this with much interest.
w00p!
Cool! I saw him tweeting about this the other day but didn’t know what it was.
Great tutorial. This is one reason I’m a member!
nice! what i really like about using MDF, besides it being cheap and easily available, is that it was some weight. if there’s one thing i find sad in props, it is when they look like the real mccoy, and when you take them in your hands, they weigh nothing.
also, that build method scales down well. nothing in there that can’t be done with hand tools just as well, it’ll just take longer.
shaping hand tool pro tip: there are japanese rasps made from a lattice of rivetted together saw blades. the manufacturer’s name is shinto, they have a rough and a fine side, and they are amazing. the rough side removes material super fast, while the fine side allows very accurate planar control for things like bevels, and leaves a smooth surface, too. much better than common wood rasps and files!
That’s awesome. I like Punished Props because of all of the tutorials he puts out, and it’s cool to see Tested and Punished Props working together like this.
Hmm. If Bill’s building the District 9 rifle what’s Frank making? A prawn costume?
nope 🙂
I just looked up those Shinto rasps. Super rad! I’ll have to nab one. =D
yay 🙂 ever since i got mine, it’s been an indispensable asset.
the one thing it’s not good at – no surprise with its flat form factor – is concave curves. i’ve been looking for something comparable that leaves a relatively clean surface and just bought what they call a carving file made by iwasaki. they come in half-round and from my first impression, remove wood at a really good rate (even with the extra fine cut i got) while leaving a surface of ~200–240 grit sand paper.
Good work, and good follow-along descriptions for anyone who wants to do that! I agree that the step of building stuff in SketchUp first is really helpful in planning the actual build – I’ve done the same with cabinet-making jobs (I used to do that for a living), laying out built-in shelves so precisely in SU that I could pull a cut list from there and order everything cut to the right sizes.
If I may add some tips, I recommend those traditional woodworking tools: Planes and chisels.
Now, MDF blunts those right quick but for non-finishing work – like taking away material to reach a bevel (if you don’t have the right power tool) – they don’t need to be that sharp. Hold back a few really sharp chisels for nicking out nooks and corners, you can get satisfyingly sharp corners with a little practice.
These tools can even be used on filler, which can be really great; you know how, when you try to sand down a “wavy” filler surface, hitting just the peaks can be hard, and you tend to also sand the divots deeper etc. – well, with a sharp one-hand plane you can slice those peaks down cleanly, making the sanding afterwards so much easier. The low-angle Stanley “Bailey” is my absolute favorite – http://www.homedepot.com/p/Stanley-6-in-Bailey-Low-Angle-Block-Plane-12-960/203727261 – this baby can even shave end grain.
If I may, here’s my single prop build project, which I share here as an example of the completely opposite work flow: No planning, no material consistency, all haphazard (and a result that’s more “close enough” than “accurate”): http://www.therpf.com/f9/river-song-alpha-meson-nerf-blaster-228504/
Any chance the schematics and or sketch-up renderings will be available for purchase on Punished Props Website?
I just stopped in at Weta Workshop in Wellington this weekend and got to handle this prop (It’s apparently a sonic jackhammer, which isn’t mentioned in the movie). They used it as a case study on the tour to show the moulding process, and CNC’ing it out of foam initially etc. Thanks to watching this vid I actually understood the process they were talking about.
They wouldn’t let us take pictures inside though!