


Building a District 9 Alien Rifle Replica, Part 3
Walking through the making of a matrix mold for the alien rifle body.
Over the course of this month, Punished Props’ Bill Doran is building a 1:1 scale replica of the alien assault rifle from District 9 to unveil with us at Comic-Con. Bill’s build logs and videos will walk through his design and fabrication process, and his finished piece will be paired with a surprise at SDCC. Place your questions for Bill in the comments below!
In the previous part of this project, the molds we made were very simple. They were either one or two part box molds. The kinds you’ve seen Frank and Norm make in Tested videos. These types of molds made a lot of sense for the smaller pieces, but for the big body on the District 9 alien rifle, I decided to make a matrix mold.
I have never made a matrix mold before, but I’ve seen so many of my mold maker friends adopt this technique for most of their big molding projects. There are many benefits to going this route vs a standard box mold. The most apparent upside is a drastic decrease in the amount of silicone used. Silicone isn’t cheap and, especially with such a large mold, you’re can save hundreds of dollars by going the matrix mold route.
Diving into a new technique can be pretty scary, especially when it’s such a large piece, but I didn’t go into it alone. I had a ton of help from some of my mold maker friends. A huge thanks goes out to Thom from Sorenzo Props, Harrison from Volpin Props, and our friendly neighborhood Frank Ippolito!
A Note on Print Coats
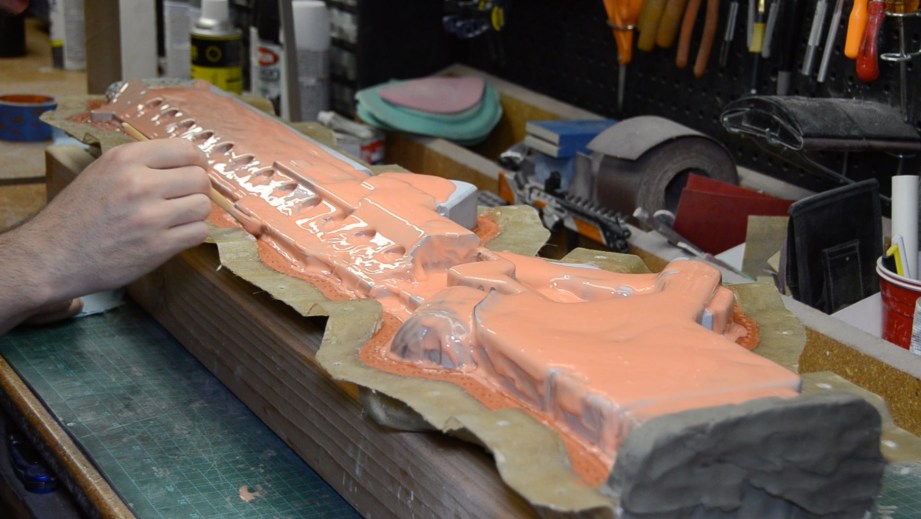
For most of these molds, you’ll see that I put down a “print coat” of Rebound 25 silicone before dumping in the Mold Star 15. It might be a little overkill, but I found that I was getting a bit of curing inhibition in the fine detail areas of other smaller molds using just the Mold Star. Not only did a brush on print coat of Rebound solve the problem, but it ensured that I captured all of the fine detail in the piece, perfectly and without trapping any bubbles.
Plug it up!

One of the main concerns with this mold was the large overhang in the barrel area on the front of the gun. I decided to make this a three-part mold by making a silicone “plug” for the front part. This way the two outer silicone mold pieces would pug the 3rd part and wouldn’t tear out when removing them from the master or final cast piece.

I clayed up a wall around the front plug and poured in my silicone. Once it was all cured, I was ready to make the matrix jacket mold around that plug and the rest of the gun.
Jacket Mold
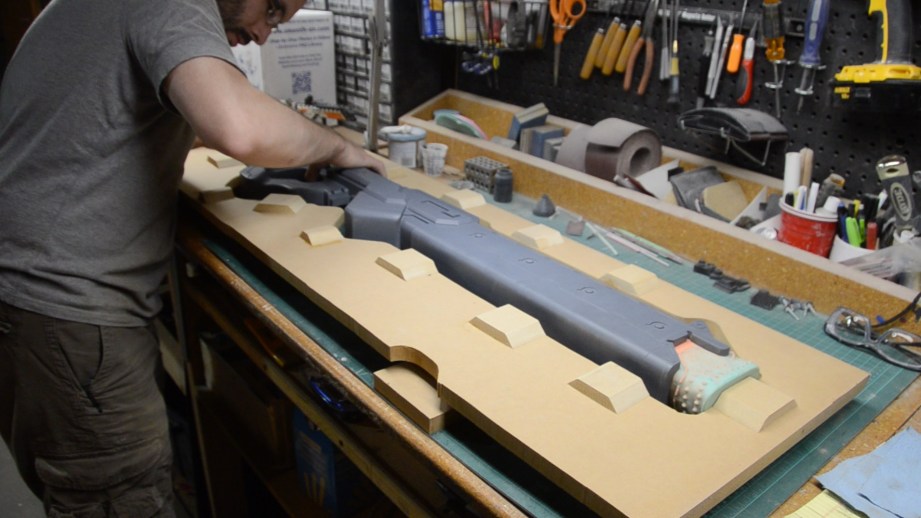
It’s vital that the mold seam is near the middle of the mater part that we’ll be molding. Using MDF, I built a frame. The gun part could just lay in the opening and it would rest so that it’s mid line was lined up with the top surface of the MDF frame. I also cut and glued down some more MDF flanges. These would provide registration for the rigid, fiberglass jacket mold. Finally I put aluminum tape over the edge surface so that the fiberglass resin would not bond to the MDF.
To protect the master during this process I should have used some kind of plastic bag, like the ones used in dry cleaning. Unfortunately I couldn’t get any in time and my impatience got the best of me. Instead I used wet paper towels to cover the entire piece. This should have been OK except that my master was made mostly of MDF, a material that likes to drink up water. This resulted in some pretty drastic damage and repair work down the road. Lesson learned!

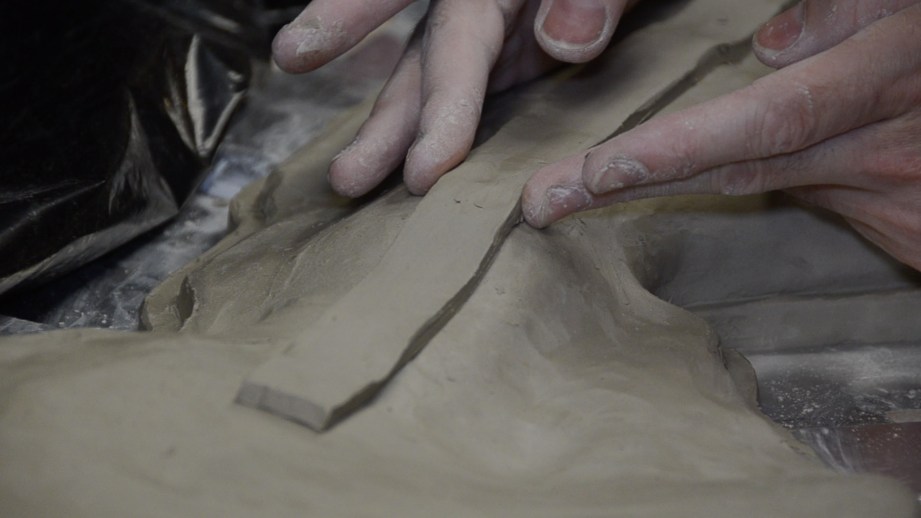
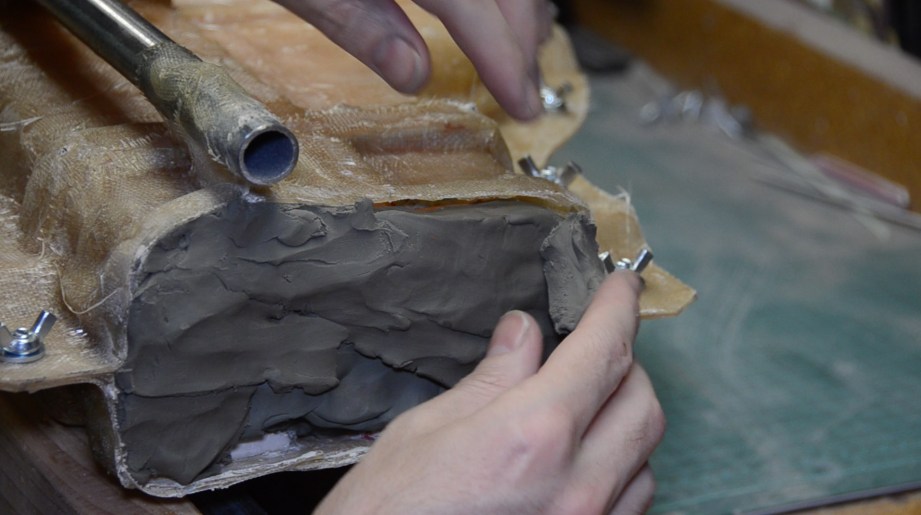
Regardless of this oversight, we added a whole bunch of water based clay to the piece. First we roughly clayed up the mid line to keep the piece centered. We used a home made board cutter thing and a wire to cut even sheets of clay in the thickness we wanted. Then those sheets of clay were laid down to cover the entire gun piece. The idea here is that the clay represents what will be silicone later in the build. As we worked, we kept the large areas of finished, sculpted clay covered with a trash bag to kept those parts from drying out.Once the entire side had a consistent layer of clay over it, we sculpted on some ridges that would be used as registration keys for the jacket mold. These were thinner strips of clay that ran along the midline of the mold, as well across the top of it. Then cardboard tubes were inserted to provide pouring spouts for the silicone.
Once I was happy with this half of the sculpt, the clay was sprayed with some Crystal Clear acrylic spray paint to help make it easier to remove the clay from the jacket mold once it was cured. Then I brushed the frame edges with petroleum jelly to provide some release and we got to applying the fiberglass shell.

In this case I used fiberglass resin and cloth. I opted for polyester resin, because I had a gallon of it on hand. In the future, however, I think I’ll go with epoxy, as recommended to me by other mold makers. In any case, a rigid fiberglass shell was added to the outside of the clay in a couple of layers, creating the first half of the jacket mold. We also embedded a metal tube along the length of the jacket to keep it from twisting during casting.

With side one of the jacket all cured, we could remove the wooden frame and sculpted on the other side of clay, fully entombing the gun piece in a half inch of clay. After that, it was rinse and repeat. We laid down the second half of fiber glass to complete the two part jacket mold.
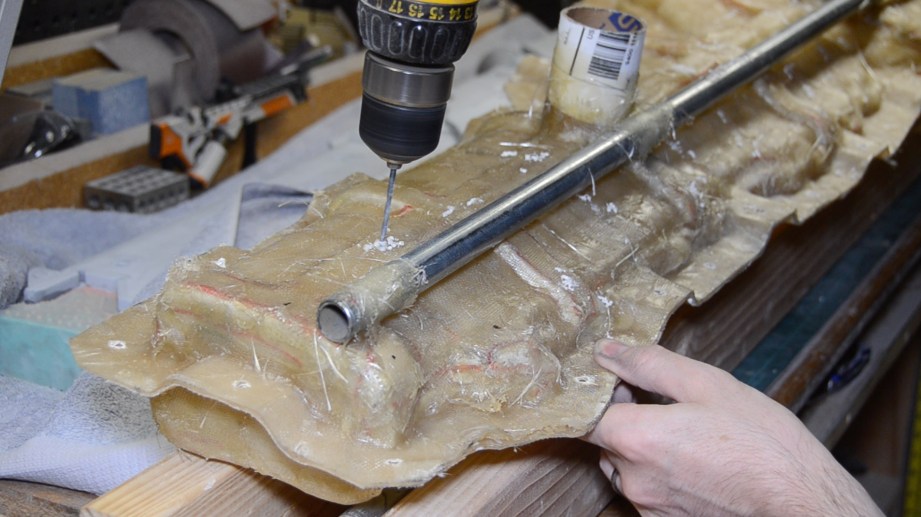
Before separating the two halves of the jacket mold, I trimmed the rough edges so they would be prettier and less deadly (pointy fiberglass hurt a lot). I also drilled holes through each side so that they halves could be bolted back together.
Creating the Silicone Mold

Once the fiber glass on the jacket mold was fully cured, we removed it from the master and rescued all of our clay. Not only did we want the jacket to be free from any offending clay, but we needed to measure the volume of the clay used so that we could have a good estimate on how much silicone we would use. This was done with water displacement.

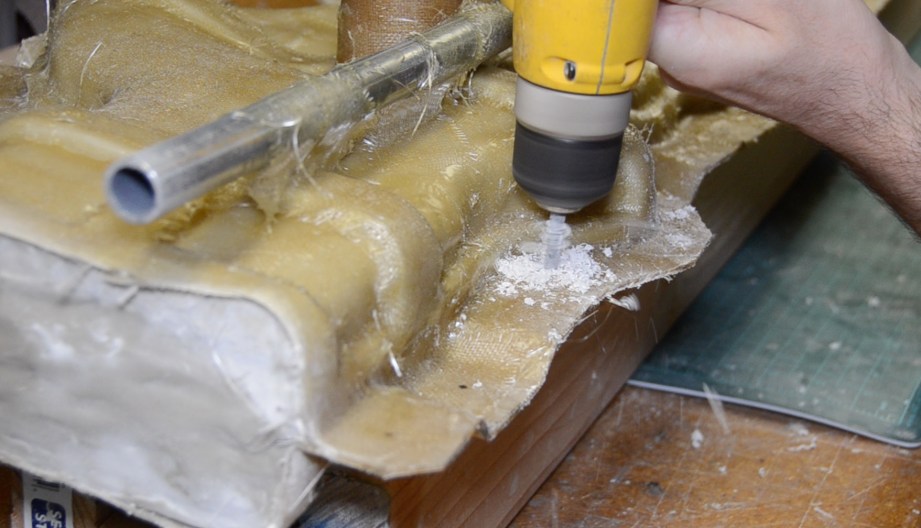
With our master free of the fiber glass, we could clean up our work a little bit. Despite our best efforts, we ended up with many bubbles in the jacket mold. Those were filled in using Free Form Air. This would ensure that silicone wouldn’t leak into those pockets and lock it to the jacket mold. I also drilled in a bunch of small “bleeder” holes all over the jacket mold. These holes would allow air to escape the mold when the silicone was poured in.
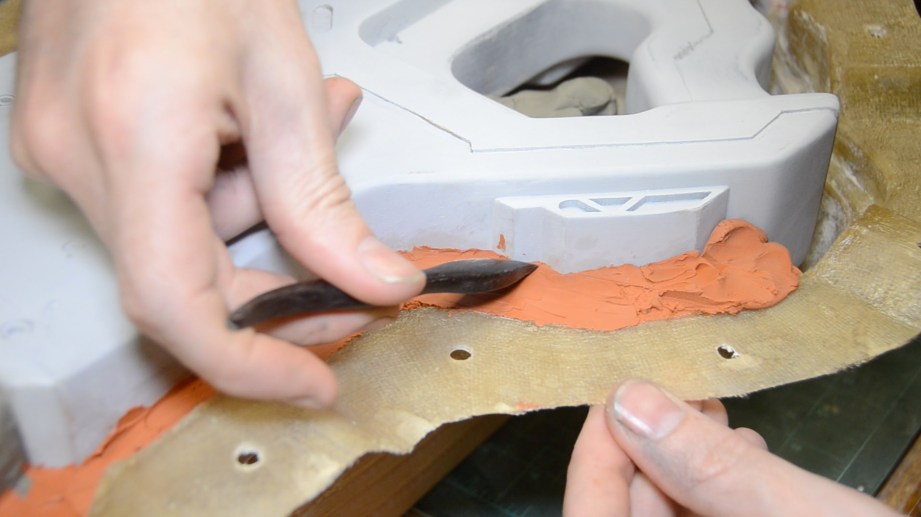
The master was cleaned up (remember I water logged the MDF earlier) and placed back into the jacket mold, taking sure that it was nice and centered. Then we clayed up the mid line to create a tidy edge between the two halves of the silicone mold. This was done with some non sulfuric, oil based clay and some neat tools that Harrison made. Finally, we cut in some registration keys and prepped for silicone.
I also sculpted in a plug in the rear of the gun to act as a pouring spout. This part of the jacket mold was left open on purpose so that we could remove the silicone plug to pour in resin. We could either leave it open and just use the area as a pouring spout, or we could plug it shut if we decided to rotocast the part.
I made sure to spray some mold release on the front barrel silicone plug that I made earlier and then mixed up my silicone. We did a brush on layer of Rebound 25 and let it cure for about an hour before clamping on the other side of the jacket mold to pour the rest of the silicone.

The I mixed up a bunch of Mold Star 15, degassed it in my vacuum chamber, and poured it into those handy tubes we embedded earlier. As the tubes filled up, they fed silicone into the rest of the mold jacket, filling up the empty space between the master and the outer jacket wall. When the silicone got to a bleeder hole, we would cap it off with a piece of clay. Once that side was full of silicone, we let it cure.

The other side of the silicone was done the exact same way. We needed only to take off the other side of the jacket mold, remove the mid line clay, spray down some mold release, and then apply the rest of the goo. Easy, right?
When that side cured, the last thing I needed to do was pour the plug for the rear of the gun. This was as simple as removing the clay and dumping in some more Mold Star 15.

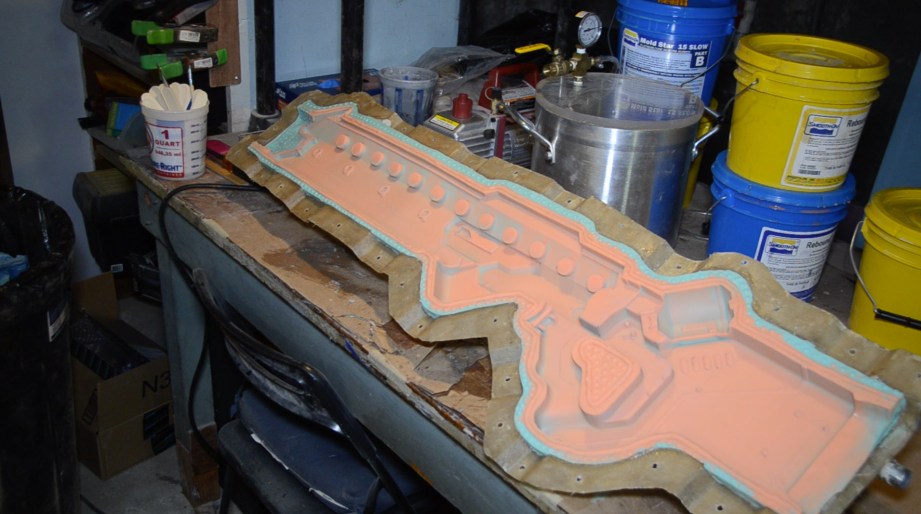
Once all of the silicone had cured, the mold was finally finished! The only thing left to do was to retrieve the master from the mold. It took some effort, but I was able to pry the jacket mold away from the silicone underneath and then the master from that silicone.
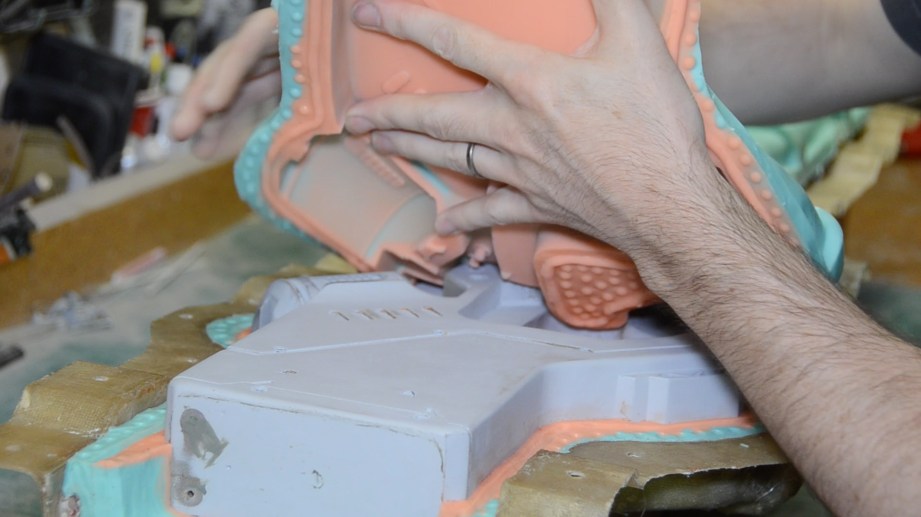
Then the silicone halves could be placed back into their right jacket mold halves and the completed mold was ready for casting! Huzzah!
I have to say, I was hesitant to try a new process like this, since so much can go so very wrong, but I was glad that I did it. I now have a full understanding of the process and I know that the next time I do it, not only will it be easier, but I know how to get an even better finished product out of it. Hurray for taking risks!
Find more of Bill’s work on his Punished Props website and YouTube channel.
Thanks to Smooth-On for providing materials for this build. Subscribe to their YouTube channel here.


4 thoughts on “Building a District 9 Alien Rifle Replica, Part 3”
Leave a Reply

One Day Builds
Adam Savage’s One Day Builds: Life-Size Velocirapt…
Adam embarks on one of his most ambitious builds yet: fulfil…

Show And Tell
Adam Savage’s King George Costume!
Adam recently completed a build of the royal St. Edwards cro…

All Eyes On Perserverance – This is Only a Test 58…
We get excited for the Perserverance rover Mars landing happening later today in this week's episode. Jeremy finally watches In and Of Itself, we get hyped for The Last of Us casting, and try to deciper the new Chevy Bolt announcements. Plus, Kishore gets a Pelaton and we wrack our brains around reverse engineering the source code to GTA …

One Day Builds
Mandalorian Blaster Prop Replica Kit Assembly!
Adam and Norm assemble a beautifully machined replica prop k…
House of MCU – This is Only a Test 586 – 2/11/21
The gang gets together to recap their favorite bits from this past weekend's Superb Owl, including the new camera tech used for the broadcast and the best chicken wing recipes. Kishore shares tips for streamlining your streaming services, and Will guests this week to dive into the mind-bending implications of the latest WandaVision episod…

One Day Builds
Adam Savage’s One Day Builds: Royal Crown of Engla…
One of the ways Adam has been getting through lockdown has b…

Making
Adam Savage Tests the AIR Active Filtration Helmet…
Adam unboxes and performs a quick test of this novel new hel…

Making
Weta Workshop’s 3D-Printed Giant Eyeballs!
When Adam visited Weta Workshop early last year, he stopped …

One Day Builds
Adam Savage’s One Day Builds: Wire Storage Solutio…
Adam tackles a shop shelf build that he's been putting off f…

Show And Tell
Mechanical Dragonfly Automata Kit Build and Review
Time for a model kit build! This steampunk-inspired mechanic…
Thanks for doing this, Bill. I love the subject matter.
However in this video particularly, I’d like to see a bit more SHOWING what you were doing, and a bit less of you TALKING about what you were doing as a talking head. The first two videos were better at showing clips of you doing the work rather than you sitting there describing what was going on.
Also, I’d have LOVED to see video/pictures of the damage that the MDF sustained. You mentioned it, but there was nothing to show what happened, and that’s an IMPORTANT part of the maker process: show your mistakes. We LOVE seeing that, not purely from a schadenfreude standpoint, but from empathy… we’ve all been there.
Unfortunately, when I’m both the maker and camera man, it’s really hard to capture all that video as I build, so I didn’t get as much as I had hoped. Especially when the finish was damaged. I was a bit emotional and forgot to film it.
You need to clone Joey.
Nicely done! This stuff looks really tough, but a lot of fun.
I’ve been following Harrison’s (Volpin Props) work now for a while, so I’m glad to hear him get a shout out.