The Zoidberg Project, Part 12 (Finale and Recap!)
We've debuted the Zoidberg Project at both WonderCon and Comic-Con, but here's Frank's final write-up describing the finishing touches!
Even though The Zoidberg Project has been wrapped up for a while now, it’s not over. I got sidetracked back in May with the Gore Magala build for Capcom’s Monster Hunter 4 Ultimate display, and I still owe you all one more article!
So let’s back track a bit….back to early April. Leading up to the debut at WonderCon, I had a ton of finishing to do on the Zoidberg costume. The feet that Carson and I sculpted and molded needed to be cast up and painted. We opted for a simple latex and polyfoam casting. To make this cast, we brushed in about four or five good coats of latex into the mold, giving plenty of time for them to dry between layers. If you don’t let the previous layer dry enough, you will end up with wet layers sandwiched between dry layers, which will make the skin too soft and prone to stretching out of shape.
Since this mold for the feet are stone, I could have just filled it up with latex and let it set for an hour to form a “skin” around the outer edge, then dump the excess latex back out into the bucket and let it dry. But I felt that manually brushing in a few layers and drying them with a hair dryer between layers would be the fastest route. Once this layer of latex skin is set up, I mixed up a batch of Flex Foam 3 from Smooth-On and just rolled it on the surface until it started foaming up. I didn’t need it to be a solid foam casting because I still need room for my food and ankle inside.

This finishes the casting, which could then be demolded and trimmed up while the second foot was being done. I like to use an electric turkey cutter sometimes when I’m trimming foam, and it helps to hog out big sections quickly. Once I find the right fit for my foot, I used a little Barge glue to tack the latex down to the foam, as sometimes it can delaminate. That was it for the feet, but we all know that Zoidberg doesn’t walk barefoot.
Zoidberg wears sandals, too! To replicate this, I thought some white L200 foam would work great. L200 is a dense foam that also comes in black, and also comes in a denser L300 version. It’s similar to the EVA foam that cosplayers and makers like Bill Doran use to make Mass Effect armor, but I can buy it in 4×8 sheets of various thickness from places like Foam Mart or Atlas Foam here in Southern California. This foam is also best glued with Barge. To make the sandals, I took the foot forms and drew it out on some paper, then estimated out the shape of the sandal around the foot. I then cut a couple strips to make the foot straps of the sandals. Pretty simple. But before I glued it all together, I needed to get the feet painted so I didn’t have to worry about getting color onto the white sandals.
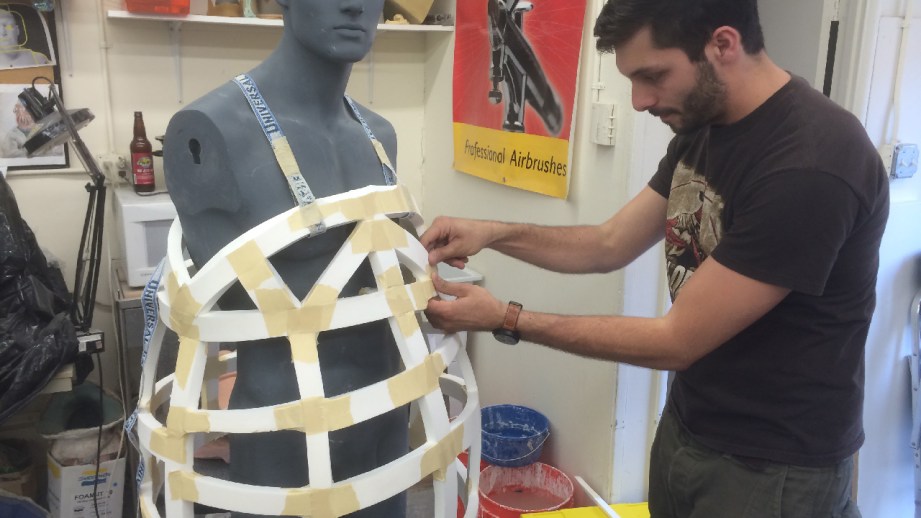
WonderCon was coming up fast, and we needed to get onto the body form of Zoidberg done too. Since I had a ton of stuff going on at once at the time, I called up my pal Ben Bayouth, who you might recognize from the Jim Henson’s Creature Shop Challenge show to help with the body form and claws.
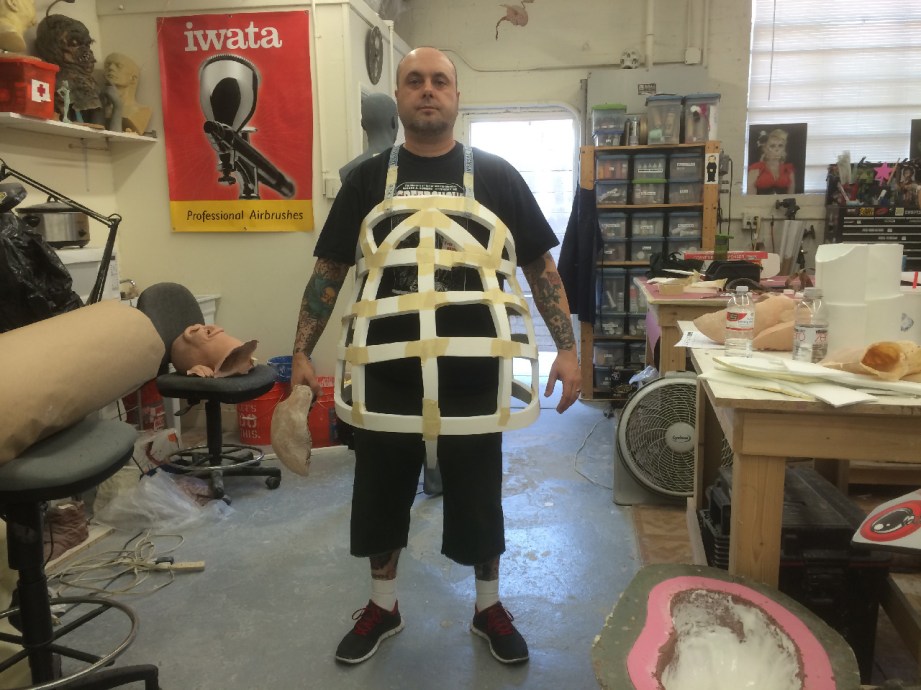
I grabbed a mannequin and Ben quickly jammed out a framework for the body in a couple hours. Starting with the belly diameter, then the profile, he simply cut strips of L200 foam and used masking tape to tack them together into shape. As the shape started to take form, he would just simply add more strips to fill out the form and give it a smooth shape. Originally we had planned for this to serve as a pattern to make a final version, but because of time, we opted to just use this as a final version, and just put some thin batting on the surface to hide the ribbing a bit.
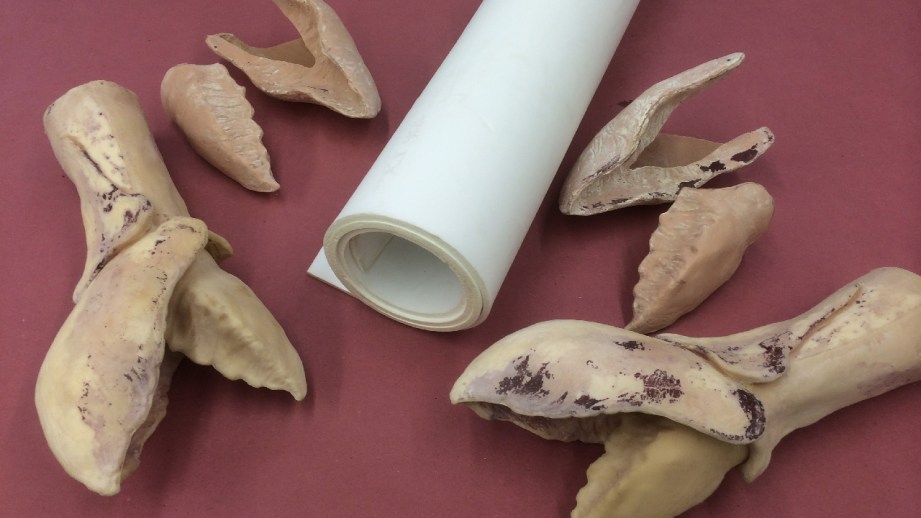
Then Ben took the claws I made and started into assembling them. He first glued the plastic claws onto a pair of leather gloves then using some L200 to make some sleeves. Once this was all glued together, he had to hide all the seams between the claws and the sleeve, so we decided to take some latex and make some strips and sheets by stippling it onto a table top, then glue that into the parts to bridge everything and form some folds.

I had originally had a costumer offer to make the wardrobe for Zoidberg, but apparently got overloaded (ie. flaked) so I had to scramble for someone else to build it on such a short notice. There are many nuances to Zoidberg’s wardrobe so I couldn’t justify just getting a lab coat and scrubs to make do. I remembered back to a film I worked on called Return of Zoom, which had a costumer who was really fast and efficient. She came into the shop and took some measurements of me and what the body form, neck, and wrists were. We decided making the costume a dickie for Zoidberg’s collar that would Velcro in back. Then she made the lab coat, which only has a pocket on one side, and a few buttons. Last were some pants with suspenders. And boom–she had it completed and back to me a few days later!
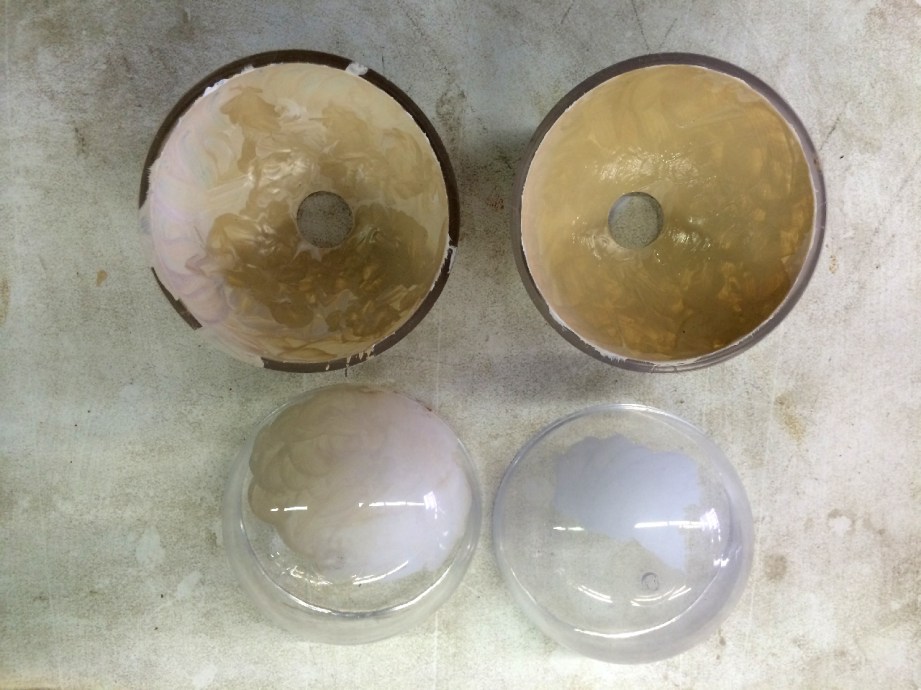
My pal Harrison Krix (Volpin Props) helped me out and took those clear eyes forms and laser cut a whole in the center for me. It was just an easier option than to try and drill or dremel it and risk a wavy cut or crack in the plastic. We settled on a specific diameter for his pupil, which is the size that Pete Avanzino, the supervising director from Futurama drew on the eye form for me back when he visited the shop. I wanted these eyes to maintain their gloss, so painted them from behind with some acrylic, using a couple different colors to mottle up the color. I thought this will look better than just painting it a solid color. That subtle break-up in tones will look nice and a bit more natural. Once a few coats were on to make it opaque, I airbrushed some black over the whole thing and onto the rim of the hole that was cut. This matte black will help hide the fact that I’m looking through little holes in the eye forms.
The eyes have become a bit of a controversial point. When I looked for reference and watched the show a million times, I had never noticed that Zoidberg’s eyes were light blue. When you do an image search for Zoidberg, I now see that about half of the pictures have white eyes and half have a very light blue. Even when I had the directors of the show over to see Zoidberg, or when they saw my final version, none of them mentioned his eye color! Again, it was a simple mistake that I made his eyes white-ish, but am repainting a set to be the light blue. So now the internet can calm down from their tizzy. Next time I wear Zoidberg, he will have light blue eyes.
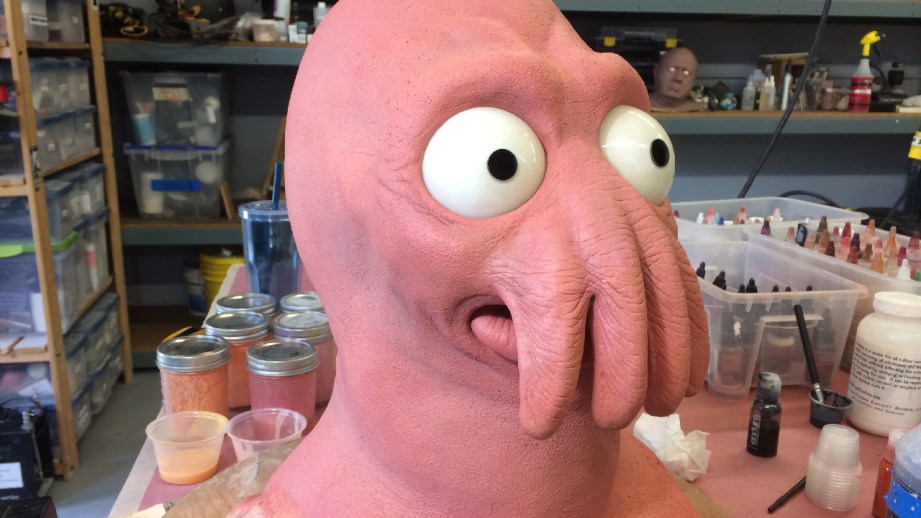
The final thing to be done on Zoidberg was painting his claws and head.
To paint latex (or foam latex) rubber cement is my go-to. I feel that it sticks best to the material and if you do it right, and doesn’t build up a skin layer that could clog small details like pores and wrinkles. Like all paints, you need three things: a binder, a solvent and a pigment. The binder for this is rubber cement, and you can usually find it in craft or art stores. The solvent is Naphtha, which can be found at paint or hardwear stores. And the pigment, in this case is oil paint.
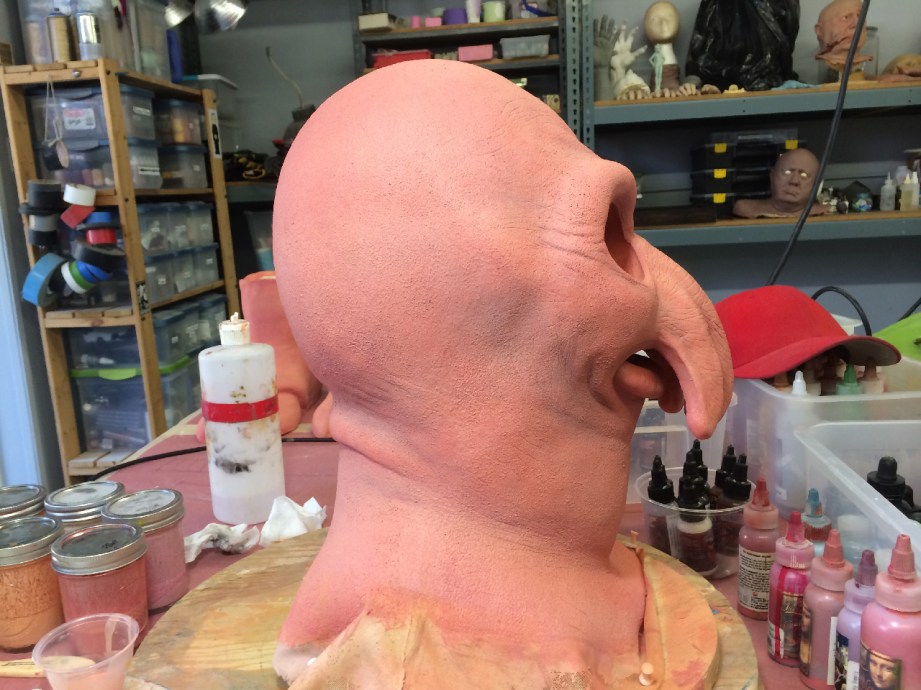
The ratios you mix them in all come down to personal preference. I usually start by taking a mason jar and pouring some rubber cement in, then the naphtha to dilute it until it seems to be a viscosity that I could airbrush with. Sometimes this ratio needs to be altered depending on the air pressure that you prefer in your airbrush, or maybe if you are going to use a regular brush to paint it on. For the oil paints, I like to take a small jar and mix my preferred colors in there with some naphtha to thin them out also. This helps in mixing the paint into the rubber cement base. If you just squeeze a glob of oil paint into the naphtha, you have to spend a ridiculous amount of time shaking it up to disburse, and still might end up with specks of un-dissolved paint. I’ve even lately been keeping squeeze bottles of thinned oil paint to mix as needed into other paint bases (like silicone).
So, to get the paint onto Zoidberg, I mixed up two base colors that I brushed onto the surface and alternated between to give some tonal breakup. Then I went in and started airbrushing some details with Tim Gore’s Bloodline paint. This as a great new line of paint from Createx. It’s a water based paint with excellent pigment concentration and colors available. My only gripe is the color names, which are cool, but takes a while to get to know which color is associated with some of the names.
After I put in some details, I wanted to wash them back to make them appear sub-dermal, so I painted a thin layer of the rubber cement paint over the whole thing. This helped subdue some of the crispness of the lines and help layer the colors a bit. You can see a lot of these steps in the video that was shot for he process.
But after Norm and Joey left, the next morning I came into the shop and decided to repaint the whole thing. Just like when I was working on the initial designs and sculpture, I started out making it too detailed and trying to add in too much realism. I reverted back to what I found I the sculpting and simplified the whole paint job. I took those initial base colors and re-sprayed them all on, making them less blotchy. Then I made up a darker version and lighter version that I also sprayed on to highlight and contour the forms a bit, but this time, I used my Iwata g3 airbrush with the air pressure turned down a bit. This makes the paint spatter a bit and gives a speckled look. Using this spatter technique to highlight and shadow helps relieve that “airbrushed” look a bit. Rubber cement is a contact adhesive, so freshly painted parts will want to stick to each other (like the tentacles). There is a great product called V-matte and V-gloss, which are coatings that can be brushed or sprayed on after painting and between coats to resolve this.
The same treatment was done on the feet as I mentioned above. The hands were a bit of a different story. Because the claws were epoxy while the wrists were latex and the arms were L200, I had to mix and match paint a bit. I sprayed the latex parts with the rubber cement paint, then made an acrylic paint mixture of all the colors that were used and painted the claws and arms.
But after all that painting and finishing–right up until the day before WonderCon–we have finally finished The Zoidberg Project! Thanks so much for following along through all these months, and please leave your feedback in the comments below!
3 thoughts on “The Zoidberg Project, Part 12 (Finale and Recap!)”
Leave a Reply

One Day Builds
Adam Savage’s One Day Builds: Life-Size Velocirapt…
Adam embarks on one of his most ambitious builds yet: fulfil…

Show And Tell
Adam Savage’s King George Costume!
Adam recently completed a build of the royal St. Edwards cro…
All Eyes On Perserverance – This is Only a Test 58…
We get excited for the Perserverance rover Mars landing happening later today in this week's episode. Jeremy finally watches In and Of Itself, we get hyped for The Last of Us casting, and try to deciper the new Chevy Bolt announcements. Plus, Kishore gets a Pelaton and we wrack our brains around reverse engineering the source code to GTA …

One Day Builds
Mandalorian Blaster Prop Replica Kit Assembly!
Adam and Norm assemble a beautifully machined replica prop k…
House of MCU – This is Only a Test 586 – 2/11/21
The gang gets together to recap their favorite bits from this past weekend's Superb Owl, including the new camera tech used for the broadcast and the best chicken wing recipes. Kishore shares tips for streamlining your streaming services, and Will guests this week to dive into the mind-bending implications of the latest WandaVision episod…

One Day Builds
Adam Savage’s One Day Builds: Royal Crown of Engla…
One of the ways Adam has been getting through lockdown has b…

Making
Adam Savage Tests the AIR Active Filtration Helmet…
Adam unboxes and performs a quick test of this novel new hel…

Making
Weta Workshop’s 3D-Printed Giant Eyeballs!
When Adam visited Weta Workshop early last year, he stopped …

One Day Builds
Adam Savage’s One Day Builds: Wire Storage Solutio…
Adam tackles a shop shelf build that he's been putting off f…

Show And Tell
Mechanical Dragonfly Automata Kit Build and Review
Time for a model kit build! This steampunk-inspired mechanic…


Awesome! Thanks for circling back on this!
At first I started thinking you actually had snacks within the costume…was disappointed to realize it was probably a typo.
Anyhow… Awesome project and fascinating blog posts! Thanks for giving us a peek inside your creative process.
This whole series has been awesome!!. I just spent many hours reading and watching the whole process!. This has been so helpful to answer questions I have had as to how to go about molding my dragon sculpt I am working on with Monster clay which I plan to make out of Silicone and paint. Thanks so much for sharing all of this!.