Molding and Casting Tiny Prop Parts
Small molds have their own, different set of hurdles than large prop molds. Two things help: proper venting and pressure casting.
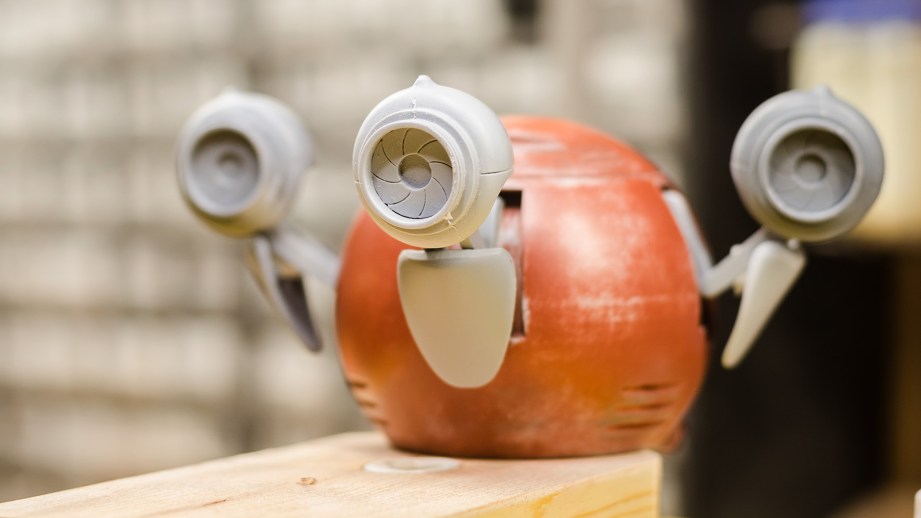
I don’t know about you, but I tend to jump from one project obsession to another. Just as I was getting over my space gun prop obsession I slipped right into a deep fascination with tiny robot models. My current project is a 1:6 scale Mister Handy robot model from Fallout 4. The majority of it is 3D printed, but I’m molding and casting all of the parts for durability and so that I can make multiples of repeated parts like the arms and eyes.
I’ve made a whole bunch of silicone molds in my career. Most of them have been of a moderate scale; roughly space pistol sized. Some of them, on the other hand, have been ridiculously large. For example, the District 9 alien rifle main body mold is over 44″ long and took my wife and me 4 days to build.
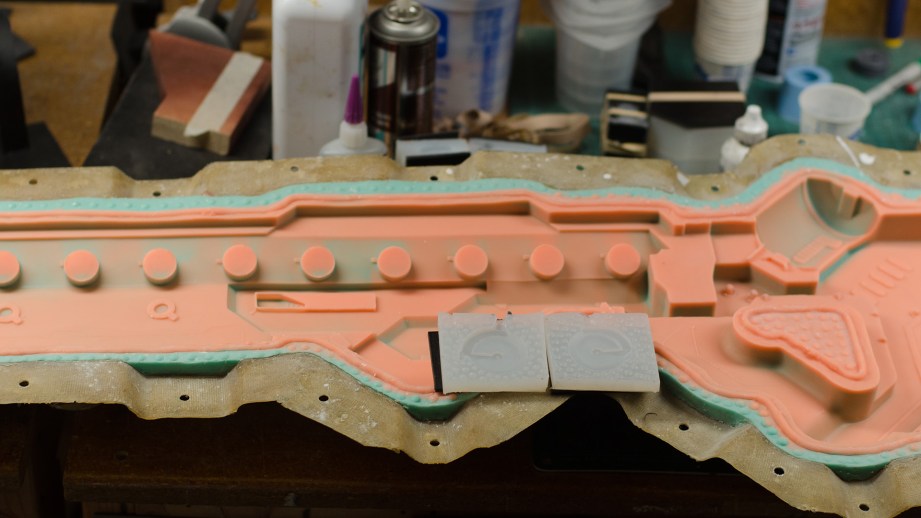
With this latest tiny robot project, I’ve gone in the opposite direction. The molds and pieces for such a small model kit are comically tiny compared to the rifle molds. Some of the parts for this pint sized robot are only a couple of centimeters long! Making gigantic molds and castings is extremely challenging, but I quickly learned with this new project that small molds have their own, different set of hurdles.
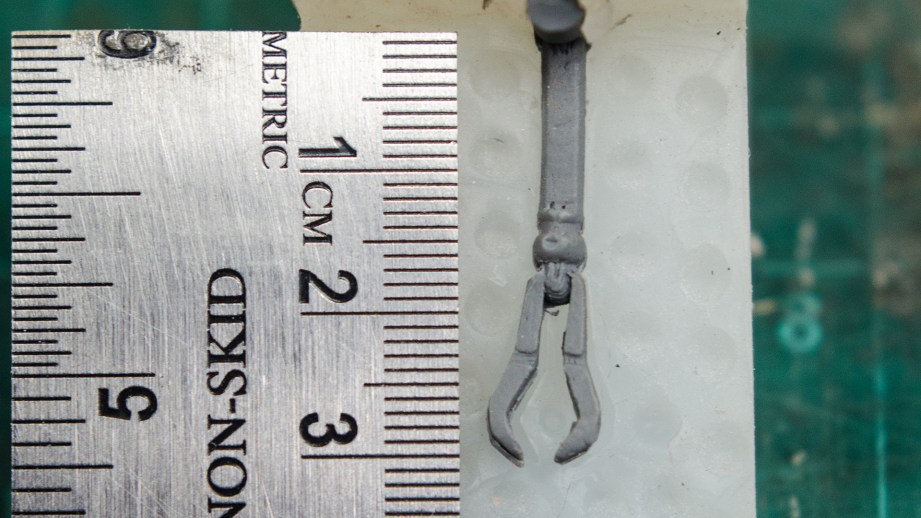
Note: For the examples in this build I used Mold Max 30 and Mold Star 20T silicone to make my molds. Mold Max is a good, all purpose silicone and 20T cures super fast (30 minutes) which was really handy for mold experimentation. I cast all of my parts in Smooth Cast 300, tinted gray. This is a great general purpose urethane resin that cures pretty quickly (10 minutes). It also has a relatively low enough viscosity, which helps in capturing the intricate details in my small robot parts.
My Nemesis: Bubbles
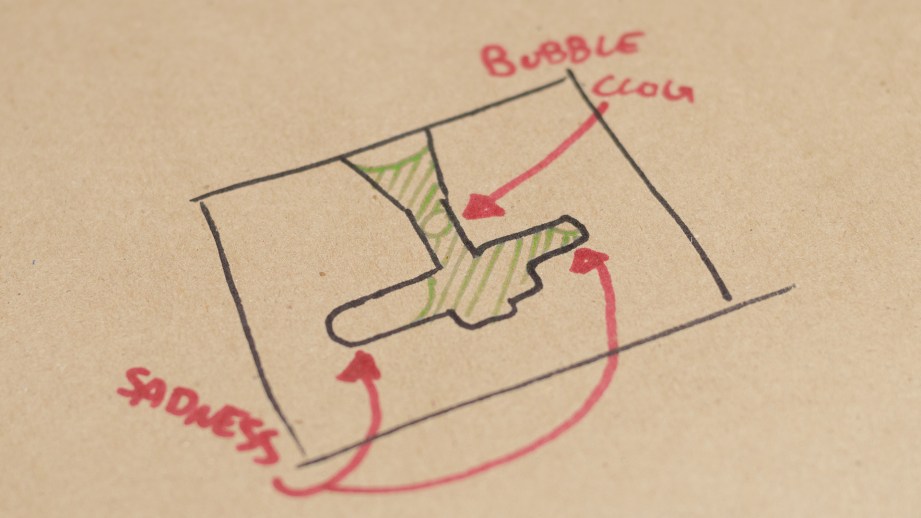
Yes, with every mold you make, big or small, you need to be very aware of the bubbles your castings may trap in the resin. Large molds have a distinct advantage in that the fluid weight from all the resin you pour into them will help force bubbles up and out of the mold cavity, usually through the pouring spout. In a really small silicone mold, that pouring spout is too small and there isn’t enough liquid weight for the air bubbles to escape via that one spout. This causes a clog that won’t allow the resin to completely fill the mold cavity. From the outside the mold appears to be full of resin. The inside, however, is mostly air, shame, and sadness.
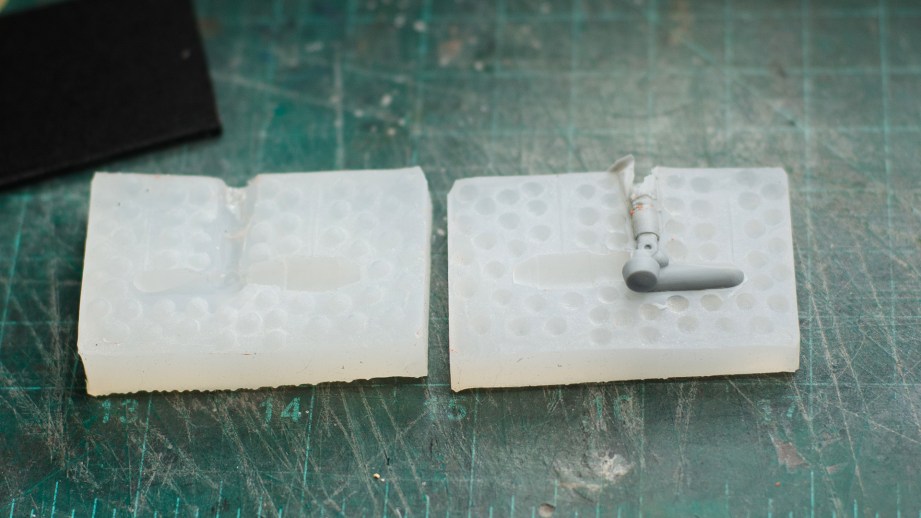
To combat this, molds must be planned and properly vented. This way, when the liquid resin is poured in through the pouring spout, the air can escape through a vent instead of trying to force it’s way back through the tiny spout that you’re clogging with the resin. Planning these molds on paper is a good first step!
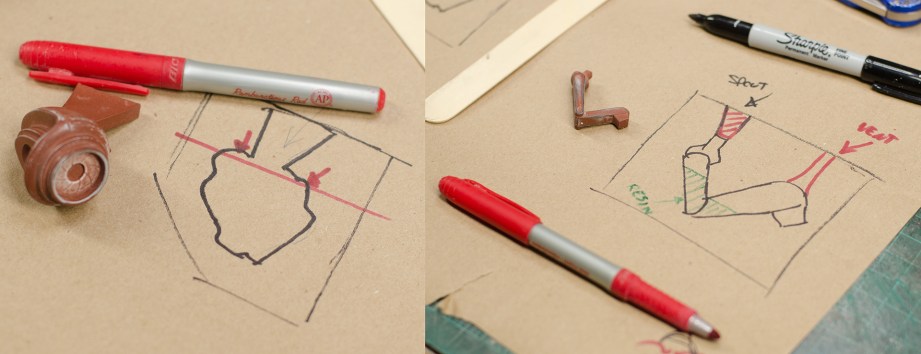
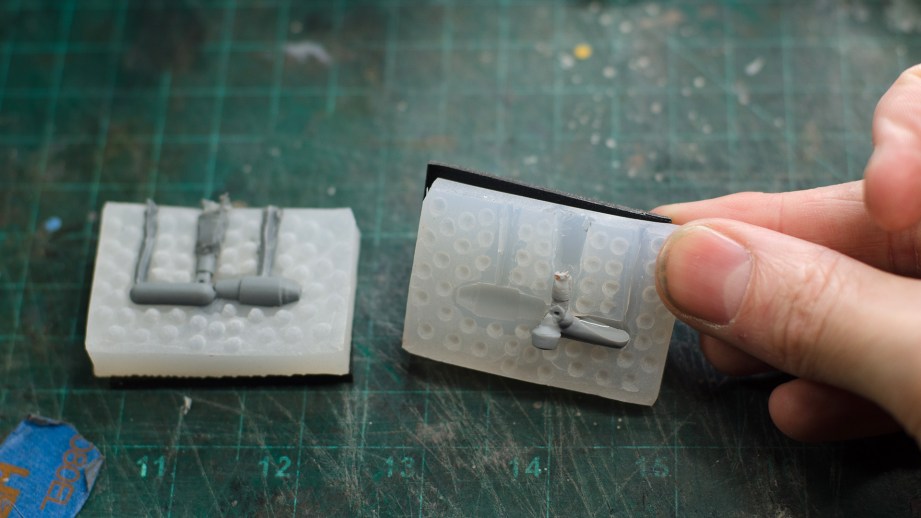
By cutting a couple of vents in the appropriate places in your mold you can almost completely negate any trapped air bubbles in your castings!
Planning Your Vents
Many times you won’t really know the proper places to add vents, or if you even need them, until after you’ve tried casting a part from your mold. In that case you may just have to get X-Acto happy on your cured silicone mold and carve trenches willy-nilly until you can get a good casting.
The more mold making you do, however, the more you can anticipate problem areas and plan them ahead of time. I like to draw lines when I’m claying up the first half of my two part molds in the areas where I think I’ll need some vents. This can be extremely handy because you can plan your registration keys around where the vents will be added.
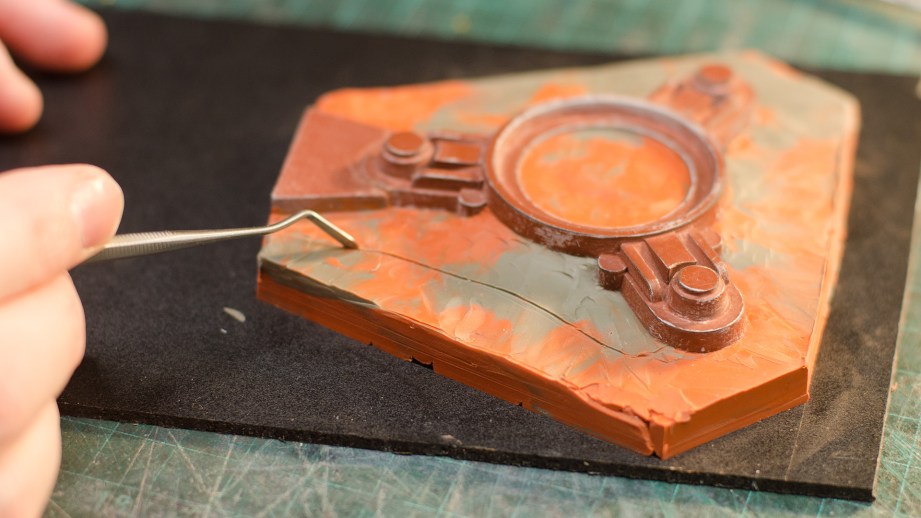
I also don’t try to sculpt in the vents before pouring the silicone. This would be extremely tedious. You would have to leave a thin snake of clay in the vent area. Instead I’ll simply draw the vent area into the clay and pour the two halves of my silicone. Then, using a small tool, I’ll punch in all of my registration keys around the part and my vents.
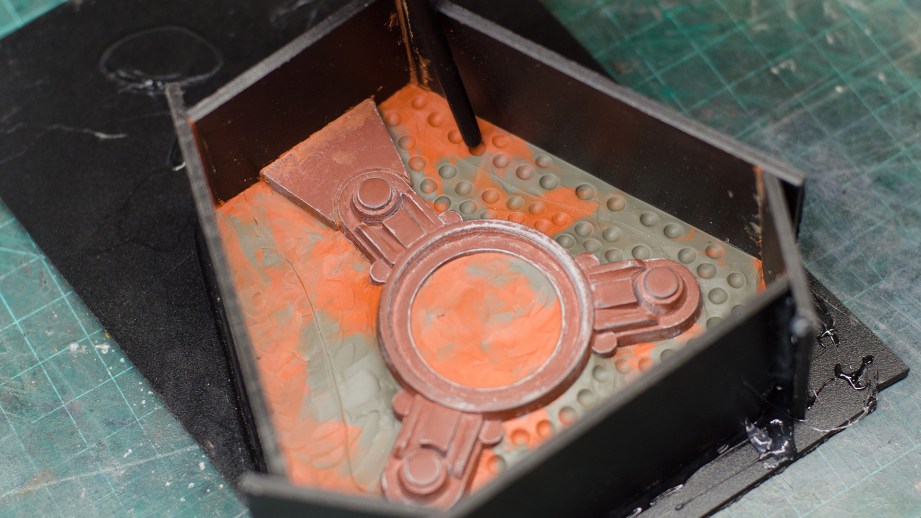
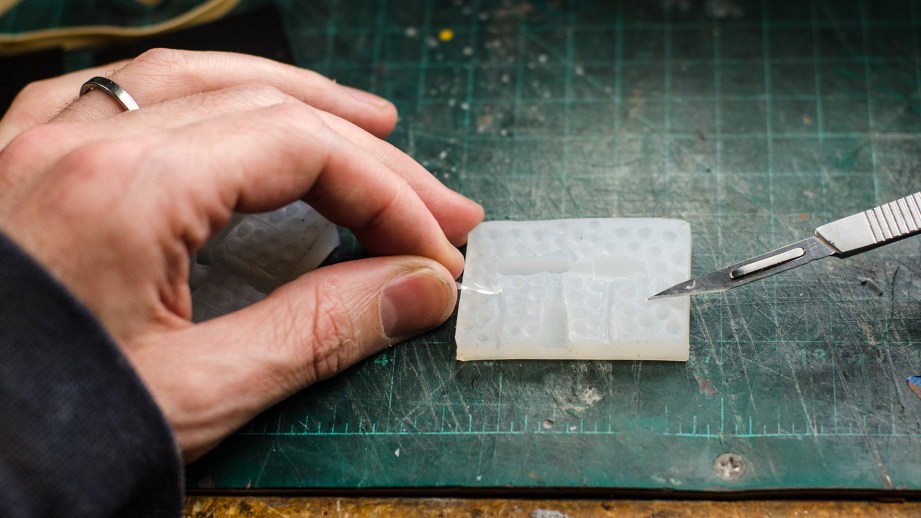
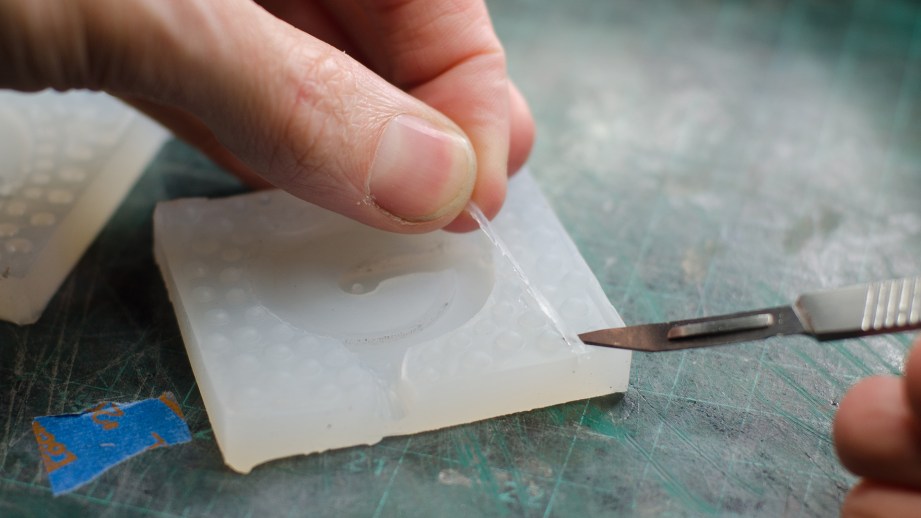
When the mold is done and cured, you can cut a trench in the vent areas with a sharp knife. It doesn’t have to be pretty, these vent sprues will be trimmed away from the final cast piece.
More Bubbles?!
Cutting good vents in your small molds will solve your major bubble problems, but it turns out that air is an extremely devious foe. Despite your best efforts, castings can still have microbubbles lurking just under the surface of your cured resin. These bubbles don’t show themselves until you start sanding your casting for paint!
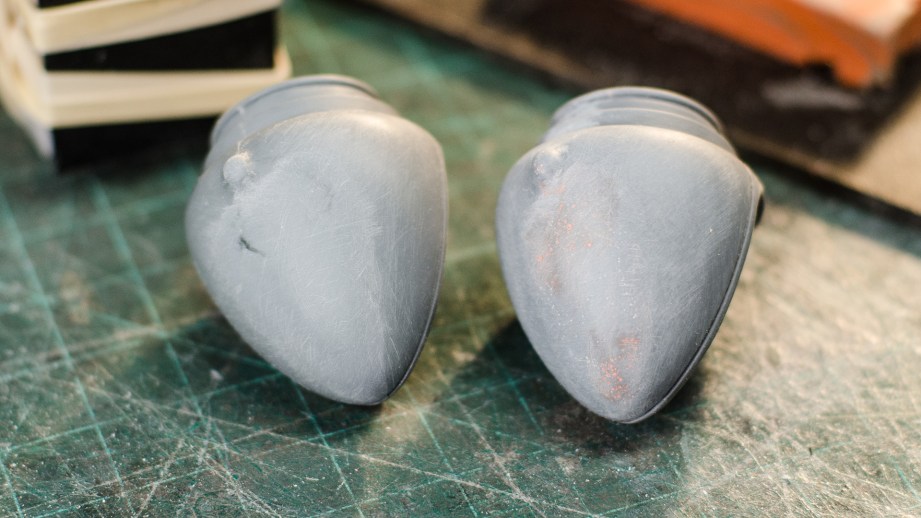
The above example showcases these microbubbles in fine detail. In the casting on the right, after discovering them during the casting cleanup process, I filled the bubbles with a red spot putty. After sanding the putty down you’ll end up with a perfectly smooth piece, but it would be great if there was a way to avoid these bubbles too.
In fact, the example on the left doesn’t have any of those pesky microbubbles! This was done using a pressure pot. Pressure casting is invaluable for small parts or anything that needs to be cast in a transparent resin. Both cases have a tendency to show off any imperfections in the casting and by compressing those microbubbles, the problem nearly vanishes.
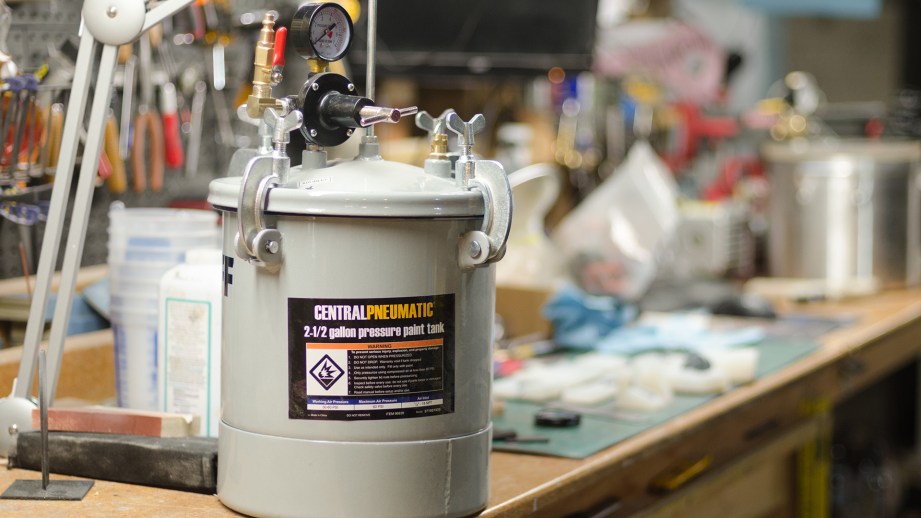
My pressure pot is a commercially available paint pressure tank from Harbor Freight. I had to change up the fittings a little bit to make it work for my purposes and with my air compressor, but the price was right and it gets the job done.
The idea is that, under high pressure, air will compress and liquid will not. When you place your liquid resin laden molds into the pressure pot, seal the lid, and raise the pressure to about 40 PSI, those microbubbles will be compressed to an invisible size. Then you can leave the mold in the tank until it cures into a solid plastic and those little bubbles remain microscopic until doomsday!
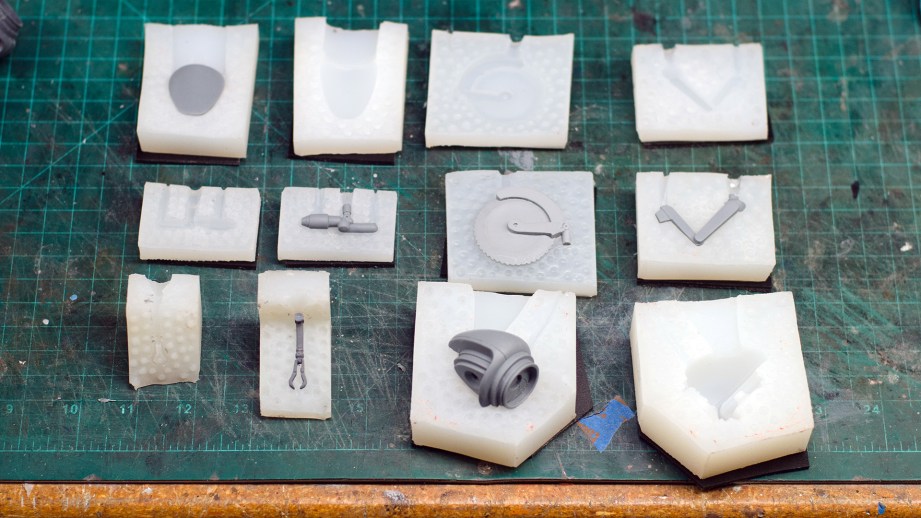
These two simple techniques, venting and pressure casting, will help you make tiny molds that are extremely effective at casting flawless resin copies. As always some trial and error is to be expected. Fortunately these wee little castings don’t take up too much resin, so you can be free to experiment to your heart’s content without breaking the bank.
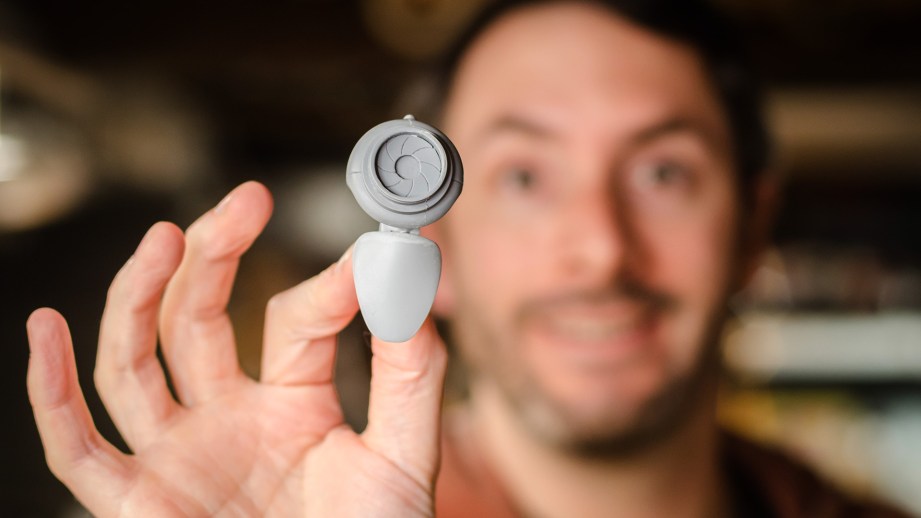
I do hope you give this kind of molding and casting a try. I’ve been having a joyous time making and casting all of these tiny robot parts, giggling like a child the entire time! If you’d like to learn more about silicone mold making, feel free to check out our ongoing molding and casting video series!
17 thoughts on “Molding and Casting Tiny Prop Parts”
Leave a Reply

One Day Builds
Adam Savage’s One Day Builds: Life-Size Velocirapt…
Adam embarks on one of his most ambitious builds yet: fulfil…

Show And Tell
Adam Savage’s King George Costume!
Adam recently completed a build of the royal St. Edwards cro…
All Eyes On Perserverance – This is Only a Test 58…
We get excited for the Perserverance rover Mars landing happening later today in this week's episode. Jeremy finally watches In and Of Itself, we get hyped for The Last of Us casting, and try to deciper the new Chevy Bolt announcements. Plus, Kishore gets a Pelaton and we wrack our brains around reverse engineering the source code to GTA …

One Day Builds
Mandalorian Blaster Prop Replica Kit Assembly!
Adam and Norm assemble a beautifully machined replica prop k…
House of MCU – This is Only a Test 586 – 2/11/21
The gang gets together to recap their favorite bits from this past weekend's Superb Owl, including the new camera tech used for the broadcast and the best chicken wing recipes. Kishore shares tips for streamlining your streaming services, and Will guests this week to dive into the mind-bending implications of the latest WandaVision episod…

One Day Builds
Adam Savage’s One Day Builds: Royal Crown of Engla…
One of the ways Adam has been getting through lockdown has b…

Making
Adam Savage Tests the AIR Active Filtration Helmet…
Adam unboxes and performs a quick test of this novel new hel…

Making
Weta Workshop’s 3D-Printed Giant Eyeballs!
When Adam visited Weta Workshop early last year, he stopped …

One Day Builds
Adam Savage’s One Day Builds: Wire Storage Solutio…
Adam tackles a shop shelf build that he's been putting off f…

Show And Tell
Mechanical Dragonfly Automata Kit Build and Review
Time for a model kit build! This steampunk-inspired mechanic…


Hi,
great article! I’ve been haunted by bubbles quite a bit in technical molds that often also have potted electronics inside where air can get trapped. I’ve so far gone the opposite route, using vacuum instead of a pressure pot for degassing the resin. One technique that I found works well but is a bit more effort to set up:
– set up two vacuum pots, one of them with two glands for vacuum hose (I just use 6mm vinyl tubing from the hardware store, and screw-in glands that are sold for electrical boxes). Connect pot 1 to the vacuum pump, and to pot 2 with the second port. Also put a hose clamp on the connecting tube.
– Put the mold in pot 1, and stick the hose coming from pot 2 into the mold inlet.
– Put the cup with mixed resin into pot 2. Arrange the vacuum hose into pot 2 so that it is above the resin cup (it will be pushed down into the resin later).
– Pull a vacuum (pot 1 will be evacuated directly from the pump, and pot 2 through the connection hose). The resin will now bubble and degas for a while.
– When the resin stops bubbling, push the vacuum hose that connects the two pots down into the resin cup. Now slightly unscrew the gland to create a small vacuum leak into pot 2. This will now start pushing the resin through the connecting hose into pot 1 which is still under vacuum, and into the mold. Once you see resin coming out of the vents, close the hose clamp to stop the resin flow. For curing the vacuum can now be released.
It would be easier to explain with a video – if I find the time I should film the process…
I’ve been casting 30mm tall miniatures and ascociated components for tabletop games for a few years and have settled on vacuum followed by pressure. I also use one-part split moulds, rather than two-part keyed moulds. Much quicker set-up, though slightly more prone to mould lines. Almost everything I know, I have learned as part of the Resin Addict community: http://www.resinaddict.com/forum/
The harbour freight pots have a bit of a reputation for being dangerous – the clamps screw directly into the lid, damaging it over time (http://www.resinaddict.com/forum/download/file.php?id=488&mode=view), and the welds on the side can also weaken after a couple of years (http://www.resinaddict.com/forum/download/file.php?id=490&mode=view). The photos are of my similarly-designed UK pot.
Does anyone have tips about casting polyurethane rubber resins? I’ve tried several, but found it extremely difficult to remove bubbles from the resin (as the viscosity is higher they don’t rise well, even in vacuum). Sometimes I even had the impression that if I pull too much vacuum I get a lot more bubbles that weren’t there before, and it doesn’t stop. Are there any solvents or parts of the resin that can “boil off”? I also tried warming up the resin a bit to lower the viscosity, but that often reduces the work time too much. Anything I should try?
Schill That’s a pretty ingenious solution! Like some kind of mad scientist. Freaking awesome. =D
Great tips all around. I’ll have to upgrade to a more robust pressure pot in the near future. Maybe something bigger? Bwahaa!
Hi Bill,
Great article – where’s the video? lol…..I watch your videos at night for fun.
All this time you have been saying pressure pot and I didn’t get it until I saw it.
At work we use a vacuum chamber. My buddy who does a large amount of casting uses a vacuum chamber. Of course, we have different needs at work. But vacuum is the only way I have ever heard, so I just thought your “pressure pot” was a vacuum chamber.
Vacuum works awesome but it’s pricey. I finally manged to salvage a Welch pump (about a $3k device that look’s like it is from 1920) and I still can’t use it because I have no chamber!
I also had (unfortunately “had” is an operative word) an electric toothbrush fitted with a small ball on the end instead of a brush. It did a good job. And then brushing a coat on first does a good job. But you lose a brush each time and it doesn’t work for everything. Silicon release will do it with some rubber we use – but not others. I have even used a vibrating table.
Pressure sounds good and 40 PSI is really doable. I will look into it!
Make a video!
PS – since Bill Doran explained what pressure does, I will explain vacuum quickly to anyone caring. Mainly, it causes the bubbles to expand (by many orders of magnitude). The larger ones then detach and float away from the surface. Many of the smaller ones combine to larger ones and do the same. You don’t let the material set under vacuum though (unless you are really watching it and know what you are doing). Instead, after the larger bubbles are gone mostly you let the pressure in and all the remaining bubbles shrink. I guess the best way would be to use both if you could.
Schill Have you tried pulling a vacuum on the parts before mixing them? Then pull again once mixed & poured. A high vacuum can cause the rubber to continue boiling, which may introduce extra bubbles. I have an additive for silicone rubber which lowers the viscosity (& shore hardness), there may be something similar available for PU rubber?
I use these: http://www.pressurepots.co.uk/resin-moulding-tanks.html. There are similar US pots here: http://www.finishsystems.com/resincastingpressurepots.html and they go up to 20, 40 & 60 litres! You sure pay for it though.
Vacuum needn’t be pricey. My 2-stage, 8CFM pump (http://www.wiltec.de/rotary-vane-vacuum-pump-2-stage-224l-8cfm-0-3pa.html) cost me just over £200 and sufficiently evacuates my 10 litre chamber in around 30 seconds. I use my pressure pot as a vacuum chamber, with a home made Lexan polycarbonate lid so I can see the bubbles.
For some reason, I can’t submit my message when I use the reply feature to tag MantaBase.
thanks for the feedback! I’ve tried degassing the resin first, but I think maybe the vacuum was too hard and introduced extra bubbles due to boiling. Also, the mixing of course creates new bubbles. I didn’t see anything about vacuum pressures in the data sheets, but it sounds like you encountered the problem as well – guess I’ll have to figure out experimentally the minimum pressure that avoids boiling.
Thanks for the feedback.
Nice pump. Almost as much vacuum (very close) as the Welch for like 10 times less. I have a 3/4 inch thick piece of acrylic with a sheet of rubber I could use as a lid. I see if I can get the pot.
Thanks! Sweet solution.
Oh yeah, my account got accidentally (yeah right Will) tagged as a spammer last year and has never been right since. I’d complain, but I doubt it would do any good – folks don’t seem to have time for such.
I was able to reply to you this time – but normally I can’t. Maybe someone fixed it!
Do you think the pressure pot used by Bill would work?? Just curious since I can get it down the street.
When casting with pressure or vacuum do you need to prepare the moulds in anyway? If there is any air trapped in the mould won’t it deform under pressure/vacuum?
I ask as I’ve seen many videos about casting under pressure but no mention on how to prep the mould.
Not sure about acrylic’s flexibility. Test it carefully! The pot he uses would be fine. I used two like that for a couple of years, but now they scare me! Just like the idea of driving cars without airbags, despite doing just that for many years!
There is an argument that moulds to be cast with under pressure should set under pressure. This is because any tiny bubbles near the surface will be crushed by the pressure, leading to small protrusions on the cast’s surface. I don’t bother, but my silicone sets very slowly, allowing any tiny bubbles to escape. Bear in mind I am also putting the mixed silicone under vacuum before pouring – which I do slowly, from a good height.
Before pouring the silicone to make your molds, it needs to be degassed. If there are any bubbles in the silicone mold, when you put them in the pressure pot, the bubbles will compress, deforming the shape of your mold.
Hey everyone, I’m trying to make a metal version of a wax mold I made. I’m having problems with shrinkage. Anyone know how to make a wax mold into a fairly exact size metal version?
Are there any metal 3D printers coming out that anyone knows of?
Thanks!
Hi – I wonder if I can pick your brain concerning casting small parts. I’m new to casting. Trying to mold parts which are the width of a 3mm knitting needle tip and about 3/4″ long. The resin I’m using is hard to get in there without over-filling and a lot of spilling. A big mess. I’m using a syringe which works well but the pressure makes it hard to control once I plunge.
Is there a better technique for what I’m trying to do? Perhaps a very runny resin that would work better for very tiny deep molds?
I forgot to mention that I need to insert a piece of elastic cord in there before it hardens… big mess.
Thanks so much!
Hi Bill,
Do you find that Smooth Cast is strong enough for those tiny robot parts? I’ve been using Task for thinner parts and pressure casting. I have some Smooth Cast laying around so I guess I can try it out. It would be nice to cut down my de-mold time.