How To Assemble the 3D-Printed Ghost Trap
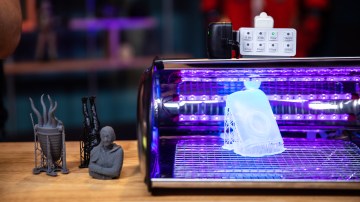
Watch how the 3D-printed ghost trap project comes together in this step-by-step build tutorial! Sean puts together his ghost trap kit, explaining the design of each piece along the way. You can download the files for the print here, and buy hardware kits here. Thanks to Dremel for providing the 3D printer and tools for us to build this project! Learn more about the Dremel 3D Idea Builder here.
Shot by Joey Fameli and edited by Adam Isaak
12 thoughts on “How To Assemble the 3D-Printed Ghost Trap”
Leave a Reply

One Day Builds
Adam Savage’s One Day Builds: Life-Size Velocirapt…
Adam embarks on one of his most ambitious builds yet: fulfil…

Show And Tell
Adam Savage’s King George Costume!
Adam recently completed a build of the royal St. Edwards cro…
All Eyes On Perserverance – This is Only a Test 58…
We get excited for the Perserverance rover Mars landing happening later today in this week's episode. Jeremy finally watches In and Of Itself, we get hyped for The Last of Us casting, and try to deciper the new Chevy Bolt announcements. Plus, Kishore gets a Pelaton and we wrack our brains around reverse engineering the source code to GTA …
Making
Adam Savage in Real Time: God of War Leviathan Axe…
Viewers often ask to see Adam working in real-time, so this …

One Day Builds
Mandalorian Blaster Prop Replica Kit Assembly!
Adam and Norm assemble a beautifully machined replica prop k…
House of MCU – This is Only a Test 586 – 2/11/21
The gang gets together to recap their favorite bits from this past weekend's Superb Owl, including the new camera tech used for the broadcast and the best chicken wing recipes. Kishore shares tips for streamlining your streaming services, and Will guests this week to dive into the mind-bending implications of the latest WandaVision episod…

One Day Builds
Adam Savage’s One Day Builds: Royal Crown of Engla…
One of the ways Adam has been getting through lockdown has b…

Making
Adam Savage Tests the AIR Active Filtration Helmet…
Adam unboxes and performs a quick test of this novel new hel…

Making
Weta Workshop’s 3D-Printed Giant Eyeballs!
When Adam visited Weta Workshop early last year, he stopped …

One Day Builds
Adam Savage’s One Day Builds: Wire Storage Solutio…
Adam tackles a shop shelf build that he's been putting off f…






Amazing! The cunning detail of the tabs-in-slots assembly is better than anything IKEA does. (High praise)
Now I just need to flat-pack it better.
Do you think an SLA printer could do the detail to get the screw heads?
You’d be paying more in terms of time and electricity and materials than you would getting a big assortment box of self drilling screws the next time your at the hardware store.
Besides being single extruder where does the flash forge and the dremel differ?
Stereo lithography has much higher resolution than filament printing with no lines.
Absolutely but even then you would have to deal with gluing the whole thing together and then painting a bunch of tiny screw heads. Which is one of the big reasons I designed it with real hardware and this way you can open it back up for mods, maintenance, etc.
I don’t think they do, Dremel worked with Flash Forge, so pretty much a direct comparison.
I see your point. Your design is pretty amazing and looks great in both versions.
Great project and tutorial series Tested! I noticed some super shiny shiny surface as you put it all together, the door tops being and example. How did you get those so shiny? Simple sanding job or was something else done in addition or instead. Asking because I’m learning to post process my models but never gotten anything that shiny out of the printer or after hand sanding.
I was wondering the exact same thing. My guess is those surfaces are the ones that were on the print bed and thus are smooth since the filaments ran together and formed one continuous surface.
berjb is correct, I typically print on glass or kapton tape and it will get you that nice smooth surface.
Hey guys, thanks so much for putting up the resources to build our own. I’m certainly going to try.
I’m trying to cut down on 3D printing costs, Is there a list of parts that I DONT need to print if I’m planning on making a standard Trap?
Thanks again guys