Pi Score Assembly Guide
For those of your building your own Pi Score arcade cabinets, you’re going to want to watch this assembly guide showing how all the 3d printed pieces fit together with the electronics. (Download the files here!)
13 thoughts on “Pi Score Assembly Guide”
Leave a Reply

One Day Builds
Adam Savage’s One Day Builds: Life-Size Velocirapt…
Adam embarks on one of his most ambitious builds yet: fulfil…

Show And Tell
Adam Savage’s King George Costume!
Adam recently completed a build of the royal St. Edwards cro…
All Eyes On Perserverance – This is Only a Test 58…
We get excited for the Perserverance rover Mars landing happening later today in this week's episode. Jeremy finally watches In and Of Itself, we get hyped for The Last of Us casting, and try to deciper the new Chevy Bolt announcements. Plus, Kishore gets a Pelaton and we wrack our brains around reverse engineering the source code to GTA …
Making
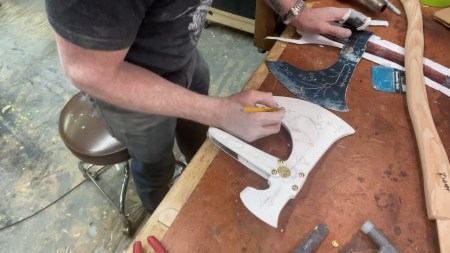
Adam Savage in Real Time: God of War Leviathan Axe…
Viewers often ask to see Adam working in real-time, so this …

One Day Builds
Mandalorian Blaster Prop Replica Kit Assembly!
Adam and Norm assemble a beautifully machined replica prop k…
House of MCU – This is Only a Test 586 – 2/11/21
The gang gets together to recap their favorite bits from this past weekend's Superb Owl, including the new camera tech used for the broadcast and the best chicken wing recipes. Kishore shares tips for streamlining your streaming services, and Will guests this week to dive into the mind-bending implications of the latest WandaVision episod…

One Day Builds
Adam Savage’s One Day Builds: Royal Crown of Engla…
One of the ways Adam has been getting through lockdown has b…

Making
Adam Savage Tests the AIR Active Filtration Helmet…
Adam unboxes and performs a quick test of this novel new hel…

Making
Weta Workshop’s 3D-Printed Giant Eyeballs!
When Adam visited Weta Workshop early last year, he stopped …

One Day Builds
Adam Savage’s One Day Builds: Wire Storage Solutio…
Adam tackles a shop shelf build that he's been putting off f…













Holy moly guys, do you actually realize you’ve hit jackpot with these series!? Amaaaaazingly cool!
ps. Isn’t the conversion towards higher Voltage, a thing of transistors? Or was that current… mm
No, transistors are basically controled switch through which you can control higher voltage devices. In order to power a high voltage device through a transistor you still need a high voltage source. A Boost converter however is a switching power supply that uses a coil to generate higher output voltage than its input voltage. I’m simplifying but if you are interested in more detailed, yet simple, explainations I encourage you to check the youtube Chanel “Great Scott”. He has videos on how both trransitors and boost conveters work, he also does some cool electronic projects.
wow guys, great video, and that series really looks like a winner. 🙂 i’m curious, did you already think of what you’ll do if you just can’t get something to work? drop the episode, or would you rather document what you did, and where you hit a wall?
re integrated pins breaking off: this reminds me of something from bowmaking. when shaping a bow limb, you’re building something to react to force by bending along its entire length, distributing surface stress as evenly as possible. (or risk overstressing the material at a weak point and getting a much less powerful and less long-lasting bow. if it doesn’t explode and transform into firewood.) one design principle to reduce these spikes in stress is to keep the limb tapering smoothly, without angularity or harsh steps. these will be stress risers, where the instantaneous drop in cross-sectional stiffness will combine lowered strength with a sharp onset of bend/stress – a recipe for overstressing the material. (the opposite of easing in/out of a bend)
i’d imagine the integrated pins protruding from the part’s surface at right angles putting a massive stress riser right at the foot of the pin. any sideways force at the pin tip will exert maximum leverage at the pin’s root, right where it all of a sudden transitions into not having any give whatsoever. i’d imagine this cold be reduced in a fashion similar to the flared screw standoffs sean mentioned – but that would probably make fit more difficult (having to match a more complex shape), and for no real benefit either.
Oeh nice, thanks for the tip and explanation! Makes sense yes.
This is my favorite series on the site now.
Great job, guys! Any chance that you guys could do a soldering how-to video? I have no idea what I’m doing, but I would like to.
Keep up the great work!
just an idea for you out there, Bluetac, great for holding components when soldering, if you don’t have a friend with aspestos fingers close by.
Also the work is SOLDER, not SODER 🙂
I have an amazing idea: Simone should build you a “helping hand” to assist with the soldering.
I’m a total novice when it comes to electronics Ive build a “nerd kit” i found on amazon and replaced a circuit board on an old Dometic RV refrigerator, that’s pretty much my only electronic projects, both gave me a good introduction tho with tons of research need..lol. You guys have definitely inspired me to dive deeper into electronics and programing with the raspberry pi …super cool new series and hope there are more videos to come.. whoever had the idea for an electronics series is a genius ..lol..
If the battery is required for the controller unit to run, is there a way to put a capacitor on there instead where the battery would go to fool it? The unit should charge the cap as though it was a battery, and once it has voltage reached “charged” it should just operate as normal. Has anyone tried it yet?
It’s a slippery slope 🙂 but it’s a lot of fun
found the European 😀
for the screws, would a drop of mineral oil help lube them into the plastic?
Jeremy, I notice you do not use the through holes on your pcb when soldering, any reason? it seems to me it should be much easier than just laying the wire on the top of the pcb