


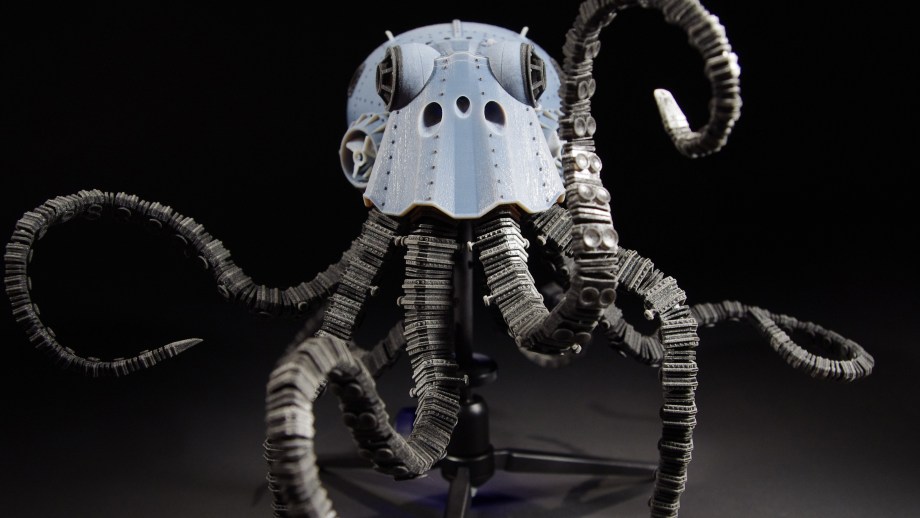
Bits to Atoms: 3D Printing Rubber for Octopod Tentacles
Most 3D printer users are familiar with printing with plastic materials like ABS and PLA. But high-end machines and new flexible filaments allow you to print materials that are like rubber. Here's one example of how rubber printing was used to fabricate the slithering tentacles of the Octopod project.
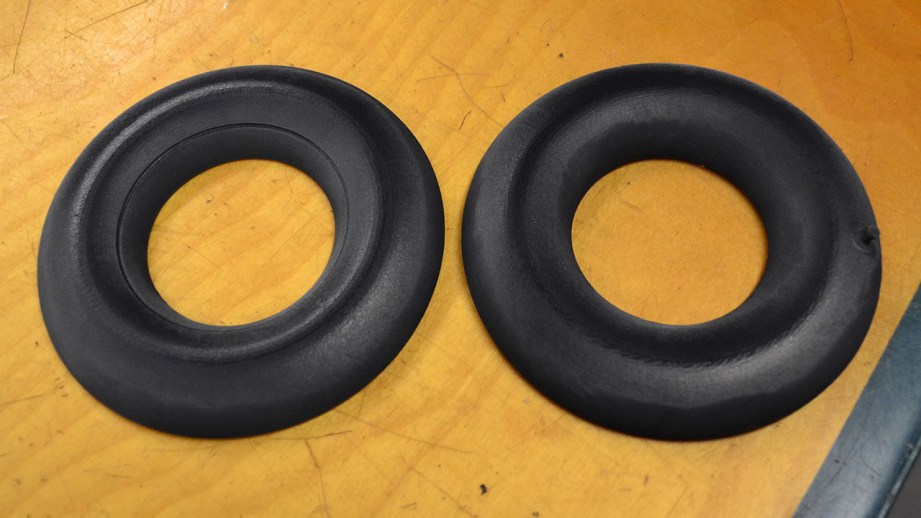
Consider this scenario: while cleaning out your parents’ basement you find your G1 Optimus Prime Transformer (in the original box, natch) only to discover the rubber tires have dry-rotted and fallen apart. Noooooo! What can you do!? Have no fear, the technology to restore Optimus to his former glory is now available in the form of 3D printing: simply print some new tires out of rubber!
My first encounter with modern 3D printing was at the 2010 World Maker Faire in New York. There, I saw a lot of RepRap-based printers and MakerBot introduced their second machine, the Thing-o-matic. All of these printers used ABS or PLA plastic filament. Aftermarket modifications were soon introduced that allowed you to extrude (print) other materials, like frosting, peanut butter, and chocolate or any other gooey, non-food material–that was awesome. Later, I was introduced to the high-end machines that printed with plaster or plastic resins and even metal. But the material that really took me by surprise was rubber. To my mind that just didn’t seem possible–could printed parts really bend and stretch and be as resilient as real rubber? Online printing service Shapeways uses EOS printers that can print in an elasto plastic material that is translucent and very flexible but still pretty stiff–not what I’d call truly rubbery.
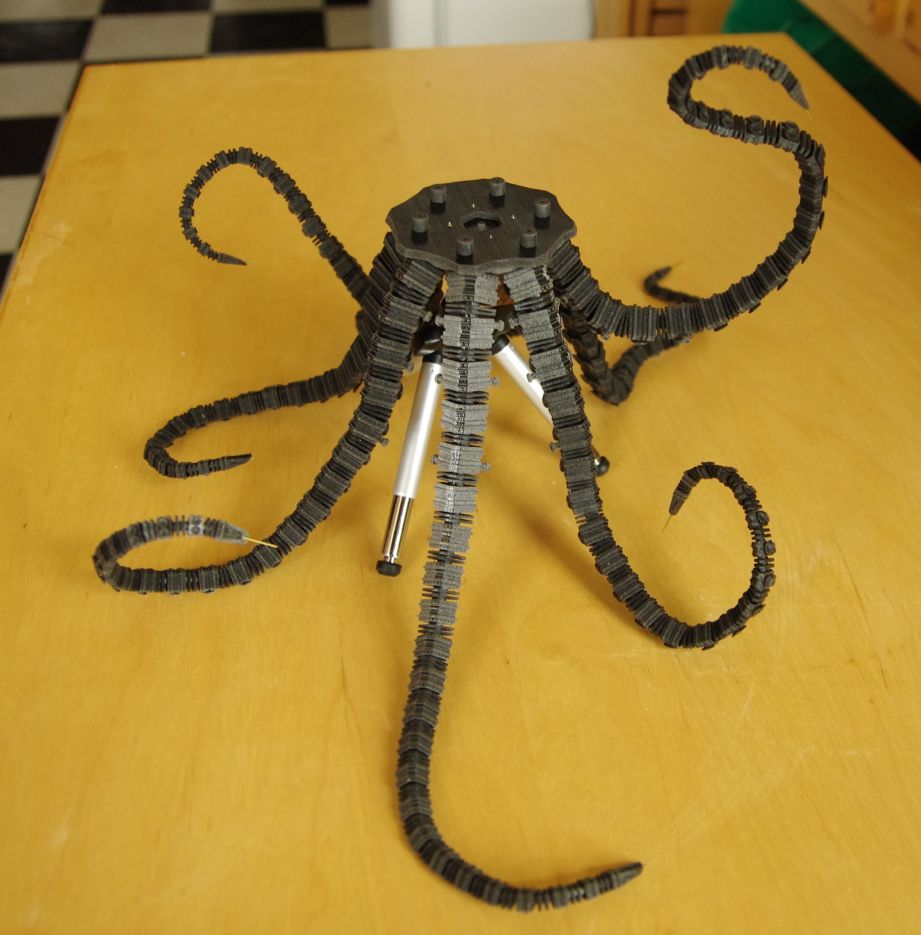
The EOS material is very nice, but as far as I know the only 3D printer that will do a true rubber-like material is the Stratasys Objet Connex line of machines. I was very lucky to have access to one of these at the NYU Advanced Media Studio. At the time, I was preparing to do my thesis project and was waffling between ideas, one of which was the Octopod that ended up being my Inventern submission. A deciding factor for building the Octopod was the Connex500 printer the AMS lab had just purchased which could print in multi-materials, including rubber which would be perfect for dynamic tentacles. Here’s what I learned about printing in rubber for that project.
It’s important to note that when dealing with the high-end printers, manufacturers and printing services will use the term ‘like’ a lot. A material will be described as ‘plaster-like’, ‘acrylic-like’, ‘rubber-like’ but they probably aren’t made from those actual materials. Usually it’s some sort of proprietary resin which approximates the qualities of the target material, which is the case with the Stratasys Connex. So, I can’t tell you exactly what the ‘rubber-like’ material is made from but it has all the properties that you’d expect from rubber and smells nice–kind of like spirit gum. I did some test parts to see what how rubber parts would turn out and was pleasantly surprised by how stretchy and durable the prints were.
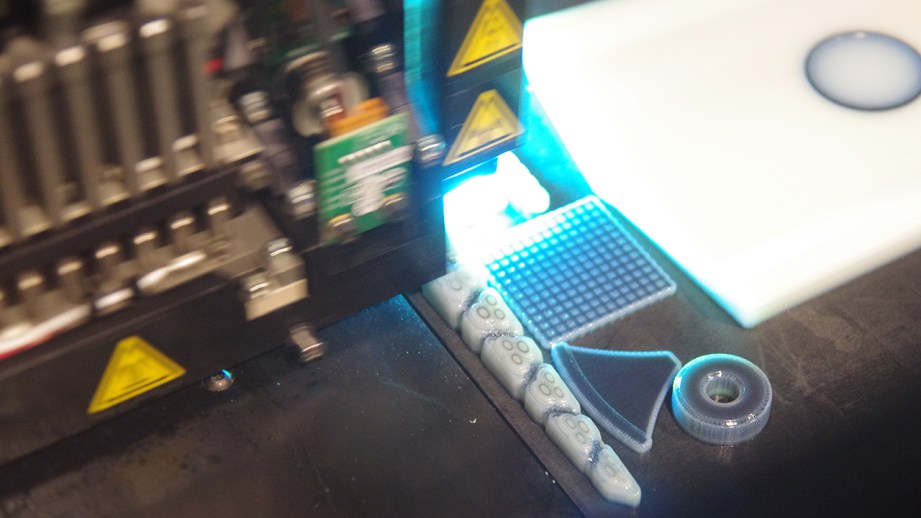
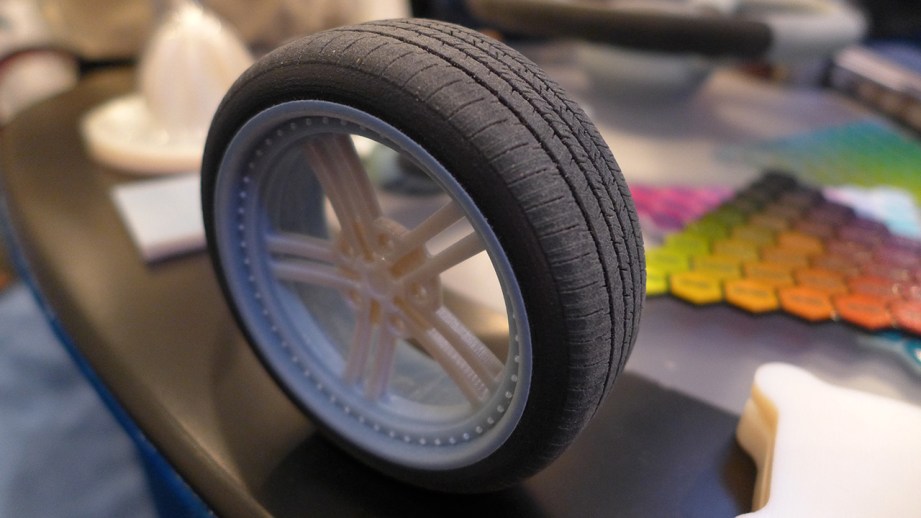
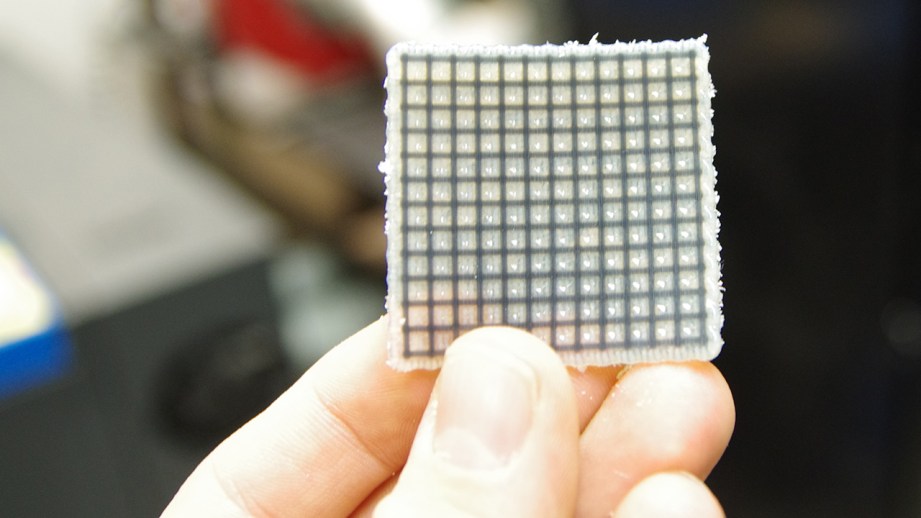
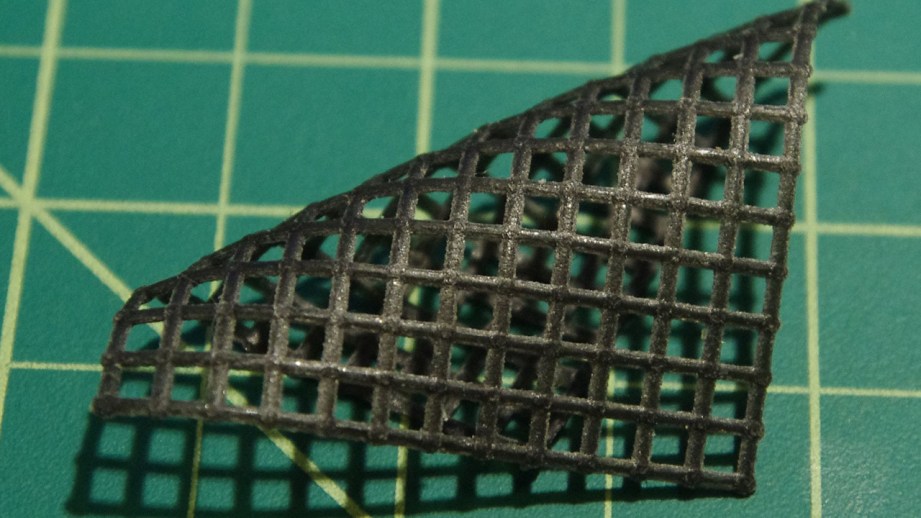
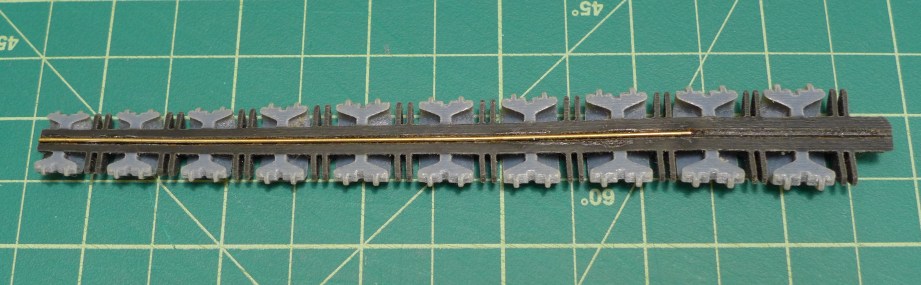
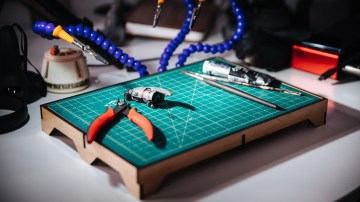
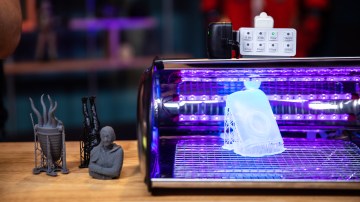
The Connex500 prints with a wax-like support material that holds-up the model where needed and is particularly important with rubber objects which can flex. I printed out a thin rubber sheet, some netting which I might use on the Octopod and a tire to see how well detail printed. Here’s the progression of the test material after I printed and cleaned it.
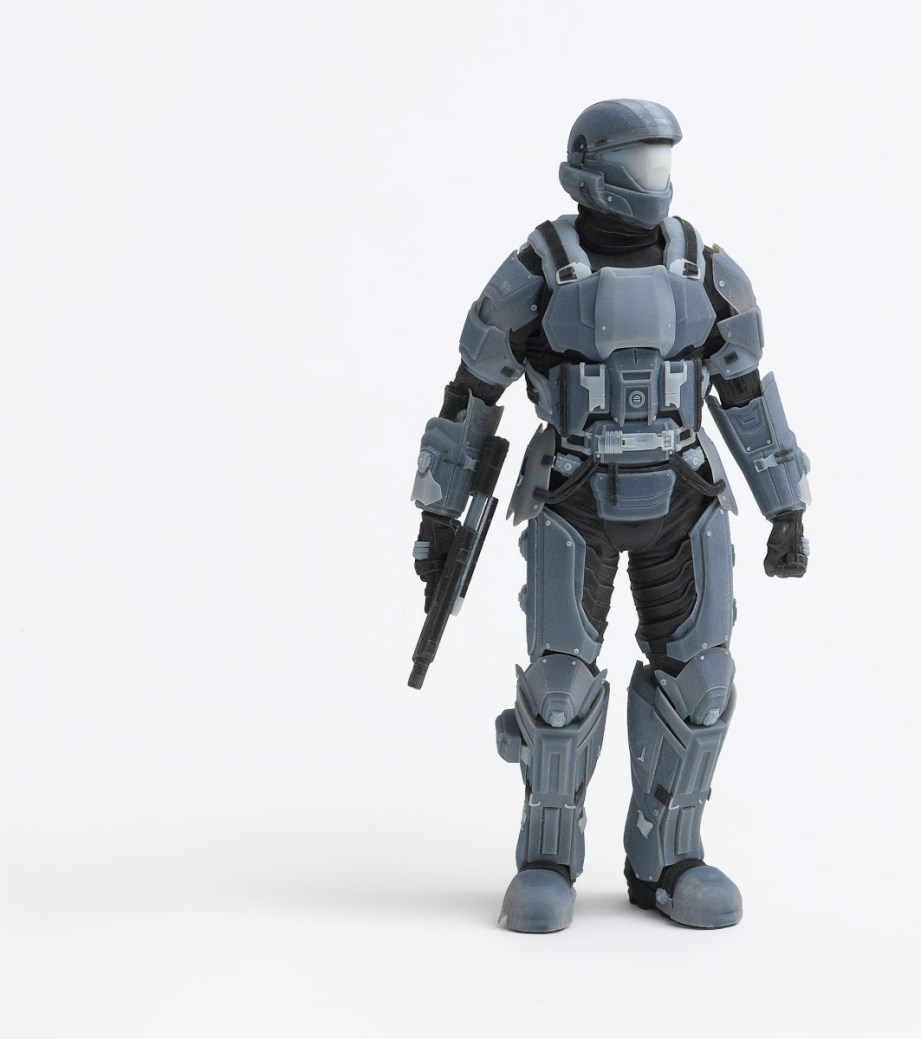
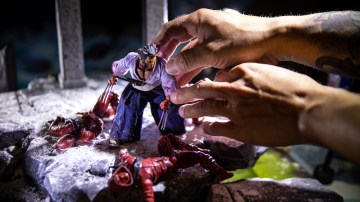
Printing in rubber is cool but the Connex500 has another feature which takes it to the next level: digital materials. The printer can use two different material cartridges at the same time AND the cartridges can be mixed producing a variety of in-between materials. The Halo Spartan figure here, for example, was made by using black and white plastic cartridges at the same time and mixing them. Different digital materials are assigned via the printing program and the model is produced with a variety of material types ranging from black and white straight from the cartridge to various shades of gray which are produced by mixing the two cartridges at different ratios.
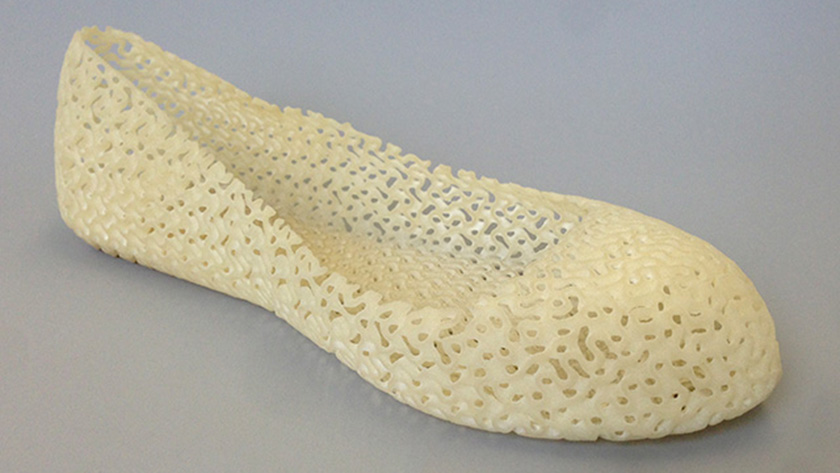
Amazing models such as this foot can be produced by using rubber and plastic materials in the same print. The plastic produces rigid bones while the clear rubber flexes realistically. The firmness of the rubber can be varied by mixing it with the plastic material.

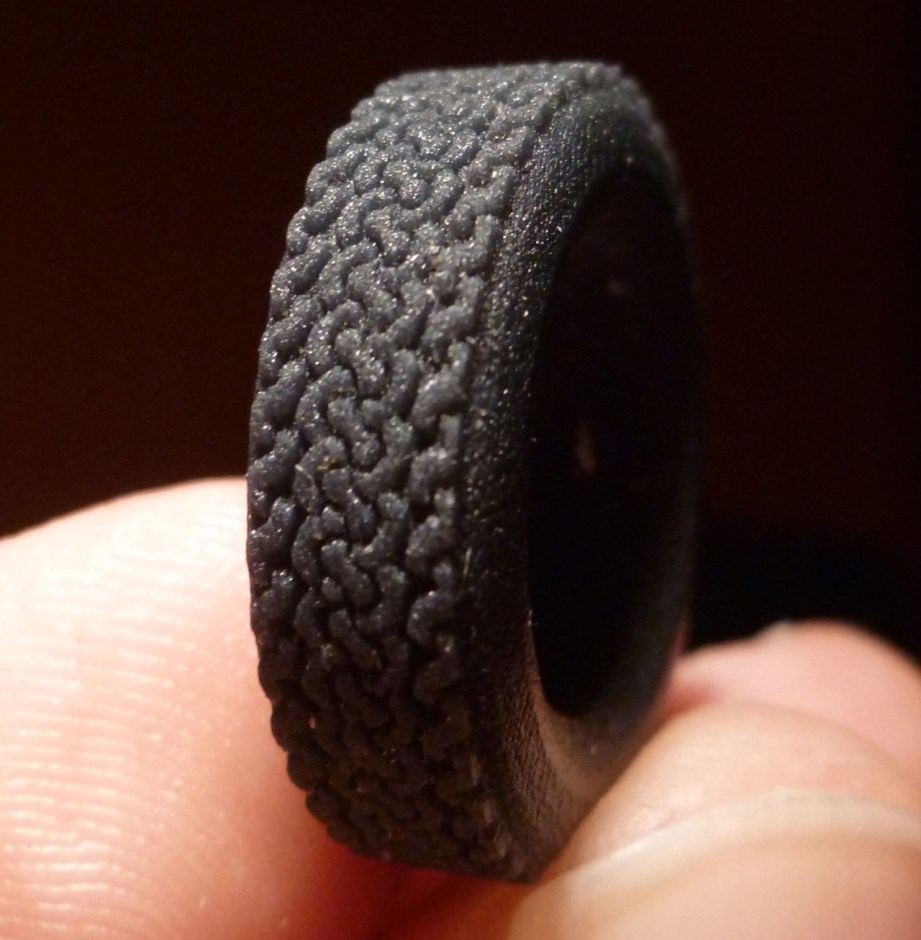
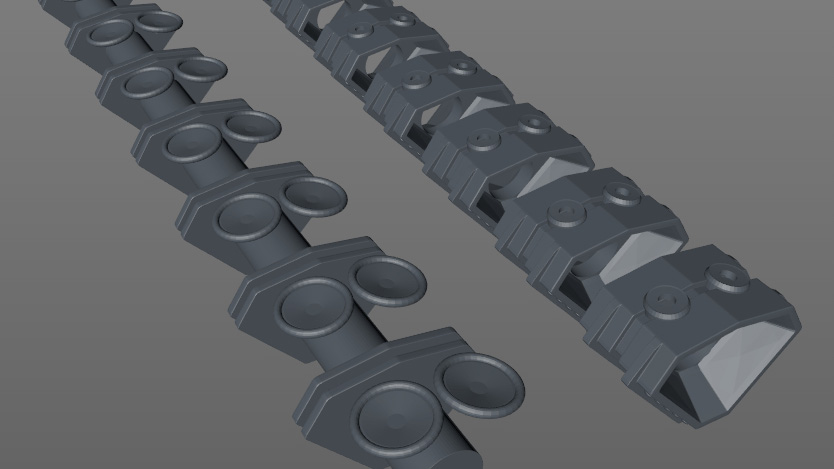
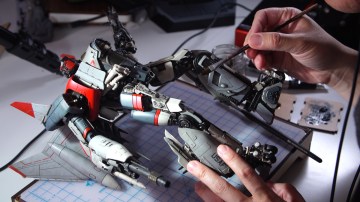
I was able to print a realistic, semi-rigid tire by mixing black rubber with black plastic which also allowed for greater detail such as the treads. With all of these possibilities, I was pretty confident I could make really nice tentacles for the Octopod. I wanted the tentacles to be super-flexible AND poseable so I decided to use an armature wire inside each tentacle like a simple stop-motion animation puppet. I used the pure rubber for a flexible core and suckers and the plastic for the knuckles so they could have a lot of detail.
Preparing for dual-material prints on the Connex500 is the same process as on the MakerBot–the pieces representing the two materials must exactly touch without overlapping. I created two models: the rubber parts which include the core, decorative fins and the suckers and another model which consists of the plastic knuckles. The rubber parts are subtracted from the knuckles so there is now a hole running through the middle and along the bottom for the suckers.
The rubber and plastic models are then brought into the printing software at the exact same coordinates so they are now touching but not overlapping and if done correctly, the rubber fuses to the plastic when printed. This is called overmolding and is seen all the time on products such as toothbrushes, razors, etc where the rubber grip is fused to the plastic handle. I was able to make the knuckles gray by printing with white plastic and adding just a touch of the rubber to it, therefore changing the color but not the hardness.
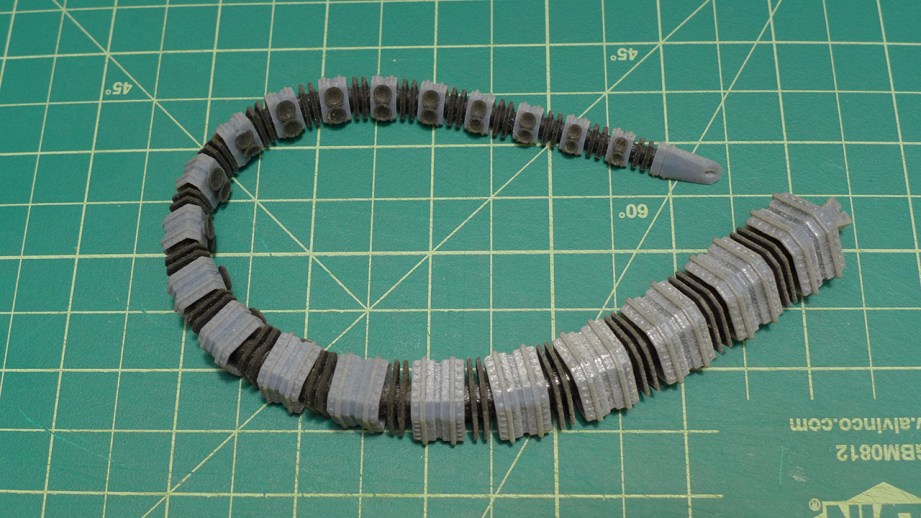
After many test prints I worked out all the kinks and produce an amazing tentacle. The version above was printed with black rubber and white plastic and used a digital mix of the two to make gray knuckles. A disadvantage of printing all in one piece like this is amount of time and effort it takes to clean out all of the support material. It was packed in each knuckle and between all the fins and the water jet couldn’t get it all out. My wife, Kate, took pity on me and cleaned out all the tentacles using a toothpick!
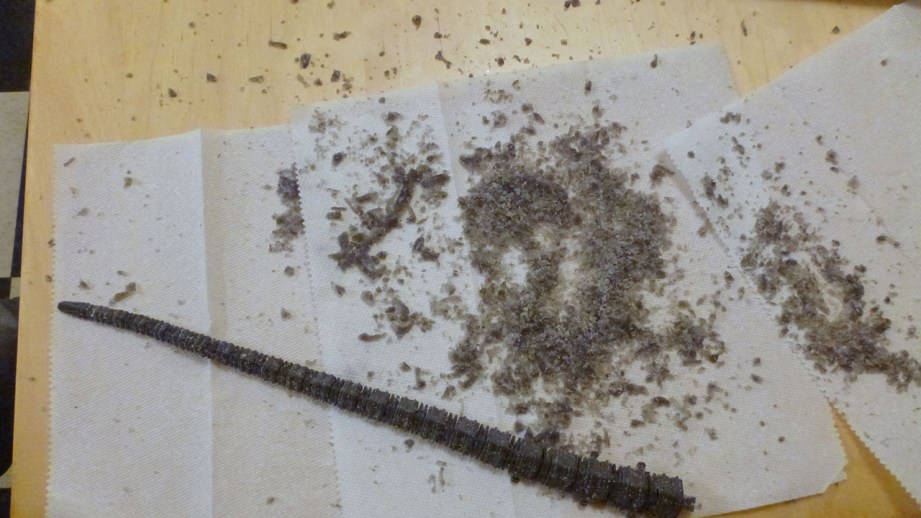
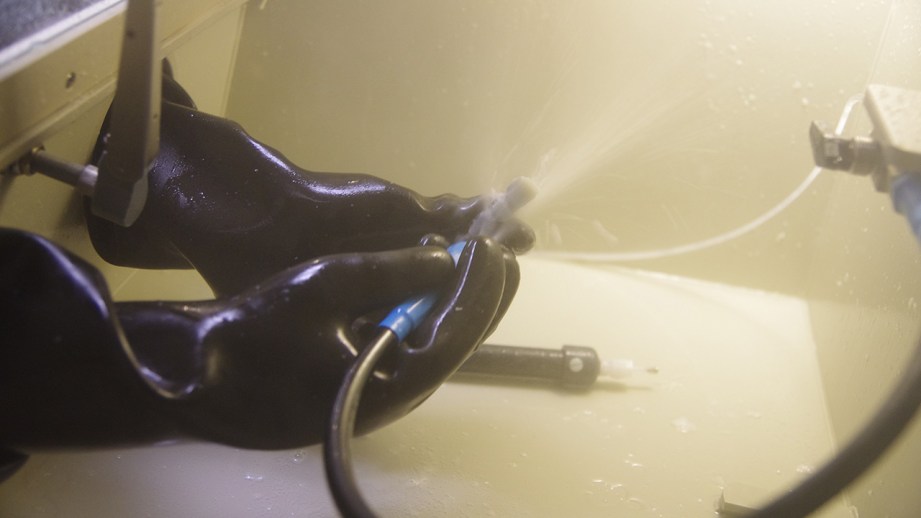
Inserting the armature wire in each tentacle was a tricky business even though I modeled a hole through the center. What I didn’t take into account was during printing the hole was filled with support material which had to be removed with compressed air, a small diameter wire, and a lot of patience. After cleaning, I was able to carefully feed the armature wire through using pliers and going really slow. The end result was worth the effort but is not a technique suitable for mass production. The rubber has proven to be very durable but not indestructible. Tentacles that I printed for demonstration purposes managed to make it through an entire weekend at Maker Faire intact–not bad.
The Octopod tentacles are just one example of the many possibilities opened up by rubber and digitally mixed materials. As 3D printing technologies continue to advance I expect to see more materials like this and even more exotic choices.
The Stratasys Connex500’s ability to print with unique materials opens up fabrication potential, but personal 3D printers are also making the foray into rubber materials with flexible filaments. There’s a cool material called NinjaFlex which is available for FFF printers like the MakerBot. There’s even some crazy stuff such as wood and ‘brick’ filament showing up. All of these can be tricky to print with and they do not work well will all extruder types but with some patience they can be made into some pretty cool stuff!
All photos and images courtesy Sean Charlesworth unless otherwise specified


2 thoughts on “Bits to Atoms: 3D Printing Rubber for Octopod Tentacles”
Leave a Reply

One Day Builds
Adam Savage’s One Day Builds: Life-Size Velocirapt…
Adam embarks on one of his most ambitious builds yet: fulfil…

Show And Tell
Adam Savage’s King George Costume!
Adam recently completed a build of the royal St. Edwards cro…

All Eyes On Perserverance – This is Only a Test 58…
We get excited for the Perserverance rover Mars landing happening later today in this week's episode. Jeremy finally watches In and Of Itself, we get hyped for The Last of Us casting, and try to deciper the new Chevy Bolt announcements. Plus, Kishore gets a Pelaton and we wrack our brains around reverse engineering the source code to GTA …
Making
Adam Savage in Real Time: God of War Leviathan Axe…
Viewers often ask to see Adam working in real-time, so this …

One Day Builds
Mandalorian Blaster Prop Replica Kit Assembly!
Adam and Norm assemble a beautifully machined replica prop k…
House of MCU – This is Only a Test 586 – 2/11/21
The gang gets together to recap their favorite bits from this past weekend's Superb Owl, including the new camera tech used for the broadcast and the best chicken wing recipes. Kishore shares tips for streamlining your streaming services, and Will guests this week to dive into the mind-bending implications of the latest WandaVision episod…

One Day Builds
Adam Savage’s One Day Builds: Royal Crown of Engla…
One of the ways Adam has been getting through lockdown has b…

Making
Adam Savage Tests the AIR Active Filtration Helmet…
Adam unboxes and performs a quick test of this novel new hel…

Making
Weta Workshop’s 3D-Printed Giant Eyeballs!
When Adam visited Weta Workshop early last year, he stopped …

One Day Builds
Adam Savage’s One Day Builds: Wire Storage Solutio…
Adam tackles a shop shelf build that he's been putting off f…
I wish that this technology had been available when I was working on my blood draw tube contract years ago. Being able to mix the properties of materials makes for interesting design ideas.
The nice thing is that we see more and more 3D Printer material out, just look at 3Dfilamenta.com , the store has almost all material. This mean you can easily fuse different material such as these rubber flex with normal ABS or other p0olymers