


Maker Profile: John Findra’s Classic Wrecks
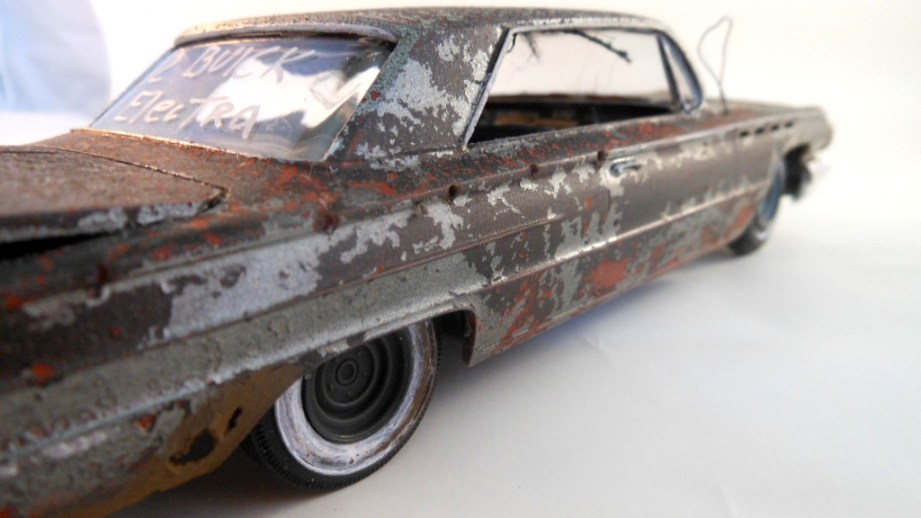
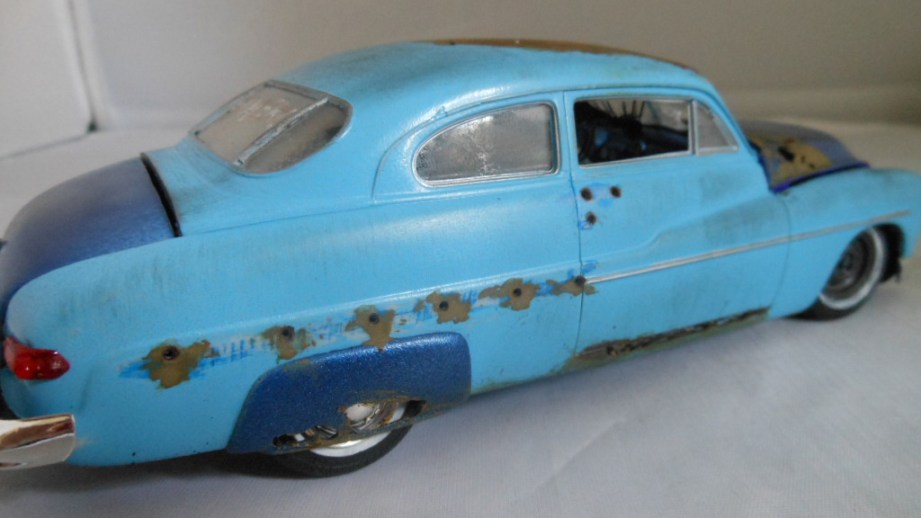
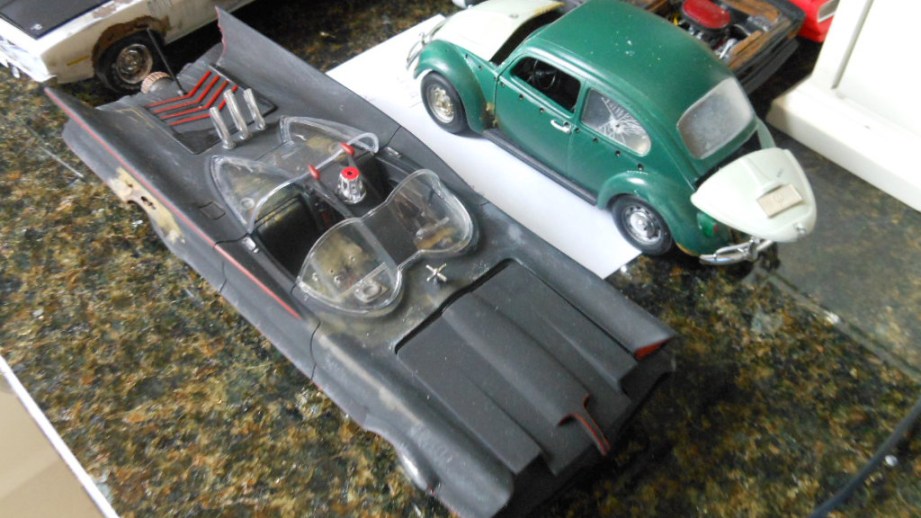
Scale model cars don't age with the same kind of grace and distinction that real cars do, so John Findra applies some extreme weathering to plastic toys to turn them into junkyard beauties.
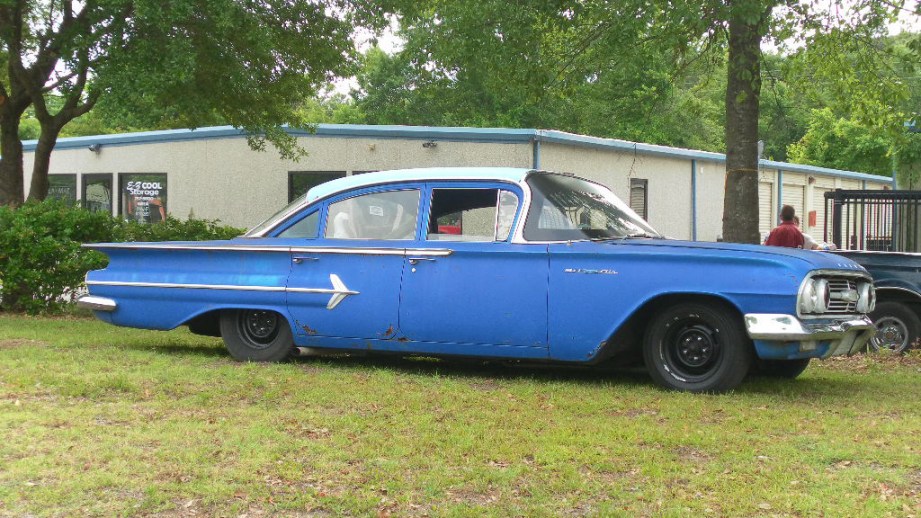
I first heard about John Findra on a Virgin America flight, while watching the BoingBoing channel. An Etsy-produced video featuring Findra drew me to his store, Classic Wrecks, where Findra describes his works as “handmade junker car art”. And while the 1:18 scale model cars he sells may not look out of place in a junkyard, they’re definitely not junk. Findra painstaking transforms new model replicas into aged junker cars with intricate painting, fake rust, and custom plastic. It’s a case of extreme weathering that, unlike props for movies, is made to be appreciated up close and in photographs. I corresponded with John to learn about his process and what stories he’s trying to tell over the thousand or so model cars he’s modified.
What was your background in model building and how did you get started with your Classic Wrecks project?
I got started late in the late fifties when I was a kid. In those days there were always car model contests and after I saw some displayed, I asked a friend if I could have on of his rejects. He gave me a beat up ’59 Buick that was a mess and I remade it [like new]. I have been looking for that Buick ever since. After I retired, I started up again [making models]. It took weeks to complete a perfect example, and I was going to throw away some imperfect ones but I decided to try something different. I decided to make it look like a junker.
It didn’t take too much time and the result was so much more realistic and interesting. The patina of the paint alone was more varied and when I added the body rot and put the rust on it created almost a watercolor effect.
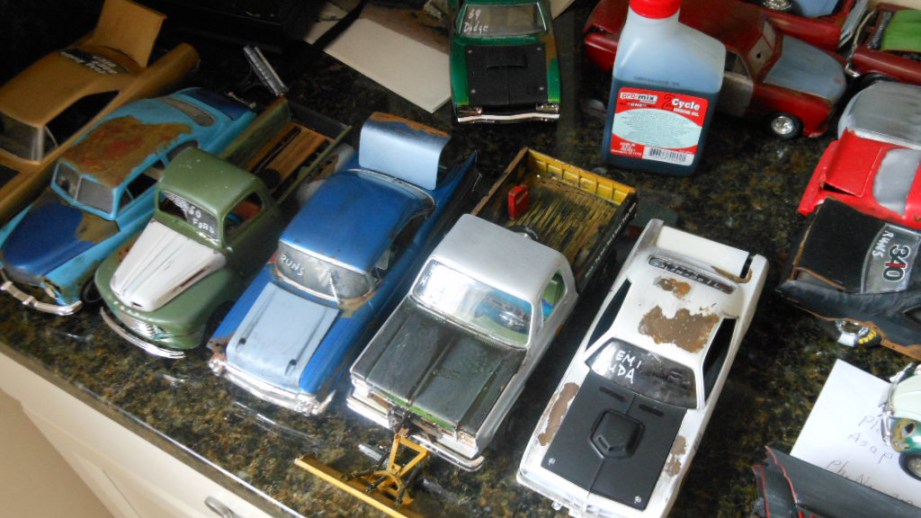
My wife had a shop on Etsy and I put my first two Junkers in her shop and sold them to a customer in England. After that, I was hooked. I started to take all the perfect ones I had made over the years and wrecked them. So when I ran out on those I started to buy the kits from companies such as Revell, AMT, Tamiya, Monogram and others.
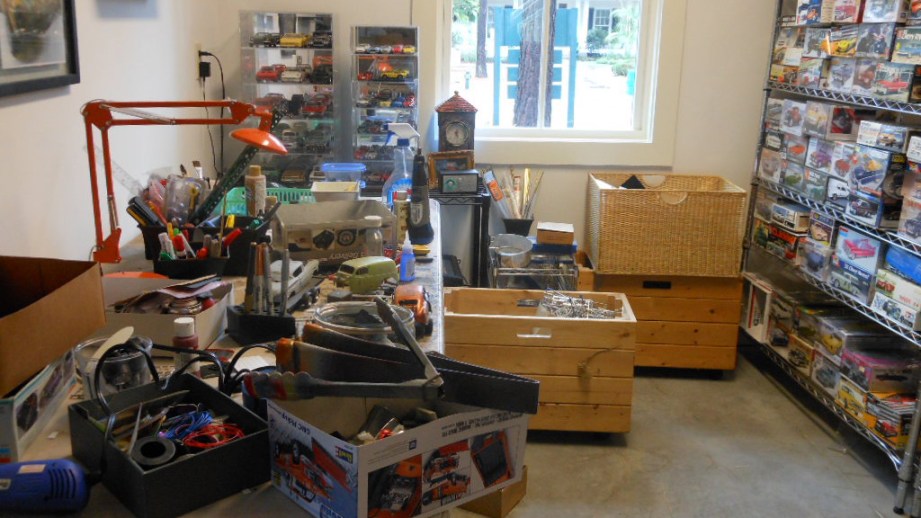
What tools do you use for your model jobs? Are these tools someone could just get at a typical art supply store?
I use a lot of different products to create the look of my Classic Wrecks. I use actual automotive paints, acrylic art paints and ink pens to create the paint schemes. I use art supplies such as rust distressing solutions, fabrics, leather scraps from old wallets, wiring from old electric devices, Indian ink, plastic from plastic bags, small metal rods and tubes, wire mesh, wood planks and thin wood sheets (for woodies, pickups), and other items to create the look I am after.
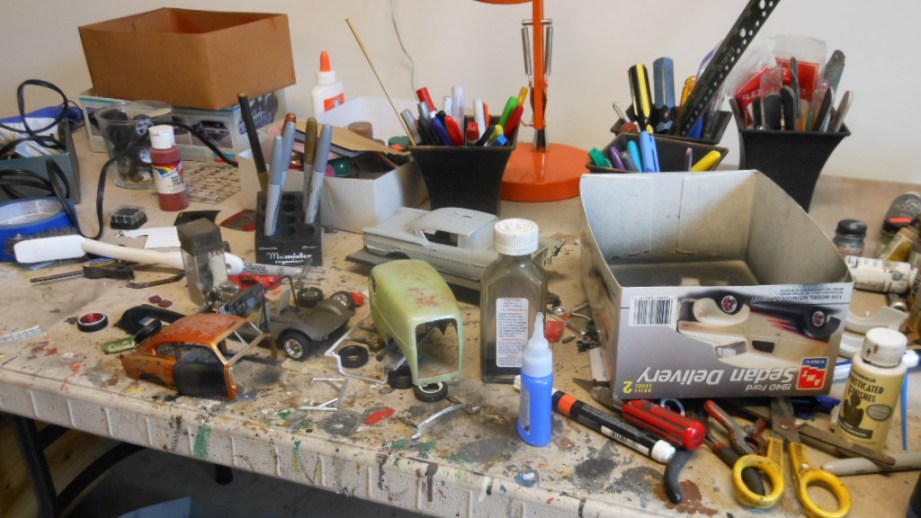
There are many tools in my shop. The major tool is the Dremel and all of the differnet bits and fittings that go along with it. It’s used to create the drilled out headlights, strip off chrome trim and most importantly the actual rusted out body rot.
Several different drill bits are used to create the holes in the body. These bits are in barrel form, rounded form with groves so you can chew up the plastic from the inside of the body to create the jagged pattern. The drill is also used to create the broken window effect by first drilling a hole and using a very small plier to nib the plastic away and create that jagged look. You can also use a small sanding bit that is used to wreck the tires and create the desired patina.
Another important tool is the exact-o knife with a very sharp blade. I use this to stripe away trim chrome detail so I can create a line of holes where the chrome once was attached to the car. When creating a two tone paint job the blade comes in handy to create a line of separation between the two paint colors. I use painters tape and a steady hand to create the perfect separation between the paints, the blade most be perfectly sharp to cut the painters tape in a line and prevent tears in the tape.
Pliers are important to create the wired engines and to hold very small pieces in place for glueing. I go to art stores to buy rusting solution, jewelry chains, tools, paint pens, fabric. foam, wood, wire, decal graphics and any miniature item that I can use that looks in the right scale.
How do you begin with a model and when do you feel that your work is finished?
The first thing you need is the car kit. 99% of the the time I use plastic kits because they are much easier to work with to create the body rot and they are more realistic than metal die casts. Metal kits tend to be thicker and not as detailed. Painting is the first order of business. I pay a lot of attention to color combinations to create an attractive color scheme. I have a good selection of automative paints from the auto shop, and usually check the authentic color charts of the actual car I am doing so I don’t select a color that wasn’t available at the time the real car was manufactured. I also have a selection of metallic paints to create a realistic engine compartment and chassis. These include aluminum, steel, titanium, silver gold and copper patinas.
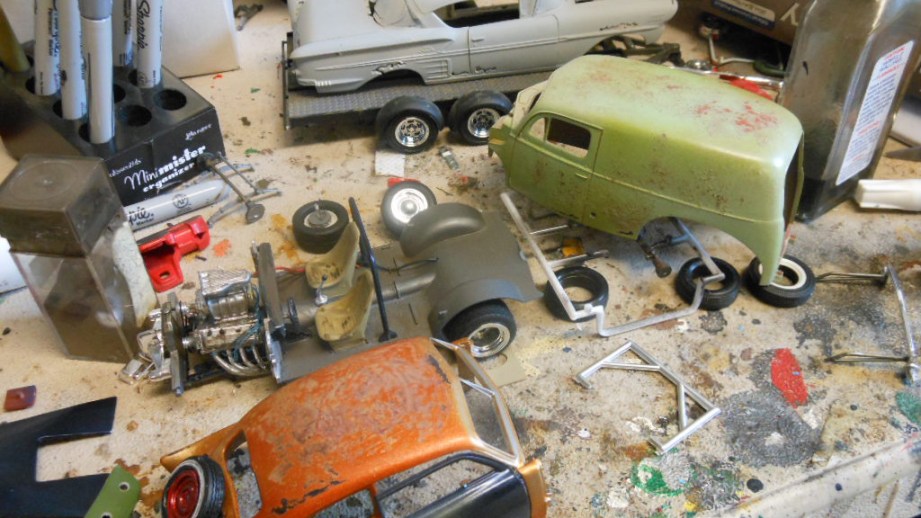
Next, I tear out parts of the model, like the doors or trunk lid, to create a haphazard look of a door that is hanging off or a trunk lid that will not close. I will use the dremel to create the rot holes in the strategic spots that I have observed from reference photos–edges of hoods and trunks, around wheel wells, bottom of doors and undercarriage.
If I decide to do different color panels such as roof, doors or fenders I have to mask off the part being painted to create a perfect demarcation of the painted panel. While these are drying I start the assembly process. You always have to keep moving because the time it takes to complete a model has to be kept at a minimum.
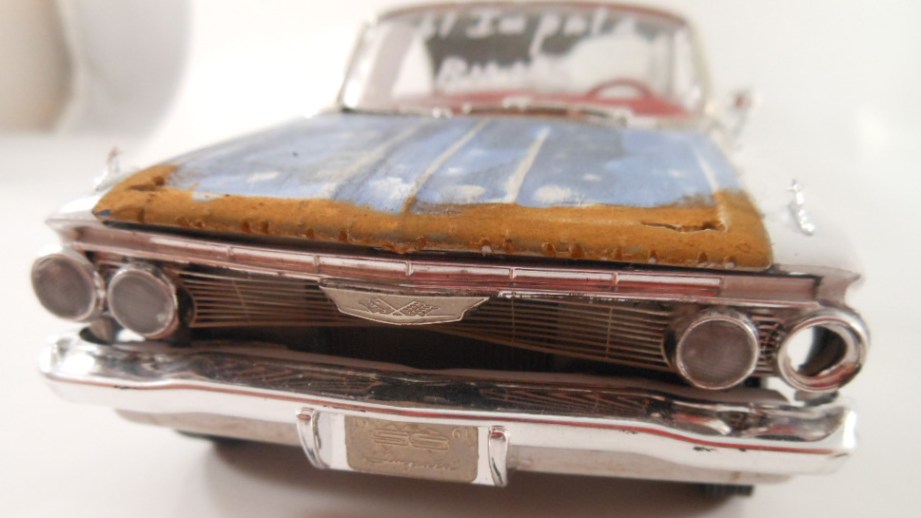
The engine is where I work on next, then moving on to the interior, and finally the chassis until all the sub-assemblies are done. After the paint is dry I need to create the aged patina. This process involves rubbing adhesive dirt onto the finish, sanding, repainting with a slightly different shade of paint, using dull coat to knock down the shine of the new paint, using a exact-o blade to simulate key scratches, using different paint pens to create mud splashes, etc. It’s only done when every piece has been touched and aged and made to look perfectly imperfect!
You’ve mentioned that you want each car to tell a story. Do you approach each piece with a story in mind or does that story reveal itself to you over the course of the project?
There are several ways I approach each project. I get special orders all the time and I get a lot of pictures from my customers. One time, I received over 100 pictures of a car showing every angle. The special orders are great because they are a challenge to get as close as possible to the pictures.
I also remember cars of my past that I recreate. Whether it’s was the blue VW I drove as a drugstore delivery boy, my friend’s Camaro, or some of the cars I remembered parked in my high school parking lot. When I write the copy for the description. I always try to tell the story of that car and the inspiration.
I also sometimes just freestyle and create with no actual car in mind. Here I am tring to tell a color story to appeal to the eye of the viewer. Some of my coolest ones though are of customer requests like the 1966 Ford econoline van that I created from 60’s grainy pictures or the tow truck-wrecked car combo I created from a 1930’s picture.
Photos courtesy John Findra/Classic Wrecks


2 thoughts on “Maker Profile: John Findra’s Classic Wrecks”
Leave a Reply

One Day Builds
Adam Savage’s One Day Builds: Life-Size Velocirapt…
Adam embarks on one of his most ambitious builds yet: fulfil…

Show And Tell
Adam Savage’s King George Costume!
Adam recently completed a build of the royal St. Edwards cro…

All Eyes On Perserverance – This is Only a Test 58…
We get excited for the Perserverance rover Mars landing happening later today in this week's episode. Jeremy finally watches In and Of Itself, we get hyped for The Last of Us casting, and try to deciper the new Chevy Bolt announcements. Plus, Kishore gets a Pelaton and we wrack our brains around reverse engineering the source code to GTA …

One Day Builds
Mandalorian Blaster Prop Replica Kit Assembly!
Adam and Norm assemble a beautifully machined replica prop k…
House of MCU – This is Only a Test 586 – 2/11/21
The gang gets together to recap their favorite bits from this past weekend's Superb Owl, including the new camera tech used for the broadcast and the best chicken wing recipes. Kishore shares tips for streamlining your streaming services, and Will guests this week to dive into the mind-bending implications of the latest WandaVision episod…

One Day Builds
Adam Savage’s One Day Builds: Royal Crown of Engla…
One of the ways Adam has been getting through lockdown has b…

Making
Adam Savage Tests the AIR Active Filtration Helmet…
Adam unboxes and performs a quick test of this novel new hel…

Making
Weta Workshop’s 3D-Printed Giant Eyeballs!
When Adam visited Weta Workshop early last year, he stopped …

One Day Builds
Adam Savage’s One Day Builds: Wire Storage Solutio…
Adam tackles a shop shelf build that he's been putting off f…

Show And Tell
Mechanical Dragonfly Automata Kit Build and Review
Time for a model kit build! This steampunk-inspired mechanic…
I know car-guys who have had stock model-versions of their cars customized to mirror their cars’ options and mods, for when they display their cars at meets and shows.
A lot of them also have various props, real or replicas, in the car to tell a story about the car, its origins and its associated culture.
Awesome. My 7 year old loved the idea of making things look old. Thank you.