


Still Untitled Supplemental: Adam’s Inexpensive Beginner’s Toolkit
On the March 26 episode of Still Untitled, Adam shared his essential starter toolkit with us. Here's the list, boiled down, with links (where possible).
Knowing what tools to purchase when you’re a fledgling maker is tough, especially if you’re on a tight budget. And building a tool collection can get downright pricey–the price swing from a cheap version of a tool to the expensive version can be massive. On the March 26 edition of Still Untitled, Adam, Norm, and I came up with a universal list of tools to put in a cheap toolkit for beginners.
You should really listen to the whole show for context, but the short version is that you shouldn’t be afraid to start out with inexpensive or used tools when you start out. I’ve also broken out the optional, but recommended upgrades or enhancements to the kit. Some of the optional items are only applicable to people who are into electronics or woodworking, while some are simply a bit more expensive than we’d put in a beginner kit.
One last note: we almost certainly forgot something important and obvious, so please post our omissions in the comments below. And please, be nice.
- Big Phillips Screwdriver
- Small Phillips Screwdriver
- Big Slotted Screwdriver
- Small Slotted Screwdriver
- Pliers
- Needle-Nose Pliers
- Wiha Jewelers Screwdrivers
- Claw Hammer
- Rubber Mallet
- Adjustable wire strippers
- Wire Cutters
- Soldering Iron
- Corded Hand Drill With Hand-Adjustable Chuck
- 25-Foot Extension Cord
- Set of Drill Bits (aka a Drill Index)
- Hacksaw
- Jigsaw
- Japanese Handsaw aka Ryoba
- Tape Measure
- Awl
- Digital Calipers/Micrometer
- Pop riveter
- Xacto Knife
- Single Edge Razor Blade
- Nail Files
- Adustable Crescent Wrenches
- Socket Set
- Jeweler’s Tweezers
- Plier Tip Tweezers
- Eyebrow Tweezers
- Allen Wrenches
- Scissors for Everything Else
- Clip Lead
- Multimeter (w/ Continuity Tester)
- Spring Clamps (aka Grip Clips)
- C Clamps
- Electrical Tape
- Duct Tape
- Masking Tape
- Doublestick Carpet Tape
- Foam Doublestick Tape
- Elmer’s White Glue
- Contact Cement
- Cyanoacrylate
- WD-40
- 3-in-1 Oil
- Basic Sewing Kit
- Safety Glasses
Optional Tools and Upgrades


58 thoughts on “Still Untitled Supplemental: Adam’s Inexpensive Beginner’s Toolkit”
Leave a Reply

One Day Builds
Adam Savage’s One Day Builds: Life-Size Velocirapt…
Adam embarks on one of his most ambitious builds yet: fulfil…

Show And Tell
Adam Savage’s King George Costume!
Adam recently completed a build of the royal St. Edwards cro…

All Eyes On Perserverance – This is Only a Test 58…
We get excited for the Perserverance rover Mars landing happening later today in this week's episode. Jeremy finally watches In and Of Itself, we get hyped for The Last of Us casting, and try to deciper the new Chevy Bolt announcements. Plus, Kishore gets a Pelaton and we wrack our brains around reverse engineering the source code to GTA …

One Day Builds
Mandalorian Blaster Prop Replica Kit Assembly!
Adam and Norm assemble a beautifully machined replica prop k…
House of MCU – This is Only a Test 586 – 2/11/21
The gang gets together to recap their favorite bits from this past weekend's Superb Owl, including the new camera tech used for the broadcast and the best chicken wing recipes. Kishore shares tips for streamlining your streaming services, and Will guests this week to dive into the mind-bending implications of the latest WandaVision episod…

One Day Builds
Adam Savage’s One Day Builds: Royal Crown of Engla…
One of the ways Adam has been getting through lockdown has b…

Making
Adam Savage Tests the AIR Active Filtration Helmet…
Adam unboxes and performs a quick test of this novel new hel…

Making
Weta Workshop’s 3D-Printed Giant Eyeballs!
When Adam visited Weta Workshop early last year, he stopped …

One Day Builds
Adam Savage’s One Day Builds: Wire Storage Solutio…
Adam tackles a shop shelf build that he's been putting off f…

Show And Tell
Mechanical Dragonfly Automata Kit Build and Review
Time for a model kit build! This steampunk-inspired mechanic…
Oh my gosh you guys left out a basic pair of pliers and potentially vice grips! I think this is probably the backbone of any good tool kit, you will always need to grab things and break, pull, bend, twist them out, or off of something.
I don’t know how essential it is, but I love a good t-square. Everything just lines up, and if you get a nice long one, you don’t even have to bother with a tape measure.
I also notice you don’t have pencils. You will need them, you’ll need lots and lots of them.
Must have: An arm lamp or good light source for your work station. It goes with the cutting board/surface… I found out that you work a lot more and more efficiently with good lighting. My favourite is the incandescent halogen bulb(for smaller budget) or the combined lamp (with a T9 and a halogen) for higher budget. It gives better colour quality and you will be able to work longer (without headache or tired eyes).
This is a really good podcast/article by the way! Most of those things are the most used in my 10 years old tool box! 🙂 And foam nail files for the win! It is my most used discovery since I make molds and casts. I’ve bought a dozen of them in the last year.
Recycled paper as green cutting board casting spill protection is a must if you do some casting(I’m lucky to say that at my work there’s a lot of recto verso printed 11×17 scrap/recyclable paper). Otherwise the green cutting board is really easy to wash.
A metal rule (18″ is more versatile) with a cork backing for exact-o cutting is also a must!
I have a really cheap drill and man it run the crap out off me every single time I use it… please don’t buy the one cordless drill they sell with a bunch of other non-tool accessories (bag, gloves, etc.) My is so cheap that I have to lay it down when I’m not using it because when it stands, it automatically falls on its bit… and deeply scratch the surface I’m working on and if it’s holding a small drill bit, it brakes that too!
Thanks again for that article!
I dunno if I’d count eye protection or lamps as tools but if you are, a good pair of work gloves or steel toe boots is also an essential in my mind. But again, not something that lives in the toolbox.
A headlamp, the kind they sell in the sporting goods section of Walmart or anywhere else, with a bright LED light and a dimmer red; great for when you’re working under something (a car, a bench, in the attic) and you need both hands. A few pencils (contractor pencils, the big ones), a good eraser, a Sharpie or some other marker for when you’re wanting to mark metals, soapstone and a lumber crayon.
My best tip is to invest in a can of penetrating oil to supplement the WD-40 and 3 In 1 light household oil. A lot of my work in the shop involves working on equipment that is used around the property and many times I need to free bolts that are frozen by rust and corrosion. Skip the WD-40 and PB Blaster and grab a can of Liquid Wrench penetrating oil or if you can afford it a can of Kroil. Both are excellent products and they are the best for freeing frozen parts. But WD-40 still has a place because it is non-conductive and can be used to dry out moist electric contacts.
If I were going to add to your list it would be things to give you mechanical advantage.
Pliers, Vise Grips, Mole Grips, Tin Snips, Side Cutters, Finger Clamps, Cleco Pliers/Pins/Clamps.
Most of my tools are air powered so I had to add a 25 foot airline to my tool box.
Something I regret getting rid of from my tool box is a pair of cherry max blind rivet guns. Picked them up for £20 each, sold them for £500 each when I wanted some cash but I want them back so badly now I have some sheet metal work to do.
1-2-3 blocks sold by machinist tool suppliers are incredibly useful for setting parts up square for glueing. They are steel blocks, sold in pairs, that measure exactly 1 by 2 by 3 inches. Usually they have holes through them so they look a little like precision blocks of Swiss cheese. The cheap sets from Taiwan are perfectly good and can often be found for under $20.
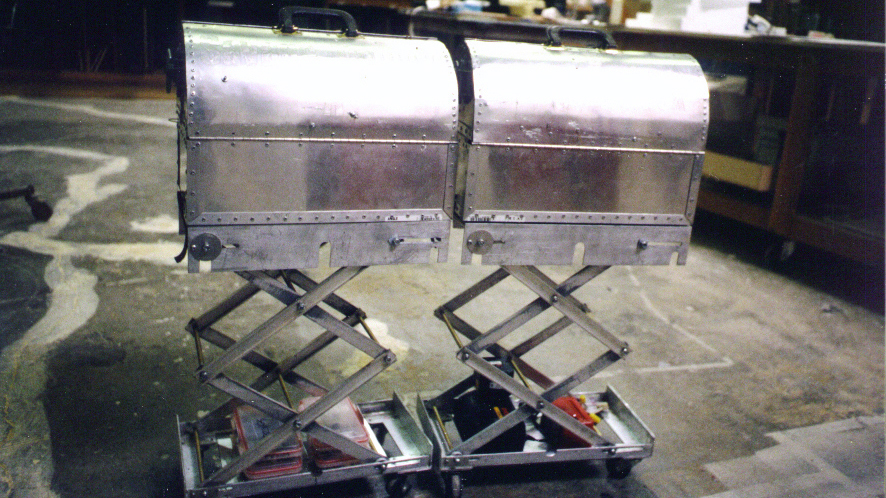
Those tool boxes in the picture are beautiful.
ZIP TIES OF ALL SIZES
I use them for all sorts of things but my all time favorite was when a steering control arm broke on my van and drove it home 15 miles (slowly) held together with a giant zip tie, the kind the police use for disposable hand cuffs.
Wow that sounds bad disposable handcuffs in my van
Handy tip my dad taught me, when cutting open a bag of zip ties, use a knife to slice a gash across the middle of the bag (width-wise) on one side.
If you open the bag on one end, you will inevitably grab the wrong end and dump them everywhere or throw them in a tool box/bag resulting in the same thing. This way they stay in the bag until you need them.
Also, if you live in Canada, you’ll likely want to invest in a couple more screwdrivers, a big and a small Robertson (or square) bit. Robertson/square screws were a Canadian invention and are super common in Canada. You won’t see them a lot if you’re taking something apart, but if you’re buying screws from the hardware store or doing some handy work around the house, you’ll find most screws are of the Robertson/square variety.
Lastly, maybe it’s the 3 electricians in my family talking but I’ve always been taught to buy tools as you need them and buy quality. For example, I have Klein Cushion-Grip screwdrivers and Channellock pliers and cutters. They aren’t cheap but I bought them only as I needed them (instead of trying to spend $200 or more on 6-10 hand tools all at once) and my uncles have had their Klein and Channellock tools for over 20 years and used them everyday all day and they’re still kicking.
As someone just starting out to make things and not planning on doing it full-time, it’s extremely helpful! I do graphic design full-time and only occasionally need to make stuff so a simple and inexpensive tool kit is just great~
Couple of suggestions:
1. Get a xacto knife but just buy the handle with one blade already on it (probably a No.11 blade which is the blade that I use the most if not all the time). There will come a time where the blade dulls and you need to change blade, what I do is instead of buying xacto replacement blades, I buy non-sterile surgical blade. They fit the handle, are insanely sharp (surgical after all~) and also insanely cheap (i’m in the UK and a pack of 5 blades cost less than 80p!)
P.S. There might be a safety concern for not using xacto blade on a xacto handle, in case you are worried, you can just buy the handle for surgical blade then. I use xacto handle because I like the weight and the grip~ 😉
2. Photographer’s tip: Gaffer Tape. They are like duct tape but better. Gaffer tape work just like duct tape except for that they do not leave mark or residue when peel off even if left on for long periods of time. They are also nearly infinitely reusable so a roll of Gaffer tape can last you a lifetime (probably…). The only drawback is that they are much more expensive than regular duct tape.
P.S. Photographers and stage lighting people use it to mask off unwanted leaking light from light source.
If you want to dabble in leather work, get a speedy stitcher
It’s an awl, needle and yarn spool in one and you sew a simple double stitch with it which is important for ticker material like leather.
I made my rig with it and a couple of similar ones for friends. For my next leather project, a sleeve for my nexus 7 I have bought proper needles and an awl.
What Adam said about all in one tools applies partially: it’s a compromise tool and forget to do intricate fine work with it, but for starting out its perfect.
And for repairs on the go it is the best solution. Every ship I sailed on had a couple flying around and all people with leather gear like riders should have one.
The premise is for beginning makers so I’m not sure steel toes are something that would make the list as much as they would for someone in a machine shop.
I love this podcast, and I have a few more tools to add. If you work with metal, especially with forming metal, a vise (smooth-jawed if possible) and anvil are handy. The vise can also be the anvil if it is heavy enough. As well, if you want to drill through metal precisely get a center punch so your bit doesn’t skitter around while you are trying to drill. As well, if you want to do a lot of small and precise drilling/buffing/carving and a lot of what you work with is metal a dremel might not be the best choice and a flex-shaft would be easier to control and also lasts longer (In my experience). They are rather expensive on the outlay though. If you intend to sew leather, get some leather sewing needles. They will save you lots of time, pain, and broken normal sewing needles and are relatively inexpensive.
if you are left handed, you’ll find that the standard xacto knife’s knurled section will unscrew when you are using it and the blade will fall out. to defeat this, buy thexacto gripster model. it has the screw mechanism on the opposite end of the device and doesn’t interrupt your maker zen.
As someone who’s going through the process of getting supplies to start building models, flush cutters are NOT the same as wire cutters. Sure, for just cutting wire they’ll do the same thing. But if that’s all you’re doing you can just use the wire strippers to cut wire (the bit below the hole for the wire). What I’m trying to say is, you can use flush cutters to substitute wire cutters, but not the other way around. And if all you’re looking to do is cut some wire just use the wire strippers.
(Side bar – if you’re going to be doing a lot of electronics, get automatic strippers. You will thank god for them.)
You list a soldering iron, but no solder/flux? No holder for the soldering iron? I didn’t listen/watch the podcast yet, but those seem like essentials if you have a soldering iron.
That multimeter seems like shit to me. Maybe I’m spoiled because I use fairly decent ones at work, but I would not want that one at all. There’s no indication on the front of the device as to what setting your on, so you have to go by what’s on the screen alone. I also can’t find any info on the product page about the max current load. And it seems like the leads are permanently attached to the unit. Do not want.
EDIT
Oh god, they actually do this?! What the efffffffffffff.
I dont bookmark often but when I do it has to be really good. I bookmarked this.
Hello there, and thank you for the great episode (especially the list with links!)
I used to have a job constructing teak furniture which used mostly dowel rods. One of the most important tools I had for that job was a plastic/rubber double headed hammer. With a metal hammer head you would dent the wood, and a big rubber mallet either was too big or would leave marks on the wood. I could have used some cardboard to protect the teak but that meant both hands were occupied, which sometimes made construction awkward. The plastic/rubber hammer was great. The plastic was soft enough that It rarely harmed the wood. The rubber side was pink, like an eraser, but harder. What’s more, it never left a mark on the wood. Finally, the wood handle could be shaped into a wedge for forcing one thing into another thing. I picked up that tip as a glazier because installing the weather stripping was a pain. This works best when you have to force something into another thing but can’t just smack it with a hammer, either because of glass or aluminum or if there’s simply no room to swing the hammer. The length of the handle and the handy t-grip of the double heads gave me plenty of leverage to apply tons of force to the object without having to swing a hammer around.
I should also mention a painters tool. While I agree that most all in one tools are crap (Full disclosure I have a multi-bit screwdriver with ratchet which I use for general screwdriving) this is one of the few multitools that actually works. It scrapes, pokes, prys up nails, opens cans of paint, wedges into things, and a well constructed one with a solid tang can even hammer in small nails.
Can you share a photo?
Awesome episode. Tools have a very special place in my maker heart.
I think doing a build podcast of Adam walking through his scissor lift toolbox would be amazing. It would totally be a merging of so many topics that you’ve touched on. Tools in your toolbox and why they are there. Building boxes which has already got some love with the Blade Runner gun case and Nasa box. Organization/ simplification which Jamie talks about in his wielding video.
It’s also an awesome toolbox that deserves its own podcast. I see their is interest from the rpf community too.
As an artist i find i always need spray mount (super 77) in tons of stuff I’m doing. I would add that to the glue/adhesive category.
completely loved the episode
Very nice space, I’m jealous. What kind of work do you do most of?
Instead of C clamps get bar clamps. They hold as good and are more versatile. Other folks have mentioned Vise Grips and when you got nothing they can be everything. Someone else mentioned steel rules and I think they are handy too. I can’t live without my combination square either. It comes with a steel rule, but not a thin flexible one. I guess in a pinch the steel rule out of a combination square would do the job though. I use my measuring calipers all of the time. Using those almost gives me a sixth sense. Here is something everyone can have for free that is a tool of sorts:
http://www.delorie.com/wood/DrillGuide.html
DJ is kind enough to host it for me. He reformatted it too. Unfortunately he didn’t fully appreciate just how handy it is. But if you are trying to make things to some precision I think it is useful. I use it constantly to make the numbers my calipers display have some context in reality for me. The most powerful tool any of us can possess is knowledge.
Nice. Very clean and organized space, probably not far from how mine would’ve looked if I had such a space. But, I’m a student and I live in a SF apartment, thank god for Techshop. :p
I find hemostats to be extremely useful in many projects. I also thought it was weird that my hemostats always seemed to be disappearing on me. This was back in the days (maybe ten years ago) when we used to host a lot of LAN parties. I eventually figured out that some of our gamer guests were also stoners and were sneaking off with my hemostats for their nefarious indulgences. Hide your hemostats!
I love these podcasts! Thank you.
However, I have to disagree about the wire strippers. While the automatic strippers are awesome they aren’t good for every job. I have tried a ton of strippers and most of them are just terrible. Most aren’t very sharp or don’t accurately adjust. I do a lot of work with small wires and using cutters to strip by feel doesn’t work. These have been the best so far:
Ideal T-Strippers.
You can get them for around $15, they’re sharp and accurate.
If you’re doing electronics work, the Imperial IE-159 is great and will do down to 32AWG.
I’d also add a 6″ steel ruler, 4oz ball-peen hammer, and small brass/plastic face hammer for fine work.
While not for a beginner, my all time favorite tool is the air compressor. I’m not even talking about nailing, riveting, etc but just using it as an air gun. I do a lot of camera work and it’s great for cleaning stuff out and off. When I ultrasonic clean stuff I will hit it with the air to dry it off quickly.
That is the cleanest workshop ever.
Contact cleaner is essential for audio stuff!
Cleans out crackly guitar pots, sliders, faders, etc.
Servisol Super 10 seems to be perfect, and pretty cheap.
Ha! The search for ryoba returns pretty much all tested recommendations. Amazon’s relevance algorithm has noticed us 🙂
I had a $50 cordless hammer drill with two batteries that when I needed to use it for more than two holes into concrete the batteries would both be flat. I have now upgraded to a Hitachi DS18DBL which is worlds apart. At $300 it was not a cheap one but everything about this new drill is so far apart from the cheapie that I will never buy a cheap powertool again.
http://www.hitachipowertools.com/index/main-navigation/tools.aspx?d=2,20&p=764
On the matter of drill bits though dont spend too much on highspeed ones. They all break easily, although the more expensive ones stay sharp longer. For masonry bits spend a bit more, having to not change a bit going through a few lintles is worth the cost 🙂
On a side note thanks for all the tips we are getting through Adam, they have given me creative ideas to do stuff
Semantics I know but I would use Pozi drive instead of Phillips head.
A lot of screws you get these days are Pozi and a Pozi driver works better in them than a Phillips does. Also a Pozi can fit into a Phillips head screw. Same price but better in my mind.
I repair cameras for a living and the three tools which are NEVER more than a couple of inches away from my hand when I’m working are:
Tweezers (Dumont 3C, not cheap, but VERY good and non-magnetic which is handy)
Scalpel (Swann-Morton with either 10 or 10A blade)
Screwdriver with interchangeable tip (Niwa PD-30 is stamped on the handle if that helps at all)
I’m surprised Adam didn’t mention a contour gauge. I guess they are more useful if making organic curves, but they are super useful and I’ve seen quite a few makers highlight their virtues in process-threads. 🙂
I do a lot of home repair and wood working projects and there are two tools I go to all the time.
The first is my trusty pry bar. Great for demo, removing nails, breaking things apart for material. I find it a lot more useful than your standard crowbar.
The second is a rafter square (also known as a speed square). It’s a great heavy duty square that I use whenever I’m marking lumber. It’s sturdy so it can be tossed around on a job site and has a fantastic edge which presses up against the edge of the board.
Id also add earplugs, a pocket ref, a good flashlight, channel locks and like others have said zip ties. A good portable work light comes in handy time to time as well, you can generally find them at yard sales and you wont use them daily but there will be times where one could really come in handy. Also its never a bad idea to have a various assortment of screws, though one usually accumulates that after their first couple of projects. A tool box is invaluable, there is no use having all these tools without having some where to put all of them. I generally like to have at least one that I can carry around when out working away from the shop along with a couple of larger one to keep all my good tools in that stay in the shop. Heres a pic of most everything in one of the boxes that I use carry around day to day, please excuse the poor quality.
Another cool tool to get is a bench grinder with a wire wheel, or even a wire wheel that you can put into an electric drill. Most of the tools that you find at garage sales are in great condition except they are usually covered in surface rust, and a wire wheel makes very short work of that.
My grandfather was an avid craftsman. When he and his wife moved to an assisted living residence. He got rid of a number of things. He gave us his toolbox and some other tools aswell. I only started going though it today. A couple photos below, more in this album.
– Scale ruler
– 18″ cork backed steel ruler. Even better if you can find a Zero at center type.
– 18″ x 6″ clear plastic quilting rulers often have 1/8″ increments in a grid. Great for layout.
– Japanese saw blades for Olfa style utility knives.
– Stanley 3 1/2 in. x 1 in. Small Trim Plane less than 10 bucks have had mine for 15 years.
Loved it, as a person who is not a native speaker but lives in the U.S. now, I listened to this podcast with a google image page open and I learned the English name of so many tools. Now I won’t sound like a completed retard, making hand gestures when I go to the hardware store, so thank you.
Crime scene caulk outline and allen keys.
The loose tool argument of how do you know it’s missing? I’ve had pouches and pouches of Allen keys as a teen because I only needed my 8mm for my bike and that’s the one you loose. But knowing one is missing means you take an extra minute or two to find it when you clean up. Also saves you the aggravation of rummaging through a pouch and testing each key. Especially important when you realize that there are usually only 2 or 3 sizes you use regularly. Add to the argument that sometimes sizing an Allen key means a little smaller or a little bigger. Loose Allen keys can make that difficult. A sleeve can make that easy. I bought this set from Walmart 12 years ago for $6.99 with metric and SAE. Some people like the clam-case but I find a sleeve means you can quickly size an Allen key. A case, the prongs bend and you can’t use it as a key gauge anymore. I also find it hard to get the keys out of a case quickly.
Also, there are often buckets and pouches of loose allen keys around in shops or garage sales. A lot of mechanics hate throwing out tools but at 60-120$/hr they can’t ethically rummage. A sleeve looses a key or two and it goes into the 2nd’s bucket. Ask nice and often they will let you rummage away if you need a key or two. If you happen across an old sleeve, it’s easy to repopulate on the cheap. Note the slight mix of keys on my SAE & metric kit.
Something mentioned but not in the list: End Nip Pliers
These are good for cutting metal and metal rod. Personally I used them a lot for cutting solid rivets down to size.
http://www.amazon.com/Channellock-357-Inch-Cutting-Plier/dp/B0000BYDYD/ref=sr_1_3?ie=UTF8&qid=1373862915&sr=8-3&keywords=end+nip
Something not mentioned:
Aviation Snips
If you’re going to be cutting sheet metal by hand, these are what you want. You may be asking yourself why there are three of them, and that’s because they’re designed for different handed use. You have a left hand snips, right hand snips and straight snips. When you’re cutting sheet metal, you only want the junk portion to have any deformation to it. The snips are designed so that you can take the one you need so that you can cut it at the most suitable angle.
http://www.amazon.com/Columbian-Wilton-3-piece-Aviation-30676/dp/B002NVFRU2/ref=sr_1_3?s=hi&ie=UTF8&qid=1373863049&sr=1-3&keywords=aviation+snips
As a young maker a lot of my tools are either my dad’s or ones that I bought/received as gifts. I focus mainly on electrical stuff, but I also build mechanical things as well. My main tools are:
Black and Decker 12v lithium drill. I LOVE this drill, the only thing that could be better is if it had a level built on to the top and the back. It has more punch than 18v nimh or nicad drills that I use at school, it is smaller and much lighter. Though it is a bit pricey upgrading to a good lithium drill (preferably from a brand that uses the same battery for many tools) is well worth it. That being said, menards has their brand $20 16v drill that works totally fine. It is less powerful and a bit clunkier to use but it does the job and I have abused a few at school for the past 3 years and they still work
Dremel. I have the 3000 series and a pack of many different bits for it. A lot of my projects are small or have tricky areas that need to be taken out and the dremel is great for that. I have gotten away with using it to cut things like 1/2 inch pvc and other materials but a hacksaw is much better for that. I also have the drill press for it. A great addition if you have the adjustable chuck for the dremel.
Soldering station/iron. I use a knock off of the weller 40w station. It has served me well for several years and I am still using the first tip. I highly recommend a bottle of liquid flux if you are soldering a lot or use stranded wire. Solder with flux already in it is okay but actually applying flux works much better. The paste at radioshack works but it is a sticky mess for anything else you get it on.
Bench top power supply. I built my own based on an adjustable voltage regulator that is capable of 30vdc at 1.5amps. It cost about $30 to make and uses a laptop power brick (not included in cost) to power it. For projects that require more power a pc power supply has 3.3v 5v and 12v out and can often be found cheaply.
Digital multimeter: I have used cheap ones and I have used expensive ones. My Sperry DM-6400 is easily my most used tool. It was around $30-$40 when I got it. It has a large easy to read screen and a nice stand built onto the back. The only downside was the fuses for measuring current were DOA.
Screwdrivers: I have a ton, but My favorite is a snap-on SDDP31 that I found when we moved into our current house. Magnetic tips can be extremely helpful or extremely annoying depending on the use case. Either way, make sure to have a high quality big philips, small (usually #1) philips, and the same for flat head.
Vise: I have two that I use nearly every day. The first is a panavise that sits next to my soldering station. The second is a large table (more like shop bench) vise.
Pencil, pen, sharpie: Keep all three at your work area. Each one has a set of surfaces that it works best on.
Side cutters/snips are incredibly useful and for larger things tin snips are also useful.
Pliers: I always keep two good sets of needle nose pliers at my work benches and two good sets of normal pliers. Along with those vise grips are incredibly helpful.
Safety glasses/goggles. I just have a cheap set for working at home, but at school I prefer to borrow the nice expensive set from the teacher that I work on robots with. The only real advantage is that they are more comfortable.
Other things that don’t need an explination
lighter, fire extinguisher, flashlight (preferably led), hearing protection if using large power tools, and a good general light source.
Pics to come soon 🙂 just got done with an overhaul on the robot arm and the shop area is a disaster right now.
I would like to recommend tools that won’t rust. I live in the Sunset and even though I keep my tools in my apartment, I still end up with some rusty tools.
Some items in my toolbox:
Magnetic parts dish and telescoping magnetic wand, so you don’t lose small parts and can retrieve them easily from tight spaces
JB Weld
Hand cleaner
Dremel (great for hacking vintage cameras)
Driver bits for security fasteners
Zip ties in various sizes
Loctite (both red and blue)
Latex gloves
Self-tapping drywall screws – they’re not just for drywall anymore!
Vise-grips in a few different sizes – accept no substitutes
The Cruz Tools kit for BMW motorcycles has saved my ass on numerous occasions. 🙂
What a nice video. Great to have the list as well. I have a few thoughts to add, but I’ll do that later. For the moment, I’ll just comment on one of the other comments on the use of dikes as wire strippers.
First of all, to clear up a confusion, the term “dike” is simply short for “diagonal cutters”. There is nothing “non PC” about it … if anyone still cares about being PC. I have some lesbian friends who cheerfully refer to themselves as “dykes” so it is time to get over this stuff. 😉
As to why it might be a bad idea: yes, if you are careless about it, you can nick the wire, or if you are using stranded wire, cut some of the strands off … not a good idea. HOWEVER, one develops a “touch” over the years and it is quite easy, with some practice to get it right. The advantage of doing it this way is that one ALWAYS has the dikes out and within easy reach. (If you do electronics work, just look at your bench top and you’ll no doubt see dikes, needle nose pliers, a screwdriver, the odd nut driver or two and soldering iron with solder … all right under foot.) To get the nice pair of strippers out will most likely take additional time and using them requires looking at the tool. Using the dikes is an almost instantaneous process.
So, if you are not practiced, you’ll bung up the wire using dikes to strip it … but then, that is how you get practice.
So I have been a huge fan of Tested for a while now and finally decided after watching this episode on Youtube again, I needed to finally join and comment. To clarify though I only recently discovered I was a maker, although I come by it honestly(Father is an Engineer, Mother is an artist) I also come at it through the side of having been in construction for over a decade, so some of the tools/brands I have and use are well tested from a commercial point of view.
For wire strippers(I know you said Greenlee) I personally HATE automatic strippers, I’ve had 3 pairs of Klein strippers. The reason I’ve had three is that from constant use I have actually worn out two pairs! They also have the crimpers on them that allow the use of various wire connectors in a pinch.
You mention Duct tape, and I’ve got a special place in my heart for the black all weather tape. Stuff will stick to water, and lasts forever.
There is a nice multi tip jewlers screwdriver set that you can buy where all the various tips are stored in the handel. I believe it’s made by Kobalt? ( I apologize for guessing I’m currently 15,000 miles from home deployed to somewhere in the Middle East)
A cheap drill will last you for a while, but for around $100 you can get a used Dewalt XRP. I swear by them only because from 12-18 volts they are excellent tools. They will last through the rough stuff and will drill through anything with a good bit(sometimes even with a bad one) They also have electric brakes which is something most plug in ones do not have. This can make a HUGE difference if your new to drilling and don’t have good trigger control. (Quick explanation for those that don’t know, when you let go of the trigger without a brake the drill will continue to spin and slowly stop, with the brake it will stop as soon as you let go of the trigger.)
A putty knife is an extremely useful tool I find. Good for it’s obvious use as a spreader of putty, but also great for prying, scraping, cutting, and cleaning out corners. Plus they make them with about a dozen built in tools, however a basic heavy bladed model is just as good(sometimes better)
I hope this helps some, most of what I mentioned is merely a variant on some of the stuff they have, but they are all things I stand by after years of use. Sorry I can’t post some pics, I actually have a bunch of tool boxes, but at the moment they are a little far away.
Something I’ve only tried recently that I now find invaluable on occasion (and I doubt it’s just cause I’m getting old) is a head-mounted light. Bought a cap with LEDs in the bill and I love it.
My sight is probably better than most folks my age (39), so I didn’t think I’d find it such a boon, but now I regard a head-mounted light as a huge help with anything intricate and fiddly, for instance overhauling the brake/shift levers you find on road bikes.
(I am in Wales UK so some stuff is specific for here)?
Okay, as a model makers specific tool kit. Safety boots are not a needed as some have suggested…but for a basic starter kit other items to add are
Cloth pegs…ideal for holding to thin sheets of wood while glue dries.
Dust pan and brush to sweep down your work top.
Magnets ( I have loads from discarded speakers). These are ideal for holding items also for picking up small screws nails etc before sweeping down work surface.
As you build up your kit..try
Needle files.
Lino cutting tools ( perfect for removing small amounts of wood or modelling medium).
Vice….if you can only afford one, fashion some wood blocks to protect your work.
Over the years I have brought the best tools I could afford..with drill bits buy a cheap set of hss/twist bits you can get a set of over 100 pieces for under £20 (UK)…as they break then replace with best quality…
As for workshop tools.
Pillar drill even a £40 hobby one will make life easier.
Table saw or band saw…ideally both…but choose one that will suit your needs better.. (an upside down circular saw can double up as a table saw for £30).
Bench sander…a combined one with a big vertical disk and belt….
And parts boxes…
I also take everything apart remove all bits before throwing away the casings and junk.
As for a work shop.. even a small 8×6 shed can be used if you think carefully about storage and space..wall panels full of tools look amazing but take up lots of space..I prefer draw units and stacking boxes..home made shelving is always a perfect fit.
My work table is 3 sheets of 12mm ply thick cut to fit the space..when the top gets ruined ( which it will) I just unscrew it and replace for under £10..
I collect the cardboard veg boxes from super markets that stack together for some parts and also lesser used tools (sharpening stones for example.
Plastic tub lids (ice cream tubs) cut with a stanley knife make really useful spreaders for glue.
My latest addition…is rubber flooring mats oh how these make a difference…if your spending an hour or so on your feet even an off cut of carpet will be more comfortable.
Most importantly just enjoy what your doing
My toolbox and tools occasionally come into contact with water or moisture. I keep them clean, but every 6 months or so when I clean out my toolbox I end up cleaning out rust. About a year ago when cleaning out my toolbox I put down a layer of duct-tape to protect the metal. Also, I added about a teaspoon of rice. I noticed a difference over the next few months, it seemed to help. I like a very organized and neat toolbox though and the loose rice was getting to me so I went as far as adding a tablespoon of rice to a cloth and tying it up with some string. I was about to look into getting a kilogram of silica gel, as I would have other uses for it, but I thought I would try out sodium bicarbonate(baking soda). A teaspoon in the center of a few squares of toilet paper, tied with a bit of thread. Super cheap; great at controlling moisture; and even absorbs odors.
Here’s a link for a tool which in my opinion is super cheap and one which I use constantly especially in post processing after printing:
http://www.dx.com/p/repairman-s-1-8-1-2-hand-operated-steel-taper-reamer-silver-327685
http://www.dx.com/p/0-14mm-steel-hole-saw-installation-kit-41133
Love this stuff, and the suggestions are really good ones. Only thing I didn’t hear for a basic kit that might be a good add would be a decent mill file 8″, bastard cut; the basic small end file that makes anything fit.
My father used to say, either buy really, really cheap tools that you expect to break, or spring for the really good ones. About 60 years ago, when he was making maybe $40 a week, he bought himself the best Snap-On tools he could get, because he was doing lots of his own auto work and home repairs. I still have these after he used them daily for decades, and they are still in great shape. I even have some of my grandfather’s tools, including the surprisingly useful adjustable wrench that came with a new Ford Model A! Not bad quality and completely indestructible.
One daily carry tool that I always have on me is an 1/8″ straight blade screwdriver (I favor the Craftsman 2″ Mfg# 41421, which I have been using continuously since the 1970s.) Make a couple of slight mods to this and you have something really useful: narrow the width of the blade with a file just slightly, and you have a cheater bit for #2 Philips screws, and while you have the file out doing this, thin just one corner of the tip a little bit so you can use it as an emergency cutter. The two-inch size will travel nicely handle down in your pocket without making holes, too. I even carried this at my daughter’s wedding when my usual Leatherman Supertool would have looked out of place. Naturally, having the little driver handy saved the day.
Did I miss the hot glue gun? That has been a vital piece for me since my first builds. Also a good heat gun has become a staple.
Thanks for this list guys. I’ve got my birthday and fathers day presents planned for a next 20 years.
If seems like the tool i use the most when voiding warranties is a size #2 Phillips head. I have a ratchet screwdriver I was given second hand as a kid with a size 2 Phillips head welded in.
also my drill came with an insane amount of screwdriver attachments, which is nice if i ever find an awkward screw.
cheap tip:
if you need to clamp something large (massive even), a ratchet strap is a nice cheap solution and alternative to a long bar clamp.
below is i picture of how i organized my toolbox last year (it’s a mess again now).
An open spanner is a useful tool if you’re faced with a tight nut and need to break something or self harm.
do not get the harbor freight locking pliers/ vise grips. i use them a lot for quick clamping/welding/whatever but the harbor freight ones tend to flex and theirs a good amount of side to side play. also a good tip if you have access to a welder. for locking pliers with the c sort of arms. weld a bit of angle iron to the pads on each end it will give you a lot more gripping force and clamp down to many things. it also helps if you accidentally weld them to your work instead of scrapping the whole tool just re weld some more angle iron on later. ect. my tools currently are mostly lathe oriented. oh one of the best things i have in my shop is my anti fatigue mats i forget where i got mine they interlock were like 20 bucks for 6 panels. i think i got the rubberized floor mats for kids playrooms if i remember right tho. standing on concrete all day in work boots takes its toll on your feet.. so if you have actual shop space. that is a great thing to put in.
Sharpies, too
It would be great to see a new list of tools that builds on the beginners tool kit, after all, we have all had 2 years to spend our money on the first list!
Thanks for the list. My bf is a new maker and has been slowly acquiring the necessary tools. He actually had quite a bit on the list but I just picked up a decent digital calipers and bench vise per the list for Christmas. Thanks again, this has been very helpful.
I mentor a FIRST robotics team, and we use Allen bolts for everything, and I agree the L or T handles are usually better, but I have Eklind sells these all metal sets that I consider a must have if you use a lot of Allen bolts. The whole thing is less than .75x.75 so it fits in places no other set would fit. I have 4 and I bought my team several more. It is the only single peice set I ever use.
Eklind 20811 Fold-Up Set #81, 0.050-Inch to 5/32-Inch Hex Keys https://www.amazon.com/dp/B0000CBJDX/ref=cm_sw_r_cp_awd_64H7wbVZFBJ9N
I love these thing so much I spent hours to electro etch mine.
I have a bottom of the line dremel and cuts steel great with a dirt cheap tungsten carbide burrs, I spent $15 on 10 burrs and they eat mild steel like nothing.
This may be common knowledge among makers, but a great place to find tools, scraps, electronics, and pretty much anything is your local Buy Nothing group.
These are groups organized locally via Facebook (search ‘buy nothing). No money is exchanged ever. You can post to either give or request items. Members are expected to be valuable members of the community and do a bit of both.
It’s used by mostly regular folks, not makers, which is great for us because you’ll usually be the only one who wants fabric scraps, broken appliances, or boxes full of shoe laces or hinges.
there was one thing that i remember from a long time ago. i believe that adam had suggested getting this one small book that had every calculation that you need to know in it. i think he said that you can get it from an auto parts store? could someone please tell me what this book is called?