


Worklog: Tetris Shelves – Sanding, Priming, More Sanding, and Painting
Once I'd assembled the shelves, I thought the hard part of my tetromino shelves was done. I couldn't have been more wrong.
Sorry for the break unexpected break gang. My daughter was born the week after the last installment, and just as I was starting to recover, I got sick and was out of commission for a few more weeks. Everything’s groovy now though, and I’m ready to wrap up the build log on my first project of 2013, a set of modular Tetris shelves for my baby’s room. If you’re just joining us now, you should probably check out part 1 and part 2 before you read this.
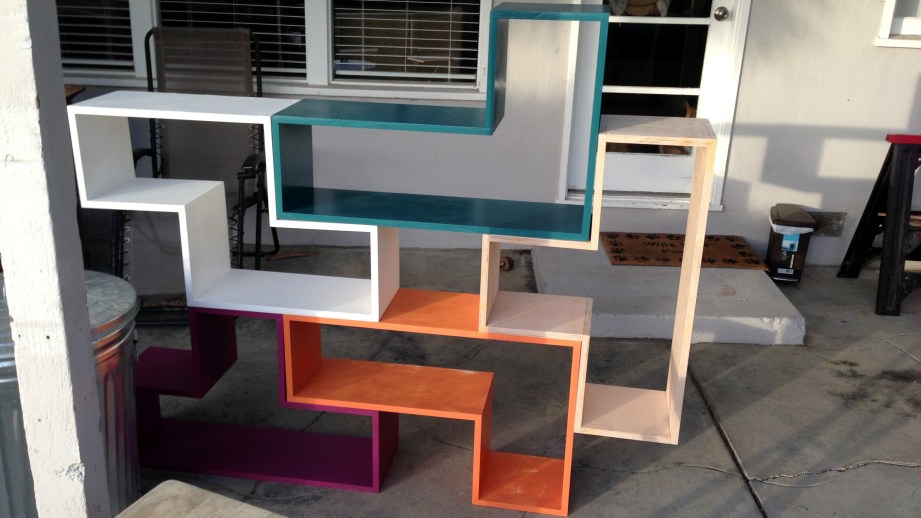
When we last left off, I’d successfully assembled five Tetrominos, using biscuits, glue, and square clamps to join everything together. At this point, I was pretty sure that the hard part was done, and all I had left was a little bit of painting and sanding. I couldn’t have been more wrong.
Sanding Really Sucks
For a project like my shelves, sanding serves two purposes. It was important to smooth over any rough edges where my board cuts were slightly off. Typically these little mistakes amounted to edges that were just fractions of an inch off, but the effect was jarring. Any place that the boards didn’t perfectly line up, I sanded until the joints were smooth. I also made sure to sand down any places where glue had dripped or the board edges had burned during my initial cuts.
This is where an orbital sander is extremely handy. My orbital sander–a cheap Black & Decker model–uses a quarter-sheet of sandpaper and allowed me to remove material much more quickly than I could by hand. I experimented with different grit sandpaper, remembering that lower grit numbers are more coarse and will remove excess material more quickly, and found that 150 grit was great for sanding down edges that didn’t meet, while 220 or 300 were better for sanding the surfaces and edges of boards.
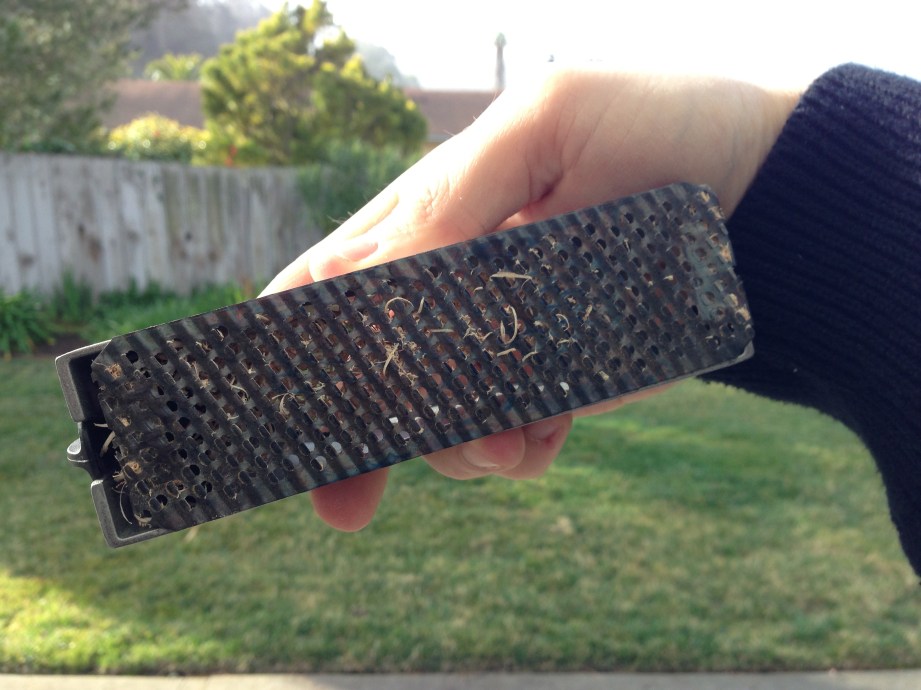
There were also a handful of joints with particularly bad overlap. To take the excess wood off of those joints faster, I used a rasp. A rasp is basically a cheese grater for wood. Once the offending pieces almost lined up, I also needed to sand the surface of each piece before priming to ensure a clean surface for primer adhesion.
The entire time I was removing material, I was cognizant of the fact that it’s very easy to remove too much material and very difficult to restore material once sanded. Whether I was rasping or sanding, I was careful to remove a bit, check my seams, and then remove more if needed.
All told, the first sanding pass took between 20 and 30 hours to complete all five pieces. The sanding was absolutely backbreaking work, but the finished shelves would have looked crummy had I not taken the time to sand them properly. Sanding both allowed me to fix any minor flaws and cover any mistakes I had made while assembling the shelves.
As a warning–I did a fair amount of my sanding inside, but I used a respirator mask to block particulate the entire time I was working. I also coated everything in my garage with a fine layer of dust because I was cheap and didn’t buy the Shop-Vac attachment for my sander. As a result I’ll have to spend a weekend in the near future dusting the entire garage–not fun. The difference between a good sander with a vacuum attachment and the one I have is so great that the next time I need to sand anything substantial, I’ll probably pony up for a new sander and the adapter.
Priming
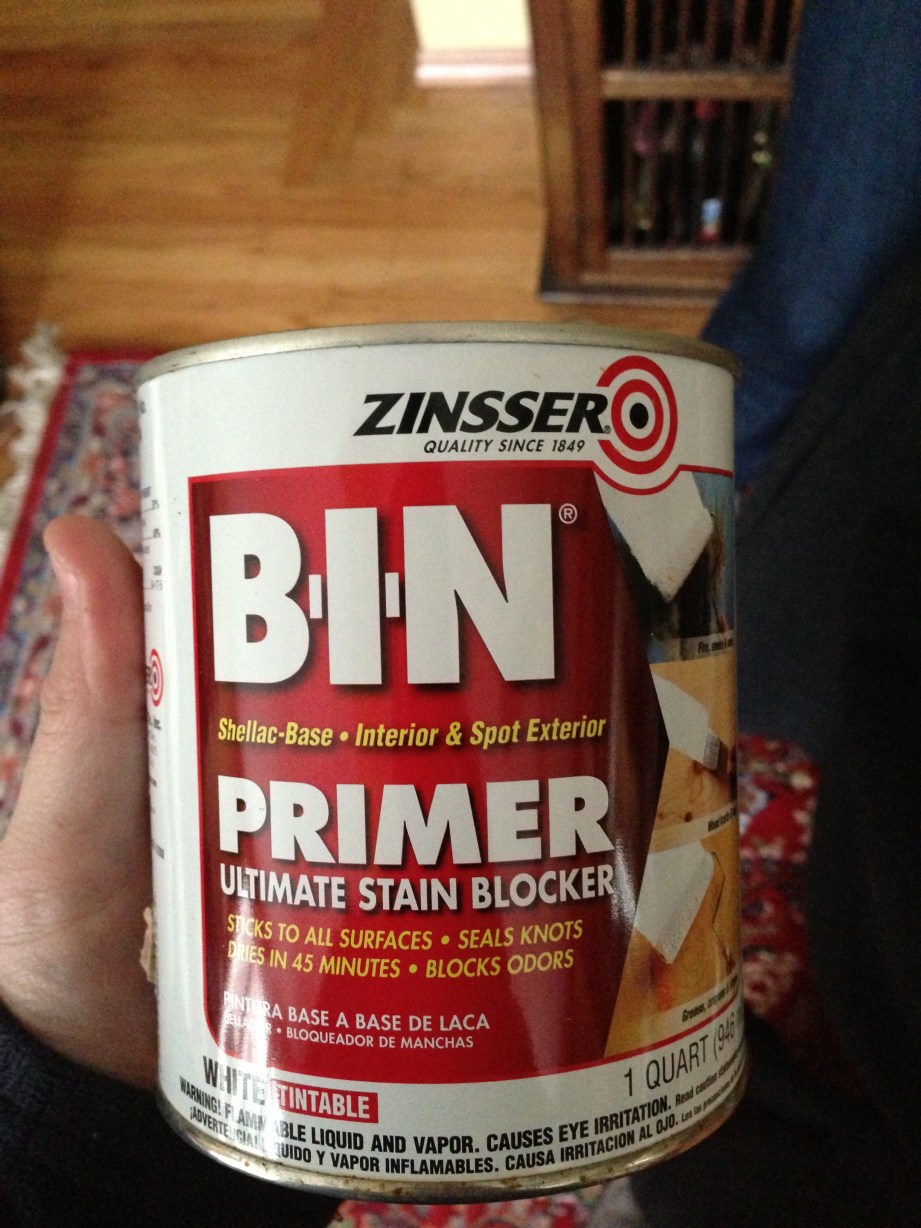
After consulting the helpful professional at my local paint shop, I bought a gallon of Zinsser B-I-N Primer from Home Depot for my first coat. Why use primer? Well, there were two reasons. Using a primer designed for use on new wood reduced the number of coats of paint I needed to finish the shelves. It also has a high particulate count, which help fill in the handful of gaps that I found in the side of the thin-ply I used to build the shelves. By using the primer, along with a little wood filler, I was able to avoid having to add veneers to the cut edges of the plywood, which saved me a ton of time. If I was doing this over again, I’d have had a light grey tint added to the primer–in its pure white form, it required two coats of the thinner colors to cover the white. Had I bought the paint from a real paint shop instead of Lowe’s, I would have been able to get a slight tint added the primer, which may have helped get decent coverage with the first coat of paint.
Applying the primer is just like painting–except instead of paint, you’re applying a viscous colloidal suspension of particles and a stinky water base. First, I wiped the entire shelf with a damp rag, to remove the last traces of the dust from the first sanding pass. After the shelves dried, I used a 2.5-inch brush to apply a liberal coat of primer to every side of the shelves, starting with the top piece. It seems like the best way to avoid drips and weird corners was to skip every other face, then come back and finish the unpainted faces after the rest of the paint had dried. To do the last side, I rested the shelf on two pieces of scrap wood, then let it dry for at least 2 hours, but preferably more. Then, it was time for more sanding.
I used a finer grit sandpaper on the primer than I did when sanding the naked wood. The goal when sanding the primer was to smooth any rough patches I’d inadvertently added when I applied primer. After some experimentation, I found that 220 or 300 grit paper on the orbital sander did a good job taking off rough spots without removing too much of the primer.
Aside from a handful of spots I missed, I was done priming. I wiped off the sanding dust from each piece with a damp rag, and was ready to paint.
Painting
Because these shelves were going in my kid’s room and I don’t have a good place to let them air out, I wanted to stay away from paint that would need a long time to dry away from people. Even though it isn’t the best paint for furniture, I ended up going with a glossy latex paint. I was able to put it in the baby’s room after a day or two of drying, and if she scrapes chunks of paint off it isn’t the end of the world.
As I wasn’t exactly sure how well the latex paint would work on furniture, I didn’t want to spend a ton of money on it on the chance it didn’t work. With that in mind, I bought quarts of Valspar from Lowes and of each color I needed. I matched the colors by bringing stuff from home that was the colors I wanted and comparing it to the many thousands of color swatches at the store.
I used a couple of nylon brushes to do the actual painting, both 2-inch and 3-inch versions, making sure to avoid drips. After a fair amount of experimentation, I found that painting adjoining surfaces was a surefire way to mar fresh paint, so I switched to painting alternate edges.
Unfortunately, because I was using bright colors of paint, I needed to apply at least two coats of paint to every shelf. That did give me the opportunity to fix a few rough patches and drips that happened while I was painting. A few moments with some fine grit sandpaper were enough to fix the mistakes.
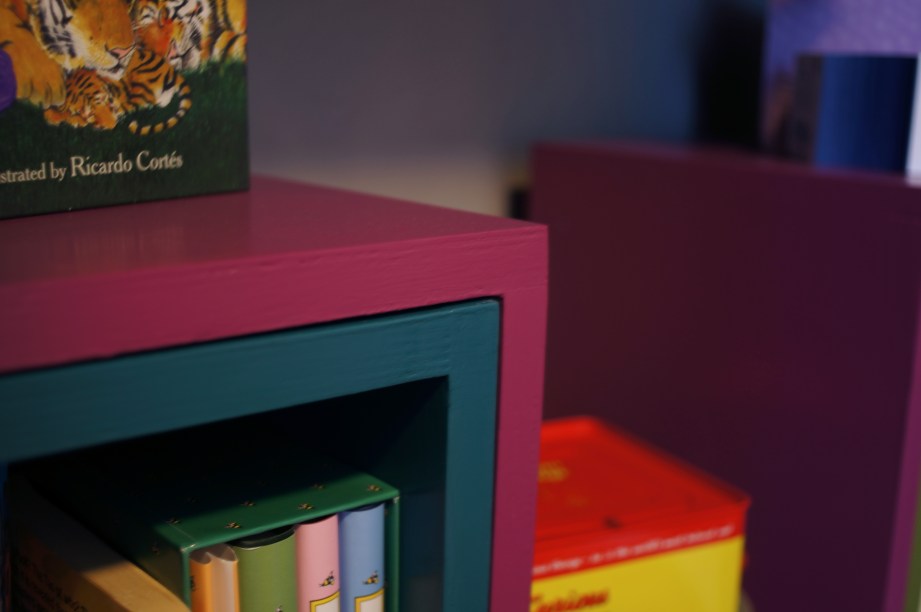
The Finished Product!
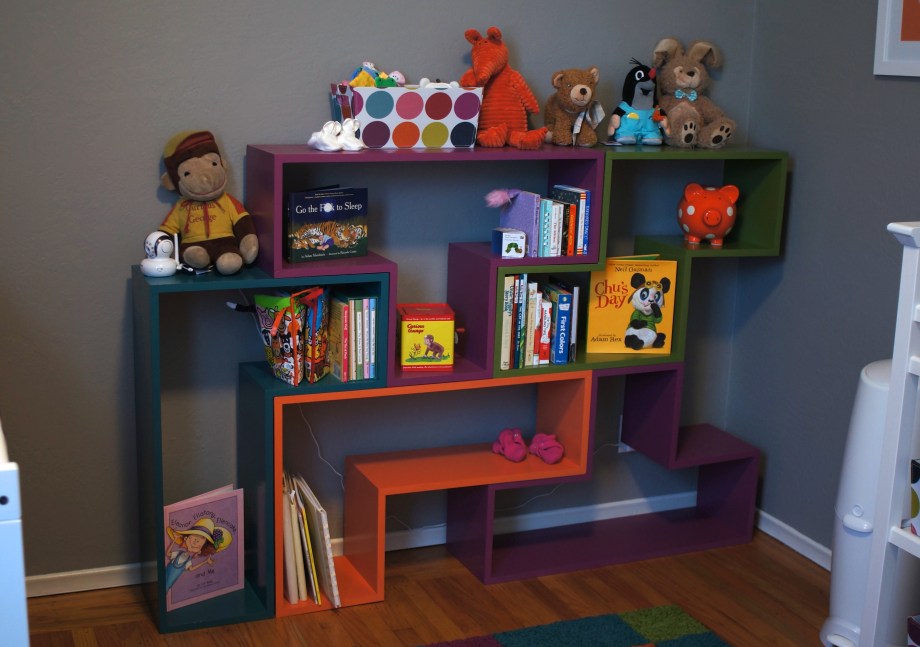
After a few days in the garage to give the paint plenty of time to dry, it was time to set the shelves up. I originally thought I was going to have to add a sealant to them in order to prevent sticking when they were attached to each other, but when the paint was fully dry, I didn’t have any serious sticking problems. The arrangement my wife and I chose for the layout gives us plenty of shelf space and leaves each piece both well supported and locked into place. I do need to tether the shelf to the wall, but I can do that with a pair of screws and some inexpensive nylon webbing.
All told, I spent about $700 on the shelves–$220 on wood, $200 on clamps, $60 on tool rentals, $50 on saw blades, $60 on paint and primer, $30 on sandpaper, and another $50 on assorted small tools and consumables (mostly glue and biscuits). About half of that was on tools, tool rentals and other stuff I’ll be able to use again in the future–at least if I ever have a project that requires 16 corner clamps again. It took me somewhere between 60 and 80 hours of work to complete the shelves, spread out over a month or so. I guess it’s kind of a cliche, but I was surprised that finishing the shelves too much longer than actually assembling them.
The shelves turned out much better than I thought was possible. They actually look like they were made by someone who knows what they were doing. The individual piecesjoin up properly at the seams much better than I anticipated, so the individual pieces look like one unified piece of shelving when they’re assembled. My careful measurements and all those corner clamps really paid off as the good fit saved me from having to make either of the mechanisms I designed to affix the shelves to each other.
I wish I built enough pieces to take the shelves all the way to the ceiling. Knowing what I do now, I’d pay a wood shop to break down the plywood sheets for me and rent a sprayer to prime and paint the shelves, which would save me a ton of time. I’m carpentered out for the time being though. Maybe I’ll build the rest when she’s old enough to help, if she’s into them.


19 thoughts on “Worklog: Tetris Shelves – Sanding, Priming, More Sanding, and Painting”
Leave a Reply

One Day Builds
Adam Savage’s One Day Builds: Life-Size Velocirapt…
Adam embarks on one of his most ambitious builds yet: fulfil…

Show And Tell
Adam Savage’s King George Costume!
Adam recently completed a build of the royal St. Edwards cro…

All Eyes On Perserverance – This is Only a Test 58…
We get excited for the Perserverance rover Mars landing happening later today in this week's episode. Jeremy finally watches In and Of Itself, we get hyped for The Last of Us casting, and try to deciper the new Chevy Bolt announcements. Plus, Kishore gets a Pelaton and we wrack our brains around reverse engineering the source code to GTA …

One Day Builds
Mandalorian Blaster Prop Replica Kit Assembly!
Adam and Norm assemble a beautifully machined replica prop k…
House of MCU – This is Only a Test 586 – 2/11/21
The gang gets together to recap their favorite bits from this past weekend's Superb Owl, including the new camera tech used for the broadcast and the best chicken wing recipes. Kishore shares tips for streamlining your streaming services, and Will guests this week to dive into the mind-bending implications of the latest WandaVision episod…

One Day Builds
Adam Savage’s One Day Builds: Royal Crown of Engla…
One of the ways Adam has been getting through lockdown has b…

Making
Adam Savage Tests the AIR Active Filtration Helmet…
Adam unboxes and performs a quick test of this novel new hel…

Making
Weta Workshop’s 3D-Printed Giant Eyeballs!
When Adam visited Weta Workshop early last year, he stopped …

One Day Builds
Adam Savage’s One Day Builds: Wire Storage Solutio…
Adam tackles a shop shelf build that he's been putting off f…

Show And Tell
Mechanical Dragonfly Automata Kit Build and Review
Time for a model kit build! This steampunk-inspired mechanic…
These shelves look really good!
Those look quite awesome. They’re definitely more expensive than what most people would expect a DIY project to be, but the care and attention to detail really shows.
I’m not really knowledgeable in wood working, though I have made a few projects, and I do think this could have been done cheaper.
It could have been done without the biscuits and the clamps, using screws or nails instead…. but then you have screws or nails in it that you would have to cover up or live with. That would save you a ton of time on waiting for clue to dry and money on clamps though.
Obviously not a huge issue now (unless there is an earthquake), but locking them together and attaching it to the wall would be a good idea when the kid is older and uses it as a ladder.
I’m not sure if you used water or mineral spirits to do your final wipe down before priming, but it should be noted that water tends to swell the grain of wood and undo a lot of the smoothing done by fine sanding. Using a rag dampened by mineral spirits allows for a nice cleaning of the surface without that swell. It is stinkier, but yields a better surface.
Just a friendly FYI.
Cool shelves, Will!
They turned out nicely.. 🙂
Cool project and a great writeup. As someone who just did his first woodworking project since wood shop in the fifth grade, I know how quickly costs rise on these things.
My project was much smaller, but with tools, materials (mine was made from hardwood and aluminum) and Techshop membership/classes ended up being almost as expensive as your shelves. But like you say, the tools will last a long time… and so will the many skills I learnt throughout the process. 🙂
Good shelves. Now you have to wait about six or seven years to explain the shapes and then explain Tetris.
Nice job!
awesome work, great job!
Hey, great looking project will!
They look fantastic, Will. Congrats on a job well done!
They look fantastic, Will. Congrats on a job well done!
Nice job!
You have the quintessential first time parents decorated nursery. Keep these pictures to remind yourself of the free time your used to have and how clean your house used to be…
And congrats on the baby! Having kids made me a better person, I wish the same for you.
Looks great Will. I would love to see future projects that you may do as well.
Great shelves! I would love to see a slightly more basic project how-to (say, a standard short bookshelf, or maybe even something super simple like a box). Or maybe I just need to find a woodworking class or something that will provide easier access to tools and materials. I’d love to learn to do stuff like this, but the barriers to entry feel a little high; I don’t want to spend hundreds of dollars buying tools and materials only to realize that I’m in over my head.
Really, if you have a small air compressor and cheap nail gun, you could tack the thing together with a few brads down each side, and it’d probably be just as solid without having nail heads showing.
Most community colleges will have a night class on trade stuff like that. I’ve heard a lot of good stuff about the one at my local college. Might be worth checking out.
Great job ! I want to try this myself, but have no tools and am horrible at making things. :/
Hey, never too late to start learning. Where do you live? Have you tried finding a resource that does classes in carpentry or other skills you might want to achieve?
Not everyone has access to a Techshop (yet) but there are makers everywhere and a surprising percentage of people with skills are willing to teach them to others. 🙂