


The Zoidberg Project, Part 9: All About Molding
To be honest, I have been kind-of putting off creating the final mold for the Zoidberg project. It's probably a little bit out of fear that I'll get it wrong; once the sculpt is molded, there's very little I can do to change it. But, I'm finally doing it this week.
To be honest, I have been kind-of putting off creating the final mold for the Zoidberg project. It’s probably a little bit out of fear that I’ll get it wrong; once the sculpt is molded, there’s very little I can do to change it. But, I’m finally doing it this week.
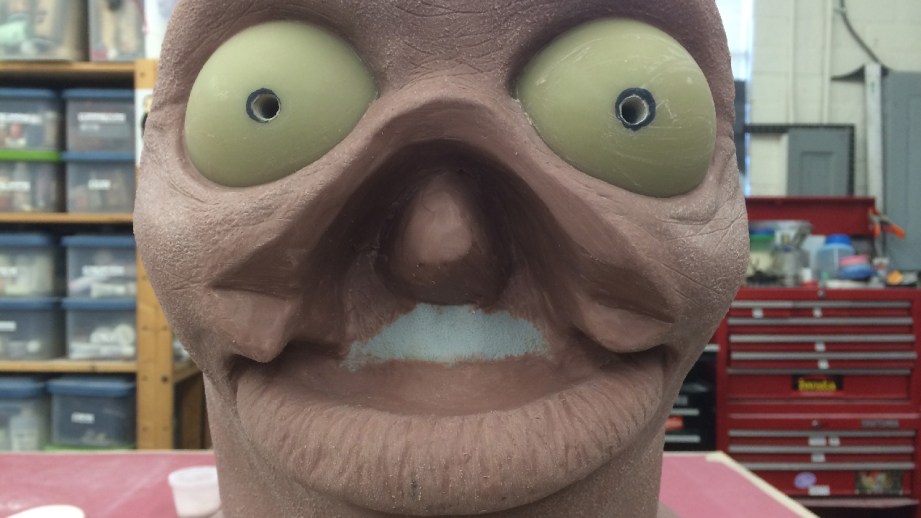
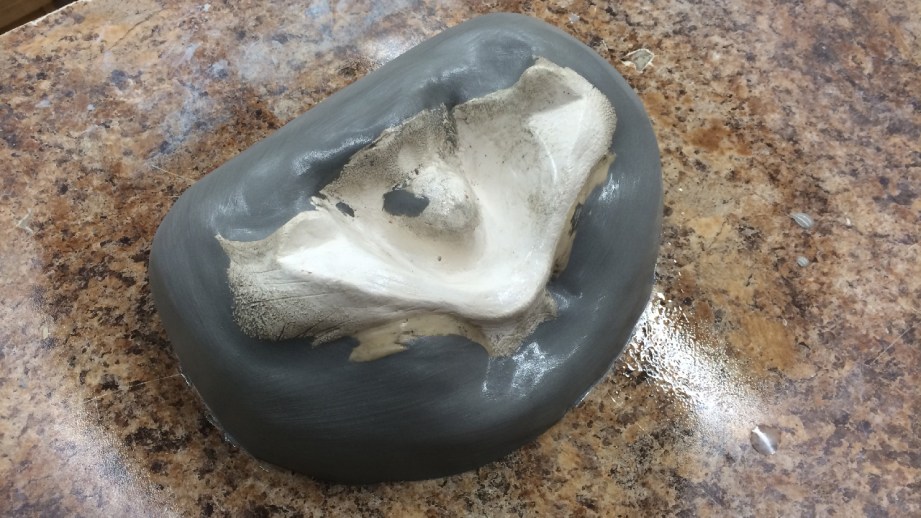
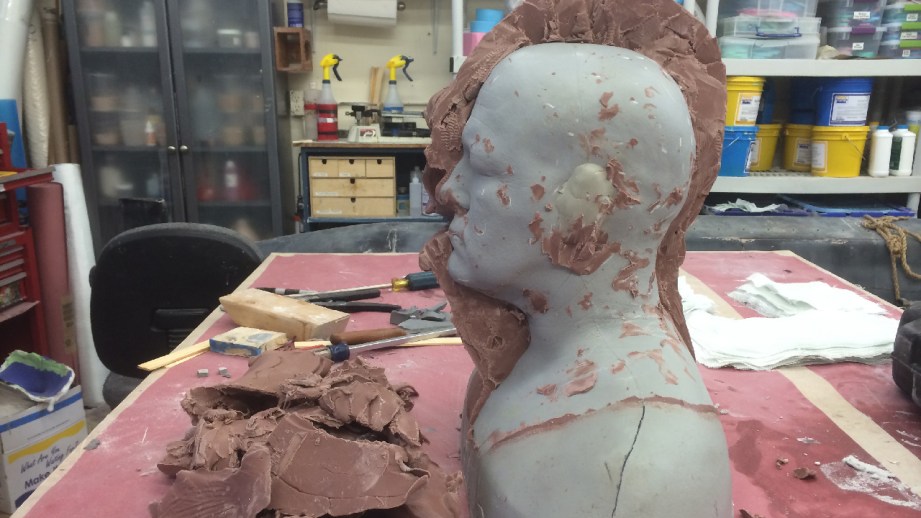
Molding the Zoidberg head with his tentacles attached would not be the best way to do it. There is too much detail on the inside of the mouth that is unfinished. I would never get the clay out of the long tendrils, it would be tricky to core out the tentacles for the animatronics to fit in, and would be a pain in the neck to cast up in foam latex–just to name a few possible issues. So the first thing I need to do is cut his upper mouth off so I can mold the head in two separate pieces.
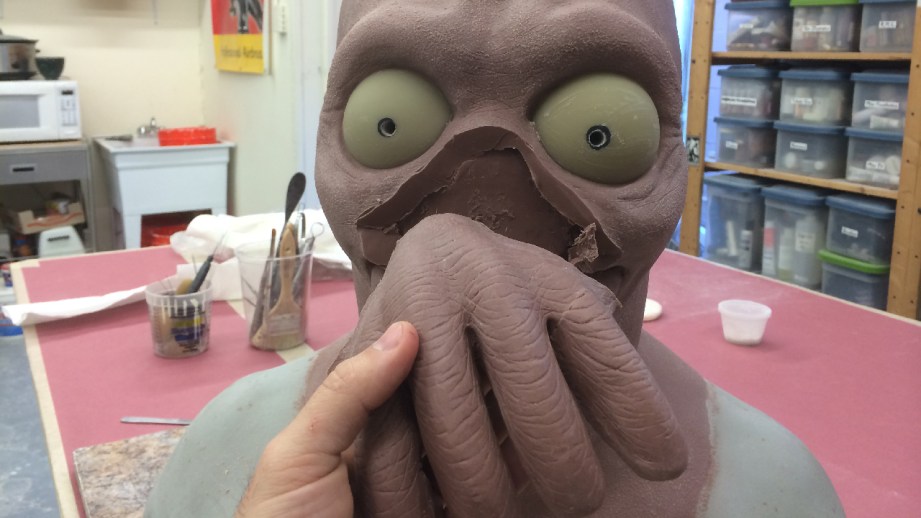
I’m going to be as delicate as possible and try not to disturb any of the major forms. Once the upper mouth is fully removed, I want to clean up the spot where the two pieces of the sculpture would meet up. Kind of like making a blending edge on a prosthetic appliance. This will help when the final tentacle part is reattached.
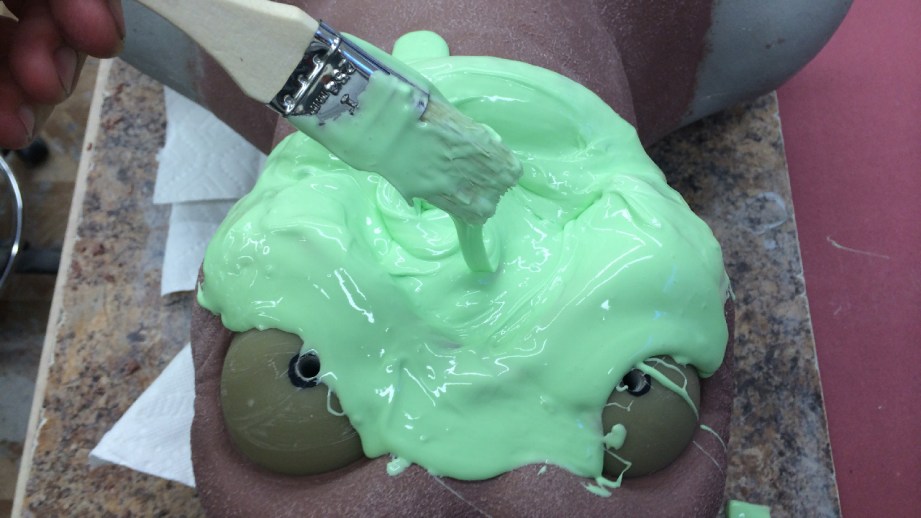
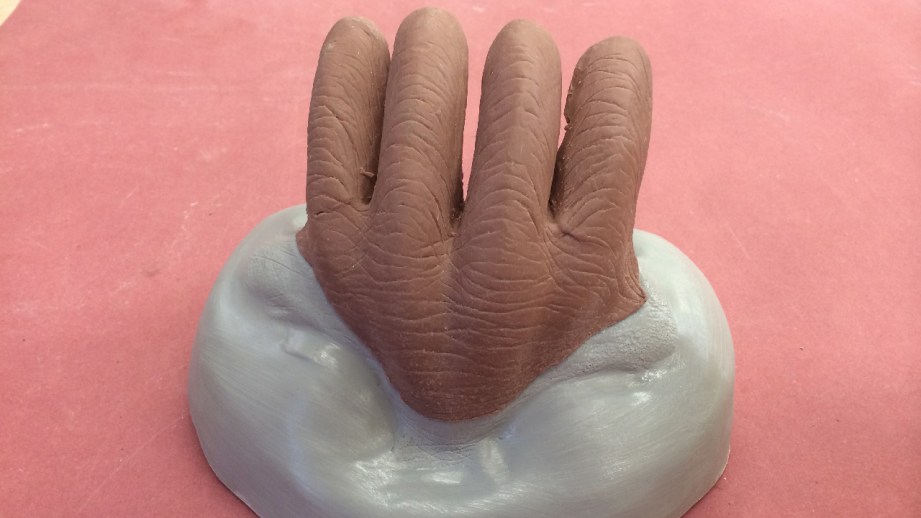
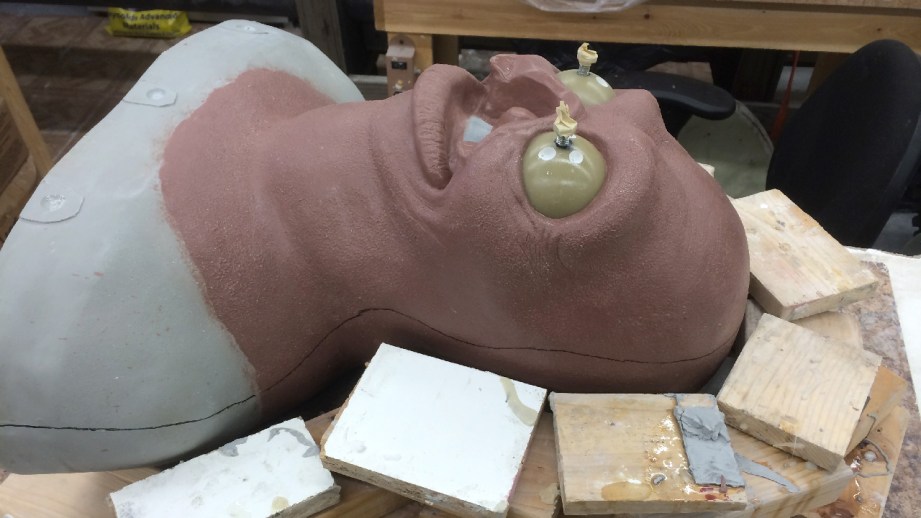
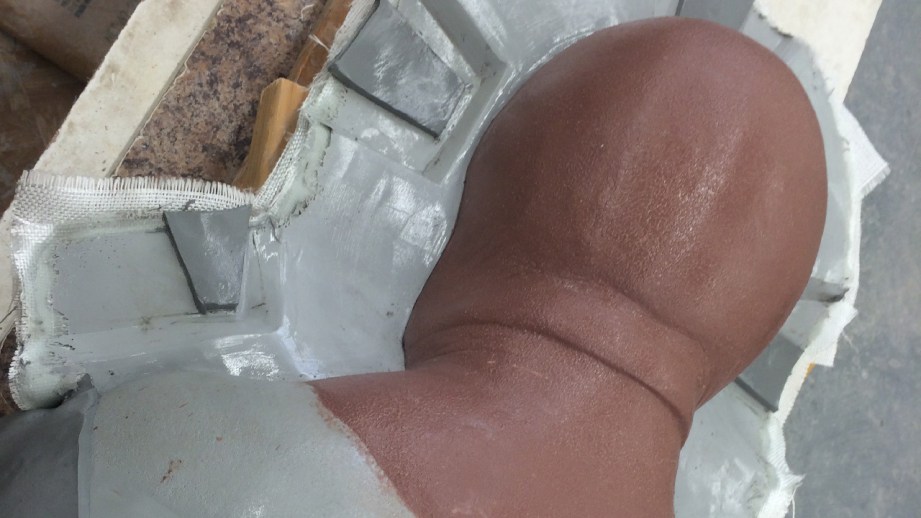
Once this is all cleaned up, I use some Body Double SILK silicone to mold the area of the face where the tentacles will attached. This will give me an accurate reproduction of that area to sculpt the tentacles onto. To do this, I just mix up a small batch of the silicone and carefully brush it onto the sculpture, being careful so I don’t scratch up the surface. I’ll apply two coats of this silicone, then I’ll take some plaster bandages and carefully lay them up to make a rigid shell. This will keep the silicone in the correct shape after I take the mold off.
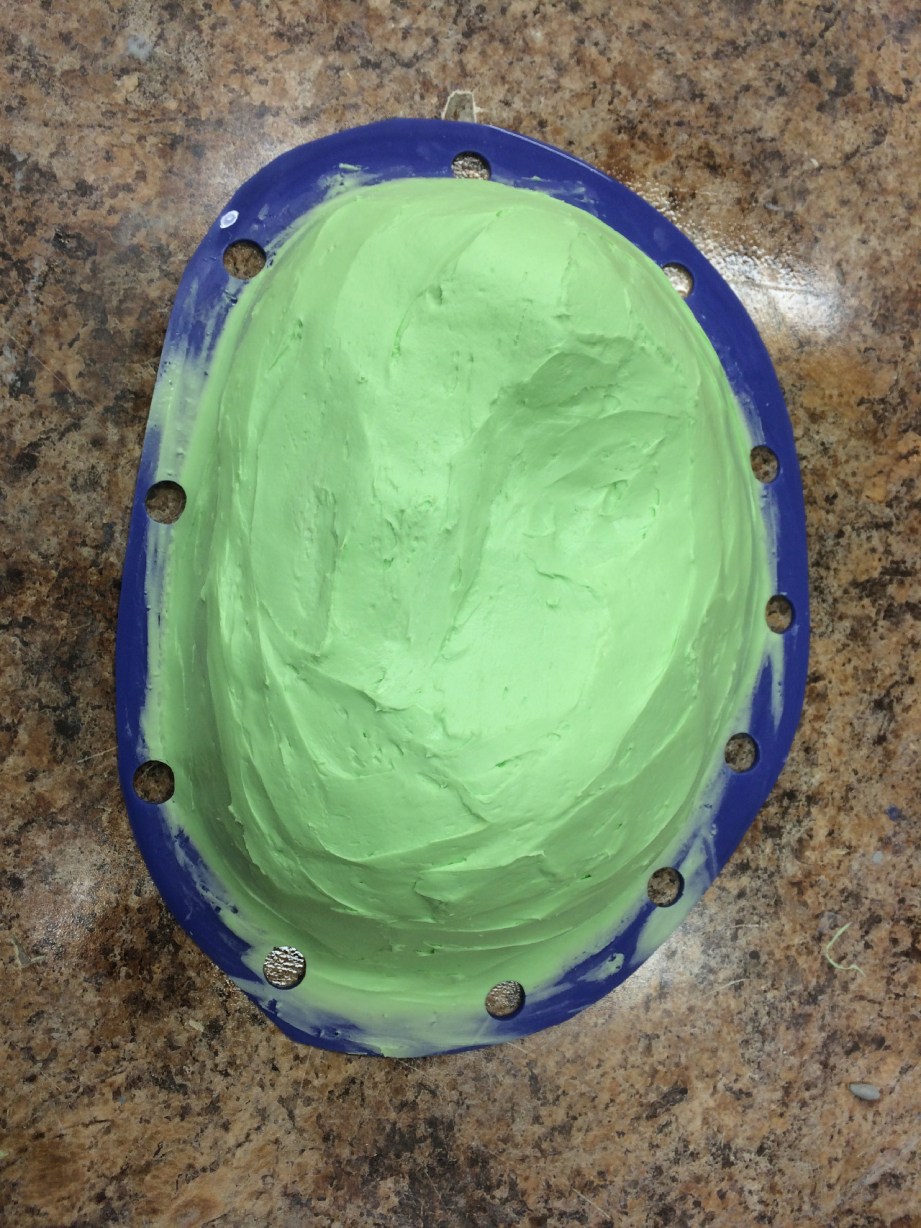
Next, I need to take the Body Double SILK mold and fill it with some hydrocal gypsum to make a fast positive of the mouth area (the silicone mold was a negative impression) so that the removed tentacle section can be blended off on to. At first the whole negative-positive terminology might be a little tricky to grasp, but if you just remember that the negative is a void, and that the positive is an addition of space it can be easier to understand.
I want to add a little bit of extra land onto this positive so that it can be clamped or bolted closed. ‘Land’ is a term for the extra space outside of the area that you are using on the mold. In this case you can probably also consider it a flange.
Now, I know that these tentacles will be a two-part mold, so I want to make sure that the positive is laid out correctly to make all the parts fit together easily. I also know that I will be adding some sort of core inside this section to create a space for the animatronics. In addition, I want the pieces to all bolt together easily.
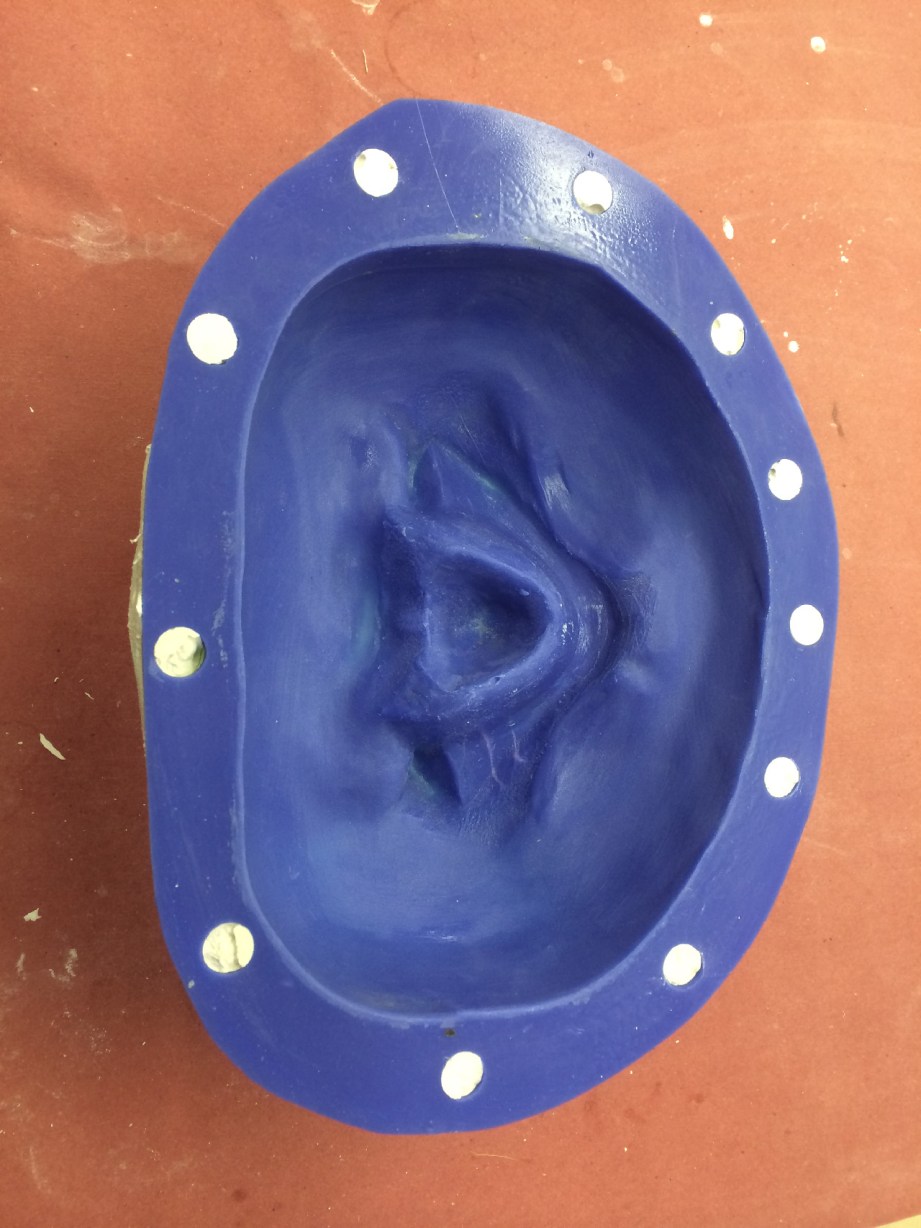
Once I have the material added in water clay (EM-210) I’ll make another mold of this, in regular Body Double silicone. The reason I used the Body Double SILK on the first part is that it has extra ingredients in it that allow it to release from skin better, and I figured that it would release from the sculpture better and minimize any damage and cleanup. Since this mold is less fragile, I’ll use the regular Body Double. Just like with a lifecast, I’ll apply two layers and then back it with plaster bandages. Except this time I ran out of standard body double, and did my second coat with some left over body double silk.
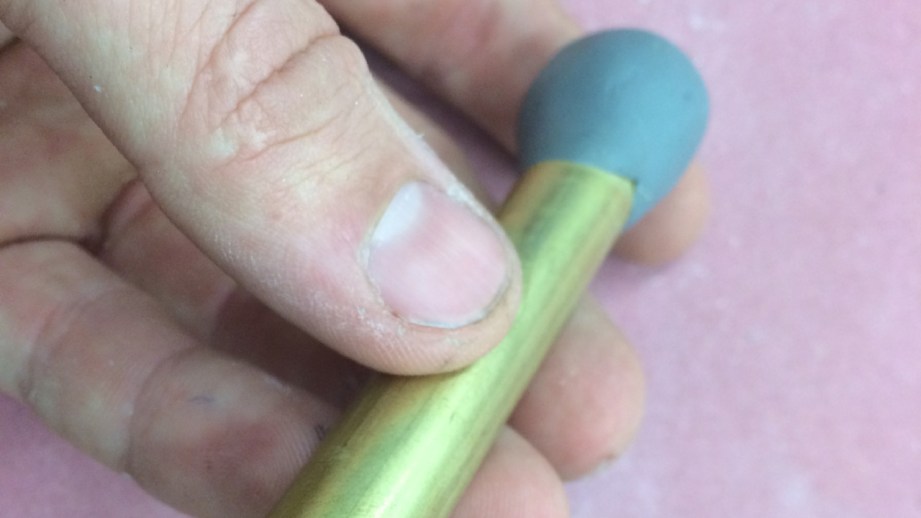
When I make little brush-up molds like this, I leave the run off on the table and trim it back to a sort-of flange, then cut little holes in it to register into the bandage jacket with a little tool that I made out of some brass stock, and a little plumber’s epoxy on the back side to create a handle.
Then I want to clean it out and cast up an epoxy positive, exactly the same way I did the epoxy positive of the head. Two layers of EpoxAcote GREY, two layers of 10 oz cloth with EpoxAmite 102 MEDIUM. Next, some Free Form AIR epoxy dough and then two more layers of cloth with EpoxAmite.
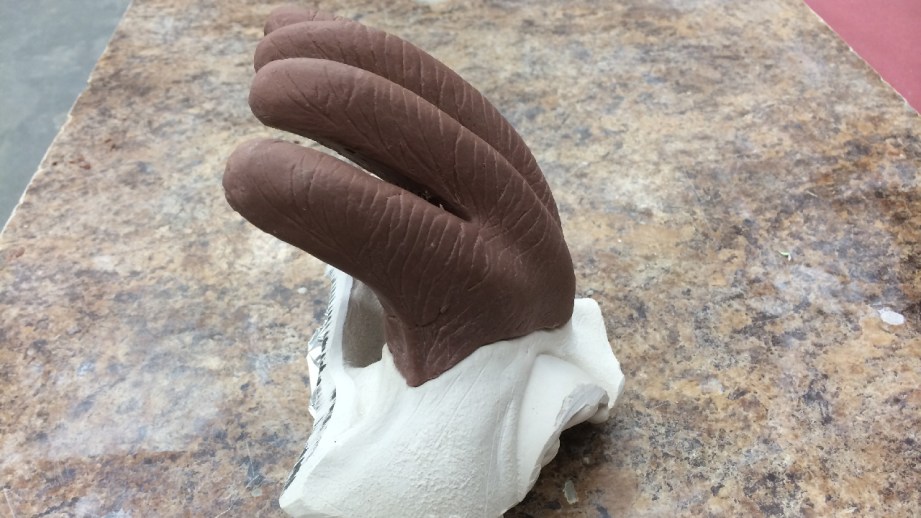
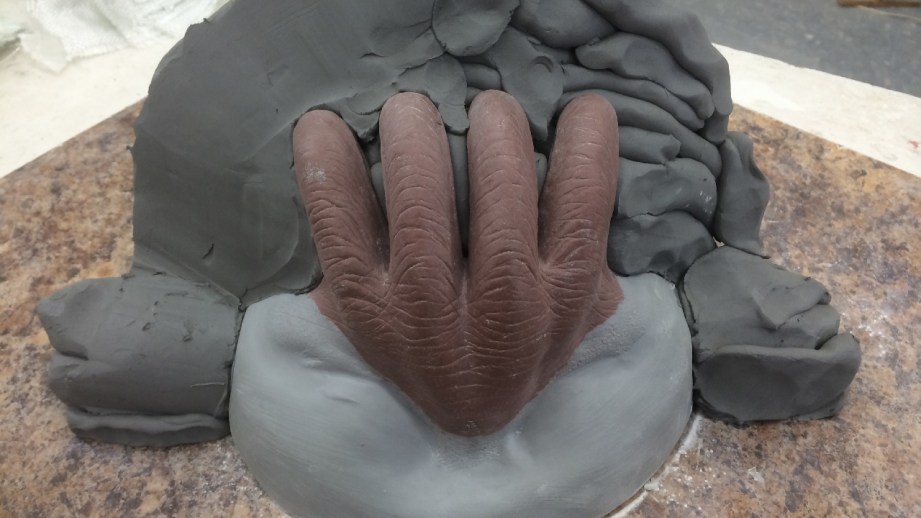
Now that I have this all made, I can place the clay onto this epoxy positive and clean up the sculpture. I can repair any damage and sculpt the edges to blend onto the rest of the head.
I also want to straighten out the tentacles and spread them apart a bit more. This will help with molding and make it easier for me to clean up all the detail.
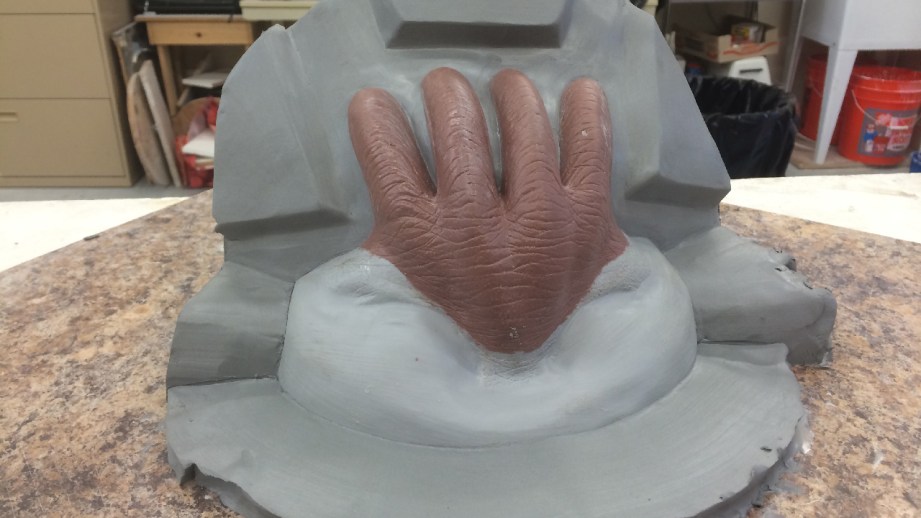
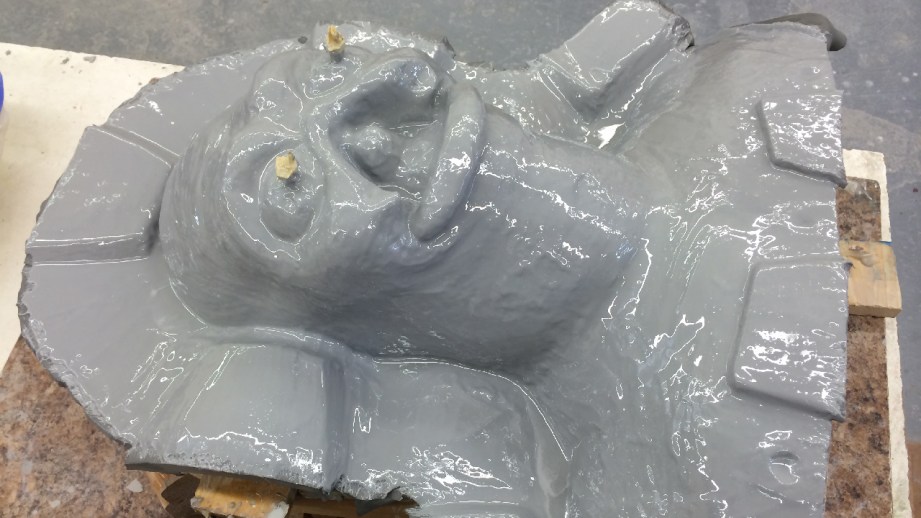
With the sculpture cleaned up, I can finally get to molding it. I’ll spray a couple coats of Crystal Clear acrylic spray onto the clay as a sealer, then mark my dividing wall. This mark works as a target when making the wall out of clay.
Without a mark, it’s easy to get off track and not place the wall in your desired spot. I’ll use water clay for this (EM210) just like I have done on the arms before. Once the clay wall is up, a few more coats of Crystal Clear acrylic, and a few heavy coats of Ease release 200…then back to the same ‘ol epoxy workflow. Two layers of EpoxAcote GREY, then five layers of 10 oz glass cloth laminated with Epoxamite 102 resin. You don’t always need to put in the dough layer on the flange, it just helps with rigidity and accuracy. For this little mold, I don’t think it’s necessary. When this is set the next morning, I gently remove the clay wall, and clean up the clay residue with some water in a spray bottle and a soft brush. I’ll add a couple of pry points, to make the mold easier to open, and repeat the whole epoxy process again.
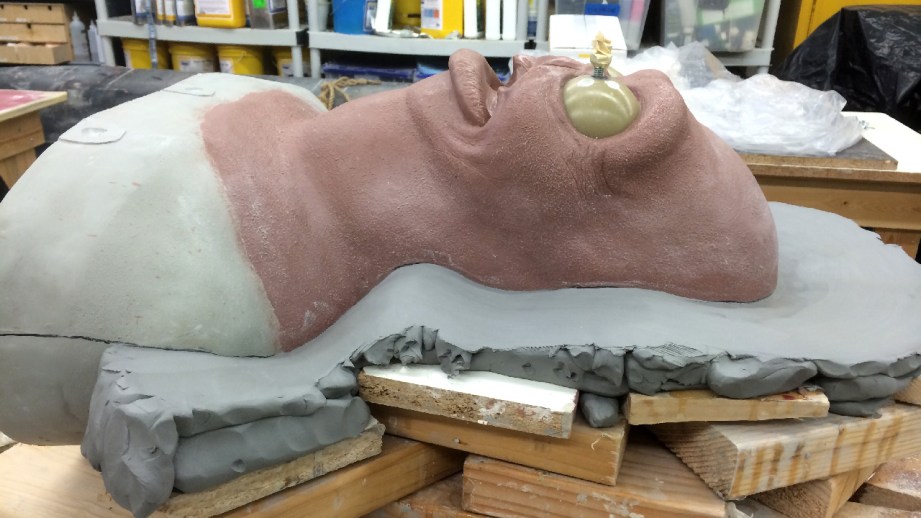
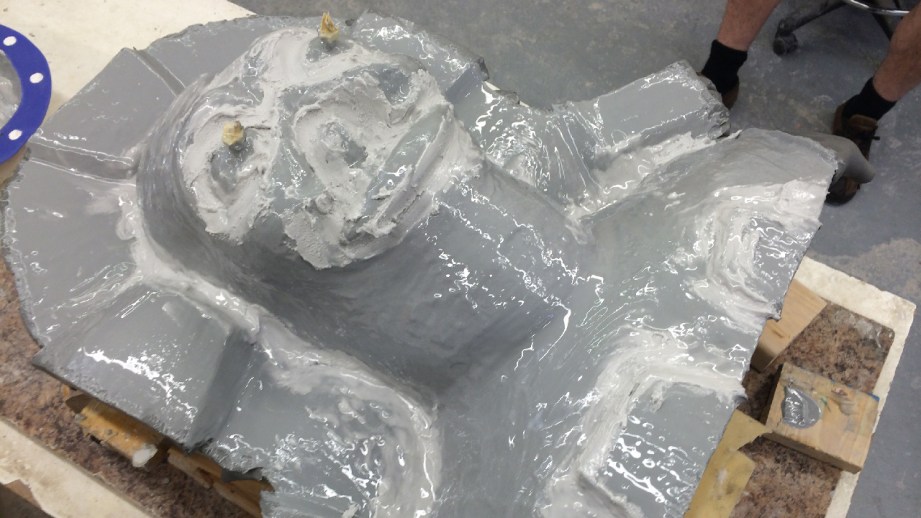
Molding the head will be the same process, only scaled up. I apply a few coats of crystal coat for sealer and mark the dividing wall. I want to lay down the sculpture for this part, it will just make it easier to lay up if it’s laying down. I have a few scraps of foam laying around that I’ll use to cushion the sculpture when I lay it down. Then I have a bunch of scrap pieces of wood that I’ll place around the sculpture to create a sort of scaffolding just a little shy of the parting line. Then I can bridge those pieces of wood with a bit of plaster bandage and lay water clay on it to make the parting line.
Usually when I do these clay walls, it’s a few steps to get it all nice and smooth. I start roughly putting in the clay, sometimes in slabs, sometime in wads that I just form in my hands. Then I take any number of spatulas or serrated scrapers to even out the surface, not worrying about the edge closest to the sculpture yet. This gives me a good general surface to work with.
I take a small spatula and clean up the part closest to the sculpture, again not necessarily worrying about the tiniest bit up close to the sculpture–this pass is mostly to refine the line of the wall, and make sure it comes right up the line that I marked.
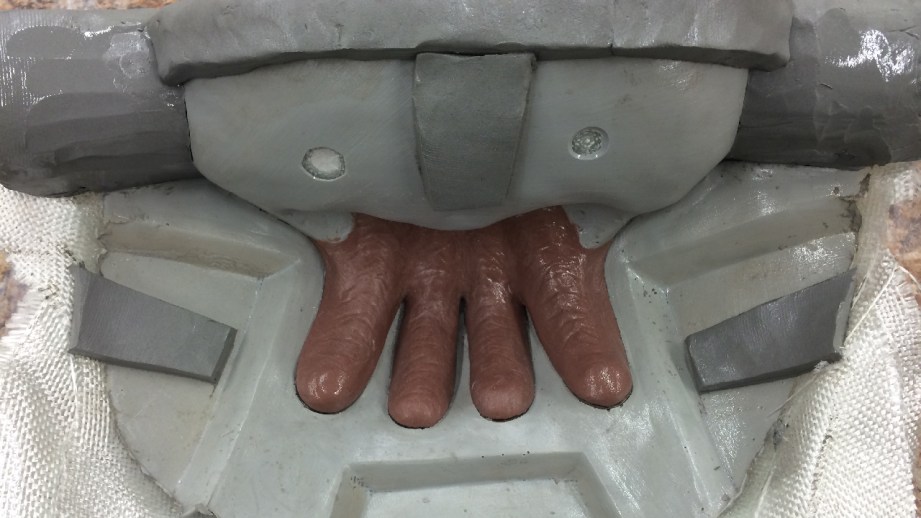
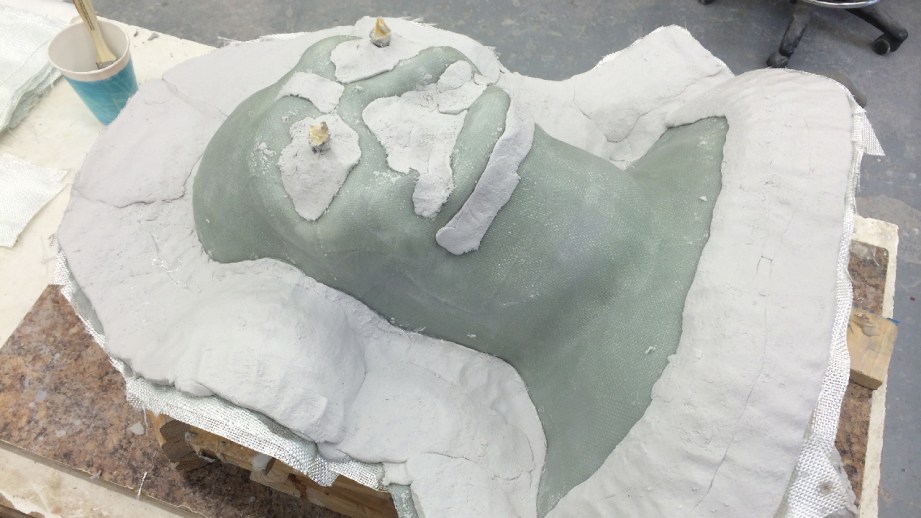
Once a pass is done, I’ll take a rubber-tipped tool and a little water and run that up against the sculpture to get the finished parting line. If used gently, the rubber tool won’t nick up the sculpture. To finish the wall off, I’ll sometimes take a makeup sponge and some water and wipe it down. Then using my clay cutting board, I’ll cut some slabs of clay and make some registration keys. I prefer big trapezoidal keys for this kind of mold.
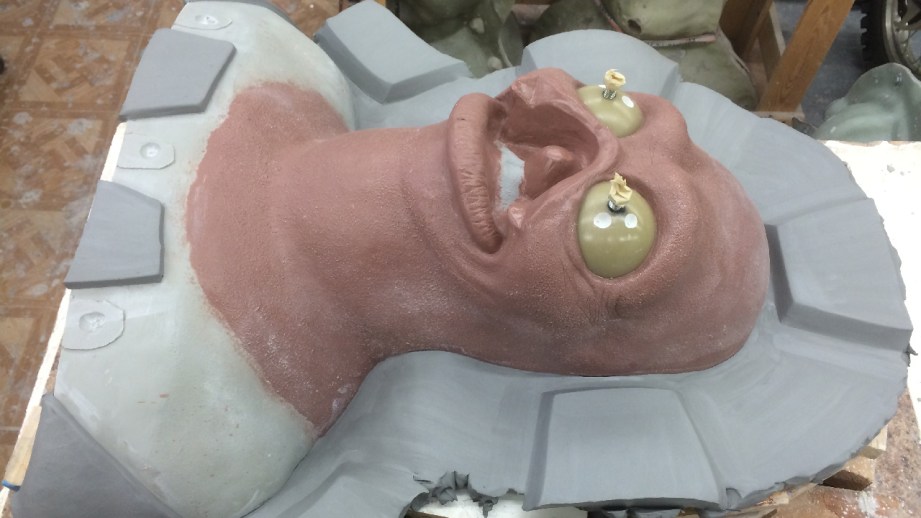
Topping it all off with a few coats of crystal clear to seal it and a few heavy coats of Ease Release 200.
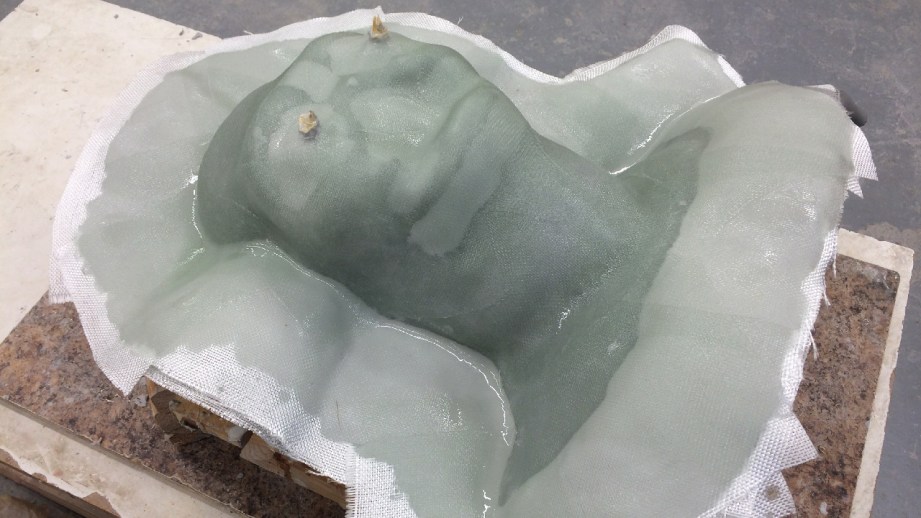
Now, back to the tried and true steps of epoxy. I’ll start with a batch of epoxacote grey. It’s a 100-15 ratio, and I’m doing a 500g batch. That means I’m going to use 75 grams of catalyst. Epoxy is like any other material: it works best when mixed in the proper ratios. I don’t recommend adding more catalyst to speed up the process, as too much catalyst will change its dimensional properties (eg. it may shrink more) or heat up too much, or not cure correctly.
I like to use an air hose to blow the surface coat around as I brush it into the details. I also sometimes use a hair dryer as well. The small amount of heat will drop the viscosity and help get rid of small air bubbles or voids where the surface coat didn’t get into the detail. You have to be careful, because with clay like Monster Clay, a small amount of heat could soften the surface and mess up the detail of the sculpture.
This layer will sit for about 45 minutes, or until when you touch it, it will be slightly tacky but not stick to your finger or pull away. Then it’s safe to do another layer and wait another 45 minutes. During this dow time I like to prep my glass cloth and dough for the rest of the mold.
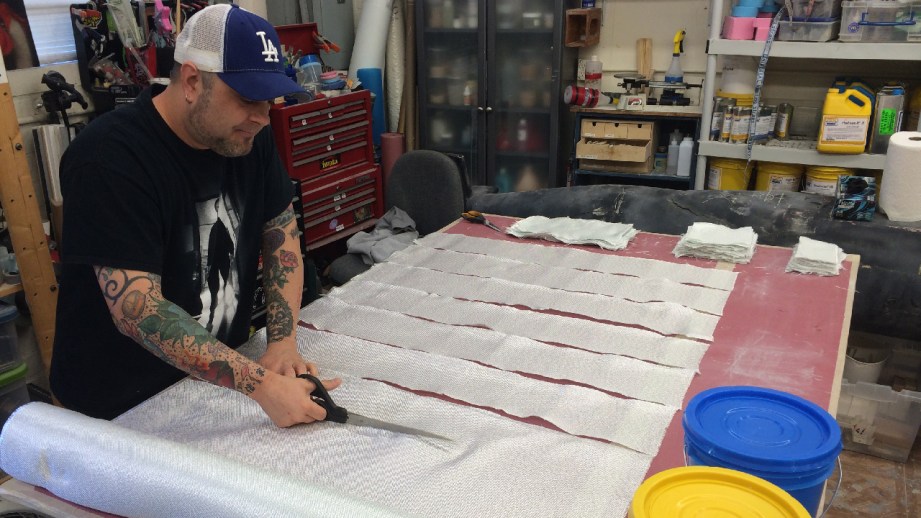
When using glass cloth, it’s better to use the largest pieces that you can. For this kind of mold, I usually prep out three sizes of cloth. Small (3 x 6) strips to work into detail and compound curves, 6 x 6 squares, long 12 x 6 strips for the flange layers. I’ll use a bit of freefrom air in the next step, so I will pull out a golf ball-size of the A part and the same of B part, and set them aside. For the flange, I’m going to only use a thin layer of Dough, so I’ll pull out a couple softball size portions of a and b, and set them aside also.
One of my favorite things about epoxamite is that is comes in containers that you can get metered pumps for. This means that one full push of A and B will be the correct volumetric ratio to work with. I have noticed that the pumps can sometimes be a little lean on catylist, and I don’t know if that’s my error or not, but I like to always use three or more pumps of material, that way any inconsistency of catalyst will be a smaller overall percentage. If I ever need to do smaller batches, I like to weigh them out because of this.
I time all of this prep to be done when the second layer of surface coat is to the tacky phase.
Now comes a bit of timing. I mix the two golfball-size portions of freefrom air, and set them aside, then I’ll take a four pump batch of resin and coat the whole thing. Using the small portions of dough, I’ll fill in any sharp corners or deep detail. My goal isn’t to use much of the doing, but only just enough to help the glass cloth transition any sharp changes in direction, and tiny corners. The dough has little compressive strength, I only really want to use it for sandwich construction between layers of glass. But it comes in handy for small things to fill a bit.
Once this is put in and smoothed out, I can start laying my glass. For the first two layers I’m not too worried about size or direction of the glass, only that it’s getting two even layers of coverage. Once I have these two done, I’ll mix the softball-size portions of dough by kneading it out on a sheet of freezer paper or wax paper that I have taped to the table. I’ll leave it smushed out into a thin section while I’m working with it because in a large mass,, it will heat up and kick off quicker.
I like to pinch off handfuls and press them between my hands to get close to the desired thickness, then lay it onto the flange. I only want about 1/4-3/8″. I don’t think I need more for this kind of mold, and how I’m going to be using it. When I do molds that have longer production runs, I’ll make the flange 3/8-1/2″ it just helps with handling and rigidity when you are running molds often.
As I press sections in, I take care not to trap air under, or I between new material. sometimes taking a tongue depressor or paint stuck and pressing it flat into the dough to pack it down.Once this is done all along the flange and a strip at the base of the torso, I’ll go ahead with my last two layers of glass. Make sure to we’d down the dough with some a resin batch, as it will help with taping the glass and with adhesion. Again. I try and use the largest pieces of cloth, and alter the direction of the weave and where they overlap. It helps make the layers stronger to vary these things.
Once two layers are done, I can let it sit overnight. First up the next day is to carefully flip the mold. I don’t want any of the wood blocks to ding the yet to be molded side of the sculpture. After cleaning off the water clay like before, I’ll add some small pieces of clay for pry- points to aid in opening the mold, and do the whole process over again. Crystal clear, Ease Release 200, two layers of epoxacote, two layers of glass, a bit of Dough on the flange, and two more layers of glass.
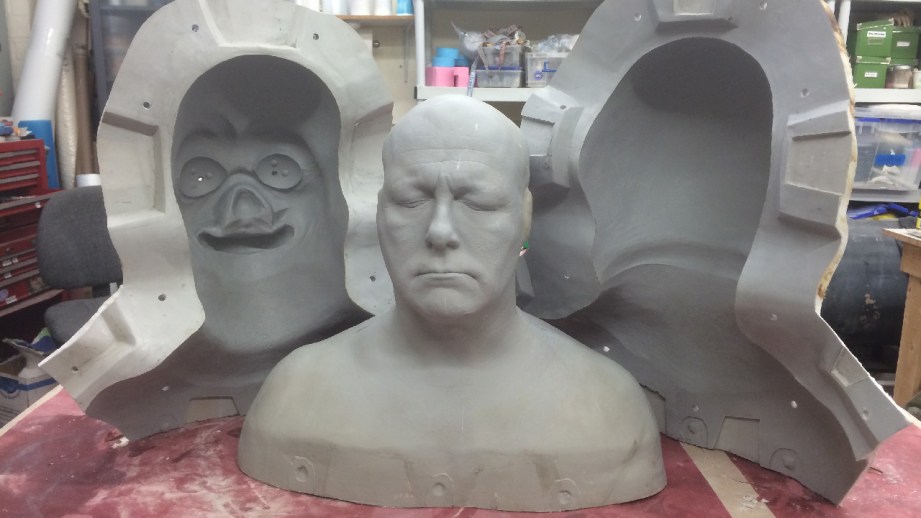
Now all that’s left is to trim these molds, crack them open and clean them out.
I like to use a reciprocating saw with a general purpose 8/12 TPI blade to trim my molds. Any fewer teeth and it gets chewed up, and more teeth, and it takes forever or burns up the blade. Because I made the clay wall about 3″ wide, I know I can trim off the last 1″ of the wall without getting too close to the sculpture. Once they’re all trimmed up, I’ll pull out a couple of large screwdriver or pry bars and slowly work my way around the mold and pry with slow even pressure. You don’t want to force a mold open, as it might crack.
The next step it to order a pizza and crack open some beers while you bribe your friends to help clean out the molds. Sometimes this takes forever, because you have to get it out of all the little nooks and you can really only use wooden tools. I try and avoid using anything metal, as it can scratch the the plastic surface of the mold. With monster clay, you can warm it up a bit to soften it, but I generally avoid using heat to aid in removing the clay. If you try and melt it out, it will just leave a layer of molten clay stuck on the surface of the mold that you will have to scrub out with solvent later. Which brings us to the next step. After you get as much as possible out, you need to use a little solvent to clean the small amounts of residue. For Monster Clay, Naphtha seems to work best.
Phew. Now the main molds are done. Next time, we will deal with adding t-nuts, making some core-inserts for the animatronics, and running the foam latex skins! We’re getting close!
Thanks to Iwata-Medea and Smooth-On for providing materials and sponsoring this project.


14 thoughts on “The Zoidberg Project, Part 9: All About Molding”
Leave a Reply

One Day Builds
Adam Savage’s One Day Builds: Life-Size Velocirapt…
Adam embarks on one of his most ambitious builds yet: fulfil…

Show And Tell
Adam Savage’s King George Costume!
Adam recently completed a build of the royal St. Edwards cro…

All Eyes On Perserverance – This is Only a Test 58…
We get excited for the Perserverance rover Mars landing happening later today in this week's episode. Jeremy finally watches In and Of Itself, we get hyped for The Last of Us casting, and try to deciper the new Chevy Bolt announcements. Plus, Kishore gets a Pelaton and we wrack our brains around reverse engineering the source code to GTA …

One Day Builds
Mandalorian Blaster Prop Replica Kit Assembly!
Adam and Norm assemble a beautifully machined replica prop k…
House of MCU – This is Only a Test 586 – 2/11/21
The gang gets together to recap their favorite bits from this past weekend's Superb Owl, including the new camera tech used for the broadcast and the best chicken wing recipes. Kishore shares tips for streamlining your streaming services, and Will guests this week to dive into the mind-bending implications of the latest WandaVision episod…

One Day Builds
Adam Savage’s One Day Builds: Royal Crown of Engla…
One of the ways Adam has been getting through lockdown has b…

Making
Adam Savage Tests the AIR Active Filtration Helmet…
Adam unboxes and performs a quick test of this novel new hel…

Making
Weta Workshop’s 3D-Printed Giant Eyeballs!
When Adam visited Weta Workshop early last year, he stopped …

One Day Builds
Adam Savage’s One Day Builds: Wire Storage Solutio…
Adam tackles a shop shelf build that he's been putting off f…

Show And Tell
Mechanical Dragonfly Automata Kit Build and Review
Time for a model kit build! This steampunk-inspired mechanic…
Grodd help me, I can never un-see those first two photos.
The mask blocking the nose off may make the wearer talk like Zoidberg regardless of what they sound like normally. To me this is a benefit.
Frank, It seem like it’s a mistake to destroy the master sculpt before making a cast. Couldn’t you have made a cast of the head and used that as the core? That way, if the mold turns our wrong, for whatever reason, you don’t have to start from scratch.
It’s actually quite common for a master sculpt to be destroyed in the process of demolding, especially when you’re working with clay over a rigid life casting. And a lot of times, that’s not even the fault of the sculptor – the clay will just lift right off of the life cast/support structure because the mold rubber will have such a good grip on it.
^^^^^^^^^
LMAO!!!
Lol awesome! First thing I think is man the mask looks creepy without the tentacles on, and then see all the comments talking about that very thing 🙂
Having said that…this project is turning out sweet! Can’t wait to see it all finished
I’m not following what you’re getting at. Molds like this almost always ruin the sculpture. There are ways to make a mold of something without totally destroying it, but this is the kind of mold that I want for the process. And no need to make something more complicated or expensive if it doesn’t need to be.
it only looks like that right now. That part around the nose will be trimmed back in the foam latex copy. It’s just clayed up to remove undercuts.
HAHAHAHAHAHAHAHAHAHAHAHAHAHAHAHAHAHAHAHAHAHAHAHAHAHAHAHAHAHAHAHAHAHAHAHAHAHAHAHAHAHAHAHAHAHAHAHAHAHAHAHAHAHAHAHAHAHAHAHAHAHAHAHAHAHAHAHAHAHAHAHA
Frank,
I have a manufacturing and scale modeling background where the last thing you want to do is destroy the pattern. I’m used to requiring parts I the hundreds or being able to create a new mold fairly quickly if mistakes show up. That’s what was throwing me off. I’m just learning how things work in SFX and losing all that work seemed to me to be rather risky if the mold had air pocket or something. Admittedly you are only pulling a small number of casts and you could if necessary make resin rotocast to make another mold if you had too. I have to guess that you rely on your judgement as to which path you take. With this mold, I don’t think that Tested is going to want a big pile of Zoidberg heads to wear at Comicon, so taking the extra time to make sure the sculpt is saved doesn’t pay off.
So… you basically made a small flash mold for the tentacles to be molded off of, and they will realign afterwards. Are there any tips or tricks you implement when building up your dividing wall to keep from ruining the integrity of your sculpt? When working with WED clay and building up walls from water based clay, I can never get them to play nice and stop trying to stick to each other. I always assumed that the glycerin from the WED would prevent this- am I doing something wrong? Also- why is it so important to have your dividing line SO smooth?
This is looking so good, if anything maybe even slightly better than my polystyrene one! 😉
Great work Frank.
Earlier you mentioned using epoxacoat and then you said, “One of my favorite things about epoxamite”. To clarify, are you only use epoxacoat here? And the reference to epoxamite is a mistake?
Thanks
read above under his tool he made. “Two layers of EpoxAcote GREY, two layers of 10 oz cloth with EpoxAmite 102 MEDIUM. Next, some Free Form AIR epoxy dough and then two more layers of cloth with EpoxAmite.” Hope that helps 🙂