


How To Make Your Own Giant Papercraft Head
Our freaky giant paper heads were constructed using a combination of cool techniques and software: photogrammetry with PhotoScan, modeling in Maya, and papercrafting with Pepakura. Here's how you can make your own.
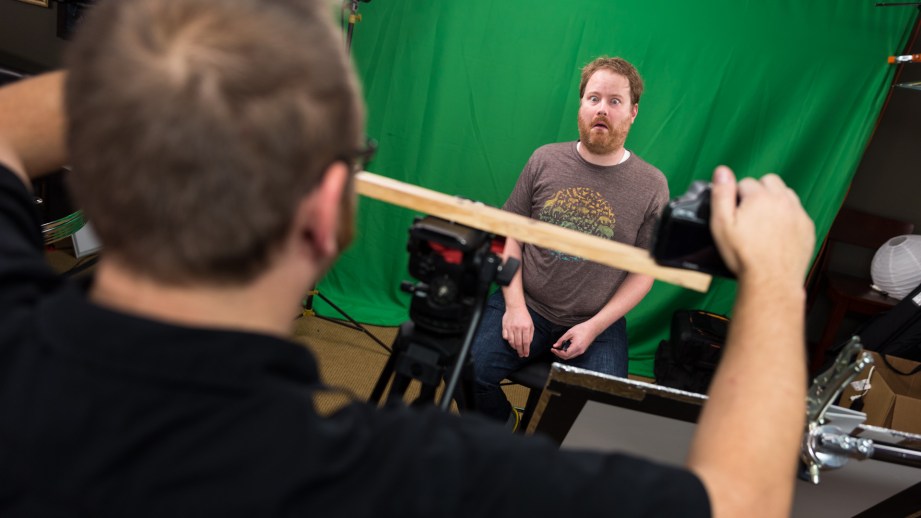
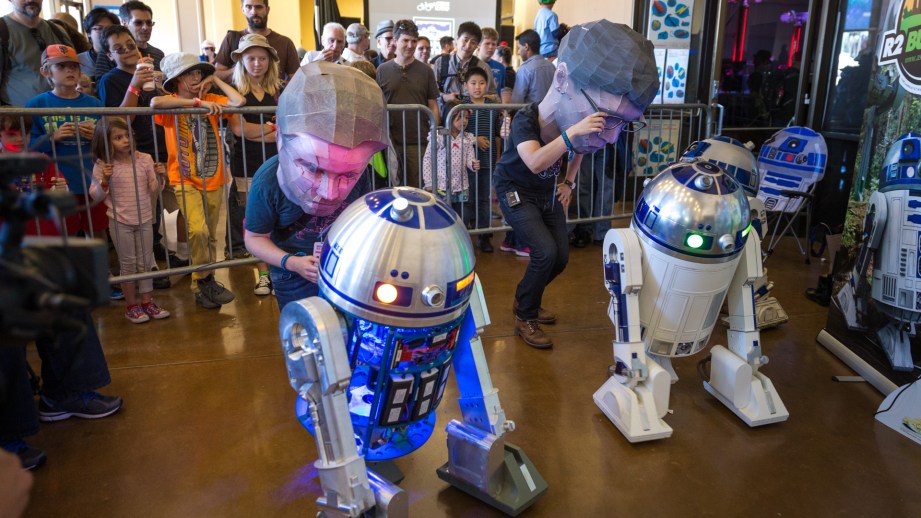
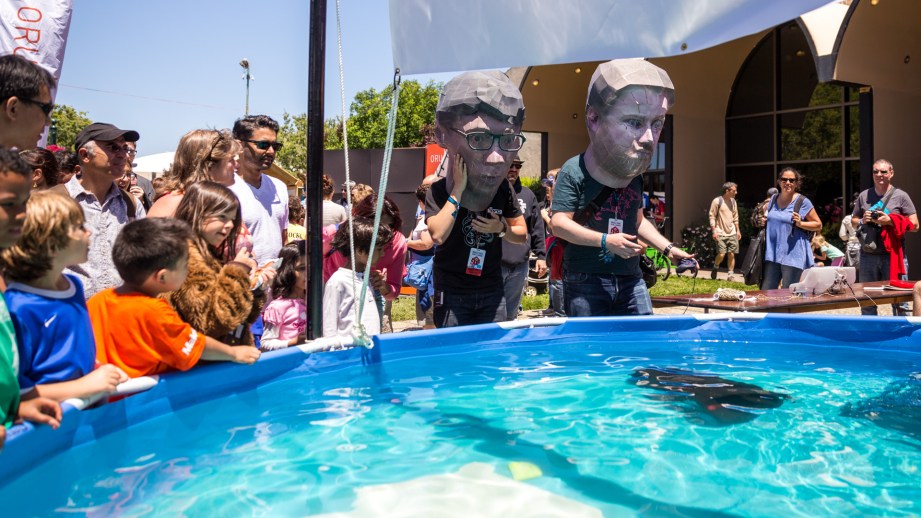
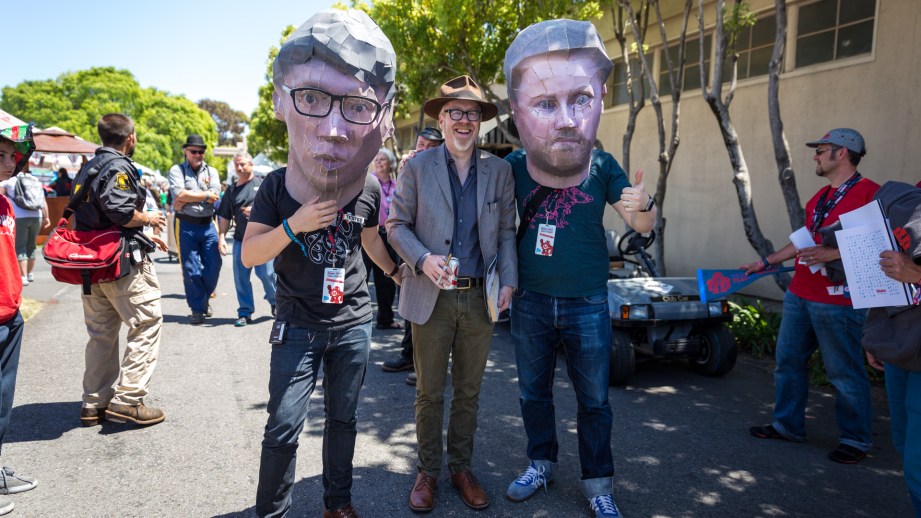
If you saw us at Maker Faire this year, you may have caught us bumbling about wearing big versions of our heads, giving high-fives and confusing children. A bunch of people we met asked what these masks were made of, and how we built them to look so much like our own heads. These paper heads were constructed using a combination of cool techniques and software: photogrammetry with PhotoScan, modeling in Maya, and papercrafting with Pepakura. The heads took about about two weeks to build from start to finish, including several long nights of paper cutting and gluing, right up until the morning of Maker Faire. They were laborious to make, but it’s technically a project that anyone can do without previous papercrafting experience. Of course, knowing what I know now about the process, I would’ve done several things differently to streamline the build. Having just a few more days of time for putting the heads together would’ve gone a long way to making them look so much better, but I think they still turned out great for the first attempt.

So for anyone who wants to build their own giant papercraft heads, I’m going recap the steps of the project from start to finish, guiding you with tips that I learned from time around. Photogrammetry expert Brandon Blizard, who did the modeling work on this project, also has some tips for how to image your visage for use in Pepakura. And for those with more experience with this kind of Pepakura papercrafting, please share your own tips in the comments below.
Step 1: Capture Your Head with Photogrammetry
The first thing we needed to do was get a digital copy of our heads. This could’ve been done a few different ways, ranging from a completely manual process to a fully-automated one. On one end, we could have sculpting a model from scratch in a CAD program like Maya or Sketchup, which requires 3D sculpting skills we didn’t have. This method also doesn’t give us an image texture for our faces. On the other end, we could have generated a computer model of our heads using a 3D imager, like a hand-held laser or optical scanner. 3D Systems makes one, but these tools are generally pretty expensive.
We went with a middle ground–somewhat automating the modeling with photogrammetry. That’s the process of generating a 3D model computed from the processing of numerous photographs, all taken around one subject from a multitude of angles. Photogrammetry apps like 123D Catch would’ve worked for our needs, but we invited Brandon to our office to take high-resolution photos using a DSLR rig to import into a piece of software called PhotoScan.
We’ve previously detailed the basics of Photogrammetry software and hardware along with some best practices for taking your photogrammetry pictures in these guides.
Step 2: Import Your Photos in PhotoScan
After taking the photos, Brandon imported them into PhotoScan software for processing into a 3D model. Some color correcting and RAW image processing may be needed before you can just dump the photos into PhotoScan, and once again we’ve detailed the step-by-step process in a previous project walkthrough.
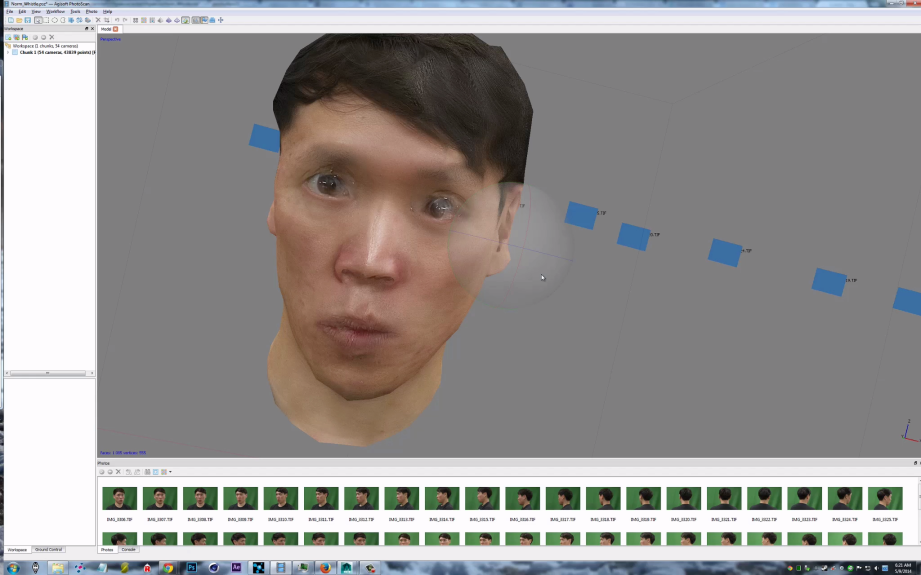
This is probably the most complicated part of the big heads project, though the model you create from PhotoScan doesn’t need to be as refined as something you would use for 3D printing or in animation. The PhotoScan model can be a little messy, since the next step is to basically rebuild that model with fewer polygons using a program like Maya. The model you want to give to Pepakura shouldn’t be more than few hundred polygons/meshes. The more “faces” of your model, the more complex the physical build is going to be. That’s not to say that you can’t put together a papercraft head with 2000 faces, but it’s going to be really difficult, with not much room for error. Fewer faces (~300) reduces the complexity of the papercrafting, and also produces a more authentic low-poly videogame look. Think PlayStation 1 game instead of PlayStation 4.
Step 3: Model Your Head in Maya
Says Brandon: “There are many ways to create a low polygon model that Pepakura Designer can read. I had I started off by taking a series of pictures of Norm and Will, and used a program called PhotoScan that can stitch the photos together into a 3D model. Since there were far to many faces in this mesh, I used Maya to create a low-polygon model, using the high-polygon model as a template. Simple reduce functions will work well, but I wanted a little more control over where the folds would be.”
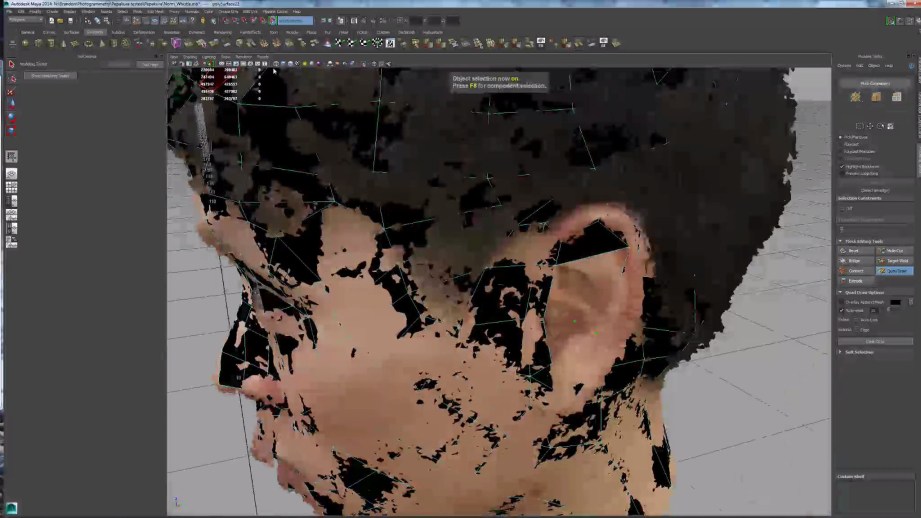
Basically, Brandon had to recreate our heads in Maya, one edge at a time. Some of this can be automated, but it does require 3D modeling experience. Blender can be used as a free alternative to Maya as well.
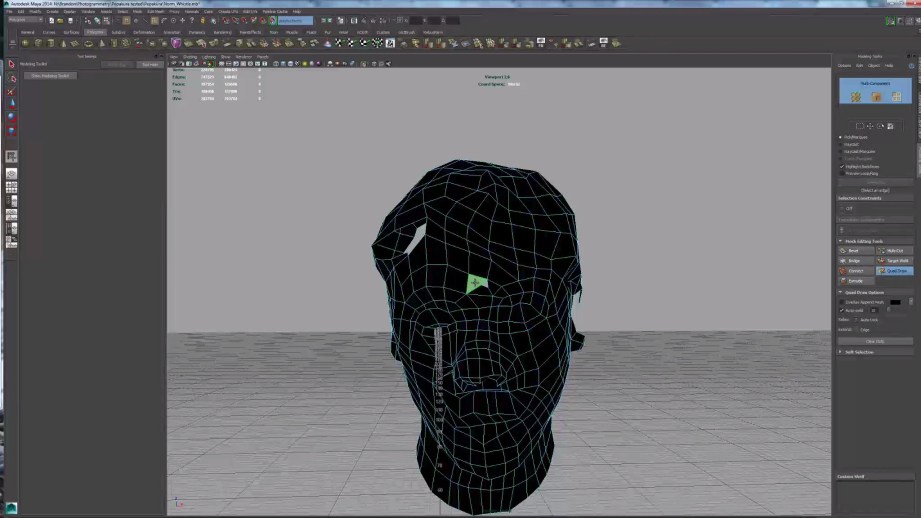
When modeling, keep in mind that every polygon you create is a separate piece that will have to be connected to the others around it when the papercraft is being assembled. The faces can be geometrically any shape–Brandon used three and four-sided faces for his modeling. In other examples I’ve seen, modeling only with triangles can give a better result to work with in Pepakura.
Also recognize that the most important features of your face are your eyes, nose, and mouth. Those are, unsurprisingly, the most complicated to model–every curve and bend you make will add to the complexity of the gluing later. Ears are also surprisingly complex, requiring many folds and bends. Next time, I would simplify the ears and keep their geometry simple, leaving the complexity only for the eyes, nose, and mouth.
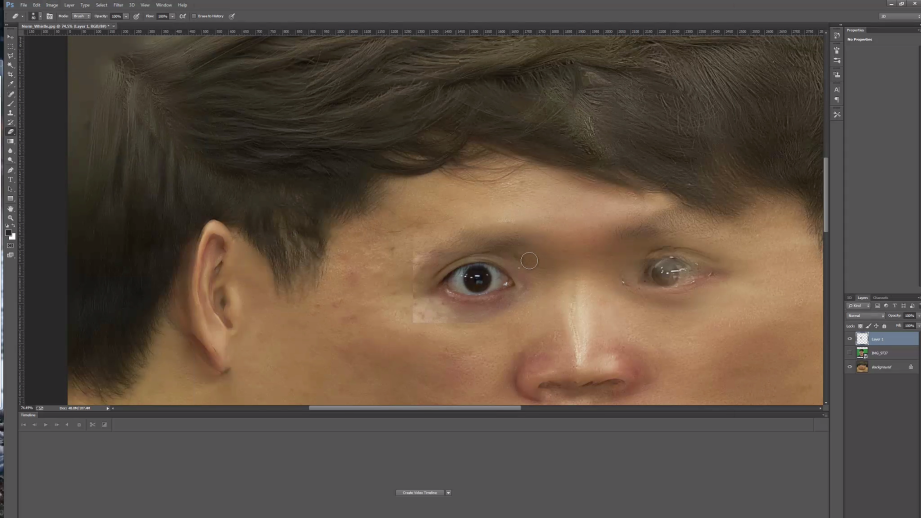
Step 4: Tweak Your Skin in Photoshop
Brandon: “After I created the Low-polygon versions, I needed to apply the photographs to color the models. PhotoScan has a great feature that lets you import a model that you have made in another program, and run the “build texture” command. That takes all the photographs and uses them to automatically build a texture image. Since Will and Norm moved around a just little during the photography session in between photos, their eyes were a bit blurry. I used pieces of the original photographs in Photoshop to clean up blurry features like the eyes and mouth.”
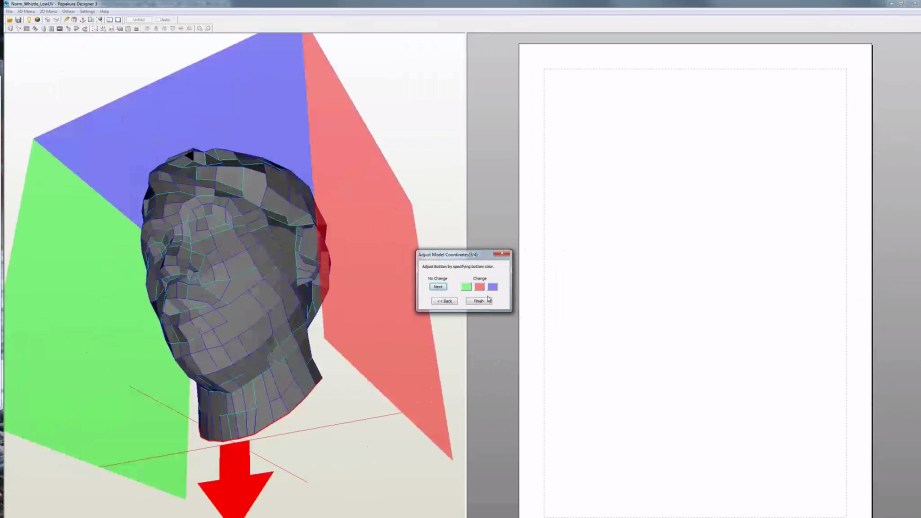
Step 5: Import Your Model into Pepakura
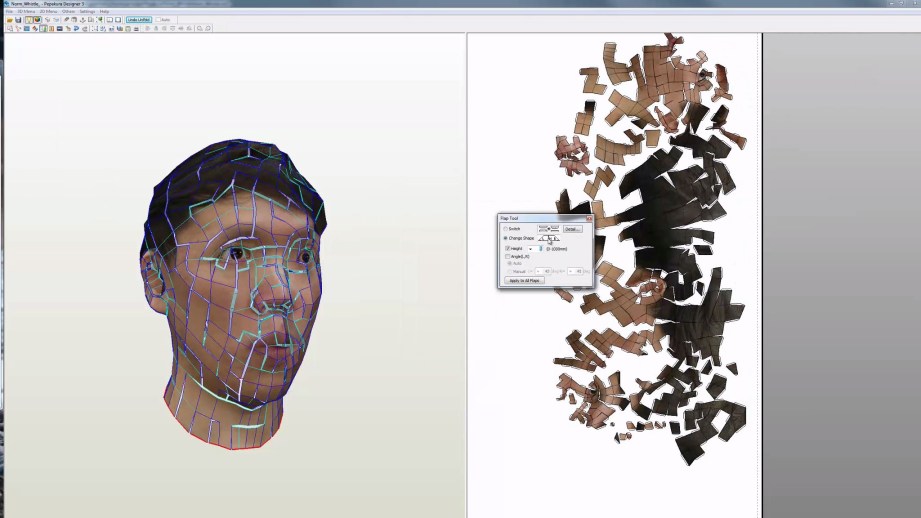
Brandon: “After creating both the model and texture, they were now ready to bring into Pepakura Designer. I scaled the heads in Maya so that they would be the desired size once in Pepakura. I then imported the model, oriented it right side up and brought in the texture file. The unfold procedure automatically splits up the model faces and lays them out on the 2D paper plane, as seen on the right side of the screen. Since Norm was using a really big printer, I could keep it almost all on one big piece.”
Pepakura will automatically create a small paper tab on one side of each seam, which is used for gluing the edges together. There are options in Pepakura to let you configure the size and shape of the tabs. You can also swap which edge of a seam a tab is on. This is handy when you need that extra few millimeters to fit a piece on a page.
Once your model is flattened on the 2D plane, you can manually cut edges to create new seams, weld them back together, move, and even rotate the pieces. Every piece you weld together is one fewer piece to cut and glue when you are putting the model together.
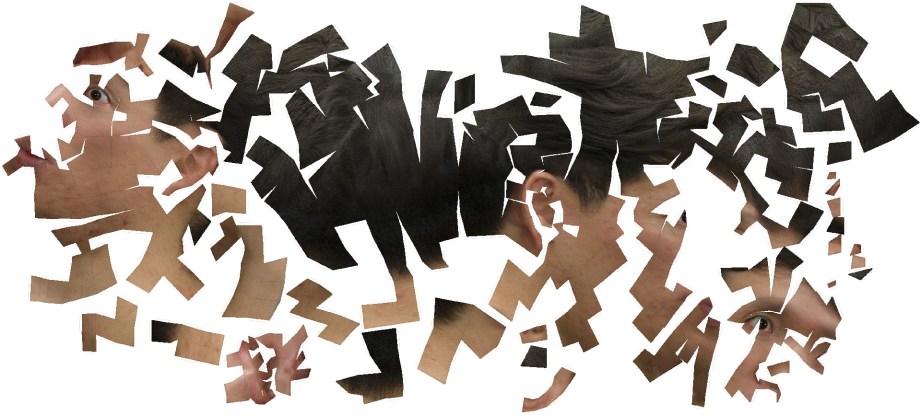
Brandon: “Try to preserve continuous strips, This will make for an easier time cutting and assembling. Will’s head had 419 faces, while Norm’s had a a bit more at 545 faces. Even though the difference in the numbers is small, each polygon is a bit of work, this can add up quickly to hours on a complex model.”
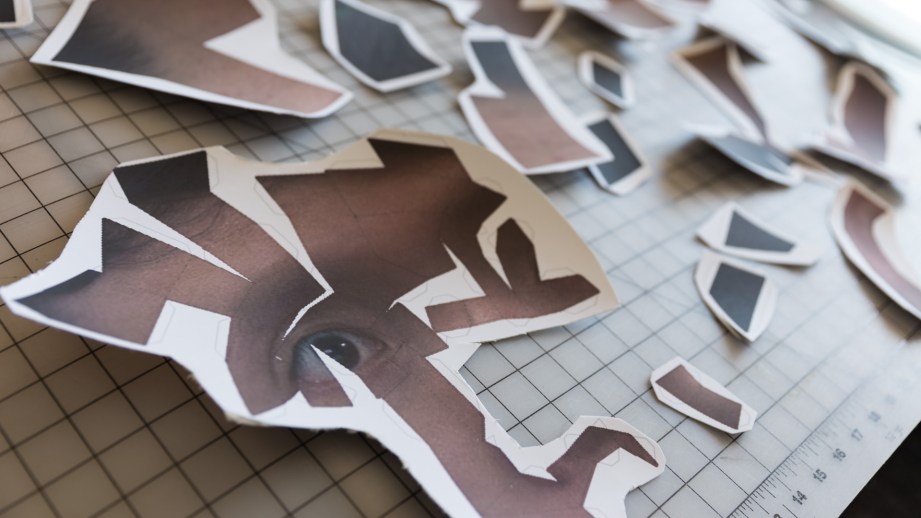
In the example of my model as seen above, the majority of the pieces were contained to one very large strip, which encompassed part of my face and most of my “hair”. For a future build, I would try to ensure that my hair and neck pieces were connected in one strip, and that the important details of my face–eyes, nose, and mouth–were each isolated in their own pieces. Even though that may mean a larger overall print surface, keeping details like the eyes all together will save a lot of headache later. It was a pain to try to connect half of an eye to one large strip and the other half connected to a strip of nose.
Essentially, break your head apart into logical pieces–neck and back of head, scalp and skullcap, ears, eyes, nose, and mouth. Building those pieces individually and then patching them together later is much easier than mixing them together arbitrarily.
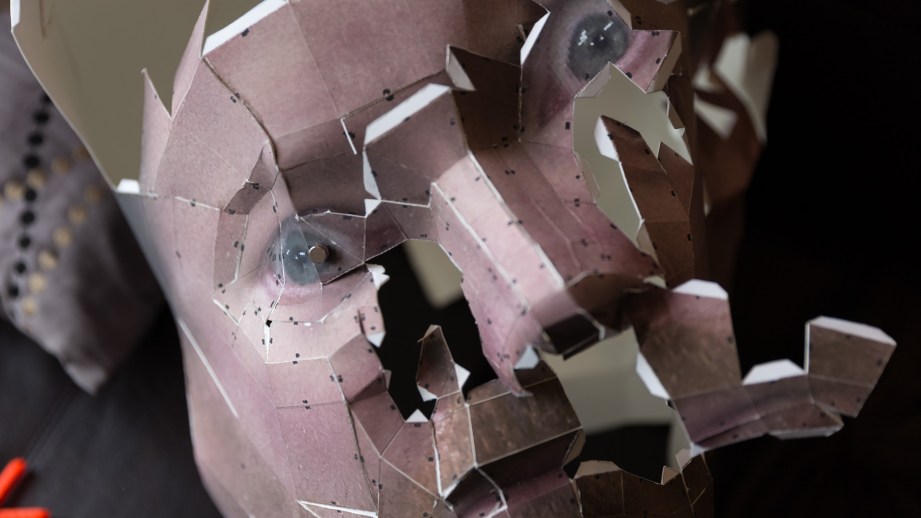
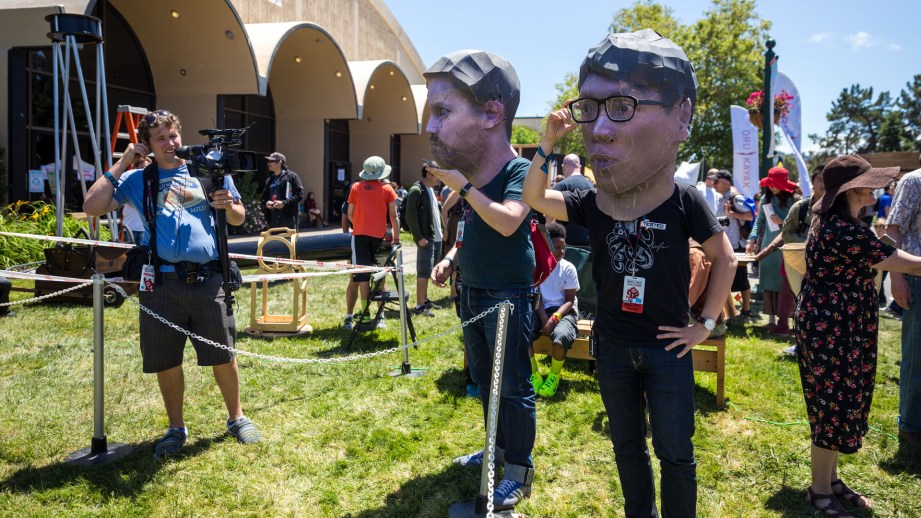
When you export your papercraft pieces, also remember to turn off the numerical matching annotations in Pepakura. These are tiny numbers set along the edge of each polygon, which show you how the edges match up in the construction. We forgot to do this with Will’s printout, which is why it looks like he has little black freckles scattered throughout his face.
Step 6: Print Your Papercraft Skin
As Brandon mentioned, he provided the Papercraft printout as one large sheet, in this case exported as a high-resolution Bitmap, 4000 pixels wide. The standard version of Pepakura doesn’t export high-resolution textures, but the detail in the standard version was just fine for our purposes.
Using the size of my ear in the image as a guide, I manually scaled the image up in Photoshop, using the ruler tool to approximate a size so my ears would be about 7-inches tall. That produced a very large image with low DPI, but again, that resolution is fine for large-scale papercraft. People far away wouldn’t be able to notice the details anyway.
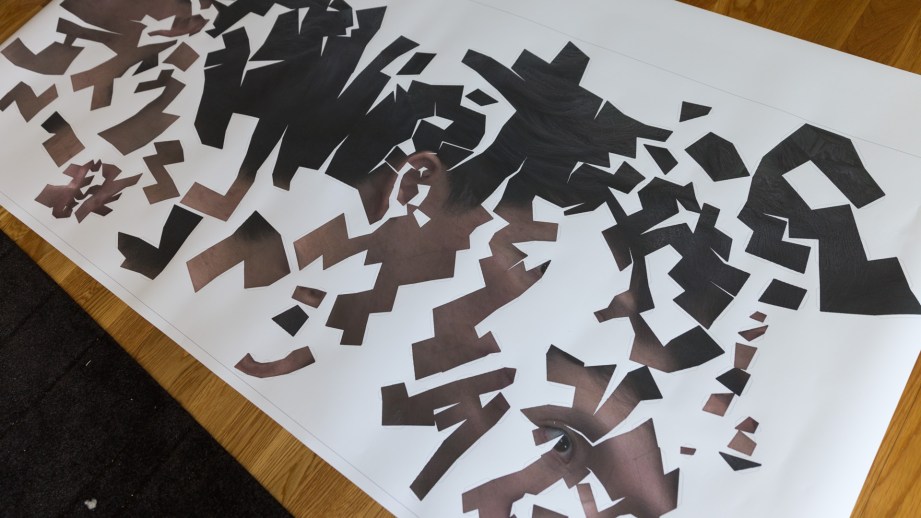
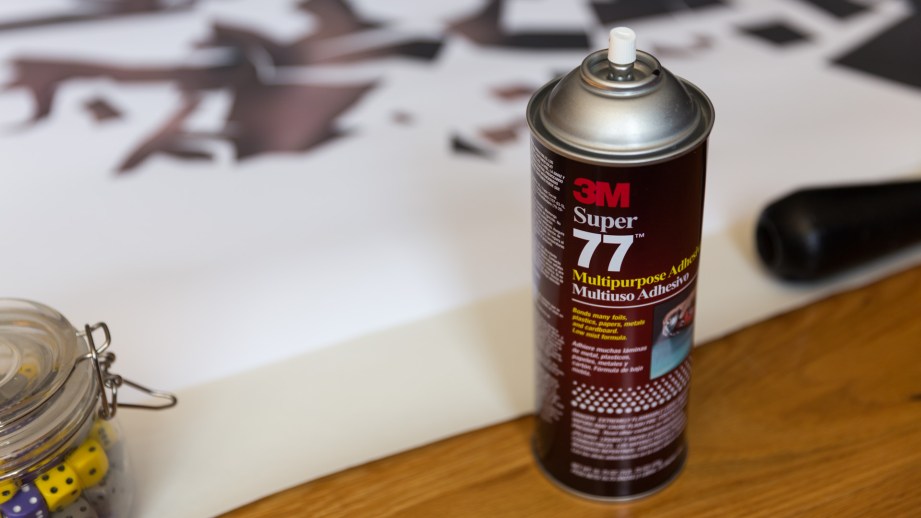
I sent the image to be printed on one giant sheet 36-inches by 80-inches. The printout was the most expensive part of the project, since we did it on short notice at a photo lab. Each sheet cost about $150 to print. The printed sheet looked great and was scaled properly, but the printer paper wasn’t firm enough to be crated into a sturdy head. So the next task was to mount it on a thick sheet of cardstock. I bought a roll of 300 gram/m2 (110 lb) cardstock from the local art store Flax and spray glued the printout on the roll.
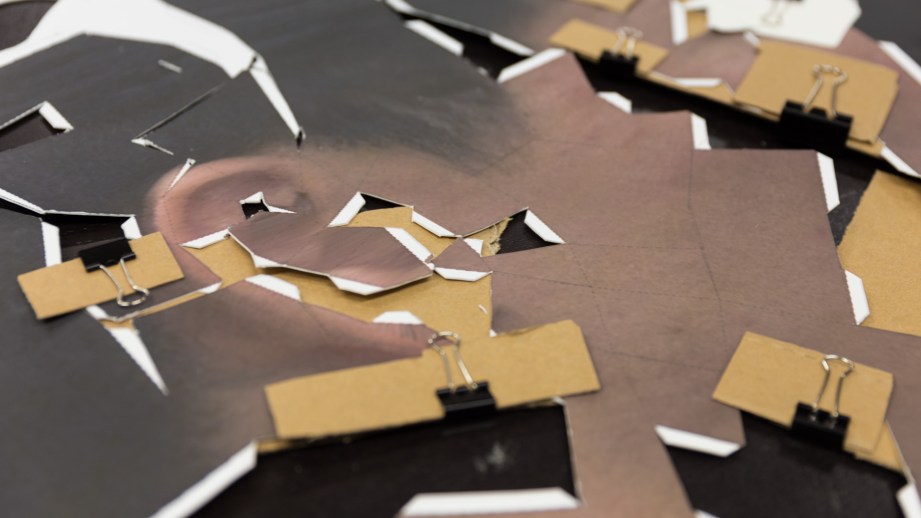
Step 7: Cut and Prep Your Model Pieces
After the print was mounted onto the cardstock came the painstaking process of cutting out the pieces. This was done using an arsenal of scissors and cutting blades, on a large cutting mat.
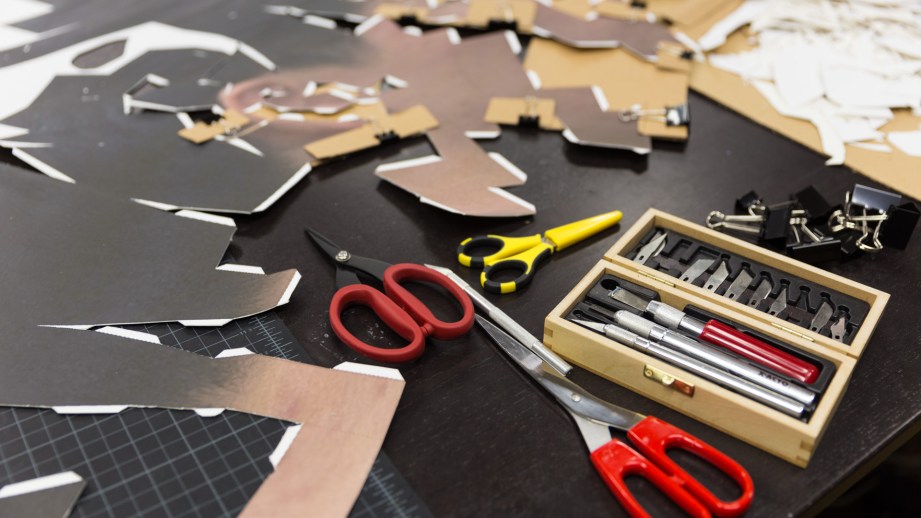
Cutting out the pieces was about a full week of work–there are ways to automate the cutting using equipment like the Silhouette Cameo or maybe even a laser cutter, but I opted to do it by hand.
Once all the pieces and strips were cut out–tabs intact–I needed to crease all of the edges before I could start folding and gluing. In our video, we talked about using a bone tool to crease the edges. This worked well but was pretty slow. In the end, given how thick the cardstock was, I ended up lightly scoring all of the edges using an X-Acto knife.
Pepakura isn’t perfect when it comes to its guides and instructions–there were many fold seams that didn’t show up in the print out. So as I scored the tabs and folds using the blade, I had a laptop in front of me with Pepakura open, as a reference to see which edges needed scoring.
Step 8: Assemble Your Head Model
While the cutting and the scoring were the most time-intensive parts of the build, the assembly was probably the most maddening. I didn’t build a jig or frame to hold the pieces into place, so all of the propping up and connecting was done manually by hand.
To affix the pieces together, I used just regular clear-drying paper glue, also bought at Flax. This is the same glue I used for my Terada Mokei papercraft architectural model kits, which is relatively fast drying and easy to apply with a small brush.
I also kept a small bottle of superglue nearby for gluing very small tabs. The superglue was risky to use because if any of it got on the front of the printout–eg by way of my fingers–it would stick to the printed texture side and tear out that detail. It was only used as a last resort.
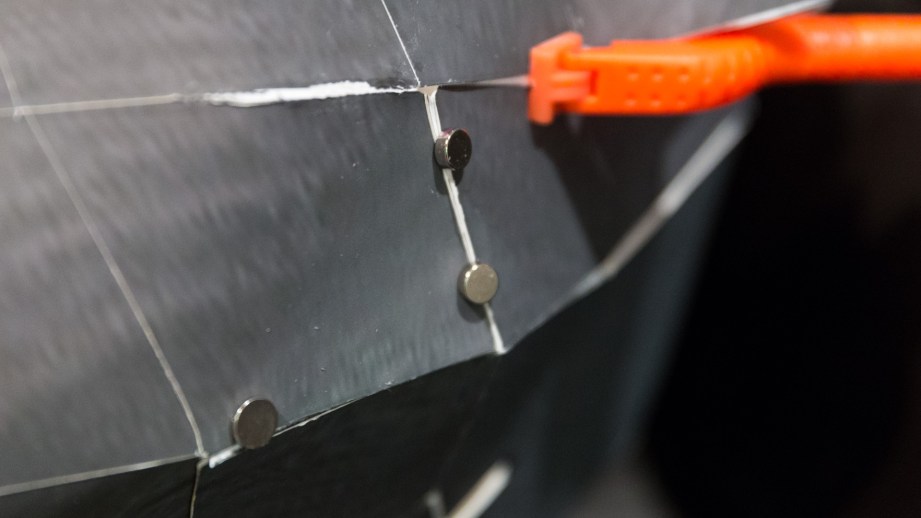
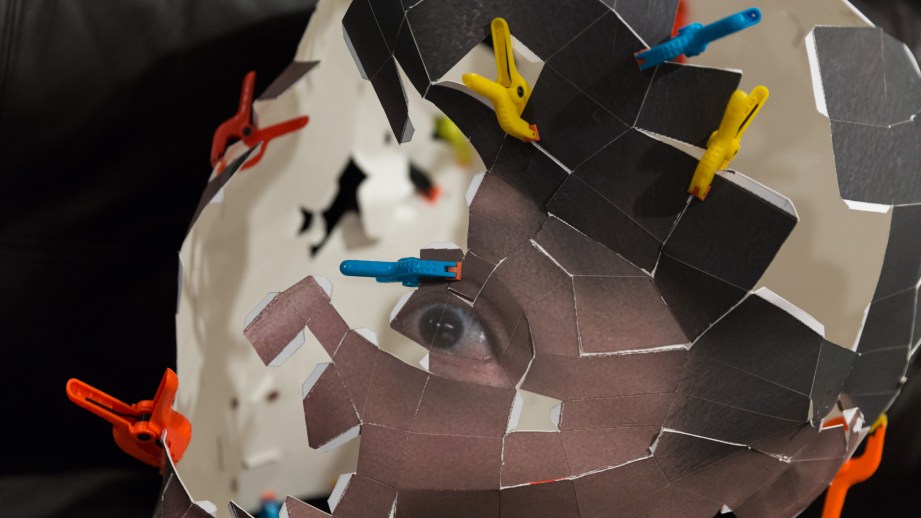
Much of the difficulty in piecing together the head was keeping the pieces affixed in place while the glue dried. To help, I used a combination of small plastic clamps and a batch of strong neodymium magnets to hold the seams together.
I found that the best way to start building the heads was to get the overarching structure figured out first–meaning the hair at the top of the head and the neck at the bottom. Getting that neck ring figured out and clamped together laid the foundation for the rest of the pieces, guiding the folds and showing me how tabs were supposed to fit together. Like with the scoring, I had Pepakura open on a laptop nearby to use as reference.
Not every tab is going to fit together perfectly, and not every fold will be exact. By the end, I had to cut some excess material out of my ear pieces to get them to fit.
I finished by fabricating my eyeglasses out of a sheet of black card stock, eyeballing its shape and size from my own glasses, sketched first on a sheet of printer paper.
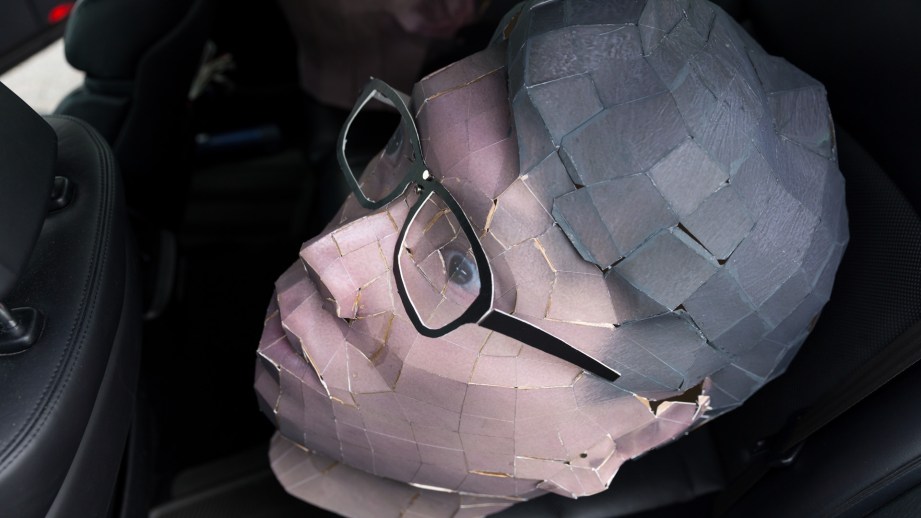
The finished papercraft head looks pretty good from a distance, but you can definitely see the cracks and holes up close. A golden sharpie was used to hide my crimes and fill in the seams on the face texture, while grey paint was applied to the seams in the hair pieces to make it look like one solid paper model.
Wearing Your Papercraft Head
Given the rush to the finish at the end of the project, I didn’t have time to properly make eye holes or structural padding inside the heads for wearing at Maker Faire. The lack of eye holes made walking around difficult, but I was able to see through some of the seams to lock onto nearby objects like Joey in front of me with his camera.
The paper heads also ended up fitting perfectly over our own heads, so that the back of the neck rested on the back of our heads. The card stock was also really light, and it wasn’t hot inside the heads at all–no fans required. The only scare we had was that the heads were still pretty fragile, and even light winds could blow them out of our hands.
But now that Maker Faire is over, I’m going to spend some more time on the heads, fixing up the ear pieces and finding a way to seal the paper with a coat to keep its structure intact. Overall, I think the project was a success, and it was fun rushing from concept to completion in just a few weeks before the event.
Thanks to Brandon Blizard and Danica Johnson who helped me with this project.


13 thoughts on “How To Make Your Own Giant Papercraft Head”
Leave a Reply

One Day Builds
Adam Savage’s One Day Builds: Life-Size Velocirapt…
Adam embarks on one of his most ambitious builds yet: fulfil…

Show And Tell
Adam Savage’s King George Costume!
Adam recently completed a build of the royal St. Edwards cro…

All Eyes On Perserverance – This is Only a Test 58…
We get excited for the Perserverance rover Mars landing happening later today in this week's episode. Jeremy finally watches In and Of Itself, we get hyped for The Last of Us casting, and try to deciper the new Chevy Bolt announcements. Plus, Kishore gets a Pelaton and we wrack our brains around reverse engineering the source code to GTA …

One Day Builds
Mandalorian Blaster Prop Replica Kit Assembly!
Adam and Norm assemble a beautifully machined replica prop k…
House of MCU – This is Only a Test 586 – 2/11/21
The gang gets together to recap their favorite bits from this past weekend's Superb Owl, including the new camera tech used for the broadcast and the best chicken wing recipes. Kishore shares tips for streamlining your streaming services, and Will guests this week to dive into the mind-bending implications of the latest WandaVision episod…

One Day Builds
Adam Savage’s One Day Builds: Royal Crown of Engla…
One of the ways Adam has been getting through lockdown has b…

Making
Adam Savage Tests the AIR Active Filtration Helmet…
Adam unboxes and performs a quick test of this novel new hel…

Making
Weta Workshop’s 3D-Printed Giant Eyeballs!
When Adam visited Weta Workshop early last year, he stopped …

One Day Builds
Adam Savage’s One Day Builds: Wire Storage Solutio…
Adam tackles a shop shelf build that he's been putting off f…

Show And Tell
Mechanical Dragonfly Automata Kit Build and Review
Time for a model kit build! This steampunk-inspired mechanic…
Great writeup, Norm. That last photo is hilarious.
That’s a crazy amount of work, I think it turned out great. Nice work!
This kind of dumb fun is exactly the kind of thing I want to see. I consider my premium membership dollars well spent. Keep it up guys!
I might have to do something like this for Halloween. Excellent work Norm, and thanks for showing the full process.
Norms face looks perfect!
You have to make a video when you make one of these for Adam.
The only thing I would suggest is to increase the contrast of the image before printing next time
Great job on thesee fatheads, Norm!
I still think that Will’s could have benefited from having a pair of glasses on it like yours did..
The obvious choice here was for Will to use his Occulus Rift expression. An opportunity missed!
Surely the obvious next step is a serious of Goldeneye DK mode costumes?
The low poly count on the N64 would probably make it much easier too!
Epic work guys. These are awesome.
Really creepy, and really cool! Would like to make one of those for myself, but it would take waay to much time
You all area a whacky bunch. I love it!
Lining the inside of the model with fiberglass sheets & resin can solidify the model and make it more structurally sound. I built a Spartan Helmet a’la Master Chief a few years ago using Pepekura paper craft and fiberglass. I’ve been thinking about making another one, and after seeing this post I think I’m finally gonna do it!
Any chance of getting the pepakura files? I’d love to go to MCM London Comic-Con next month as Wil or Norm 😉
It reminds me “Deodorant type” by Gwon Osang.