


How To Paint a Realistic Rusty, Metal Helmet
Bill Doran walks us through his process of turning a plastic helmet into an old, weathered, beaten hunk of battered steel.
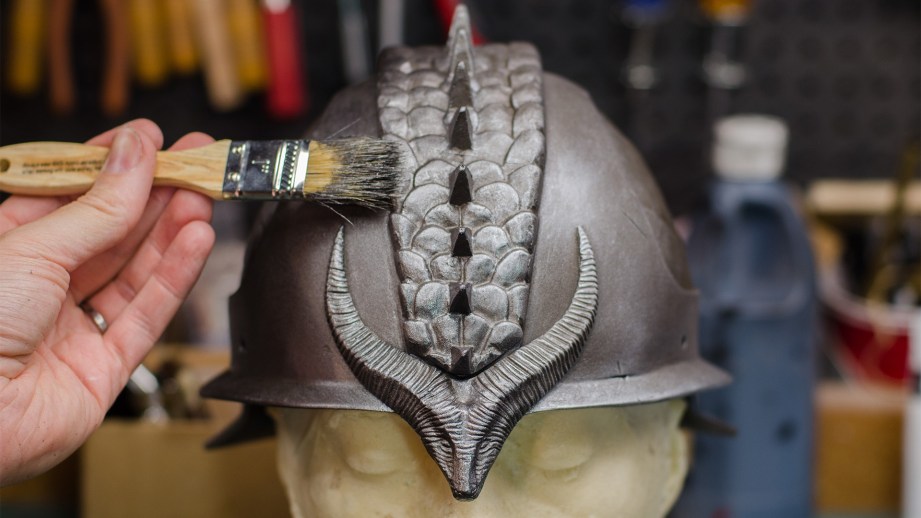
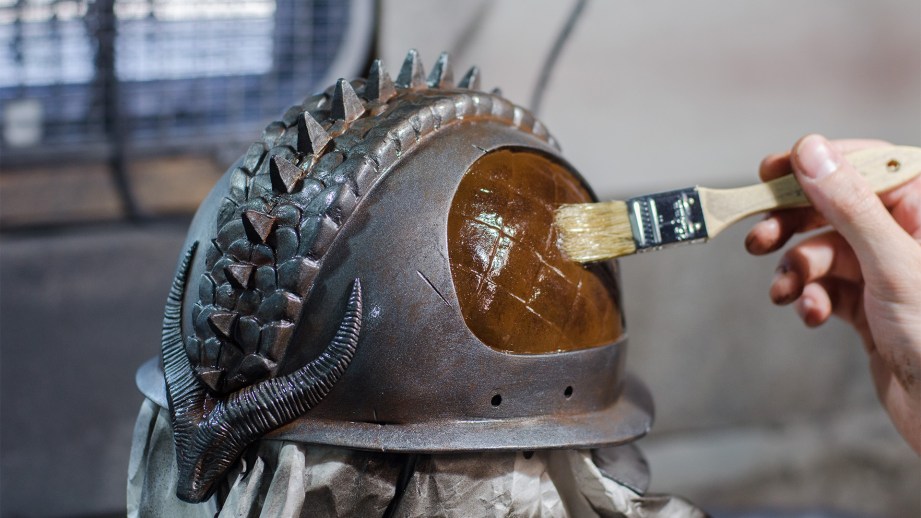
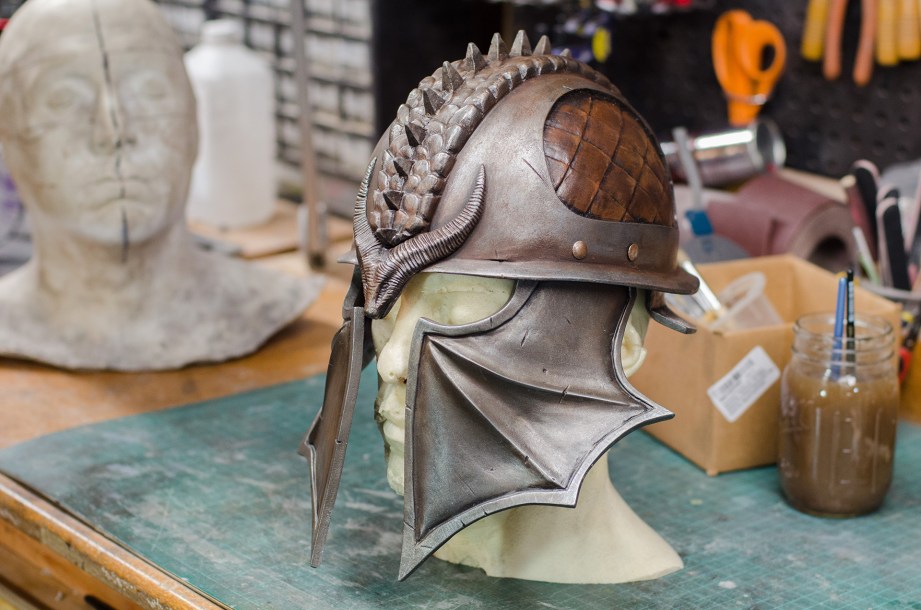
This is a plastic helmet. Urethane plastic, to be exact. It’s a resin kit that I got from my pal Allen a while back and I was chomping at the bit to get it painted, but really wanted to make sure that it didn’t end up looking like that original plastic. I wanted it to look like an old, weather beaten hunk of battle scarred steel. I wanted it to look like real metal.
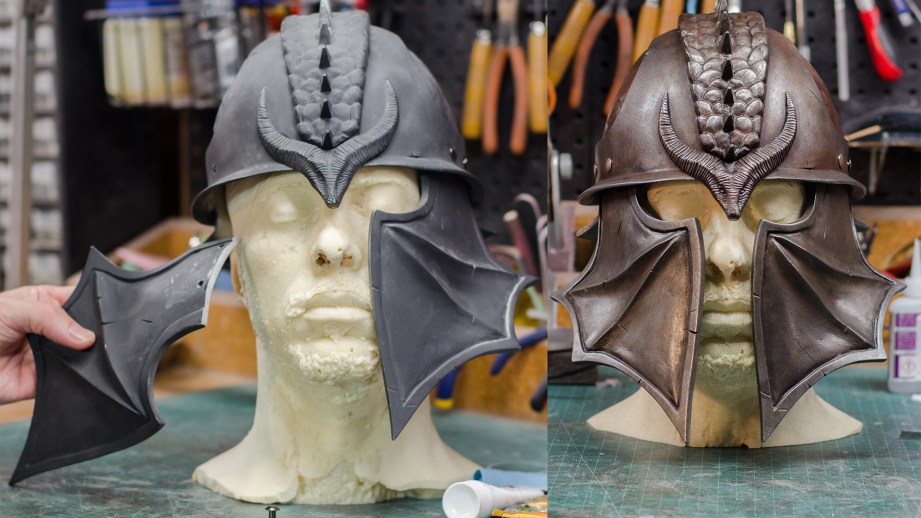
I’ve covered metallic finishes here on Tested before, but this was a very different beast. It couldn’t look chromed and shiny like Rey’s blaster. It needed to be dark, textured, rusty, and grimy. When painting something that needs to be metallic, there tends to be an impulse to reach for a “metal” can of spray paint cover every square inch of plastic in a silver metallic sheen. This is the easy way to do it, but if you look at a piece of bare steel, something that spends its days exposed to the elements like a manhole cover, you’ll note that there isn’t a single bit of shiny silver anywhere on it. This is why I started with a dark color.
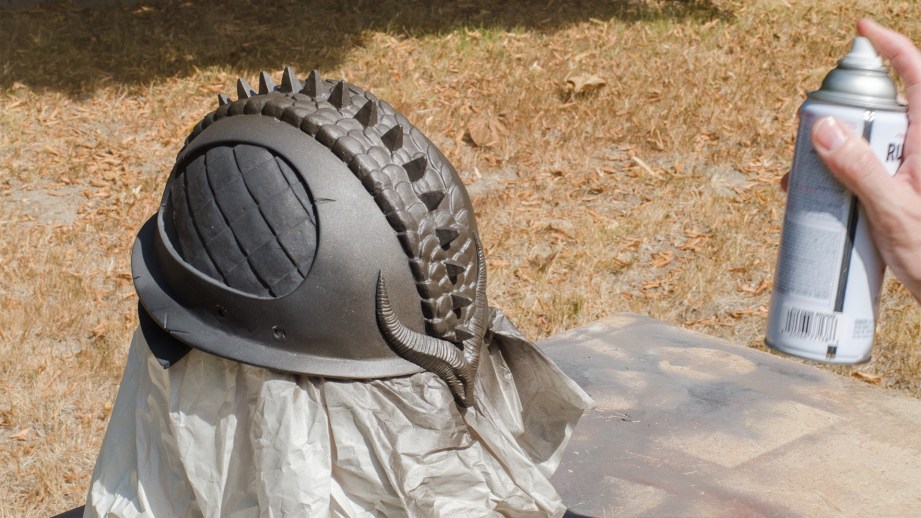
The kit was already primed, so all I needed to do was hit it with the base color. In this instance I used a rattle can of nice bronze paint.
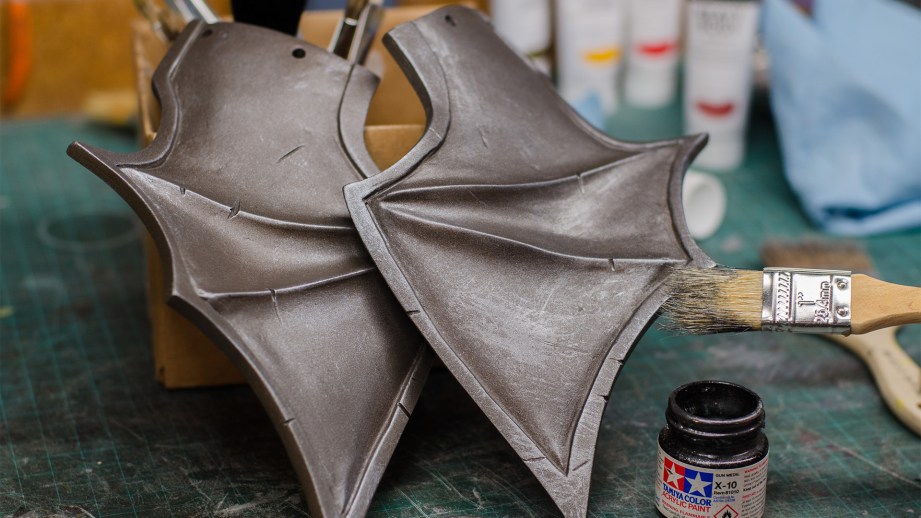
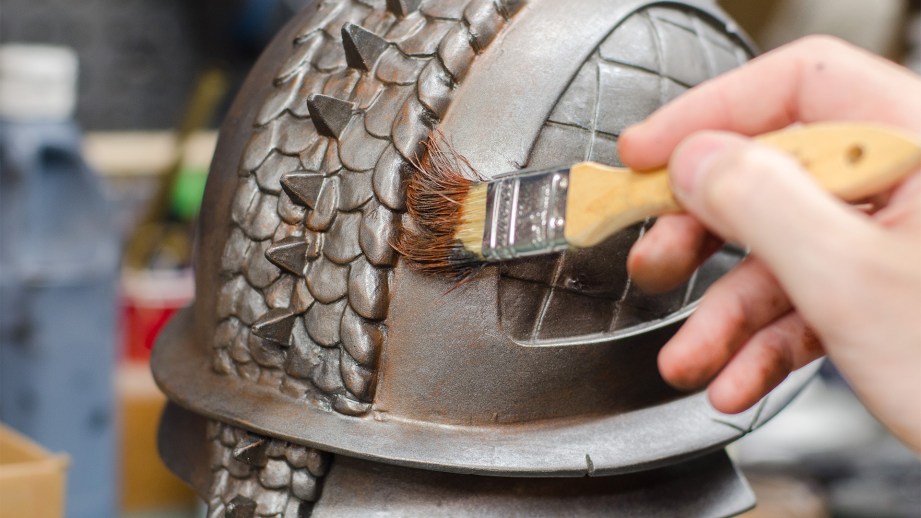
Once this base coat of dull, dark paint dried, then the real fun began. I started with some silver acrylic paint. Yes I said earlier that we wouldn’t see any silver spots, but don’t worry, I was incredibly subtle with my use of this bright paint. My application was a slightly heavy drybrush. I applied just a little bit of silver paint to a ratty old brush, wiped most of that paint off on a paper towel, and then “scratched” the bronze base coat with the brush.
This was done in several passes on all parts of the helmet. You can always add more paint where you need it, but it’s a pain to try and take it off or cover it up. The goal was to add subtle texture to the surfaces and to highlight the edges just a little bit.
Once I was happy with the layer of silver, I did almost the same thing with a darker, gunmetal acrylic paint. This was done to cut back on the bright silver and to add a little bit of value contrast.
One of the things that really sells an old piece of metal is rust. There are many colors that can be used for rust, and you should experiment with as many as possible, but it’s hard to go wrong by starting with good old fashioned burnt sienna. Similar to the metallic layers, this acrylic paint was applied with a gross old brush in a scratchy, subtle manner. Then I used my finger to smear it a bit, blending it in with the other paints.
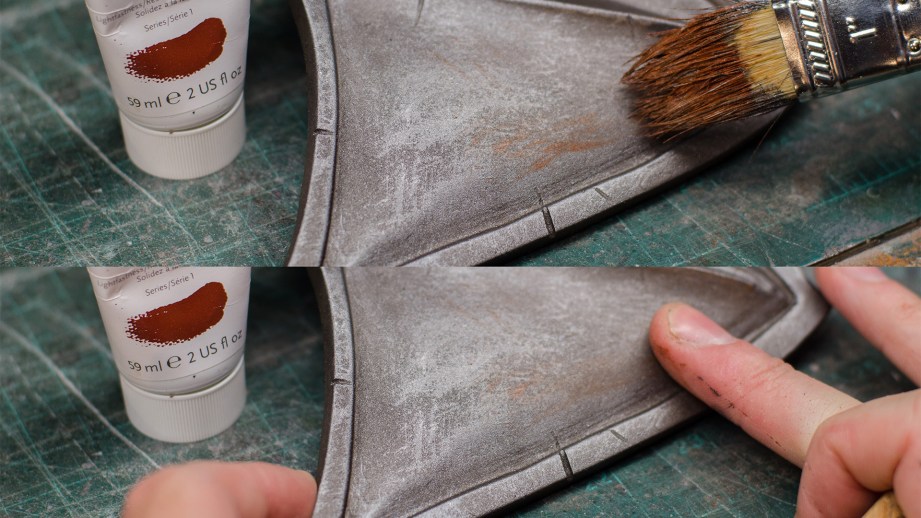
Subtlety is the key.
Just like all the other paints, this was done a little bit at a time. I found myself revisiting some areas to punch up the color just a little bit where I felt it was necessary. By using a brush that was nearly dry with paint, I was able to put just a tiny bit down at a time. This kind of application is tedious, but it gives you a lot of control over the finish.
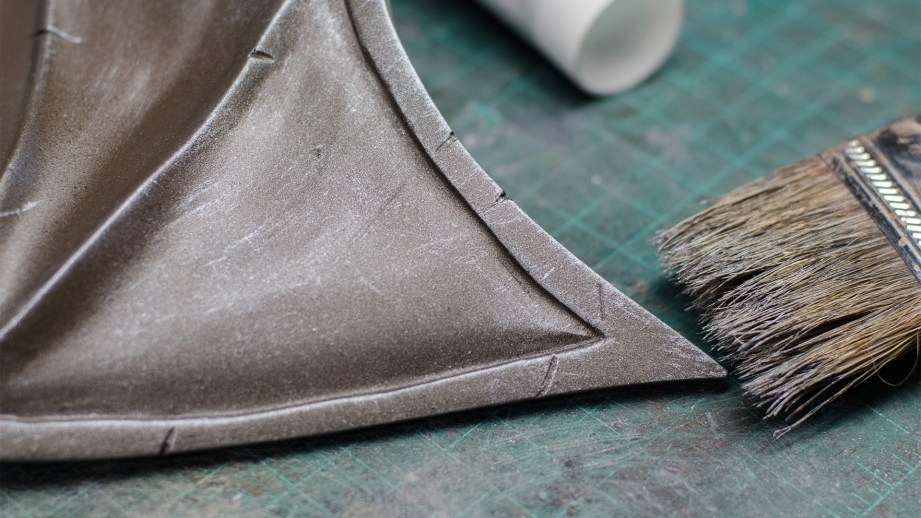
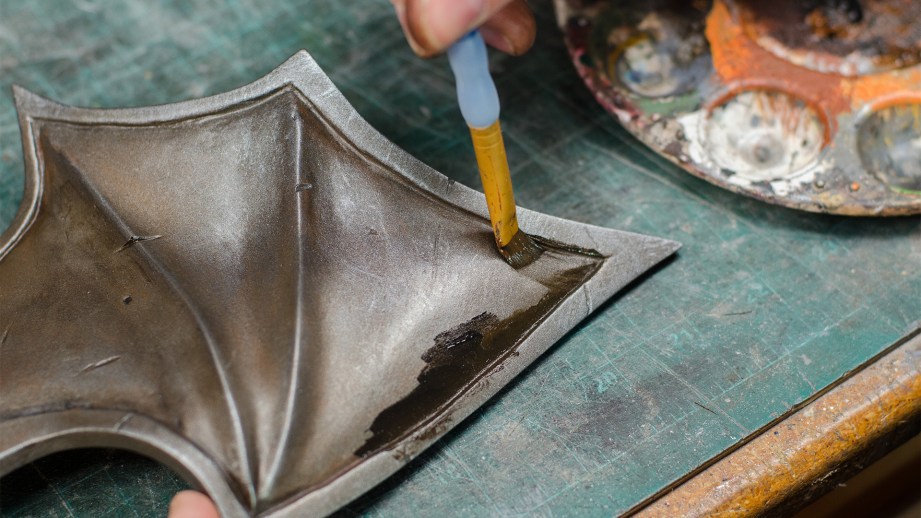
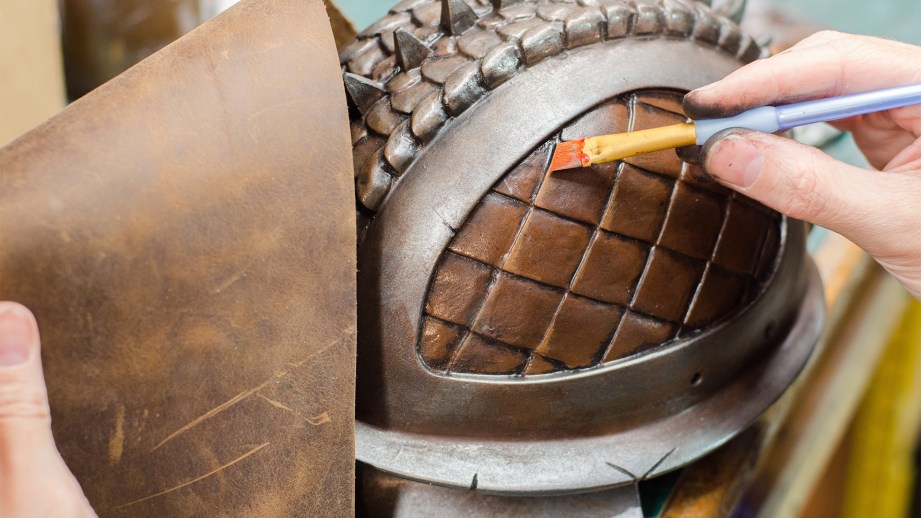
Happy with the direction the metal was going, I turned my attention to the side panels of the helmet. I do believe that in the original game art these parts are meant to be a metal, but I thought they would look sharp with a faux leather finish. To get started I base coated the panels with a couple of layers of dark brown acrylic paint.
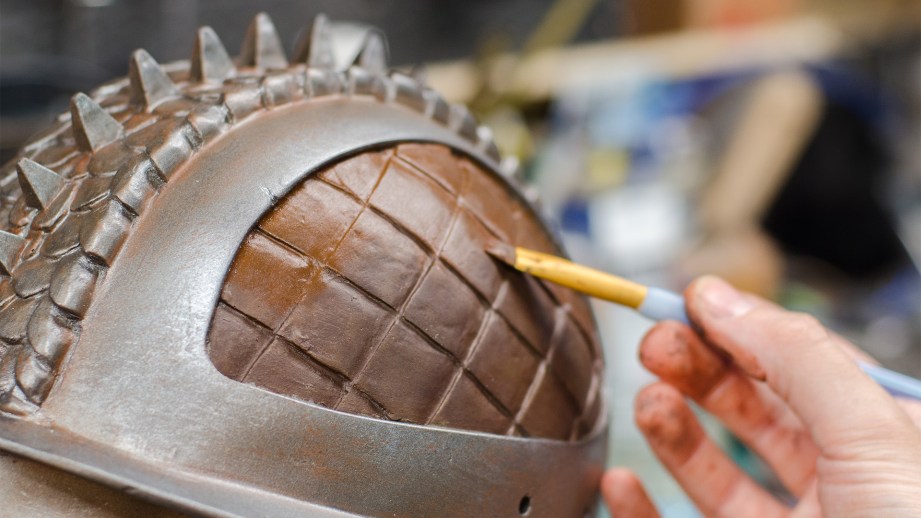
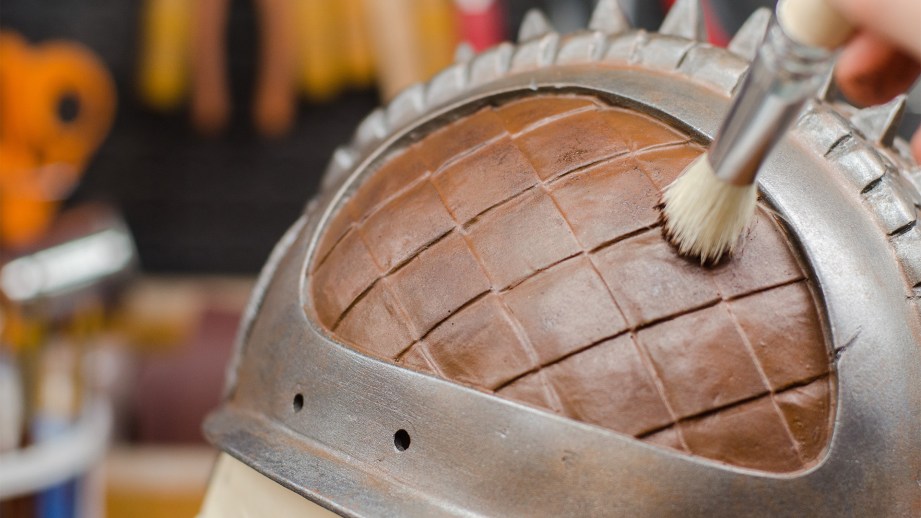
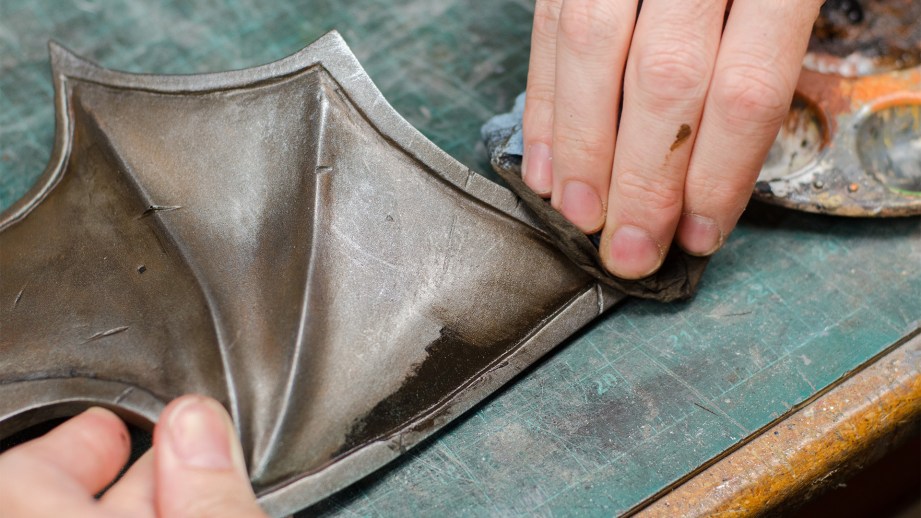
To give the leather a little bit of visual interest, I used a stencil brush and some darker brown paints to stipple on just a hint of contrasting texture. Just like before I did this in a couple of passes, adding a little bit more each time until I was happy.
The leather painting concluded all of my basic colors and I was excited to start adding some more grime to the piece, but I figured it would be a good time to seal everything. All of the pieces were covered in a gloss varnish, brushed on. Varnish leaves a nice finish and dries quickly–two qualities I prefer in a finish.
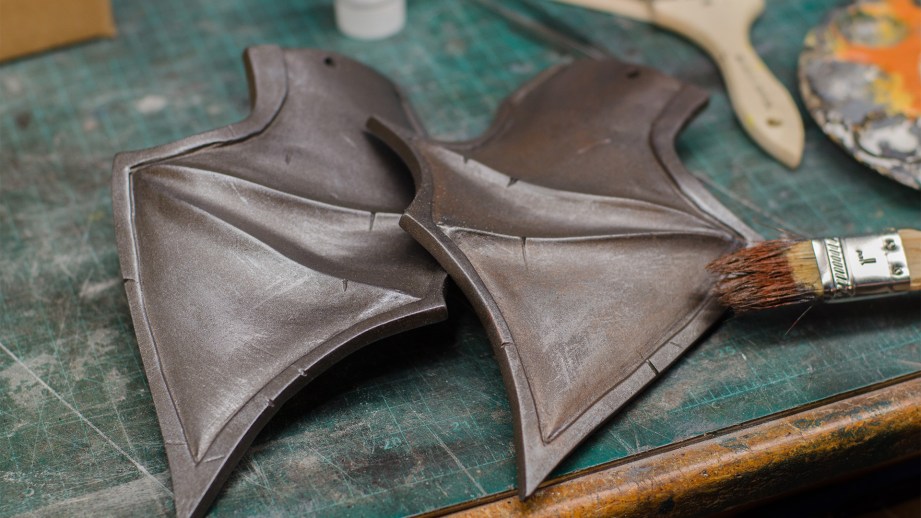
Once the varnish was dry I dove right into weathering. Most of this was done with your standard washes of black, brown, and burnt sienna acrylic paints. I brushed on some smears of colors into the deep crevasses of the helmet and then wiped most of the paint away, adding some grime to the grooves as well as some nice contrast. This was done over the entire helmet for one initial pass.
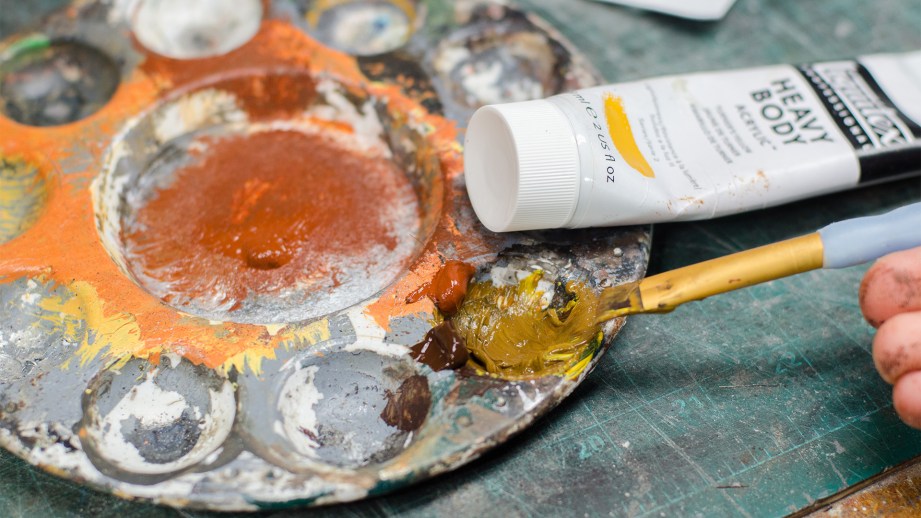
On my second pass I realized that some of the cheaper, black acrylic paint that I was using was a little bit thin for what I was trying to do. The more pigment laden “heavy body” paints did a better job of sticking to the surface, which meant I really needed to scrub with a paper towel to “clean” it off. This gave me more control over the areas that were left with some dirt and grime, including adding some more texture. It really is worth experimenting with different brands of paints.
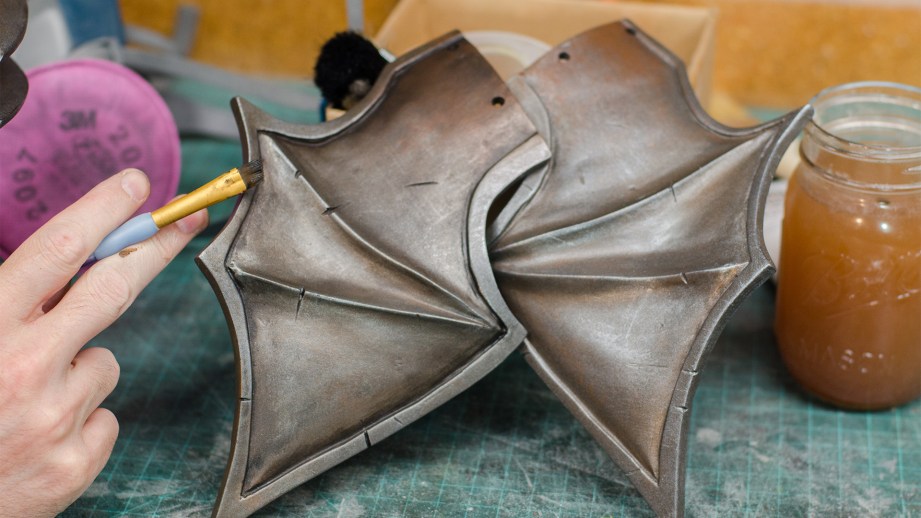
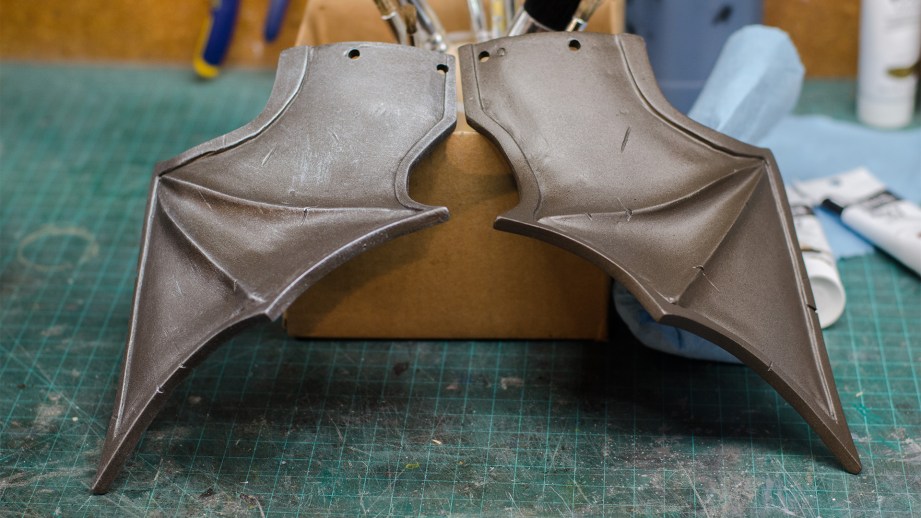
This weathering was repeated over the entire helmet, including the faux leather areas. I also added some highlights to the leather to make the edges look lighter and worn. To do my best to make it look authentic, I had a piece of genuine leather on hand to check my work. I think I did an OK job at matching the finish, but that is definitely one area where I could use a little more practice.
The last touch on this helmet was assembly. The kit came with a handful of Chicago screws to attach the wings to the dome, but they were all new and shiny. That simply would not do, so I gave them the old Punished Props treatment and beat them up. First I sanded the metal surface, then I brushed on some rusty looking paints, finally I mottled the finish a bit with a paper towel. Piece of cake!

With that final touch, the helmet was screwed together and completed! This was a wonderful learning experience and a lot of fun. Recently I’ve been taking a good look at my painting techniques and trying to branch out from the more basic techniques and learn a bit more about adding the subtleties that turn an OK finish into something that looks like the genuine article. The best part about this finish is that it didn’t require any special tools or materials. Just some spray paint, crummy brushes, a handful of acrylic paints and a little varnish.


5 thoughts on “How To Paint a Realistic Rusty, Metal Helmet”
Leave a Reply

One Day Builds
Adam Savage’s One Day Builds: Life-Size Velocirapt…
Adam embarks on one of his most ambitious builds yet: fulfil…

Show And Tell
Adam Savage’s King George Costume!
Adam recently completed a build of the royal St. Edwards cro…

All Eyes On Perserverance – This is Only a Test 58…
We get excited for the Perserverance rover Mars landing happening later today in this week's episode. Jeremy finally watches In and Of Itself, we get hyped for The Last of Us casting, and try to deciper the new Chevy Bolt announcements. Plus, Kishore gets a Pelaton and we wrack our brains around reverse engineering the source code to GTA …

One Day Builds
Mandalorian Blaster Prop Replica Kit Assembly!
Adam and Norm assemble a beautifully machined replica prop k…
House of MCU – This is Only a Test 586 – 2/11/21
The gang gets together to recap their favorite bits from this past weekend's Superb Owl, including the new camera tech used for the broadcast and the best chicken wing recipes. Kishore shares tips for streamlining your streaming services, and Will guests this week to dive into the mind-bending implications of the latest WandaVision episod…

One Day Builds
Adam Savage’s One Day Builds: Royal Crown of Engla…
One of the ways Adam has been getting through lockdown has b…

Making
Adam Savage Tests the AIR Active Filtration Helmet…
Adam unboxes and performs a quick test of this novel new hel…

Making
Weta Workshop’s 3D-Printed Giant Eyeballs!
When Adam visited Weta Workshop early last year, he stopped …

One Day Builds
Adam Savage’s One Day Builds: Wire Storage Solutio…
Adam tackles a shop shelf build that he's been putting off f…

Show And Tell
Mechanical Dragonfly Automata Kit Build and Review
Time for a model kit build! This steampunk-inspired mechanic…
I like the part where you made the one thing look like the other thing and then made it look super old and gross.
Nice. (Seriously, Thanks for the tutorial- This will work great for my battleworn samurai armor project, THANKS BILL)
Ok wait, why isn’t this called “Oh hey let me show you how to paint realistic leather” seriously, no Bill seriously that’s nuts!
That’s great! I’d love to see the armor when it’s all painted.
HA! Yeah that’s a little bonus. =)
A couple words about how it was primed please?
I didn’t do the primer work on this one, but if I had, I would have sanded it down to a 220 grit and then sprayed it with a rattle can primer and let it dry.