


Bits to Atoms: Designing a Custom 3D-Printed Lightsaber
How I designed my lightsaber to be printed on the Form 2 desktop SLA printer.
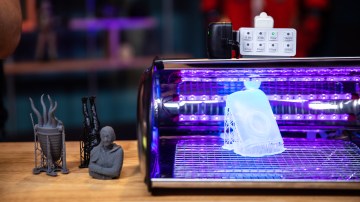
We’ve been using the Formlabs Form 2 SLA 3D printer since its release and have loved our experience with it so far. The Form 2 produces high-resolution models using liquid resin cured via laser. Formlabs recently introduced new formulations of most of their resins and various software and firmware updates, which I wanted to put to the test. So when the opportunity came to create a custom project with Formlabs, I wanted to see how far I could push the detail and precision of the Form 2.
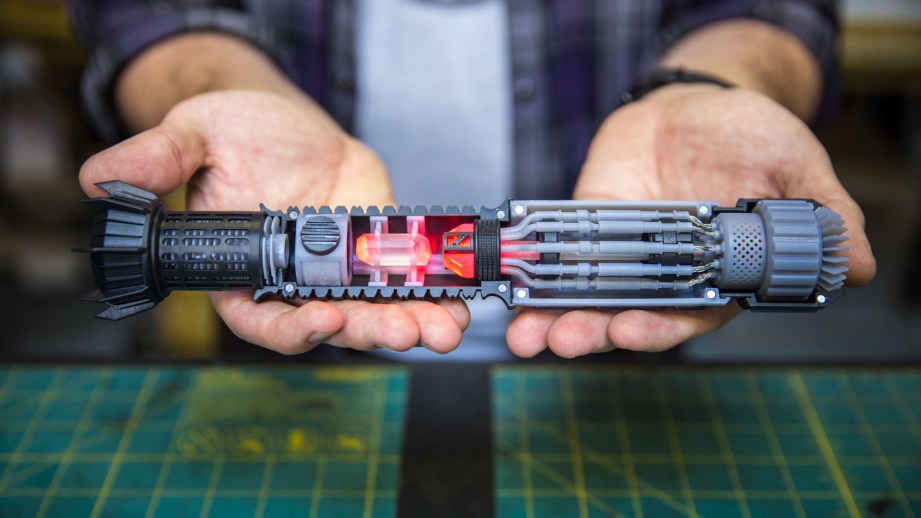
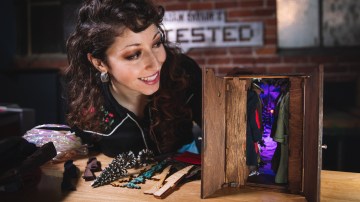
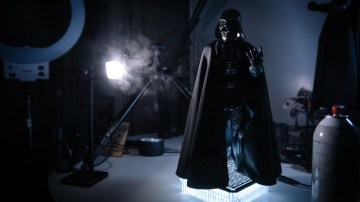
Since I’ve always wanted to make a Star Wars lightsaber and love seeing how things work, I proposed the Cutaway Lightsaber Project. The first decision was choosing what kind of lightsaber to make. The movie sabers have been done many times over, so I decided to design my own–like a true Jedi… or Sith. The lightsabers from the Star Wars prequels tended to be more sleek and refined, but I wanted the chunkier look of the original movies that I grew up with. As most fans know, many of the original props, including the lightsabers, were designed from found objects such as Graflex camera flash handles. Additional details, known as greeblies, were added to complete the prop and make it look appropriately sci-fi. With my background in film & TV repair, I have collected a lot of oddball and cool-looking parts, so I decided to start in the same way.
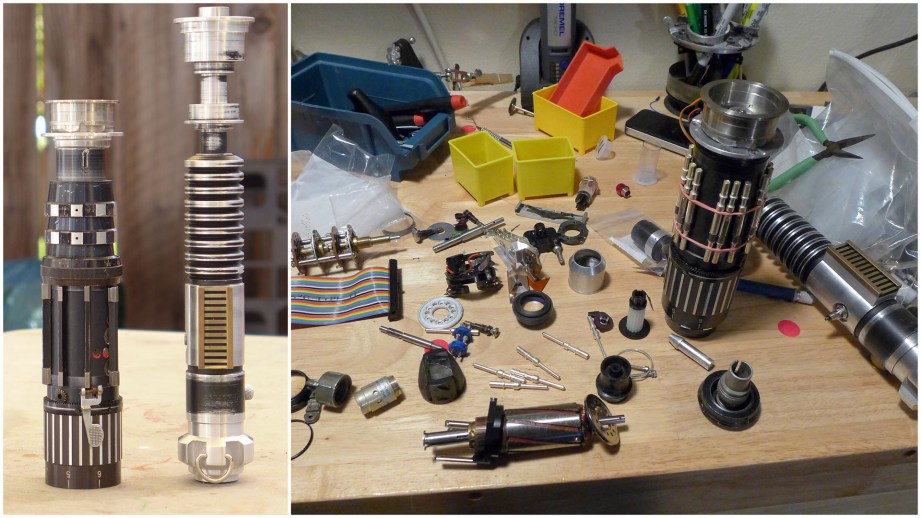
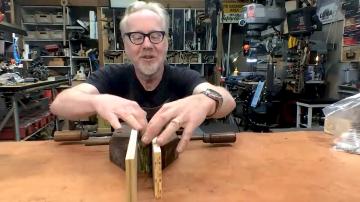
I used Luke’s Return of the Jedi saber replica as a size reference and started cramming my junk parts together until I had a rough lightsaber that I liked. There was a little of everything: optics, camera parts, hard drive spindles, electrical connectors and miscellaneous gears. I knew this wasn’t the final form, but there were a lot of features that I liked. I started recreating approximations of these in 3D, adjusting as needed to accommodate size and other features that I wanted. Early on I knew I wanted to include what I refer to as ‘Death Star Grate’ which many will recognize as the distinctive pattern of cutouts used as windows, lights, grates, etc throughout the Star Wars Universe. Typically it’s used in facilities of the Empire, so I figured this was going to be a bad guy’s saber. I wanted it to be beefy and look like it could mess you up even when it wasn’t ignited–kind of like a D&D mace.
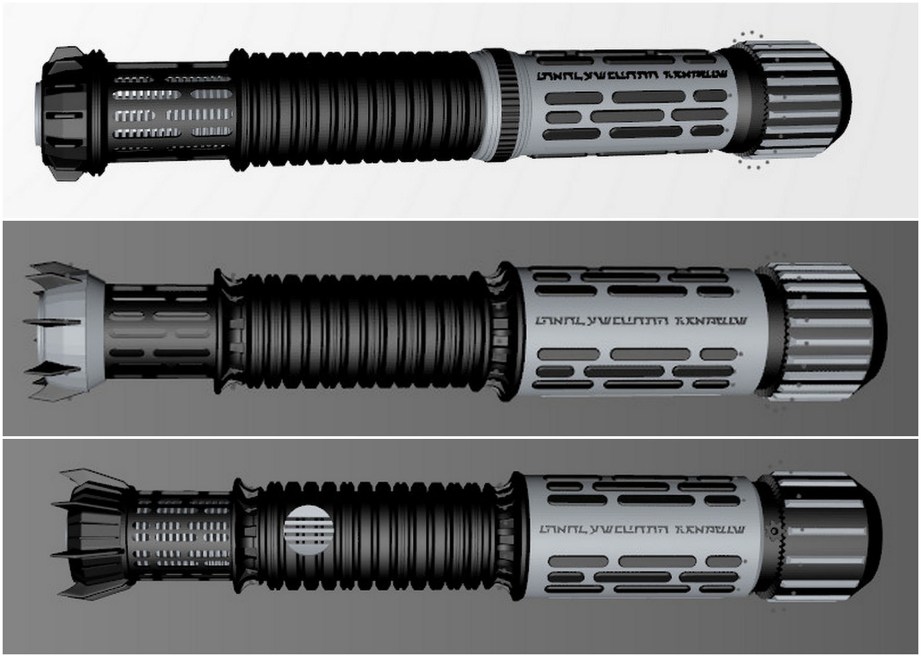
Concentrating on the outside only, I worked up the first version but it looked too much like a flashlight, so back to the drawing board. Inspired by the evil wizard Saruman’s fortress in Lord of the Rings – the top of the saber became an intimidating spiked tip. I also varied the width of the different sections to break up the silhouette. Many of the parts for the outside of the saber started as simple primitive shapes that were modified in various ways.
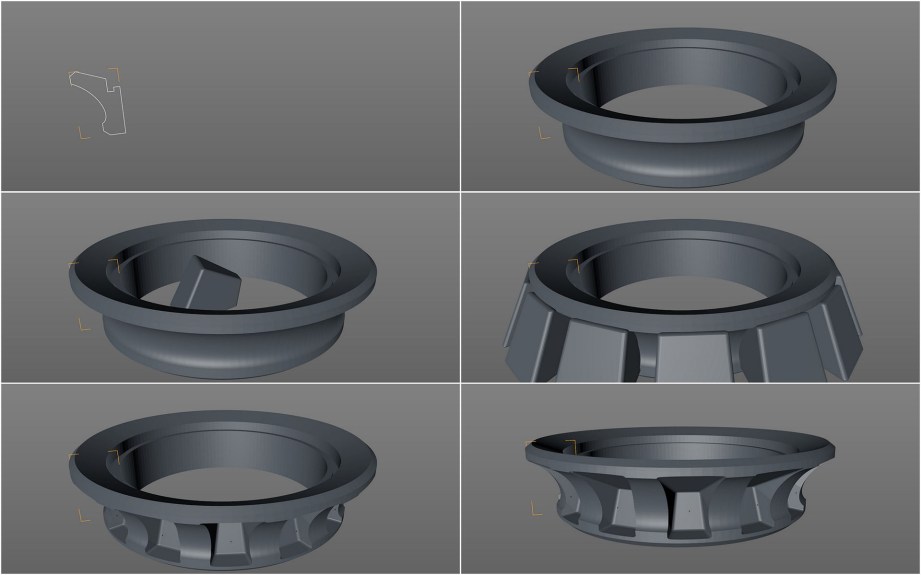
Parts such as the decorative end rings on the top grip started as spline shapes and lathed to make the final piece. Shallow indents were cutout of the bottom handle for the rubber grip pads patterned after ‘Death Star Grate’. I was feeling pretty good about how the outside was looking but since I wanted this to be a cutaway, I had to make further adjustments to accommodate the grips splitting apart. This also involved figuring out how each section would nest together. I decided that the very top would be solid as there wasn’t much to show there and it further complicated the construction. Very early on I chose to use small, powerful magnets to hold the halves together. This is a great way to assemble parts as the magnets can be very small and they automatically align parts without the need of any kind of keying.
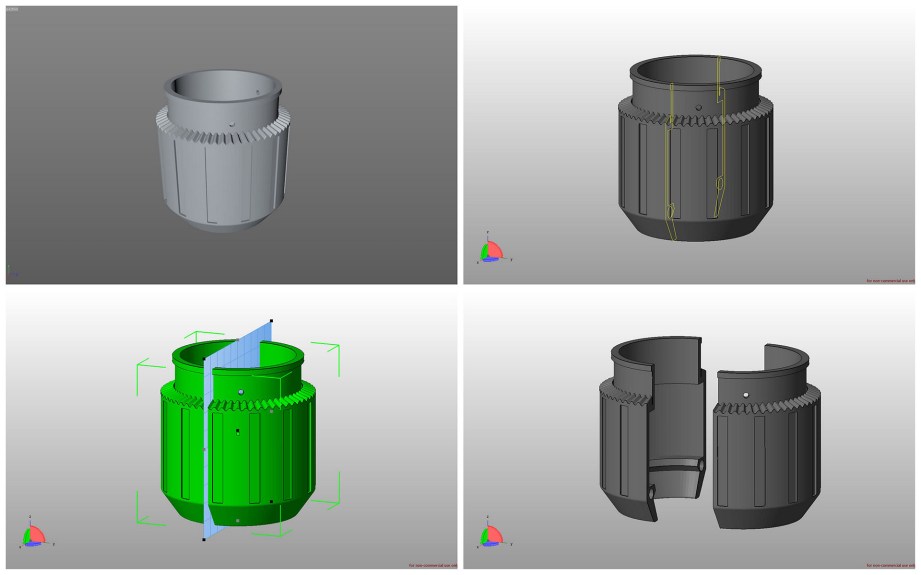
Just like any construction job, you have to use the right tool when building 3D models. Sometimes this simply means the right tool within the software package but other times it means using completely different software. I modeled the outside of the saber as full pieces instead of halves because this was the easiest way to get the overall shape, but it needed split in two to make the cutaway. While technically possible within my regular software – Cinema 4D – it was far easier to do in Netfabb (recently acquired by Autodesk), a program meant for mesh repair and manipulation for 3D printing. I would export the complete grip parts to Netfabb, cut them in half and then export them as two pieces.
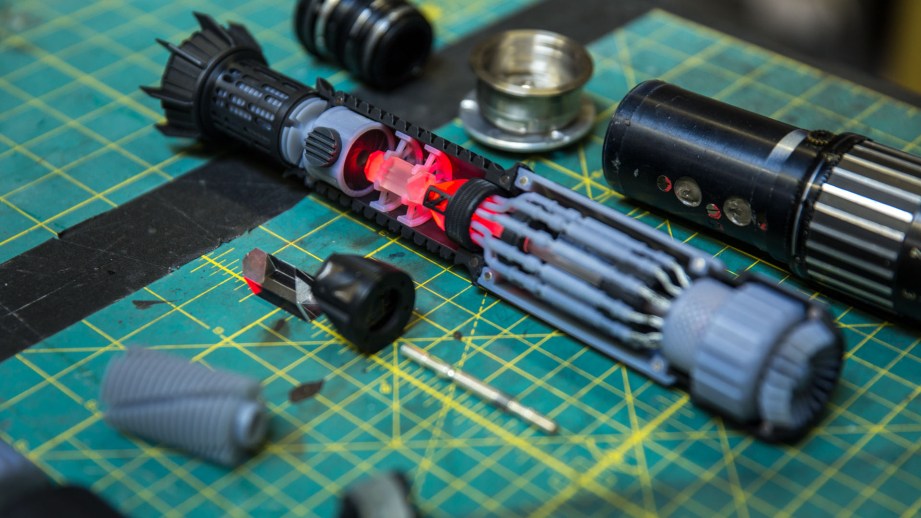
With the outside of the saber finalized I had to figure out the guts. This is an interesting prospect as we’re dealing with a fantasy weapon, so maybe the inside is actually a bunch of microscopic lifeforms that use mysterious powers to shoot laser beams out their eyes – or not. Luckily, Star Wars is pretty popular, and the insides of lightsabers have been documented in various ways and I had some idea of items that should be in there. I also took inspiration from Hungarian artist Roland Palotai who makes amazing lightsabers by hand. Once again, I based some of the pieces on real parts – the ‘manifold’ was based on electrical pins from movie lights. The crystals were almost exact replicas of prisms found in movie cameras. And the focusing mechanism for the crystals was based on a lens iris. I designed a ‘true’ power cell that sits in the pommel and contains the battery and charger that run the LED light. Certain parts and details such as the cooling fins, the mesh on the power cell and knurling on various parts were also meant as a torture test for the Form 2.
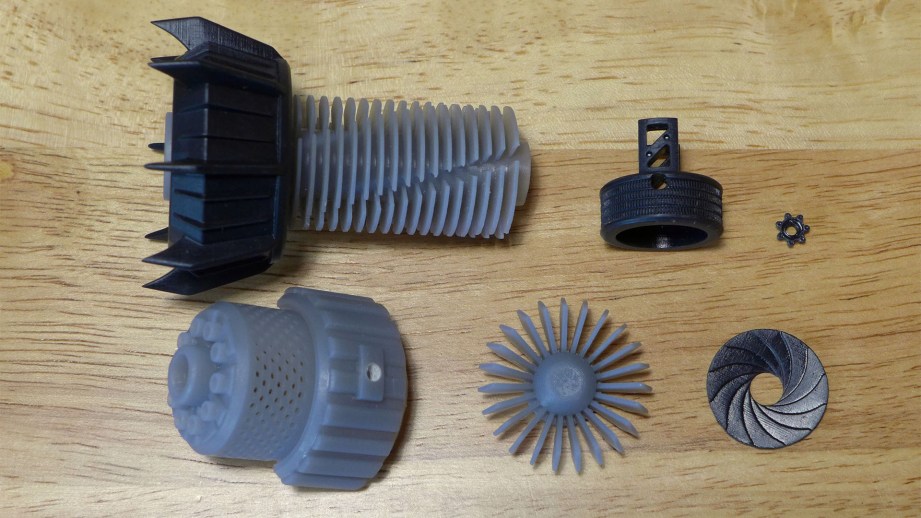
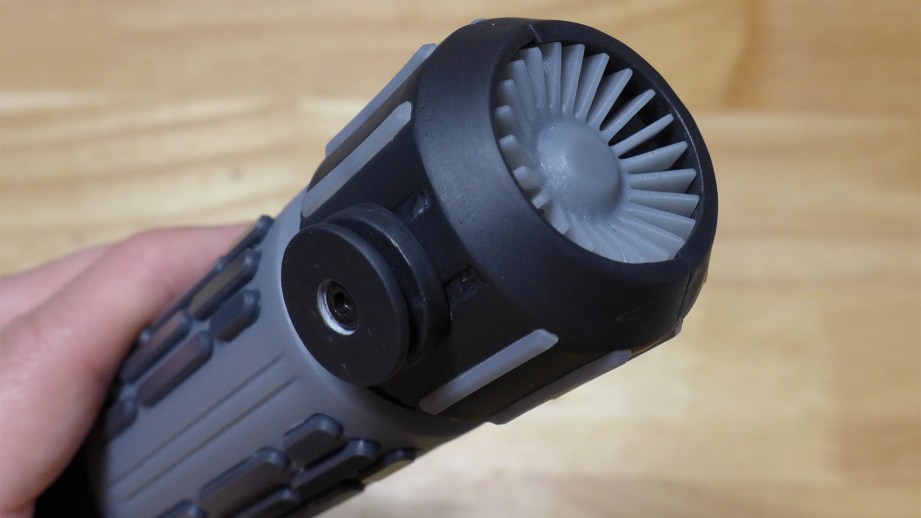
I love how heatsinks and engine fins look and I wanted to incorporate some for aesthetics and to see what the Form 2 could do. I started with the bottom fins, which I based off a jet engine and are meant to cool the power cell. I pictured this as a really overpowered saber so I also added a cooling stack to the top, below the emitter. Originally each fin was a simple disc but it needed a little something more so I added the grooves which spiral down the length. This ended up making the print far more challenging but it turned out in the end.
I didn’t have nearly as many ‘real’ hardware parts in the lightsaber as I did on the Ghost Trap, but there were some – such as the power switch, LED, battery and a few screws. I made 3D stand-ins to represent all of these parts so I could make the appropriate space for them. When designing assemblies digitally it’s really important to think about how these will go together in the real world. It’s easy to fall into the trap of designing something that looks cool until you realize that there’s physically no way to assemble it once printed – it’s happened to me. An additional challenge is designing parts that go together easily and not like a brain-teaser puzzle. This was especially important on this project since I would be releasing the files to the public. In some cases I had to redesign parts so they went together in a more logical or easier manner.
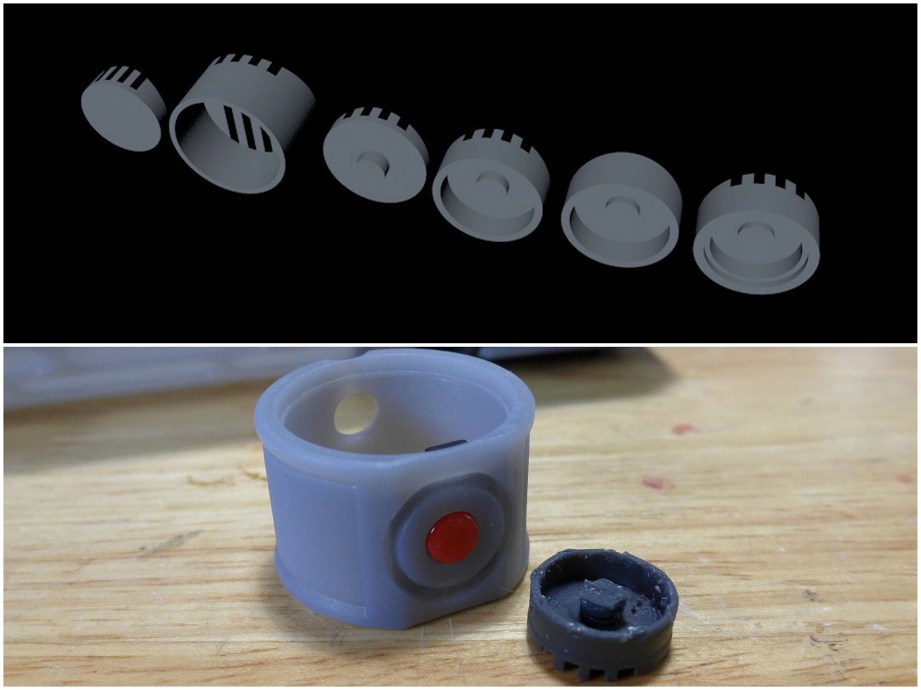
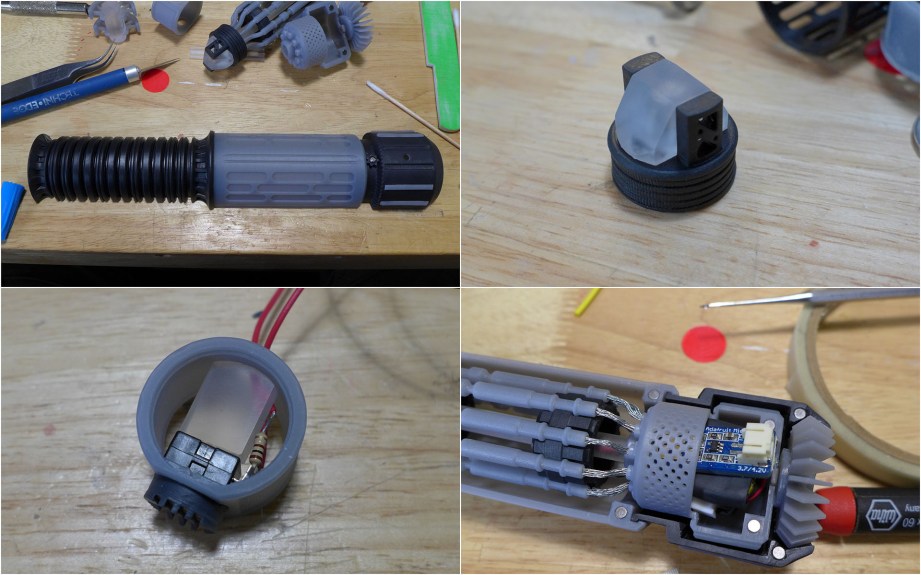
Special consideration went into designing the power button. I wanted to use the new flex material to make a rubber on/off button that would interface with the physical switch below it. The catch here was the flex resin was so new that I wouldn’t get it until a day or so before I needed to print everything out, so I designed a button based on my best guesses as to what would work. The flex material is actually fairly stiff (think the heel of a shoe) so I couldn’t make the button solid or it wouldn’t flex enough. Instead I made the button as a thin shell with a nub in the middle that would contact the switch plunger. I made a recess in the switch housing that the edge of the button would be glued to. The first version of the button totally worked – but I made the walls too thin and the button tore after a few on/off cycles. For number two I beefed up the walls but now it didn’t flex as much and the switch activating nub wasn’t long enough. The third version was perfect, just enough flex and a longer nub activated the switch with a firm press and the material held up to multiple activations. While 3D printed materials may not be the best choice for long-term use, the flex button survived being handled all weekend at the the Bay Area Maker Fair – not bad.
I added a belt clip modeled directly after the ones used on ‘real’ lightsabers. They’re designed to fit a belt clip meant for walkie talkies and the 3D printed version worked perfectly. This is one of the few places I used real hardware – a screw – for strength. The clip can simply be glued on if the saber is not to be worn. I also modeled recesses in the bottom of the manifold pipes and top of the power cell so I could run braided picture hanging wire between the two as a nice detail. A final detail added to the outside were the three gears around the top of the pommel. This was another piece based off some real camera parts and I also wanted to see how well the tiny gears would print. Other than the belt clip, these were the only other parts attached with real screws, mainly for aesthetic reasons, as they can easily be glued on as well.
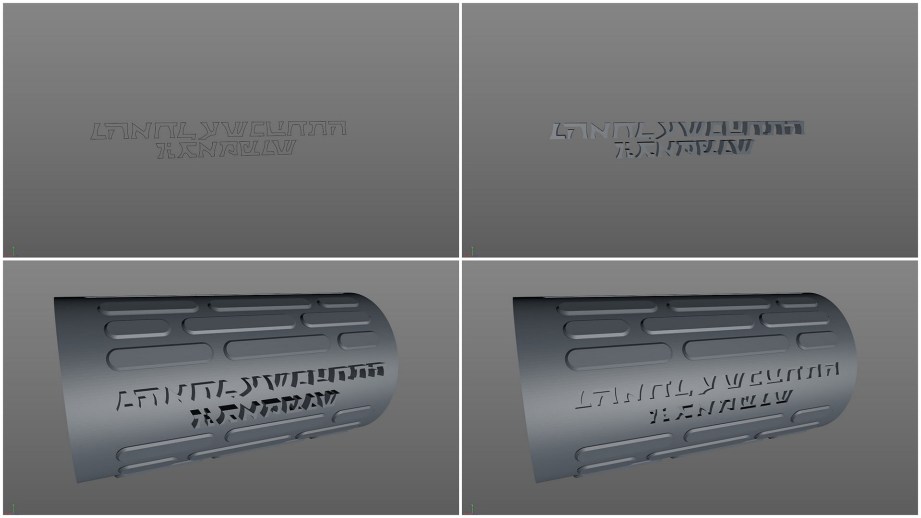
At this point there were a lot of different pieces meant to be printed in different resins and then assembled. With all these parts, it’s important to design with tolerances in mind or they simply won’t fit together when printed. Many times the printer manufacturer will list recommended tolerances for assembling parts in different manners. I followed Formlabs recommendations and all the parts fit perfectly. One of the last details that I finalized was the engraving on the lower grip. I was able to find a Star Wars Sith font (supposedly based on Hebrew) which I was able to extrude and then cut out of the hand grip – it says ‘Charlesworth Dynamics’.
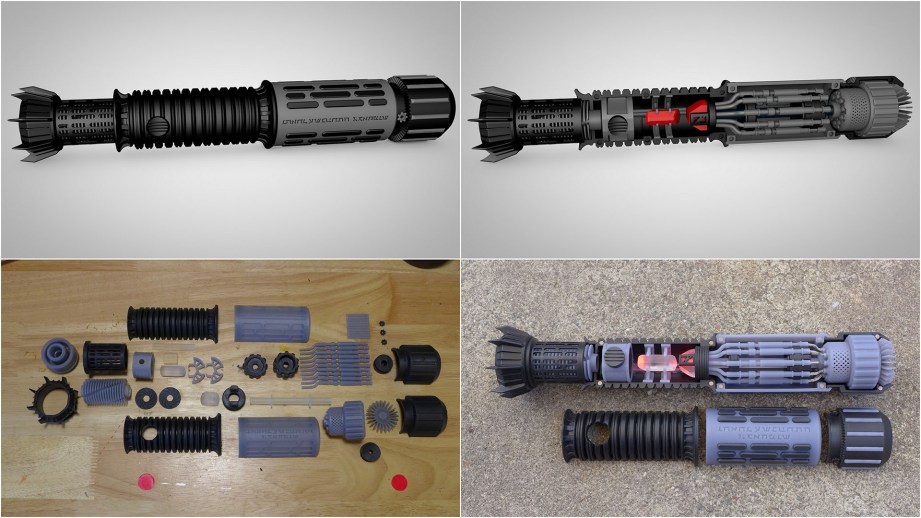
In the end I went through about three versions of the saber until I was happy. I also had to make the hard decision to rein in some of my design elements. Due to time and budget I decided to only have lights without sound or motion elements. At first this was a tough call as I usually envision the grandest possible version but I had to be realistic about the time I had. I came to realize that lights-only served the model far better as it’s only meant to be a display piece and this kept things simple.
With all the design elements in place it’s time to start printing! We’ll cover this and finishing work in Part 2 of the lightsaber epic–so stay tuned! In the meantime, check out the previous entries:
Cutaway Lightsaber Reveal Video


One thought on “Bits to Atoms: Designing a Custom 3D-Printed Lightsaber”
Leave a Reply

One Day Builds
Adam Savage’s One Day Builds: Life-Size Velocirapt…
Adam embarks on one of his most ambitious builds yet: fulfil…

Show And Tell
Adam Savage’s King George Costume!
Adam recently completed a build of the royal St. Edwards cro…

All Eyes On Perserverance – This is Only a Test 58…
We get excited for the Perserverance rover Mars landing happening later today in this week's episode. Jeremy finally watches In and Of Itself, we get hyped for The Last of Us casting, and try to deciper the new Chevy Bolt announcements. Plus, Kishore gets a Pelaton and we wrack our brains around reverse engineering the source code to GTA …
Making
Adam Savage in Real Time: God of War Leviathan Axe…
Viewers often ask to see Adam working in real-time, so this …

One Day Builds
Mandalorian Blaster Prop Replica Kit Assembly!
Adam and Norm assemble a beautifully machined replica prop k…
House of MCU – This is Only a Test 586 – 2/11/21
The gang gets together to recap their favorite bits from this past weekend's Superb Owl, including the new camera tech used for the broadcast and the best chicken wing recipes. Kishore shares tips for streamlining your streaming services, and Will guests this week to dive into the mind-bending implications of the latest WandaVision episod…

One Day Builds
Adam Savage’s One Day Builds: Royal Crown of Engla…
One of the ways Adam has been getting through lockdown has b…

Making
Adam Savage Tests the AIR Active Filtration Helmet…
Adam unboxes and performs a quick test of this novel new hel…

Making
Weta Workshop’s 3D-Printed Giant Eyeballs!
When Adam visited Weta Workshop early last year, he stopped …

One Day Builds
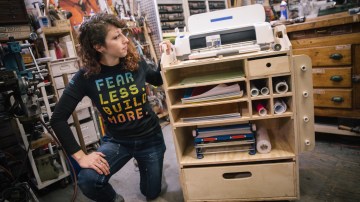
Adam Savage’s One Day Builds: Wire Storage Solutio…
Adam tackles a shop shelf build that he's been putting off f…
Well done! Very meticulous work.