


Building a Studio Scale Death Star Laser Tower Model, Part 4
Painting and weathering (or "Why is there rust in space?")
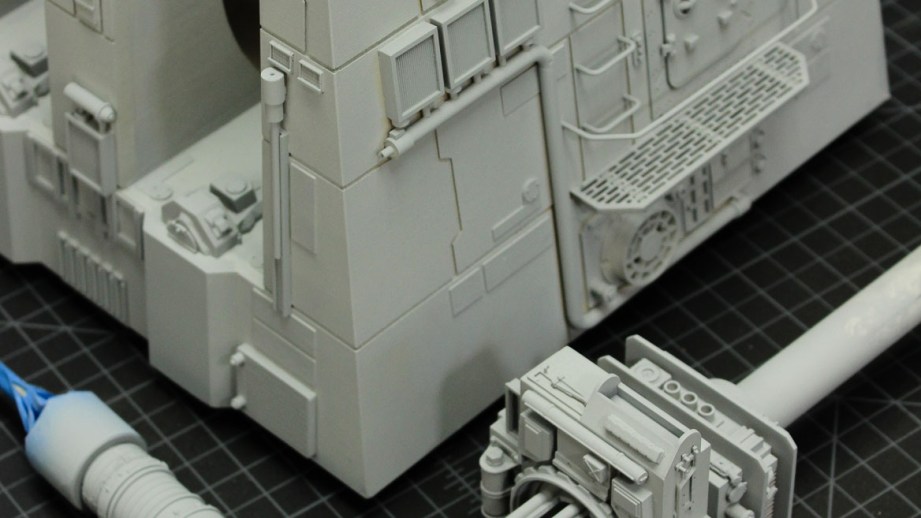
This month, prop maker David Goldberg shares with us his build of a studio-scale replica of the Death Star laser tower from Star Wars. Previously, David covered sourcing his reference, fabricating the structure, and adding the details. We finish with painting and weathering!
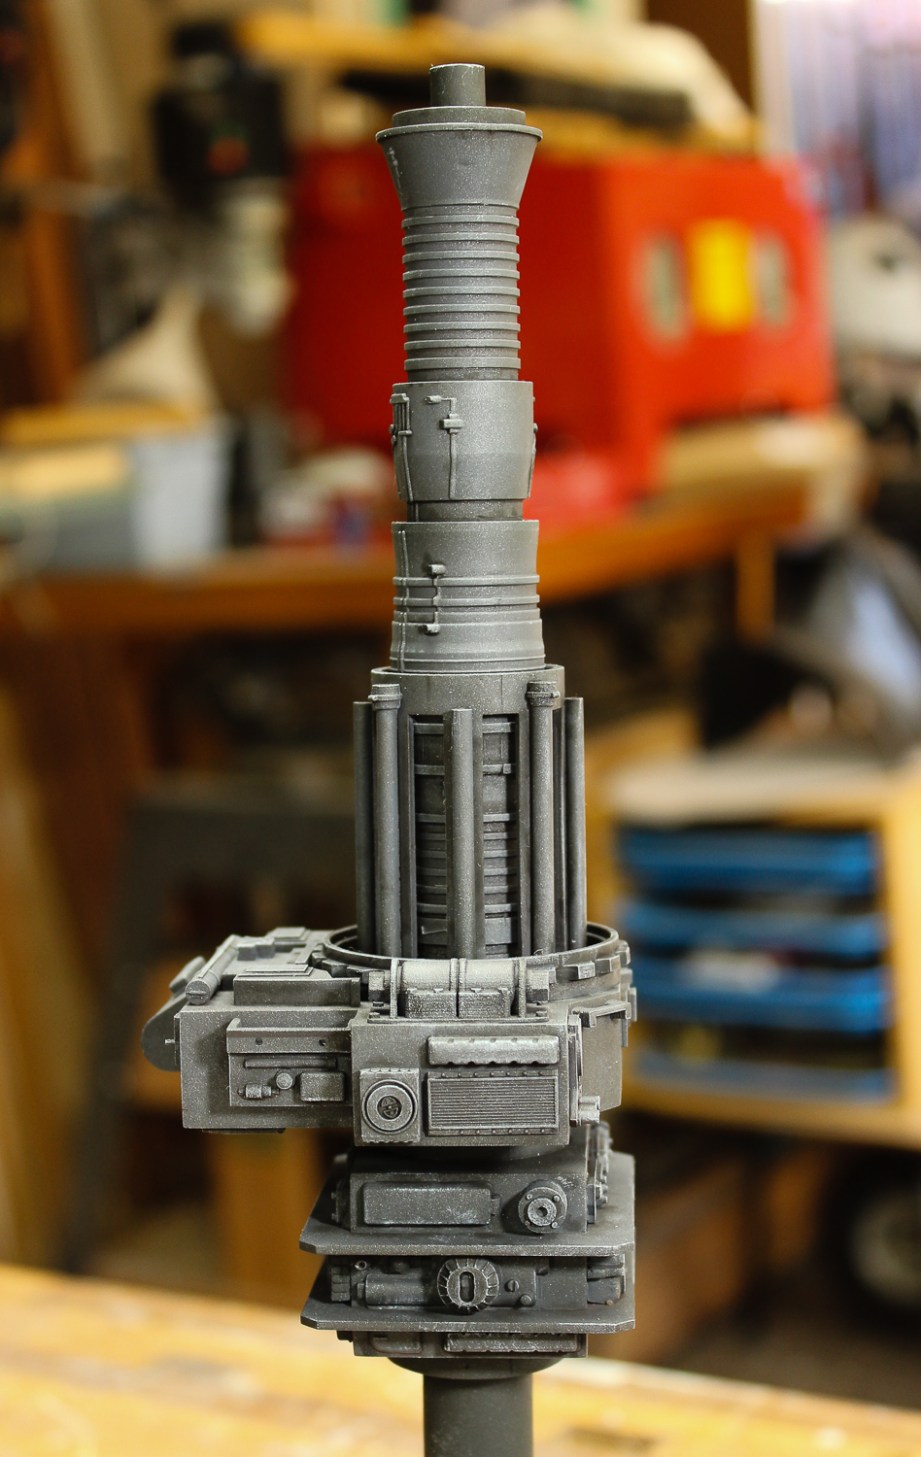
The time has come to paint and weather the model. This is one of my favorite parts of the whole modelmaking process. The time when everything comes together visually as a unified whole. Before painting I disassembled the laser cannons and curved tracks in order to make them easier to paint. The first step is to give the model an overall coat of grey primer. This gives the model a uniform base color, seals the MDF and aids in the adhesion of subsequent paints to the plastic and brass parts. I used a spray can Filler Primer from Rustoleum, applied in several light coats until the model was a uniform shade of grey. It’s amazing how just a simple coat of primer can tie everything together!
There was a little bit of over spray (it was a particularly warm weekend) so I went over the whole model with an extra fine scotch bright pad to knock off any dusty overspray. The next step was to “pre-shade” all the panel lines and around some of the detail features with flat black water based Tamiya acrylic paint sprayed with an airbrush. This pre-shading will subtly show through the base paint layer to be applied next giving a little bit of visual depth and variation to the overall look. Its okay that the pre-shading is a little rough and sloppy, it actually looks a little better in the end not being too consistent.

Next was an overall base coat of Tamiya Acrylic Royal Light Grey sprayed on with an airbrush. I thinned the paint almost 1:1 with water and built up the opacity with subsequent coats until I had the amount of pre-shading showing through that I wanted. The thinned paint dries more transparent so it usually takes more coats than you originally think. The end result is a subtle dark shading around the edges of the panels. The effect will be further reduced with the washes and other weathering yet to come.
Next came a little fine overspray of a darker grey applied with an air brush. The overspray doesn’t really show up in the pictures but does add a bit of variety to the surface of the model. Once the overspray had dried the whole thing was sealed with a coat of Pledge Liquid Floor Finish, which is basically just a water based clear varnish. This will prevent the wash coming next from staining the base color too much.

Now it’s time to wash up! Only this kind of washing has the opposite effect of cleaning, it makes the model look dirty and weathered.
I love washes; they are simple to apply and do such a great job of bringing out surface detail and texture. I prefer to use oil-based paints on my models as they flow, puddle and dry so nicely. And with oil paints you’ve got a good bit of time to work them before they dry. Water based paint washes look great when wet but dry quickly tend to be splotchy when dry.

The wash for the laser tower was made from artist’s tube oil paints. For this wash I used a mixture of Ivory Black and Burnt Umber to create a brownish black, which is a great overall weathering color for almost anything. The paint was thinned down with odorless mineral spirits but was still fairly concentrated, as washes go. The nice thing about artist’s oils is you can apply them really heavy and then wipe most of it off, leaving paint mostly in the corners and recesses.
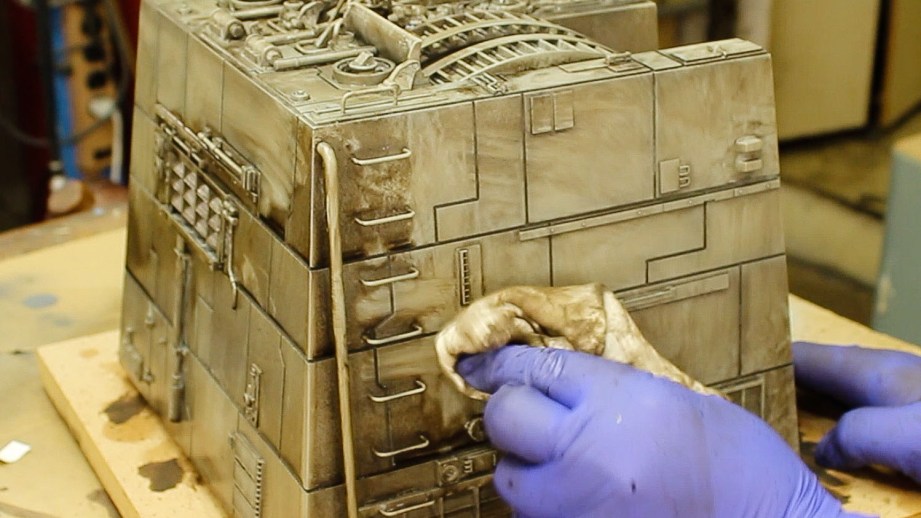
When using oil based washes it’s a good idea to pre-moisten the surface of the model with mineral spirits. This helps the wash flow into all the tiny cracks and crevices and keeps it from staining the surface too much. Just apply clean thinner liberally with a big brush before applying the wash. The secret to a good wash is to not be timid, go for it! The wash was applied quite liberally with a big paintbrush, working it into the panel lines and around all the details. Then I wiped off as much of the wash as I could with a clean cotton rag, always wiping vertically from top to bottom to create vertical streaks. It’s a messy job but it’s amazing to watch all the detail start top pop as the dark wash settles into the cracks!
At this point there is still a lot more wash on the surface of the model then I want, but that’s the nice thing about the very long drying time of artist’s oils, I can brush more clean thinner over the surface and continue to remove the wash as desired. During this process I also did some specific detailed streaking in places. Though this is really an overall wash and I will be coming back to do more detail spot streaks and washes next. I let this base wash dry for several days so that the thinners used in subsequent weathering would not affect it. There are fast drying artist’s oil paints which are handy for detail painting but I prefer the extended working time you get with traditional oils. Besides, who needs to be in such a hurry anyway?!
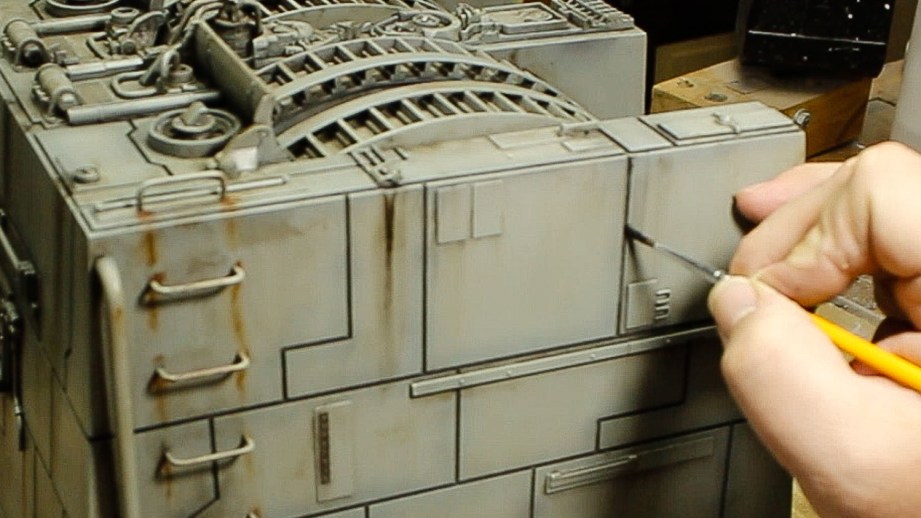
The next step was to add finer detail weathering, mostly streaks and runs, in contrasting colors. As with the washes, I used artist’s tube oil paints, but this time straight out of the tube. Color wise, I squirted out dabs of Ivory Black, Titanium White, Raw Umber, Burnt Umber, Raw Siena, Burnt Siena and Dark Rust on a palette and worked back and forth between using each color, both straight, and blended with the others. The Dark Rust (from MIG Productions) turned out to be my favorite. Don’t ask me how there’s rust in the vacuum of space! That was part of George Lucas’ genius; hardware is so worn in space it actually rusts! (and that there’s no underwear in space, but that’s a topic for another article!). Okay, maybe the Death Star is SO BIG it has its own climate?

As far as technique, it’s pretty straight forward. As with the wash, I moistened the area being worked on first with a bit of clean mineral spirits (it’s important that the overall wash has dried thoroughly for a couple of days or else this pre-moistening may remove it), then put a little point of paint at the top of where I wanted the streak to be and worked it down with a clean brush or rag. Since the oils take a couple days to dry there’s plenty of time to play around with it, or even remove some weathering entirely with thinner if you don’t like how it’s going. Once I was happy with the look of the streaks I set the model aside again to dry before moving onto the next step, dry brushing.
Dry brushing is exactly what it sounds like. A paintbrush with very little paint on it, almost “dry”, is lightly brushed over edges of the model depositing minute amounts of paint. Usually dry bushing is done with very light shade of paint which adds visual highlights to the model. Dry brushing can also be used to make a model look dusty, add the effect of old rust or just add a subtle texture to a flat surface.

For this model I used a very light grey for the dry brushing to add highlights to the top edges of the various details. As with the washes, I used artist’s tube oil paints, again since they take a long time to dry and won’t dry out in the brush as acrylics or enamels might.
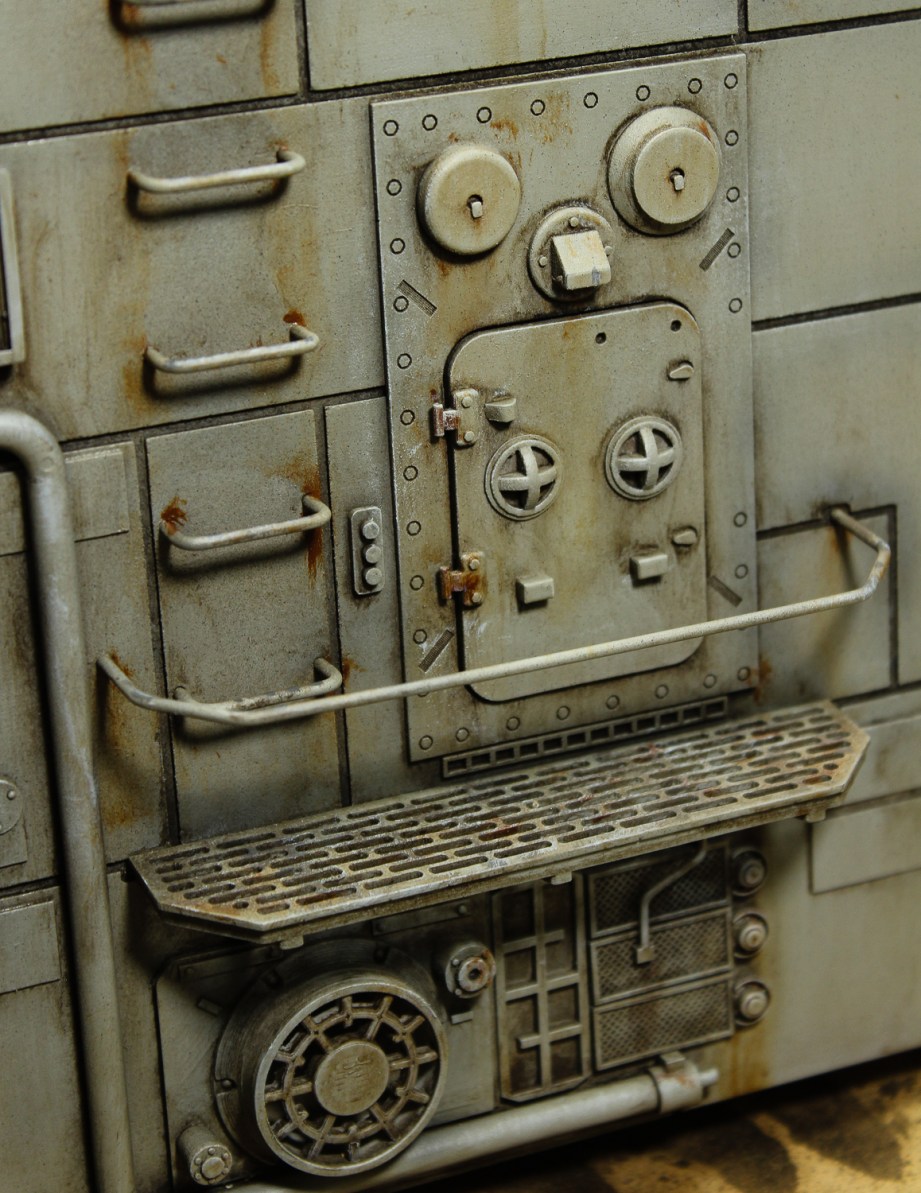
The technique for dry brushing is very simple, I put a small dab of the light grey oil paint on a scrap of cardboard and then dipped a narrow flat brush into it. Then I wiped the brush against a paper towel to get out as much paint as possible. Then very lightly ran the brush over the edges of the model leaving very small traces of paint behind. As I was trying to simulate highlights I concentrated the dry brushing on the upper edges of the details. When dry brushing it is not necessary or desirable to pre-moisten the surface with paint thinner. Although, as with the washes, if some of the dry brushing doesn’t look like it should it’s easy to remove it with a little paint thinner on a rag or cotton swab. Dry brushing is a subtle effect, but it adds a lot to the overall impression of the model.
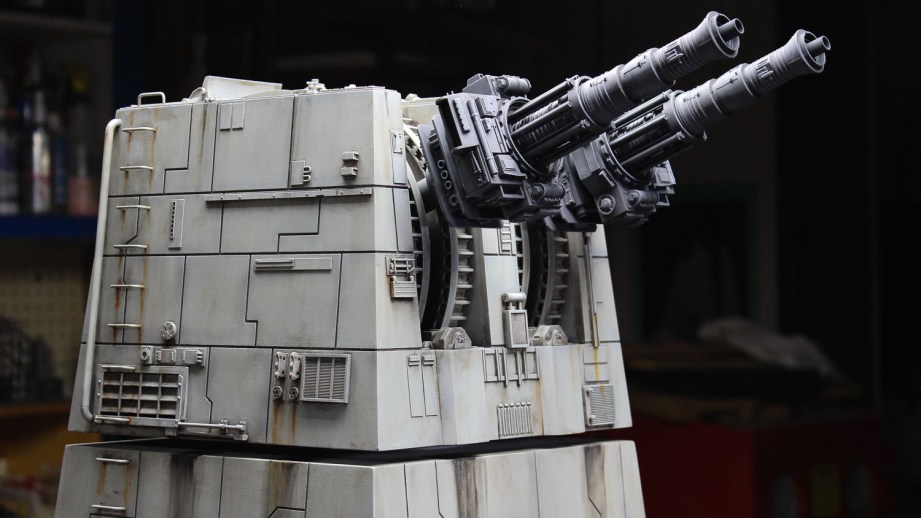
The painting process on the laser canons was similar to the rest of the model but with a different color palette. Using an airbrush, I sprayed the parts with a dark bluish grey acrylic base coat to give the canons a cool undertone. Over that I airbrushed a selective overspray of a Dark grey. The parts were then sealed with Pledge floor polish and once that had dried given a wash. This time I used an enamel wash made from Testors Rubber Black oil based enamel. Rubber Black is one of my favorite wash colors.
Once the wash had dried I applied a selective overspray of Tamiya Acrylic NATO Black and Gun Metal to give it a little metallic kick. Following an application of satin clear varnish to seal the surface I applied an oil-based blackish ‘pin wash’ just to the nooks and crannies to add a little more shadow effect.
As with the rest of the model I dry brushed the laser canons with a light grey oil paint to bring out the highlights.
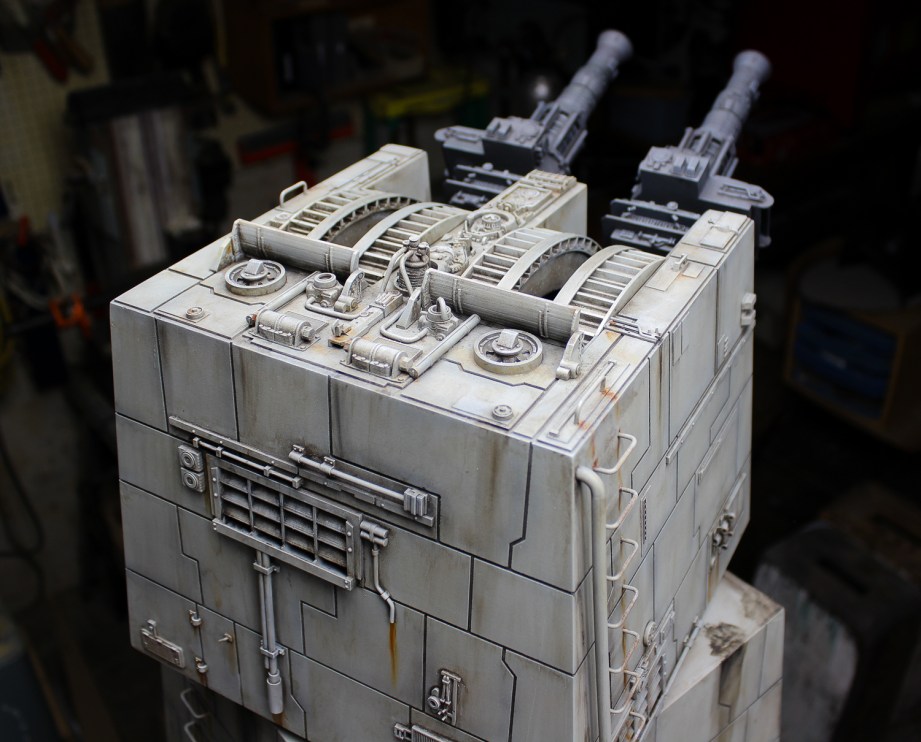
At last it was time for the final assembly! 3D printed parts were used inside the turret to connect the laser canons to a horizontal pivot. While the canons aren’t motorized they can be positioned at different angles for display.

It’s important to sign and date one’s work! In this case with a little laser engraved plate.
The finished model! I just love how this one turned out. An iconic model from one of the greatest movies of all time. Come on you Rebel scum, take your best shot!

Photos and images credit David Goldberg
David Goldberg is a professional modelmaker, propmaker, visual effects supervisor and mechanical designer with more than 30 years experience working in the motion picture, television and theme park industries.


7 thoughts on “Building a Studio Scale Death Star Laser Tower Model, Part 4”
Leave a Reply

One Day Builds
Adam Savage’s One Day Builds: Life-Size Velocirapt…
Adam embarks on one of his most ambitious builds yet: fulfil…

Show And Tell
Adam Savage’s King George Costume!
Adam recently completed a build of the royal St. Edwards cro…

All Eyes On Perserverance – This is Only a Test 58…
We get excited for the Perserverance rover Mars landing happening later today in this week's episode. Jeremy finally watches In and Of Itself, we get hyped for The Last of Us casting, and try to deciper the new Chevy Bolt announcements. Plus, Kishore gets a Pelaton and we wrack our brains around reverse engineering the source code to GTA …

One Day Builds
Mandalorian Blaster Prop Replica Kit Assembly!
Adam and Norm assemble a beautifully machined replica prop k…
House of MCU – This is Only a Test 586 – 2/11/21
The gang gets together to recap their favorite bits from this past weekend's Superb Owl, including the new camera tech used for the broadcast and the best chicken wing recipes. Kishore shares tips for streamlining your streaming services, and Will guests this week to dive into the mind-bending implications of the latest WandaVision episod…

One Day Builds
Adam Savage’s One Day Builds: Royal Crown of Engla…
One of the ways Adam has been getting through lockdown has b…

Making
Adam Savage Tests the AIR Active Filtration Helmet…
Adam unboxes and performs a quick test of this novel new hel…

Making
Weta Workshop’s 3D-Printed Giant Eyeballs!
When Adam visited Weta Workshop early last year, he stopped …

One Day Builds
Adam Savage’s One Day Builds: Wire Storage Solutio…
Adam tackles a shop shelf build that he's been putting off f…

Show And Tell
Mechanical Dragonfly Automata Kit Build and Review
Time for a model kit build! This steampunk-inspired mechanic…
This has been a neat read through! Nice job. I just wish the greeblies were more available
Thanks, Dan!
I would encourage anyone that wants to build a model of the Laser Tower not to be discouraged by the availability of the absolutely correct vintage model kit parts. As I did with this project you can scratch build or 3D print many of the detail parts, or use other kits parts that you have on hand. Be creative, be unique! It’s a BIG Death Star, there’s bound to be some variations from tower to tower.
To make it a little easier, I’ve just uploaded an STL file to the repository linked in the first article that has all the parts (and a bit more) that were 3D printed for this project. Many of them are too small or too finely detailed to be printed on a consumer 3D printer but can be printed in finer resolution detail plastics at a company like Shapeways.com.
Thanks much for sharing, nice to see a different project done to such extraordinary amount of perfection!
Tested needs more of this. Featured builds that are heavy on photos, techniques, specific materials/supplies used (links to where you can get the paints/etc. would be a bonus).
The RPF is cool and all, but builds like the above get interspersed with comments like, “Awesome, man!”
And all I want to see, as a reader, is the author’s build log.
I like too that this post is done in post (see how I made a pun there?) instead of in real-time as it often is on forums like TheRPF. The author has more of a narrative control after the fact (perhaps avoiding a rambling tangent or dead-end attempt in a live, running “build-thread”).
JK, Thanks! It’s funny as this was first a “real-time” build thread on the RPF and then I re-wrote it as this series of articles for Tested.
This is very cool
Great work, but the top part of the turrent it’s totally different compared to the original, and the pieces in the floor in the middle of the toothed wheels of the cannons are also diffent.