


The Zoidberg Project, Part 5: Clawing Away
This week, Frank tackles Zoidberg's claws and feet, and takes a different approach to making a claw mold than he did with Adam's Admiral Ackbar costume. Learn about three-piece molds, slush cast latex, and carving polyfoam with an electric turkey carver!
A confession: this isn’t the first time I have gone down the path of trying to make a Zoidberg makeup. I started a version in 2011, got sidetracked by some jobs, and had to shelve it. I then pulled it out again last year to start over again, but for some reason, I started with the claws first before blocking out a head. Those claws, along with Zoidberg’s “feet,” are what we’re going to be talking about today.

For the claws, I created sculpts using WED (EM-217) clay. WED clay is a water based clay developed by Laguna Clay for Disney (WED = Walter Elias Disney). WED clay has some components which seem to slow the drying down a bit because water based clays tend to dry out fast, and that makes it hard to sculpt with. For the head i am using Monster Clay, and that’s an oil based clay, which never dries out (its a oil/wax based clay). There are a lot of differences in these two types of clays, but one of the big advantages of WED clay is the speed at which you can crank stuff out. These claws don’t really have a lot of nuance, so i want to be able to move quickly and get to the next step.
In approaching the design of Zoidberg’s claws, I had to make a design decision: do I make the claws more like a decapod claw (kind of like a pair of scissors or pliers) or more like how the cartoon is drawn. I noticed in some episodes that his larger claw seems to have cupping on the inside, like the palm of a hand. So, even though the animal anatomy is technically the more accurate way to do it, I went for the cartoon version of his claw shapes because it would suit the wearer being able to comfortably use them as gloves.
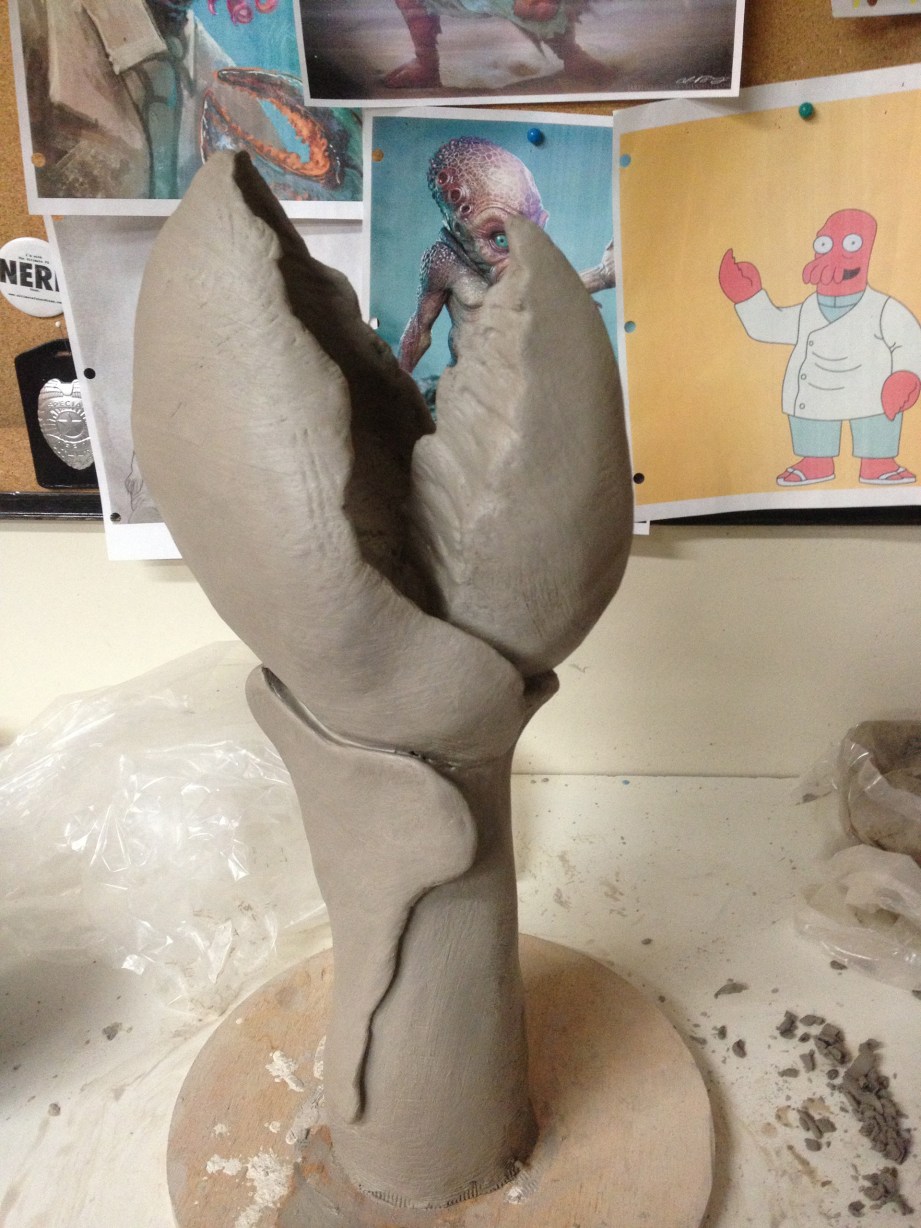
The sculpture process with WED is pretty much the same as with the Monster Clay in the head sculpt. To start, I just add blobs of clay onto an armature that I built and block out the rough forms and shapes, then spend some time refining the anatomy and then finally the texturing (I’ll cover refining and texturing much more when I get back to the head).
I sculpted the whole thing together, then separated the smaller claw to make molding easier. At this point I was thinking that I’d brush in a latex skin, back it with a soft polyfoam, then just carve out the inside until my arm fit in. The latex will act as a layer of “skin” which I can paint, and the polyfoam will take up the extra space between where my hand goes and the latex. That way it will fit snug!
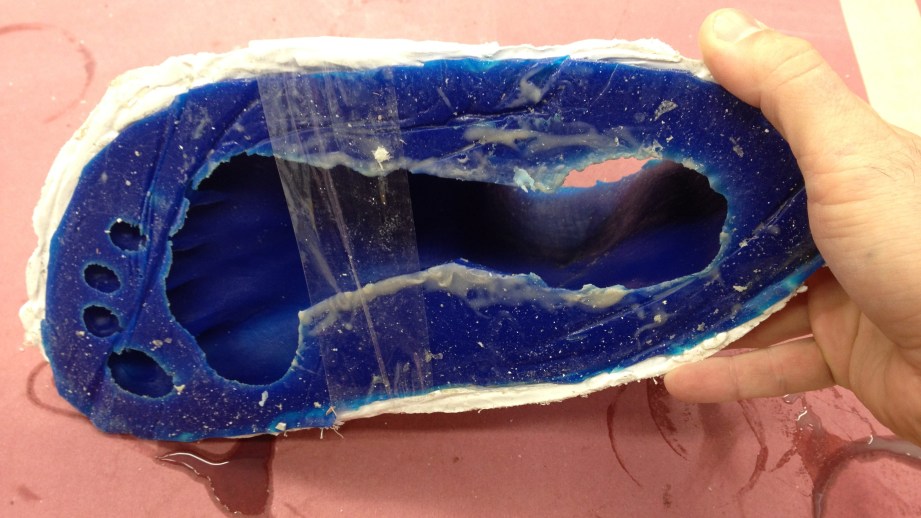
If you remember back to the Admiral Akbar build, I originally thought about making the gloves out of slush cast latex, but the latex would not dry correctly in the epoxy molds. I had to create an arm core for that mold and fill it with foam latex between the core and mold. Well, because I wanted to make Zoidberg’s claws out of slush cast latex this time around, I opted to make the molds out of something that wasn’t epoxy. I ended up choosing Ultracal 30. Ultracal is a hard Gypsum cement, and has a 30 minute working time. For the small claw, it was an easy two-part mold, split right up the center. I coated the sculptures with a few coats of shellac (as a sealer), built a clay dividing wall with white clay (EM-210) and went at it.
Whether the mold is going to be for a latex slush cast, a jacket mold, or for running foam latex, I make most of my Ultracal molds pretty much the same way. I first brush on a splash coat of Ultracal to capture the details of the sculpt, and build that up to about ¼-inch thick. When mixing Ultracal (or any plasters), you add the powder to the water. As a rule of thumb, the volume of your initial water will be about doubled once all the plaster is sifted in. I slowly and evenly sift in the plaster to water, to avoid clumping and make sure all the little plaster particles are getting wet out. Once the surface of the water looks like a dried riverbed, this means all the plaster is hydrated and I mix it with my hand or a whisk. You don’t want the plaster too thick, or it will trap air bubbles on the surface of the sculpture, and you don’t want it too watery or you will just be chasing it with a brush forever. If you stick your hand in the plaster, it should give a nice opaque coating. It sometimes takes a bit of trial and error to get the ratios and the “feel” for mixing plaster down.
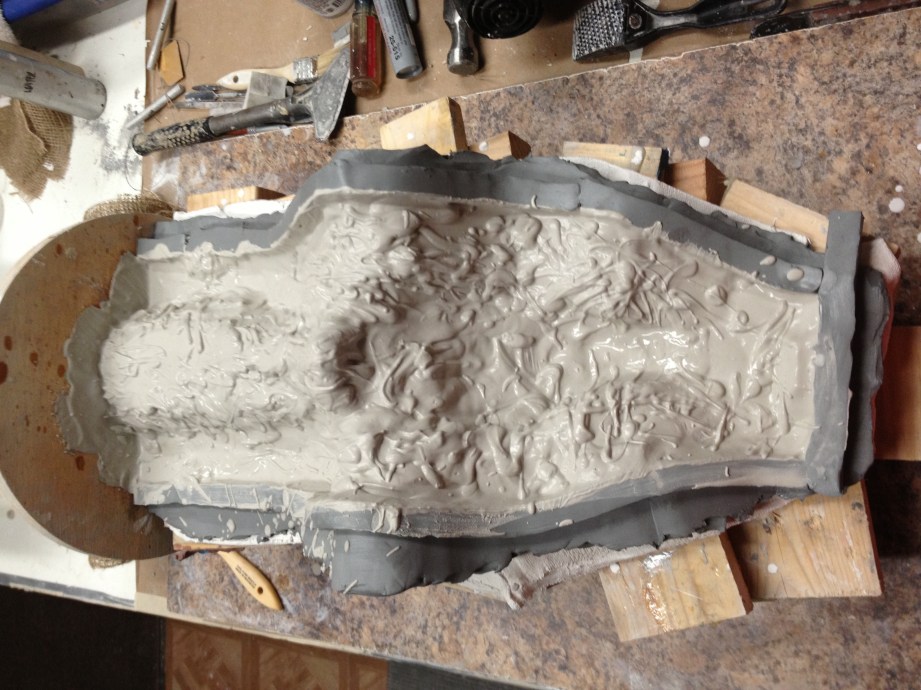
Once you have that surface coat on your sculpt, you need to wait a little bit. This is another place where the “feel” and experience comes in. You want the plaster to just lose its shine and start to develop a matte finish before moving on. If you wait too long, the plaster starts steaming and curing up, and if you go too early the plaster is soft, and you could damage the surface coat. When it’s just right, you can start adding your reinforcement layers of the mold. I usually do four or five layers of open weave burlap that are dipped in the plaster, and then use the leftover plaster to do a “beauty coat” and make the mold look pretty and clean.
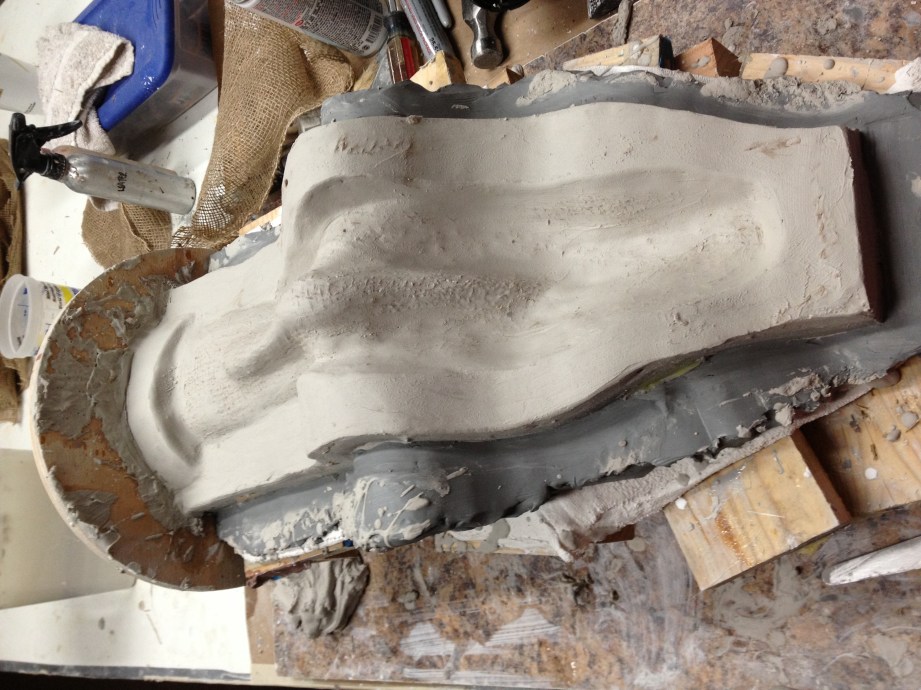
When this is all set up (which takes about an hour) you can pull the clay wall off, seal the plaster with a couple coats of Crystal Clear acrylic spray and do the other side of the sculpt the same way.
For the big forearm section, I will make a three-piece mold. This will make demolding the casting easier in the end. This is the same process as before for the plaster; you just have to plan how the three mold pieces are going to come apart. Visualizing multi-piece molds can be tricky, but if you’re a fan of Tetris, it might be right up your alley. An easy way for this is to treat two of the pieces as one (in your mind) and as long as the third will open up easily, all you have to do is separate the other two. That will help keep your mold from locking together and being stuck.
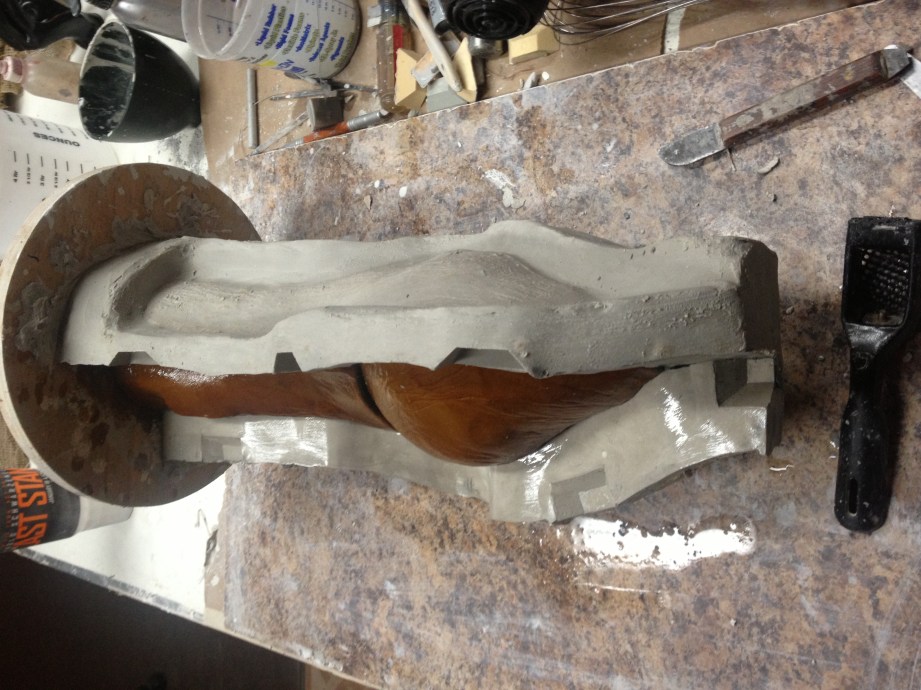
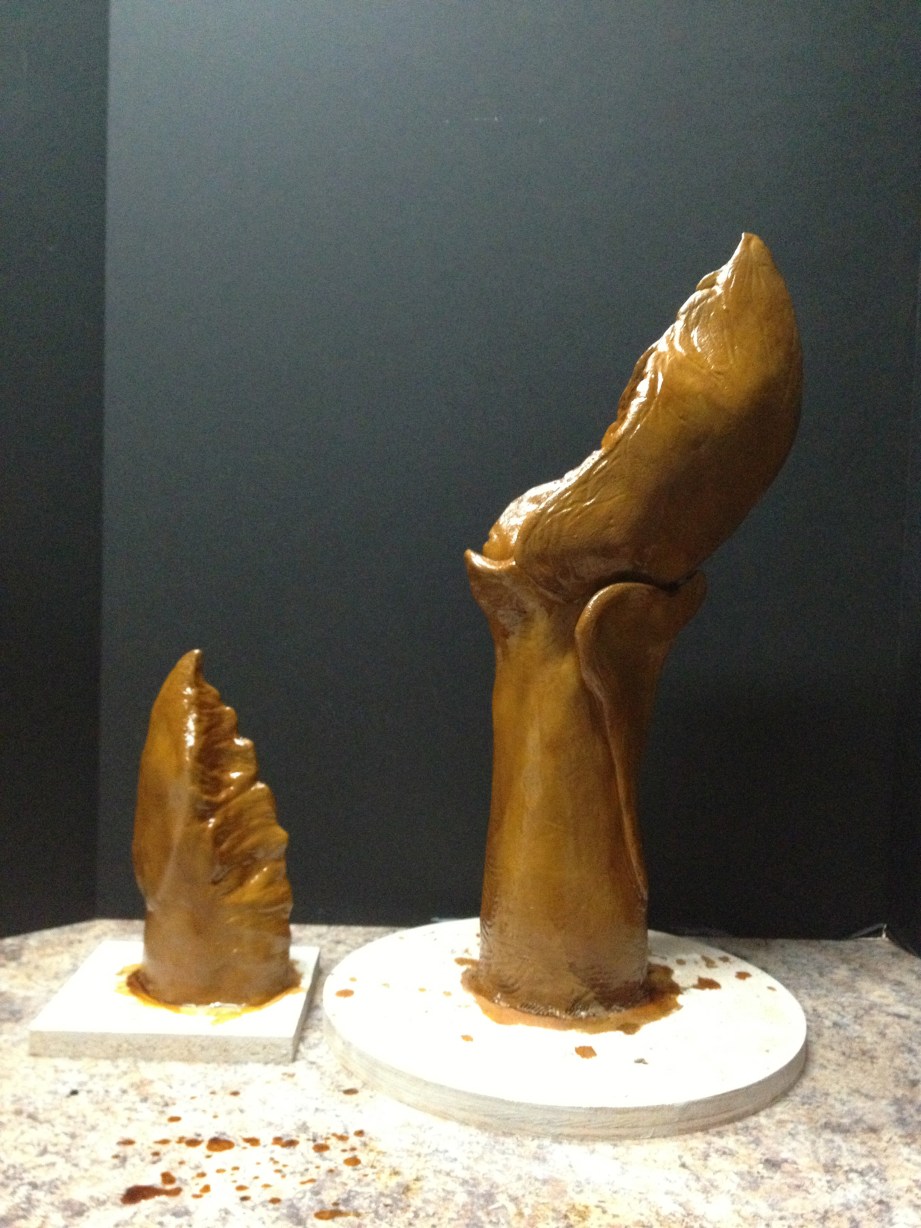
Once the molds are cleaned out and strapped back together all you have to do is fill it with latex for about 30 minutes, and then dump it back out. That’s the “slush” part of the Slush Cast Latex. This will allow a thickness of latex to collect on the inside surface of your mold. You can it sit longer if you want a thicker glove wall, or shorter if you want it thinner. Keep in mind that this only works in plaster molds–which is why we ran into the problem back on Adam’s Ackbar hands, and had to make a core and inject foam latex instead.
For casting latex objects like this I prefer RD-407 latex. Different latexes have different amounts of filler and viscosities and shrink rates. From my experience, this one seems to have a good blend of all the properties. I’ll then prop the mold up on some boards and let the excess drip out for about an hour, then sit the molds on their sides and point a fan into them. This will help it dry a little faster.
Pretty much the next day, I’ll do the next step, which is filling the rest of the mold with soft polyfoam. If you’re keeping track, the outer layer of the glove will be made of latex, and in the inner material where the wearer’s hands will be touching will be polyfoam. To help give the foam a little extra bite and stick to the latex, I mist in a coat of 3M Super 77 spray adhesive, then mix up a batch of Flex Foam-it 3. I can’t remember how big of a batch I did back then, maybe 500 total grams of material if I had to estimate. I always use an electric drill and mixer when I mix up any kind of polyfoam. Since I began using this trick, I haven’t run into inconsistent or collapsing foam runs. Sometimes when I cast polyfoam, I like to give it a little back pressure to fill all the voids, too. For these claws I won’t, so I’ll just pour it in and let it rise (and probably overflow). After about two hours, I can pop open the mold and trim up the excess. Because I filled the whole arm with polyfoam, I’ll want to hog out the inside to fit my arm and fingers. I can do this a little quicker with the aid of an electric turkey carver!
But, here is the problem then I ran into–the polyfoam can get too warm, since it’s akin to wrapping your arm in snug insulation. And it didn’t have the freedom of movement that I was hoping for. When you’re wearing a costume at a convention, or on a movie set, the performer has to be at least a little bit comfortable….so I really need to rethink this.
So now here I am. I still think the sculpture is fine, it just needs to be built a different way. The mold is a rigid stone mold, but I could take a chance waxing it and casting thick fiberglass/epoxy pieces, or do a quick silicone or alginate mold on the polyfoam/latex parts and make plaster copies that could be vacuformed over. I don’t know right now, but I’ll be working on that in the upcoming weeks. This is the kind of problem solving that I have to go through with my builds: finding the most appropriate materials and processes for the right purpose.
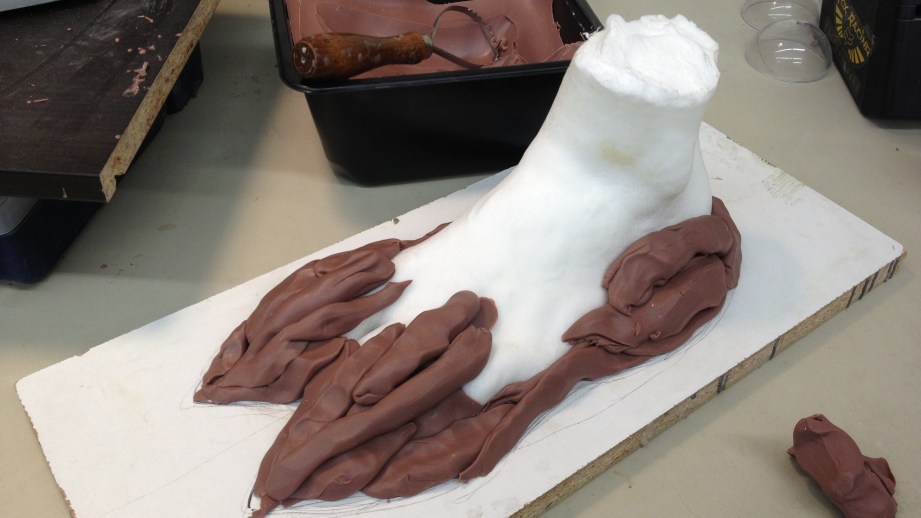
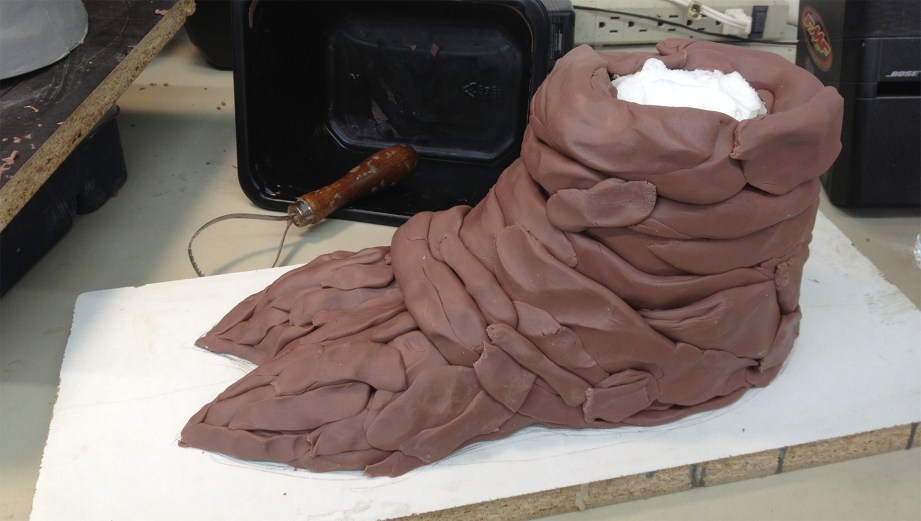
That’s just the claws, too. Then there’s the feet. I borrowed a mold of a human foot from my pal (and the guy that I split my shop space with) Mike Hill, strapped it to a board and filled it with some 8 lb rigid polyfoam. This is just for a simple form, and so that I don’t have to make a solid clay foot sculpture. From what I can tell in the pictures of Zoidberg, his left and right feet are the same. And even if they aren’t, I’m going to take some creative license and make them the same. I need to figure out what I want to make the sandals out of and how that will interact with the sculpture, but for now, I’ll just start getting the forms blocked out and thinking about how I want to cast this up (and again, out of what material).
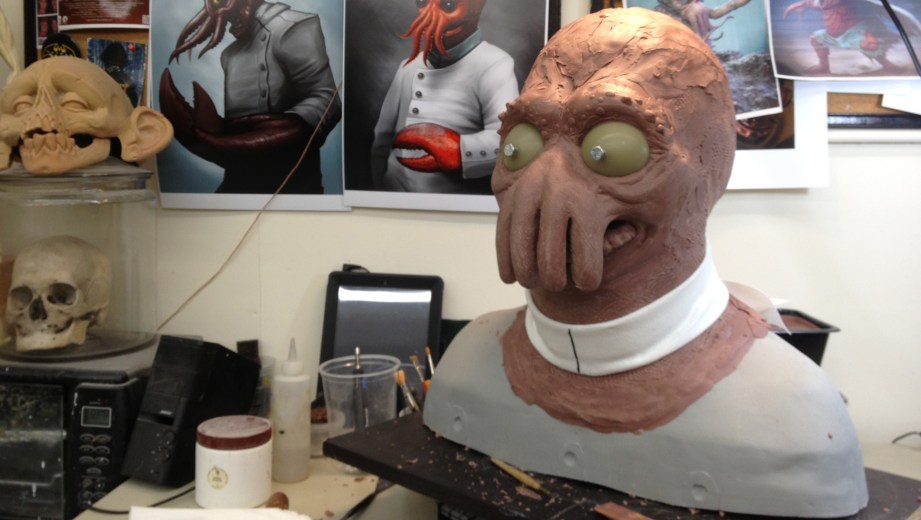
While working on the claws and feet, I’ve continued to plug away at refining the head sculpt too, and it’s coming along. I’ll get more into the refinement of shapes and anatomy, and all the awesome people that I’m collaborating with on this project in the next article!
Thanks to Iwata-Medea and Smooth-On for providing materials and sponsoring this project.


5 thoughts on “The Zoidberg Project, Part 5: Clawing Away”
Leave a Reply

One Day Builds
Adam Savage’s One Day Builds: Life-Size Velocirapt…
Adam embarks on one of his most ambitious builds yet: fulfil…

Show And Tell
Adam Savage’s King George Costume!
Adam recently completed a build of the royal St. Edwards cro…

All Eyes On Perserverance – This is Only a Test 58…
We get excited for the Perserverance rover Mars landing happening later today in this week's episode. Jeremy finally watches In and Of Itself, we get hyped for The Last of Us casting, and try to deciper the new Chevy Bolt announcements. Plus, Kishore gets a Pelaton and we wrack our brains around reverse engineering the source code to GTA …

One Day Builds
Mandalorian Blaster Prop Replica Kit Assembly!
Adam and Norm assemble a beautifully machined replica prop k…
House of MCU – This is Only a Test 586 – 2/11/21
The gang gets together to recap their favorite bits from this past weekend's Superb Owl, including the new camera tech used for the broadcast and the best chicken wing recipes. Kishore shares tips for streamlining your streaming services, and Will guests this week to dive into the mind-bending implications of the latest WandaVision episod…

One Day Builds
Adam Savage’s One Day Builds: Royal Crown of Engla…
One of the ways Adam has been getting through lockdown has b…

Making
Adam Savage Tests the AIR Active Filtration Helmet…
Adam unboxes and performs a quick test of this novel new hel…

Making
Weta Workshop’s 3D-Printed Giant Eyeballs!
When Adam visited Weta Workshop early last year, he stopped …

One Day Builds
Adam Savage’s One Day Builds: Wire Storage Solutio…
Adam tackles a shop shelf build that he's been putting off f…

Show And Tell
Mechanical Dragonfly Automata Kit Build and Review
Time for a model kit build! This steampunk-inspired mechanic…
Loving the detailed writeups, as soon as the foam was mentioned i thought “that sounds very uncomfortable in the long run” 🙂
Thanks yet again for another wonderful update on this project, Frank!! 🙂
I’m behind on this feature, it’d be great if there were links to all the previous articles.
I would love to see a video of this build. The text is allright but a video would really do it.
AAaahhh so thats where my claws went! GIVE THEM BACK TOO ME NOW!