


Building a District 9 Alien Rifle Replica, Part 2
In Bill's second build log for his District 9 prop replica, he discusses building the rifle components with his lathe and then molding those pieces.
Over the course of this month, Punished Props’ Bill Doran is building a 1:1 scale replica of the alien assault rifle from District 9 to unveil with us at Comic-Con. Bill’s build logs and videos will walk through his design and fabrication process, and his finished piece will be paired with a surprise at SDCC. Place your questions for Bill in the comments below!
Welcome to the second installment of the District 9 rifle prop build! The project is moving along at a good pace and I’ve made a lot of progress. While the main body of the gun was made mostly in flat layers, there are a bunch of cylindrical pieces and it would be a pain to build them from flat sheets of material. Instead, I opted to bust out my lathe.
Working with Foam
For these pieces, I used a urethane tooling foam called RenShape. It comes in several densities. I ended up using the most dense foam I had. This stuff is so dense that you would think it’s made of rock.
I was also made aware by my pal Harrison Krix that sometimes this kind of foam could cause curing inhibition in platinum cure silicones, so I performed a simple test. I took a small sample of each of the four densities I had on hand and dumped silicone over them all. Sure enough, the two least dense foams caused some inhibition, while the two most dense ones did not. Hence the decision to use the most dense stuff!
Taking Foam to the Lathe
With my foam in hand, I took to getting it cut down to the rough size of each of the cylinders I needed. This is the kind of job where a bandsaw excels.
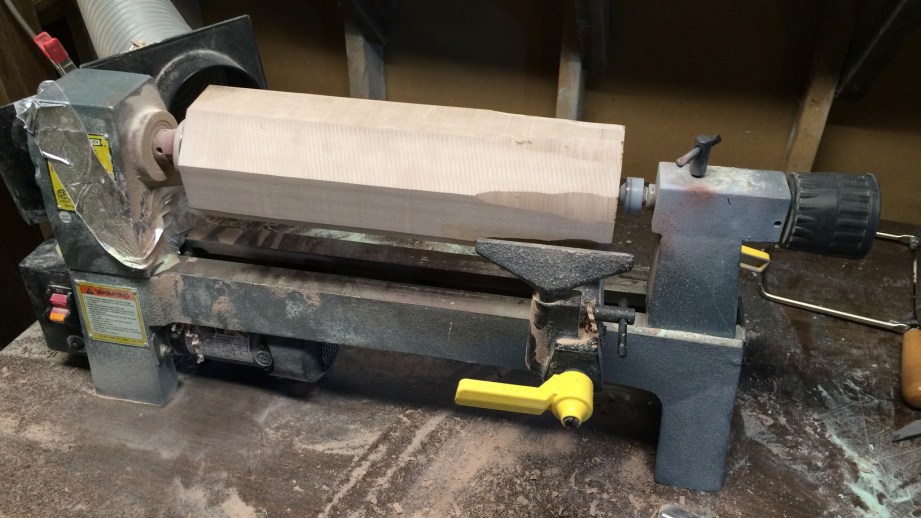
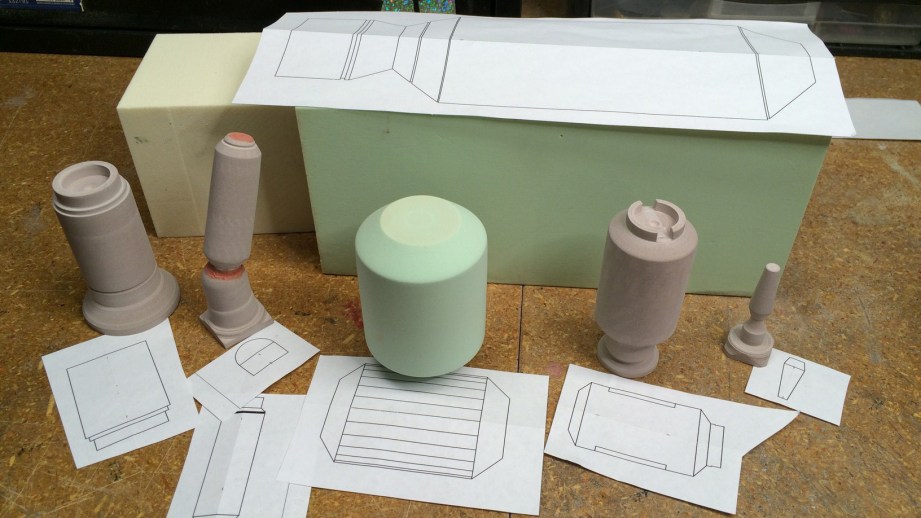
Then I centered the pieces on my lathe and got to turning! Basically I would turn it down to a tube shape, roughly the widest diameter on that piece, and then start carving in details. Since the foam has a nice homogenous density, it lathes like a champ!

One by one I knocked out all the pieces, turning them down to shape. Some of the pieces were quite tiny and required lots of finesse to shape them without breakage. Others, like the main tube thing under the handle, took up every dimensional inch of my poor mini woodworking lathe.
Some of the details on these parts couldn’t be made on the lathe. Instead, they needed to be added by hand. Most of these details were carefully carved in by hand with my Dremel. Other parts could be cut in using the bandsaw.
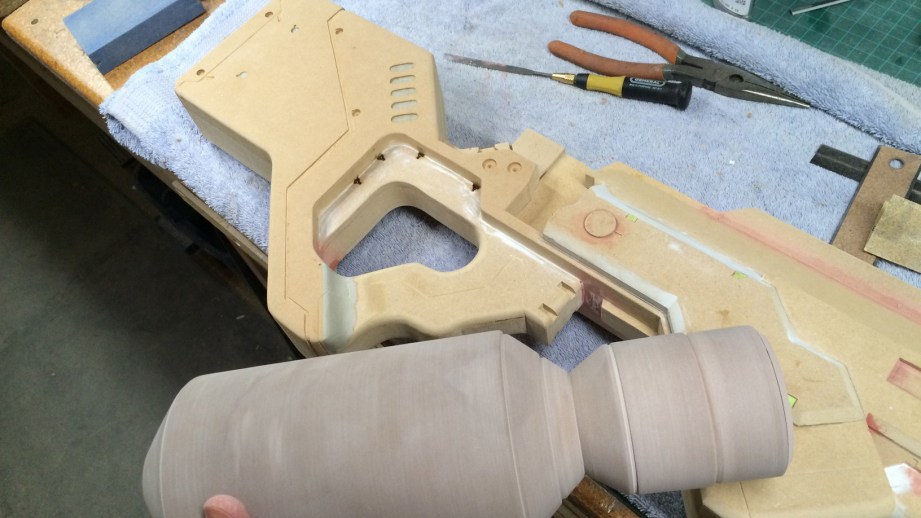
I also added on some details by gluing down strips of styrene plastic or pieces of acrylic dowel. Each part demanded it’s own set complex modeling skills to achieve a specific look.
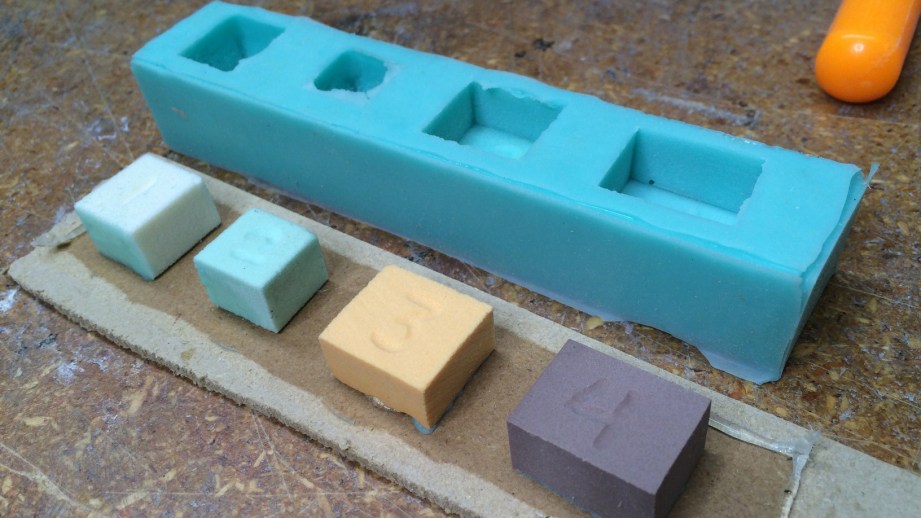
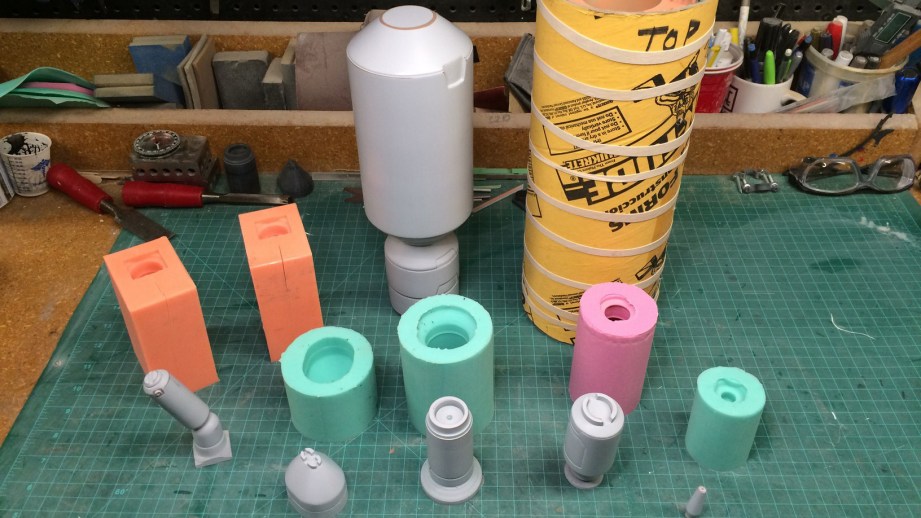
Creating Box Molds
Once these pieces were finished, sanded and primed, they could be molded! This way they could be cast from sturdy plastic resin. There are a number of reasons for doing this:
- The cast parts will be more durable than the foam masters.
- I need 24 of the tubes that run the length of the barrel. I don’t like lathing that much.
- The tube under the handle is huge. Making a mold means I can rotocast it hollow and much lighter.
All of these tubular shaped molds were made by gluing their pouring spout ends down to a surface and building a mold box around them. For most of them, I used cardboard tubes to make the mold walls since they were already the perfect shape! Some of the pieces were a little oblong, so I made boxes from foam sheets.
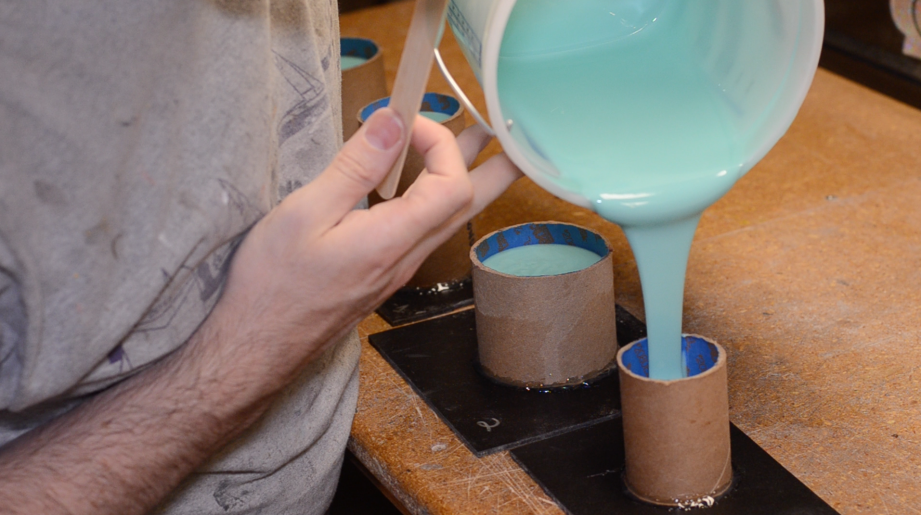
With the pieces all prepped I mixed up some Mold Star 15 silicone, degassed it in my vacuum chamber, and dumped it into the mold boxed. Piece of cake! Just a handful of simple, one-part dump molds like the one Frank made with Norm a while back.
When the silicone cured I popped the masters out and was ready to start casting pieces for the final gun prop!
What about molding the main body? That’s a story for the next installment of this project: matrix molding.


8 thoughts on “Building a District 9 Alien Rifle Replica, Part 2”
Leave a Reply

One Day Builds
Adam Savage’s One Day Builds: Life-Size Velocirapt…
Adam embarks on one of his most ambitious builds yet: fulfil…

Show And Tell
Adam Savage’s King George Costume!
Adam recently completed a build of the royal St. Edwards cro…

All Eyes On Perserverance – This is Only a Test 58…
We get excited for the Perserverance rover Mars landing happening later today in this week's episode. Jeremy finally watches In and Of Itself, we get hyped for The Last of Us casting, and try to deciper the new Chevy Bolt announcements. Plus, Kishore gets a Pelaton and we wrack our brains around reverse engineering the source code to GTA …

One Day Builds
Mandalorian Blaster Prop Replica Kit Assembly!
Adam and Norm assemble a beautifully machined replica prop k…
House of MCU – This is Only a Test 586 – 2/11/21
The gang gets together to recap their favorite bits from this past weekend's Superb Owl, including the new camera tech used for the broadcast and the best chicken wing recipes. Kishore shares tips for streamlining your streaming services, and Will guests this week to dive into the mind-bending implications of the latest WandaVision episod…

One Day Builds
Adam Savage’s One Day Builds: Royal Crown of Engla…
One of the ways Adam has been getting through lockdown has b…

Making
Adam Savage Tests the AIR Active Filtration Helmet…
Adam unboxes and performs a quick test of this novel new hel…

Making
Weta Workshop’s 3D-Printed Giant Eyeballs!
When Adam visited Weta Workshop early last year, he stopped …

One Day Builds
Adam Savage’s One Day Builds: Wire Storage Solutio…
Adam tackles a shop shelf build that he's been putting off f…

Show And Tell
Mechanical Dragonfly Automata Kit Build and Review
Time for a model kit build! This steampunk-inspired mechanic…
good looking pieces there. 🙂
i have a question regarding your lathing technique and material, though. it was hard to detect in the sped-up footage, but it looked like you were using a really high angle with what looked like a skew chisel. almost as if you were scraping away material instead of cutting it with a rubbing bevel. is that due to how the foam lathes or more of a process quirk you have? (or did i just misinterpret the whole thing?)
As a longtime fan, this really is the perfect project for Bill, just up his alley 🙂 SciFiGunGuy!
That was more of a lack in training on my part. =)
Out of curiosity, how are you removing your more complex parts (the ones with the undercuts) from the one piece moulds? It looks like that on a couple of them that you have spliced through one side of the mould wall, while the others are obviously just pulled out because of their simple shape.
The part that intrigues me the most is the largest tube shape that you have there in your last photo. If you are simply doing a straight splice through the mould wall, that always worries me with the notion of misalignment of the register when you allow the mould to close back up… which is why I always cut the splice with an undulating (register locking) line. I take it that you are doing this as well.
when i tried learning these kinds of cuts you were scraping, i wrecked so many pieces by having a chisel corner snag in the wood and tear a deep spiral gash all over the place. especially when your material doesn’t really benefit from being cut, scraping doesn’t sound like an unwise choice. 🙂
I cut a seam in either side of the piece using this custom X-Acto blade that I made. It makes it so I can release the piece with it’s overhangs, but also creates a little bit of registration along the seam. Blade image here: https://twitter.com/chinbeard/status/612081534669975552
For those who don’t want to, or can’t, take a blowtorch to an X-Acto blade, there is also a specialty tool to do this called a mold key knife. You can usually find them for around $20 if you search around.
– Well there you are. I was wondering if this was what you were doing, as I sort of alluded to in my question. Thanks for the reply. I’m always keen to see how others approach their projects.