


Adam Savage’s One Day Builds: Custom Workbench LED Lamp!
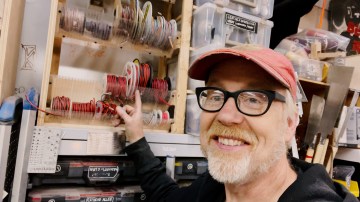
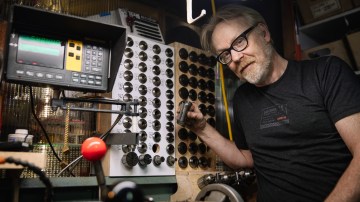
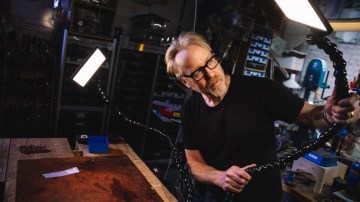
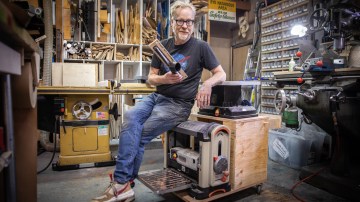
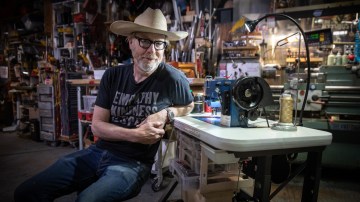
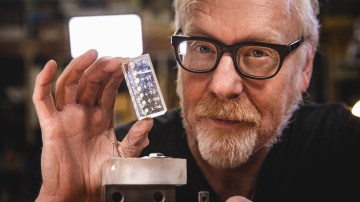
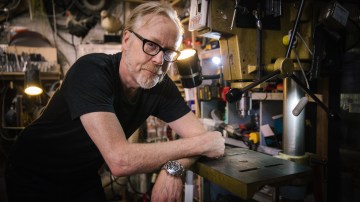
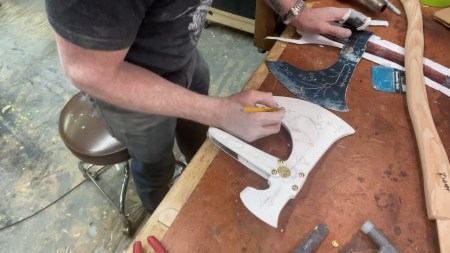
While working on a recent prop project, Adam realizes that he needed better lighting for his workshop bench, and embarks on building a custom light rig for illuminating his builds. Using off-the-shelf parts like an affordable LED light panel, Adam wires up this versatile bench lamp that can be positioned precisely where he needs it!


29 thoughts on “Adam Savage’s One Day Builds: Custom Workbench LED Lamp!”
Leave a Reply

One Day Builds
Adam Savage’s One Day Builds: Life-Size Velocirapt…
Adam embarks on one of his most ambitious builds yet: fulfil…

Show And Tell
Adam Savage’s King George Costume!
Adam recently completed a build of the royal St. Edwards cro…

All Eyes On Perserverance – This is Only a Test 58…
We get excited for the Perserverance rover Mars landing happening later today in this week's episode. Jeremy finally watches In and Of Itself, we get hyped for The Last of Us casting, and try to deciper the new Chevy Bolt announcements. Plus, Kishore gets a Pelaton and we wrack our brains around reverse engineering the source code to GTA …
Making
Adam Savage in Real Time: God of War Leviathan Axe…
Viewers often ask to see Adam working in real-time, so this …

One Day Builds
Mandalorian Blaster Prop Replica Kit Assembly!
Adam and Norm assemble a beautifully machined replica prop k…
House of MCU – This is Only a Test 586 – 2/11/21
The gang gets together to recap their favorite bits from this past weekend's Superb Owl, including the new camera tech used for the broadcast and the best chicken wing recipes. Kishore shares tips for streamlining your streaming services, and Will guests this week to dive into the mind-bending implications of the latest WandaVision episod…

One Day Builds
Adam Savage’s One Day Builds: Royal Crown of Engla…
One of the ways Adam has been getting through lockdown has b…

Making
Adam Savage Tests the AIR Active Filtration Helmet…
Adam unboxes and performs a quick test of this novel new hel…

Making
Weta Workshop’s 3D-Printed Giant Eyeballs!
When Adam visited Weta Workshop early last year, he stopped …

Show And Tell
Mechanical Dragonfly Automata Kit Build and Review
Time for a model kit build! This steampunk-inspired mechanic…
parts here!
LED Light: https://www.amazon.com/gp/product/B01KZLM3QC/
Power Supply: https://www.amazon.com/gp/product/B00DKSI0S8/
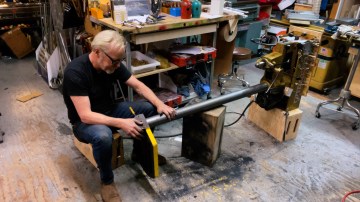
3/4″ Loc-Line: https://www.amazon.com/Loc-Line-inch-Ball-Socket-Flexible/dp/B001EHCFFG/
Ball Socket MPT Connector: https://www.amazon.com/Loc-Line-inch-Ball-Socket-Connector/dp/B001EHJO1Y/
Ball Socket Flare Nozzle: https://www.amazon.com/Loc-Line-inch-Socket-Flare-Nozzle/dp/B001EHI1FO/
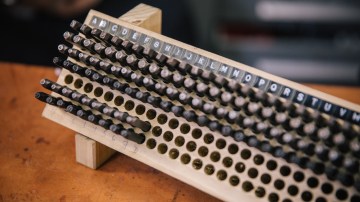
Watch engraving video Adam mentions: https://www.youtube.com/watch?v=sfyj-J0YxT8
I’m using the same light with a cheap microphone suspension boom and a ballhead. Not quite as flexible as your solution but works fine for me.
Didn’t Joey mention his use of light panels like this in a recent video, I wonder if that is where Adam put two-and-two together to get this idea 🙂
Don’t know about anyone else, but the thing I covet most in this video is that pair of wire strippers.
Also: I should point folks in the direction of this fellow’s YouTube channel… https://www.youtube.com/user/DIYPerks/videos
He does a lot of similar build videos, usually using harvested components (such as salvaged LED TV panels).
Here is mine I put together a couple months ago for my drill press! Fully 3D printed light housing, LED strips, 2amp power supply and a mic gooseneck with some custom printed brackets! All done for less than $20 and super helpful!
Ho yes! Adam, One of your best.
Merci
Jean-Luc
Mtl, Qc
I bought old power supplies from Urban Ore for mine.
Also you can use a vacuum to suck the string through the locline. That’s the method I’ve seen bike builders use to route internal cables through the frame.
Why bother fabricating a mount at all? Just get a 3/4″ pipe clamp for $12 and a hunk of pipe for even less, then thread it in.
Those are Knipex strippers and they don’t like to work reliably on THHN, but they are great for other applications–especially if you’re wiring up a bunch of terminal blocks.
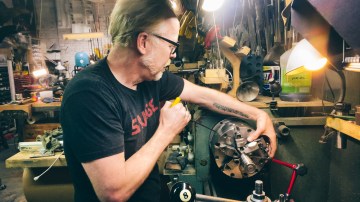
As an alternative to machining a delron threaded base, I would say a 3/4″ NPT pipe flange would work just as well (especially if you don’t have the appropriate Tap)
I have a lot of different light solutions on my desk cause I also like taking pictures or videos of my works, but what I think is very valuable is a HeadLamp. It gives you the light just where you need it, with only one disadvantage I found: working on very shining stuff like a PCB may reflect too much light on your eyes.
And to avoid this, I think I’m going to build a lamp very similar to the Adam’s
I love how Adam explains as much as possible of what he’s doing in every step. It makes the project much more approachable, since something as simple as checking continuity can be a completely foreign subject for a lot of people! Great job!
I recently discovered those little video lights after getting my son one for shooting video with and love them. I was inspired afterwards to make a lamp from scratch. Mine is composed of reclaimed LED strip and a bit of laser cutting. The project and files are posted on Thingiverse at https://www.thingiverse.com/thing:2757548 . Definitely want to make a larger version now for use on my bench!
Looks like it would be great for mini painting.
Hey, Adam! Great video. I picked up one of the Viltrox L116T panel lights (which I think is the same one in the video), and it’s a great deal for thirty bucks shipped.
You’re right about the 8A power supply being overkill. The way these lights works is there are two colors of LEDs, and depending on the brightness and color temperature, you get a different mix of power to each one. With a bench supply and ammeter, I measured the current at different color temps and full brightness. The peak current was at 4400K (where I infer both sets of LEDs are at or near 100% on). Here are my measurements:
3300K 0.620A
4400K 1.230A
4500K 1.227A
5600K 0.596A
The current draw will vary depending on component variations between individual lights, as well as temperature, service life, humidity and probably phase of the moon. But the above should be in the ball park. A 1.25A supply is iffy. 1.5A should be fine. Anything more is over the top. (You could use that 8A supply to run 5 panels in parallel, though.)
Thanks for the video, and Happy Hacking!
Greatest trick I learnt for feeding string through any tube. Use either a vacuum or a compressor to suck/blow the string through the tube.
I learned this after breaking a draw line for a 35m power duct from the house to my workshop.
This build is trending in Amazon… I only searched for Loc-Line and next time I went into the app, the LED panel, power supply and the Dremel butane soldering iron were all in the related items list!
*A *A I think they are Knipex Multistrips, they just got put on my Christmas list
Totally on a wrong video but this is the most recent, I just did like 20 minutes of searching, did the Martian spacesuit replica project just die back in 2016? Last video I could find was the one on patterning.
Sorry Adam. Couldn’t resist this one. Blast from the past, eh?
What project are you working on that’s on the table?
A 3d printed life size R2-D2 (https://www.patreon.com/mrbaddeley/overview)
I built mine today!
Photos: https://photos.app.goo.gl/vMWpKgyy5QgvoATS8 (includes detail shots, with my comments)
I really liked Adam’s video, so I first ordered the LED panel. (justification: I could use it for photos/video!) Then this week I ordered the Loc-Line and armature wire.
Loc-Line makes a magnetic base (“60 lbs strength”) which works beautifully.
My only fear was how to attach the “6-inch rigid support” in the base, but I realized I could use a long bolt, replacing the short one that came with the magnet. (see photos) That worked perfectly.
Thanks for the design, Adam. I now have a flexible work light!
Cost Breakdown: (All prices Canadian, including tax & shipping)
Total Cost: $195 CAD
Big thanks to you! I followed what you did and managed to put together an entire light rig for under $60! The microphone armature is better than the Loc-Line (look at how many times Adam double-adjusts it in the video), and there is definitely enough freedom of movement. Here’s my shopping list:
$30 – LED Light (per Norm above): https://www.amazon.com/gp/product/B01KZLM3QC/
$13 – Microphone Suspension Stand: https://www.amazon.com/gp/product/B00DY1F2CS
$10 – Power Supply (per Norm above): https://www.amazon.com/gp/product/B00DKSI0S8/
$6 – Ball Head Adapter: https://www.amazon.com/dp/B00WQRQZS6/
Yes, I can confirm the stand easily holds the weight of the light without dropping or shaking, and I mounted mine upside down.
Folks this is all you need! Don’t spend big bucks!
Thanks again Hajuskin for putting me on the right track! 😉
Thanks Adam for the inspiration, no more squinting! 3D Printed a part to accept the MPT connector and blend in with the 3D Printed pencil holder.
Thank for providing your take on the workshop lamp, the shopping list and pictures! I’m trying to recreate for a Christmas gift and running into an issue. Hoping you can help!
I bought the same mic boom and ball head as you listed, but the two do not match. The pin on the mic boom has 3/8″ thread, but the ball head is set to receive 1/4″. Did you use another part? Your photos look like you got the mic pin straight into the ball head. Any help would be appreciated!
Really awesome build. What I like is that Adam makes the same mistakes we all make (at least ones I make) like forgetting a step and then you have to go back and retrace yourself. He could just as easily edit the video but he’s not like that. Thanks Adam for letting us know it’s ok to mess up as long as you don’t give up.
So sorry to respond to your comment over two months late! The ball head has a threaded insert, so it can accept either 1/4″ or 3/8″. Notice the screwdriver cutout? You can remove the 1/4″ insert, and then it accepts 3/8″ threads. Very nice piece of hardware!
Loc-Line is expensive in the UK. Otherwise went as expected. Used a rubber bung in the nozzle so only needed to make a hole for the cable. Found it easier to melt a hole with a soldering rather than drill as i snapped a nozzle due to a new sharp drill bit grabbing. I think the draw is 1.35A each as a 3A power supply is easily powering both. G-Clapped the flange to the bench so i can use them for other things like holding cameras ect.
I used more powerful Viltrox VL-300T light (1450 lm) and mounted it on Ikea Tertial work lamp / suspension boom. I just replaced original pin with 1/4″ – 20 UNC screw. FYI new LED light matches the weight of original Ikea head with a bulb.