One Day Builds
Adam embarks on one of his most ambitious builds yet: fulfil…
Show And Tell
Adam recently completed a build of the royal St. Edwards cro…
Making
Viewers often ask to see Adam working in real-time, so this …
One Day Builds
Adam and Norm assemble a beautifully machined replica prop k…
One Day Builds
One of the ways Adam has been getting through lockdown has b…
Making
Adam unboxes and performs a quick test of this novel new hel…
Making
When Adam visited Weta Workshop early last year, he stopped …
One Day Builds
Adam tackles a shop shelf build that he's been putting off f…
Show And Tell
Time for a model kit build! This steampunk-inspired mechanic…
One Day Builds
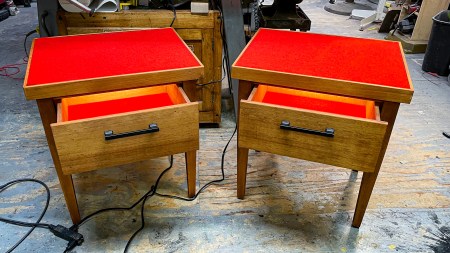
Adam reveals his surprise Christmas present for his wife--a …


I’ve got one for Adam since I fuck this up all the time. What is his method for measuring the spacing between two holes to transfer/copy to another material?
I feel like Messirs Baker and Tippett should be convinced to get all their archival pics scanned and posted somewhere… archive.org? Maybe the Smithsonian?
I absolutely loved Adam’s Maker Faire advice on knowing when to go with a loose tolerance versus a tight tolerance and this week’s talk about knowing when good enough is actually good enough. Unfortunately though, my mind knows it to be true but my heart has a hard time accepting it. I suppose that someone should perform a tolerancing intervention for me. My wife will tell you that she firmly believes that my first job in mechanical design ruined me for general carpentry and other home projects. In 1986, I worked in the tooling design department of an automotive drivetrain components company. Our tooling tolerances were typically 10% of the respective product feature we were making the jigs and fixtures for. Since some part features were +/- .0005 (five ten-thousandths of an inch) , we were aiming for +/- .00005 (fifty one-millionths of an inch!). I remember being very dismayed one day as I was working out a set of calculations for my tolerance stack-up of several features of a critical fixture I was designing when I looked up from my drafting board (yes – it was that long ago!) and muttered out loud, “Jesus Christ! 38 millionths of an inch – that damn thing is going to be flopping all over the place!”
I feel the having too many projects going at one point. As a maker I build custom lighting and furniture. Besides that I am attending Burning Man for my first year so I have burner projects going. At the moment off the top of my head I have 12 separate projects going in my shop at the moment. Oh yeah my shop is a one car garage, ahh…
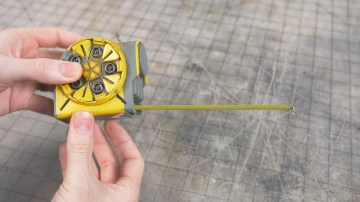
Adam, what’s that wood thing on the table?
Here’s the photo we promised!
The single phrase that change how I view sanding:”It’s not sanding, it’s reductive sculpture.” I have no idea who said it, but since framing the work in that light I love to sand my projects..
After the opening, talking about about Rick Baker I had to pause the vid and go find his twitter. Then I spent a good half hour looking at all the pics he posted. Thank you, that was a fun half hour.
This is an awesome question that has plagued me for a long time.
Also, how to get orange peel out of paint when finishing to give a nice clean and glossy paint job? Since you can’t really hide crimes on a finishing step.
I also can’t wait to see what Adam’s working on!
When they described it I was thinking of something more alien, since I’ve got an actual antenna sitting in my office that looks a lot like that with a funny looking dipole and all!
Hi guys,
So, Adam, I was actualy trying to heat form lasercut plexiglass yesterday.. and kinda gave up due to being unable to control the whole process with anything other than luck. I tried the heat gun bend; worked well for a simple fold but accuracy was nowhere to be found. I felt I needed to laser cut a wooden form to minimally check the bend or at best to form the piece on directly. I tried heating a sheet of 3 mm plexiglass on the bed of my 3d printer to an accurate 80, 90 and 95 deg. C and it was not flexible at all (the piece shattered). Soo.. what process/temp would you recommend to form a 3mm peice of plexi to a approximately head sized result within a tollerance of, say , 2mm?
Thanks,
David
The pictures that Rick Baker is showing on his twitter account are just amazing. I wish that I had the ability to crank out my own shelf full of Darth Vader helmets on a whim..
.
Thanks for sharing that photo, 😎
Superb podcast, guys! This is exactly why I run to Tested on Tuesday Morning! I’d like to offer a bit of a twist on Adam’s comments on the One Way/Two Way Door thought process. At its most basic, I call this my Order of Operations. I’d subscribe that thinking through the Order of Operations before a build (or stopping to do so before a One Way Door situation) is the single most important thing I do in the shop other than wearing PPE. Much like Adam, I only have a finite amount of scheduled time to work on my build, so on my way to the shop, I think through my Order of Operations.
This process cuts the time it takes for me to fabricate parts almost in half just in the amount of time saved match-drilling items that need to be precisely located and fastened together, or planning for areas that need to be welded first due to clearance issues, or even welding something last once all other parts have been bolted together. It’s worth including an example to illustrate the importance of this process. Most of the time the task at hand is manageable enough that you can keep track of the order in your head, but in the case of my first roll cage, I had to lay it out. Following this process ensured that I never got into a situation where I welded parts out of order and could no longer fit in a piece or reach an area with the MIG gun.
I’d like to ask Adam if there are any examples he can think of where the tasks on a build had to be ordered in a counter-intuitive way to maintain a tolerance? Was it something that was caught initially, or only after a mistake was made that led to a rethink of the process?
My most recent example was a Fire System mount in my rally car, I first cut and drilled the square tubes, and welded studs that mounted to the bottle’s clamp. I then cut the flat tabs and drilled the two holes in each. I mounted the clamps and square stock to the fire bottle and set the whole unit in the car where I wanted it. I then edged the two tabs against the square stock, located/drilled the holes, and bolted the tabs to the floor next to the square tubes. The very last thing I did was to actually weld the tabs to the square tube! Had I welded them any earlier, I would have spent a ton of time making sure they were all true and the holes were drilled in the floor properly. I almost screwed this up, but a pause to think about my order of operations saved added time/effort/possible rework.
Questions on hiding faults:
how do you hide a split in a piece of wood you’ve just cut? Do you tape *every single cut*?
How do you know when to pre-drill a screwhole and when to just count on the self-driving screws to muscle their way in without doing too much damage?
My main technique for hiding faults is related to the tolerance question:
When in doubt err in the direction you can correct later: A little long is better than a little short if it can be sanded down or trimmed later, and a little loose is better than a little tight if you can add thickness via tape or paint or plastidip later.
Hey Will, Adam and Norm
Love the pod cast always have it on in my shop when it comes out. I was wondering if there was anything you wish you could ‘un learn’ – if it were a bad methodology that you learnt starting out that caused you problems or even a whole method of working that became redundant.
Thanks
Jake
Wet sanding.
Just saying. 😉
This made me shudder. The first car I painted ended up orange peeling everywhere. Took me somewhere on the order of 50+ hours to sand the whole thing down.
if you don’t know, wet sanding uses waterproof sand paper (buy it in packs at your local autobody supply store, not Home Depot, significantly cheaper) and water with a little bit of dish detergent (a couple drops per litre of water).
Basically, use a sanding block that you dip in a big bucket of water (I prefer pieces of 2×4) regularly. The more water the better and if it starts to get cloudy, replace it. Make sure the surface is coated with the water/detergent mix before you put the block down. The detergent acts as a surfactant pulling the grit away and keeping it from clogging the sandpaper. Depending how bad your orange peel is, you may want to start as low as 320, if it’s not bad, 400 or 600. Then move up the line, 800, 1000, and if it has to be super smooth, all the way to 2000. Beyond that you need to buff.
If you wonder if it’s time to move up a grit, the surface should feel the same to your finger tips. If you think you are done, close your eyes, run your fingers over the surface. If you can feel a difference in the paint, you can see it. This is one place where you do have to strive for perfection.
Love the podcast. Every one of these teaches me something new, introduces me to a new product/technique or lets me know about something/someone I’ve never seen or heard of and usually it’s all three.
My questions relates to project organization and storage. I’m getting to the point where I am going to have a couple of longer term projects with shorter projects interspersed. I’m wondering how Adam organizes and stores the projects he’s not currently working on in a way that keeps all the stuff related to that project together and still enables him to bring it out and work on it quickly when he gets to the next step in that project.
Thanks!
Great podcast & knowing when to stop being quite so persnickety is a big help. I’ve spent more time than I’d like on some things because it wasn’t _quite_ right, I have to watch myself on that.
Issues on being propietary: I’ve found it’s best to keep any new ideas to yourself until you’ve actually done the thing you’d thought of.
I used to be enthusiastic and helpful around people, telling my ideas for things I was about to do, or giving people ideas on things they were doing, only for them to either steal my idea outright, or follow my ideas and not mention any of my involvement at all.
After having been burned like that more times than I’d like, I’ve felt like I had to stop being quite so imaginative out loud. I sound a bit bitter I guess but it pisses me off sometimes.
off topic, but i just watched the animation cast, you should tell Adam that if he likes Katsuhiro’s work then he should heck out steamboy, think he’d dig it,. Another thing , cant remember the ep but you were speaking about making 3d models of your self’s and that tri polys were just as good as quads, id just like to add as an animator if our just wanting to build a maquet then its fine, but if your planning on animating at any point then qauds are the way to go ( quads deform better ) keep up the good work 😀
oh and ps, i think rick baker does most of his 3d work in zbrush, hes a very active spokesman for the program, and its what most sculptors use for 3d printing models 😛
This episode is the Lexus of Tested podcasts! 😄
I would be really interested in hearing Adam’s take on good enough in regards to machine/tool setup.
As an example: when I cut a piece of plywood on my table saw and it doesn’t turn out straight/perpendicular/smooth, how do I know if it’s my lack of skill in using the tool or setting up the tool? I squared the fence (pretty well but it was last month), chose the most appropriate blade (that I had on hand), didn’t feed the material so fast it smoked (too much), and held the wood against the fence (with a stick I found under the saw).
Also, I have an inexpensive Craftsman desktop bandsaw that I can’t for the life of me get to cut straight, and can’t figure out if it’s my technique, the saw setup, or just a crappy saw…
I don’t know how Adam lines up holes, but I use a pair of drafting calipers for small numbers of holes in models. for larger things I use my digital caliper to measure close or drill the holes for one part and use a scriber or center punch to line up the other hole. Make sure you clamp the parts together before you do this. You can’t have too many clamps.
A question for Adam. How do you keep your enthusiasm for stuff. Lately it seems like all my creative energy has been drained. I have some great ideas for stuff, but can’t seem to get started.
Question for Adam, what was your biggest perceived “screw-up” while making something that turned out to actually be a “good thing”?
Hey Adam – early in the podcast, you mention that you need to have some parts waterjet cut. I work for Omax Corp, the leading manufacturer of abrasive waterjet machining centers and I would absolutely love to cut out whatever parts you may need, if only so that I could have the opportunity to say that I contributed to a bona-fide Adam Savage project – whadaya say?!
Adam,
Another question, do you scrounge for old books for techniques? I was going through a book I bought for ebay, sold, and bought another copy for myself on scratchbuilding model cars. I’ve got quite a collection of books and references like that, many of which were bought at booksales and used bookstores really cheap. Books like that can be a real source of inspiration. Also Evergreen is an essential for model making, at least for small styrene sheets and shapes:
http://www.evergreenscalemodels.com/
One of my big recent scores was an Evergreen rack of my own from closed hobby store for 45 bucks. Worth every penny.
I just read through the comments and this is more or less what I was asking. I’ve wetsanded before but ended up going through the paint (600 grit on gloss black enamel). I’ve heard that there’s a few different ways to deal with it and was wondering if he did anything different since he’s very speed-oriented and makes mistakes just like the rest of us.
Just curious, but if you were painting for a glass black finish (with gray primer) how many coats would you go for and then sand?
Anywhere I’ve wet sanded cars it has been two coats minimum, usually 3+. Auto paint is hard once it has cured properly, so that may not be a good analogue.
If you are going through the paint with 600, I would try starting with 800 grit. On a thin spray paint that you want to gloss, I would guess it is 5+ coats to be able to put a deep shine into it.
When you follow Adam’s recommendation to make multiples of all your parts, you do sometimes end up with more of whatever you’ve been wanting than you either want or need. Depending on what it is you’re making, you can probably find a local non-profit with an auction fundraiser coming up that would love to take it off your hands. I made a front-facing bookshelf for my kids several years ago, and donated my prototype to the school’s silent auction. It ended up netting them over a hundred dollars.
There’s even a chance it might be deductible.
If you are using the fence that came with the saw, that might be the problem. I seem to remember a few of the youtube woodworkers mentioning that the fences that come with lower-end table saws are their biggest problem. I believe you can buy aftermarket fences to fit the dovetail or whatever rail your saw has. A better fence will stay square for longer and under more stress.
I don’t know what Adam does, but from the podcasts it seem to be a combination of:
Only building things he really wants to own.
Having enough projects going that he always has *something* he can find the enthusiasm for.
Setting deadlines, external (such as having to finish before SDCC/DragonCon) or self-imposed.
Having projects that are easy to pick up and put down (weathering the Terminator) and don’t require a ton of engagement.
Some of those might not apply to your projects.
Personally, one thing I have found helps a lot is getting some skin in the game. I usually do that by making an investment in tools, materials or paying for a month of Techshop access. If I’ve just spent $200 on wood, it is unlikely I’ll let it sit around for long.
In that same vein, I like getting someone else onboard. Collaboration means you have responsibility to put in the effort and get quality results. If you have someone waiting for you to complete a step so that they can begin the next, you’ll have a lot of motivation to do so.
Hey guys, I saw a video on Makerbot’s site about finishing pieces that you print on your 3D printer. Part of it was on sanding. For some reason I can’t seem to get the nice smooth finish on my prints.
What grit should I start with? How long should I sand an area before moving to a finer grit?
Approx. how big of an area should I sand at one time?
What is the progression of grits that I should work through in order to get that nice smooth finish I am looking for?
Thanks for any info you can provide. I love these conversations 🙂
Agreed, that is a big motivator for me too. There’s also a good teaching/learning aspect. Working on a project using skills you’ve already polished but could still use some motivation to finish? Invite someone over to teach as you work! Good thought.
Totally and that goes for techniques I’m still just learning myself, as well. Conveying the technique to others is highly efficient in internalizing the process.
After I have the basics of a technique down I usually find some other serial-skill-collector to come hang out and do a one-day build. I make something, they make something and I try to guide them through the steps as we go along. It is a lot of fun and a great way to spend an afternoon. And, the next weekend I go to someone elses studio or workshop and learn from them. 🙂
This weekend I’m doing a workshop with a few friends on doing gilded lettering/signs on glass. I’ll probably post some photos in the forums of that process 🙂
Kim,
Money doesn’t seem to be an incentive. I’ve got some stuff with fairly large pieces of skin in the game already, that I would like to do. Of course some of that is that I don’t really have space and keeping stuff in boxes protects the investment. The irony is that I have the free time, access to a new coworking space and lots of tools. But not the space I would like to put stuff away after I finished the projects. Oh well.
that is a great question! i’d love to see it answered, as i’m somewhat in the same boat.
all the excessive thinking beforehand makes me end up with pages upon pages of handwritten notes. that itself is nothing bad, but storing and organising them starts becoming a necessity. piles of pages on every horizontal surface (including the floor, of course!), pinched under every stack of books to hang over the table/shelf/whatever corner…
bonus point for a good idea on how to correlate the pen/pencil notes with the .txt/.jpg notes.
is it just my naughty mind, or does the wording of “i don’t know how adam lines up holes” sound like something unfit for daytime tv?
A good night’s sleep does wonders for enthusiasm! Stress drains enthusiasm like you wouldn’t believe! –Paul E Musselman
I was wondering does working in an intense production environment like special effects and model making does it drill the perfectionism out of you due to the fact that you always on a deadline and budget crunch?
In model railroading we have the “3-foot Rule.” If a detail can’t be seen if you’re standing back 3 feet, does it matter if it’s there or not? This isn’t to say that some museum-quality models deserve all the detail you can see up close and personal, but the majority of the time 3-foot rules!
.
Then there was my grandfather. He worked as a machinist for the Lackawanna railroad. Metal; moving parts on steam locomotives. When he retired he took up woodworking. And tried to machine wood to metal tolerances. His ‘failures’ were fantastic!
.
–Paul E Musselman
I tend to design most projects with paper and colored pens– red for the first attempt, and darker colors for the corrections. It’s rare if I haven’t “built” the project several times before I start actual construction.
.
Sketchup is marvelous for seeing how the parts will assemble in 3-D– before you slice that first piece of plywood.
.
My main slowdown in building is if I make a misteak– I’ll abandon a project when it doesn’t come out the way I want it to. The only solution is to rip out the mistake and do it over again. Otherwise a project will be stalled for months!
.
–Paul E Musselman
Topic for future episodes, joints. How do you decide what joinery to use for your projects? It seems to me that all successful projects come down to tolerance and joints. Well, maybe finish too. It would be great to hear Jamie’s two cents on this topic as well.
Adam,
Here is my question. Im a huge fan of styrene and Im becoming a decent model builder. Car and military kits and Ive been delving into some custom stuff with sheets and bars of styrene. What is the best way to mark and then cut styrene accurately? My dremel tool seems to almost melt the plastic and my coping saw is not quite accurate enough. Or I’m doing it wrong! What are your thoughts?
Thank you!
I don’t know what Adam would recommend, but I use transfer punches whenever possible – no measuring and as long as you technique is good, its super accurate & reliable. If I can’t use transfer punches, I use digital callipers to measure the closest and furthest points inside the holes. I then add the two measurements and divide by 2 to get the centre distance.
Something I know the Tested team would recommend: when in doubt, transfer the measurements to a piece of scrap first to see it you got it right.
Evergreen has a book which covers everything you never wanted to know about styrene modelling:
http://www.evergreenscalemodels.com/Book.htm
It’s a good reference. Styrene is actually an easy material to cut and shape with knives and razor blades. I mostly use an Xacto knife, a dental pick I use as a scriber and razorblades. A nifty little tool for making multiple parts is the chopper.
ive found xacto blades are the way to go. with thicker material you can score and snap it pretty easily. also try lowering the speed on your dremel and lighten up on your touch.
Hey guys,
Learning to hide the crimes is great but what if you need to undo the crime. What would Adam subject for such a problem? Would you scrap the project and start over or take the time and try to resurrect the it for the sake of gaining that experience?
Thanks
Keep up the great work
Has there ever been a moment where someone has noticed one of your cleverly disguised fuckups and how did you react?
If you measure the distance between the same two sides of the holes, it will be the exact measurement of the centres
Well, I wasn’t thinking so much about how Adam organizes his notes and papers (although that would be very interesting too). I was more thinking about the physical pieces of projects that are in progress. How does he organize parts and pieces and store them in such a way as to make it efficient to put a project away and then retrieve it and start working on it quickly.
Just my two cents on what might be perceived as “keeping secrets”. People often see a beautiful finished project and assume there is some secret to achieving such results. The secret is almost always trial and error combined with hard work and practice. It would be pointless for me to tell someone how I get a nice finish on wood, because my path of discovery probably isn’t transferable. I’m not keeping secrets, I simply recognize that there is personal “process knowledge” that can only be obtained via experimentation. (Tested, after all)
The secret to anything impressive is almost always hard work and practice 🙂
Teller of Penn & Teller says that the secret to any good magic trick is that people are looking for something elegant and beautiful, while the technique used to achieve the trick is always tediously boring and/or unbelievably ugly.
According to Teller, a magician’s secret is that he is willing to practice tedious things for much longer than anyone could imagine anyone would ever do, go through more discomfort than imaginable while still smiling and convincingly pretend time and time again that something difficult and ugly is effortless and beautiful.
So I guess that compelling magic and making, while essentially both a function of hard work and practice, have the exactly opposite presentation. 🙂
Being self employed as a crafts man (34 years) for me meant that in the 80’s, I had to dig ‘o so’ deep for every single new technique or material. No one, except for one retired hobbyist, ever bothered to reply to my sincere requests to learn. So my interest in my craft was thrown back on itself, to see how earnest and sincere I really was.
So I did dig deep, and experimented when I could afford it, and eventually got on top of it and developed my craft into a paying business.
When people who are ’employed’ preach for ‘people’ to share their techniques and tricks, I say that is pompous bullshit. Try making your poor living selling a unique product for a decent price, all the while knowing that if you ‘share’ your unique hard won secrets and knowledge, you and your craft/lifestyle could be nickel and dimed to death by competitors. Any time I taught an apprentice, he/she paid thru the nose, and had to be already established in business.
Adam, I admire you in many ways, but sometimes your golden tongue doth runneth over and anon…
Countless crafts and techniques are only alive today, providing income and livelyhood to their practicioners while preserving and growing their culture, because of people who were confident enough to not think the technique was what set them apart, and were thus also willing to share them with those who wanted to learn.
Any business whose success and viability is reliant on a technique that can be applied, outpriced and beaten on quality by a novice is not a viable business.
If you want to keep your insights or techniques to yourself, because you think you’re screwed otherwise, fine, but once someone figures out a better way of doing what you do, and they will, you better hope they don’t have the same outlook.
There aren’t many guilds and secret techniques any more, so we can only mourn all that is lost due to their secrecy, including trades and skills that would keep many heads above water.
Love the show, and especially shows like this one! I have three assorted questions:
I am a piano technician, and one thing my mentor always drilled into me is what she called the “circle of refinement”. The concept cycling through a series of tasks, and with each pass making improvements on your last pass. This is particularly relevant when doing repair/maintenance tasks (like tuning or regulating a piano!) and it has helped me get attuned to accurately judge where the “good enough” line you were discussing in the episode. So long winded way of getting around to, what do you think of this concept? Have you used it in your shop/work and to what effect?
Another thing that has helped me is knowing when to walk away/take a break from a project. Come at it with a fresh mind later. How do you know when it’s time to take a break?
Last question, you mentioned in the episode that glue is one of those gateways that it’s a real pain to backtrack through. I am a big fan of hot hide glue, which is 100% reversible. Have you ever had any occasion to use hot hide glue and what are your thoughts on it?
Thanks all!
Harlan
You made a good point about how to hide mistakes being too big of a subject. But we all still want to know the tips and tricks so I purpose a one day build as follows.
Will and Norm build something in the first half, they make it functional but not pretty. Try and find something that is not overly complicated but uses many different techniques and materials. The only help they can get from Adam, if needed, is “How to get to the next stage.”
In the second half of the build Adam would show them “How to hide mistakes.” Also remembering film-making even with out CG and post production can hide things.
Finish up with a short scene using the made object.
How to make perfect metal circles:
Circle Shear
https://www.google.com/?gws_rd=ssl#q=circle+shear&spell=1
What do you say to someone who wants to make a place for Makers? A huge place for Makers of all paths to gather and create. I want to make a place like that, it’s my dream, but I don’t know where to start. Please help me with your wisdom. Thank you. ~Krys
I’ve found for problem solving it’s just when I’ve run out of ideas. If time permits then just going off to make a cup of tea sometimes helps.
That thing is damned slick. I have no use for one, but I want it anyhow.
http://hackerspaces.org/wiki/
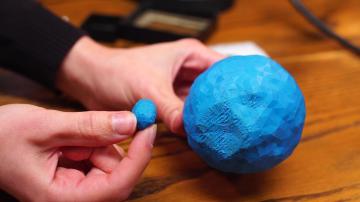
This was a very helpful podcast, I’m both a construction worker by trade, and a sculptor by hobby. My question is regarding the latter: I am familiar with the use of tolerances, and can see how what Adam says is true about knowing when to use tight and loose tolerances being the mark of a master. I would venture to say, though, that sculpting is a little different? Tolerance there is less thousandths of an inch, and more “eh, looks good enough.” How can hone my eye for the purpose of improving the perfection of my “good enough”? I’ve attached a picture of a “William Wallace (Braveheart)” figurine I have done, for example and flavor.
Man, so much traffic on this topic, They could start doing a podcast just on this topic alone! It would also be one that I would love the hear Jamie’s perspective on as well as the rest of the team, and how they approach this topic. One of the things I’ve learned along the way is that sometimes the easiest and dirtiest way can look the best if you have a process in mind. One thing that I can think of is a lot like ronericson’s post. Welding a longer bit of steel where you need it to be so you have a handle, or even just the ability to line things up and then trim the extra, instead of having to cut a precision piece, and having no way to hold it in place. I’ve also worked on carpentry and even survey projects with machinists, so hear you guys loud and clear!
RobotGuy, it could also be that your blade either has some runout or is not square to anything. There are aftermarket shim kits that can be bought to straighten lower end table saws, and correct blade wobble. As well as a better fence, you can over time upgrade your table saw and make it work for you.
Something that I would like Adam’s perspective on, I have been listening to the new CoolTools podcast and they were talking to Clive Thompson. One thing he said that struck me was that crappy tools make for great art. As in in tools that do what they were designed for very poorly often do other things very well from an aesthetic or artistic perspective. I was wondering if Adam had found this with his sculpture background, if there were things that were crappy, but were bad in a way that made them work for an entirely different purpose.
Between Tested and the RPF the thing I’m looking forward to most about my new job (starting tomorrow) is having a little bit more cash coming in that I might be able to squirrel away for projects. I am in fact typing this on a desk that I built due to our house having some odd cornered walls and that was a thrill enough… looking forward to more practical projects (and purely non practical)… debating making a folding standing desk, one that can tuck away between things but also be brought out, fold out and lock into place so I can do sculpting/sketching etc.
Really love the move towards open source too… I know it’s been bubbling along for a while but it always reminds me of the scene in Star Trek First Contact when they explain that money no longer exists, everyone just works for the betterment of everyone else… I think we may actually be on the way now! Thank you again Will, Norm, Adam and everyone else at Tested (and related industries… Mythbusters crew certainly)… for being an inspiration for young and old (love that my son, who is 4, will watch mythbusters with me… so will my daughter who is 20months).
If you are thinking about building a fold away desk you should look into large wall art pieces. I have a buddy that is a comic artist and he has a killer desk. It is a large 3’X4′ painting on the wall with hidden hinges in the bottom back. When it is folded up it just looks like a painting on the wall with a chair under it. When unfolded the back of the painting acts as his desk and the chair pulls out. There is a hidden arm bar behind the painting as well that keeps the desk sturdy and floating when the painting is down.
I’ll try to put the best photo of something like it below.
His is thinner but something like is.
Great edition of Tested guys! Thanks also for putting us onto the Visual Comedy video.
I was hoping Adam could talk about the process he goes through from first deciding he wants a prop/costume replica to actually having it in his hands. I know things like the rpf, ebay and etsy are great but are there other resources he uses?
Also if he could talk about how he used this process for his V for Vendetta costume build as an example that would be pretty cool!
Thanks guys!
I think this was one of your best podcasts to date.
It was nice to hear that some of what I do when making stuff could actually be considered having a method – Hadn’t really thought about it like that!
It was also interesting it twice, in slightly different contexts, reminded of things written by Japanese/American master woodworker Toshio Odate. (Gave me an excuse to pick his books up again.)
One was what he says about how the Japanese traditionally measure the worth of a craftsman by the combination of speed and quality of the work, which rhymes quite well with what Adam says.
The other was about how he as an apprentice had to learn his craft from his master while doing other chores and without being caught looking – And how there is a Japanese saying that “Technique cannot be taught, one has to steal it” – Which seems sort of the opposite of sharing knowledge.
I’d also like to take this opportunity to add a thanks for a the work you all do on Tested in general. Most of it’s really interesting and all of it’s really good entertainment – on one level or another.
/Niclas
Aienan Thank you ^w^ But I probably should have made myself a bit clearer ^^; Hackerspaces are Awesome but what I want is Bigger, much bigger, I mean everything from a garage for people to build custom vehicles and machines to an Animation studio. I want to create a place for Jacks to explore as many crafts as they wish as well as for Makers who revel in one craft. There’s an old shut-down Mill/Factory in the next town closest to me, it’s in a town where everything is in walking distance and there’s a college nearby, it would be the perfect place. Yes I’m talking that big, you name the craft and I want it available in that place for people to have the freedom to create with it.
I guess I could start with a small hackerspace and work up from there but I have a huge problem…I’m flat broke, I can’t get a job because I have to be available to help with my disabled grandmother. Can’t run it out of my house because 1. it’s not my house and 2. I live in the Boonies (not near a city or town) so I doubt anyone would want to drive 30mins to several hours to get here. Idk maybe I sound silly or it’s a pipe dream but if there’s a chance that I can get that place started I want to know what it is and make a run for it at least…. (sorry for the text wall) ~Krys
To get rid of orange peal wet sand with 1ooo too 2000 grit sand paper in one direction if posable then began to buff after your surface is completely flat ie. no shiny spots should get you to a glossy ass finish
Ctrl-C and Ctrl-V… That helps right? 8)
Thanks for the suggestion… I may pinch some ideas from that… I was looking at a more mobile version but there are still bound to be some design aspects to absorb from that.
I make my stuff to look old and falling apart, saves so much time when the bits don’t join up correctly. But my father had an amazing saying that I adhere to ‘A blind man would lie to see it’.
A great way to make a ‘semi’ permanent glue joint (in wood) is to put a piece of paper between the pieces before glueing then you can usually use a chisel and pry them apart. The paper acts as a week link.