


Bits to Atoms: The State of Resin 3D Printing Technologies
In light of our recent video on the Form 1+ printer and as a lead-up to a full review, I wanted to delve deeper into 3D printing with liquid resin, so let's start with a primer on the state of resin 3D printing technologies.
In light of our recent video on the Form 1+ printer and as a lead-up to a full review, I wanted to delve deeper into 3D printing with liquid resin, so let’s start with a primer on the state of resin 3D printing technologies and hardware.
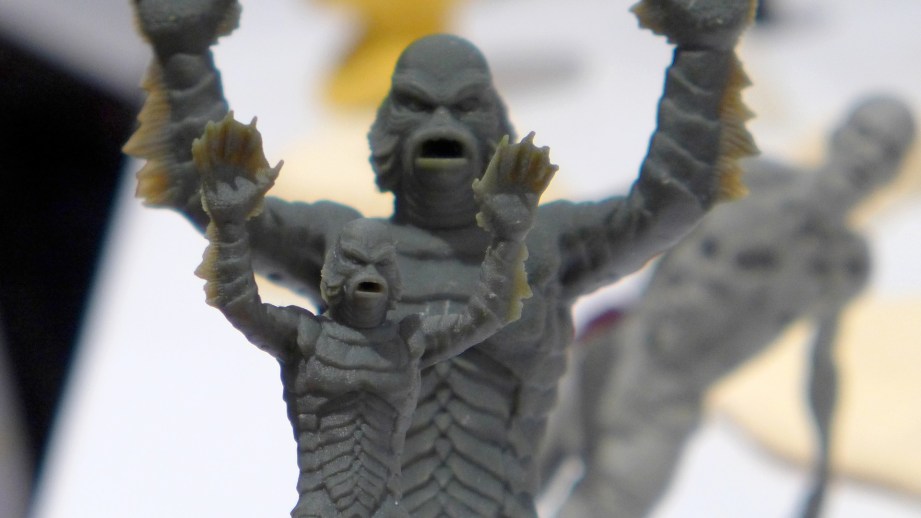
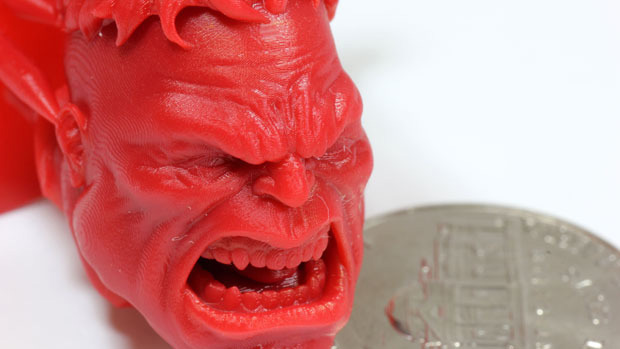
Printing with resin typically offers the highest resolution, detail and accuracy available with desktop 3D printing. For example, layer height for most resin printers ranges from 25 – 100 microns (.025mm – .10mm), as a comparison, human hair can range from 17 – 181 microns and typical filament printers (FFF), like the MakerBot, have a max resolution of 100 microns. Generally when talking about resolution you only hear about the layer height, but there is also accuracy as far as small details and resin printers excel in this area.
There are various methods of printing with resin, but all involve a liquid distributed in a thin layer and curved via UV light. Prints will typically have some type of support material or structure which must be cleaned off by either physical or chemical means. Most parts remain UV-sensitive, and should be kept from direct sunlight and/or coated or painted in some way to block UV. Let’s take a look at our options for resin printing.
STEREOLITHOGRAPHY (SLA)
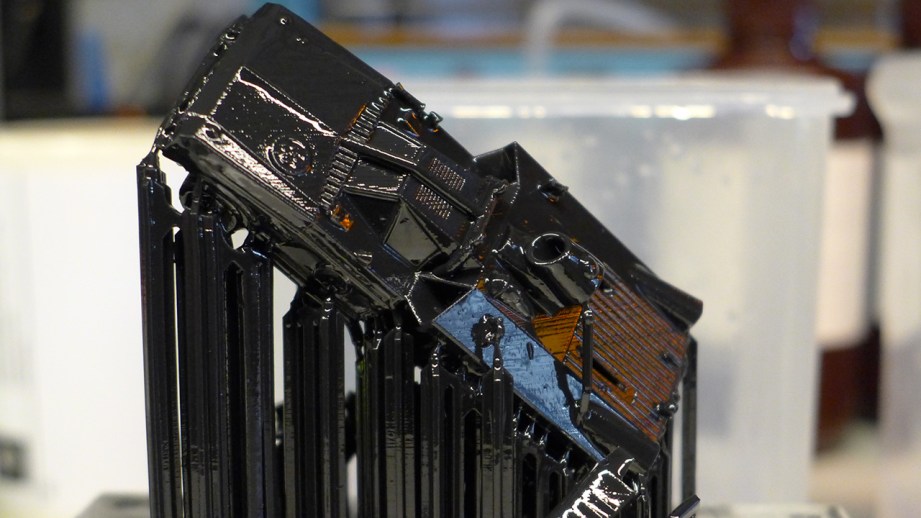
The most common type of resin printing is stereolithography (SLA) which was also the first form of 3D printing developed in 1986 by Charles Hull, the founder of 3D Systems–one of the biggest developers of 3D printing technology. SLA printing uses a laser to draw each slice of a model onto liquid resin which is cured by the UV light. The 3D Systems SLA machines print onto a platform that is lowered into a vat of resin. For each layer, a ‘wiper’ moves across the platform, distributing a thin layer of liquid resin and a laser mounted in the top of the machine draws the model onto the liquid. The liquid solidifies, the platform moves down, a new layer of liquid is distributed by the wiper and so on until the model is finished.
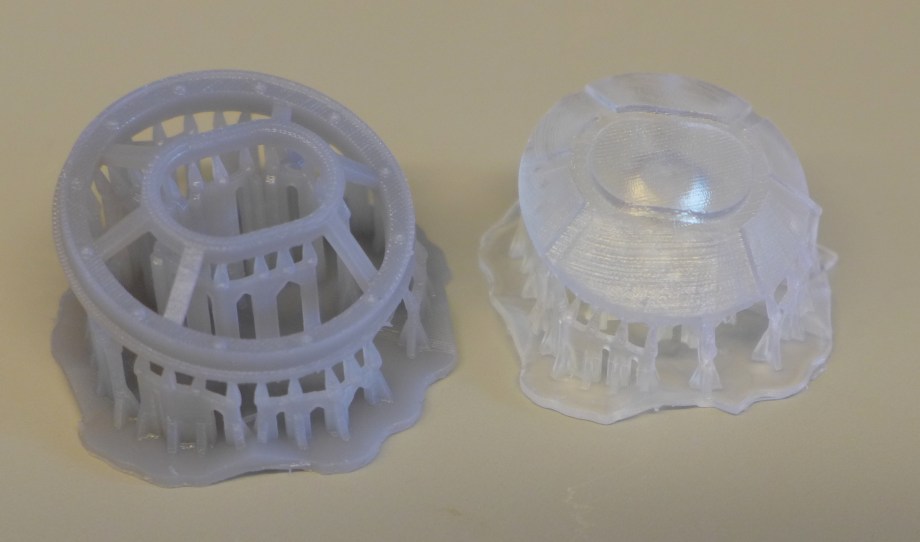
When finished, the model is lifted out of the tank and must be cleaned since it will have liquid resin clinging to it. Generally this is done by soaking in a bin of isopropyl alcohol which dissolves the loose resin. The model is solid, but to fully cure the resin, the model is usually ‘baked’ in a UV oven for a few minutes.
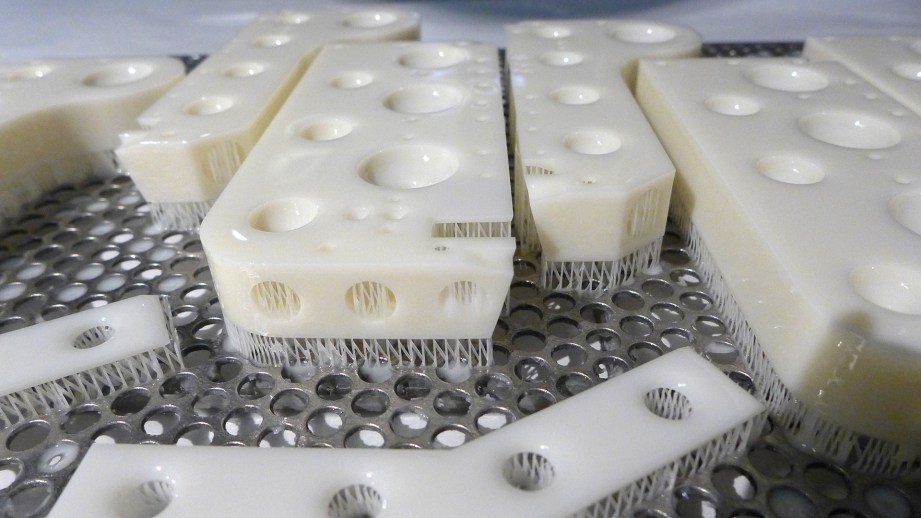
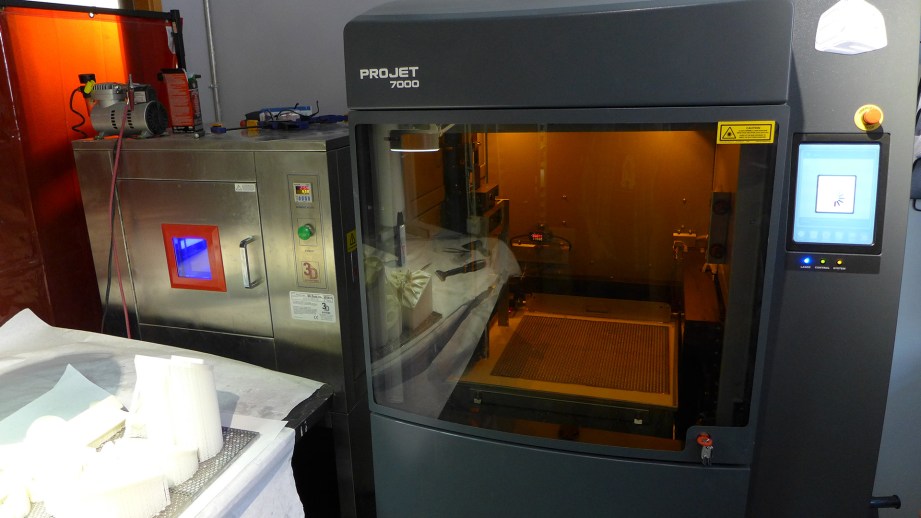
When printed, the model is held up by a lattice of supports which must also be removed. The supports will leave small marks on the model so faces that need to be the cleanest should be positioned upwards when printing. The supports are generally easy to remove and the plastic can be sanded if needed. While SLA printers tend to be very accurate, distortion can occur at the outer edges of the vat, but it’s usually negligible for most models. I used a 3D Systems ProJet 7000 to print the Millenbaugh Motivator for Adam’s Hellboy Mecha-Hand and the detail and accuracy was amazing. The resin was strong enough to tap screws into and the thin crankshaft, while not completely rigid, was able to drive the valves.
3D Systems dominates the SLA field (partly due to patents they hold) and the machines cost tens-of-thousands of dollars but consumer versions are starting to show up such as the Form 1+ which costs a little over $3000 but can rival the resolution of big SLA machines. Obviously with such a price gap, the Form 1 and similar machines aren’t going to produce quite the same quality, but they are quite impressive. Trade-offs are going to include a much smaller print envelope, slower print times, more failures, less accuracy and possibly less durable materials. But if you need to produce small, finely detailed prints, they are worth looking into. Stay tuned for a full write-up on my experience testing the Form 1+!
DIGITAL LIGHT PROCESSING (DLP)
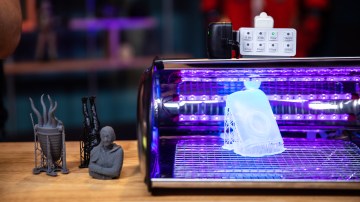
Digital Light Processing (DLP) printing is the next most common form of resin printing machines. To explain how these work, let’s look at the consumer-level machines first, such as the B9 Creator.
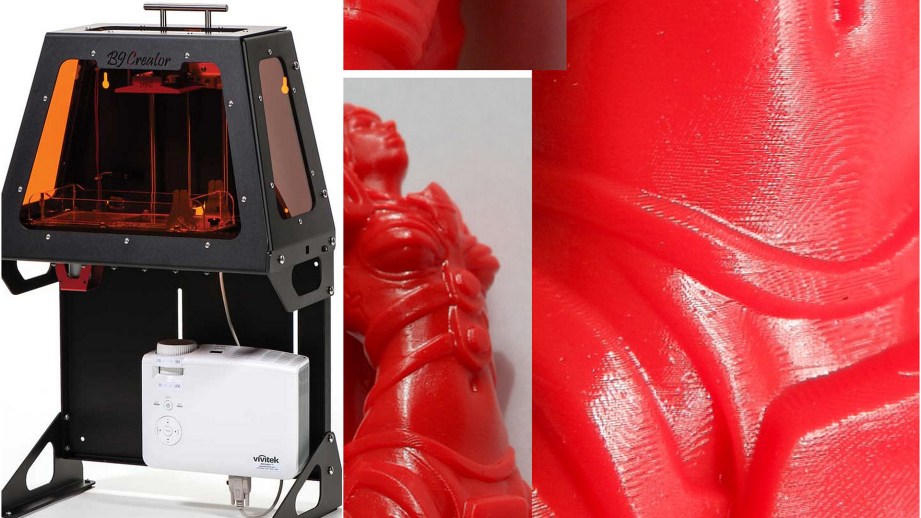
As you can see, in place of a laser, it has a video projector mounted to the bottom which may seem odd, but it’s kind of genius. These machines use DLP projector technology to cure each layer in one blast rather than drawing the layer with a laser. The advent of HD video and the advancement of small projectors with intense light and high pixel-density made these printers possible. Since each layer is zapped all at once, DLP machines can be faster and use less moving parts. (The SLA laser needs multiple mirrors and motors to direct the beam) This also makes DLP printers kit-friendly and B9 has both finished versions ($5800) and kit versions ($3700). The resin is still UV cured and requires alcohol clean-up, but the detail is really impressive. I have not been able to determine if this is true of all DLP printers, but with the B9, the print envelope shrinks as the resolution increases–I think this is due to pixel density of the projector.
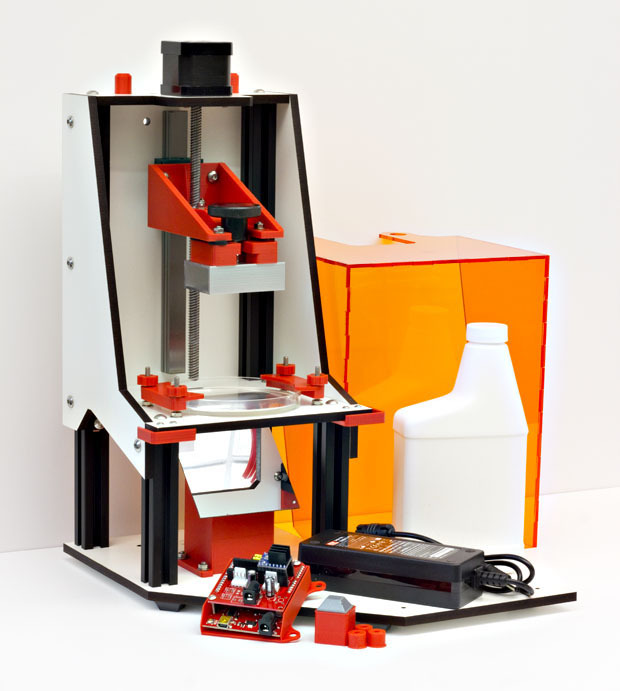
Another consumer-friendly DLP printer to look out for is the LittleRP, which was successfully funded on Kickstarter. They are offering a $1250 kit that easily assembles into a cute machine for doing small, highly-detailed prints. The build envelope is only 2.8″ x 1.5″ x 4″ but the detail is pretty amazing.
It’s geared towards user doing jewelry, miniatures, small mechanical assemblies, etc. A disadvantage of these consumer-level DLP machines is a required always-on computer connection as they use the VGA or HDMI output from the video card to transmit the layer information to the projector.
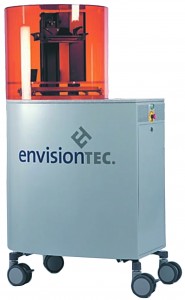
On the pro-end there’s EnvisionTec machines which use Texas Instruments DLP technology and probably don’t have the full-size projector but just the DLP elements needed for printing. EnvisionTec is the relative ‘new-guy’ on the block since being founded in 2002 but they have been producing really nice machines. Their design makes it quicker and easier to change materials versus SLA machines and they produce some of the best resin prints I have seen. If I were purchasing a printer I would be hard-pressed to choose between this and a 3D Systems machine.
POLYJET
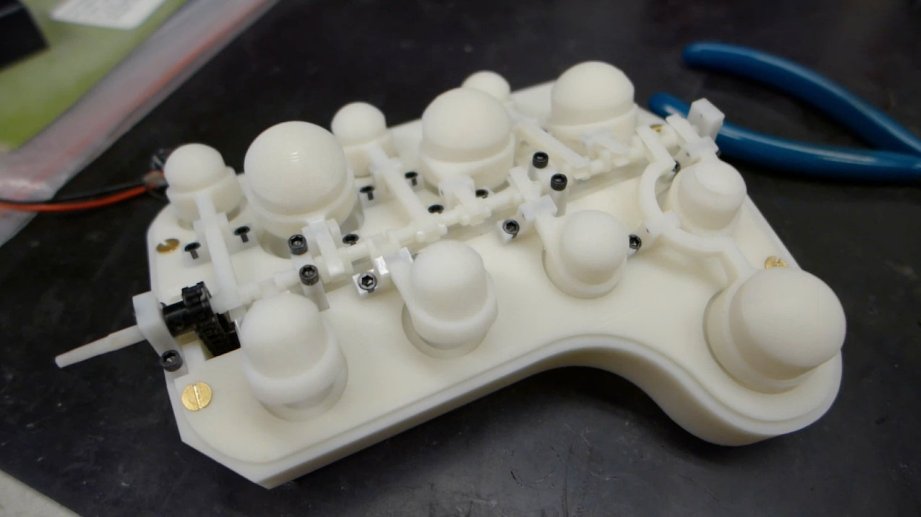
My old friend the Objet Connex500 by Stratasys (founded 1989, owner of MakerBot) is a polyjet printer which distributes liquid resin via inkjet-like printheads. Polyjets print on a print bed much like a filament printer does, so there’s no vat of liquid to deal with and no liquid to clean off post-print. If the model can be printed without any support, the surface finish will come out nice and shiny. If support is needed a wax-like material is used to encase the print and is a bit of a pain to clean off. Removing the support requires a waterjet and sometimes an additional cleaning with a mild lye solution. Since there is no liquid vat involved, materials can be swapped out easier via material cartridges which also allow for multiple materials in the same print. Black and white materials can be blended to make grays, opaque and clear can be mixed as well as rubber and solid, which is how I made the Octopod tentacles.
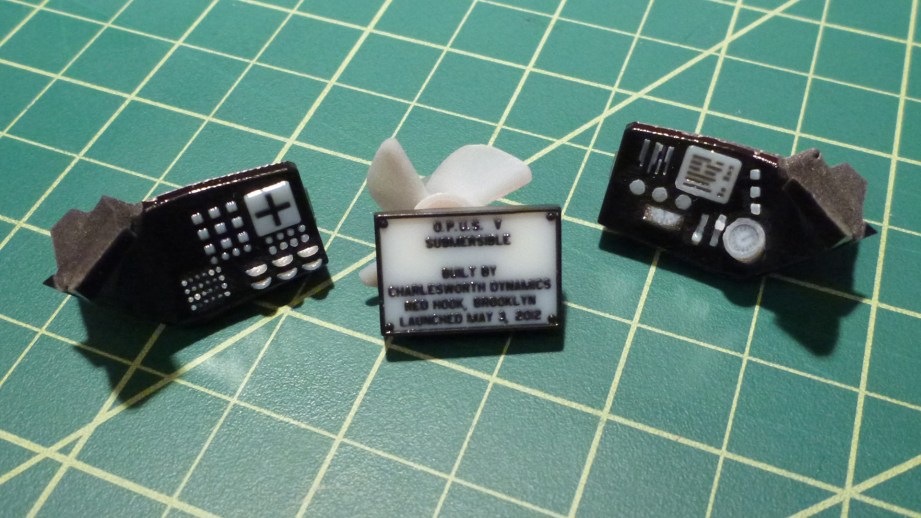
The Objet machines are the only ones I know that can print and bond multiple materials and the true rubber-like material is awesome. If you need to print in multiple materials or rubber, this is really the only way to go.
3SP: Scan, Spin, Selectively Photocure
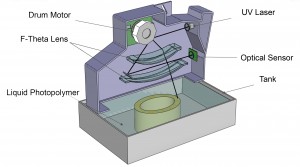
Scan, Spin, Selectively Photocure (3SP) is a new SLA printing method developed by EnvisionTec and I’m not quite clear on the details. It uses a typical resin vat and laser but it appears that they have added a spinning octagonal mirror that directs the laser through a series of curved lenses before hitting the resin. I believe the lenses help to compensate for distortions that you may get at the edges of the tank on a typical SLA printer and helps speed up printing. I believe this was just released this year and time will tell if it’s a major leap forward.
HP’s Multi Jet Fusion
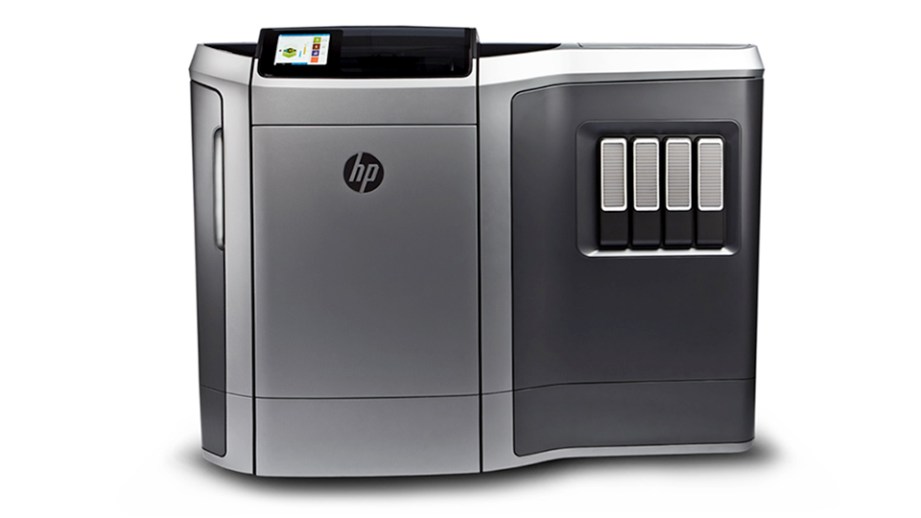
HP recently announced their entry into 3D printing with the Multi Jet Fusion which promises to be 10 times faster than other machines. It appears that it’s using technology similar to polyjet, which would make sense for HP. In addition, they are claiming it can print in multiple colors which would be a big jump that Stratasys also made on their Objet machines. HP also promises flexible and conductive materials which would be a big deal. I have not seen any prints in person and will remain cautiously optimistic until it’s 2016 release date.
While not the cheapest method out there, resin printing is the best choice if you need high accuracy, detail and strength. Options such as the Form 1+ are now within our grasp and bigger and better machines are assuredly on their way. I would not be surprised to see MakerBot introduce a resin machine, seeing as how they are now owned by Stratasys. I’m excited to see what happens!


19 thoughts on “Bits to Atoms: The State of Resin 3D Printing Technologies”
Leave a Reply

One Day Builds
Adam Savage’s One Day Builds: Life-Size Velocirapt…
Adam embarks on one of his most ambitious builds yet: fulfil…

Show And Tell
Adam Savage’s King George Costume!
Adam recently completed a build of the royal St. Edwards cro…

All Eyes On Perserverance – This is Only a Test 58…
We get excited for the Perserverance rover Mars landing happening later today in this week's episode. Jeremy finally watches In and Of Itself, we get hyped for The Last of Us casting, and try to deciper the new Chevy Bolt announcements. Plus, Kishore gets a Pelaton and we wrack our brains around reverse engineering the source code to GTA …
Making
Adam Savage in Real Time: God of War Leviathan Axe…
Viewers often ask to see Adam working in real-time, so this …

One Day Builds
Mandalorian Blaster Prop Replica Kit Assembly!
Adam and Norm assemble a beautifully machined replica prop k…
House of MCU – This is Only a Test 586 – 2/11/21
The gang gets together to recap their favorite bits from this past weekend's Superb Owl, including the new camera tech used for the broadcast and the best chicken wing recipes. Kishore shares tips for streamlining your streaming services, and Will guests this week to dive into the mind-bending implications of the latest WandaVision episod…

One Day Builds
Adam Savage’s One Day Builds: Royal Crown of Engla…
One of the ways Adam has been getting through lockdown has b…

Making
Adam Savage Tests the AIR Active Filtration Helmet…
Adam unboxes and performs a quick test of this novel new hel…

Making
Weta Workshop’s 3D-Printed Giant Eyeballs!
When Adam visited Weta Workshop early last year, he stopped …

One Day Builds
Adam Savage’s One Day Builds: Wire Storage Solutio…
Adam tackles a shop shelf build that he's been putting off f…
Excellent article, as usual, Mr. Charlesworth.
The HP video implies they can print metallic elements (or at least conductive). That would be interesting for things like the mecha hand or the steampunk octopod where you could add LEDs, or possibly power the motors. It also sounds like you could tailor the properties of the shaft for better operation. I cannot wait to learn more.
Yeah, I watched that too. Really corny and absolutely no real products shown so I suspect this doesn’t actually exist yet. Really curious to see where it goes.
I actually backed the LittleRP. I have a November delivery, and I can’t wait to get mine. I have a Kossel Clear printer and have used an abused that machine. My biggest complaint had always been about finer resolution, so I can’t wait to try my hand with resin.
Interesting read, Sean, thanks!
How’s the Kossel? Which build manual did you use? I have just built a Prusa i3 for work and was thinking of building one for myself, and while I already bought all the electronics, I got interested in the Kossel and feel like I can use most of the Prusa electronics for the Kossel as well.
I didn’t think the Multi Jet Fusion launched until 2016.
Whoops you are correct! Confused it with the EnvisonTec 3SP release date! Fixed.
Desire I built a Kossel Clear variant, produced by Blue Eagle Labs. They have several parts that are made from laser cut acrylic. I loved the looks of the machine, it is very elegant looking. I used an Arduino Mega with RAMPS board, so the Prusa electronics should work just fine. If I was to do it over, I would probably go with a Kossel Mini though, as the Clear has a very, very large footprint. It makes up for it by having a nice large build area, but I find myself not printing things that fully use that build area.
As for how the machine is? Well, easy to say I’m in love with it. The house catches fire? The wife is grabbing the cats, I’m grabbing my printer. I’m printing at .1mm regularly with decent speed and nice models. I’ve been running for over a year and I find myself still tweaking settings and working on things, which is great for me. Not so great if you just want to plug and print. The machine is very open, and it very easy to work on things, see how the machine works, and just admire the ingenuity of it all. I don’t have a single regret, except maybe that I don’t get to use it as much as I would like.
Awesome! Well, part of the reason I want to go for the Kossel is the larger volume, so I feel like I would get restricted by the mini a bit. It’s true, I probably wouldn’t use the size that often, but still.. If you build it well it’s just a nice big work of art, right? 😉 Are you using a square or circular heatbed? I’ve seen people use square beds (of which I have one from my electronics kit), so I was going to try that as well.
Something I haven’t quite worked out; is the build volume in one horizontal plane all the way up to the structural arms? I suppose the arms that hold the extruder can’t fold 180 degrees, right?
Cheers!
Alrighty, just built a quick, shitty looking kinematic model of what I want. With this I’d be able to get a build volume shaped as a cylinder of 30cm diameter x 40cm height. Of course, as you can see those traxxas rods get very severe angles on them. I think I’ll have to settle for a bit smaller diameter.
This way the machine will have to be 50cm per triangle-side, and roughly 80-90cm high. The diagonal rods would have to be 340mm, which I think shouldn’t be long enough to show stiffness problems. I’ll check for some other examples to see if the Nema 17’s would be able to cope torque-wise, if not, I’ll reduce the size.
*edit* Dimensions are just a BIT over the Rostock Max v2, so I think the Nema’s should be fine.
, Desire – Nerds!!!!
In the best possible way.
I still love watching printers work, especially the deltas.
Sir, you calling me that is an honor! I ordered all my stuff over the weekend by the way. I’m ending up cheap, winning the right auctions and sourcing everything myself, I’ll end up paying little over 500USD. Let’s make it right under 600 as I’ll probably have forgotten some stuff.
I know tons of people who are gonna get shabby test-prints for Christmas haha
Desire If that is a quick sketch, I don’t want to see on that you’ve taken your time on. I’m using a round bed on mine, but I’ve been looking at the Onyx heat bed and giving serious consideration to getting one of those after the new year. I’ve also been looking at the Gecko bed, which is metal with a special non-stick coating that is “supposed” to be great for adhesion but still easy to take models off with. It looks really good, but I don’t know anyone that has one, and I am waiting to buy one until I hear more.
My machine can match those extreme angles, but I don’t print at those. I can’t describe what it does, but my heart sinks when the arms move that way. Usually something has gone very wrong. As for the machines being art, I agree completely. I used black OpenBeam with blue acrylic. My machine is honestly beautiful. I’m hoping to get my LittleRP with the black metal beams. They just sent an email today saying that a limited number of units can get the black.
$600 is not a bad price. I figure I’ve got around $7-750 currently invested in mine. I also mostly print in PLA, I love the stuff. If you go that route, I can’t recommend mounting some form of cooling system on the end effector. I have 2 40mm fans on mine, I think at 30 degree angle (I’m not home and can’t check), but there is an amazing difference between the prints from before I used the active cooling to now.
I can’t stop staring at my Delta while it prints. It is a kinetic sculpture that makes art. So yeah, I wear that nerd badge proudly. 🙂
So you mean you can’t recommend cooling ENOUGH? (you potentially forgot the last word 😉 )
I am just starting to do some serious prints with the Prusa I just built at my work, and we are experiencing some warping, which I suspect is due to cooling plus maybe printing too fast.
And yeah, a square bed is a bit weird, but it’s what I already had laying around, I wanted to salvage as much as possible.
OpenBeam is so much more beautiful! But the price of the rails would drive it up quite a bit, so I decided to go for a Rostock in stead of a Kossel (same, except for dual slide bars instead of the rails). I might change it later, although honestly I think I’m going for a reprap Simpson or a resin printer next 😉 (have you seen those simpsons!? it’s like a giant crab making your print)
What extruder do you use?
This is the best overview of the major consumer 3D printing solutions I’ve come across. Well written article – thank you!
Desire Yes, I meant that I very, very much recommend active cooling for PLA. I work nights, and sometimes the brain and fingers have a slight disconnect.
Warping is a frustrating problem. There are so many potential causes including adhesion, heat, speed, the temp of the heatbed… Ugh. It can get very humid where I live, and that can even cause issues sometimes. That, I think, is my only real complaint about a Delta. It’s very open and hard to control the environment as much as I would like.
The Gus Simpson kind of makes me a little uncomfortable. I can’t put my finger on why, but I don’t think I’ll ever build one. Maybe a Lisa… As for resin, yeah, that’s my project for the month of December. I’m SUPER excited to get my LitteRP.
I find that I print a LOT of small objects, so I’m hoping that my RP will be good for that.
I’ve used a couple of extruders. I think right now I’m using an acrylic, laser cut extruder. I don’t remember who made it. I’ve tried printing a few of my own, with okay results. I keep wanting to order a complete AirTripper, but at the same time, I’m okay with how my current system is working. At least, for the extruder. I’m looking at possibly replacing the arms with some carbon fiber arms with magnetic ball ends instead of the Traxxas set up. I have a line on a decently priced set, and am thinking about putting that in my Christmas wish list. 🙂
I have such a nerdy wishlist…
Aha, I was thinking of buying the Airtripper, as I’m still not entirely sure if my printed parts will include an extruder at all. The seller says it includes the standard rostock extruder but no clue what that is or how it performs. On the picture of the printed parts I also can’t figure out which parts that should even be lol. Plus, he mentioned something about needing a NEMA with an 8mm shaft for the extruder that’s included, and I’d rather just use the 5mm one I have with an MK8 drive gear, they seem to perform much better than the MK7s. We’ll see when it arrives, the communication with the seller has been all in Chinglish so you’re never sure what you’ll get haha.
You’re right about the printer being very open, especially on the huge ones it’s a bit difficult.. 🙂 I might just make a plastic coat with a zipper for it.
I wanted to ask something else, if you were to purchase a EnvisionTEC printer, do you have a specific model that you’d prefer?
I don’t know the individual machines well enough to say and didn’t delve too deep since I will never be able to afford one.