


Bits to Atoms: Testing the Form 1+ SLA Desktop 3D Printer
For the past few months, I've had a Formlabs Form 1+ in my possession and was able to put it through it's paces. Here's what you should know about using this SLA desktop 3D printer.
3D printing keeps getting bigger, better and more accessible every day–you can now buy a MakerBot or Dremel 3D printer at Home Depot. Plastic filament printers are, by far, the most common type you will find at makerspaces and home garages, but high-resolution resin printers are slowly creeping into the mainstream. One of the most promising, is the Formlabs Form 1+ SLA printer developed by a team from the MIT Media Lab. I had the chance to put a Form 1+ through it’s paces for two months and here’s how it went.

First, a little backstory on the company. Formlabs was founded in 2011 by a group of MIT grads who were frustrated by the fact that there was no economical way for most people to experience the highly-detailed prints that SLA and DLP resin printing offered. Unlike filament printers, which were popping up everywhere at relatively consumer-friendly prices, SLA printers cost tens of thousands of dollars and were simply out of reach of most users. Formlabs set out to make a desktop SLA printer that would rival the big machines and cost only slightly more than many filament printers. At the end of 2012 they successfully completed a $100,000 Kickstarter campaign, eventually bringing in over 2.9 million dollars. Nothing like being too successful–now the pressure was on with a lot of machines to build. Production delays happened and then they got hit by a patent infringement lawsuit from 3D Systems, the inventors of SLA printing. I am happy to hear that the parties have settled, and the case was just dismissed with prejudice on December 1. Formlabs is free to forge ahead.
Having met the Formlabs team a few times at Maker Faire and other events, I have always been impressed. Everyone at the booth knew their stuff, answering in-depth anything I threw at them. One particular staffer was really killing it with thorough and informative answers–turns out she was their material scientist. The machine was sharp looking and all the prints looked great–I really wanted to buy one, almost backed the Kickstarter for an early unit, but chickened out. Recently I contacted Formlabs to request a sample unit to test. So for the past few months, I’ve had a Form 1+ in my possession and was able to put it through it’s paces!
How It Works
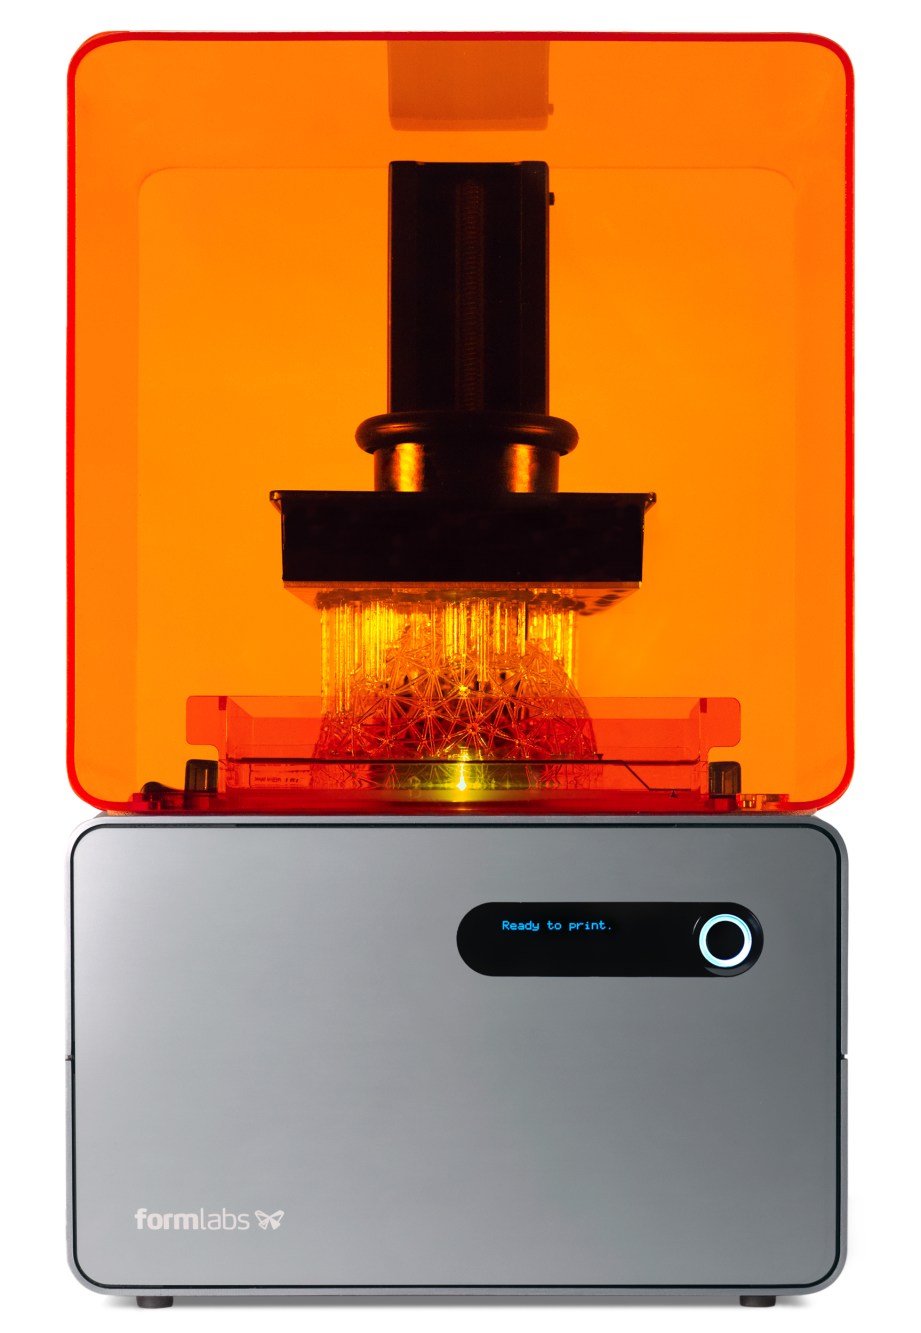
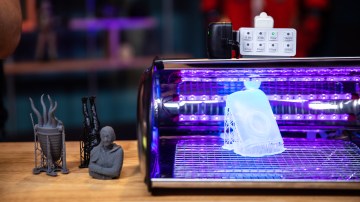
The Form 1+ SLA printer makes a good first impression–sleek and simple design, using quality materials. It just looks cool. It takes up a little more room than a large coffee maker, but it also comes with a cleaning station that you will need to make room for. The on-board interface has one button that does everything with a variety of taps and holds, mostly you use it to simply start and stop prints. PreForm is the easy-to-use model processing software that can be downloaded from the Formlabs website.
The build envelope is 4.9″ x 4.9″ x 6.5″, which may sound tiny when compared to filament print beds, but prints can be positioned in ways to maximize the space. There are three print resolutions available: 100, 50 and 25 microns (.1, .05, .025mm). As a comparison, 100 microns is typically the finest resolution available with filament printers and a professional printer such as the ProJet 7000 (which I used for the Millenbaugh Motivator) can print at 125-50 microns. “A-ha!” you say–the Form 1+ can do even finer resolution than the pro machine! Yes, it can technically print a finer layer thickness, but you also have to consider feature resolution, which is the smallest detail the printer can accurately reproduce. This is where the pro machine wins out. The ProJet can accurately reproduce details down to 50 microns, where the Form 1+ does 300 microns. Don’t get me wrong, 300 microns is still really small and the Form 1+ can do details just great, but you can start to see what a lot more money will get you.
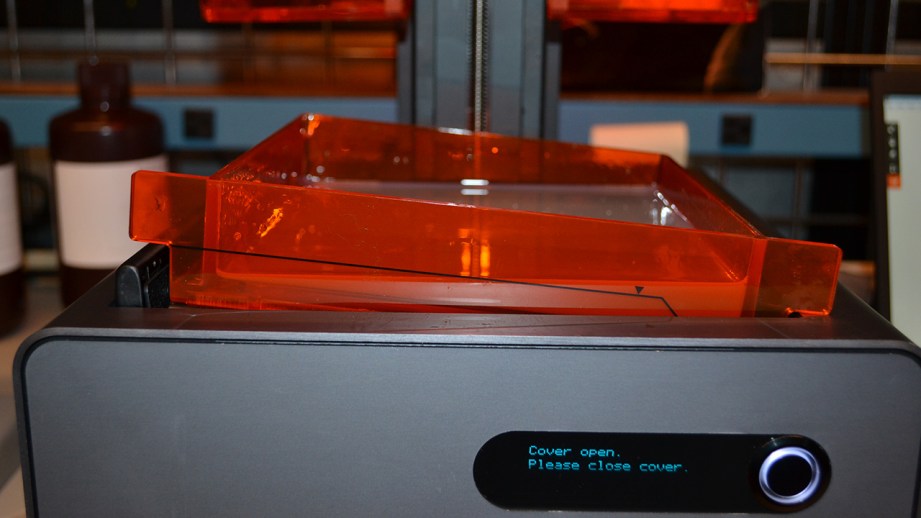
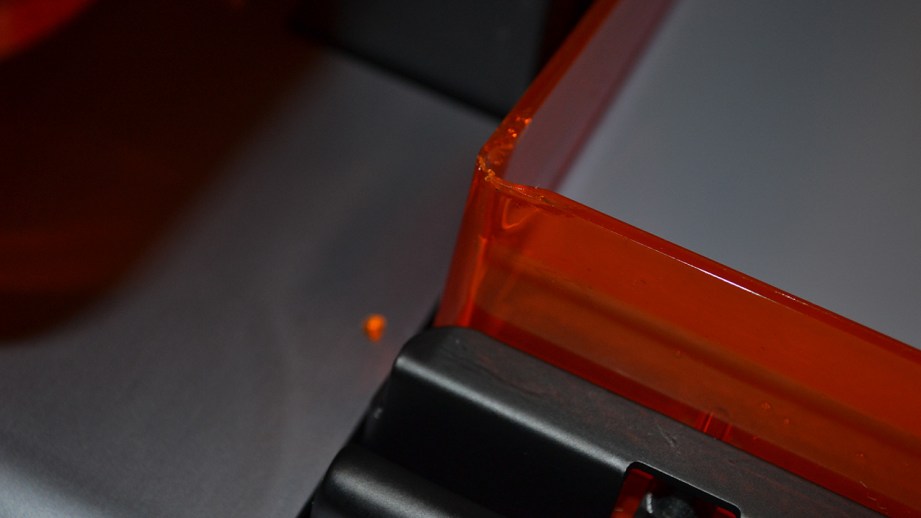
The Form 1+ uses a laser to ‘draw’ and cure each layer of the print in a UV-curable, liquid resin. An amber acrylic cover encases the print area to keep sunlight out, which would cure the resin and to protect you from the laser. The print adheres to a removable print platform that clamps into the machine, at the top of the z-axis spindle. Below the platform is a removable, acrylic resin tray, which has an optically clear silicone bottom and mounts into a pivot mechanism that rocks the tray up and down, during printing, in order to peel the print off. The trays are also amber and come with a lid so they can be safely stored without curing the resin inside. Upon removing the resin tray, you can see the large mirror mounted at a 45 degree angle which the rear-mounted laser bounces off of and into the bottom of the resin tray.
I was able to get the Form 1+ up and printing in no time–faster setup than a filament printer. With a filament printer there’s a lot more moving parts and the filament has to be loaded, which requires preheating the machine. Typically some kind of covering or coating has to be put on the print bed and it has to be leveled and then the machine has to preheat. With the Form 1+, I filled the resin tray to the line, uploaded the model and printing began immediately. With a filament printer, if you want to change materials, the machine must heat up, the filament extracted, the new filament loaded and then the system needs to be flushed to remove any traces of the prior filament. With the Form 1+, simply remove the tray and insert a new one with a different resin, this is assuming you have an extra tray (more on that later).
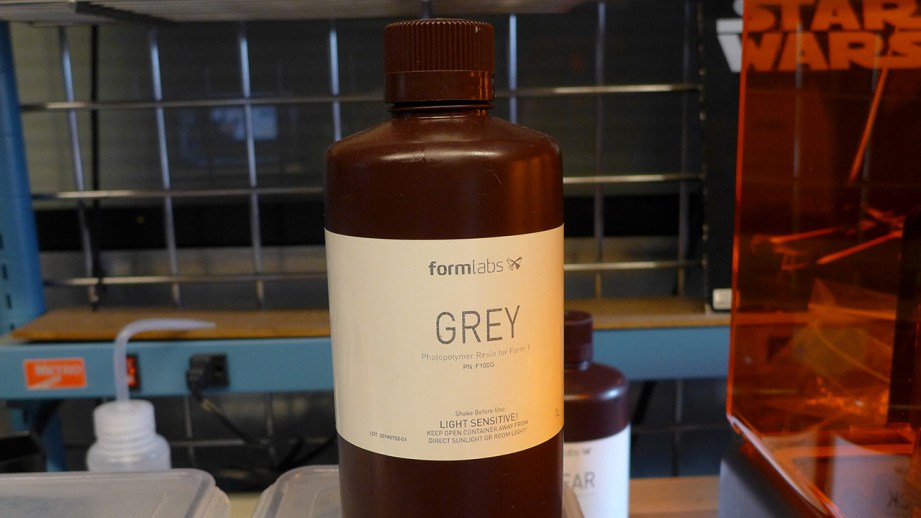
Resin comes in a light-tight bottle that needs a good shake, if it’s a pigmented material. It’s poured into the resin tray to the to the ‘max’ fill line, which should be adhered to closely, as the level of the resin rises dramatically as the platform submerges. Carelessly overfilling the tray would result in an overflow that would end up inside the machine. I would let the resin sit for a little to allow bubbles to work their way out. Once a print is initiated, the platform lowers into the resin and sits on the bottom of the tray. The laser immediately starts darting around, curing a thick layer of resin and supports that the entire print hangs from and adheres to the aluminum print bed. When a layer is finished, the resin tray, which is mounted to a hinge, dips down thereby peeling the print off the bottom of the tank. The print platform then moves up slightly for the next layer and the tray moves back into position. It does this for every layer and is the only noise the machine makes and while not silent, it’s far quieter than my MakerBot. Once the print finishes, the platform will move to it’s home position at the top of the z-axis spindle, with the print hanging, bat-like, from the bottom. I would recommend allowing the print to rest for a few minutes, as there is still liquid resin clinging to it that will drip back into the tray.

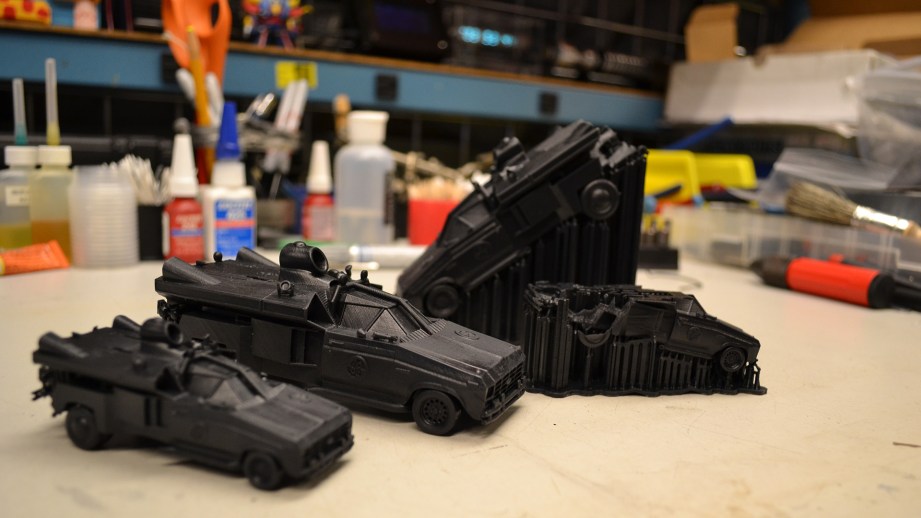
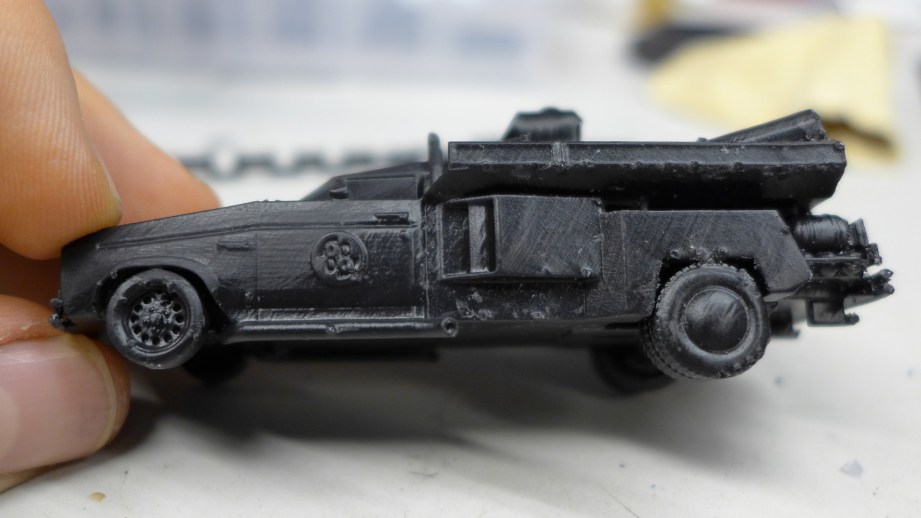
Like any 3D printer, prints can take a long time. The Form 1+ is the updated version of the original Form 1 and is twice as fast and has a laser four times as powerful. At the medium, 50 micron setting, a 1:64 scale jetcar took around 8 hours and the larger 1:48 scale took around 12 hours. A long time, but not for this type of printing and the wait is worth the details.
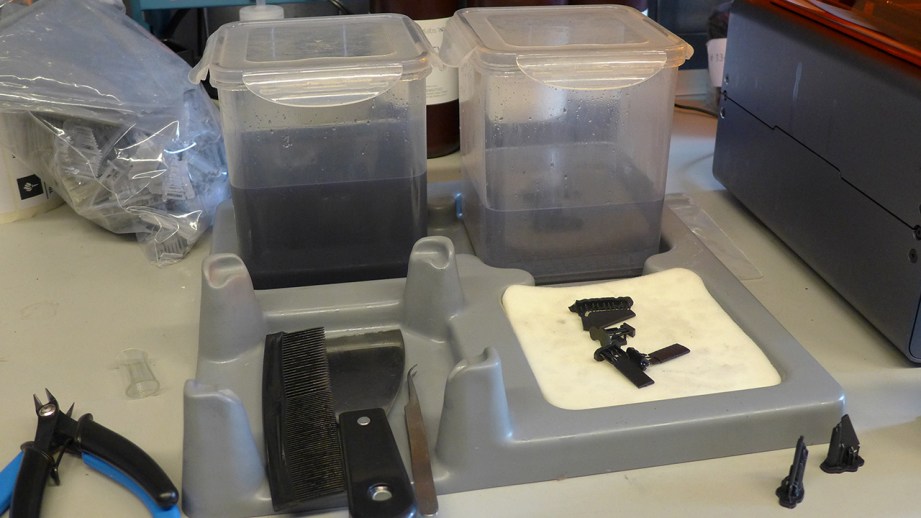
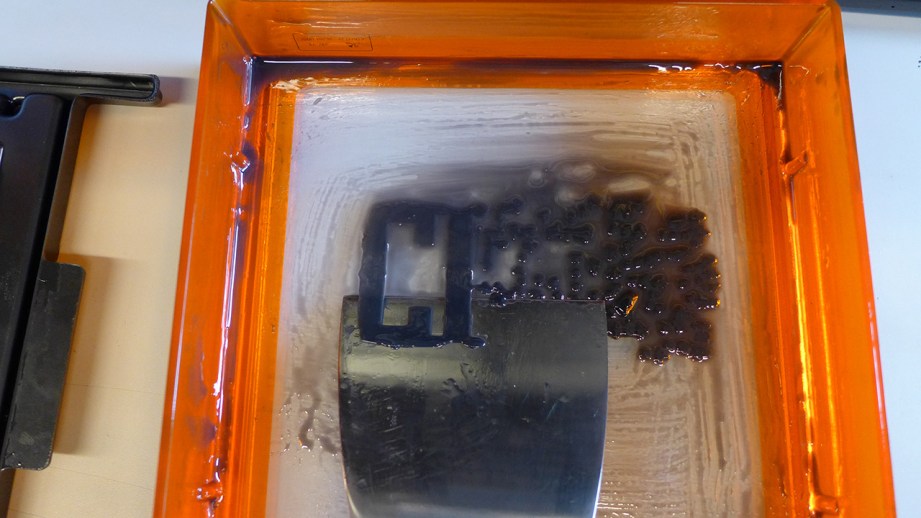
Once a print is finished, it’s onto the cleaning station where we remove any liquid resin remaining on the print. Formlabs put together a nice vacuum-formed tray that has a place for the platform, two cleaning tanks and an absorbent pad to rest models on while they dry. A squeeze bottle, blunt scraper, flush cutters, tweezers and rubber gloves are also included. You will have to purchase isopropyl alcohol for cleaning the models. I would recommend getting at least a gallon can from your local mega mart as it takes a good bit to fill all the tanks and it will get dirty fairly quick. The print has to be pried off the print platform using the included scraper. It can be a tough job but the PreForm software wisely adds little notches to the base of each print which makes getting the scraper in and under the print much easier.
Once removed, the print goes in the first tank with alcohol and gets shaken gently for a minute or two, then it soaks for around 10 minutes. The print is removed, using the convenient basket and moved to the second tank for a repeat shake and soak and then to absorbent pad to dry. At this point, the print is not 100% cured and will be slightly soft and flexible, so be careful not to bend, break or scratch anything. I confirmed with Formlabs that they will usually zap the finished print in a UV oven for a few minutes for a full cure. For the rest of us, the print could be put in the sun for a few minutes or it will cure on it’s own over a few days. I found putting prints in the sun a risky business as I had some thin features severely warp from rapid curing.
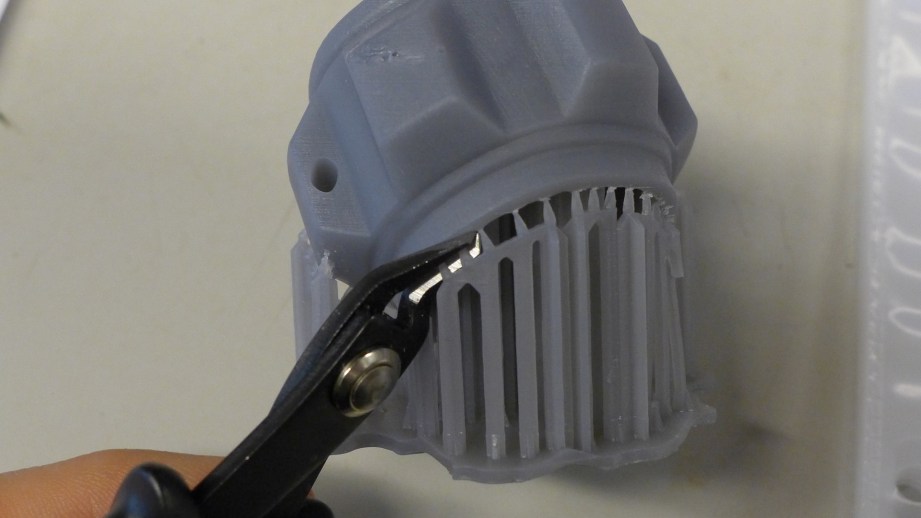
This is a good point to remind everyone that prints are UV-reactant, so you don’t want them sitting in the sun or under a halogen lamp as they will discolor and become brittle. This is not unique to the Form 1+, but true of most resin printers, so prints should be painted or at least clear coated to protect them. You will also need to remove the model from the supports, which attaches the model to the print bed (more on this in the Software section). Supports can be removed with the included flush cutters or an x-acto knife and any remaining marks can be sanded once the model is cured.
Testing the Software

The PreForm software is simple and easy to use, while still giving the user access to some tweaks. Pick the material and layer thickness and have the software orient your model and auto generate supports. Unlike filament printers where it’s ideal to have a nice, flat surface to put on the print bed, the Form 1+ needs models at an angle. Why? Because the peeling process becomes much more difficult and prone to failure with large surfaces. It’s like trying to peel a sticker off in one piece without it ripping. If you were printing a cube with a side directly on the print bed, it has to peel that whole surface versus a square positioned corner-down which would be a much smaller area to peel. By the time the printer gets to the middle of the cube, where there is a lot of surface area, there would be enough supports and mass generated that it would probably peel ok.

Ideally, the cube would be hollowed-out to both save material, time and making it more likely to print successfully. Since nothing will be laid flat, everything on the Form 1+ will print with supports, unlike filament printers where certain designs can print without supports. It It’s still a good idea to design models to use as few supports as possible to save on resin and post-print clean up. PreForm will automatically generate supports and indicate possible problem areas. There is the option to tweak support settings and even manually add and remove supports, which is nice. In general, the software did a good job but it is ‘dumb’, as it does not know what is the ‘good’ or visible surface of a model. You may want to manually orient models so the downside, or unseen side, faces the supports, this way, any marks the supports may leave will be hidden.
Familiar options such as shells (wall thickness) and fill (how solid the interior is) are absent from PreForm (and most resin printing software) since the model will print exactly how it’s modeled. A solid cube will print solid and use up a lot of material, so to save on time and materials, models should be hollowed with escape holes when possible, which will require additional modeling work. The Form 1+ needs to be connected to a computer via USB to upload the model–there is no SD card option. However, once the model is completely loaded into the printer, the computer can be disconnected. Uploading the model can take a few minutes, but nothing unreasonable and the print will start while the rest of the model uploads.
The Materials
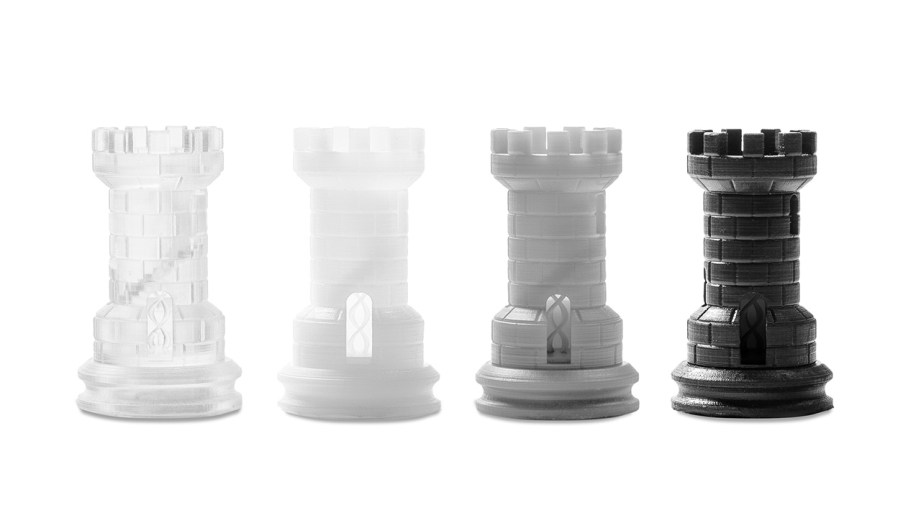
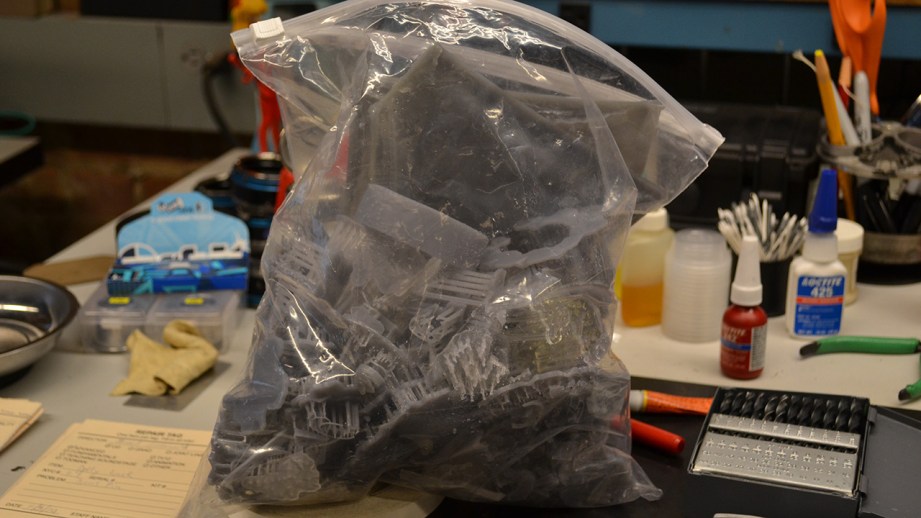
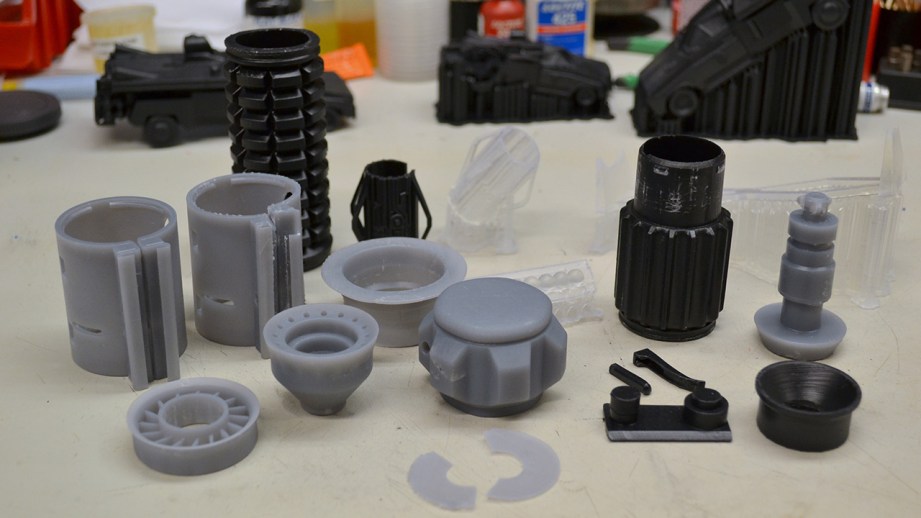
Formlabs offers white, gray, black and clear resins which run $149 for a liter. I haven’t crunched the numbers on how this compares to filament, but it’s definitely more expensive. I filled a whole gallon bag, plus some, with prints from one bottle of resin, so it does go quite a long way. I tested the gray, black and clear which all produced nice prints. My favorite was the black which made details really pop. I didn’t like the gray as much since it was slightly translucent on many parts. The clear came out nice and can be polished to transparency, although it is prone to yellowing as it ages or if exposed to too much UV light.
I would describe the fully-cured resin as acrylic-like, as it can get brittle and I have snapped off thin pieces and edges. To confirm my suspicions, I dropped a failed print on the floor and it shattered into pieces, so prints should be handled with care. I don’t know if I would want to use them for mechanical parts, other than mock-ups, as I would feel more comfortable with ABS which has some give. Formlabs just released a castable material that can be used in ‘lost wax’ applications, which is excellent for jewelry makers. They also announced that a clear, flexible material is due anytime now and it looks promising.
The Bad Stuff First
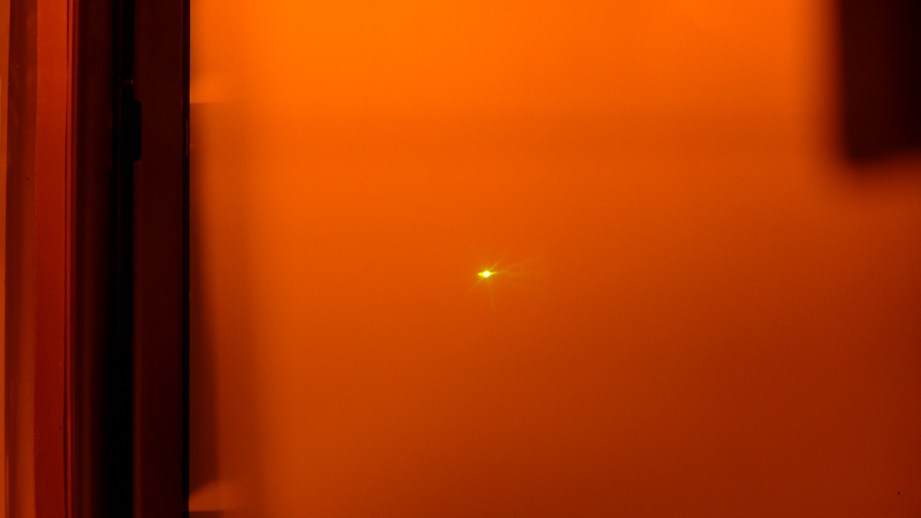
Let’s get the bad out of the way first. The worst thing I can say is that in the two months I was testing the Form 1+ I went through three printers. Yep. The first one had a bad laser which caused every print to fail. The beam should normally be a pinpoint, but mine had a halo around it which was like painting with a rag versus a fine paint brush. The second had a spectacular fail with the peel motor, which moves the tray up and down. There was a horrible grinding noise and it pulled the tray down so far it rammed into the body of the printer. The tray was stuck in the down position and wouldn’t budge, meaning it couldn’t be removed or emptied easily. I had to let the printer sit open in the sunlight for a few days to cure all the resin left in the tray, so it could be shipped back.
The third printer worked like a champ and I got great prints on it until a few days after Norm and I shot the Form 1 video when the peel motor stopped working. This was different than the second unit, as I could move the tray up and down and even remove it. Turns out the peel motor uncoupled from the tray mechanism and could be fixed relatively easily, but it was time to send the printer back anyway.

I was a bit disappointed by the failures but I will say this – these are the typical things that go wrong with the Form 1+, Formlabs is aware of the problems and have been addressing the issues. I was also getting demo units that have been shipped all over and probably used more than a typical printer. Disappointing, nonetheless. Customer service was very good, prompt and thorough, but that could be biased by the fact that I was reviewing the unit. Although, I don’t think that’s how Formlabs operates, they seem to take customer service seriously and to be doing a pretty good job. I think for a Kickstarter project that wildly outperformed expectations, with a small group of people, they are doing pretty well.
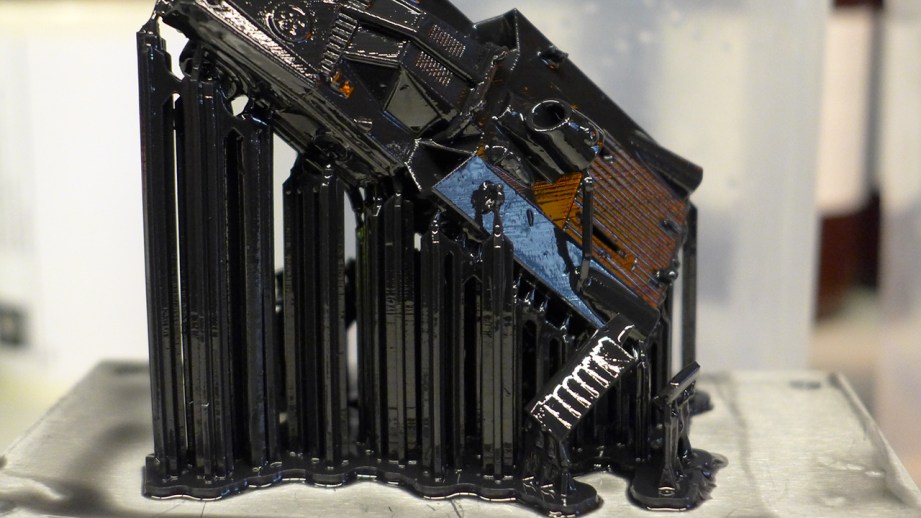
Aside from the hardware failures, I would have occasional print failures, where the print would not peel properly and get stuck to the tray. When this happens you get a layer of resin baked to the tray bottom, which blocks the laser from adding to the model. The print is ruined and you have to very carefully use the included scraper to remove the baked on resin. This is nerve wracking as the bottom of the tray is a soft silicone and if you gouge or scratch it, your tray is toast. I was surprised that this wasn’t as bad as I thought it would be–I managed to get it clean every time without damaging anything.
After scraping off these baked-on bits you have to run a comb through the tank in order to sift out any stray bits that would ruin prints. Formlabs gives you every possible tool you need except for this–I used a regular fine-tooth hair comb. I asked Formlabs why they chose silicone and not glass and it comes down to the stresses that the peeling process causes on the tray. Their answer: glass would break. The biggest bummer concerning the tanks is the silicone will eventually start to cloud due to the laser. The clouding will then cause bad or failed prints and the tray must be replaced. Formlabs recommends moving the position of prints around the print platform to give all surfaces of the tank equal play, but ultimately after about 2 bottles of resin you should think about replacing your tank which costs $60. I don’t like that part at all, and hope to see improvements to extend the life of the resin trays.
There should be a dedicated tray for each type of resin you plan on using. It is technically possible to clean out and use the same tray for different materials, but it’s unrealistic and messy.
During my tests, I had three resin trays crack, one of which I thought was my fault, but upon further inspection they all cracked at the exact same spot – the back left corner where there’s a molded pour spout. I think this is a weak spot and the stresses of the peeling process may tend to crack the trays.
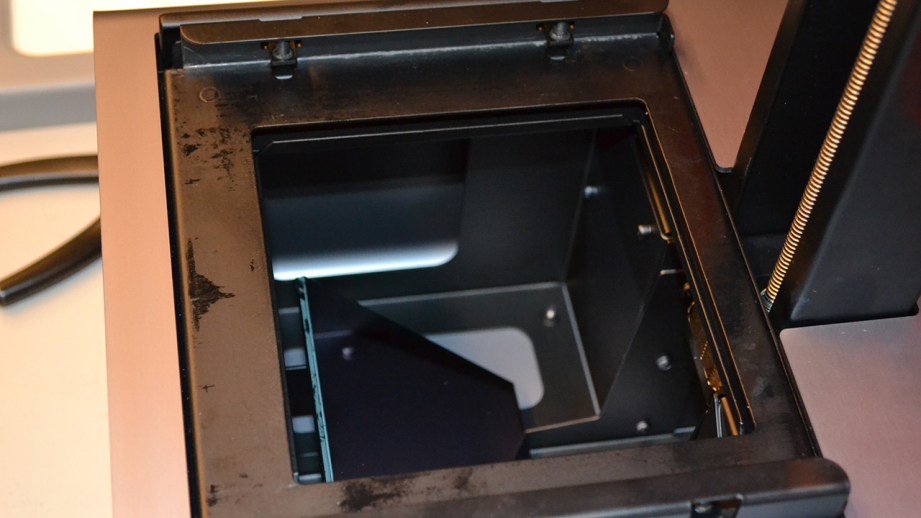
Finally, for a unit that relies on lasers and optics, the open body design is a problem and I feel it should be sealed in some way. Both my apartment and shop were a torture-test for the Form 1+, between NYC dirt, old building dirt, three cats, etc., the mirror would get dirty very easily. When the resin tray is removed, the interior of the printer is completely exposed, with the large mirror directly beneath the opening. As the repair tech at NYU Film and TV, I have a lot of experience and tools for cleaning lenses and sensors, but cleaning the mirror on the Form 1+ and getting it spotless and streak-free was really tough. If dirt gets on the smaller mirrors that direct the laser back inside the machine, cleaning would be particularly difficult. With this layout, it’s relatively easy to accidently get resin on the mirror and even a drop would be very bad and difficult to clean off. I spoke with Formlabs at NYC Maker Faire about this and they indicated that they had always wanted some type of sealed unit, but there’s only so much they could address and still keep costs down and, especially while doing a startup. I hope to see this improved in future units.
While not a bad thing per se, something to keep in mind when using the Form 1+ is that a dedicated workspace is needed for the printer and cleaning station. My MakerBot is crammed into the corner of my desk and that works fine, but the Form 1+ system needs more space. Ideally it would be in a clean area (ie. not your woodshop) and it needs a fair amount of space in the back to open the lid. There needs to be a spot for the cleaning station as well and keep in mind, that no matter how hard you try, resin and alcohol will get on this work area. I was trying to be tidy, but everything around the printer eventually got a little sticky.
The Good Stuff!
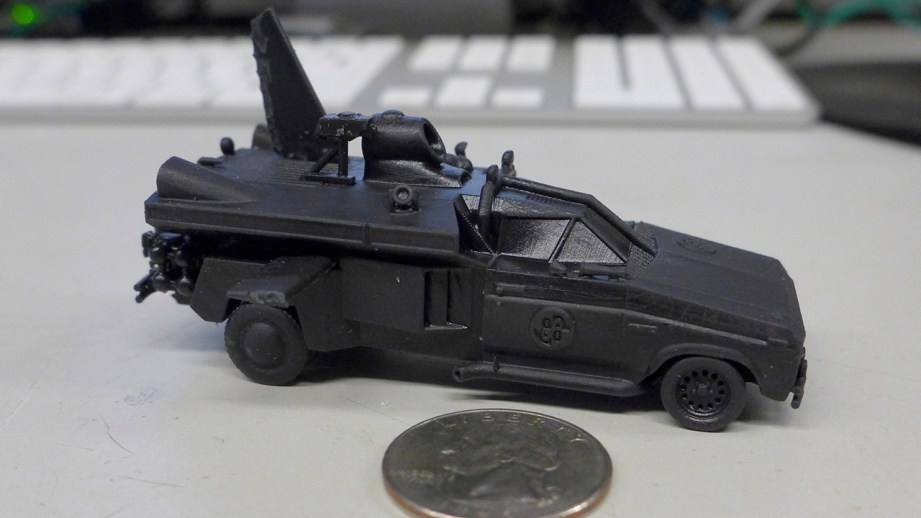
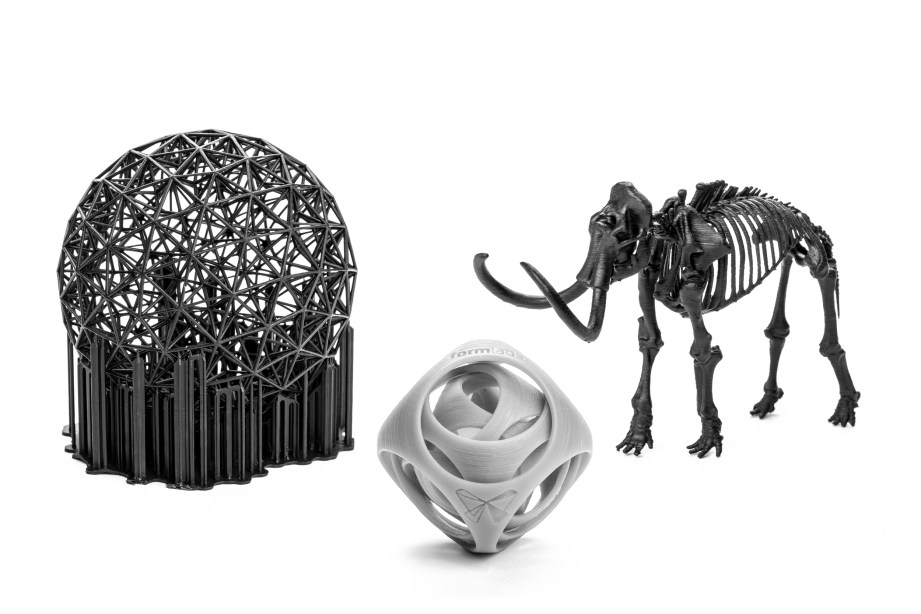
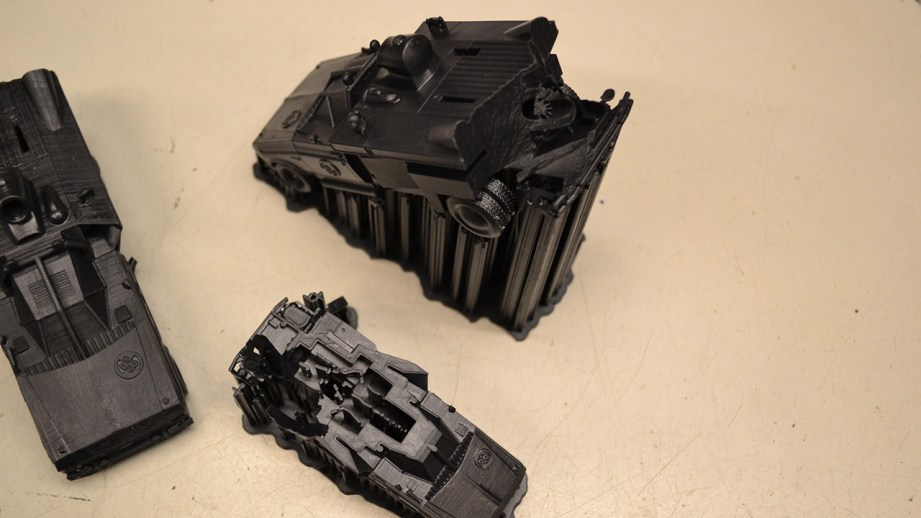
The prints I produced with the Form 1+ were very, very nice. I was really impressed with the detail on the miniature jetcar and the lightsaber turned out really well. Prints generally had a nice surface finish, supports were relatively easy to remove and sanding and painting is easily done. I felt that print times for this level of detail were totally reasonable and to be expected for SLA printing. Formlabs has a nice range of materials to work with especially with their new additions. I love how the machine looks and that it’s relatively quiet. Formlabs is obviously working on improvements and have been actively listening to feedback.
I like the PreForm software and don’t really have any bad things to say about it. It was straightforward and easy to use, it’s auto mode generally worked well, it was fast and gave just the right amount of tweaking options. Getting the printer running was a breeze and is overall easy to use, this is counterbalanced by the routine maintenance that must be done. You have to keep the mirror and bottom of the tray perfectly clean – fingerprints and excessive dust will ruin prints. You have to make sure the inside of the tank is clean and free of stray cured bits of resin. Unused trays and resin must be sealed and kept out of direct sunlight. The cleaning station will need cleaned and the alcohol changed out periodically. If you are a detail-oriented type, this should not be a problem and is worth it for excellent prints. If you run the Mr. or Ms. Messy Workshop, this is probably not the printer for you. I would not recommend this printer for most schools where students have direct access, unless highly supervised. If you are a jewelry maker, craftsman, into miniatures, a sculptor, ZBrush artist, etc, this would be an excellent printer for you.
So would I buy a Form 1+? As much as I like the prints, I personally would like to wait for their next gen machine which I hope would address some of the issues I had. I would also like to see them come out with a material that hits that sweet spot between their standard material and the flexible–something that is rigid with just a bit of give. Despite any problems I ran into, I really liked testing the Form 1+ and look forward to what Formlabs will do next. I think they have a solid foundation to work from and the Form 1+ will keep getting better. I also suspect that they will have a lot more competition down the road, especially from 3D Systems and Stratasys, the big guns in the field of 3D printing. If you would like to learn more about Formlabs (and MakerBot) I would highly recommend the Netflix Print the Legend documentary, which is an excellent behind-the-scenes look at not only 3D printing, but the world of Kickstarter and small startups.


6 thoughts on “Bits to Atoms: Testing the Form 1+ SLA Desktop 3D Printer”
Leave a Reply

One Day Builds
Adam Savage’s One Day Builds: Life-Size Velocirapt…
Adam embarks on one of his most ambitious builds yet: fulfil…

Show And Tell
Adam Savage’s King George Costume!
Adam recently completed a build of the royal St. Edwards cro…

All Eyes On Perserverance – This is Only a Test 58…
We get excited for the Perserverance rover Mars landing happening later today in this week's episode. Jeremy finally watches In and Of Itself, we get hyped for The Last of Us casting, and try to deciper the new Chevy Bolt announcements. Plus, Kishore gets a Pelaton and we wrack our brains around reverse engineering the source code to GTA …
Making
Adam Savage in Real Time: God of War Leviathan Axe…
Viewers often ask to see Adam working in real-time, so this …

One Day Builds
Mandalorian Blaster Prop Replica Kit Assembly!
Adam and Norm assemble a beautifully machined replica prop k…
House of MCU – This is Only a Test 586 – 2/11/21
The gang gets together to recap their favorite bits from this past weekend's Superb Owl, including the new camera tech used for the broadcast and the best chicken wing recipes. Kishore shares tips for streamlining your streaming services, and Will guests this week to dive into the mind-bending implications of the latest WandaVision episod…

One Day Builds
Adam Savage’s One Day Builds: Royal Crown of Engla…
One of the ways Adam has been getting through lockdown has b…

Making
Adam Savage Tests the AIR Active Filtration Helmet…
Adam unboxes and performs a quick test of this novel new hel…

Making
Weta Workshop’s 3D-Printed Giant Eyeballs!
When Adam visited Weta Workshop early last year, he stopped …

One Day Builds
Adam Savage’s One Day Builds: Wire Storage Solutio…
Adam tackles a shop shelf build that he's been putting off f…
Thanks! Detailed overview, still a bit tricky to imagine how it works with all the dipping, pivoting, rocking, etc without seeing it in the flesh. Will have to see it once! One thing I don’y really understand; What is this ‘feature’ resolution? How come, if the highest resolution is 25 microns, can the best detail only be printed at 300 microns?
Cheers!
Desire Yeah, sorry for not having a better video of it in operation. I was going to shoot one at the very end – and then it broke. The layer resolution is simply how thin each layer can be, think of it as looking at it from the side. The detail resolution is how small it can accurately ‘draw’ something, say really tiny text, think of this as looking from above. The high-end machine could ‘draw’ 50 micron text and it’s still readable, the Form 1+ can do 300 micron resolution, so if it tried to print the same size text it wouldn’t come out. It might print blurred together, just as bumps or not at all. This is a simplification, but it’s the general idea.
Aha, gotcha, so it’s basically 300 micron in the horizontal (XY) plane and 25 micron stepheight (Z) 🙂 Thanks! Still pretty cool, can’t wait for this to be implemented in even cheaper or even DIY kits. Currently all DIY kits work with a videoprojector, and I can’t imagine that working as well as a laser (although really, I have no scientific reasoning behind that statement, just guts).
Desire I would think the same thing but Make said it got the best resolution out of all the printers from the B9 Creator (talked about last article) that is a DLP. Most of the EnvisionTec printers (Creature from the Black Lagoon and Zombie from last article) are also DLP.
SLA printers that use a laser are restricted in resolution to the size of the focused laser spot. The resolution of the galvanometer that drives the laser probably has a much higher resolution but its like moving a paint roller with a precision CNC machine. The big boys use expensive optics and iris’s to get a tiny laser dot. SLA DLP printers are restricted to the pixel size projected from the DLP. Printers like the mUVe DLP (which I have) can be adjusted down to <50um XY and 0.4um on the Z. You just have to remember that adjusting your DLP down to 50um size using a 1920x1080 DLP gives you only a working area of 96mm x 54mm or at 100um 192mm x 108mm. You can do the math if you want bigger prints at less resolution. And a DLP cures each layer at one exposure while a laser has to be scanned. Lasers do tend to have more power so can give crisper edges.
Thks Sean for detailed information about this Printer..i really had an intention to purchase one..and it helps lots to me for my decision .Very appreciated. And so am i , i looking forward to seeing with their next Gen Form 3d Printer. Hope they will improve on what you got struggle ..i hope so…in my opinion 2015 year will be a year for SLA type Printer…hope would be. Also happy to hear that Form1 company was not been fine due with sued by 3d systems company. Its a good news anyway for other SLA company too.
Best