


The Volpin Project, Part 7: Introduction to Moldmaking
The basic shape of the Needler is done, but it needs to be molded and cast before continuing. There are many types of techniques to make molds, and just as many types of materials to make molds with. Today, we'll go over the processes for making hard copies--that is, a piece that ends up being cast in rigid plastic.
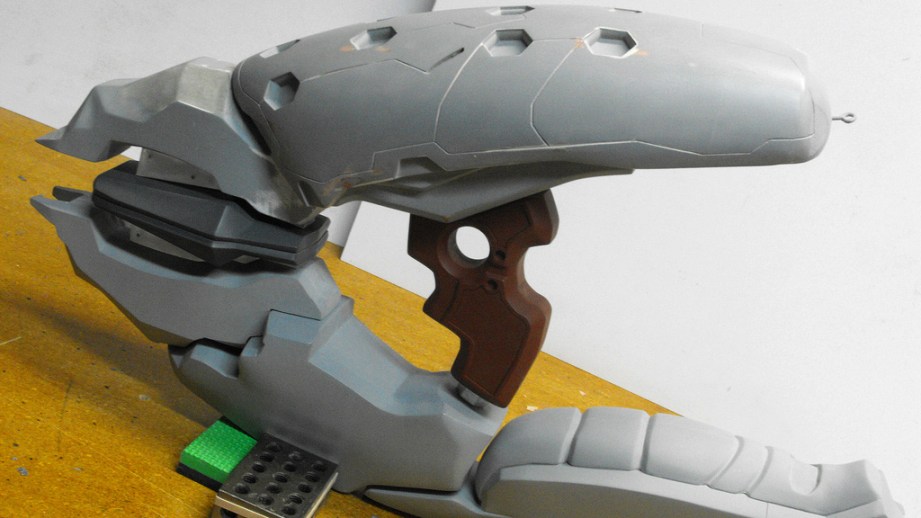
Our Halo Needler prop is somewhere around 15 pounds at the moment, an amalgamation of wood, foam, bondo and various types of plastic. While the shape of the whole thing is spot-on, the prop leaves a little bit to be desired with how heavy and fragile the mishmash of materials ends up being. The parts we’ve got so far have to be molded, then cast in urethane plastic. This will yield a piece that is both far lighter as well as more durable, since it’ll all be one cohesive material through and through.
There are many types of techniques to make molds, and just as many types of materials to make molds with. The techniques covered in this and the next build installment will give an overview on the processes for making hard copies–that is, a piece that ends up being cast in rigid plastic. First, to those who aren’t familiar with moldmaking, I’ll cover a bit of terminology. Important moldmaking terms will be bolded.
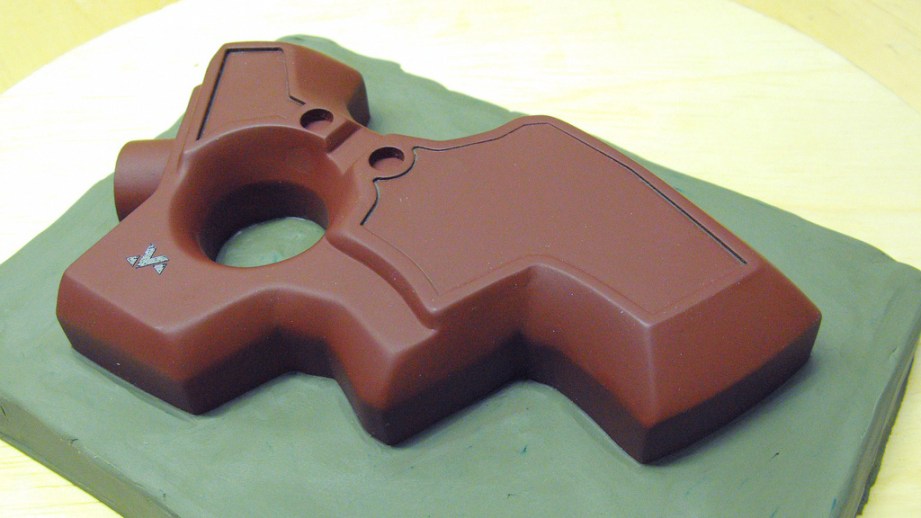
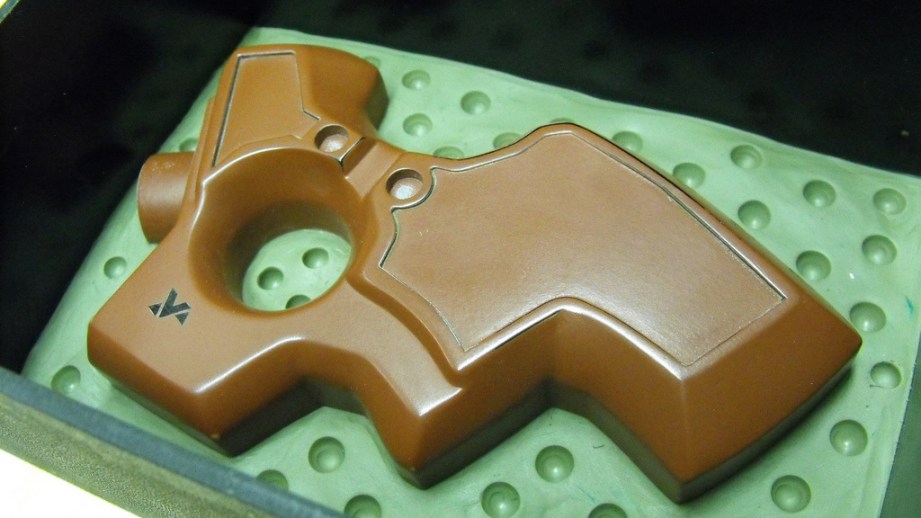
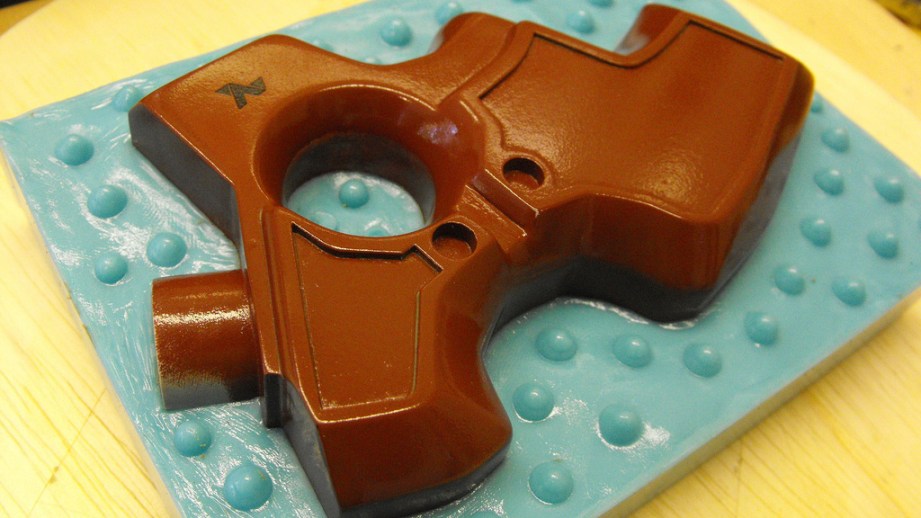
The part to be molded is referred to as a “master” or sometimes as the “sculpt.” For the purposes of this article I’ll be covering molding the grip section of the Needler. The grip here is made from MDF, Acrylic, PVC, Bondo and some epoxy clay. This is the grip master.
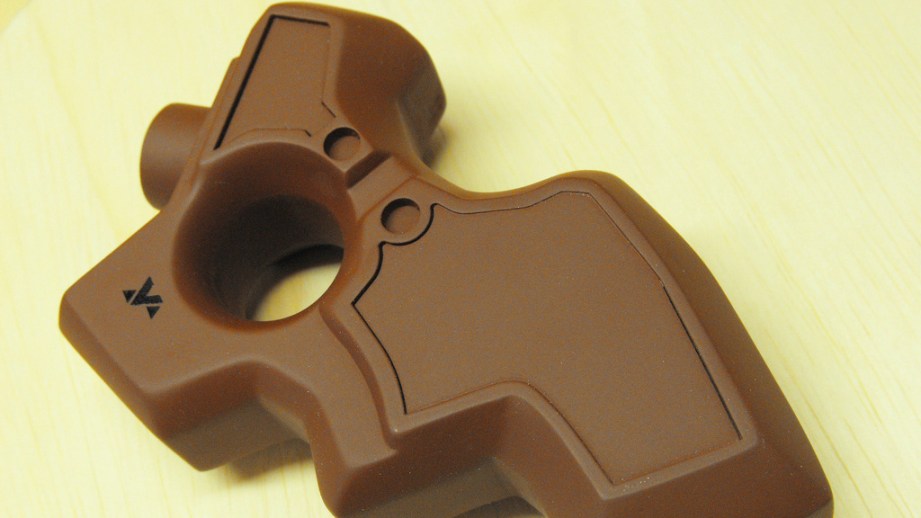
(Of note in the shot above is a little trick I learned from some of the modelmaking guys at the Replica Prop Forum. The little black arrows on the grip were cut at a local sign shop and adhered to the grip before molding. After making the mold and pouring a casting in resin, this will create small raised details in the final part.)
To make the mold, the material I’m using is silicone. The “mold” is anything into which casting material is poured in order to make a copy. Many people confuse the word “mold” with the finished result of the casting process. The pieces that come out of a mold are referred to as “castings.” Molds can be made from plaster, resin, silicone, latex–any number of materials based on the end goal of the mold and the part that is being replicated. I use silicone because it is versatile, lasts through many uses, and yields the best results for the type of work I do.
There are two kinds of silicone you’ll run into when making molds: “Platinum cure” and “Tin cure“. Generally tin-cure silicones are cheaper and less prone to curing issues, but less durable and can also shrink over time. Platinum-cure silicones shrink less, are very durable and more archival, but are more expensive and can be finicky about curing depending on environmental factors as well as what kind of materials the mold master has been made from. More on that last part in a bit.
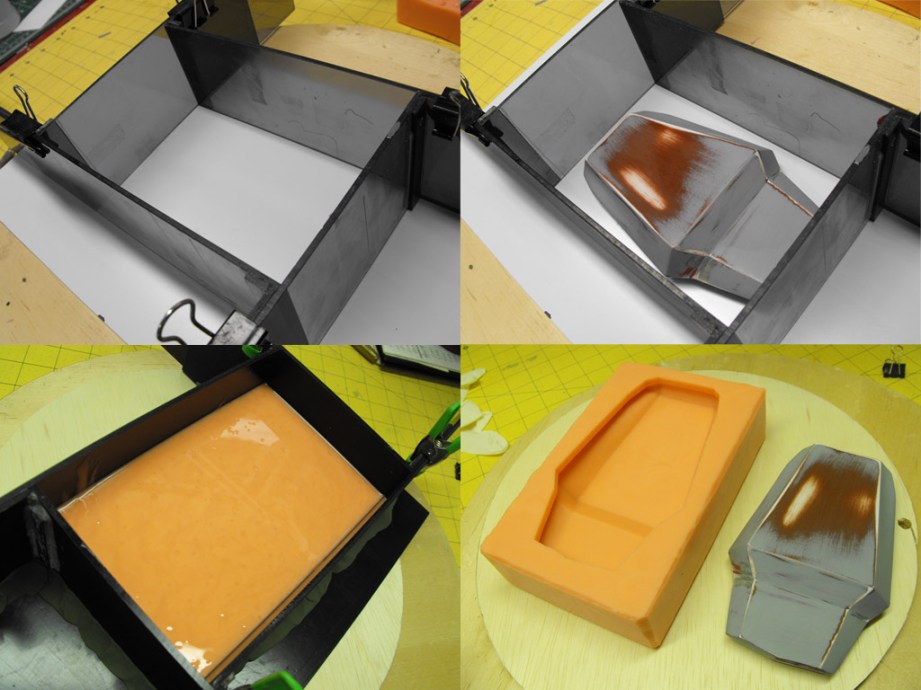
The easiest kind of mold to make is a one piece block mold. This is useful for making parts that have a flat back and detail on only one facing side. In the shot above, the “barrel” part of the Needler is placed into a mold box with a flat base. Clay is used to seal the mold box to prevent leaks around the base and edges, and silicone is mixed then poured over top of the master part. After allowing 6 hours of cure time (for this particular silicone) the walls are removed, then the master part is demolded from the silicone, and its ready to make copies!
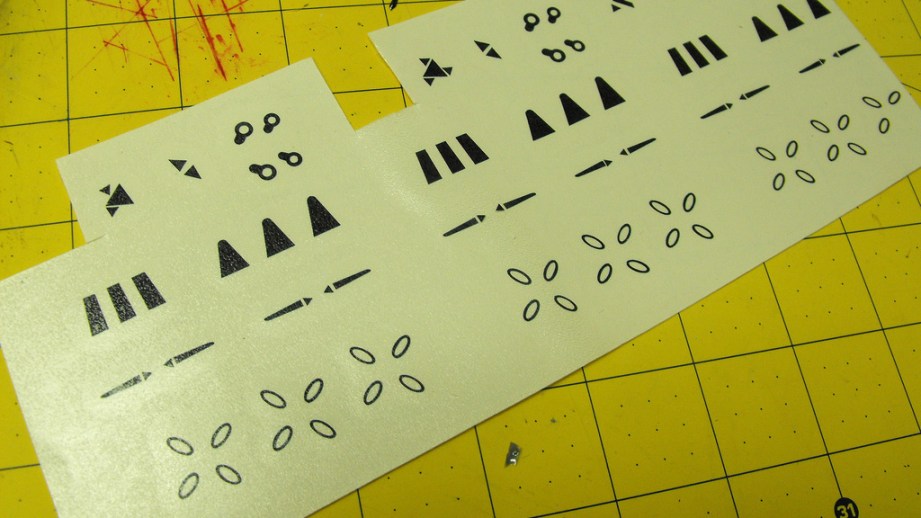
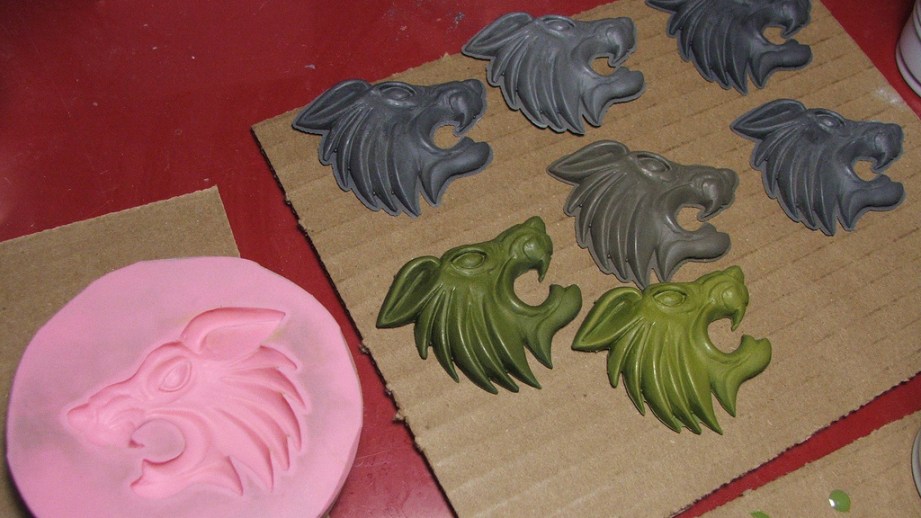
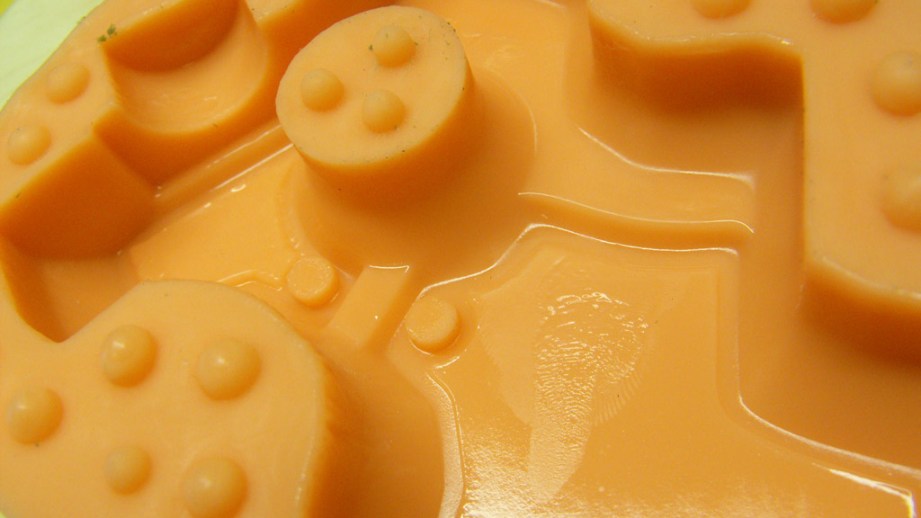
The benefits of a large block mold is simplicity. They’re quick to set up, easy to make and difficult to get wrong so long as you make sure the mold box is properly sealed before pouring. They do use a lot more material than other moldmaking techniques though, so larger block molds can be pricey and impractical. These are best used for small detail and accent parts, like the wolf heads in the picture below.
Let’s say you have a part that has detail on both sides and you can’t do a one piece mold. Again, there are many techniques for this, but I’m going to be illustrating the two piece block mold now. Let’s go back to the Needler grip I mentioned earlier. This part has raised details on all sides and will need to be replicated exactly in order to align properly with all the other parts of the Needler that have been built so far. The piece will have to be molded in two halves, which will be assembled before making a cast copy and split apart to remove the finished casting once cured. Done properly this technique can yield very accurate results.
A good idea before doing any sort of moldmaking is to take some time with clay and fill in any small cracks or hairline seams that have been created while building the master. Mold making silicone is specifically designed to pick up very fine details (even fingerprints) so most pourable silicone will seep into small cracks and can lock your part into the mold, or even produce tears in the silicone when pieces are removed over time.
A note on the clay as well: any clay used with silicone needs to be free of any sulfur. Sulfur in the clay will keep your mold silicone from curing, and you’ll just end up with a blob-like mess no matter how long you leave it to cure for.
To start out with a two part mold, pick where the seam line on your part should be located. Ideally, this is on a broad flat area that will be easy to sand or fill if your mold has any registration issues later on down the road. For the grip, I set the part down on a flat surface and sculpted clay around the perimeter along the flat front and back, leaving the sides open to the mold area.
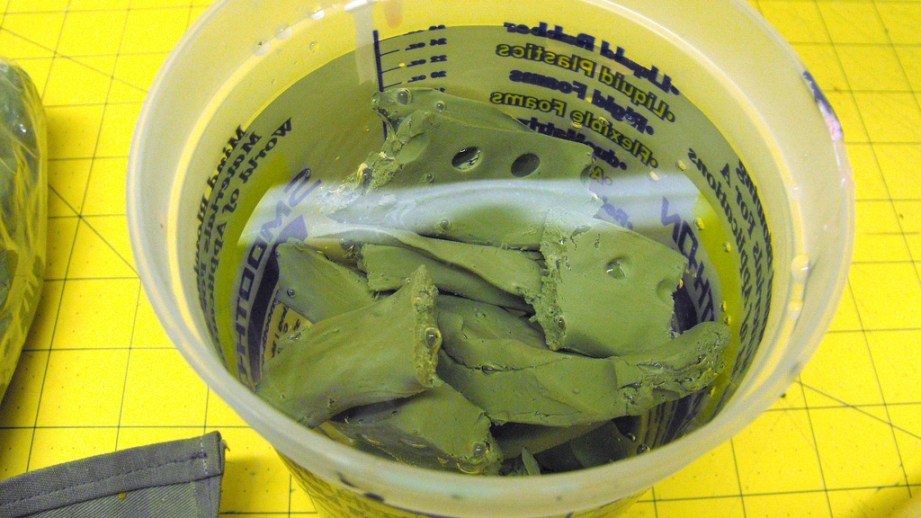
To make shaping the clay easier, I typically toss it in a bucket of warm water. This will soften your clay and make smoothing out lumps and getting a flat even surface much simpler.
Once the part is embedded in the clay and your edges along the seam line are smooth and even, it’s time to add registration keys. These are the little divots in the photo below. After the silicone is poured and cured, removing the clay will reveal little cones in the surface of the silicone. These will eventually align with the other half of the mold, making sure that when the two halves are assembled later on, everything lines up correctly. Without these keys, the two halves of the mold will slide across one another and result in a part with misaligned seams and symmetry issues.
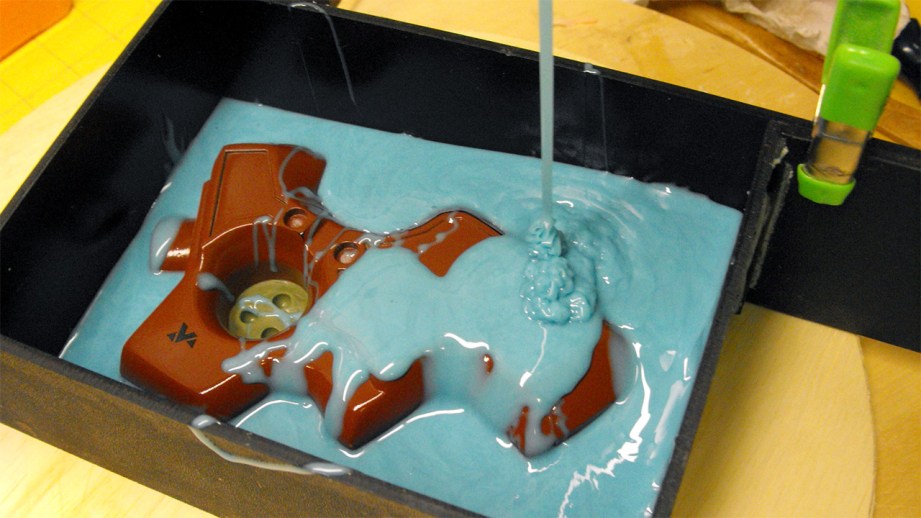
Now, just add blue goo. The silicone shown here is Smooth-On’s Mold Star 16 Fast, a platinum cure silicone that sets in just 45 minutes. In the shot below you can see I’m adding the silicone in a thin stream. This “tall pour” method of adding rubber helps remove trapped air from the silicone by stretching out air bubbles along the thin stream of silicone as it’s poured until they pop. Typically I use a vacuum degassing chamber to remove air from my rubber, but since this stuff starts to set up in about 6 minutes, I didn’t have time to properly degass the material before pouring it. Make sure to pour from one corner and allow the silicone to seek its own level over your master part naturally.
You might recall I mentioned earlier that platinum cure silicones can suffer cure inhibition issues, and that’s exactly what happened to me on the first attempt with this mold. I put the master part under the rubber too early, and the final primer coat hadn’t fully cured yet. The uncured primer released chemicals into the first pour of a different kind of platinum cure silicone, and the result was a very gummy mess that refused to cure even after 12 hours. I removed the part, allowed the primer to dry fully for a complete day, and tried again.
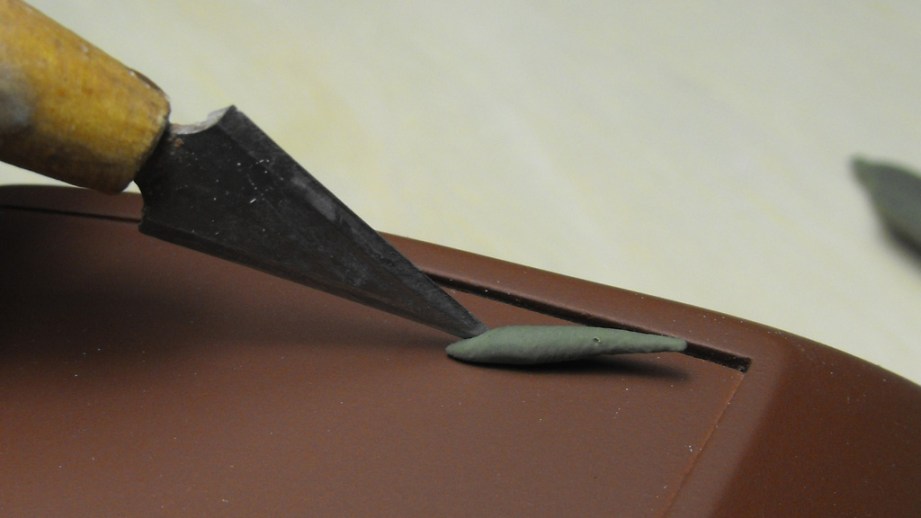
After leaving the mold for an hour to cure, the part is flipped over and the clay from the first half is removed along with the mold walls. There may be some residual clay along the seam lines which can be removed with an exact-o knife or similar clay scraping tool. Once this is all cleaned up, put the mold walls back in place and add mold release. Mold release is a spray-on material that prevents silicone (among other things) from sticking to or adhering to itself. This part is very important, as forgetting to add mold release will leave you with a very pretty solid block of rubber that you’ll have to cut your part free from. That isn’t necessarily death to the entire mold, but it does negate all the work done with the clay earlier.
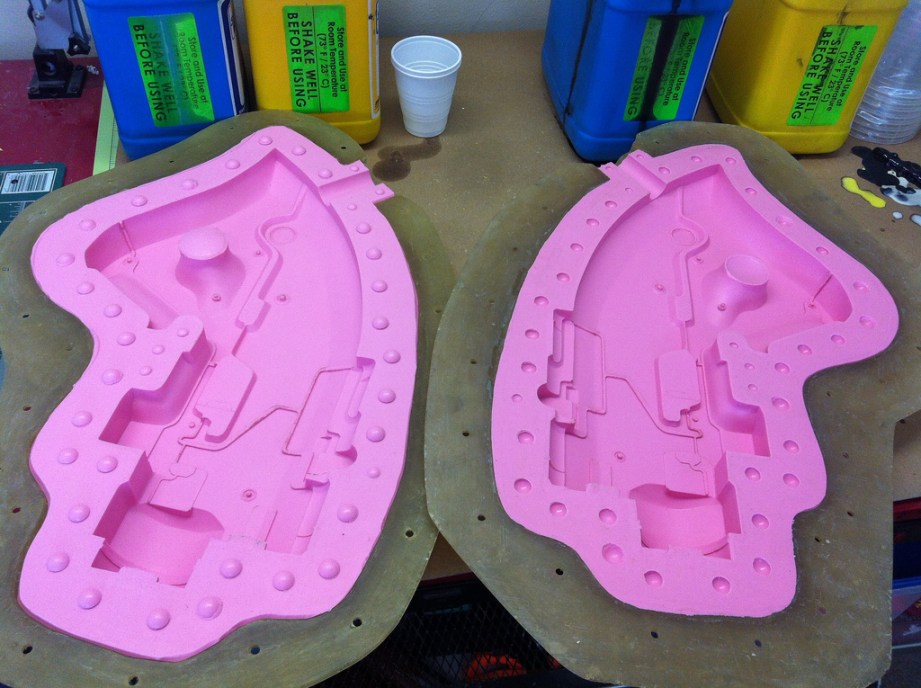
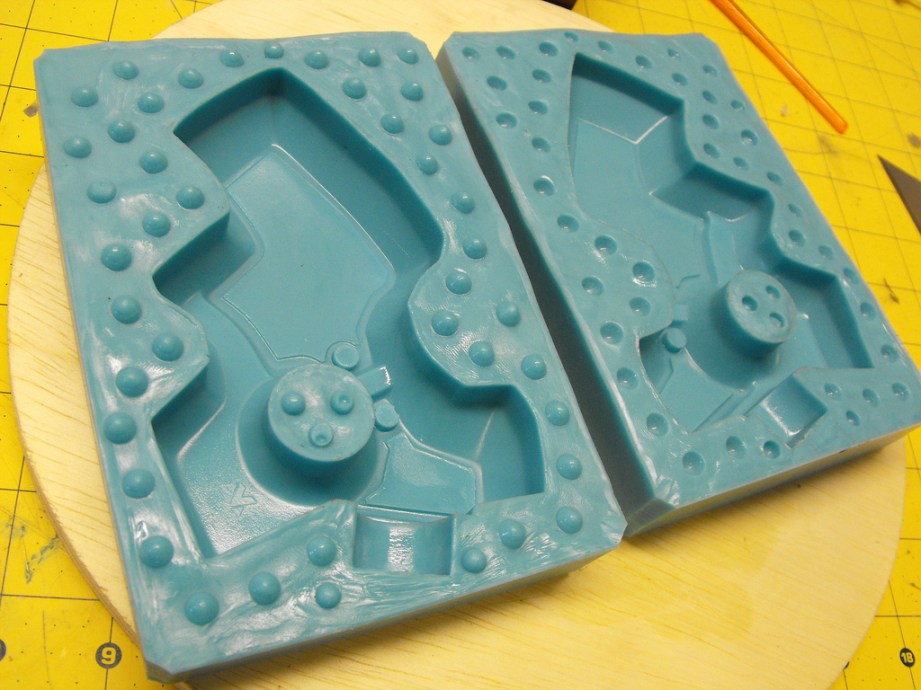
Once both halves are cured, you can open the mold up and remove your master. Pretty!
Lastly, there needs to be a hole in the mold to add casting resin, and a couple smaller holes to allow air to escape. Some people like to add these before pouring the mold, sculpting small channels in clay to block out pour and vent spouts. I’ve found cutting them out of the finished block with an exact-o knife to be far easier after the silicone is cured. You may lose a few grams of material, but you save some time.

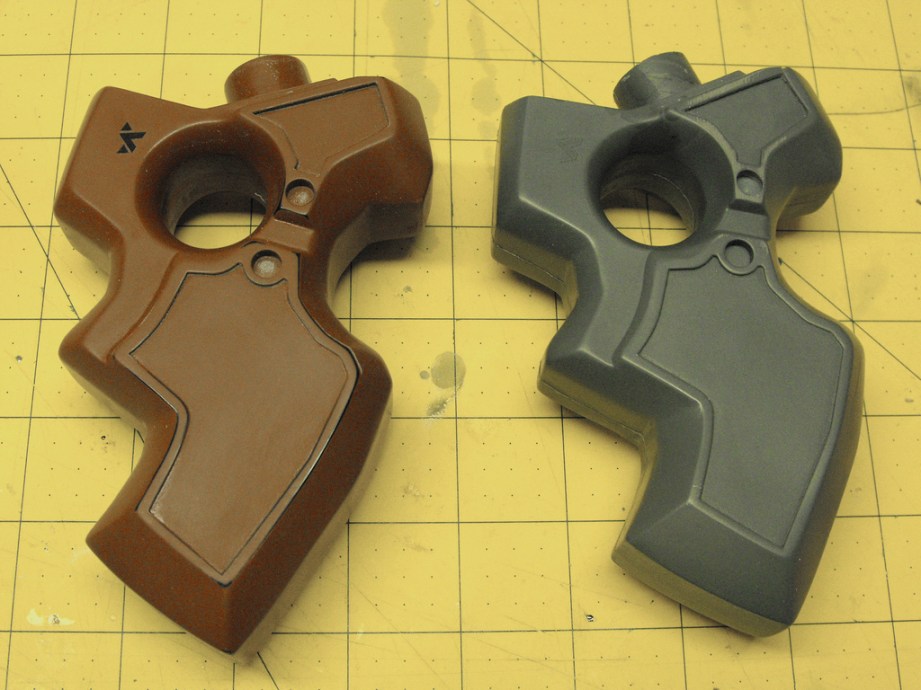
The details of the casting process are going to be covered in another article later on down the road, but here’s a quick shot of the finished piece, cast in Smooth-On’s “Smooth Cast 320” urethane casting resin. An exact, but far more durable copy, and the ability to make dozens more later on down the road.
Thanks again for reading! I’ll be going into more complex moldmaking techniques for the rest of the Needler parts in the next installment. See you then!
The Volpin Project, Part 1: Introductions
The Volpin Project, Part 2: References and Blueprinting
The Volpin Project, Part 3: Selecting Materials
The Volpin Project, Part 4: Taking Shapes
The Volpin Project, Part 5: Bondo Strikes Back
The Volpin Project, Part 6: Details, Accents, Refinements, and Mockups


6 thoughts on “The Volpin Project, Part 7: Introduction to Moldmaking”
Leave a Reply

One Day Builds
Adam Savage’s One Day Builds: Life-Size Velocirapt…
Adam embarks on one of his most ambitious builds yet: fulfil…

Show And Tell
Adam Savage’s King George Costume!
Adam recently completed a build of the royal St. Edwards cro…

All Eyes On Perserverance – This is Only a Test 58…
We get excited for the Perserverance rover Mars landing happening later today in this week's episode. Jeremy finally watches In and Of Itself, we get hyped for The Last of Us casting, and try to deciper the new Chevy Bolt announcements. Plus, Kishore gets a Pelaton and we wrack our brains around reverse engineering the source code to GTA …

One Day Builds
Mandalorian Blaster Prop Replica Kit Assembly!
Adam and Norm assemble a beautifully machined replica prop k…
House of MCU – This is Only a Test 586 – 2/11/21
The gang gets together to recap their favorite bits from this past weekend's Superb Owl, including the new camera tech used for the broadcast and the best chicken wing recipes. Kishore shares tips for streamlining your streaming services, and Will guests this week to dive into the mind-bending implications of the latest WandaVision episod…

One Day Builds
Adam Savage’s One Day Builds: Royal Crown of Engla…
One of the ways Adam has been getting through lockdown has b…

Making
Adam Savage Tests the AIR Active Filtration Helmet…
Adam unboxes and performs a quick test of this novel new hel…

Making
Weta Workshop’s 3D-Printed Giant Eyeballs!
When Adam visited Weta Workshop early last year, he stopped …

One Day Builds
Adam Savage’s One Day Builds: Wire Storage Solutio…
Adam tackles a shop shelf build that he's been putting off f…

Show And Tell
Mechanical Dragonfly Automata Kit Build and Review
Time for a model kit build! This steampunk-inspired mechanic…
Good tutorial, maybe next time you can show your pressure setup and give a quick run down of how that works because its a pretty important part of making molds to remove air bubbles from the silicone.
Fantastic article, and extremely timely, as I am about to attempt my very first mold of a sword. I have a question about placement of the holes to pour resin. It seems like you’re going to have to have sit the block of silicone upright to pour the resin into the hole you took a picture of. Since my mold will be long and thin due to the shape of the sword, I’m really concerned with the hole being placed say, on the bottom of the hilt. I assume the two silicone pieces will flop apart if i attempt to sit the thing on its short end while pouring the resin.
Any tips would be greatly appreciated!
It looks so bad ass! Probably one of the best things you’ve ever made.
Can’t wait to see this finished. Also, the clay-in-hot-water trick is something I haven’t seen before.
I love these updates. Keep em coming!
I remember on the TV show The Salvager the guy used a belt sander to vibrate a mold filled with concrete to get it to settle and remove any bubbles. Would something like this work with a silicon mold too, or would it dry too quickly for that?