


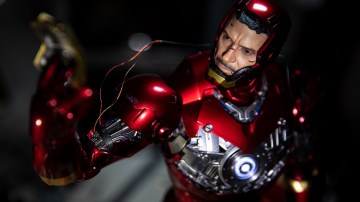
Bits to Atoms: Designing and 3D-Printing Tested Nametags
Our 3D printing columnist Sean Charlesworth describes the process of designing, 3D printing, and assembling the awesome Tested nametags he made for us!
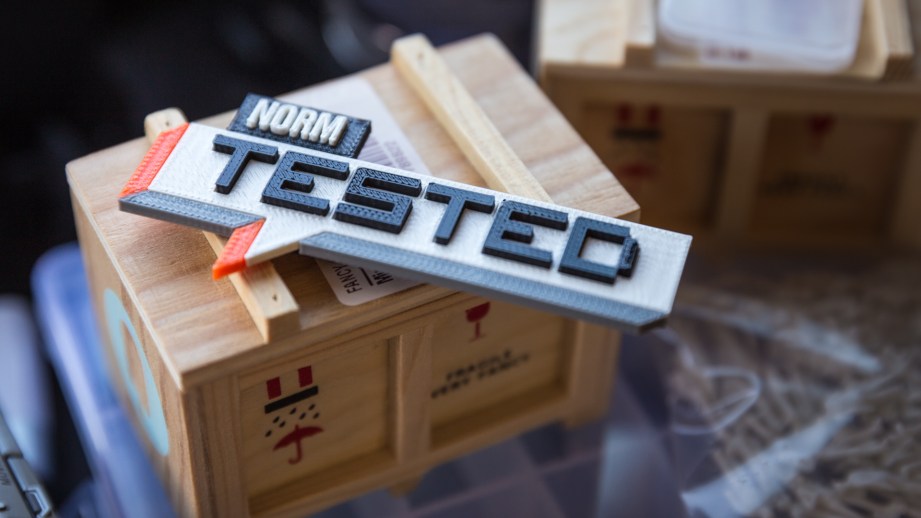
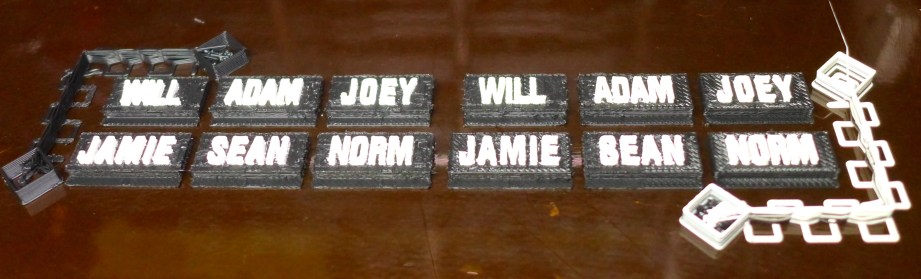
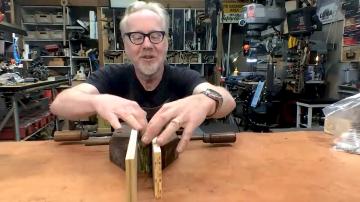
Sometimes a project pops into your head and keeps popping up–on the subway, at work, during meetings, while making dinner, laying in bed trying sleep, etc., until you just have to do it in order to purge it. It occurred to me that the Tested logo would be perfect for a 3D print! With its simple geometric parts as well as the opportunity to demonstrate a variety of printing techniques, I couldn’t resist. I had made name badges before for my booth at Maker Faire and thought it was a good idea for the Tested logo–the guys need to represent!
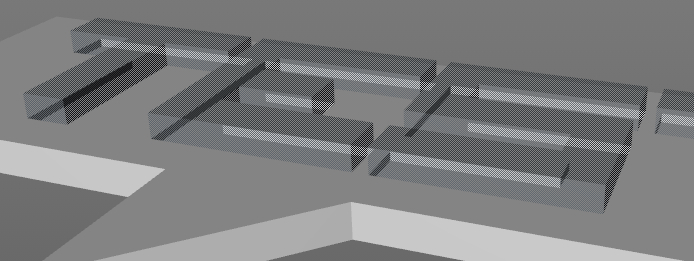
The first step was to simply sketch out how the logo would break down into parts for printing. Since the Tested logo is made up of simple shapes the break down and modeling were relatively simple.
In the TARDIS article I mentioned using a backdrop picture to build on top of and Norm supplied me with some Tested logos files, not knowing what purposes they would be used for! A dimmed down version of the logo was used in the top view and the geometry was built right on top of it. Since mechanical precision wasn’t needed, a simple cube was stretched out and modified by eye to match up with each piece.
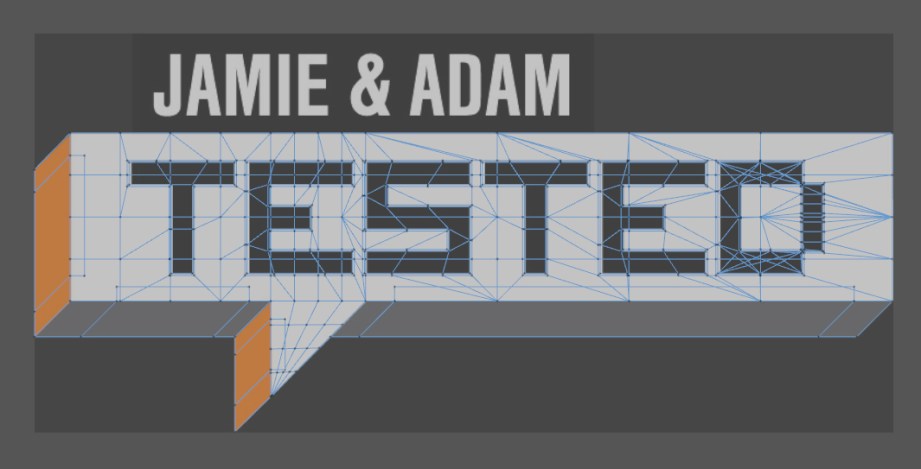
The ‘Tested’ text could easily be built from scratch since it’s so blocky, but there’s an even easier option if you can find the actual font, which is free at one of my favorite sources, dafont. Most modeling programs will have a text tool that will allow the letters to be extruded into 3D models which saves a ton of time.
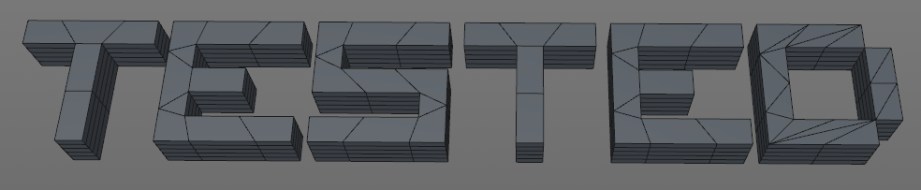
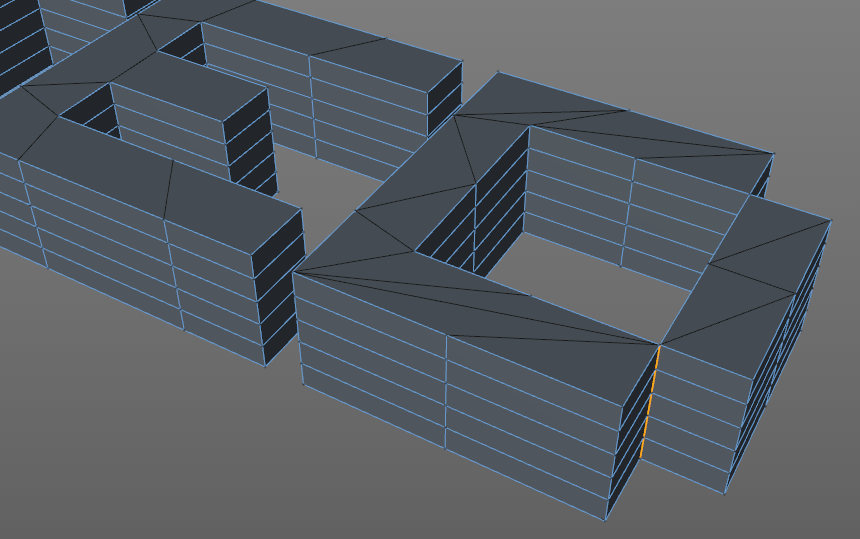
This can get a little messy since geometry is automatically generated, so keep an eye out for problems. In this case, the ‘D’ in ‘TESTED’ was an issue since it generated a non-manifold edge which, as we discussed last time, is when more than two faces are sharing the same edge, therefore creating impossible geometry. I fixed this by deleting the offending part, rebuilding it and printing it as a separate part from the rest of the ‘D’.
The next step was to decide how the text and the tag base would go together. My 3D printer and Tested’s MakerBot Replicator have two print heads and can dual extrude which means the white tag base could be printed first by one head and then the black text could be printed by the second, producing raised text. Or both the base and text could be printed concurrently so the text would be embedded in the tag. The problem is dual printing is still finicky and in particular, printing white and black at the same time tends to make a mess.
During printing with FFF, plastic bits end up on the print nozzle and when dual printing they almost always end up in the other color plastic. There have been printing improvements to minimize this, but there’s no way I was going to dual print a large white surface along with black and not get some boogers, so dual printing was out.
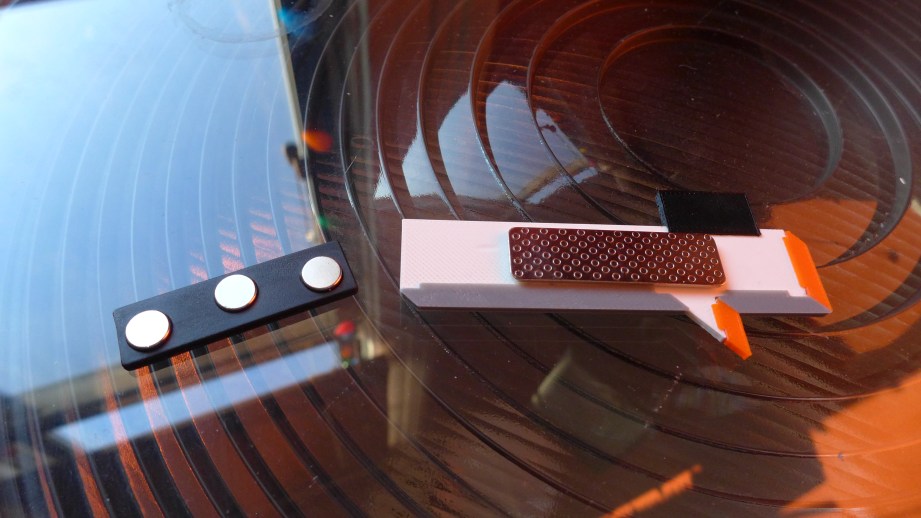
I could have just printed the letters and glued them to the tag but I didn’t want to deal with keeping them straight during gluing and drying so I made cut-outs for each letter. This was done by simply making a slightly enlarged copy of the text that was pushed down into the tag then subtracted from it with a boole function.
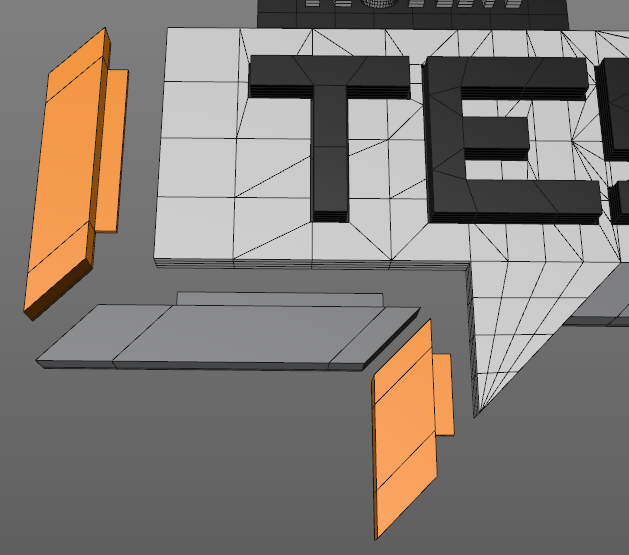
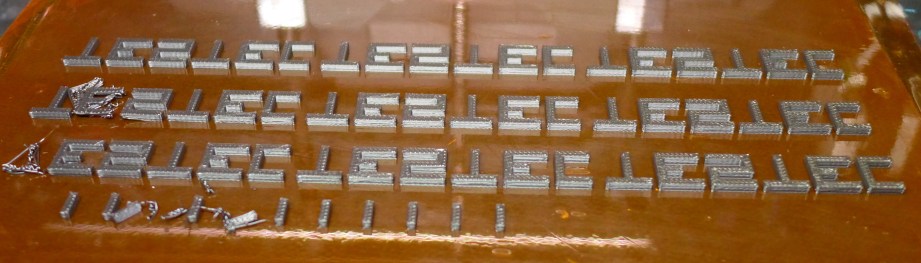
The trim pieces were very straightforward, made from slightly modified cubes, but extra attention had to be paid in order to make them fit properly. The digital model does not account for variances that will happen during printing due to the resolution, accuracy and properties of the material used. If I were to print the trim pieces right out of the modeling program as-is they wouldn’t fit quite right, most likely overhanging the edges of the tag. To compensate for this the trim pieces were reduced in size by .2mm which made them fit perfectly. This is usually a trial and error process and may even require some manual trimming with files or an x-acto. I also added a lip to the back which would help with alignment and provide more surface area for glue.
The name tag part of the badge presented another challenge. It was too small to print like the main portion. I attempted to do so but the letters were so small that the print didn’t turn out well and were difficult to fit in the recess.
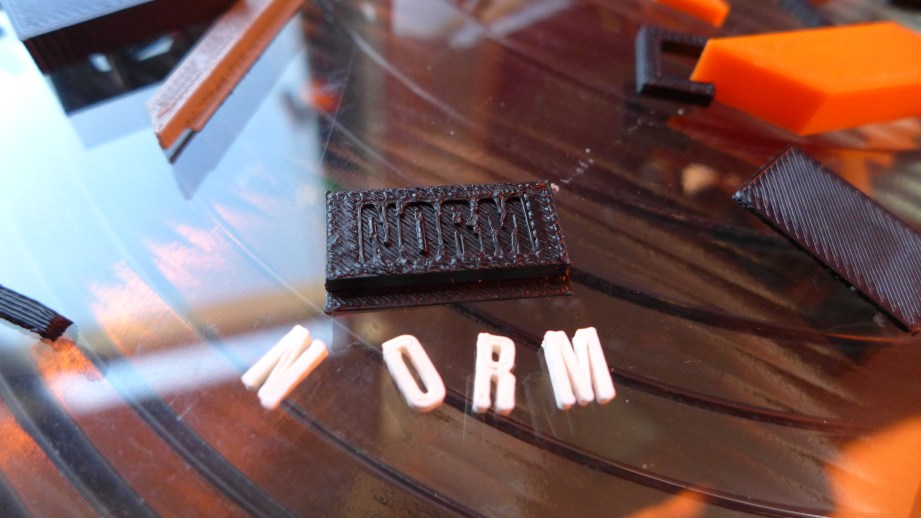
In this case I decided to dual print which worked out all right, since the main color was black, there was less white, and I could touch up any blemishes with some white paint.
Dual printing is easy to mess up since the two colors need to be brought in as separate objects and must remain in specific relation to each other to print properly.
Dual printing is a tricky business and easy to mess up since the two colors need to be brought in as separate objects and MUST remain in specific relation to each other to print properly. The prep for this is similar to how the ‘TESTED’ text was cut-out, except in this case the text is not enlarged. The ‘TESTED’ text was enlarged for cutting to allow for print tolerances so the finished product would fit together (just like the trim).
With dual printing, the two materials should fuse together and this is accomplished by cutting out a space which is the exact same size as the object which fills that space which causes the two materials to fuse together when printed.
The name text and base are brought into the slicing program together so they maintain proper spatial relationship to each other. Often the slicing program will ask if each object should be placed on the print platform and usually the answer would be ‘yes’. An object left hovering above the print bed will produce weird prints that start in mid-air. But in this case the answer would be ‘no’ since the text shouldn’t be on the print bed but on top of the base. Selecting both the text and base and then placing them on the print platform will keep them properly aligned.
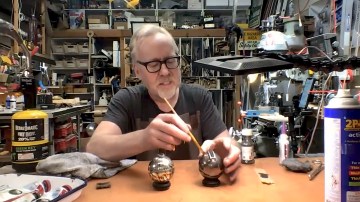
When printing the ‘TESTED’ letters I made extra since printing very small parts can be challenging as they will often pop off the print bed. I also flipped them upside down so the face would print against the smooth finish of the bed and produce a nice shiny surface finish.
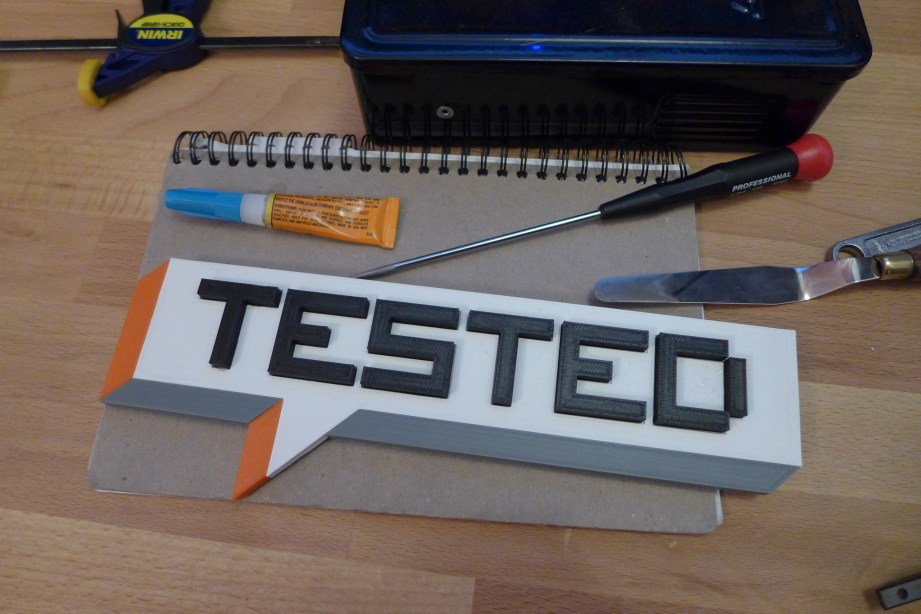
With all the parts successfully printed, they were glued together which was facilitated by the cut-outs for text and the trim tabs. ABS and PLA parts can easily be glued together with superglue, I really like Gorilla Super Glue Gel because it usually doesn’t leave white residue from fumes and it’s slightly rubbery which allows for a little give between the parts.
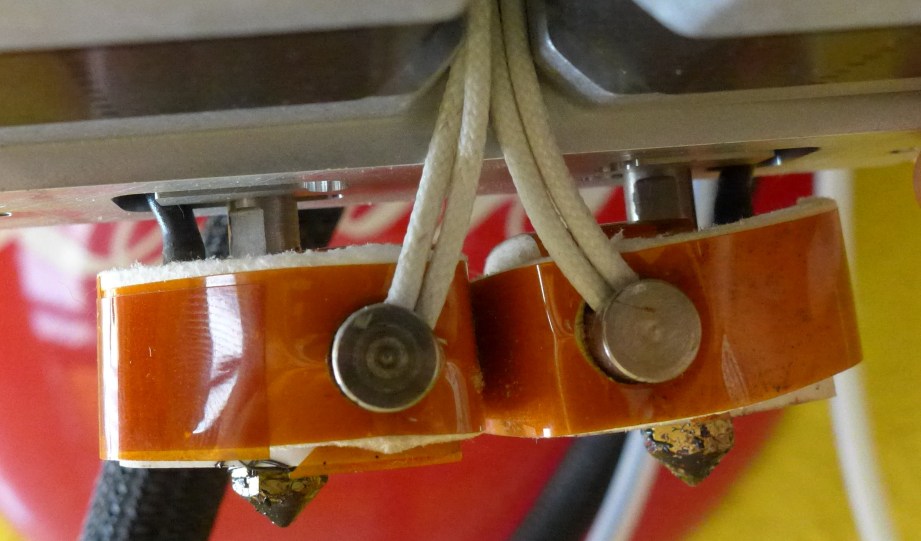
The final touch was a magnetic badge holder which doesn’t mess up clothes (but watch out for your pacemaker) and allows the badge to double as a fridge magnet.
After the name tags were done, I was inspired by Carl Merriam’s great LEGO Tested logo to print one as big as possible. Since it’s digital, I just needed to enlarge all the original pieces an equal amount and print.
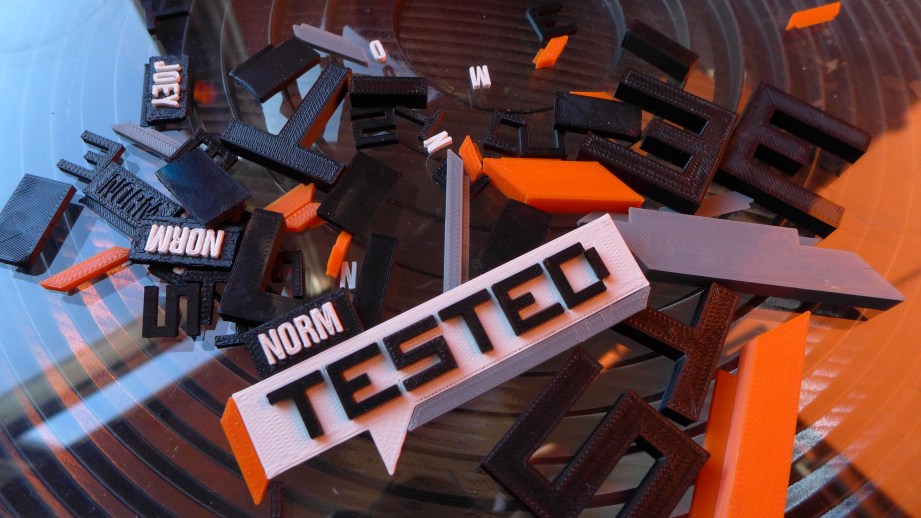
This ended up being a really fun weekend project and Will and Norm seem to like them, which is the greatest gift of all. Awwww! Would you like to know more? Ok! I also did a video walkthrough so you can see it all in 3D! See you next time!


12 thoughts on “Bits to Atoms: Designing and 3D-Printing Tested Nametags”
Leave a Reply

One Day Builds
Adam Savage’s One Day Builds: Life-Size Velocirapt…
Adam embarks on one of his most ambitious builds yet: fulfil…

Show And Tell
Adam Savage’s King George Costume!
Adam recently completed a build of the royal St. Edwards cro…

All Eyes On Perserverance – This is Only a Test 58…
We get excited for the Perserverance rover Mars landing happening later today in this week's episode. Jeremy finally watches In and Of Itself, we get hyped for The Last of Us casting, and try to deciper the new Chevy Bolt announcements. Plus, Kishore gets a Pelaton and we wrack our brains around reverse engineering the source code to GTA …
Making
Adam Savage in Real Time: God of War Leviathan Axe…
Viewers often ask to see Adam working in real-time, so this …

One Day Builds
Mandalorian Blaster Prop Replica Kit Assembly!
Adam and Norm assemble a beautifully machined replica prop k…
House of MCU – This is Only a Test 586 – 2/11/21
The gang gets together to recap their favorite bits from this past weekend's Superb Owl, including the new camera tech used for the broadcast and the best chicken wing recipes. Kishore shares tips for streamlining your streaming services, and Will guests this week to dive into the mind-bending implications of the latest WandaVision episod…

One Day Builds
Adam Savage’s One Day Builds: Royal Crown of Engla…
One of the ways Adam has been getting through lockdown has b…

Making
Adam Savage Tests the AIR Active Filtration Helmet…
Adam unboxes and performs a quick test of this novel new hel…

Making
Weta Workshop’s 3D-Printed Giant Eyeballs!
When Adam visited Weta Workshop early last year, he stopped …

One Day Builds
Adam Savage’s One Day Builds: Wire Storage Solutio…
Adam tackles a shop shelf build that he's been putting off f…
New Tested drinking game, take a sip every time I ‘um’ or ‘uh’ in the video, good times are guaranteed.
Name tags as premium member prizes!
I wouldn’t worry about it.
Besides, think of it this way. At least you didn’t film yourself making this video while pounding down beers like certain individuals on this website..
Just because you can’t see the beer doesn’t mean it wasn’t there…
Have you ever thought about selling these?
If you had a heated print bed and printed the logo pieces ‘upside down’ would they have a smoother top?
That’s pretty much what I did although the heated print bed (which I do have) doesn’t affect the finish, it’s mainly the material covering the bed. I am using Kapton tape which is heat resistant and very smooth if applied right. Another popular choice is blue painter’s tape which will leave a more textured surface. Some printers even use glass with hair spray applied which really glues stuff down and produces a smooth surface.
The top portion where the print finishes will always have a rougher texture, the quality of which is affected by different factors such as fill, size, slicer, etc
YES PLEASE!
Very nice work.
Speaking of the font, how’d you guys get a license to use Samson? I wanted to use it in a project but couldn’t track down commercial licensing info.
I can’t speak for the main site, but for the tags I used ‘visitor’ which was a free font from dafont.
Well, dafont states in the FAQ that the license info they display isn’t necessarily accurate so for paid work you should get confirmation which I wasn’t able to do.