Bits to Atoms: 3D Printing Buckaroo Banzai’s Jetcar
Buckaroo Banzia's Jetcar was actually my very first 3D print and the most complicated thing I had modeled up to that point. In the end it turned out great but there was a steep learning curve for both the modeling and 3D print preparation. Let's walk through that process so you can learn from my early ambitions!
Scientist, neurosurgeon, gunslinger and leader of the rock group the Hong Kong Cavaliers–Buckaroo Banzai, a true Renaissance man, and one of my all-time favorite characters played by the awesome Peter Weller in The Adventures of Buckaroo Banzai Across the 8th Dimension. This remains one of my top sci-fi films and while by no means a perfect movie, the cast consists of Peter Weller, John Lithgow (in one of his finest performances), Ellen Barkin, Christopher Lloyd, and Jeff Goldblum–so you know there’s going to be some good stuff in there.
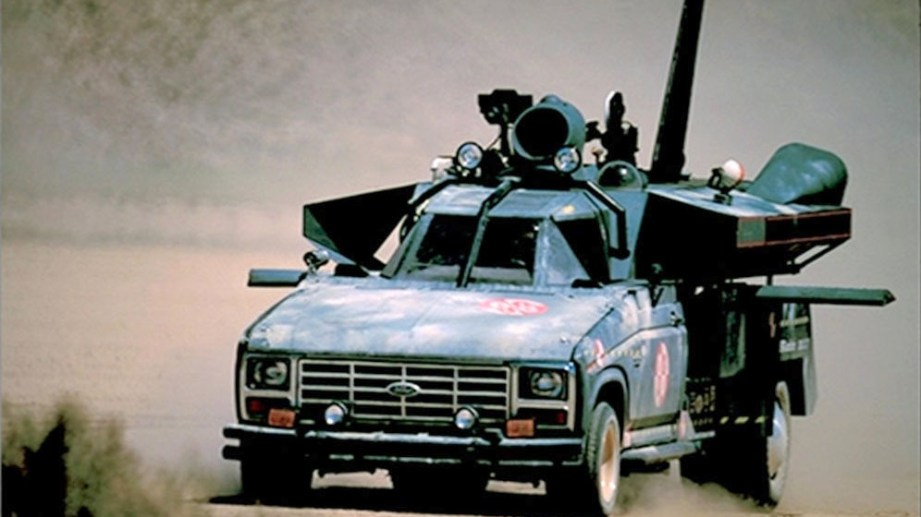
I’m not going to delve into the plot, just watch it, but the film has a great opening with Dr. Banzai testing his oscillation overthruster, a device that he theorizes will allow him to travel through solid matter. In order to do so he outfits the overthruster to a Jetcar which he intends to drive straight through a mountain. When I was a kid I wanted that Jetcar so bad, but Buckaroo Banzai toys were never meant to be. Flash forward a few decades and I’m in a 3D printing class and need something to build and print and I know exactly what that should be.
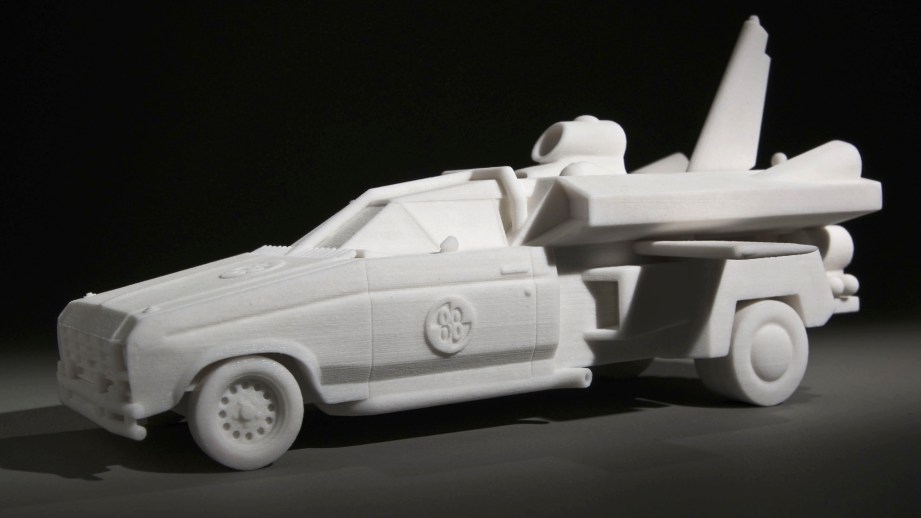
This was actually my very first 3D print and the most complicated thing I had modeled up to that point. Hence my advice to those getting started with 3D printing–start with something simpler! In the end it turned out great but there was a steep learning curve for both the modeling and 3D print preparation, and I think I may have been better off doing something simpler. But let’s walk through that process so you can learn from my early ambitions!
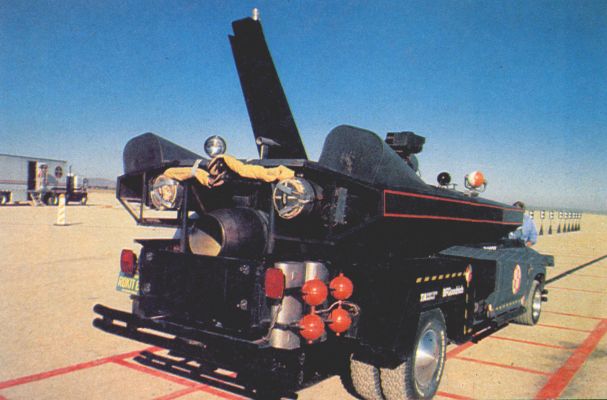
As always, good reference material is a must and you can never have too much. When I made the TARDIS, I was lucky enough to find detailed blueprints which made replicating the pieces much easier. With other props you may be stuck with screengrabs from the movie and if you’re lucky, production art books and maybe random finds on the internet. As Adam is fond of mentioning, the Replica Prop Forum is an excellent place to find source material for props and costumes since chances are someone has already done the research and saved you a lot of time.
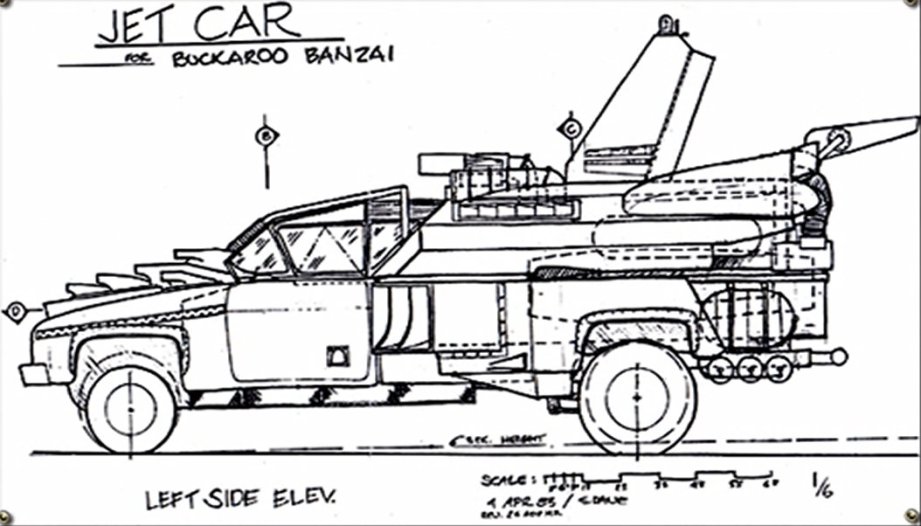
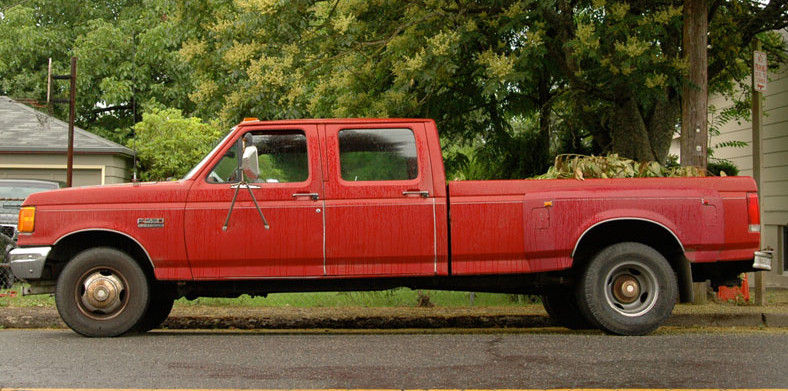
In the case of the Jetcar, there wasn’t a lot of info, especially since it’s classified by the Banzai Institute, so I had to scan through the DVD and save a ton of screengrabs. In the DVD extras, I was able to find side, front and top production drawings that would be useful. Via the RPF, I was also able to discover that the Jetcar was a modified 1984 Ford F-350 truck, so I found pictures and data such as wheelbase, etc so I had actual measurements to base the model on.
I set up image planes in the modeling program so I could build the model right on top of the blueprints. This didn’t work out due to the fact that the production sketches were drastically different from the finished Jetcar. I used the F-350 measurements as a starting point and ended up eyeballing everything else, which is fine since this was more sculpture and less a mechanically functioning model.
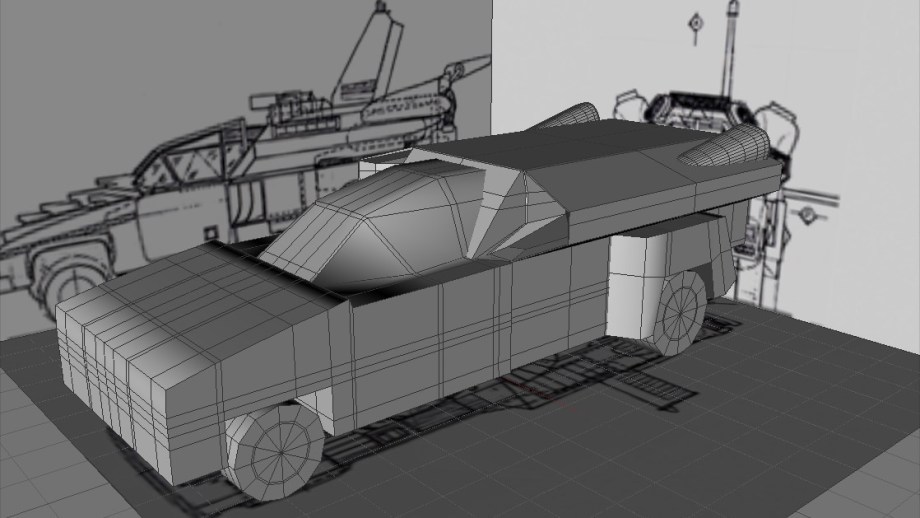
When I started the Jetcar I had not yet done a lot of modeling and I quickly felt overwhelmed and discouraged by the project. My professor sat me down and told me to break the model down into simple shapes as a way to visualize how to build the car. Tires started as simple tube shapes, doors as cubes, tanks as cylinders, etc and each was modified and smoothed until it started to resemble the real thing.
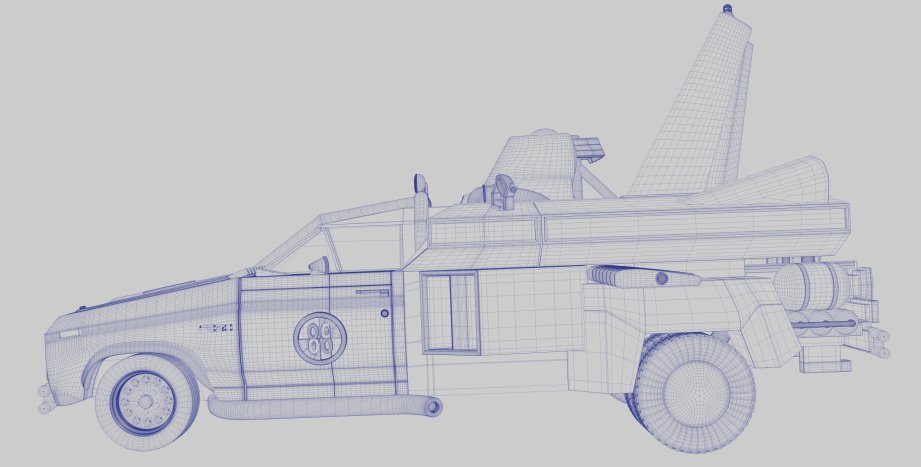
Let’s also remember something I have mentioned before: don’t be afraid to rebuild parts. I think I modeled the fenders at least three times. The first time was bungling around trying to figure out how it should be done. The end result looked good, but the geometry of all the polygons was a mess. Based on what I learned the first time, I built a second, cleaner version which took half the time as the first. As I discovered more modeling techniques, I figured out how to further improve version two, thus version three was built in half the time.
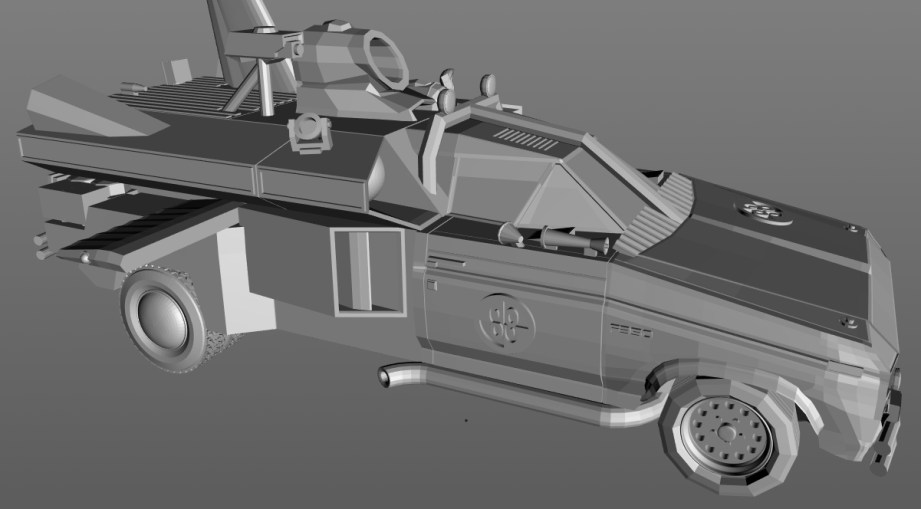
It was a rocky road, but I finished the Jetcar and was feeling pretty good about it until it was pointed out to me that I had forgot to turn off the viewport smoothing function. We’ve talked about how 3D printers only print pure geometry, so you have to subdivide your models so they’re nice and smooth (see ‘Subdivide and Conquer‘) and how you have to make sure to turn off the 3D program’s smoothing feature which makes models look smooth for visual rendering purposes. So, yeah, I left the smoothing function on so my model looked great on the screen–until the smoothing was turned off, making it a blocky, faceted mess which resulted in even more hours of tweaks to fix it. Still better than spending a lot of money on a print that would have turned out terrible.
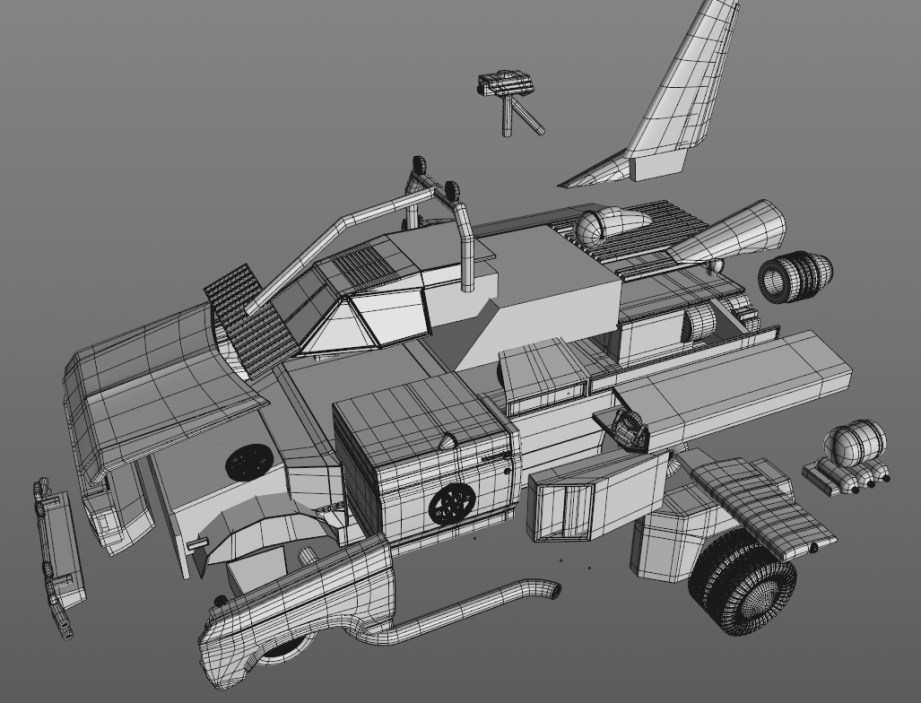
At this point the model was a lot of tires, tanks, doors, jets and other pieces all jammed together which I thought was fine for printing–nope! All the pieces had to be combined into one continous mesh or shell. There are programs out now that will do that for you but just a few years ago you had to do it by hand which took a few hours and a lot of boole functions. Booling assured that there was no stray geometry on the inside of the model and the outside was the unified shell needed for printing. The top tail and the wings were a printing concern, since they are thin and stick out. There was a good chance they would get broken off and the height of the tail could drive the price up, since print bed volume occupied can factor into the cost. To remedy this I removed and keyed the tail and wings to print separately. This also allowed me to have backups if one ever snaps off.
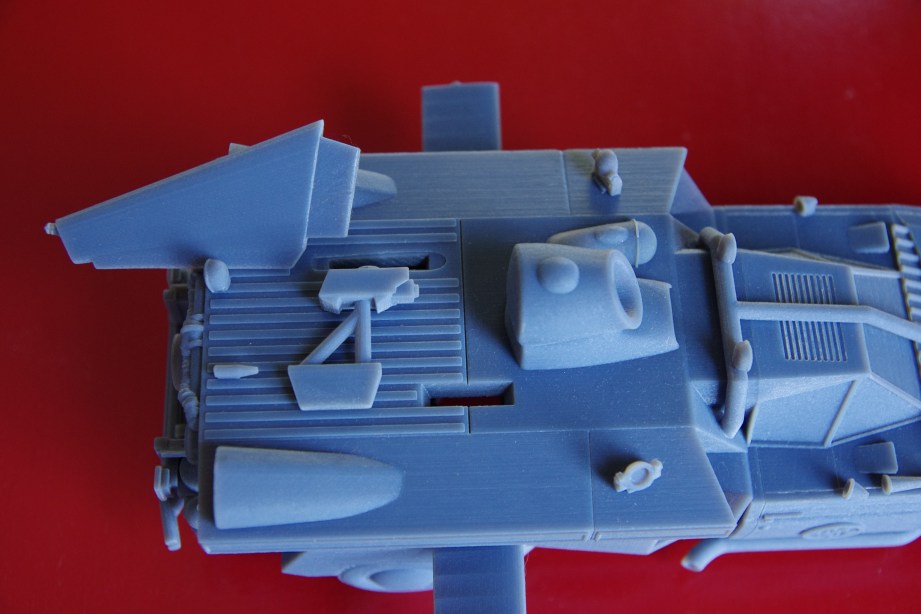
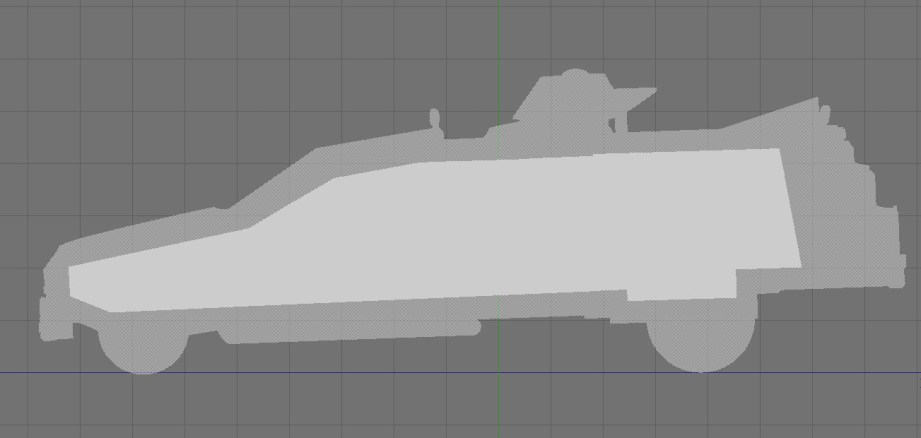
Again, I foolishly thought I was finished, only to discover that I needed to hollow out the model unless I wanted to pay three times more than I should on the print, since it’s calculated by material and mass. Another few hours later, and I finally had a hollow built inside the Jetcar with escape holes in the bottom so loose print material could be removed from the hollow. There is software such as netfabb that will hollow models for you, but it doesn’t always work correctly and you have to buy the software. I haven’t found a good free way to hollow out models other than doing it by hand. In the case of the Jetcar, I simply started with a cube positioned inside the model and extruded it outward until it filled the space inside the car. The model had to have a wall thickness of at least 2 mm to maintain structural integrity so I had to make sure the space I hollowed out met that criteria. Hollowing out the model brought the print price down to about a third of what it would have cost to print it solid. Another good reason to do this is weight–the Jetcar is about 10″ long and weighs a few pounds, a solid print would be ridiculously heavy.
Finally! the model was ready to print. Every printer has parameters such as resolution, how thin walls and details can be and still print, tolerances for mating parts and overall size of the model. I knew I wanted to print the Jetcar at about 10″ so I paid attention to how small the detail parts were and I eliminated or beef up some parts in order to print the model successfully. With all of the booling and hollowing done to the Jetcar it was especially important to run it through mesh repair software to ensure there were no geometry problems.
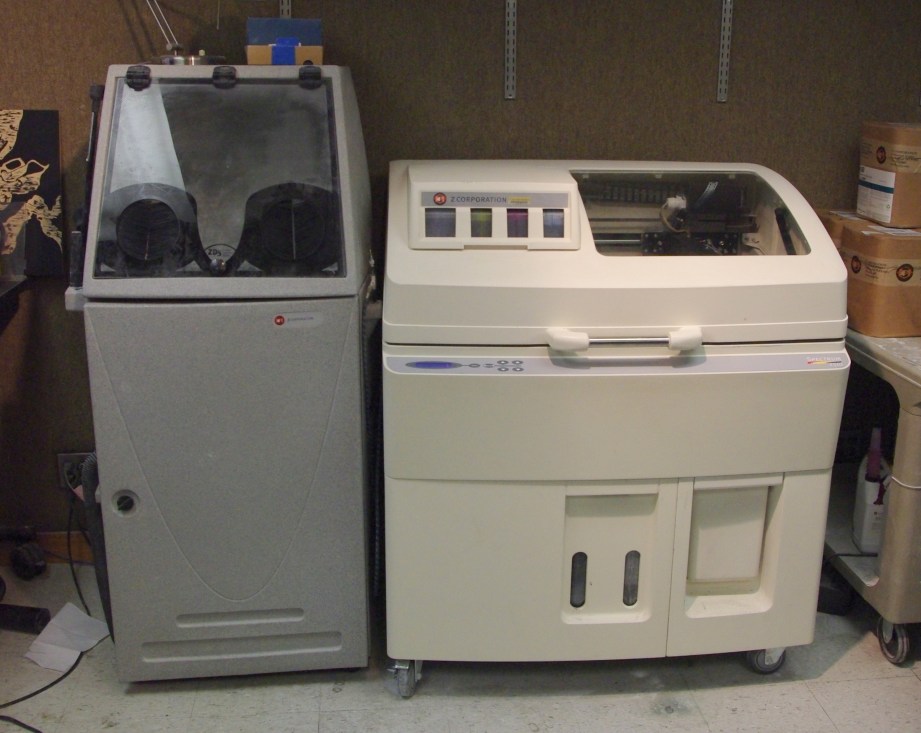
I printed the first version of the Jetcar on a ZCorp (now 3D Systems) Color Jet Printing (CJP) machine that uses a plaster-like powder and can even print in full color. These prints are often referred to as ‘sandstone’ and have a slightly rough finish which reminds me of a sugar cube.
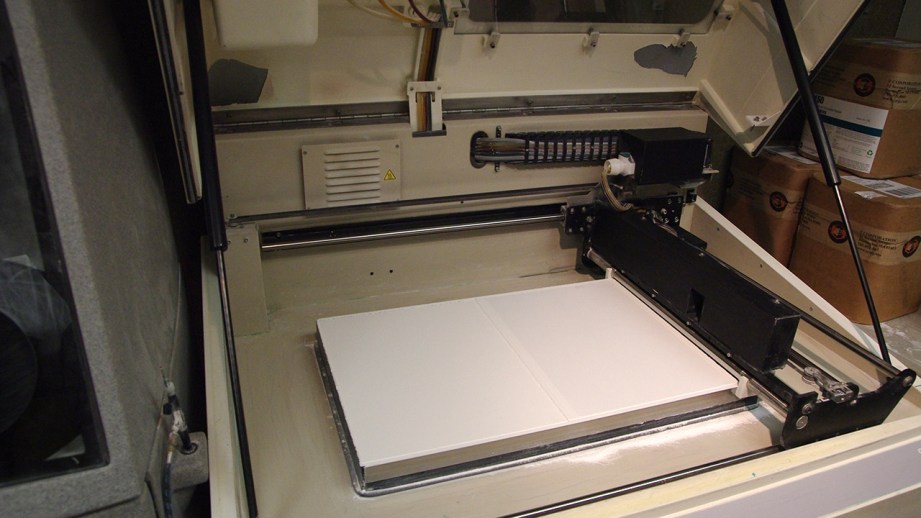
The ZCorp has two bins inside with movable platforms: the left side starts with the platform down and the bin full of powder for printing, the right starts in the up position and empty. The print arm pushes a thin layer of powder from the left bin across the right side print platform and the print head ‘draws’ the model on the powder with a binding liquid. The liquid glues the powder together while any powder surrounding it stays loose and acts as a support material to hold up the rest of the model. The print platform then moves down, ready for the next layer and the supply side moves up to distribute more powder.
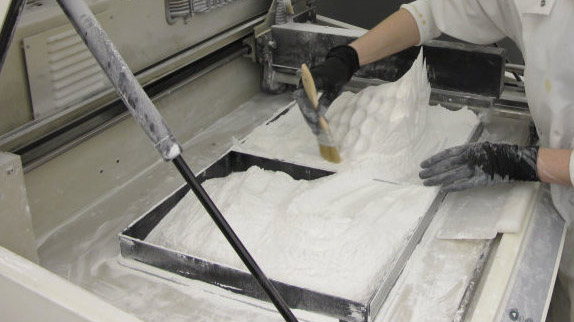
When the machine is done printing the bins look almost identical to how they started – blank white surfaces – the model is buried inside the powder in the print side bin. Now it’s like excavating a fossil, as the surrounding powder is brushed and vacuumed away and saved for another print. The model is very fragile at this point and is left to firm up before being cleaned in a booth that uses air guns to get all the extra powder off and suck it up for reuse.
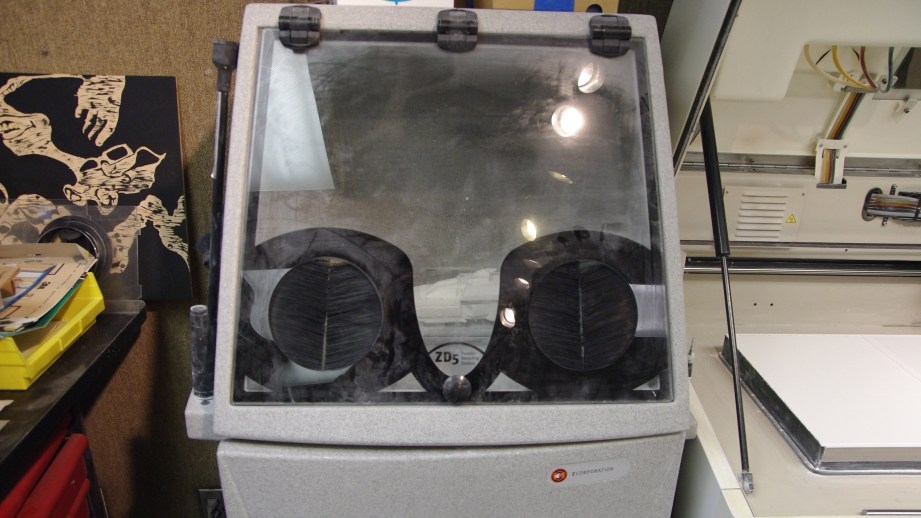
Finally, the print is covered in what amounts to fancy super glue which binds and seals the model, making it very strong–this is called infiltrating. This can be done by hand with a squeeze bottle or dipped in a vat. The advantages of this machine are the material costs are lower than most others, support material can be reclaimed and reused, and it is one of the few machines to print in full color. Disadvantages are that the resolution isn’t as high as other machines, models aren’t as durable, models require additional treatment after printing, and they’re messy.
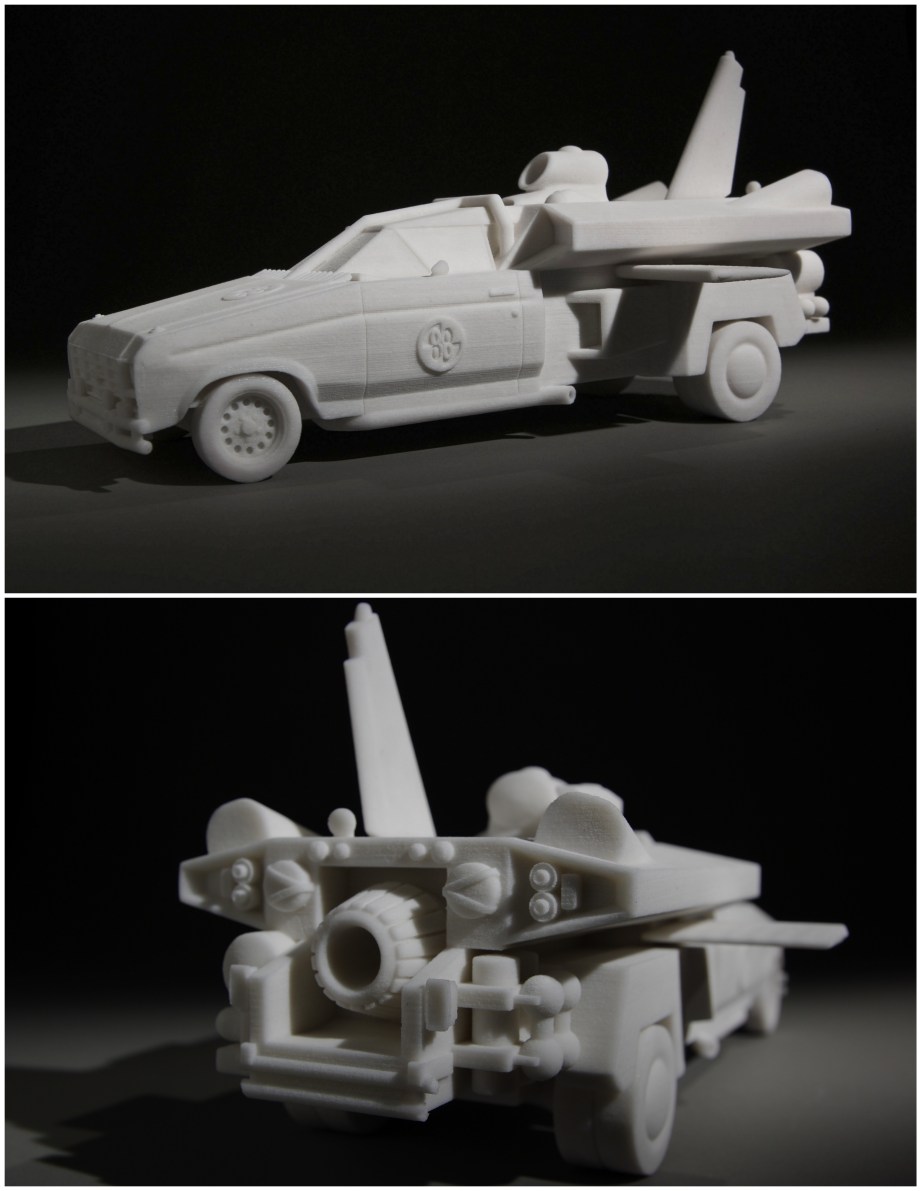
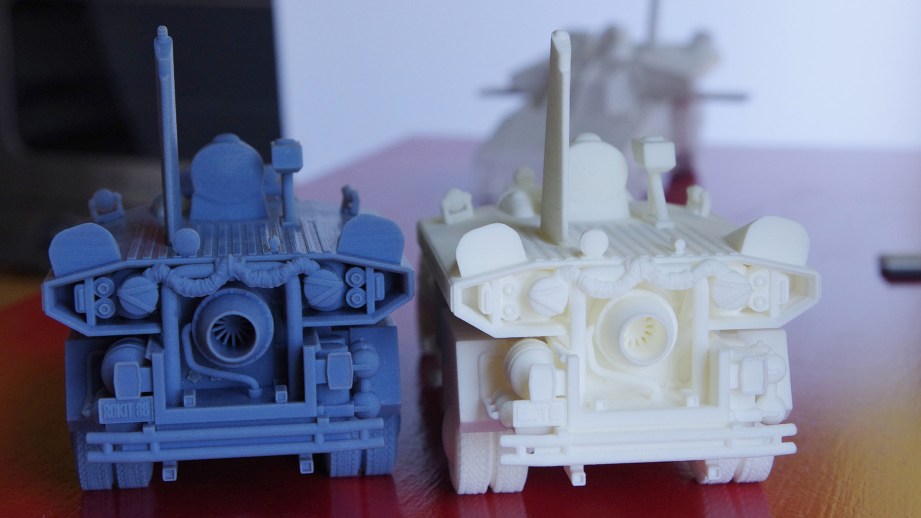
In the end my first 3D print turned out great with only a few problem areas. The rollbar headlights and parts of the bumper weren’t supported well enough, and broke off during excavation from the printer. You can see the ‘grain’ that happens with the prints, mainly on each layer transition and on sloping parts. The resolution and durability of CJP printing have improved a lot since I did the Jetcar and you can successfully print most objects in full color.
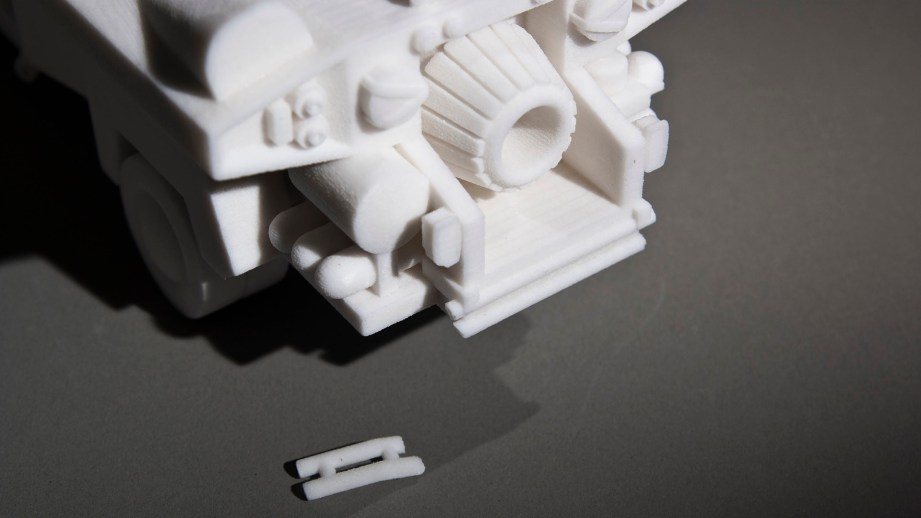
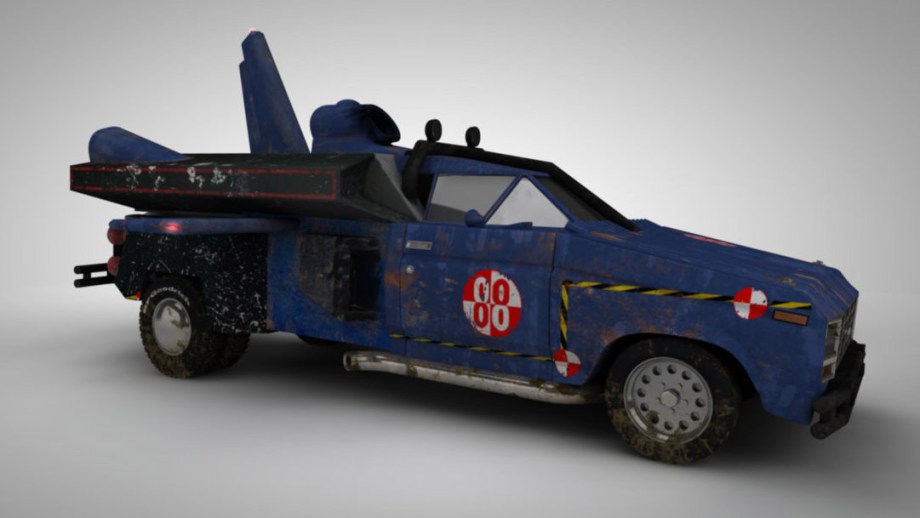
The Jetcar has been an ongoing project and is currently on version 3, I even textured the whole thing although I haven’t attempted a full color print yet. The newest versions have incorporated more detail in an effort to be more movie-accurate.
I have done an SLS print which is laser sintered nylon and has a surface finish similar to the powder print although with higher resolution, better strength and it’s ready to go out of the printer–no infiltrating necessary. The printer can reuse the support material like the CJP but it can not do full-color prints, but single color prints are available. This is Shapeways most popular method of printing due to it’s low cost and durability.
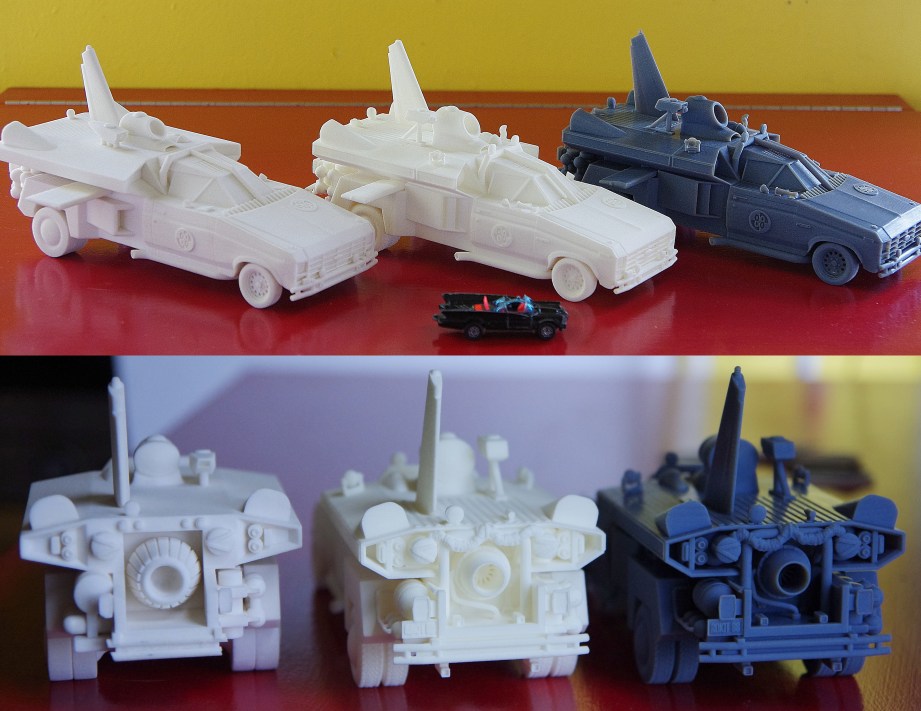
In 2012, the Jetcar was invited to be displayed at the So Far, the Future Gallery as part of Vienna Design Week. I was flattered and put in an order with Shapeways, but it got delayed, and I was forced to get another print done on the Objet at the NYU AMS lab. They saved my butt and the Jetcar made it to Vienna; Dr. Bonzai was proud.
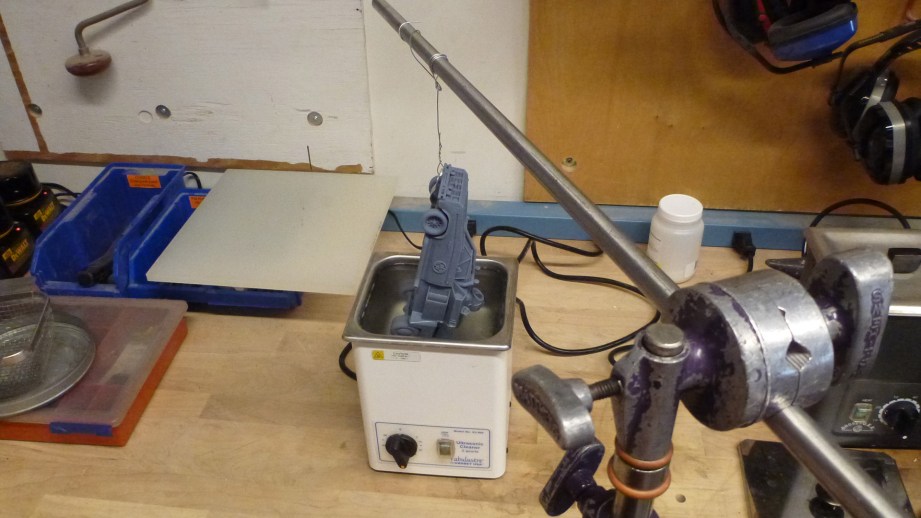
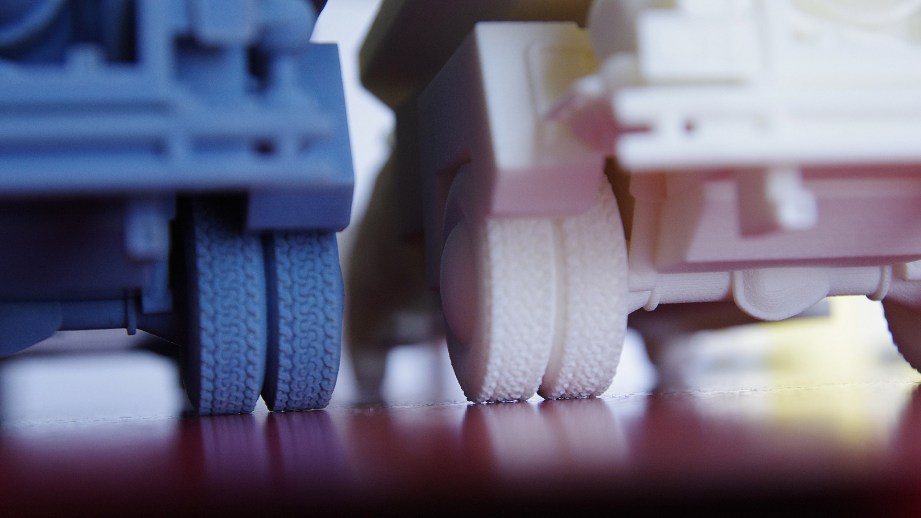
The Objet is a polyjet printer and uses a UV cured liquid resin on a print platform. The model turned out great and it’s nice to be able to compare between the printers. The Objet really shined on fine details such as the license plate and tires which turned out fuzzy on the SLS print. The Objet prints are more expensive and fragile than the SLS prints so care has to be taken. They are also a pain to clean since the support material is a clingy, wax-like material that has to be cleaned off with a water jet and/or a lye bath.
Hope you have enjoyed the journey of the Jetcar! I think there’s still more versions to come–maybe a finished cockpit–and let’s not forget the Oscillation Overthruster! Adam offered up his replica as a guide to model one, and I’m going to have to take him up on that. In the words of Buckaroo Banzai… “Hey – now. Don’t be mean; we don’t have to be mean, cuz, remember, no matter where you go, there you are.”
Every other week, 3D printing expert (and Inventern competition champion!) Sean Charlesworth will share some of his insight and experience of 3D design and printing. All photos and images courtesy Sean Charlesworth unless otherwise noted.
10 thoughts on “Bits to Atoms: 3D Printing Buckaroo Banzai’s Jetcar”
Leave a Reply

One Day Builds
Adam Savage’s One Day Builds: Life-Size Velocirapt…
Adam embarks on one of his most ambitious builds yet: fulfil…

Show And Tell
Adam Savage’s King George Costume!
Adam recently completed a build of the royal St. Edwards cro…
All Eyes On Perserverance – This is Only a Test 58…
We get excited for the Perserverance rover Mars landing happening later today in this week's episode. Jeremy finally watches In and Of Itself, we get hyped for The Last of Us casting, and try to deciper the new Chevy Bolt announcements. Plus, Kishore gets a Pelaton and we wrack our brains around reverse engineering the source code to GTA …
Making
Adam Savage in Real Time: God of War Leviathan Axe…
Viewers often ask to see Adam working in real-time, so this …

One Day Builds
Mandalorian Blaster Prop Replica Kit Assembly!
Adam and Norm assemble a beautifully machined replica prop k…
House of MCU – This is Only a Test 586 – 2/11/21
The gang gets together to recap their favorite bits from this past weekend's Superb Owl, including the new camera tech used for the broadcast and the best chicken wing recipes. Kishore shares tips for streamlining your streaming services, and Will guests this week to dive into the mind-bending implications of the latest WandaVision episod…

One Day Builds
Adam Savage’s One Day Builds: Royal Crown of Engla…
One of the ways Adam has been getting through lockdown has b…

Making
Adam Savage Tests the AIR Active Filtration Helmet…
Adam unboxes and performs a quick test of this novel new hel…

Making
Weta Workshop’s 3D-Printed Giant Eyeballs!
When Adam visited Weta Workshop early last year, he stopped …

One Day Builds
Adam Savage’s One Day Builds: Wire Storage Solutio…
Adam tackles a shop shelf build that he's been putting off f…





I am bit shocked that anyone else remembering that movie is still among us. I thought I was the last one.
That was ages ago…
Sean, is the Jetcar model available to download?
Yes. I am that old.
Not at this time, maybe down the road.
I’d love to print one out myself. Since I’d be printing on my home machine, I’d probably scale it up and chop it up into smaller pieces for better detail.
So am I! 45 last week.
Nice work!
I constantly whistle this around the house and secret want to choreograph it with myself playing all the roles.
I am glad I am not the only one that does this.
Sean, are the resin models for sale?
I’d like to buy one too, as there’s no merchandise, and it doesn’t look likely there’ll be any in the future.