


The Volpin Project, Part 11: Prepping for Painting
Today's update to the Halo Needler prop will be all about prepping your cast parts before going to paint. When the individual parts of your project are still raw resin, you can afford to have a scrape here and there figuring out the best way for everything to fit together. Once things are painted, the last thing you want to do is fret over every bit of dust that might damage all your hard work.
Way back when I wrote my original outline for this series, I kind of put the cart before the horse and said I’d be discussing the process of painting the Needler prop before assembly. Then I read the closing for my last entry and noticed I said I’d be covering prep for paint first, which includes mounting points and drilling holes, before paint and weathering. Can you tell I don’t write for a living?
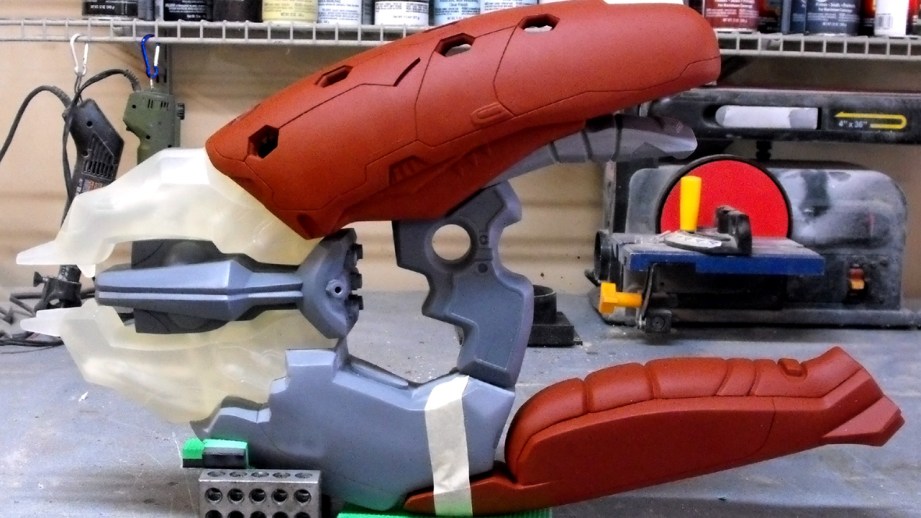
Today’s installment will be all about prepping your cast parts before going to paint. It’s important to have a plan for assembly of your prop before putting a shiny nice coat of paint on it, because as you’ll see in the steps below, it would be difficult to keep from marring a fancy paint job with all the drilling and cutting that needs to be done. When the individual parts of your project are still raw resin, you can afford to have a scrape here and there figuring out the best way for everything to fit together. Once things are painted, the last thing you want to do is fret over every bit of dust that might damage all your hard work.
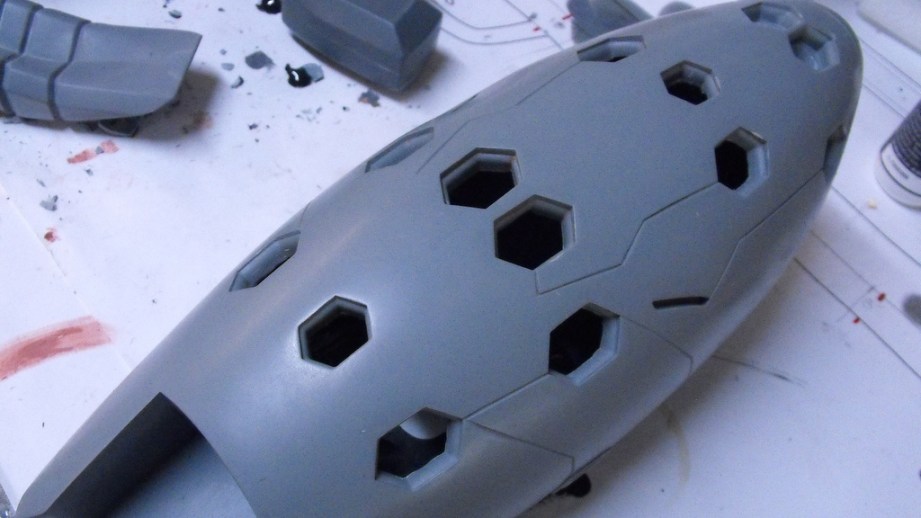
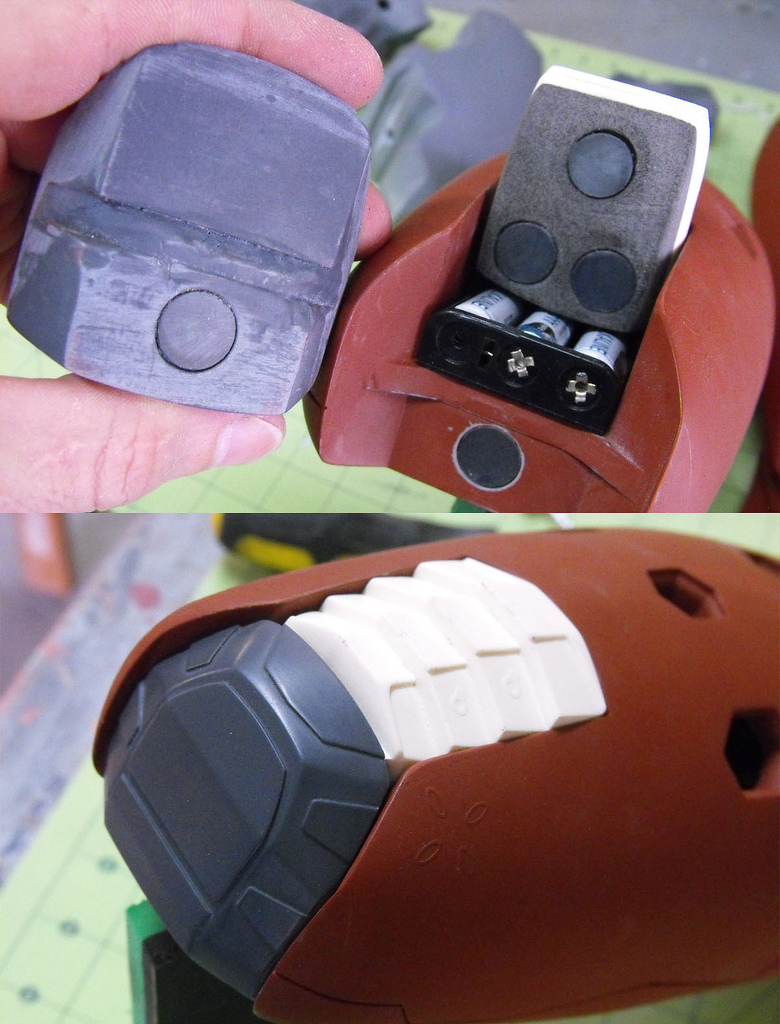
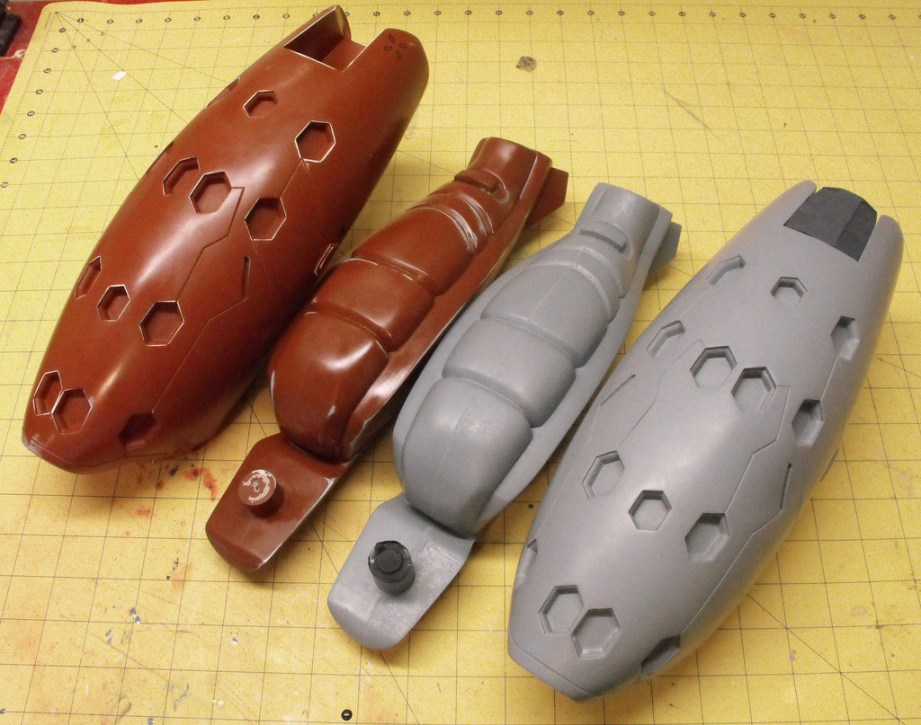
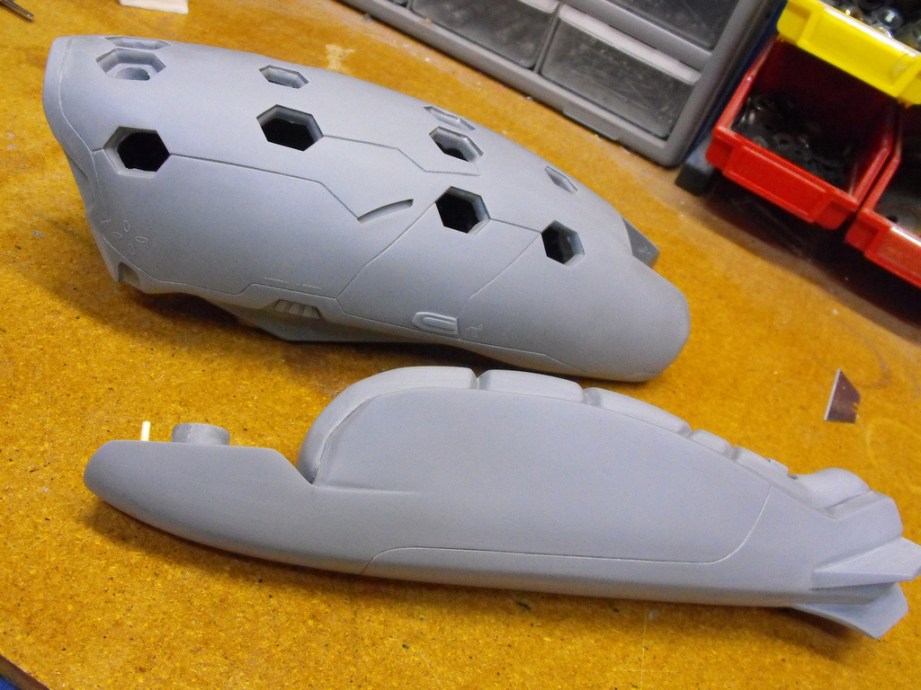
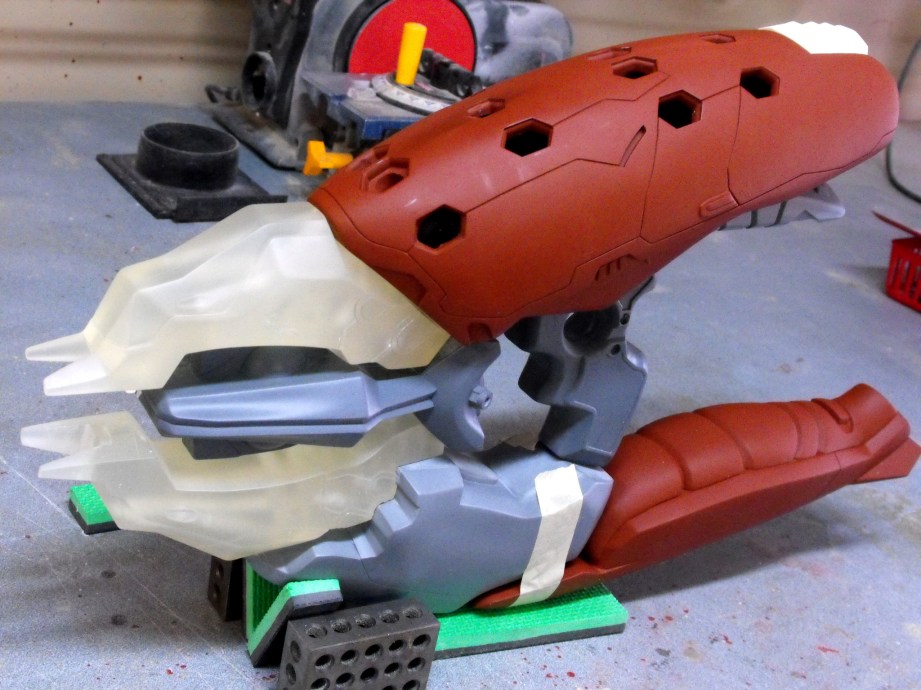
Since the upper casing will have the most chunks removed from it, I started there. The hexagonal cavities were actually pretty easy to remove with a small punch and a hammer. The needles will be epoxied into these areas once all the paint work is complete, and I want as much room in there to pull wires through and adjust the mounting angles of the needles.
There were several other holes cut into the bottom of the casing as well. The large rectangular cutout will be for the main circuit board to fit into, and will be covered up by two other parts that mount here. At the rear is the speaker; nearly invisible once all the other parts are installed. To the front on the left and right of the handle mount are the on/off and semi/auto fire select switches. There’s also a hole in the handle mount area for wires to pass through from the trigger into the main body to connect to the audio circuit board. Make sure to take into account all of the wiring as well as mounting hardware at this stage!
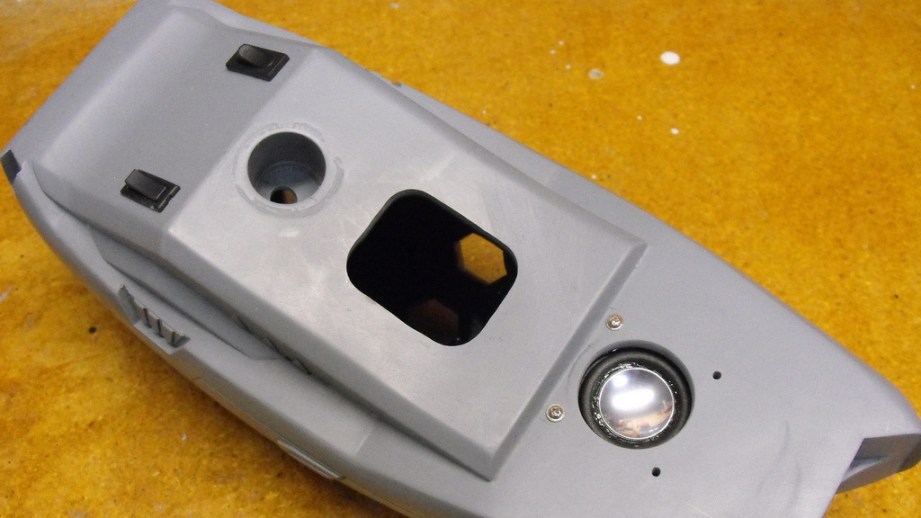
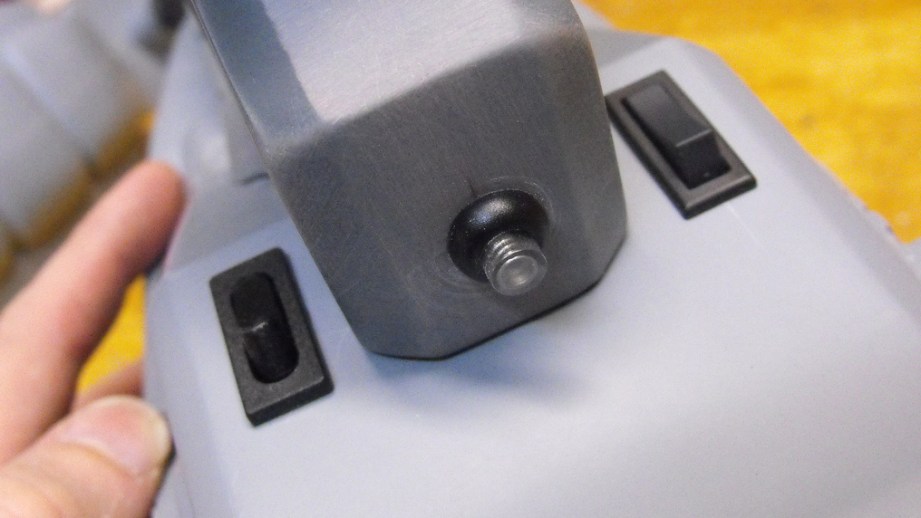
That small button will act as the trigger, and it’s been recessed into the handle with a hole routed through the top of the part into the main body. It also lights up blue!
At the rear, several magnets were countersunk into the vents and back plate to cover the three-AAA battery holder that will live in the upper casing. The magnets will hold these parts in place but will allow for easy removal when the batteries need to be changed, or if any maintenance needs to be done to the electronics later on in the life of the prop.
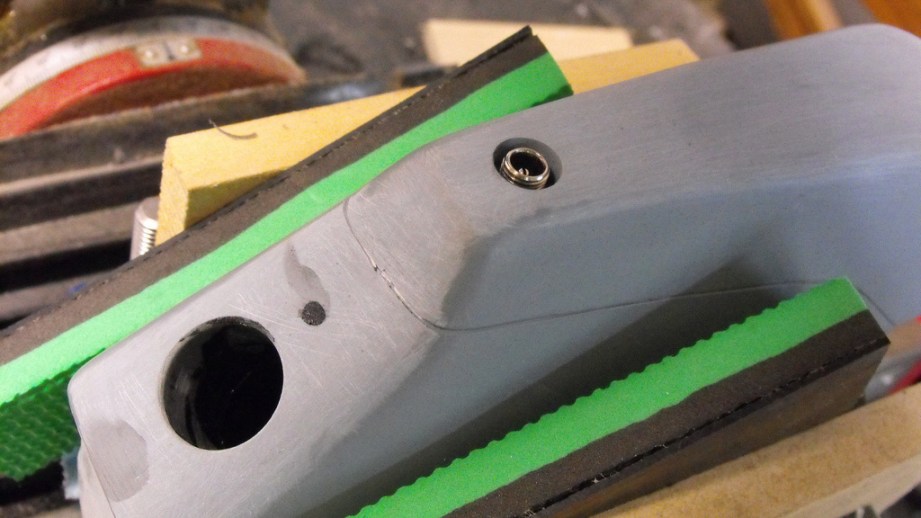
Since the Needler will be on display most of the time (theoretically), I’m making the circuit capable of running off a AC wall inverter instead of the internal batteries. The jack for this circuit has been countersunk into the lower casing at the furthest downward point of the gun to make sure the wire isn’t invasive while on display. Also, when holding the finished prop, your hand will cover this area so nobody will ever see the hole when the piece is in use.
Many people might choose to glue their props together, and a lot of my earlier pieces were held together mostly with superglue or epoxy. This can be tricky when assembling your piece as you’ll need to clamp the parts together while the glue cures, and often things can go together a little wonky.
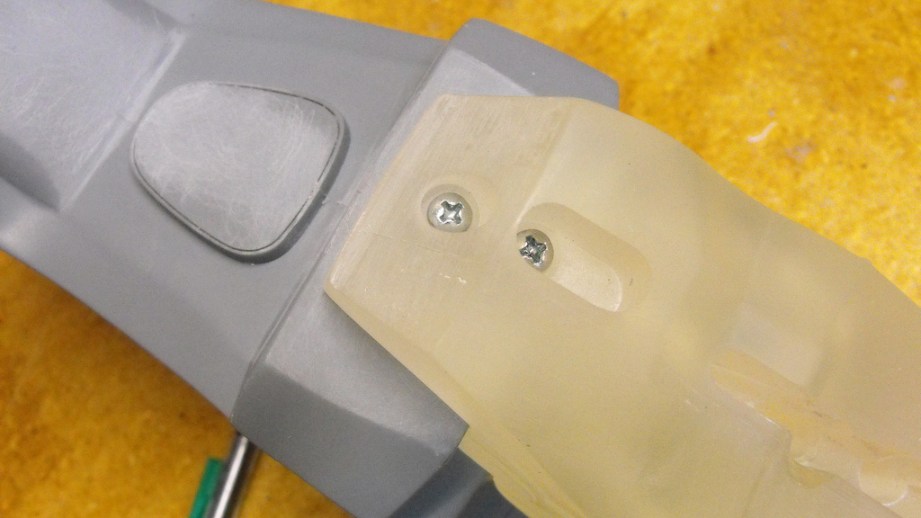
My preferred method now is to have as many pieces held together mechanically (read: screwed together) as possible. This may be reinforced with a glue joint as well during final assembly, but securing pieces together with bolts and screws ensures that every part goes together the same way each time it’s put together. Whenever possible make sure you have two mounting points–a single screw or post is really just a pivot point, and you’ll have to align it properly each time the parts are tightened down. With two posts and two holes, there’s only one way for the pieces to line up. The part below is the lower casing and the lower emitter.
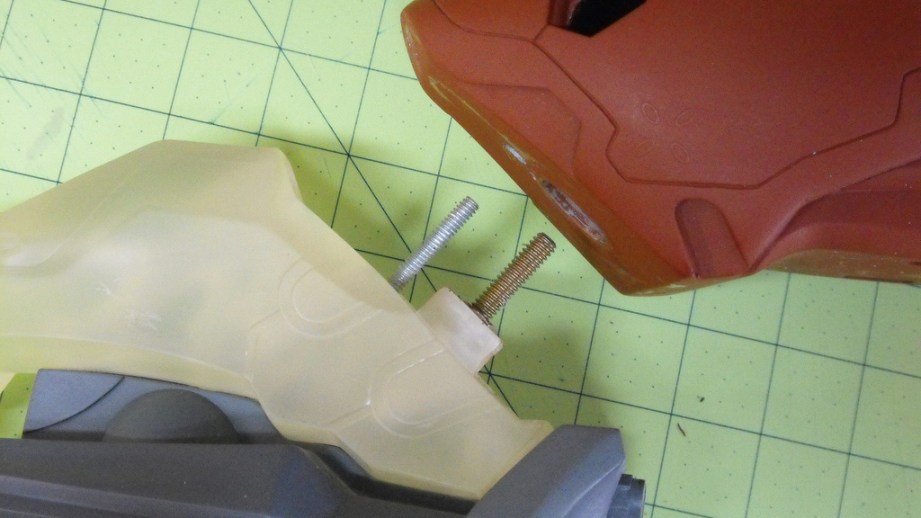
Parts that will take more strain or weight will need hardware commensurate to their duties. The upper casing only has two mounting points to the rest of the gun, but will be one of the heaviest parts once complete. Because of this, two large threaded rods mount this part to the upper emitter and are secured with large washers and locknuts. While this might seem like overkill, nobody wants to crack open a completed prop to fix a stripped screw hole. If it’s worth doing, it’s worth overdoing.
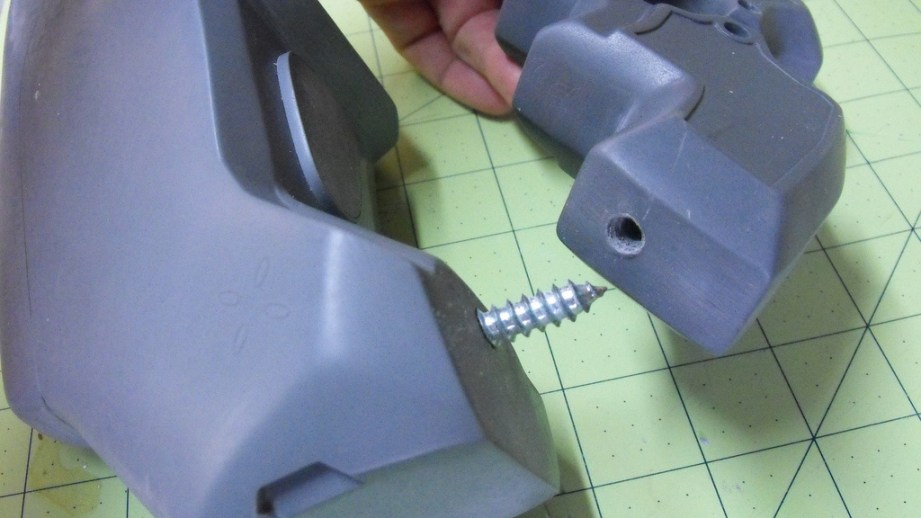
On that note, check out the nasty thing that holds the lower handle in place! I think this was a leftover from a flat pack furniture kit, but it’ll definitely get the job done. I couldn’t go with threaded rod here because the limited space in the lower casing wouldn’t let me fit a socket or wrench into the cavity to tighten a nut. I think 2″ of gnarly self tapping screw should hold things together pretty well though.
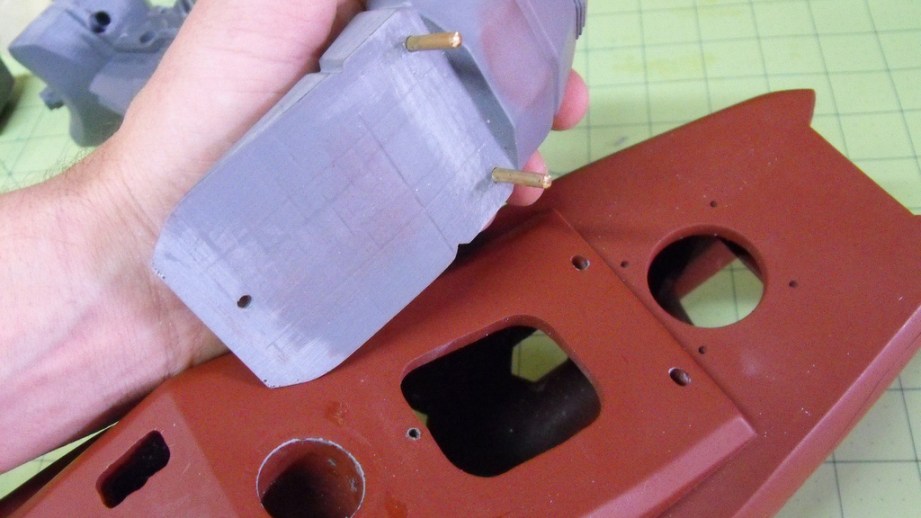
Smaller panels with less weight hanging off of them will require less dramatic solutions. For the lower detail bit on the upper casing, there’s only one small self tapping screw that will secure the part. The rear will be kept in alignment with two brass rods, and once all the parts are tightened up this piece won’t need any glue to be secure.
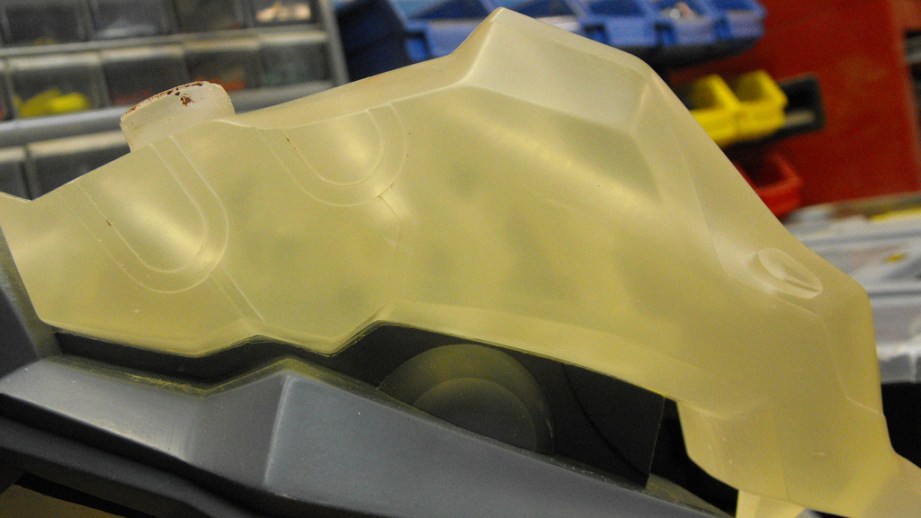
If you happen to be making something this complex bristling with LEDs, it’s a good idea to turn the drill motor towards all the parts that will need embedded illumination while you’re busy adding screws and bolts and mounting holes. Parts like the clear emitters will get sort of complicated as you try to figure out the best way to route wires while also planning where and how to assemble them. With a clear piece like this you can also see the myriad of drill holes swiss cheese-ing the part. Six cavities lead to LED mounting points, two channels are for wire routing, and four more were cut for screw and bolt placement. If nothing else, it’s a fun logic puzzle.
With all the holes cut, drilled, tapped and countersunk, it’s time to start prepping things for primer and (eventually) paint. Most of your two-part cast pieces will come out with some kind of seam line. If you’re lucky and you spent a lot of time on your molds making them as clean as possible, this should be just a minor line running around the perimeter of your resin parts. If you’re less than lucky or you were in a rush, there might be some divots to fill.
I start off by sanding around the entire line with 120 grit sandpaper. Don’t just focus on the line itself or you’ll end up with a shallow divot in place of the seam. Gradually work in a circular motion outward from the seam line until it is no longer visible and the sanding marks blend into the surrounding resin.
Once this is blended out, you can step down to a finer grit sandpaper; my preference is to go from 120 to 220. As with before, you’re going to try to blend in the sanding lines with the surrounding resin until the deeper marks of the rougher grit paper fade out.
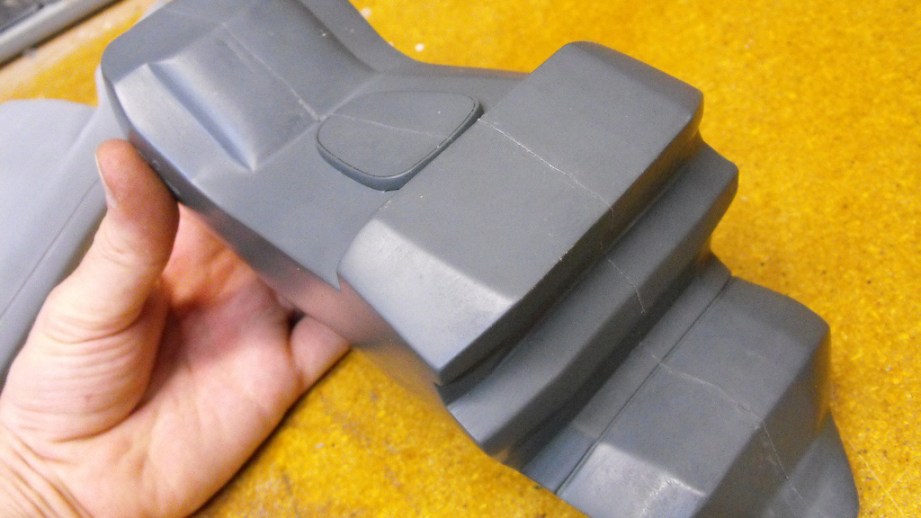
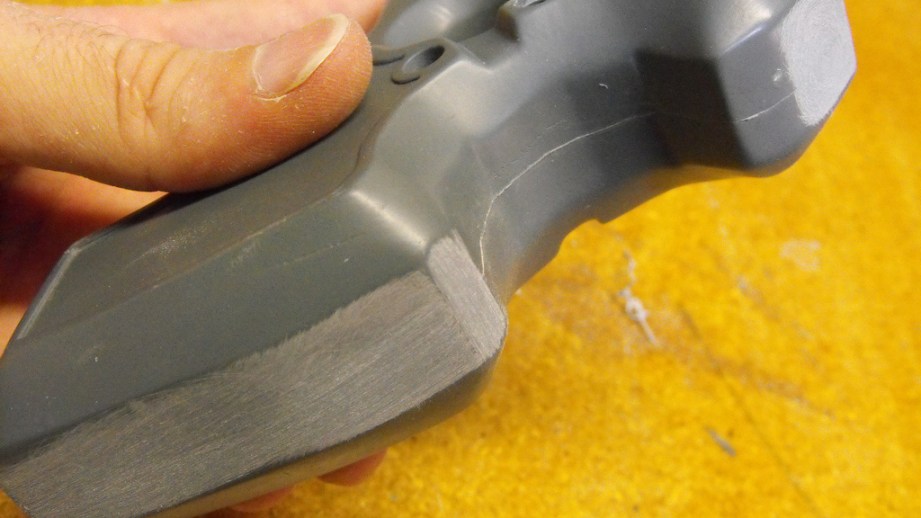
In preparation for primer, the entire part will need to be given a slight scuff to enable the paint to stick adequately. It isn’t necessary to go over the entire thing with sandpaper, and doing so might actually blunt some of your sharper details in the casting. The goal here is to knock any sort of shine off your part and have a piece with a uniform dullness to it that shows the surface has a slight roughness to it. Compare these pieces piece, straight out of the mold:
…to these parts, which have been wet sanded with a 400 grit sanding sponge and soapy water:
The dull look of the second photo is what you’re after for all parts before they can be primed. Any glossy areas should be sanded again with the sanding sponge until the whole resin piece is uniform and matte.
Sanding this many parts will take a bit, but it’s important not to rush now! We’re close to the finish line and it’s hard to resist grabbing the nearest can of purple paint and going to town, but hold back and remember that the best paintjobs start with a proper base. No amount of fancy gloss paint will cover a bad prep job or loose primer flaking off your parts!
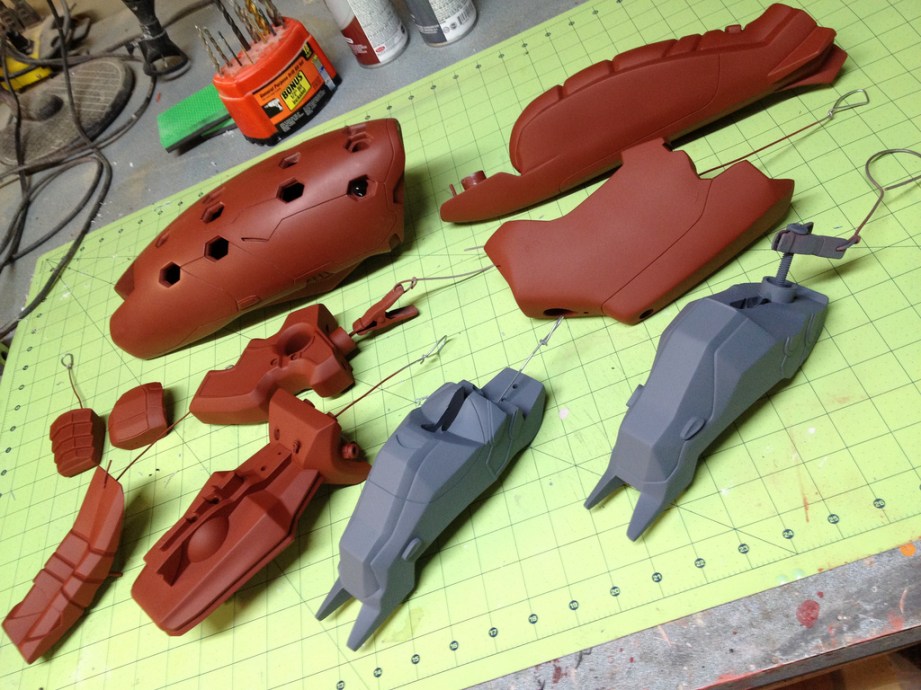
I spent the better part of a day blending out seam lines and scuffing up these parts to prepare them for primer. A few of them still need a spot of filler here and there to fix small issues with the casting process, but that (and many other things) will be covered in the next segment on filler and painting (really!).
The Volpin Project, Part 1: Introductions
The Volpin Project, Part 2: References and Blueprinting
The Volpin Project, Part 3: Selecting Materials
The Volpin Project, Part 4: Taking Shapes
The Volpin Project, Part 5: Bondo Strikes Back
The Volpin Project, Part 6: Details, Accents, Refinements, and Mockups
The Volpin Project, Part 7: Introduction to Moldmaking
The Volpin Project, Part 8: More Complex Moldmaking
The Volpin Project, Part 9: The Casting Process
The Volpin Project, Part 10: Illumination and Audio


5 thoughts on “The Volpin Project, Part 11: Prepping for Painting”
Leave a Reply

One Day Builds
Adam Savage’s One Day Builds: Life-Size Velocirapt…
Adam embarks on one of his most ambitious builds yet: fulfil…

Show And Tell
Adam Savage’s King George Costume!
Adam recently completed a build of the royal St. Edwards cro…

All Eyes On Perserverance – This is Only a Test 58…
We get excited for the Perserverance rover Mars landing happening later today in this week's episode. Jeremy finally watches In and Of Itself, we get hyped for The Last of Us casting, and try to deciper the new Chevy Bolt announcements. Plus, Kishore gets a Pelaton and we wrack our brains around reverse engineering the source code to GTA …

One Day Builds
Mandalorian Blaster Prop Replica Kit Assembly!
Adam and Norm assemble a beautifully machined replica prop k…
House of MCU – This is Only a Test 586 – 2/11/21
The gang gets together to recap their favorite bits from this past weekend's Superb Owl, including the new camera tech used for the broadcast and the best chicken wing recipes. Kishore shares tips for streamlining your streaming services, and Will guests this week to dive into the mind-bending implications of the latest WandaVision episod…

One Day Builds
Adam Savage’s One Day Builds: Royal Crown of Engla…
One of the ways Adam has been getting through lockdown has b…

Making
Adam Savage Tests the AIR Active Filtration Helmet…
Adam unboxes and performs a quick test of this novel new hel…

Making
Weta Workshop’s 3D-Printed Giant Eyeballs!
When Adam visited Weta Workshop early last year, he stopped …

One Day Builds
Adam Savage’s One Day Builds: Wire Storage Solutio…
Adam tackles a shop shelf build that he's been putting off f…

Show And Tell
Mechanical Dragonfly Automata Kit Build and Review
Time for a model kit build! This steampunk-inspired mechanic…
You must have a rely good eye to be able to determine how hard to sand and manage to do it even over the entire model. I don’t envy you at this stage
This is absolutely incredibly. I don’t have the patience for a kit, much less a build from scratch!
Love what you do sir. Your engineering, sculpting and skill with casting is bar none. I have wanted to attempt making props like this for a while now but simply cant afford to, so for now I stick to making action figures and lusting after the work you do.
I really appreciate you posting your work process because its neat to see but also I’ve learned a few things like the baby powder trick for pouring resin. Great stuff sir, really enjoy your work, inspired by it to no end.
I started out making custom action figures and warhammer models, it is just as good a way to start as any! Harrison technically started making furniture, which is even less relevant. So, don’t get discouraged in your beginnings. Any improvement in a loosely related field is still improvement!
Oh I’m totally not discouraged at all, I’m just poor haha! I know I can do this sort of thing (and have in the past) I just cant afford it currently 😀
I’ve been sculpting and mold making for years now and actually at one point almost went in the direction of furniture design, but instead stuck with graphic design. I love building and making things and seeing this just gets me super jazzed because I know how hard it is and the time and energy it takes so I really appreciate it.
I also appreciate the sharing of information, I think that’s hugely important to the maker community and is something that seems like has really become more prominent in the past 5 years roughly. There always seemed to be that cone of silence in the past but recently people are really stepping up and sharing technique and skill sets via the internet like never before and I think its incredible frankly.