


The Volpin Project: A Detour in Rapture
Harrison is away on an overseas trip this week, so he hasn't had the opportunity to continue working on the Halo 4 Needler prop. In its stead, he sends over this writeup of his recently constructed mask from the first BioShock game.
[Harrison is away on an overseas trip this week, so he hasn’t had the opportunity to continue working on the Halo 4 Needler prop. In its stead, he sends over this writeup of his recently constructed mask from the first BioShock game. –Norm]
I suppose it’s no secret that I’m a pretty big BioShock fan. BioShock: Infinite has recently been released and I’m really excited by all the props that game will open up to me. But before I can get to those there was one object from the world of Rapture I wanted to take a crack at building: the Splicer mask. Here’s my journey building on leading up to the launch of the next BioShock chapter. And if you want to take a pass at making your own Splicer mask, I sell raw styrene copies of the finished mask in my store, ready for trimming and paint!
The Splicer characters in BioShock wear once-festive party masks that have been smattered with blood and cracked with abuse during their time in Rapture. My favorite design has always been the bird Splicer masks, so when I got a commission for one earlier this year, I jumped on it.
Gathering reference was a bit tricky here. I don’t have the PC version of the game and though someone unfolded a pepakura model of the mask some time ago, it has since disappeared after the demise of Megaupload. Nothing left to do then but fire up the game! One of my save files happened to be very convenient as my character was wearing the Big Daddy suit and the Splicers would ignore him. Perfect for gathering reference images. I found a bird splicer, dispatched the poor fellow, then used the “Telekinesis” plasmid ability to get about a hundred different views of the mask.
I used these references to put together a set of blueprints, then commenced building.
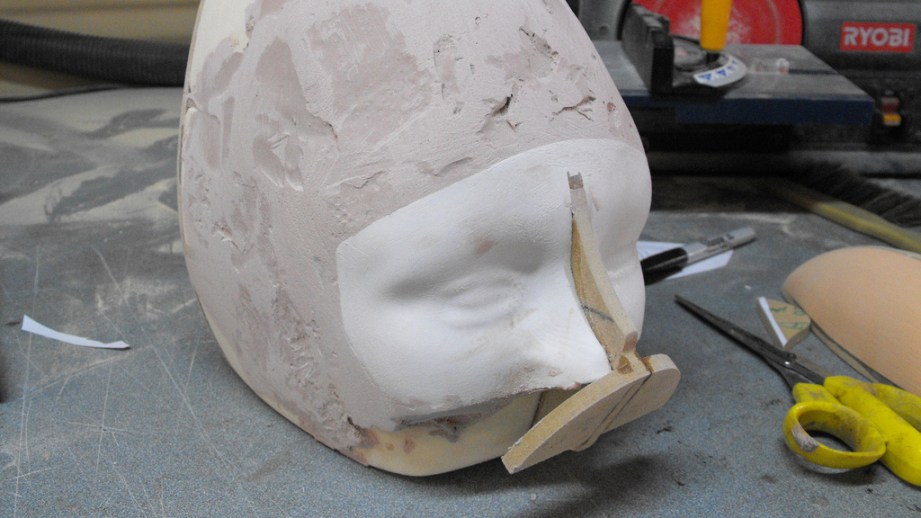
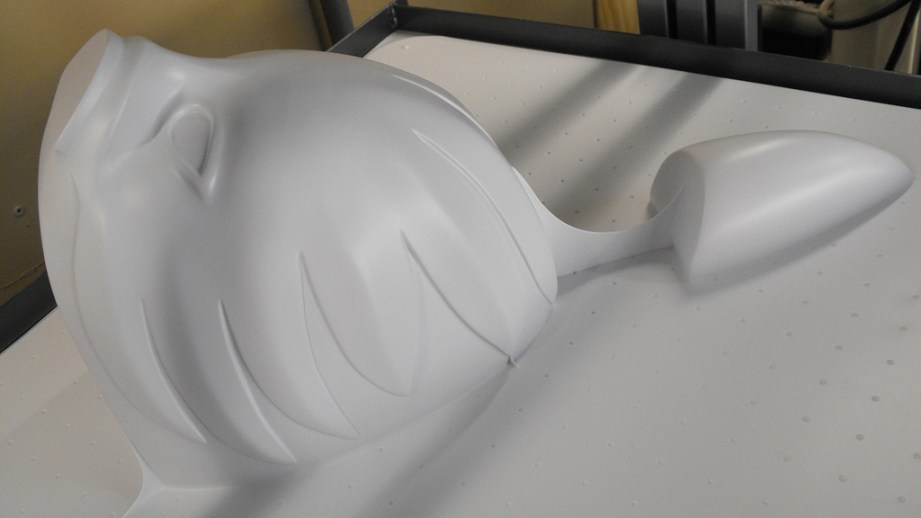
The plan was to sculpt a base mask form that would be used as a vacuum forming buck. This would be split into two parts, with the beak being separate from the rest of the mask.
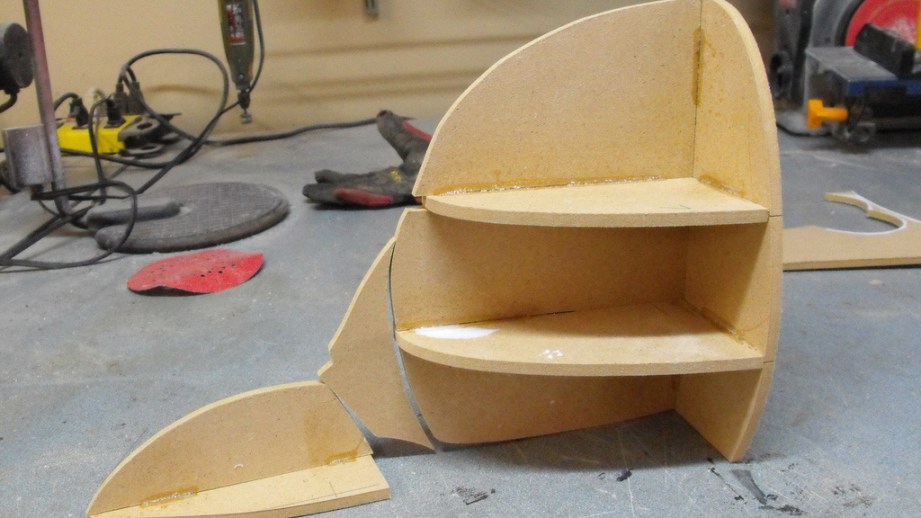
I began by making a series of MDF sliced sections, then filling the cavities with foam and sanding them to a rough shape.
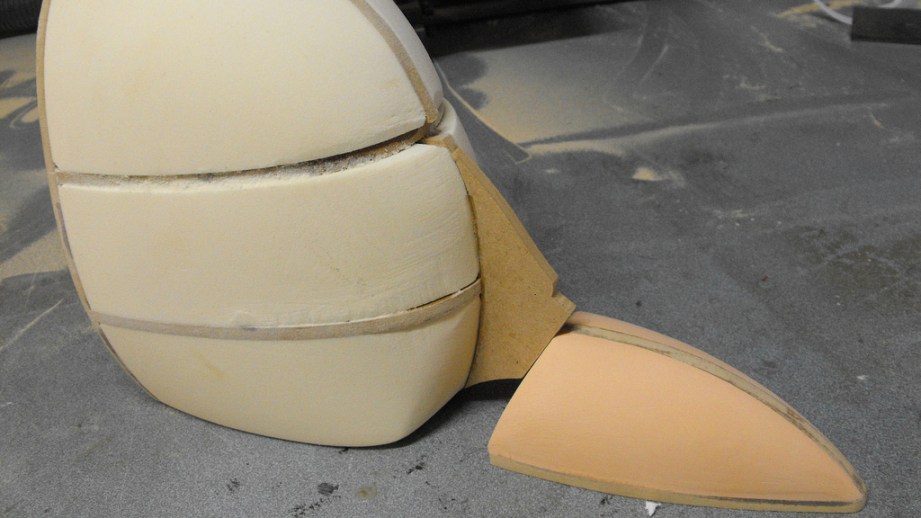
The design for the eye area of the mask was actually borrowed from a glass wig head in my shop. I took a scrap chunk of 0.1″ styrene and heated it over the form, pressing it into shape as it cooled.
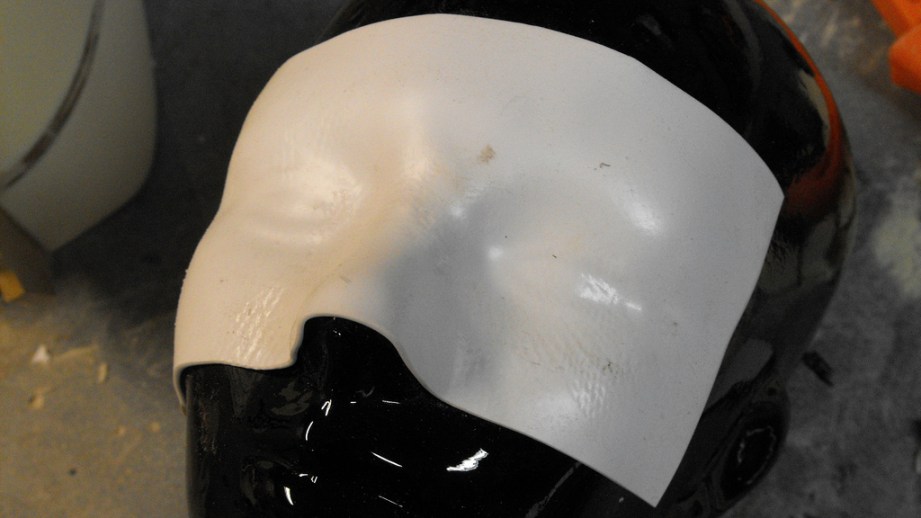
The resulting piece was trimmed down and glued to the MDF and foam frame. Bondo was then used to blend the styrene into the foam panels and make the entire dome more uniform.
This looked very, very strange.
Several passes with Apoxie Sculpt followed this step. I began by roughly blocking out the feathers and filling in the eye areas to sit further out from the mask. The mounting lip for the beak and bridge of the nose was also extended and filled in here.
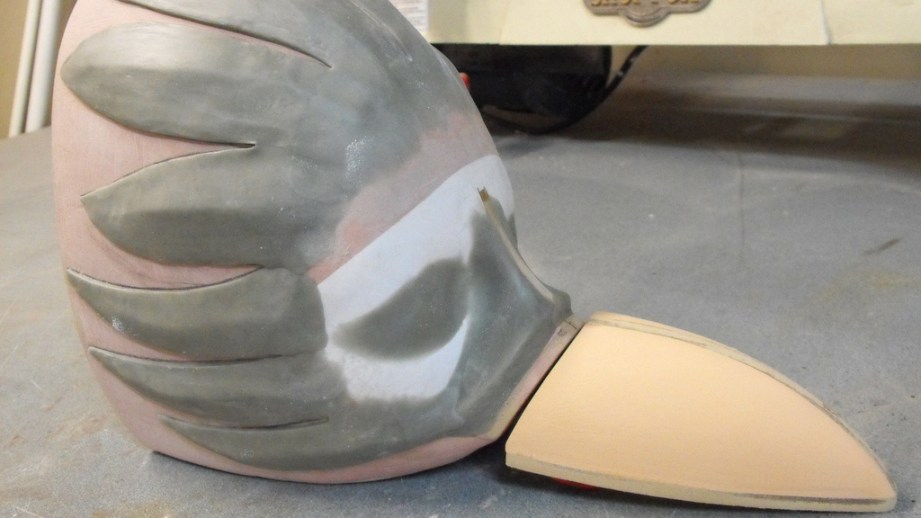
Primer and sanding followed, and then some filler putty.
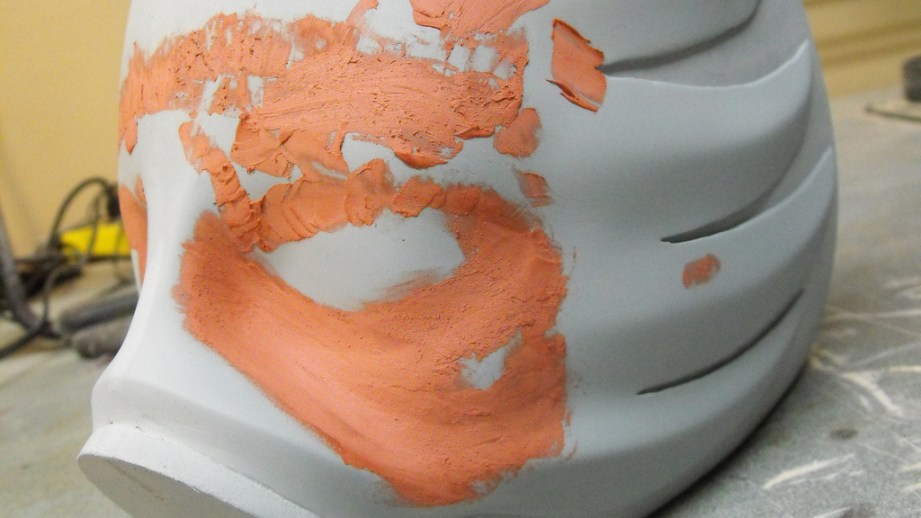
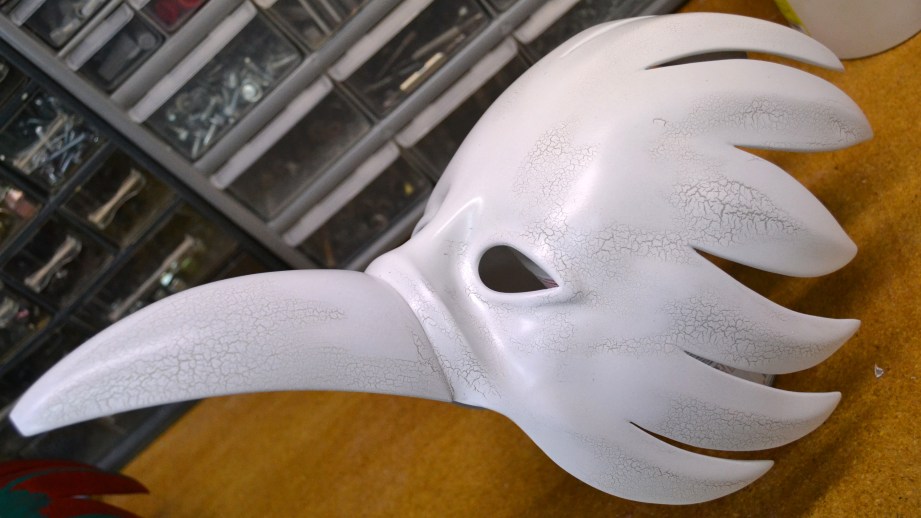
The last detail needed were a couple of raised edges around the eyes. These were also done with Apoxie Sculpt, after a lot of measuring and cutting out a paper template to use in order to make both eye holes symmetrical.
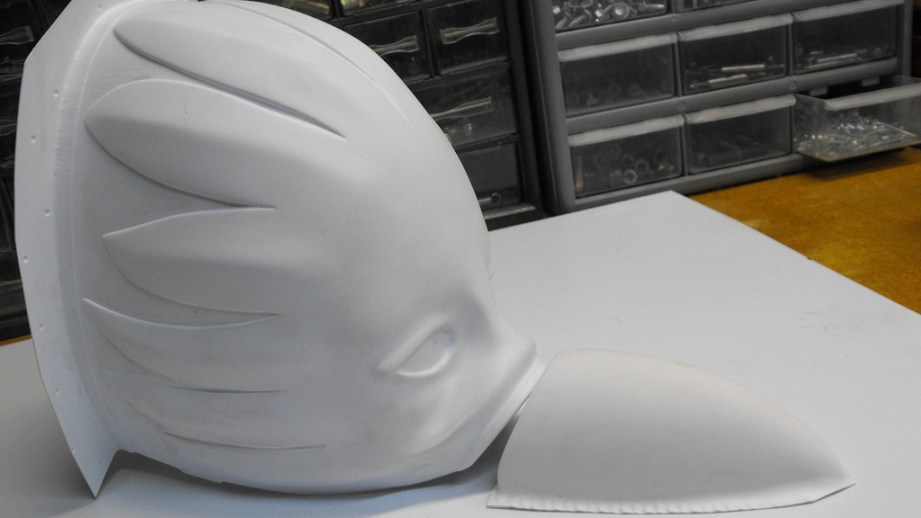
The first pull was done in .040″ styrene plastic, which proved to be too thin after stretching over the large form. There was also significant webbing when trying to do both pieces at once, so I had to separate the beak and the face sections.
The second pass, done in .060″ plastic, was much more successful.
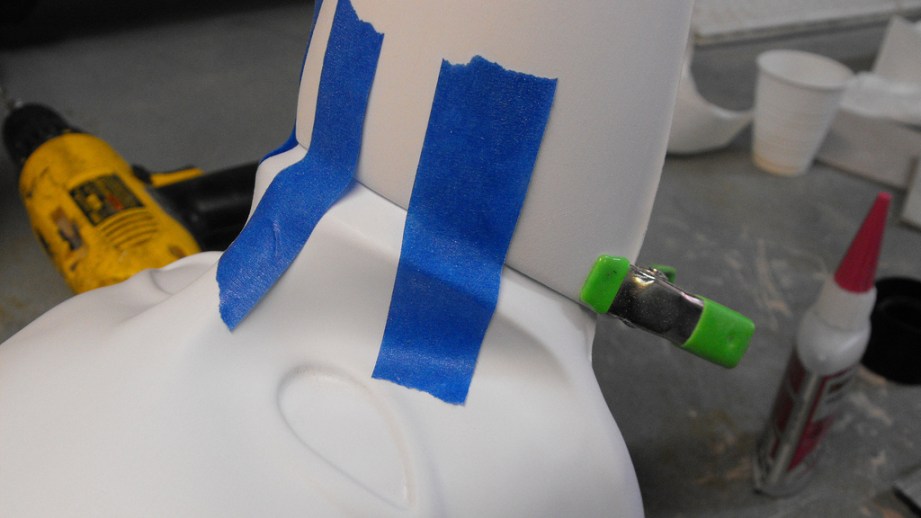
After the parts were trimmed, the beak was taped into place and secured in the corners with small spring clamps. Superglue was used to bond the two styrene segments together permanently.
A few passes of primer and a fine grit sanding sponge were used to prep the masks for paint. At this point my client requested a second mask, so I pulled another copy and assembled it as well.
The two finished masks would have very different paint jobs, so they each got a different base coat color. One is a light tan eggshell, and the other is satin black.

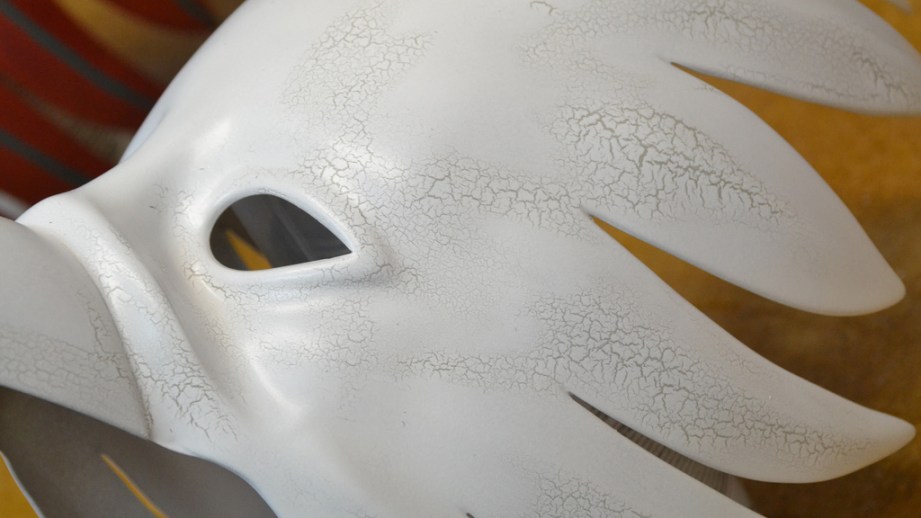
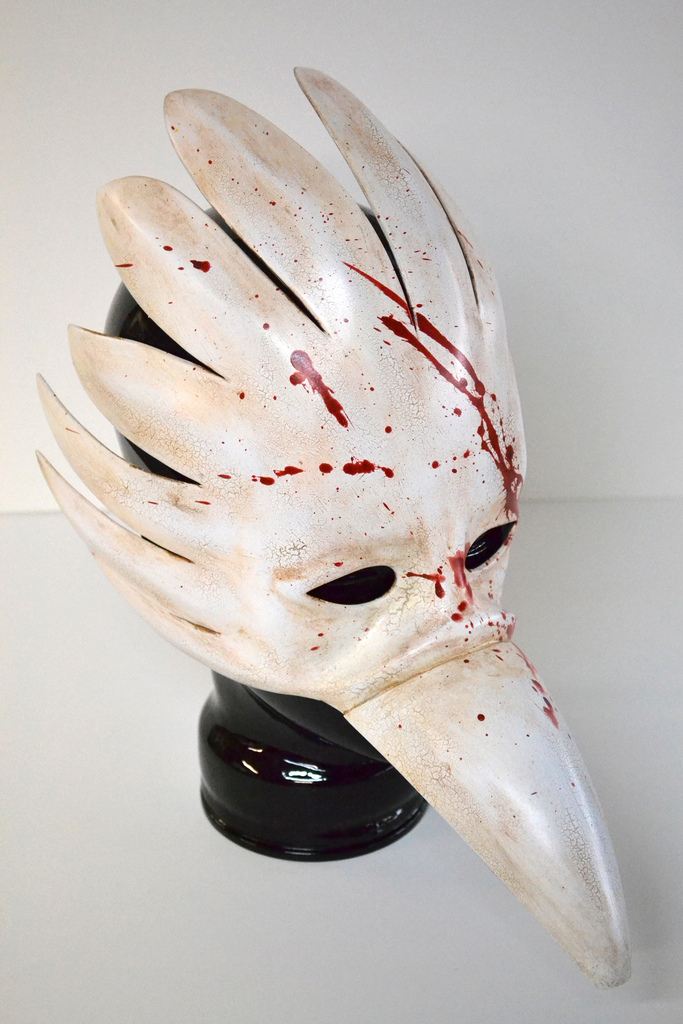
I went through a LOT of test pieces before settling on this finish for the masks. My client wanted a look that emulated cracked porcelain on the white mask. I had about a dozen test scraps before landing on the right finish. The base coat was tan colored, which was then brushed over with Elmer’s white glue. This wasn’t watered down, but it was brushed on pretty thin–enough to make the surface appear “wet” but not enough where you could see the white tint of the glue. While the glue cured, thinned acrylic paint was airbrushed over the entire part. I found that the cheaper the paint was the better it cracked; I imagine this has to do a lot with how flexible the cured acrylic is. The stuff I used was Blick brand white paint, the kind you’d find in an elementary school. Cheap!
By selectively applying the paint to certain areas on the mask, I was able to get cracks to show up in some places but not others. The finish on the white mask was perfect.
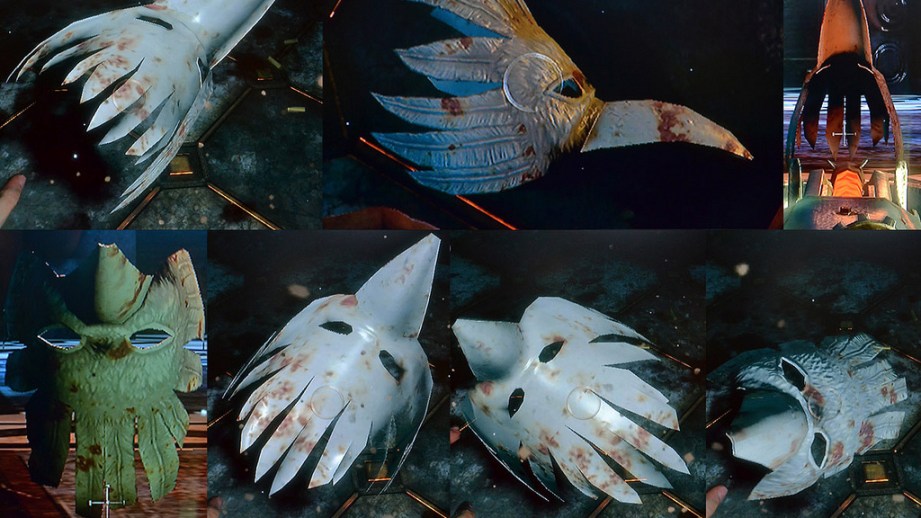
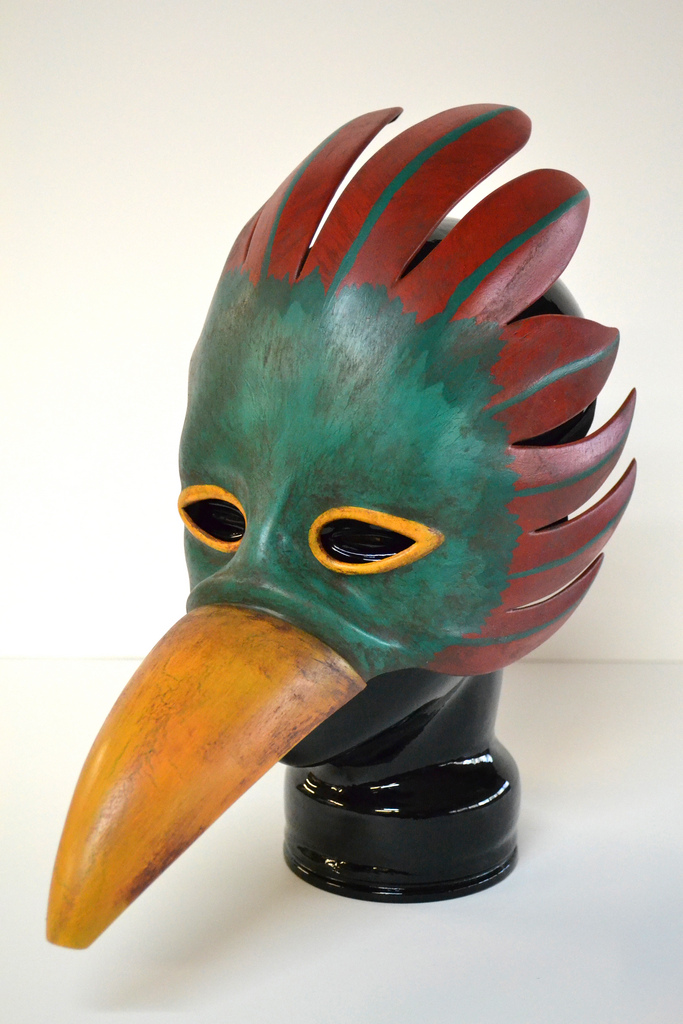
The second mask required a bit more prep. There are only four masks like this in BioShock, worn by the four Splicers that Sander Cohen sends you kill and photograph in the “Fort Frolic” section of the game. These have red feathers, green feathered paint around the eyes, a yellow beak, and yellow eye accents.
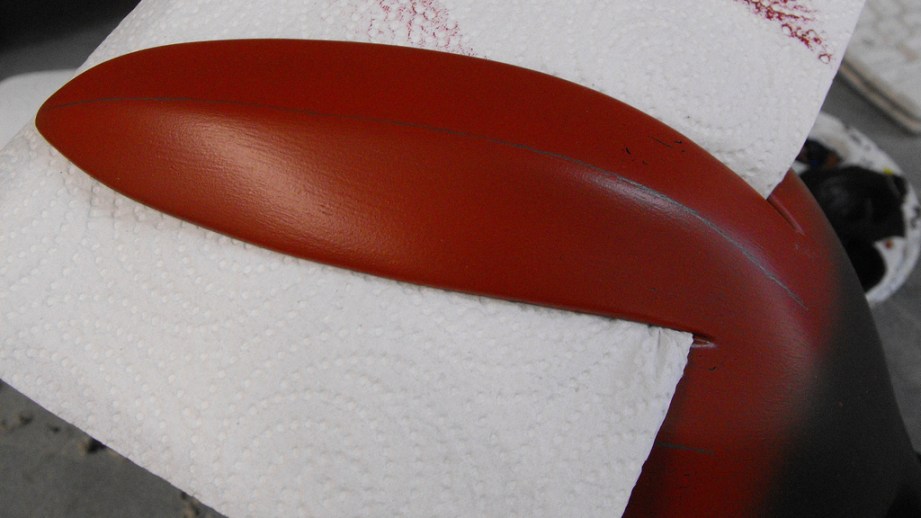
First, the feathers were airbrushed red and allowed to cure, then I used a drybrush technique to streak paint across these parts in a feather-like pattern.
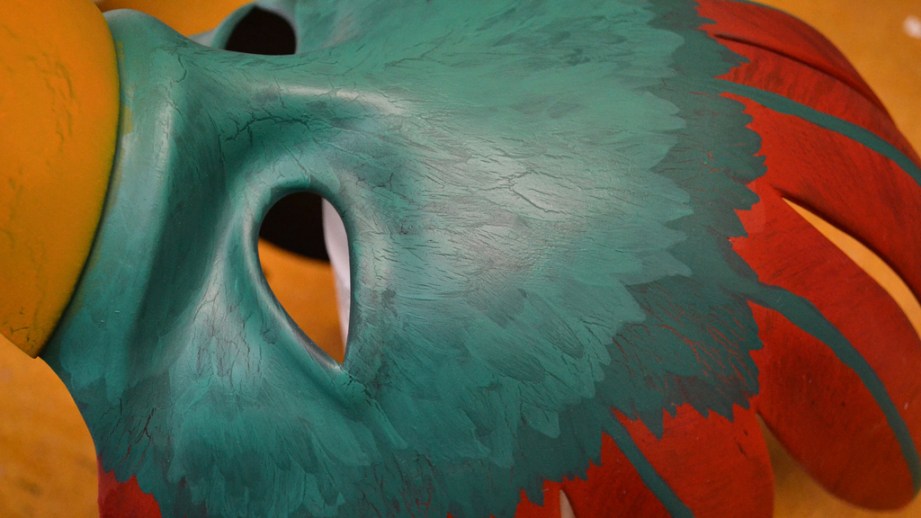
The green areas were painted with a base of Elmers glue to get them to crack a bit, but I used a thin brush to get a small feather texture to the paint. Green was also used for the quills on the red feathers.
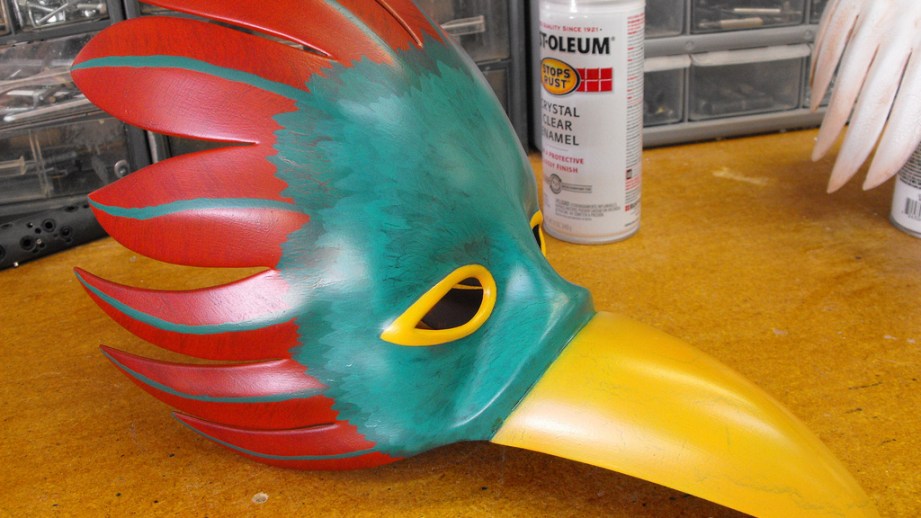
Lastly, the beak was airbrushed yellow and the areas around the eyes were accented with yellow rings. This was all done with acrylic paint.
In order to protect these base layers, the acrylic paint was sealed with clearcoat at this stage before weathering. I wanted to make sure that rubbing the grime coats into the cracks and crevices of the masks didn’t disturb all the work I’d done already.
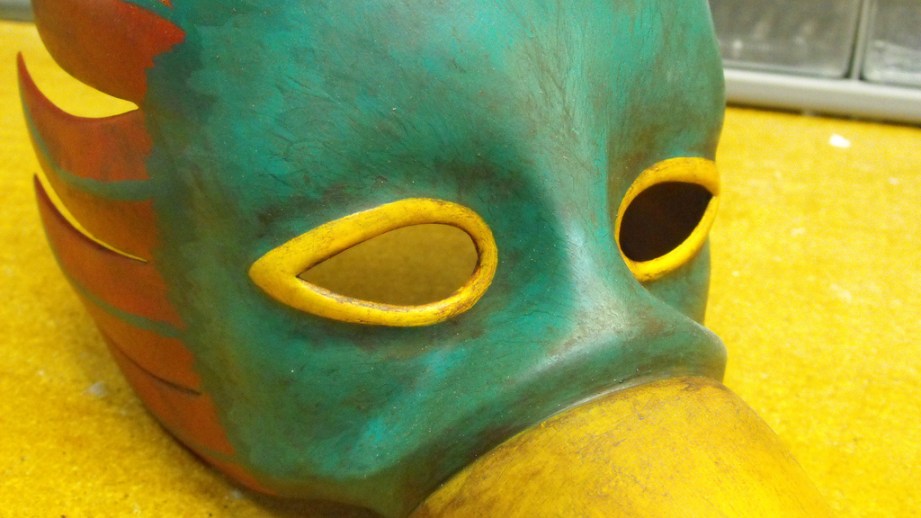
The finishing touch for the Fort Frolic mask was a few passes of dirt and grime, once again done in acrylic paint. I used a damp paper towel to streak the paint across and remove dirt in raised areas while depositing it into recesses.
The white mask got a similar coat of grime before the really fun part…
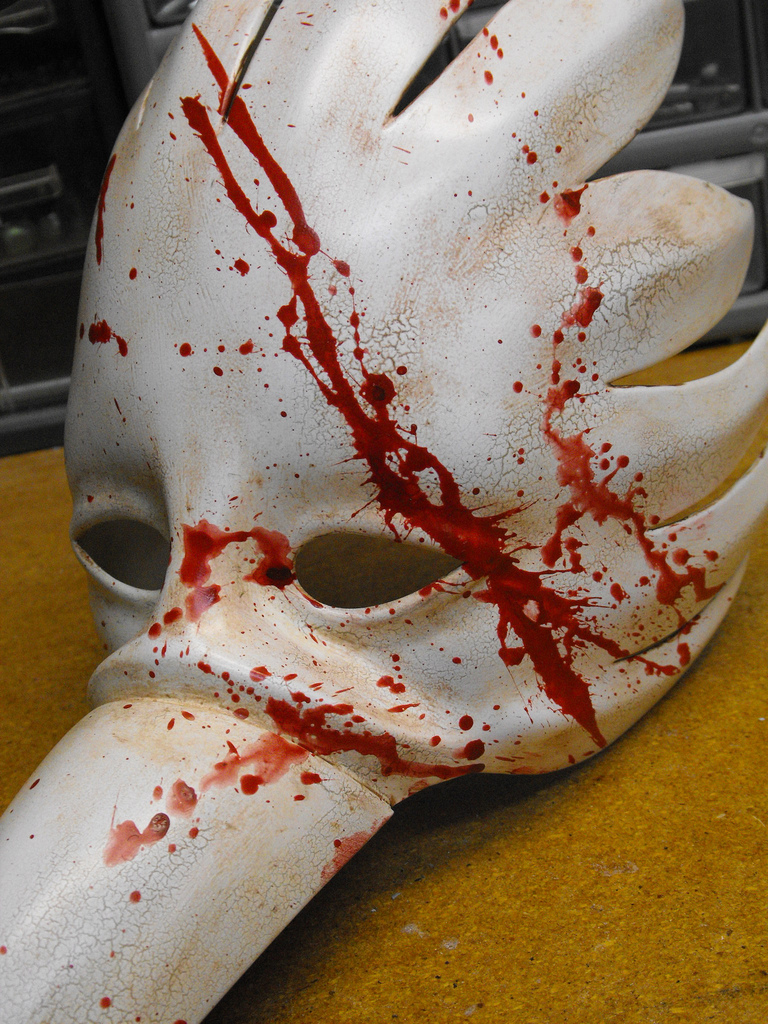
…blood splatters! It’s been a while since I got to do a really fun splat of blood, and this one turned out wonderfully. After the acrylic weathering cured, both masks got another pass of clearcoat and an elastic strap was added so they could be worn.
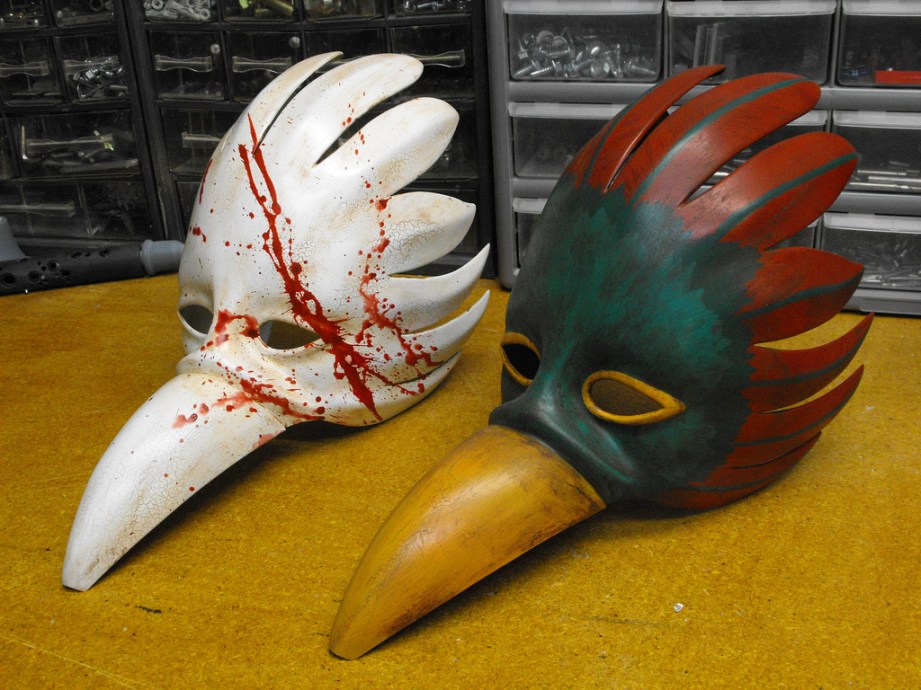
Here are some shots of the finished pieces – if you want to see more photos of them in higher resolution, check them out in my gallery.
Thanks for reading! I’ll be back in two weeks to resume the Halo Needler project!
The Volpin Project, Part 1: Introductions
The Volpin Project, Part 2: References and Blueprinting
The Volpin Project, Part 3: Selecting Materials
The Volpin Project, Part 4: Taking Shapes
The Volpin Project, Part 5: Bondo Strikes Back
The Volpin Project, Part 6: Details, Accents, Refinements, and Mockups


3 thoughts on “The Volpin Project: A Detour in Rapture”
Leave a Reply

One Day Builds
Adam Savage’s One Day Builds: Life-Size Velocirapt…
Adam embarks on one of his most ambitious builds yet: fulfil…

Show And Tell
Adam Savage’s King George Costume!
Adam recently completed a build of the royal St. Edwards cro…

All Eyes On Perserverance – This is Only a Test 58…
We get excited for the Perserverance rover Mars landing happening later today in this week's episode. Jeremy finally watches In and Of Itself, we get hyped for The Last of Us casting, and try to deciper the new Chevy Bolt announcements. Plus, Kishore gets a Pelaton and we wrack our brains around reverse engineering the source code to GTA …

One Day Builds
Mandalorian Blaster Prop Replica Kit Assembly!
Adam and Norm assemble a beautifully machined replica prop k…
House of MCU – This is Only a Test 586 – 2/11/21
The gang gets together to recap their favorite bits from this past weekend's Superb Owl, including the new camera tech used for the broadcast and the best chicken wing recipes. Kishore shares tips for streamlining your streaming services, and Will guests this week to dive into the mind-bending implications of the latest WandaVision episod…

One Day Builds
Adam Savage’s One Day Builds: Royal Crown of Engla…
One of the ways Adam has been getting through lockdown has b…

Making
Adam Savage Tests the AIR Active Filtration Helmet…
Adam unboxes and performs a quick test of this novel new hel…

Making
Weta Workshop’s 3D-Printed Giant Eyeballs!
When Adam visited Weta Workshop early last year, he stopped …

One Day Builds
Adam Savage’s One Day Builds: Wire Storage Solutio…
Adam tackles a shop shelf build that he's been putting off f…

Show And Tell
Mechanical Dragonfly Automata Kit Build and Review
Time for a model kit build! This steampunk-inspired mechanic…
Amazing!
Those masks are super creepy.
Incredible job, it brings Rapture to life. I just played it for the first time when BioShock Infinite came out.