


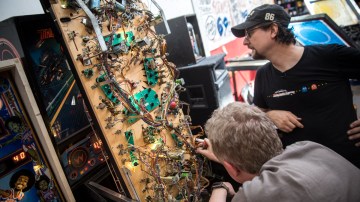
Bits to Atoms: Thermal Detonator, Part 1
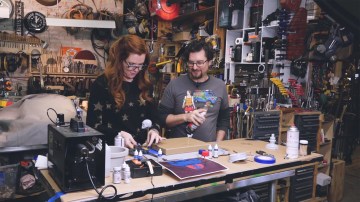
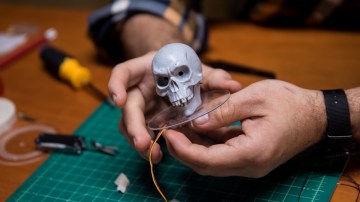
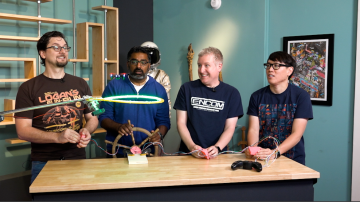
For Sean and Jeremy’s second project. they tackle a beloved hand prop from the Star Wars universe–the Thermal Detonator that appears in Return of the Jedi! Ambitions for this build are high, so the Bits to Atoms team brings in help from the rest of the Tested family, including Kishore, Frank, and Adam!
Shot and edited by Joey Fameli


73 thoughts on “Bits to Atoms: Thermal Detonator, Part 1”
Leave a Reply

One Day Builds
Adam Savage’s One Day Builds: Life-Size Velocirapt…
Adam embarks on one of his most ambitious builds yet: fulfil…

Show And Tell
Adam Savage’s King George Costume!
Adam recently completed a build of the royal St. Edwards cro…

All Eyes On Perserverance – This is Only a Test 58…
We get excited for the Perserverance rover Mars landing happening later today in this week's episode. Jeremy finally watches In and Of Itself, we get hyped for The Last of Us casting, and try to deciper the new Chevy Bolt announcements. Plus, Kishore gets a Pelaton and we wrack our brains around reverse engineering the source code to GTA …
Making
Adam Savage in Real Time: God of War Leviathan Axe…
Viewers often ask to see Adam working in real-time, so this …

One Day Builds
Mandalorian Blaster Prop Replica Kit Assembly!
Adam and Norm assemble a beautifully machined replica prop k…
House of MCU – This is Only a Test 586 – 2/11/21
The gang gets together to recap their favorite bits from this past weekend's Superb Owl, including the new camera tech used for the broadcast and the best chicken wing recipes. Kishore shares tips for streamlining your streaming services, and Will guests this week to dive into the mind-bending implications of the latest WandaVision episod…

One Day Builds
Adam Savage’s One Day Builds: Royal Crown of Engla…
One of the ways Adam has been getting through lockdown has b…

Making
Adam Savage Tests the AIR Active Filtration Helmet…
Adam unboxes and performs a quick test of this novel new hel…

Making
Weta Workshop’s 3D-Printed Giant Eyeballs!
When Adam visited Weta Workshop early last year, he stopped …

One Day Builds
Adam Savage’s One Day Builds: Wire Storage Solutio…
Adam tackles a shop shelf build that he's been putting off f…
Very cool project! I’m super excited for the next installment.
For the switch- Why wouldn’t you do a 2-position Toggle with a cavity in the switch to flick it between open and closed?
LOL at Kishore’s 4 lights quip!
What a cool project that involved almost the whole Tested crew. Great job; keep going!
Awesome. I just finished my Thermal Detonator not too long ago. I might end up with a few ideas to improve mine 😀
http://www.thingiverse.com/thing:2065383
not enough room
Just a few minutes in and I’m pretty excited!!!!
Ohhh man, I clicked the site, saw “Bits to…” and I was already in. 🙂 Love this series.
Great work everyone! Looking forward to part 2.
That makes me sad. I still think you were on the right track with the 3d printed board chassis. But what do I know. 😛
Why aren’t your videos showing up for me anymore? Are you feeding them via Facebook or something? (For some reason, maybe because I’m not a Facebook user, something has caused their videos to not show up for me).
Ad blockers, for me it is Ublock. I disable it to watch it and then I enable it.
Given that I am a paying member, why am I forced to disable Ad blockers in order to watch videos? I may kick myself for saying this but I would rather pay more for my membership than to watch $%#@ ads.
This is an amazing series, cannot wait to see the next part.
Okay, figured out the issue was my AdBlock being a little too zealous about what constituted an ad, I suspect that’s Facebook’s counter-ad-block trick. Adjusted my settings and now it works.
And I loved this video, especially how it’s involving nearly the whole build team in different ways.
THANK YOU! got no laughs in the room.
Very excited to see the rest of this build
Really creative solutions and the brainstorming sessions are masterclasses in fun teamwork.
Sean has really come into his own with this series. Great to see!
Ideas to consider (if this isn’t all done already):
* speaker mount on the inside of the ring
* the ring-LEDs on progressively longer wires so they can be bound together in a line, for organizational and leave-the-middle-empty reasons
* bind the little boards together with a layer of capton between them into a compact bundle, so you can have shorter wire runs between them
Also, the trick I’ve found for an external-accessible micro-USB port is to get the microusb breakout mini-boards and embed them in the outer shell and run some wires from them back to the main board(s). Works fine for power, not sure how well data would handle the run since it’s not properly shielded.
i got it to work with ublock origin by adding ‘@@||ooyala.com^’ to the ‘my filters’ tab. apparently, ooyala got added to one of the blocklists recently, so the premium player stopped working.
ah guys, terrific video! can’t wait to see how this is going to process.
also, for all that is sacred: CAN HAZ DEDICATED VIDEO ON KISHORE’S FORGE PLZ?
Ok this is cool. I can’t wait for part two.
When I saw the first “toy” I was already pondering using a vape smoker in it for effects, but after seeing the accurate scaled model I’m pretty sure that wasn’t going to happen.
Totally worth having a Premium Pass.
Question about this:
What was the advantage of using those speakers over the bone conduction transducer adafruit offers?
I’m a jeweler and I’ve successfully cast ABS and PLA using the same lost wax/investment mold method that they talk about with the “plaster”. You don’t need to sand cast with it. The burnout process reaches like 1400 degrees. That’s plenty hot enough to vaporize either of those plastics.
You guys matrixed the hell out of that soldering.
Totally awesome Part 1. Great to see even a pro like Frank mess up the mold making. It shows the Maker process for it really is – a process and you don’t always get it right but what you learn makes you a better Maker.
Part 2 Soon Please!!!
Coz this is worse than waiting for the next season of Jessica Jones!
You can cast that with holes and all no problem. You will want to keep your plaster mold at temp when you pour the Metal let it cool down to about 900 degrees then stuff it in a nice water bath the plaster will just dissolve off. 🙂
This was awesome! Congrats to Joey on the production, the pacing on this video was perfect.
Great video and I loved the process of how you guys figured stuff out! I was thinking a transducer epoxied into the shell would make a good speaker (Sparkfun sells a small one.) I’m all too familiar with making those “jeweler cut” molds. 🙂
If the pewter casting doesn’t work out I know a casting shop that can cast those shells in stainless steel for you.
Excellent longer form vid guys. Loved it.
Loving the series SO much. Makes my Premium subscription cheap in hindsight. Great to see the design process that you are going through. Waiting with bated breath for Part II!
I know it’s only been up for a day but come on add number 2 I’m dying to see it!lol
We haven’t even poured the metal yet! It will be a bit, cross your fingers it turns out. However, we have a good back up if it doesn’t.
hope it works out good luck! Can’t wait to see
Awesome work! At this rate everyone on the Tested team will be involved in this project if Simone makes a shitty robot that presses the detonator 😛 .
, have you considered shrinkage of the cast part? Might be negligible in this build but if space is tight, you may find your electronics don’t fit in the cast version. Might need to oversize the mold by 1 or 2%
calculated shrinkage on the pewter was negligible, so should be fine.
It’ll work – first try – no problems.
Thanks.
Yes. Yes it will.
Great project! That’s a super inside look into your creation process.
Great Vid, Can’t wait for part 2!
For the switch, you could use an IR gate, then you just need fin on the switch mechanism to break (or unbreak) the IR beam in it.
This is such an amazing series. It’s right up there with Adam’s one day builds, if not even better. This seems like such a great project. I’ve been looking forward to this coming up ever since Sean mentioned in the printer build that it got to be a really big project that was pulling in a bunch of different people. I also really love that it’s a full hour long, I love the videos that stay long instead of cutting things down a ton.
I think if I wanted to show a friend, who had never seen anything from tested, what kind of stuff tested did, I’d show them this video. It pulls together so many people and is so creative and fun to watch.
I want to see a full episode of Adam describing how hard it is to replicate the original finish
The foam core moulds are cool but I know a pewter caster who uses Lego. Builds up the outer wall with bricks then uses tiles on the bottom so there’s no stud marks. For moulds with a complex parting line he would fill the bottom of the mould with blu tack, push the model into it, then sculpt it to where he needed it. Then flip the cast rubber over, spray a generous helping of release agent on it and cast the top half.
I saw him copy a little plastic horse into pewter that way
He’s dying of lung cancer, he knows it’s likely from the release agent and/or lead vapours from the molten pewter fumes
The best option i can think of for your slide switch is to use a photogate or optical switch. I’ve known them to be used in paper printers and ball mice. Basically they are a small U shaped electrical component which registers if something opaque is between the 2 uprights of the sensor. A quick ebay search found that some printers are also using them as end stops. Mouser, or other electrical retailers in the US should stock smaller versions. The idea would be that you mount this on the inside of the upper hemisphere and add an extrusion to the slide which would pass between (or in front of) the light switch, which then triggers the arduino. To the arduino, it should be readable as a Digital IO.
Another option could be to mount a small tactile switch next to the back magnet and have the slide depress that when it moves back.
A reed switch may work, but you have a lot of magnetics and metal in this project, it may not be reliable.
Another option could be to make the exterior be ground, and have a metal contact on the slide track hit the side when you slide it.
If you were to alter the ring, or add a 3d printed bracket for the electronics it may give you an advantage when it comes to mounting sensors for the switch, Jeremy could even put a 6dof sensor board in for some fun…
Also i agree with pjz that the ring LED’s should have the common wires soldered together such that they sit into the ring, or perf board PCB’d so that mounting them is simple and fixed. A small PCB could possibly be used for making the different PCB’s mount together without needing wires – but that may take up a larger solid block of space than the wires allow for.
Love this show!
Really looking forward to the second video! 😀
Also it would be nice to see Kishore’s forge.
It doesn’t look like anyone has brought this up yet, at least not on the video or in the comments, but it might not be a bad idea to run a few tests on the alloy of pewter you are using to gauge the amount of shrink and distortion that could occur during cooling. I’ve never used pewter myself, but I’ve heard the shrink can be pretty significant on certain alloys. I would hate to see this go all the way to the end just to discover that none of the internal components fit because they were measured on the pre-cast piece. At least in 3d printing its as simple to fix as simply scaling it up 25% or whatever it happens to be for your pewter.
Argh, nevermind. Just saw someone else brought that up.
For a switch, I was thinking some type of strip of copper that acts as an actuator that is deflected away from the terminating strip by the aluminum strip you guys are casting and when you flip the switch on, the deflected copper springs back to its equilibrium state and terminated to close the circuit. You know, like how most switches I believe work.
I’m not through the entire video yet but instead of using electrical tape for insulation try “liquid electrical tape”. It is similar to plastic dip but cures into a semi flexible rubber. I quite like it for short wire connections where space can be an issue.
Leaf switch with a roller!
Great video, guys!
Fortunately with lead-free pewter (aka Britannia), the shrinkage is only about 1/32″ per foot, which is about 1%. I supposed Charles could have increased the size of the resin print by 1% to compensate, but with so little a shrinkage factor, it’s not worth the effort, especially since the mold has already been made.
I’ve never actually done metal casting before but I suspect that you will get a better cast if you heat the mold a little. Just a guess though.
Excellent video. Very interesting to see poor Frank struggle with the 60 material. I have no experience with such high S # material.
So NOW go straight to resin with these molds! Metal is fine, but one can get a pretty high shine on resin these days!
Looking forward to next installment.
wait isnt pewter so soft you can dent it with a fingernail?
Sometimes I realize that my child brain is still in there. I snorted with laughter when Frank said he always evacuates his rubbers. Couldn’t help it. Just struck me funny. Great build and I love seeing the trouble shooting as the process continues.
I love this one guys. I minored in Sculpture in collage and the methods you are talking about is called Negative Casting. Can’t wait to try this one. Been looking for a project to get me back into casting metals. This should be perfect. Thanks. If I can get it to cast in Aluminum, I’ll share the steps and process. It was the one material I cast the most in. That and Bronze.
Are you using Blender? I use Rhino 3D for all my CAD work and it would do those scribe lines no prob. Talk to Adam, I think he’s familiar with Rhino 3D if I can remember right.
I’ve done some pewter casting in my kitchen before. The silicone I used was way stickier, but with proper protection my kitchen survived 🙂
Here’s a link to the final thing, it’s been a while and it’s a bit rough but it was fun : http://dragonladych.deviantart.com/art/Celtic-Cat-153462388
I was also tempted to try a two part mold but it’s a bit daunting when you never made one before. I’ll have to try one day
I did some lost wax jewellery too but sadly I only made the wax piece and then polished the final product, melting silver is a lot harder to do a t home LOL!
Guys,
I am frequently struck by how often your projects line up with techniques the dental industry has been using for decades (or centuries where the lost-wax casting technique is concerned). Listening to you guys thinking through the casting process had my old dental school casting lectures screaming in the back of my head.
There are any number of masterful dental technicians in the bay area (I could even put you in touch with them) who could certainly up your metal casting game over the course of one sit down session, or at the very least help you think through some of the pitfalls worth knowing ahead of time.
Just a thought.
Nice build, love that you’re bridging 3D printing and casting. I’m with a jewellery company and we make most of our prototypes 3D-printing it in wax, then burning it out and pouring metal (the “lost wax” method Seanmentions). You’re right, though, there’s gonna be some renovation afterwards. You can actually see some “after casting but before renovating” pics at our Instagram, like this one: https://www.instagram.com/p/BQDZ0OEjrZQ/
Side note, I have a theory about the size of the sh*tty toy version: Carrie Fisher (the Force rest her awesomely foul-mouthed soul) was a small woman – only 5’1″ – and, as such, had small hands. Pretty sure what they did is scale for what we see in the close-up of her hand holding the prop, but scaled up to a bigger (man’s) hand. Either as a brain fart, or in another instance of Hollywood gender tone-deaf-ness.
Looking at the video, it looked to me like there should be enough space for one of those tiny microswitches with a lever on them, like this one: [trying to remove the link to get the comment to go through?]
Also: This has got to be my new favourite Tested video series, even with just one part out! I’m glad I had a bit of a backlog of Tested videos to watch, since now there’s less time for me to wait for the next part… 😀 Keep up the good work! This is why I pay for the premium membership.
God damn it. So no links, huh? Anyway, it’s this one, assuming it goes through without the “http://”:
http://www.sparkfun.com/products/13119
that was my exact thought too, but the space is real tight. Think you’ll like our solution. Part 2 will be out soon!
Looking forward to your solutions, trying to get passed the spam filter is hard it seems. Was wanting to repeat comments about photo gates, mention a pcb slide switch and if there was room, maybe include a 6dof board.
#2?
being edited now!
Thank you for the Update.
So…. two weeks to edit a video?
Can we Has part 2 now please?
Awesome project!
Some ideas of mine while watchng the video:
Magnets loose their “force” when heated past the curie point (310°C for neodimium magnets I think) so be careful when soldering to them, Jeremy. Another thing is to isolate the magnets form the metal of the switch or the switch itself will act as a short. But I think since the switch has two parts, one of them being plastic covers that . Try to model a cover for the switch, then you dont have to worry about loose wires getting into its way.
Hope this helps. Awesome work and good to see all the tested crew pull together on this one.
This is sooo great! I really like how this build is pulling everybody in, seeing development of something from multiple angles at once is awesome.
It’s really fun to watch you guys figure this whole thing out. Great video.