


Bits to Atoms: Building the Millenbaugh Motivator, Part 4
Sean recaps the final printing of three Motivator pieces he built for Adam's Mecha-Hand project, the trip back to San Francisco to shoot videos with Adam, and one last-minute hiccup with the Motivator's crankshaft.
Your patience has paid off–it’s time for the final print of the Millenbaugh Motivator! All the measurements have been made, a rough version has been completed, the final version has been modeled and prototypes printed. After three months of work, it was time to get this delivered to Adam. And that meant making a flight back out to San Francisco.
For my previous prints, such as the Octopod and Jetcar builds, I’ve used the trusty Objet Connex500. It’s a high-end polyjet printer that can print in various materials–even rubber. But as much as I like this machine, I also had access to a 3D Systems ProJet 7000 HD which could print at even higher resolutions and in stronger material, all of which would be especially useful for the Motivator. The ProJet is a SLA (stereolithography) machine that prints by ‘drawing’ the part in a vat of liquid resin using a laser that solidifies the UV sensitive material. Once a layer is finished, the print platform sinks further down in the resin, a fresh layer of resin is distributed over the top and the laser draws the next layer. The resolution can be set incredibly high, and I was told the parts would be dimensionally accurate, meaning a hole modeled at 3mm in diameter would print at exactly 3mm.
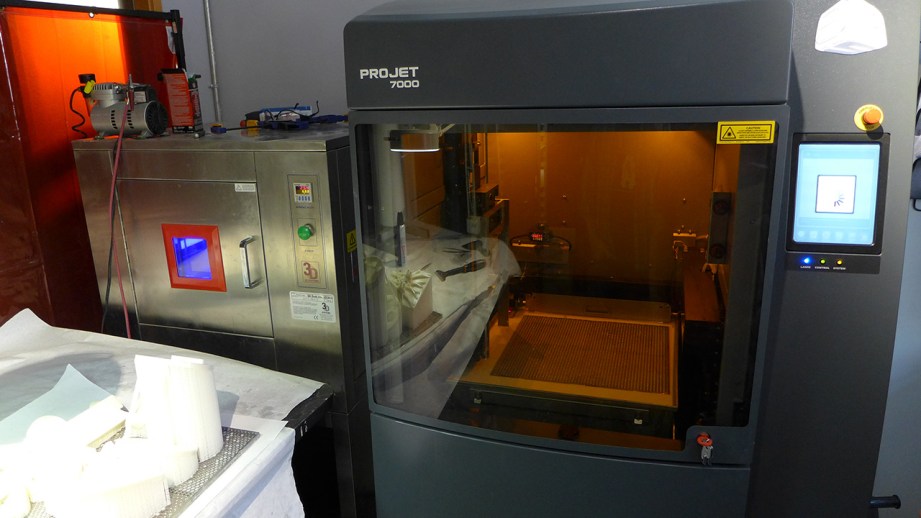
I was a bit skeptical of this claim, since typically you need to factor in some tolerances when modeling to accommodate the accuracy of the printer and behavior of the material. This has caused me frustration when 3D printing since a model built with tolerances for one printer won’t always print well on a different printer. I have done various versions of the same model with slight tweaks for different printers–an annoying and time-consuming task.
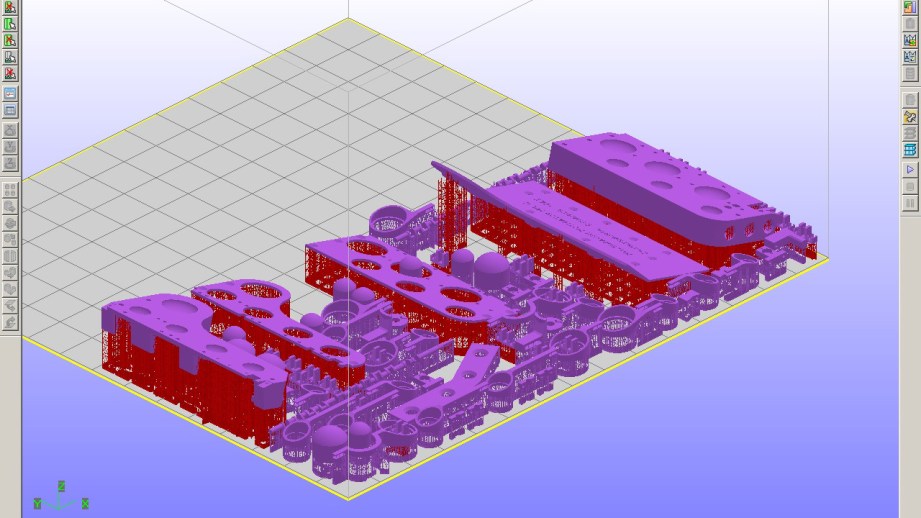
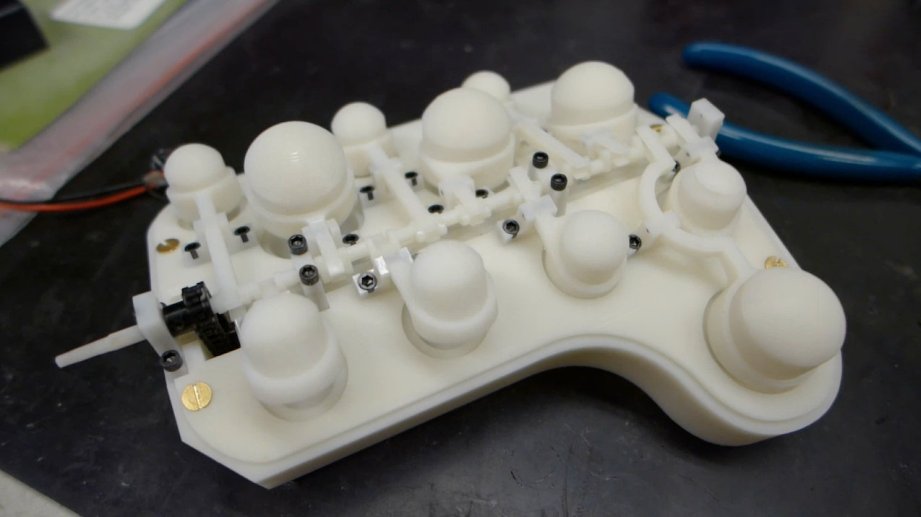
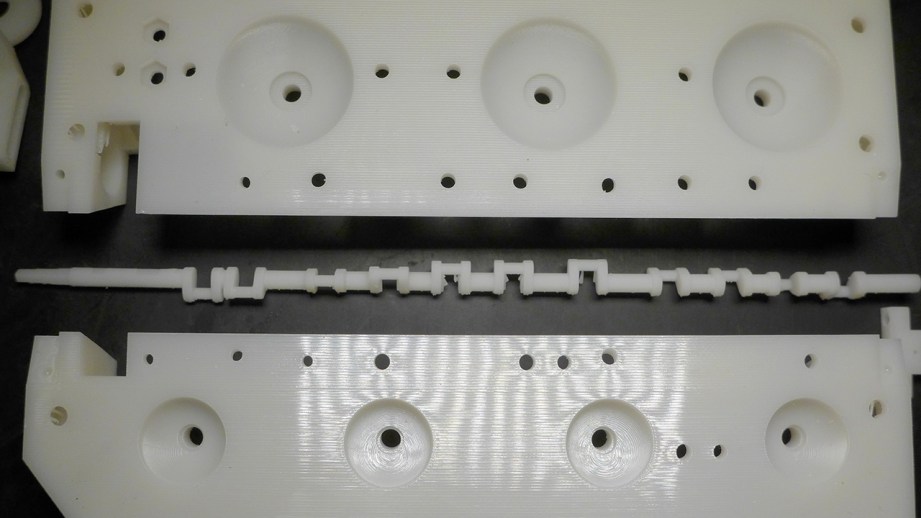
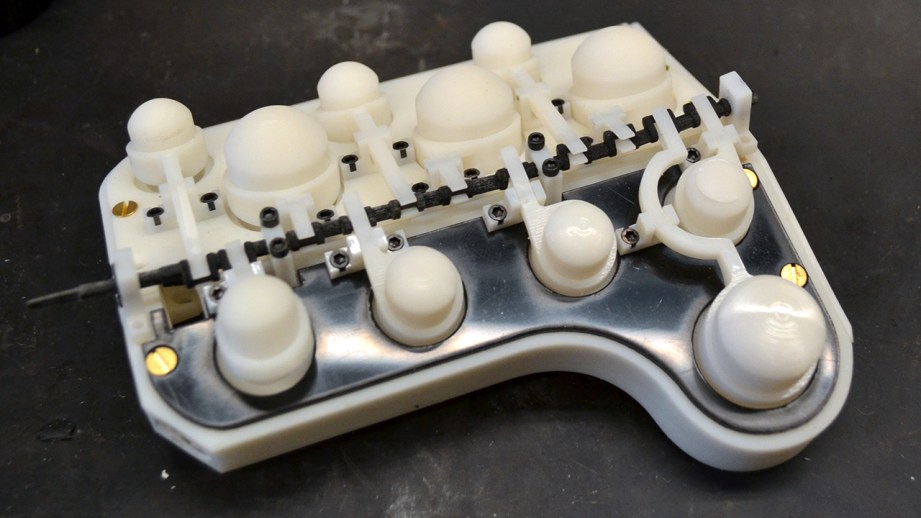
The plan was to do a test print of the Motivator, make any needed tweaks, and then print three final versions: one for Adam’s Mecha-Hand, one for Guillermo del Toro’s, and one as a back-up. This would be the first time I was able to print the crankshaft so I was anxious to get the test print. All the parts were laid out in the print software, oriented and supports were automatically generated. The ProJet uses a lattice-like support structure for each part since they can’t be floating around loose in the resin tank. The support is very fine and easy to remove but it helps to orient parts with hidden surfaces facing down toward the print bed. This way, visible surfaces will be as smooth as possible.
One complete block with a few extra parts took about 12 hours to print.
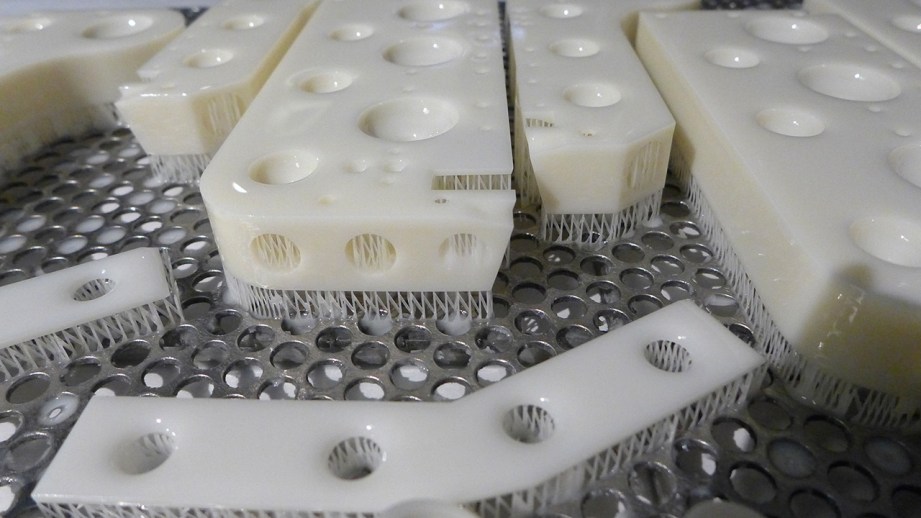
One complete Motivator with a few extra parts took about 12 hours to print. When the parts come out of the printer they’re covered in liquid resin from the tank and must be washed in alcohol. After cleaning they are ‘baked’ in an UV ‘oven’ for a few minutes to ensure the resin is completely set. Even after that, I found the parts were slightly tacky and needed to be hand scrubbed with some more alcohol and they still took a few more days until they were tack-free. The parts were gorgeous, the nicest 3D prints I have ever done, and they were indeed dimensionally accurate as every piece of hardware fit perfectly. The crankshaft even looked great but it had a good bit of flex to it due to the print material.
The test parts assembled exactly as planned and the crankshaft fit with only minor clean-up needed. There was no way that I was going to build the test Motivator and immediately fire up the motor, so I had made a handcrank that would slip on the end of the crankshaft to test it manually. I gently rocked the handle back and forth and the Motivator made a bunch of terrible squeaks and refused to budge. There was too much ‘gription’ between all the plastic parts but a drop of light oil on each crank pin made everything work! The crankshaft did flex a bit but I think that actually helped more than hindered. I installed the motor, adjusted the chain tension and ran the Motivator under power at a moderate speed successfully, so I shot a quick video and sent it off to Adam–he was pleased!
Manual crank test of Motivator for Adam.
With the success of the fully functional test print, it was time to print the final three to take to San Francisco. The test print turned out so well that I only made a few slight tweaks for the final print. I also decided to laser cut the top plates to save some time and money and it was easy to do since I had modeled the plates using splines. Laser cutters typically use 2D line drawings as the cutting file, so the splines translated perfectly. Since I had used standard material thicknesses when modeling, I was able to easily cut the plates from ABS sheets at a fraction of the cost of 3D printing.
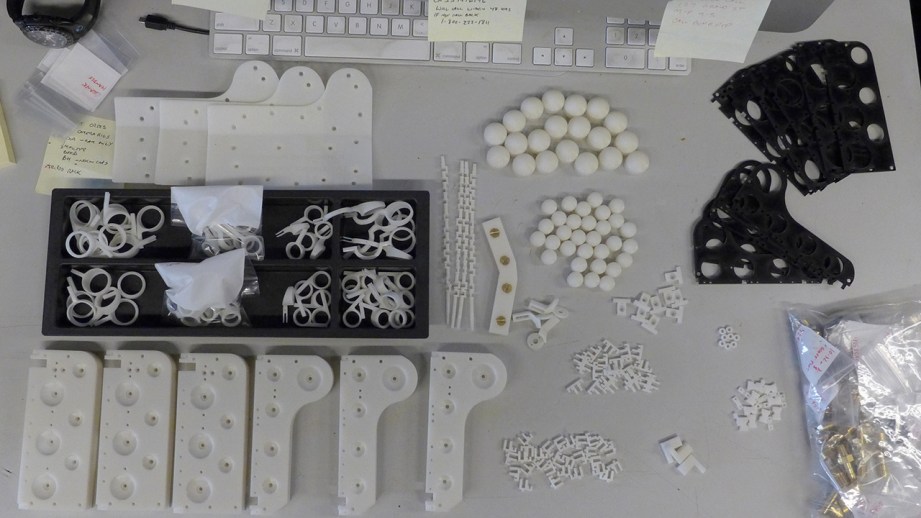
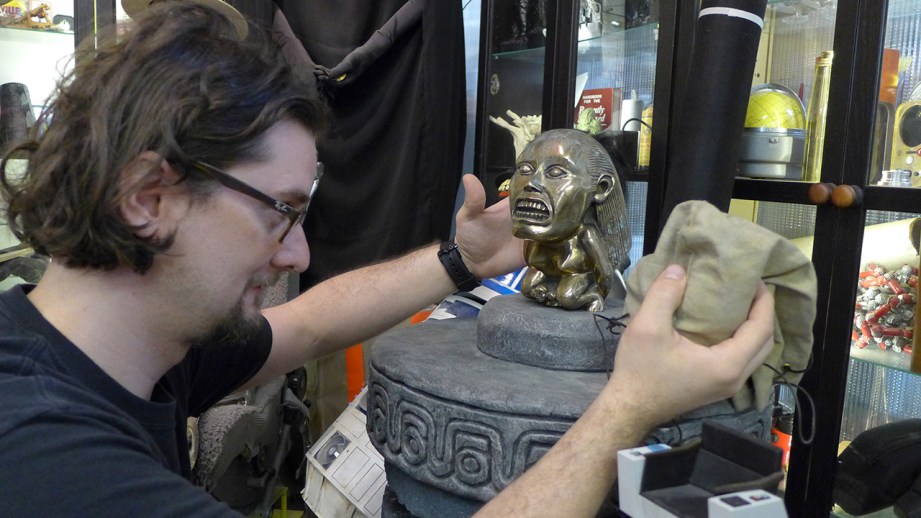
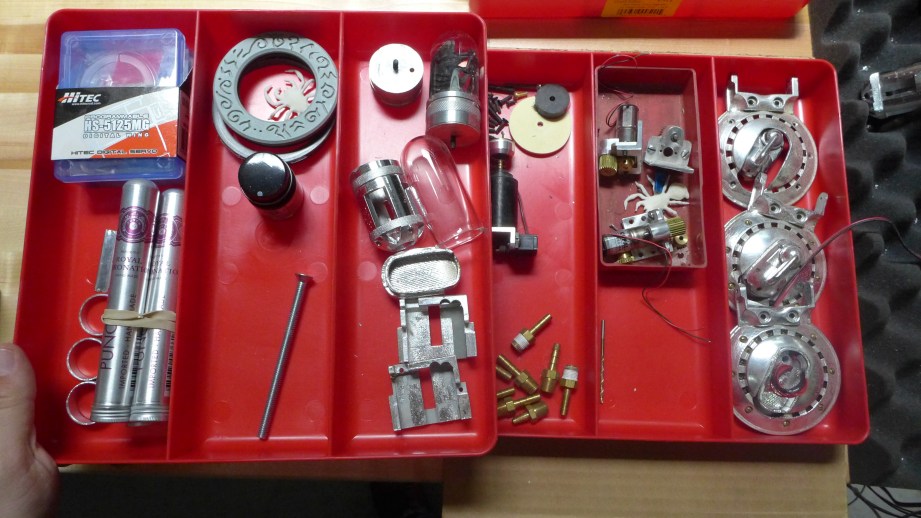
Originally, Adam wanted me to build one motivator and bring the parts for the other two but the prints were finished so close to the deadline that I wasn’t able to put one together. All the parts got a final alcohol scrub, sorted and packed in my carry-on bag (there was no way I was trusting these in checked luggage). I had a bag bulging with weird parts, in addition to my Curta calculator and Nagra spy recorder–it looked like a crazy person’s bag on X-ray, but they just waved me through at the airport. My wife and I spent two great days at Adam’s shop and I was able to fully enjoy the experience this time. As you all know, it’s a wonderland for people such as us and I took a ton of photos and tried on a bunch of his stuff. As a super-awesome bonus, that was the same weekend that Marty Cooper did his augmented-reality animation in the shop. Marty was very nice and fun to watch at work.
Adam and I sat down and went through all of the parts. He was really happy with the quality and immediately started testing the finish of Rub n’ Buff on a few pieces. He was happy enough with the 3D printed valve domes that he ended up using them instead of the cigar tubes–I’m sure they’ll find their way into another project. We shot our video discussing the Motivator and Adam put it through its paces. I had been running the motor at 3.7 volts and Adam cranked it to 12. I was convinced it was going to fly apart or start smoking, but it made it through in one piece. He showed me all the loose parts used for the Mecha-Hand and even offered me some extras. I was so tempted, but I know that I will never build the entire prop myself, so I told him to offer them up to those on The RPF who are actually building Mecha-Hands.
My wife Kate and I also got to spend quality time at the Tested office where Norm and I shot Show and Tell videos for the previously mentioned Curta & Nagra. Norm was a great host–Kate and I had the honor of experiencing the highly disappointing Comic-Con exhibit with Norm and his girlfriend at the Oakland Museum of California, although they made up for it with a great Giant Robot exhibit. Since Adam and I didn’t get the chance, I built an entire Motivator on-camera for Tested Premium Subscribers. Our five days in San Francisco were absolutely fantastic and a nice wrap-up to three months of work!
A week or so later, Adam had some bummer news: after painting and assembling everything he was unable to overcome the additional friction the paint added and the Motivator wouldn’t run. Luckily, that same week, online 3D printing service Shapeways had changed some of their restrictions for printing metal and I was able to finally place an order for a 3D printed bronzed steel crankshaft. I had high-hopes that his would fix our problem but it wasn’t quite what I expected. Metal 3D printing at a level I can afford is not very precise–plastic printers have better accuracy. This has a lot to do with how the process works; a metal powder is glued together, layer-by-layer, and then it’s fired which fuses the whole thing together. During this process the metal can drastically change dimensions which is what happened with the crankshaft. It looked great at first glance–especially the finish which was perfect for the Motivator–but dimensionally it was 1.5mm shorter than it should be! I double-checked the stats on this material and sure enough, the accuracy was +/- 1% which the 1.5mm difference fell into.
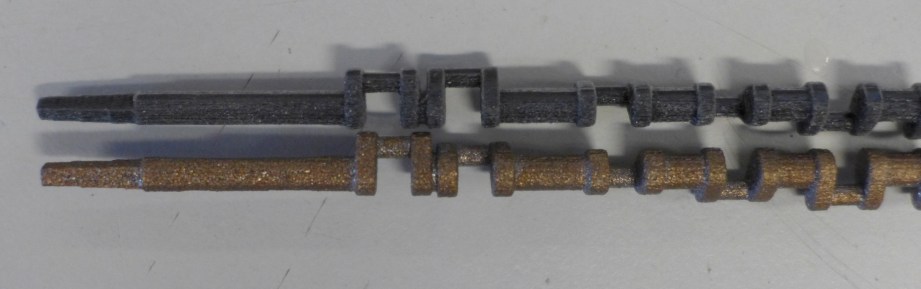
I’m working on a new version of the crankshaft with larger tolerances and higher strength and will be trying another print soon. Ultimately, Adam said that if all else fails he’ll make the crankshaft by hand, at least the 3D printed version is a good guide. Adam was able to finish up a non-running Motivator for the Mecha-Hand reveal at the Tested Incognito party. I was really impressed by how good the Motivator looked after painting and weathering. Now I had to try it myself, but that’s a story for next time!


13 thoughts on “Bits to Atoms: Building the Millenbaugh Motivator, Part 4”
Leave a Reply

One Day Builds
Adam Savage’s One Day Builds: Life-Size Velocirapt…
Adam embarks on one of his most ambitious builds yet: fulfil…

Show And Tell
Adam Savage’s King George Costume!
Adam recently completed a build of the royal St. Edwards cro…

All Eyes On Perserverance – This is Only a Test 58…
We get excited for the Perserverance rover Mars landing happening later today in this week's episode. Jeremy finally watches In and Of Itself, we get hyped for The Last of Us casting, and try to deciper the new Chevy Bolt announcements. Plus, Kishore gets a Pelaton and we wrack our brains around reverse engineering the source code to GTA …

One Day Builds
Mandalorian Blaster Prop Replica Kit Assembly!
Adam and Norm assemble a beautifully machined replica prop k…
House of MCU – This is Only a Test 586 – 2/11/21
The gang gets together to recap their favorite bits from this past weekend's Superb Owl, including the new camera tech used for the broadcast and the best chicken wing recipes. Kishore shares tips for streamlining your streaming services, and Will guests this week to dive into the mind-bending implications of the latest WandaVision episod…

One Day Builds
Adam Savage’s One Day Builds: Royal Crown of Engla…
One of the ways Adam has been getting through lockdown has b…

Making
Adam Savage Tests the AIR Active Filtration Helmet…
Adam unboxes and performs a quick test of this novel new hel…

Making
Weta Workshop’s 3D-Printed Giant Eyeballs!
When Adam visited Weta Workshop early last year, he stopped …

One Day Builds
Adam Savage’s One Day Builds: Wire Storage Solutio…
Adam tackles a shop shelf build that he's been putting off f…

Show And Tell
Mechanical Dragonfly Automata Kit Build and Review
Time for a model kit build! This steampunk-inspired mechanic…
It looked great at the Incognito party, I was surprised when I heard it was all 3d printed 🙂
Great series, Sean! A little hiccup I found, though: the link to the Nagra Spy Recorder video actually links to the Curda Calculator video. Oops!
Fixed. Thanks!
“Ultimately, Adam said that if all else fails he’ll make the crankshaft by hand, at least the 3D printed version is a good guide.”
Would love to see a video of the process!
I was surprised by how well mine turned out – I generally dread finishing work. More on that next week.
whats the core diameter of the crankshaft? Would it be possible to either print it in lobes, and then slot them into each other with a flexible glue/adhesive, So that you can maintain hardness. Or are we talking about something that is so small to begin with that your just at the limits of the materials?
Also depending on your plans for it. You might find it costs about the same to have a machinist do it or cnc the part that way.
The main shaft is 3mm dia and the crank pins for each valve is 1.8mm – it’s more of a constraint with the accuracy of the printer and behavior of the material.
Wow those are definitely some tight tolerances, definitely increase the amazement factor that you managed to get that printed in the first place somewhat accurately and with enough strength.
Hey Sean, FANTASTIC WORK! Great documentation of the process. I know how challenging it can be to stop and remember to write down your progress and take pictures.
Oh, yeah, and major DREWL on having access to the ProJet 7000!
I’ve been turning some small parts on my lathe and the more that I look at that crankshaft, the more it looks like it would a nightmare to machine out of one piece, even with a CNC machine. The fact that none of the cranks are on the same rotation and the piece can’t be held by a follow rest would make turning out of one piece very tricky. I think that you would have to change setup for every crank. It’s easy to see why the crank was made the way it was. As it was the little shaft I was turning, which was being cut from 1/4 stock to long taper was springing at least .03 as I moving along a shallow cut.
Yeah, it looks like the original had each lobe machined and then soldered together with the connecting rods. Can’t believe it was all for a prop!
That’s really amazing. Do you have any other blogs where I can find 3d scale Models.