


The Volpin Project, Part 13: Weathering the Needler
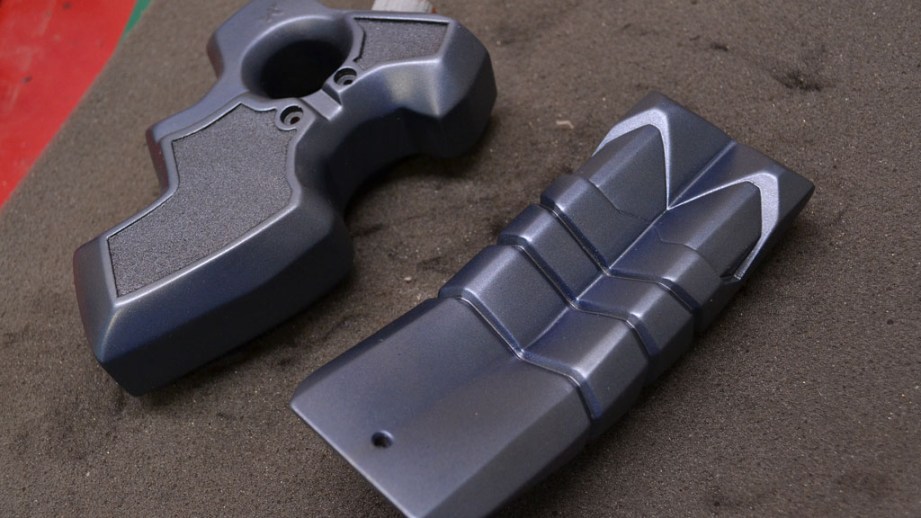
All the Halo Needler prop parts are basecoated, shiny and new, and they just require a little bit of faux history infused into them to complete the transformation from plastic to replica. One part storytelling and one part fakery, this is the process known as weathering.
Ladies and gentlemen, we are at the home stretch! All the Halo Needler prop parts are basecoated, shiny and new, and they just require a little bit of faux history infused into them to complete the transformation from plastic to replica. One part storytelling and one part fakery, this is the process known as weathering.
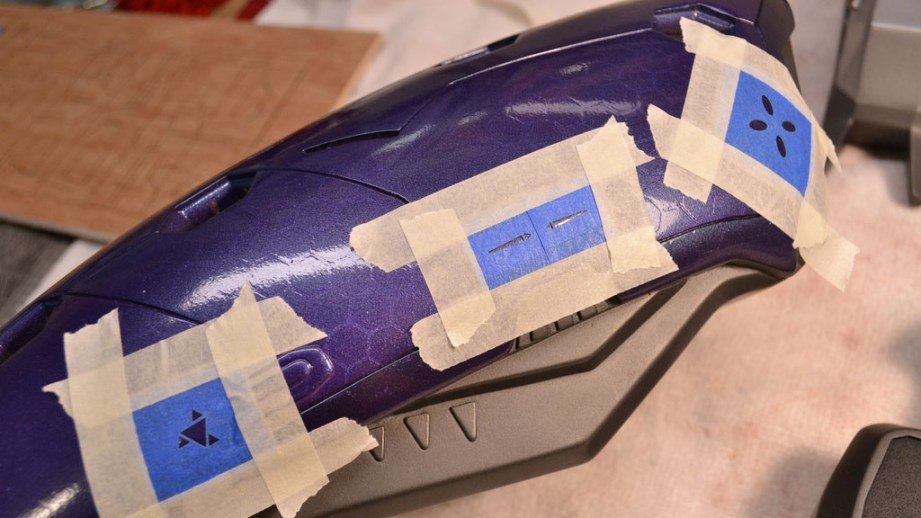
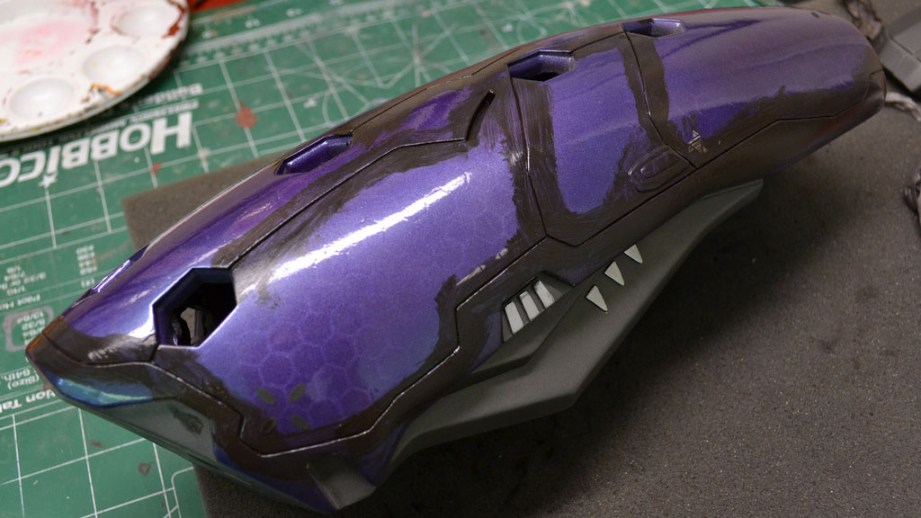
If you’ve got any decals or smaller detail paintwork to complete, this is the time to do it. The Needler has a few highlight areas scattered here and there across its surface; you might recall I used tiny pieces of vinyl on the master sculpts before molding. These need to be painted silver, so I made up a few paint masks (laser cut masking tape!) and airbrushed the details.
The handle and lower detail prong are a slightly blue tint in the official artwork, so these needed another quick pass with the airbrush as well to give them their proper color. Testor’s metallic blue was used, mixed 50/50 with satin enamel clearcoat in order to get a semi transparent layer.
Back when I first started making props, the weathering process mostly involved smearing black and brown paint over the surface of something. While I still do that, there are a few steps and refinements I’ve learned along the way which have made my final paintjobs more realistic.
Weathering Tip #1: Dirt isn’t brown, and don’t use black straight form the tube. People who do more traditional art will be better versed in the nuances of color theory, but the general jist is that dirt and grime have values of blue, red, green, and yellow mixed throughout. A close look at rust reveals similar attributes; lots of dark purples mixed with bright oranges and yellows. For the “dirt and grime” segments of weathering, my preference is to use acrylic paints.

The best way to duplicate a realistic shade of brown is to mix your own to suit the piece you’re making. HALO takes place over a variety of environments, but for this prop I wanted the Needler to look like it had lived aboard a ship for the greater part of its life, then been deployed to one of the more forested areas of the ring. The brown areas should be dark to imitate mud or fine rich soil that had been cleaned away over time. When weathering a piece, consider where grime and gunk will build up over time. Most typically, in the creases and recessed areas.
Starting off I brush a very heavy coat of paint into seam lines and intersecting planes. In reality, these areas would be the hardest to clean in the field and would collect the most grit and mud.
Weathering Tip #2: Consider the history of the piece and the actions of its owner. If you’re a HALO fan, you might be saying now “Hey, Master Chief is, like, the perfect soldier, man! He wouldn’t let his weapon be so dirty!” and you’d be right, but the Needlers belong to the Covenant, and I doubt a Grunt would spend the time to properly strip down and clean a sidearm. These are ground troop items and they’d be scattered about haphazardly, scuffed and dirty.
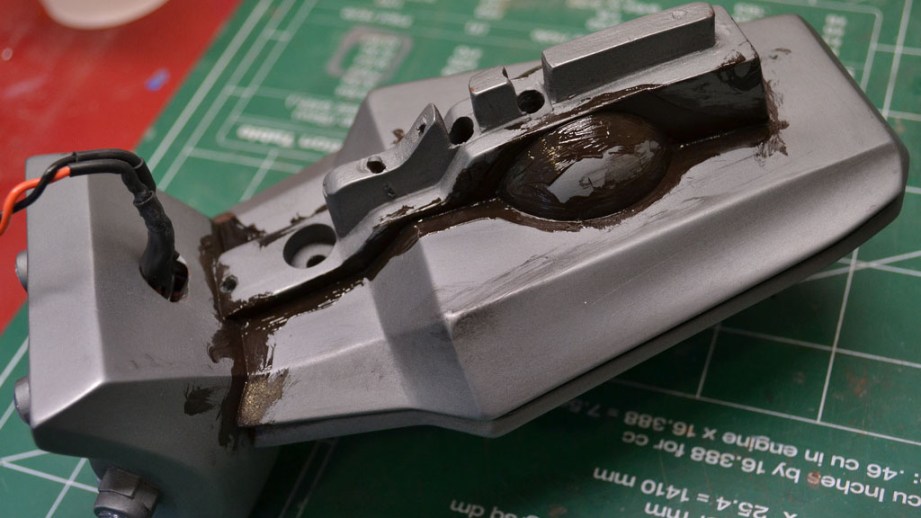
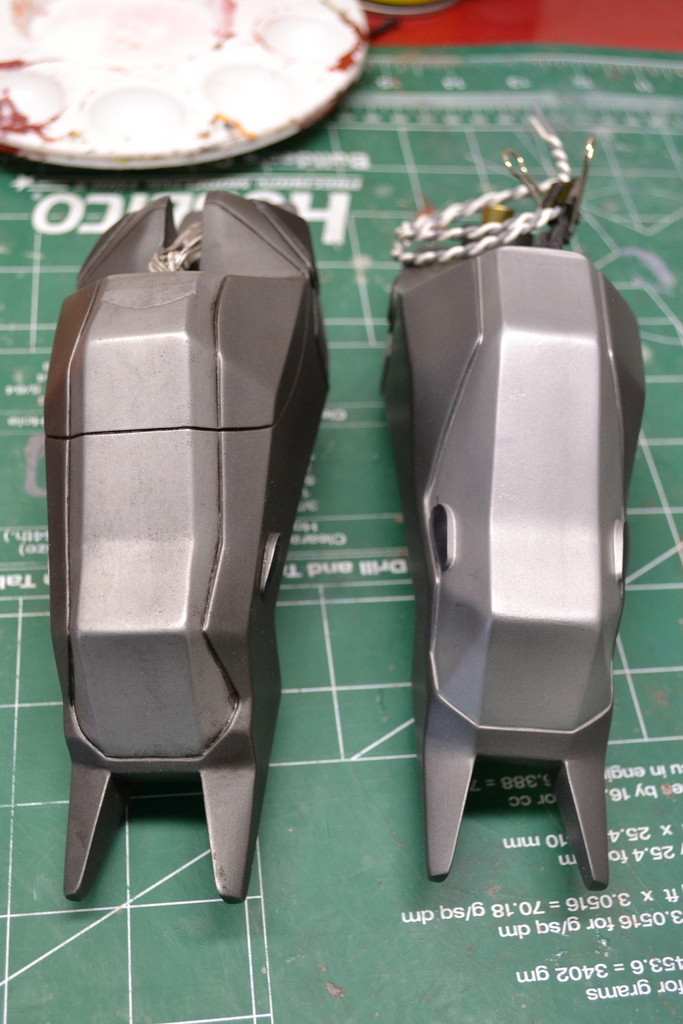
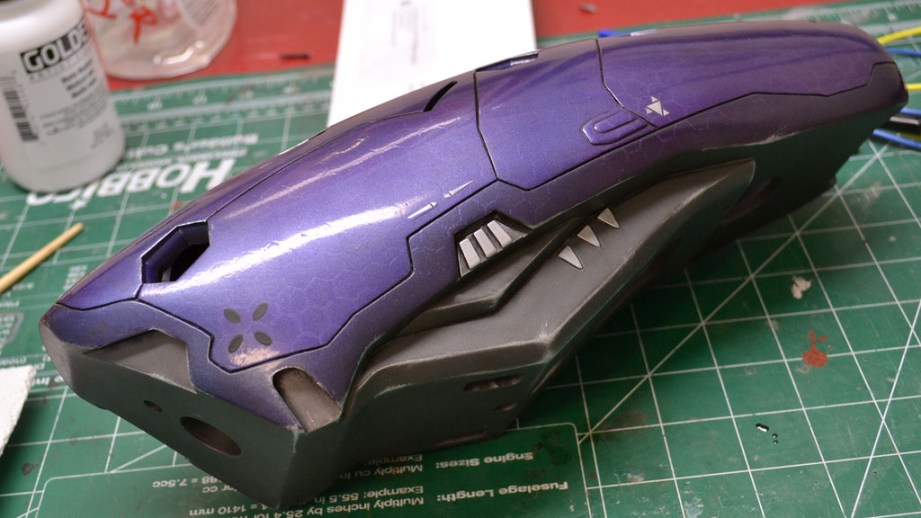
We can all agree that a big swipe of paint across the surface of a part isn’t terribly realistic, and after letting these big globs dry for a minute or two, I use (Weathering Tip #3!) a wet paper towel to wipe away excess paint from raised areas. This has two benefits – the paper towel will not press easily into recessed areas and will leave residual paint behind, and a wadded up paper towel gives any blotting motion a nice random texture. The image image shows a comparison shot between fresh paint and one pass of grit.
I actually did a little time lapse video of this with an older project a few years back. While a bit of my technique has changed, the basic steps are still relevant.
You may need to add many layers of dirt and grime to get the proper amount of crud on your prop. Varying the hue and tone across passes will add more realism, so don’t just use a single pass of brown. Situationally you might choose to seal in the weathering with a clearcoat–acrylic paint is more fragile than the enamel and lacquer used on the basecoats, and lots of handling will eventually wipe it away. The higher traffic areas on the Needler were clear coated with matte acrylic.

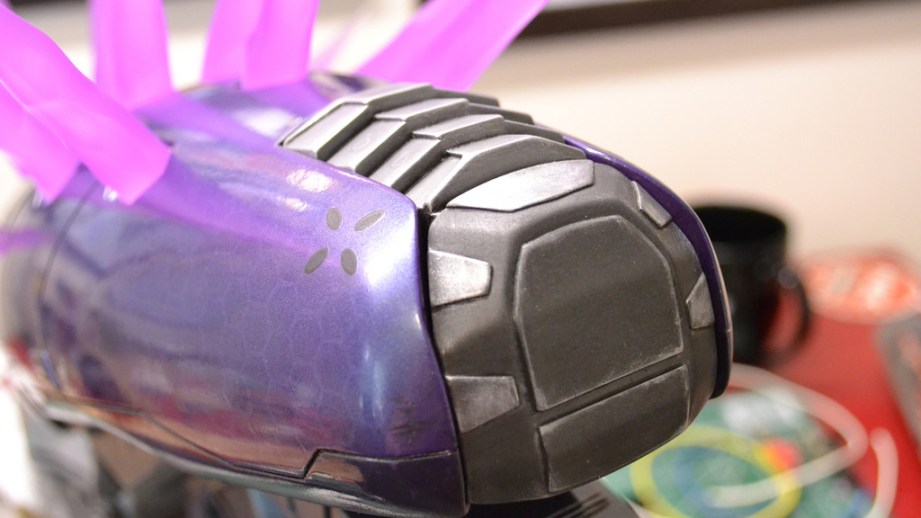
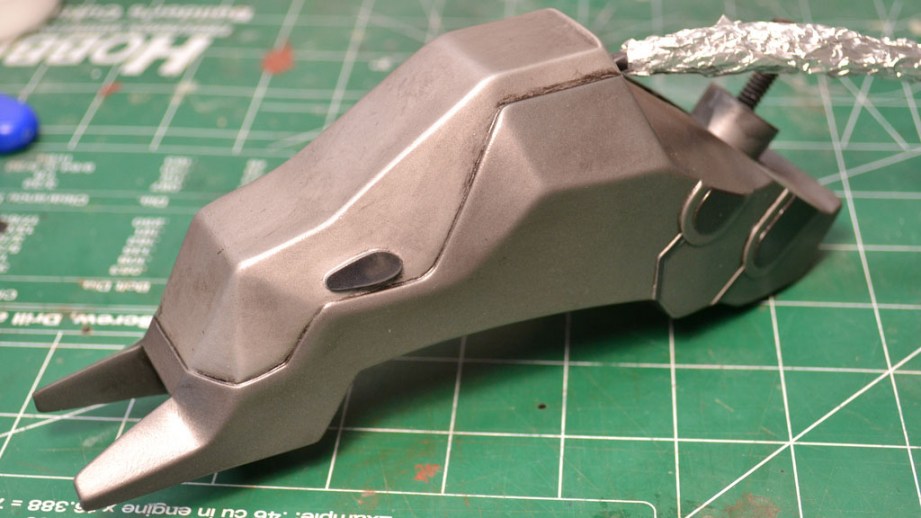
Once the base weathering is complete, the final step (and my personal favorite) is drybrushing. Drybrushing in this case is the process of using silver paint on higher edges of a prop to simulate scuffed paint and the metal areas beneath. This is another process where you’ll need to consider the life and utility of the item you’re creating; a pistol would have a lot of scuffs around the trigger, trigger guard, magazine well, safety, ejection port, etc. Areas that would be handled often or would be in danger of contacting an abrasive surface when the weapon is set down should show signs of wear and tear.
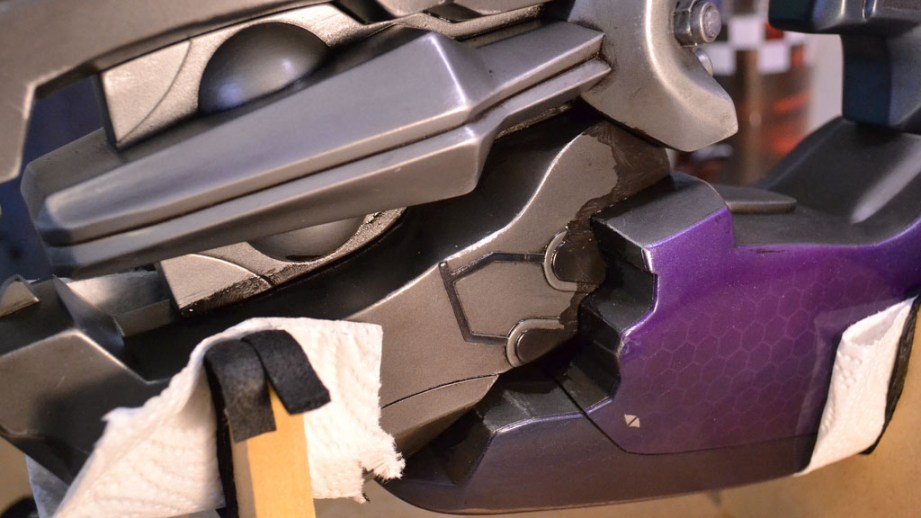
Shown above is the upper emitter – silver enamel has been used on the protruding edges to simulate scuffs and abrasion in the metal. Parts that stick out further–like the forward prongs–would have more damage and are given a heavier treatment of silver.
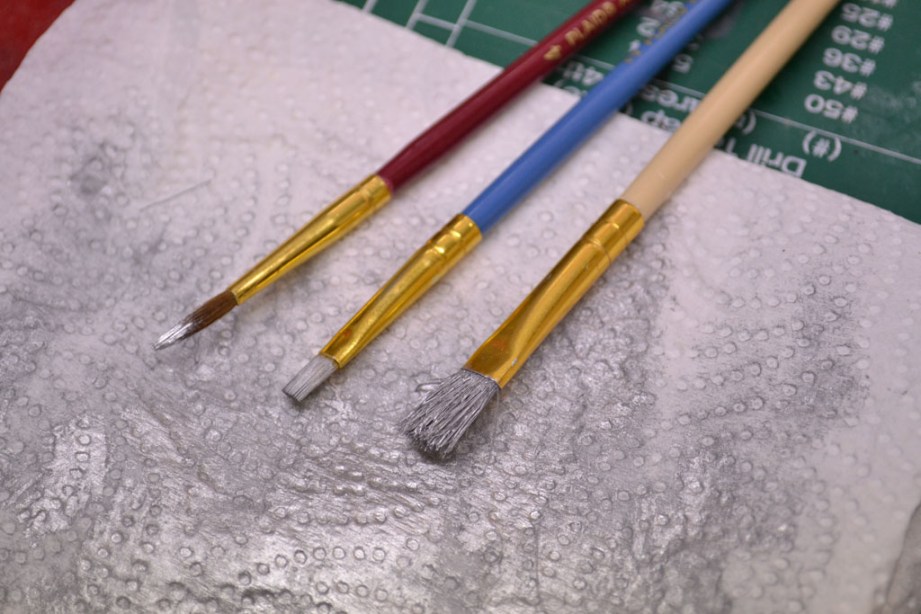
WeatheringTip #4: Drybrushing requires very little paint to work properly and, in my experience, is best done with a rougher brush. After dipping your paintbrush into the silver, the lion’s share of the paint should be sponged out of the brush with a paper towel. What you’re after is a very light coating that will just slightly dust the corners of your prop when the brush is dragged against it. Too much paint will produce thicker chunky streaks of silver and end up looking very fake.
Keen-eyed observers will notice that all of these parts are being weathered before assembly, and that process has benefits and detriments. You’ll be able to more easily reach the entire piece you’re weathering without having to worry about missing any recessed areas, but you also need to be aware of how the parts will fit together later on to make sure the weathering makes sense. Drybrushing a high point on one piece may make sense when it’s separate, but that part might not actually protrude once assembled. For example, the upper casing of the Needler wouldn’t really have many metallic scuffs on its upper side, since the protruding needles would keep it from touching the ground.
Weathering should continue after you’ve assembled your prop. Intersections between components will need another pass of dirt and grime, and you might notice certain protrusions that need a bit of drybrushing as well.
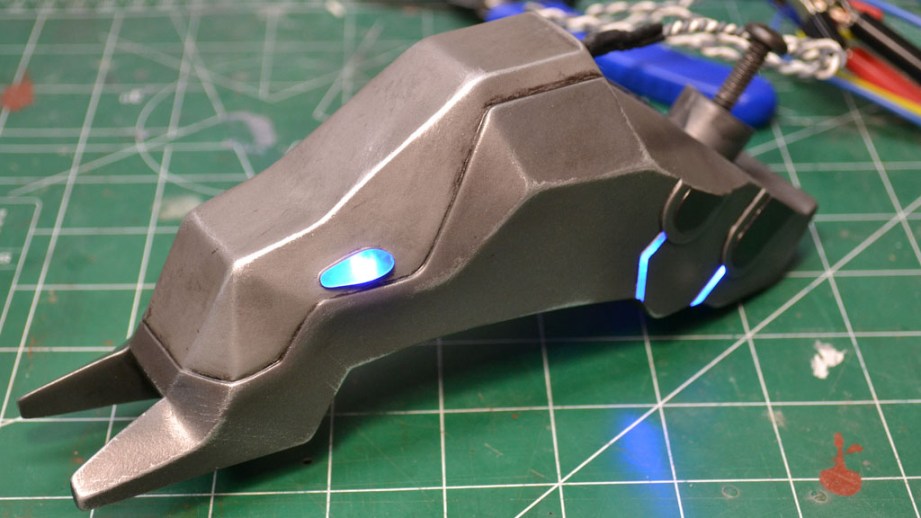
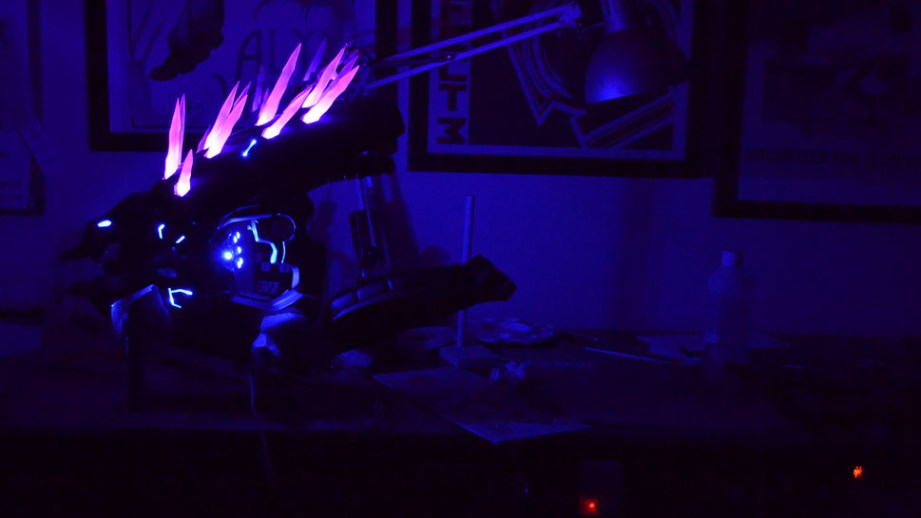
Assembly is another topic altogether, and the Needler will need many hours of bolting, screwing, gluing and clamping before it’s ready to be wielded. Now, I may have gotten a bit excited and already completed all of those steps. I may even have the completed Needler sitting right next to me as I type this, happily illuminating my entire workshop. You’ll see the fruits of my crazed building frenzy in the next installment: final assembly!
The Volpin Project, Part 1: Introductions
The Volpin Project, Part 2: References and Blueprinting
The Volpin Project, Part 3: Selecting Materials
The Volpin Project, Part 4: Taking Shapes
The Volpin Project, Part 5: Bondo Strikes Back
The Volpin Project, Part 6: Details, Accents, Refinements, and Mockups
The Volpin Project, Part 7: Introduction to Moldmaking
The Volpin Project, Part 8: More Complex Moldmaking
The Volpin Project, Part 9: The Casting Process
The Volpin Project, Part 10: Illumination and Audio
The Volpin Project, Part 11: Prepping for Paint
The Volpin Project, Part 12: Finally Time to Paint


8 thoughts on “The Volpin Project, Part 13: Weathering the Needler”
Leave a Reply

One Day Builds
Adam Savage’s One Day Builds: Life-Size Velocirapt…
Adam embarks on one of his most ambitious builds yet: fulfil…

Show And Tell
Adam Savage’s King George Costume!
Adam recently completed a build of the royal St. Edwards cro…

All Eyes On Perserverance – This is Only a Test 58…
We get excited for the Perserverance rover Mars landing happening later today in this week's episode. Jeremy finally watches In and Of Itself, we get hyped for The Last of Us casting, and try to deciper the new Chevy Bolt announcements. Plus, Kishore gets a Pelaton and we wrack our brains around reverse engineering the source code to GTA …

One Day Builds
Mandalorian Blaster Prop Replica Kit Assembly!
Adam and Norm assemble a beautifully machined replica prop k…
House of MCU – This is Only a Test 586 – 2/11/21
The gang gets together to recap their favorite bits from this past weekend's Superb Owl, including the new camera tech used for the broadcast and the best chicken wing recipes. Kishore shares tips for streamlining your streaming services, and Will guests this week to dive into the mind-bending implications of the latest WandaVision episod…

One Day Builds
Adam Savage’s One Day Builds: Royal Crown of Engla…
One of the ways Adam has been getting through lockdown has b…

Making
Adam Savage Tests the AIR Active Filtration Helmet…
Adam unboxes and performs a quick test of this novel new hel…

Making
Weta Workshop’s 3D-Printed Giant Eyeballs!
When Adam visited Weta Workshop early last year, he stopped …

One Day Builds
Adam Savage’s One Day Builds: Wire Storage Solutio…
Adam tackles a shop shelf build that he's been putting off f…

Show And Tell
Mechanical Dragonfly Automata Kit Build and Review
Time for a model kit build! This steampunk-inspired mechanic…
It really is a beautiful process seeing this come to life.
Gorgeous.
Just awesome.
Super cool!
I am always reluctant on the weathering stuff, but once it is done it always looks that little bit better than a clean new model.
Christ! Looks beautiful!
Your work is always on a whole different level man. So sick.
im wondering how is the honeycomb texture for the top body(purple part) achieved?