


The Volpin Project, Part 14: Putting It All Together
Weathering, painting, sculpting, molding, sanding and casting... it's all come down to this. After several months of building and finishing the Halo Needler prop's numerous components, it's time to bolt all the parts together and transform the mishmash of plastic bits into a complete and whole prop. Let's get to it!
Weathering, painting, sculpting, molding, sanding and casting… it’s all come down to this. After several months of building and finishing the Halo Needler prop’s numerous components, it’s time to bolt all the parts together and transform the mishmash of plastic bits into a complete and whole prop. There are 24 bits that need to be assembled in a very specific order, and that doesn’t count any of the screws, wires, circuit boards or other electrical components. Let’s get to it!
If you recall, back in Part 11, I spent a lot of time figuring out how everything fit together, along with cutting out proper holes for switches and other components. Several fit checks and dry assemblies (that means piecing together with no glue) were tested to make sure everything would align properly before painting and weathering was applied. That made this process much, much easier.
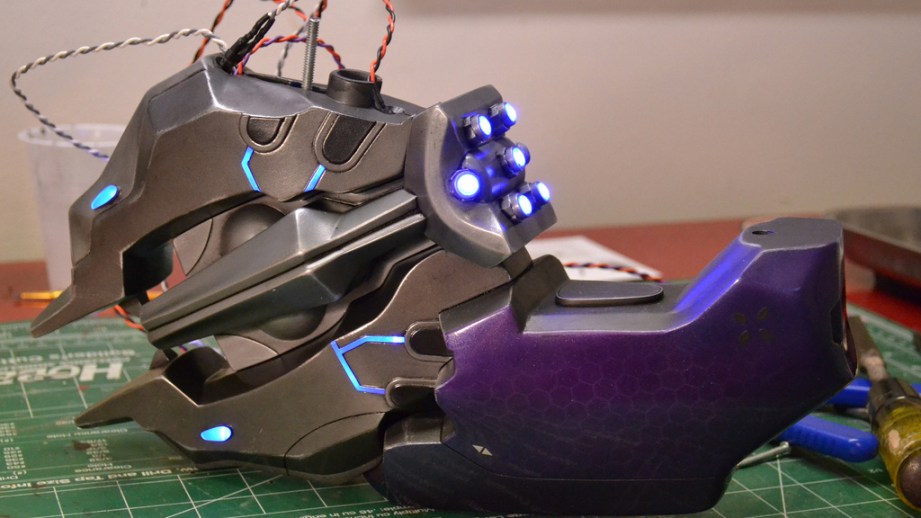
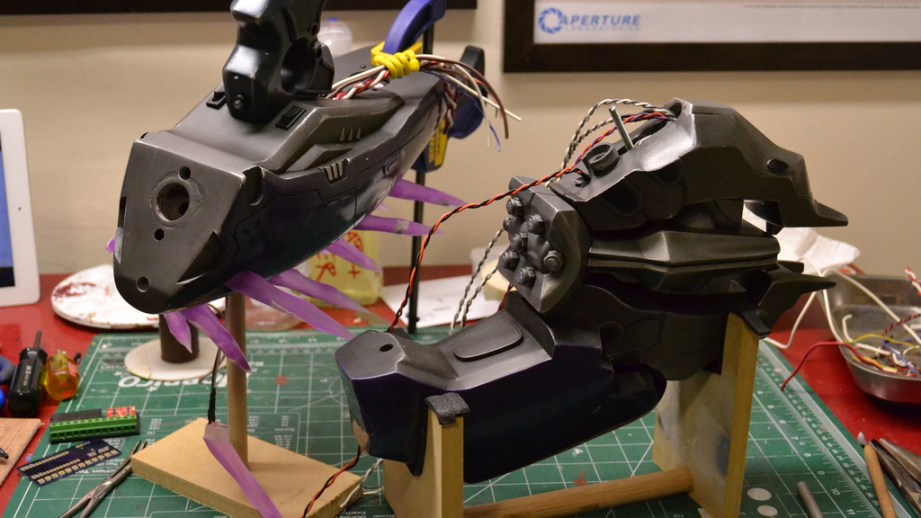
It’s best to have a plan for this stage of assembly. Much in the same way any IKEA flat-pack furniture has an order in which pieces go together, the Needler can only be assembled one way, in one order. First, all of the illumination has to be sorted, and that means securing LEDs and routing their respective wires through the channels drilled in each part back when the mounting solutions were sorted out.
Some parts are much easier than others. The middle “barrel” piece has seven oddly placed bulbs which needed a lot of wrangling to get the wires to go the proper direction.
The upper casing was similarly complex. I actually sorted out a lot of this a while back before the Needler was painted. Since the recesses in the upper casing were made by vacuum-forming over acrylic hexagons, I laser cut a second set to fit back into these holes.
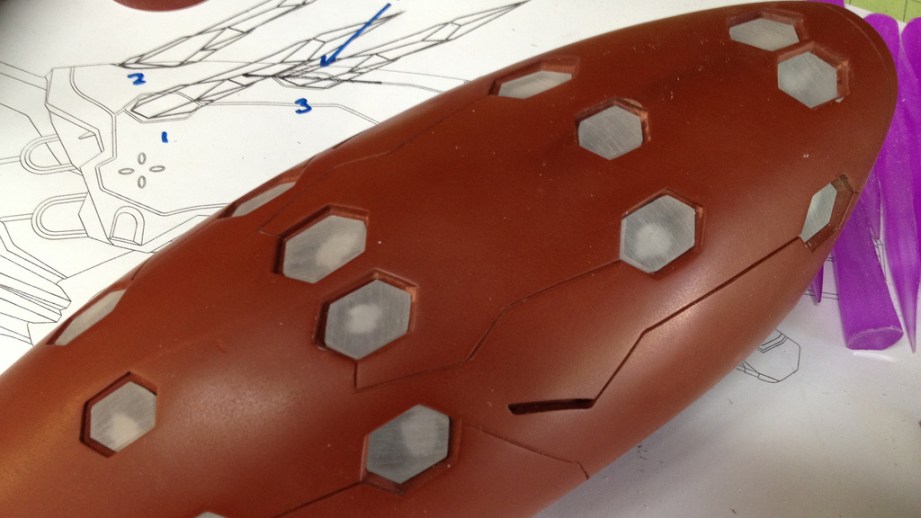
Each needle was cut individually to its proper length and angle then glued to these acrylic inserts with superglue. In testing this (“testing” means I glued one set together wrong and had to pry them apart) I found that a hammer and chisel were needed to separate the two parts once the glue cured. Seems strong enough!
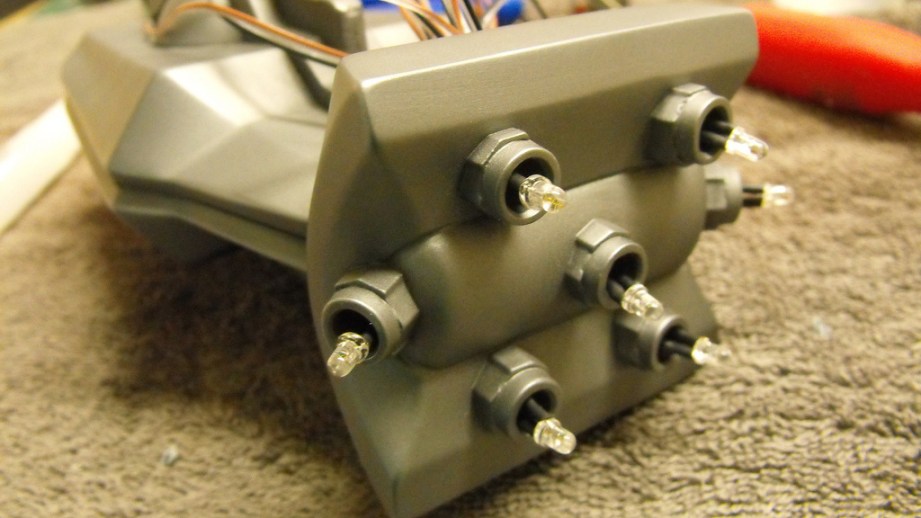
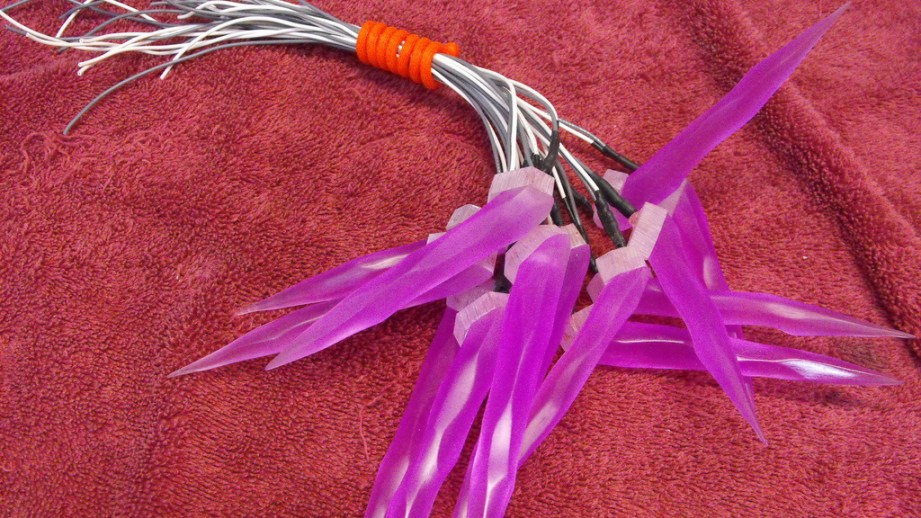
5 mm holes were then drilled into each mounting plate at an angle parallel with the direction of the needle. These were the recesses for the pink LEDs, which were also secured with superglue.
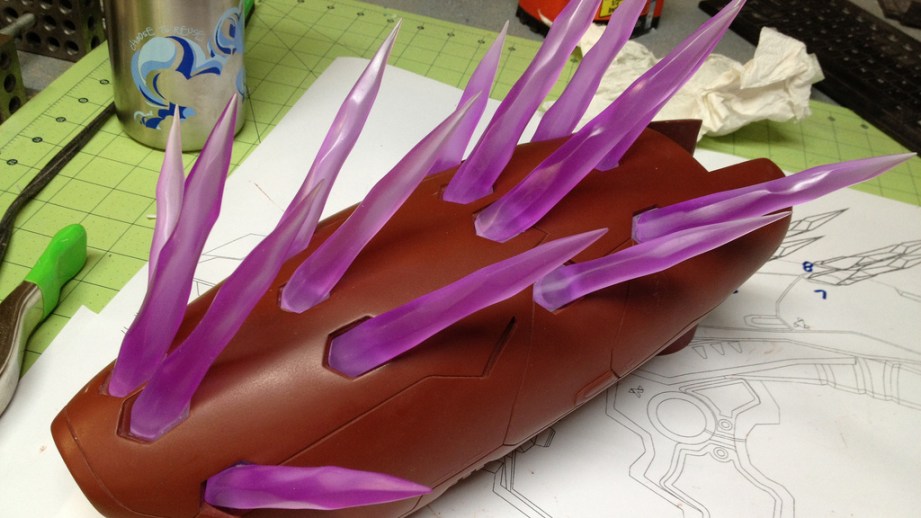
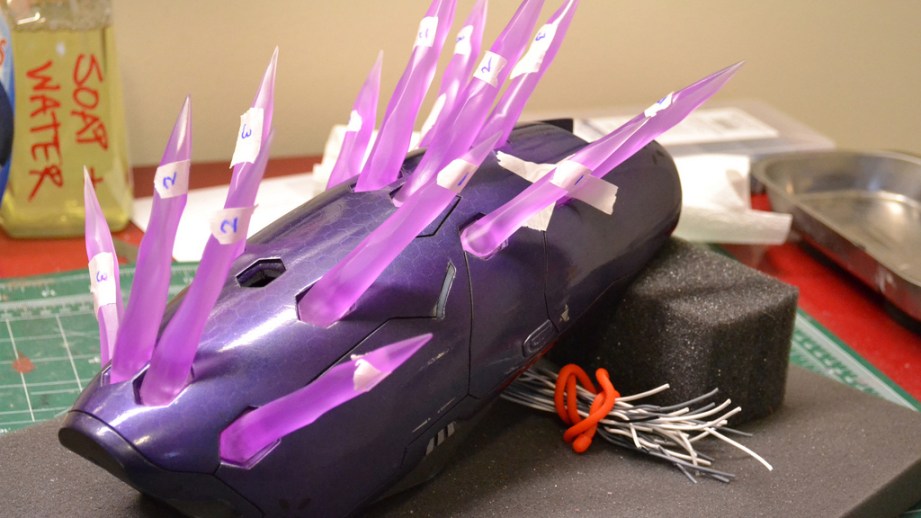
Each individual needle was glued into the casing using 5-minute epoxy. Numbered pieces of tape were applied to each so I knew which needles had been curing for longer; I could only mount three at a time without possibly bumping into adjacent pieces and knocking them out of alignment. You’ll notice one missing needle in the middle center; this was left out intentionally as that opening is used later on to tighten screws on the handle and upper emitter. Once those pieces were mounted, that needle was then epoxied in place.
When you’re using any sort of glue to secure parts together, make sure to scrape away any paint where you’re going to be applying your adhesive until the bare material is exposed. This makes sure the material itself is bonding to the epoxy, instead of bonding the epoxy to a thin layer of paint which will eventually break away.
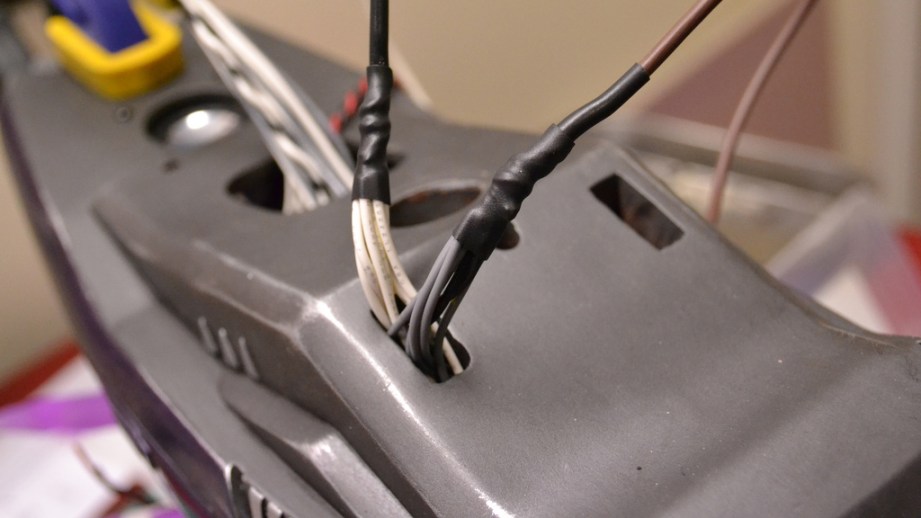
There were a lot of wires coming out of the parts at this stage, and it wasn’t necessary to run every single line to the power supply or circuit board individually. Bridge individual power and ground connections into single lines to make routing power much easier.
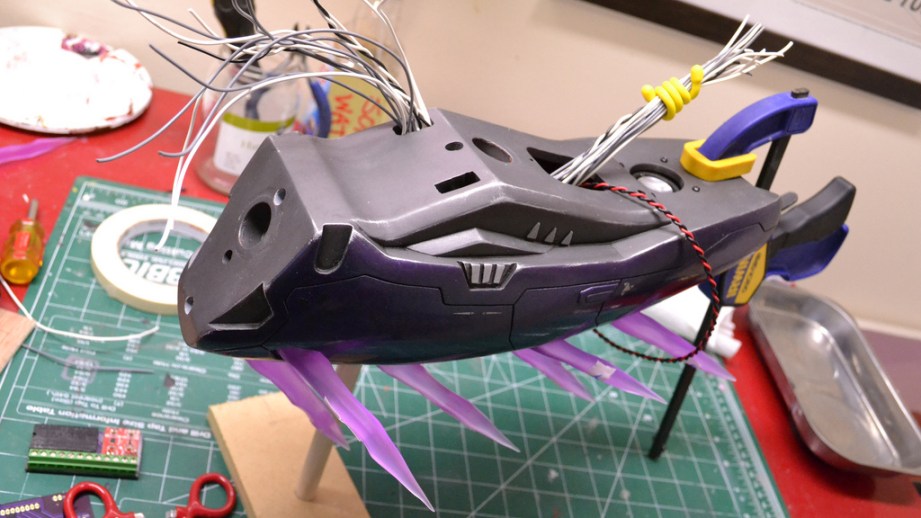
The Needler is built from the bottom up, starting with the lower casing and lower emitter. There are two screws that hold these parts together, but for good measure I added a small amount of 5-minute epoxy to the joining edges as well.
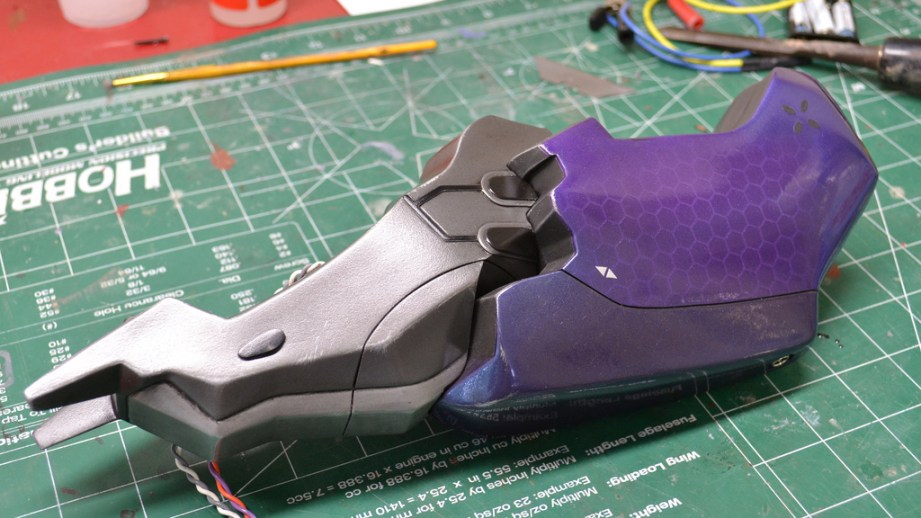
The barrel section was then added, along with the upper emitter. The wires visible here power the LEDs in the emitters and barrel, and also run to the lower casing where the wall power input jack is located.
I’m really bad at listening to my own advice, but if you’re smarter than I am make sure to check your illumination and wires at each stage of assembly. More than once I’ve fully assembled a project only to find out that a bulb had gone dead somewhere in the process. Not so this time, whew!
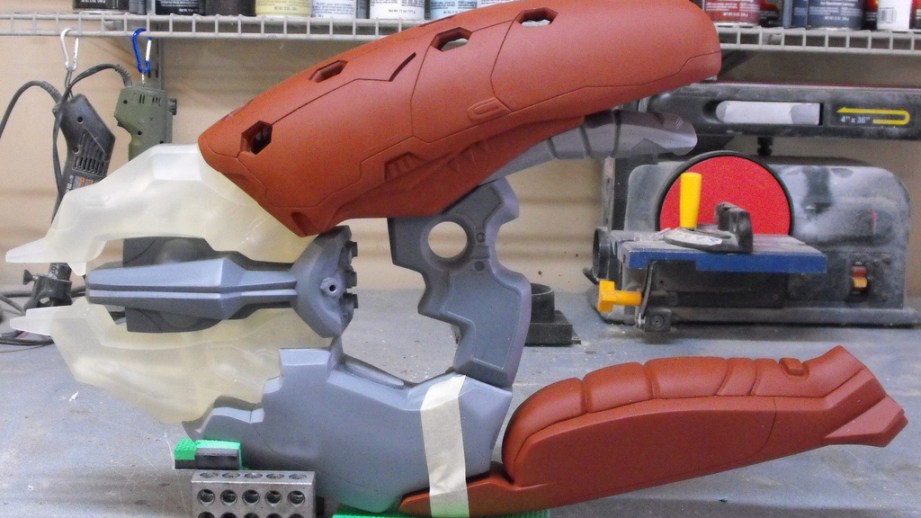
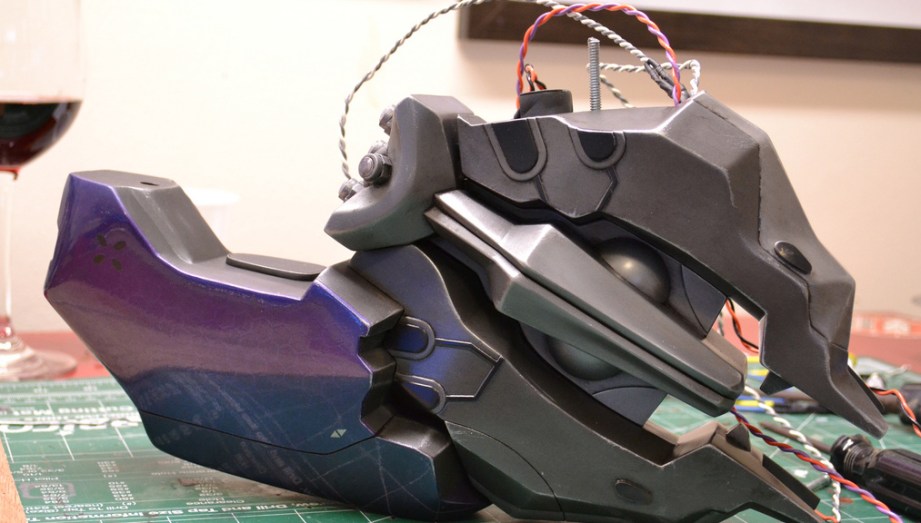
For the first time that I can recall, I built a set of MDF assembly jigs while putting a project together. Most of the stuff I make typically has a flat edge that makes it easy to set down, but the Needler doesn’t really like to be placed on its side. A simple cradle was made for the grip and emitters, using the cross-sections of some parts that I made waaaay back in Part 2. Having the parts secured this way made assembly and wiring much easier, and I think it’s a step I’ll be repeating in the future.
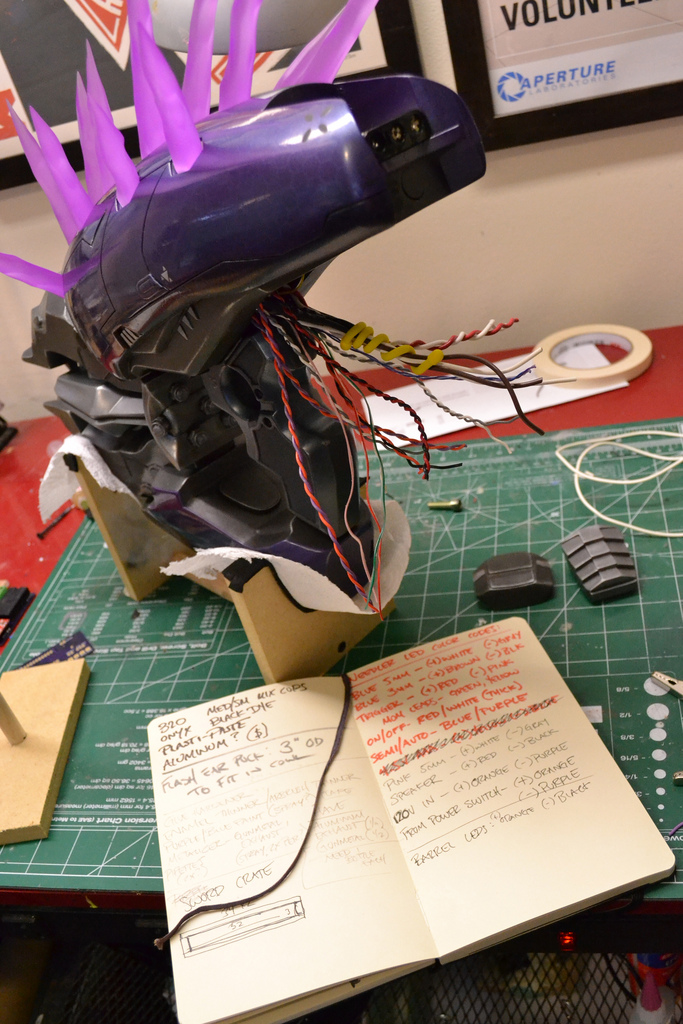
With the upper casing and handle secured, there were a lot of loose wires hanging about. I keep a record of all the wiring colors so all of this makes sense to me after I planned out circuit months in the past. A lot of soldering followed.
Eventually the rat’s nest was pared down into something a bit more manageable, and all the wires were routed into the audio/power board. The large open panel behind the grip was cut out specifically to allow this part to be installed after the wiring was complete.
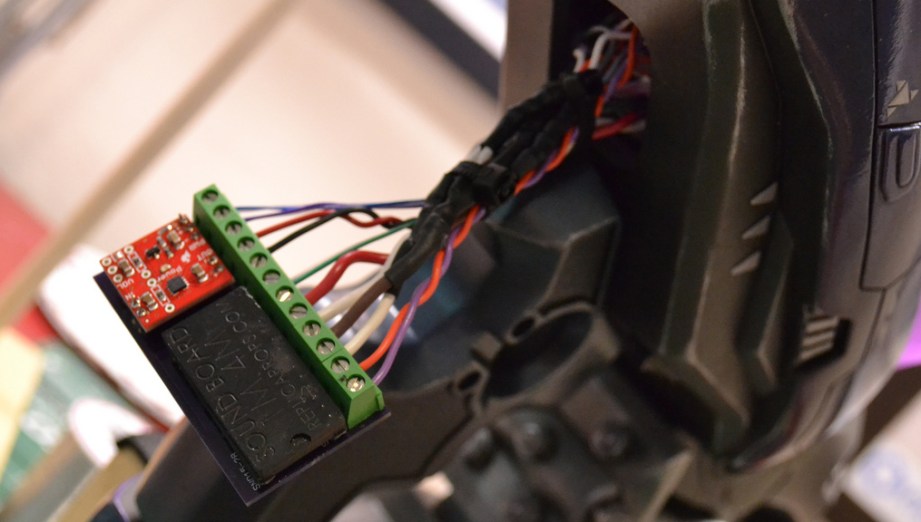
With the wires sorted, I could mount the chip inside the upper casing and seal up the top by installing the rest of the grip parts. These cover up the access panel seen above, so I had to make sure to test all components one last time before closing it. Once it’s closed I wouldn’t be able to crack it open again!

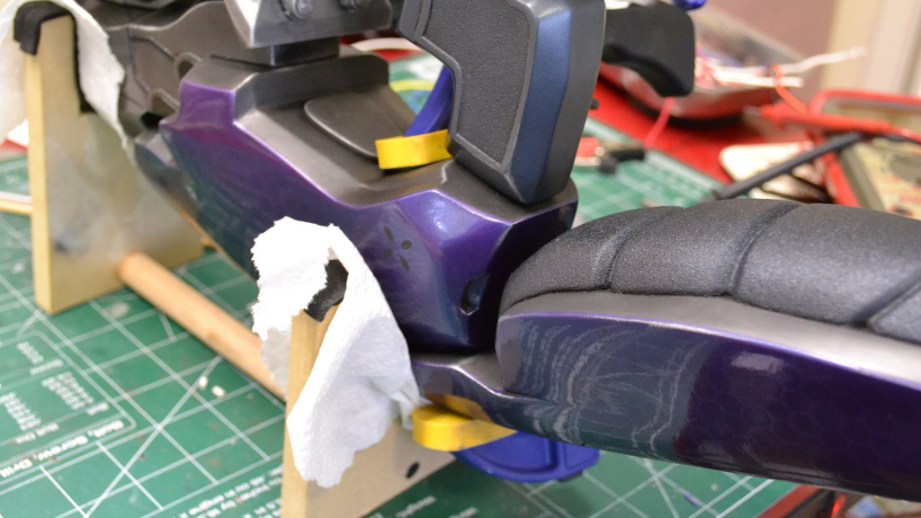
For the bottom, the final part to be installed was the lower padded grip. This is because the handle is held in place with a large coarse threaded bolt that is accessed through the mounting area for this part. It’s like a chess game getting this thing together! Unlike all the other pieces, this one is held in place with epoxy alone. The assembly jig held the part in place while the glue cured.
Thinking of the assembly jigs led me to the idea that a display stand should be created for this prop. The Needler can’t stand on its own, and laying it on its side just isn’t an option. Since I have a laser cutter, I have a huge box full of small scraps that aren’t really good for much more than little details here and there. I raided this box and drew up some plans in Illustrator based on some HALO architecture and came up with this:
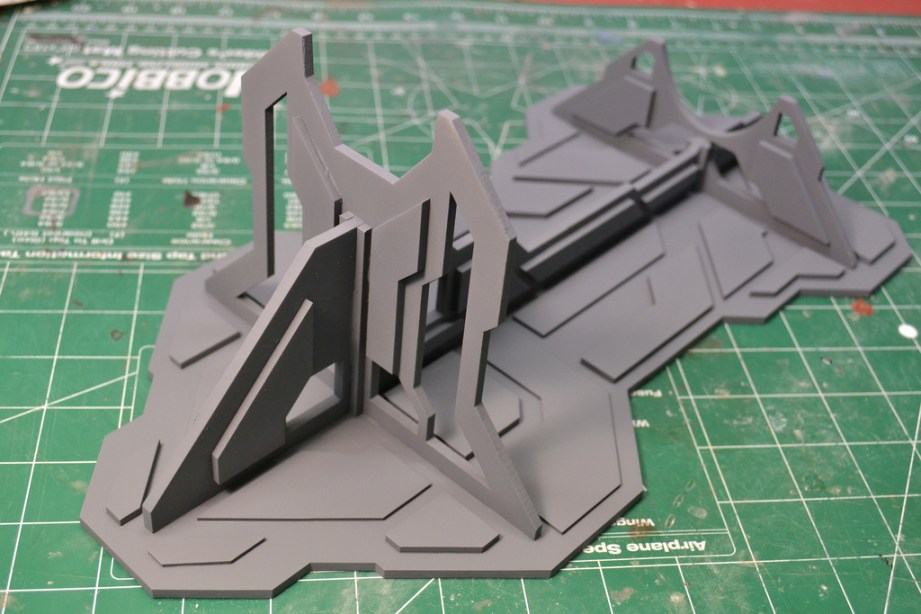
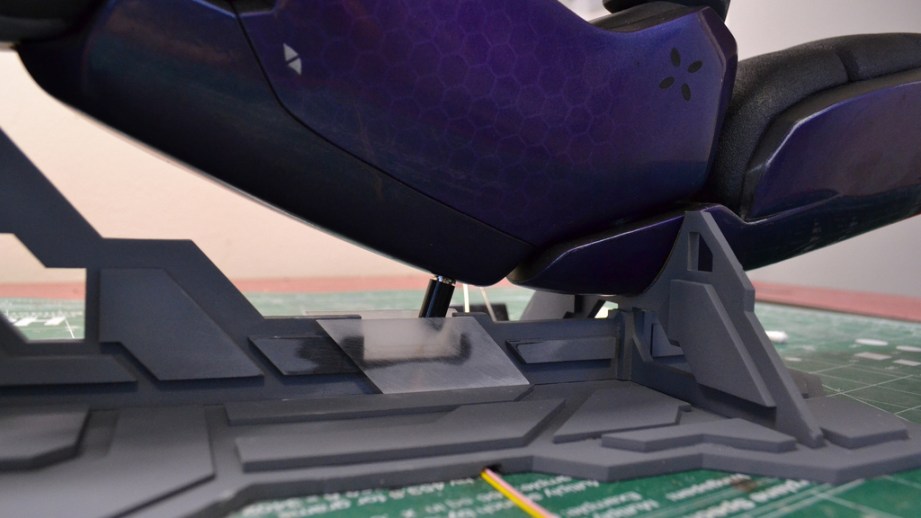
The stand is all acrylic parts and holds the Needler level and secure. I also added a small recessed area in the middle of the base where the power jack inserts into the lower forward casing.
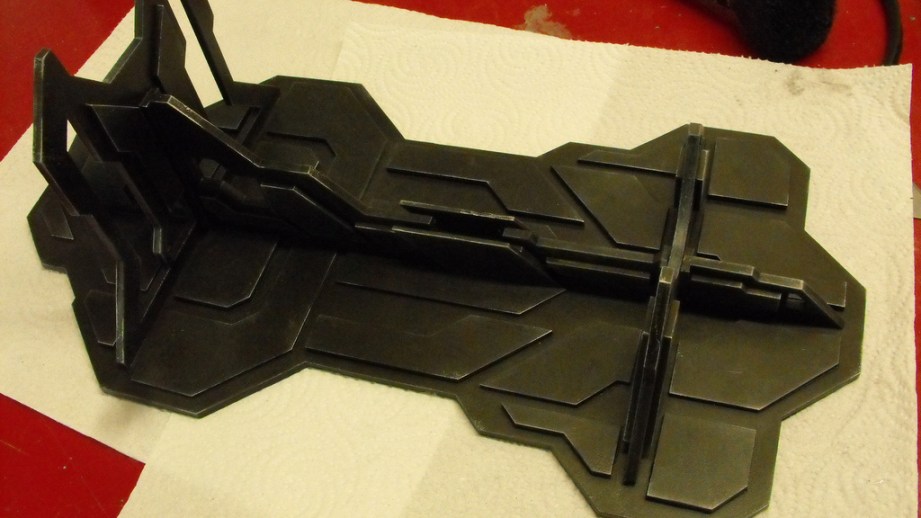
Of course, this needed some paint and weathering to look authentic to the rest of the prop. Raiding more spares, I emptied the last bits of several cans of flat black, metallic gunmetal, and dark bronze to come up with an interesting layering of color that doesn’t detract from the Needler itself while still being interesting to look at. I need a better picture than this, but that’s coming soon…
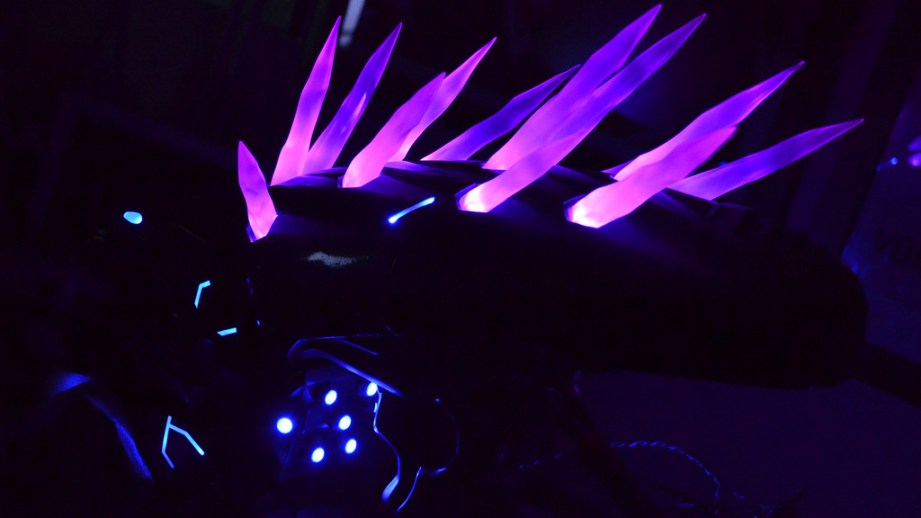
The only thing left to do now is take this prop out for a photo shoot and then bring this guy to Dragon*Con. If you’re in Atlanta for the convention make sure to keep your eyes open for a spikey glowing purple alien weapon in the crowds!
The Volpin Project, Part 1: Introductions
The Volpin Project, Part 2: References and Blueprinting
The Volpin Project, Part 3: Selecting Materials
The Volpin Project, Part 4: Taking Shapes
The Volpin Project, Part 5: Bondo Strikes Back
The Volpin Project, Part 6: Details, Accents, Refinements, and Mockups
The Volpin Project, Part 7: Introduction to Moldmaking
The Volpin Project, Part 8: More Complex Moldmaking
The Volpin Project, Part 9: The Casting Process
The Volpin Project, Part 10: Illumination and Audio
The Volpin Project, Part 11: Prepping for Paint
The Volpin Project, Part 12: Finally Time to Paint
The Volpin Project, Part 13: Weathering The Needler


11 thoughts on “The Volpin Project, Part 14: Putting It All Together”
Leave a Reply

One Day Builds
Adam Savage’s One Day Builds: Life-Size Velocirapt…
Adam embarks on one of his most ambitious builds yet: fulfil…

Show And Tell
Adam Savage’s King George Costume!
Adam recently completed a build of the royal St. Edwards cro…

All Eyes On Perserverance – This is Only a Test 58…
We get excited for the Perserverance rover Mars landing happening later today in this week's episode. Jeremy finally watches In and Of Itself, we get hyped for The Last of Us casting, and try to deciper the new Chevy Bolt announcements. Plus, Kishore gets a Pelaton and we wrack our brains around reverse engineering the source code to GTA …

One Day Builds
Mandalorian Blaster Prop Replica Kit Assembly!
Adam and Norm assemble a beautifully machined replica prop k…
House of MCU – This is Only a Test 586 – 2/11/21
The gang gets together to recap their favorite bits from this past weekend's Superb Owl, including the new camera tech used for the broadcast and the best chicken wing recipes. Kishore shares tips for streamlining your streaming services, and Will guests this week to dive into the mind-bending implications of the latest WandaVision episod…

One Day Builds
Adam Savage’s One Day Builds: Royal Crown of Engla…
One of the ways Adam has been getting through lockdown has b…

Making
Adam Savage Tests the AIR Active Filtration Helmet…
Adam unboxes and performs a quick test of this novel new hel…

Making
Weta Workshop’s 3D-Printed Giant Eyeballs!
When Adam visited Weta Workshop early last year, he stopped …

One Day Builds
Adam Savage’s One Day Builds: Wire Storage Solutio…
Adam tackles a shop shelf build that he's been putting off f…

Show And Tell
Mechanical Dragonfly Automata Kit Build and Review
Time for a model kit build! This steampunk-inspired mechanic…
Cannot wait to see the photoshoot of this thing, Harrison. Simply stunning. As someone who’s been following your work since the first portal gun build in 2009, I have to say that this is the perfect example of how every one of your pieces is a leap forward in complexity and mastery.
Definitely all thats missing now is a gallery of glory shots of this beauty.
Damn that’s hot! An absolutely amazing amount has gone into this and it really shows in the end product. I am just stunned.
WOW! That looks awesome! You should try and see if you could make a Plasma Sword!
Where is Norman chan and his camera to take a 1000 photographs of this thing?!
if only i had the ability to build something as detailed as this!
It’s happening later in August!
Just awesome.
I think I need one of these.. 🙂
I have been following this build from the beginning and it looks really great! I cant wait to see the final pictures. I am also wondering… What kind of laser cutter do you have and how did you acquire it? I have been looking into getting one myself.
Ihave a Full Spectrum 40W hobby laser I won in a contest on Instructables. Good machine after a lot of tweaking and some modifications to the vent and alignment system.