


As we take on this ambitious LEGO build, we chat with guest Kayte Sabicer about her modelmaking work on Inception, and what goes into building a “small scale” set that’s as big as a building–all made to be blown up on camera.
Anniversaries – Still Untitled: The Adam Savage Project – 9/12/17

We chat about Adam’s new science fiction interview series, SyFy Origin Stories, and check out his latest hand prop build. We’re also recording on the day of a notable anniversary for Adam. Plus, Will fills us in on what he’s been up to, working with Adult Swim on some animations projects. (Will’s Adult Swim project: http://www.adultswim.com/videos/streams/pregame-prognostifications-from-the-pigskin-wyzzard )
Adam Savage’s Maker Tour: Incite Focus
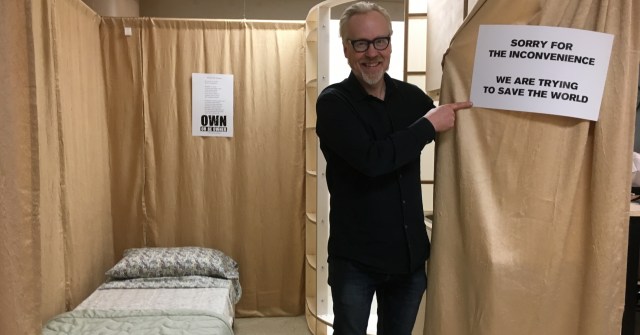
In Detroit Adam Savage stops by Incite Focus, a socially focused production and training lab, where he lends a hand building an open-source, net-zero-energy micro-cabin that could revolutionize housing. (This series and tour is made possible by The Fab Foundation and Chevron.)
PROJECTIONS, Episode 23: Inside-Out Tracking with Single Camera

One of the next frontiers for virtual and augmented reality headsets is inside-out positional tracking, a problem that’s yet to be fully solved. We visit the offices of Occipital–makers of the Structure Sensor–to get a demo of their inside-out tracking system that can work with a single camera, and chat with Occipital’s CEO about their approach to this computer vision challenge.
Let’s Build: Star Trek Enterprise Model Kit

We manage to dig up a rare Bandai Star Trek Enterprise kit that was released over 15 years ago! Jeremy, Kishore, and Norm assemble this 1/850 scale model that comes complete with painted parts and even beautiful lighting electronics!
Adam Savage’s One Day Builds: Foam Excalibur Sword!
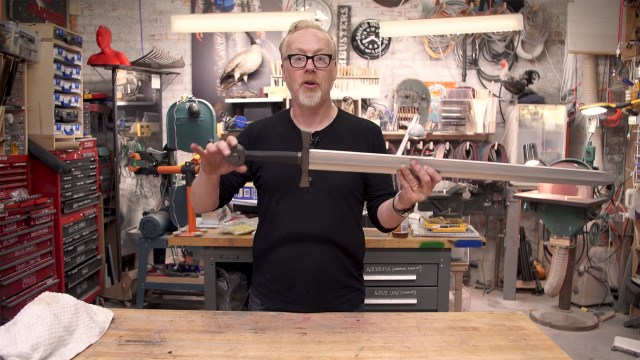
Let’s flash back to a build that was part of Adam’s preparation for this year’s Comic-Con! For his King Arthur armor cosplay, Adam needed a foam sword that would be suitable for the convention floor. He turned to the LARP community to find a prop, and today’s build is making that sword look better with different techniques for metallic finishing. To the airbrush!
Episode 415 – The Mayor Returns – 9/7/17
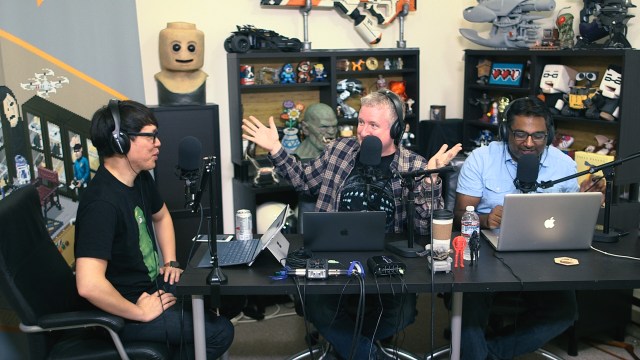
Heat waves, Dragon*Con, Burning Man, and PAX. What a weekend! The gang talks about how they spent our Labor Day holiday, Apple’s upcoming product launch, shakeups in the Star Wars world, and speed-solving rubix cubes. Plus, supermassive black holes and what we’ve been testing!
Pressure Casting a Glow-in-the-Dark Slimer Model

Frank walks us through the casting of a special kit: a slimer by legendary effects artist Steve Johnson, the sculptor of the original slimer from Ghostbusters! We learn how Frank mixes up resin to make these glow in the dark and utilizes a pressure pot to eliminte air bubbles. These kits will be available at the Son of Monsterpalooza convention later this month!
My Key to Organizing Small Allen Wrenches
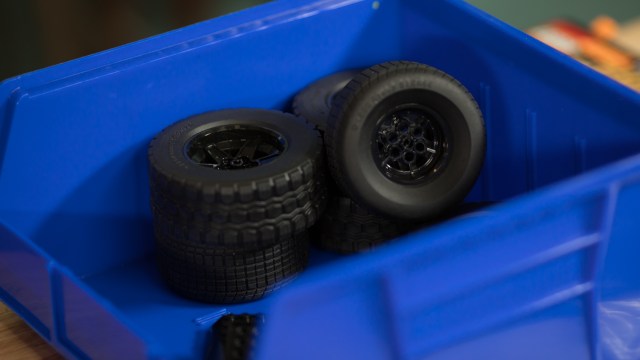
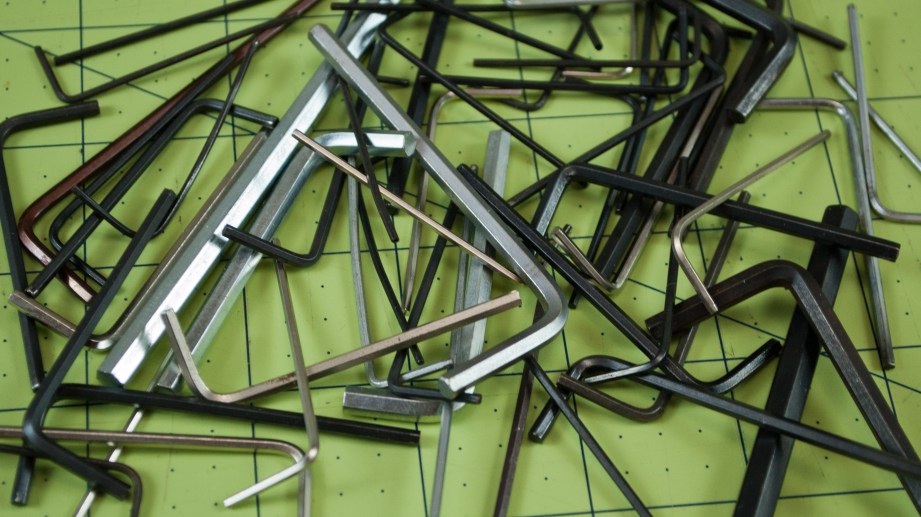
If you’re like me, you have an unorganized bin of loose Allen wrenches in your workshop. SAE and metric sizes coexist is this microcosm without discrimination or prejudice. Maybe you call these tools hex keys. Whatever the case, they are a blessing and a curse. In larger sizes (bigger than 3/16″ or 4.5mm), they are cheap, convenient, and robust tools. The smaller Allen wrenches, however, present several problems for me.

First of all, the wrenches and the heads of the fasteners that they drive tend to strip easily. This is exaggerated by the fact that there are many different sizes which are indiscernible by eye. Selecting the correct wrench for an application can be challenging. Oh, did I mention that these wrenches are not even marked with their size?
Despite their challenges, small Allen wrenches are a fact of life in the RC world. They are used in many, many applications across the RC spectrum. In fact, most of the smaller hex keys in my bin were included with RC products. Many of the larger tools can be traced to Ikea.
I have a somewhat masochistic MO when I need to find a small Allen wrench. I reach into that disheveled bin and pull out a handful of tools that look to be about the right size. Then I go through the frustrating exercise of test fitting each wrench in the fastener until I find a good fit. If I’m lucky, I’ll score a good wrench within the first five tries.
After years of this inefficient approach, I finally decided to end the madness. I set out to find a simple means of organizing my small Allen wrenches. I decided that my system would have to be easy to understand, easy to implement, and easy to maintain.
The Allen Parsing Project
Before I get into my organizational method, I should point out that I am fully aware of Allen wrench sets that come in cases with each of the wrench sizes marked. I have several of them. They are definitely an improvement over the “toss it in the bin” approach, but they still demand a simple method of identification when the wrenches are being used. It’s easy to put a wrench back in the incorrect slot. Then the size markings on the case become useless.
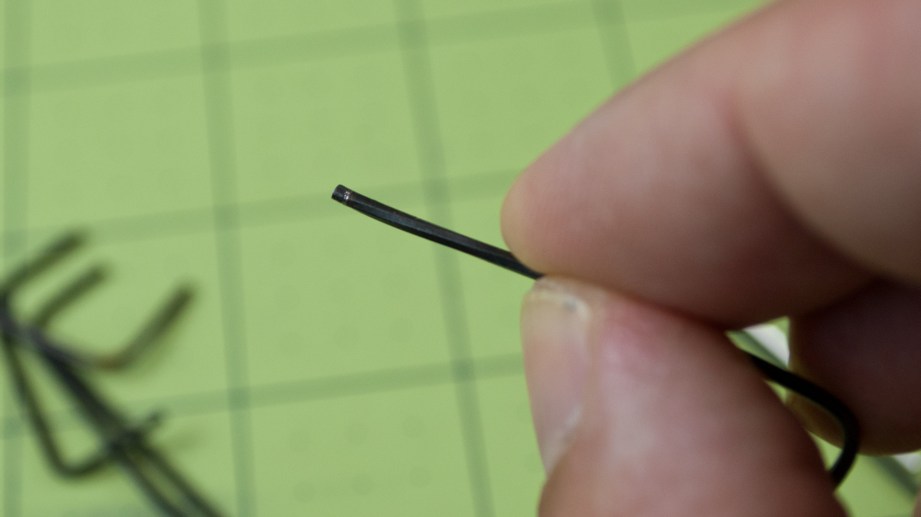
My first step in addressing the problem was to determine what I was dealing with. I really had no idea how many different wrench sizes were in my bin, or how many were duplicates. So I dumped the bin on my workbench and measured each Allen wrench with a set of digital calipers. I took at least three measurements of each wrench.
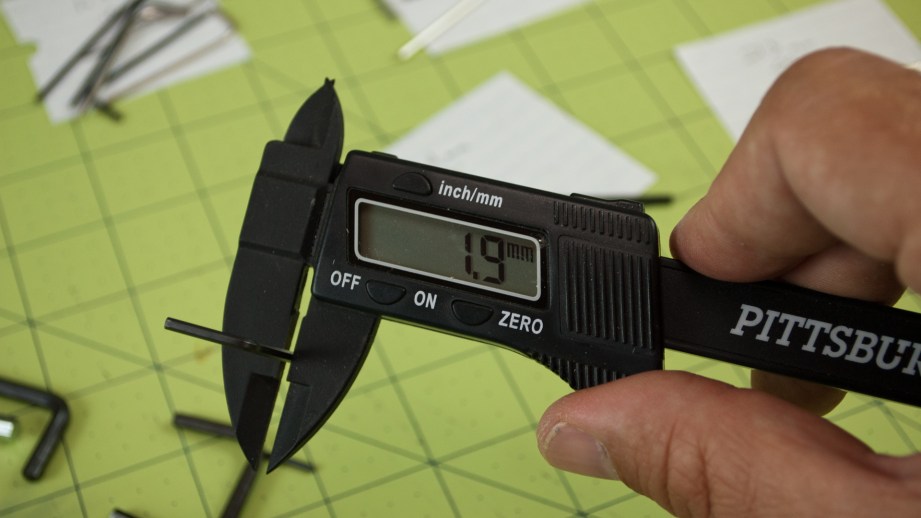
My budget calipers only measure to a precision of .1mm. But really, if I thought I was going to have to differentiate tools with differences less than that, I doubt I would have bothered. Not knowing whether any of the wrenches were SAE or metric, I measured and recorded in both units. But it was easiest to sort the wrenches by their metric values. Don’t let that go to your head you metric justice warriors (you know who you are).
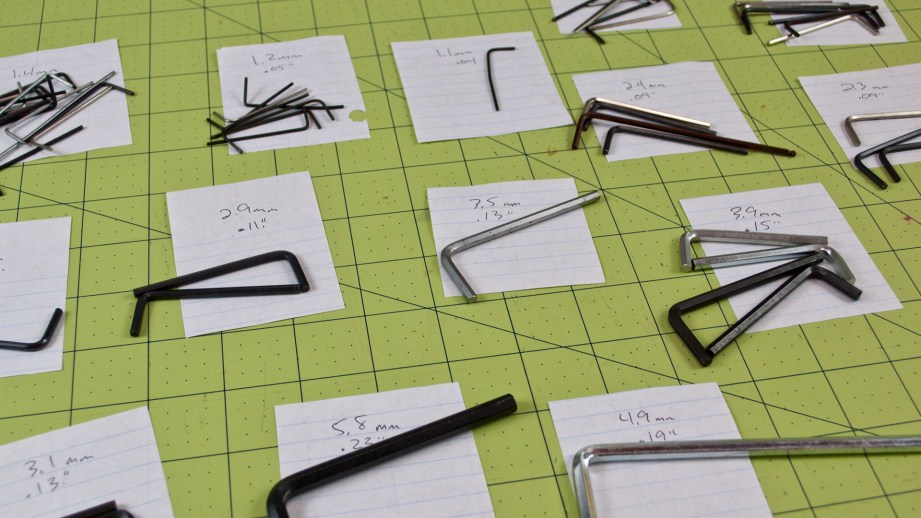
When I was done measuring, I had 11 piles of wrenches ranging in size from 1.1mm to 3.9mm. My next step was to inspect every wrench for wear (rounded edges). The reason I did this after measuring, rather than before, was to ensure that I didn’t discard any lone examples of a given size. I figured that I could salvage any such wrenches by removing the worn tips with my bench grinder. As it turned out, I had enough samples in each size that I was able to toss all of the worn tools. I’m ashamed to say that there were several.
Contrast out of Chaos
I contemplated several potential methods of marking the Allen wrenches so that I could instantly know what size any given wrench is. Applying heatshrink tubing would have been great, but I didn’t have a sufficient variety of colors in tubing small enough to stay snug on the wrenches.
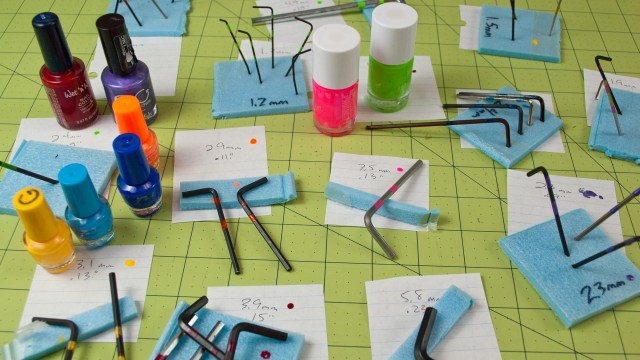
I decided to go with paint. I was digging up the colors I would need from my paint stash when I remembered my daughters’ bucket of nail polish. Tons of colors and built-in brushes too! I quickly figured out that I didn’t require 11 different colors. I really only needed to be able to differentiate small differences in sizes. So, I could repeat colors on sizes that are easily distinguished (ex. I painted the 1.4mm and 2.9mm wrenches orange).
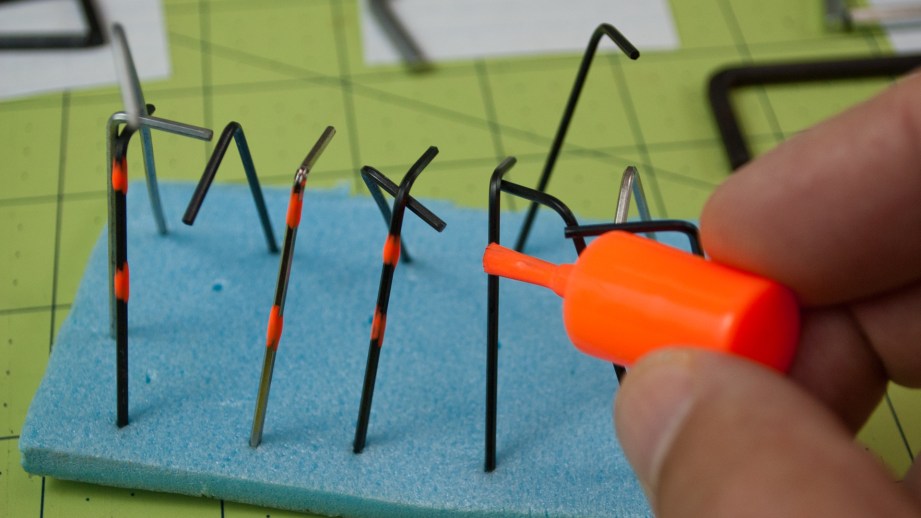
I picked a handful of colors that contrasted well on the wrenches. Some of the wrenches are black and others are nickel. Bright fluorescent color seem to work best. I should probably pick up a set of fluorescent nail polish to keep in my shop just for this purpose. The girls are bound to want their bucket back sooner or later!
I painted two stripes on each wrench to make the colors easily visible. I stabbed the tools into scrap foam to keep them upright while the polish dried. I also applied a drop of each color to the corresponding measurements on my size chart. I’ll keep this reference in my tool box. As I obtain more wrenches (I already have), I’ll measure them, paint them the correct color, and toss them in the bin.
I’ve had cause to use small Allen wrenches a few times since implementing this system. It is extremely rare for any RC-related instruction manual to indicate the necessary size of a wrench for a given Allen-head screw. So finding the correct tool still involves some trial and error. What has improved is that I no longer test duplicates of the wrong size. I grab one example of each candidate and begin test fitting. It also helps that I culled the worn out tools. The process is now a little faster and much less frustrating.
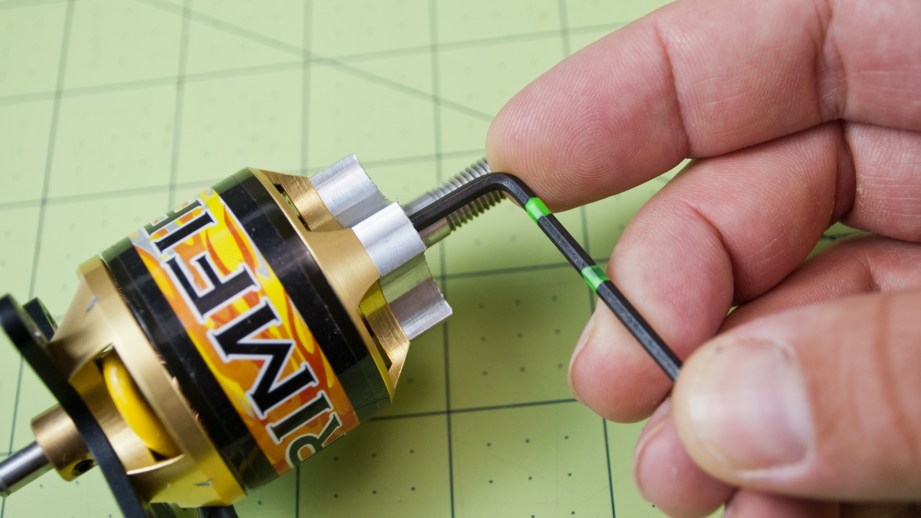
The unknown factor moving forward is the durability of the nail polish on the wrenches. I don’t expect any major issues there, but I’ll definitely be making sure it doesn’t chip off too easily. I’ll also need to make sure that I do not get lazy and start adding unmarked wrenches to the bin. I suspect that I’ll keep a side stash of new wrenches and process them for the bin on rainy days.
This little project took me less than an hour from start to finish. I should have invested this time many years ago. Now, I need to apply the same thought process to my drawers full of unsorted model airplane propellers.
Do you have a handy method for organizing Allen wrenches? Tell me about it!
Terry is a freelance writer living in Buffalo, NY. Visit his website at TerryDunn.org and follow him on Twitter and Facebook. You can also hear Terry talk about RC hobbies as one of the hosts of the RC Roundtable podcast.
Super Troopers – Still Untitled: The Adam Savage Project – 9/5/17

We’re joined this week by Ryan Kiser, Tested’s production coordinator who’s worked with Adam since Mythbusters! We talk about first time visits to pop culture conventions, Dragon*Con, and the culture of nitpicking movies. Plus, Adam shares another new shop project he’s been working on!