


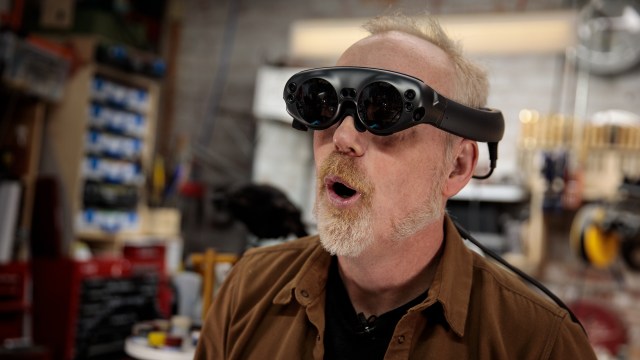
Adam shares his favorite things from 2018! From garage resin kits to aerospace replicas, Adam celebrates objects and gear from makers that he’s admired and worked with this year. Plus, a piece of tech he uses every day that radically improves his life. What have been your favorite things of 2018? Share with us in the comments below!
Tested in 2018: Favorite Coffee Table Books!
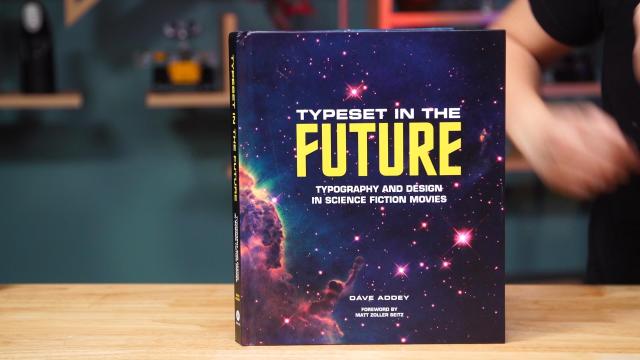
Per tradition, Norm shares his favorite coffee table books from the year, including recommendations for art books from pop culture poster artists, behind-the-scenes books from visually striking films, and a book for science fiction typography geeks. Come back tomorrow for our final favorite things video of the year!
Tested in 2018: Sean’s Favorite Things!
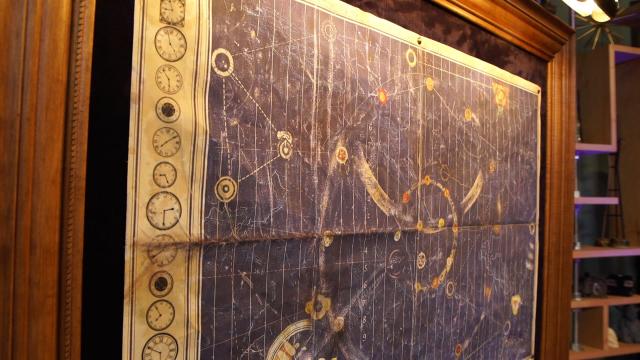
Sean’s favorite things from this year include a collectible from Alien, behind the scenes books for two classic films, a very useful portable clamping system, and a prop replica from one of his favorite films: Time Bandits!
Tested in 2018: Darrell’s Favorite Things!
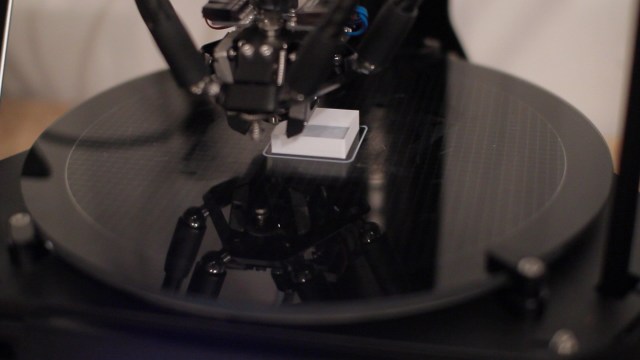
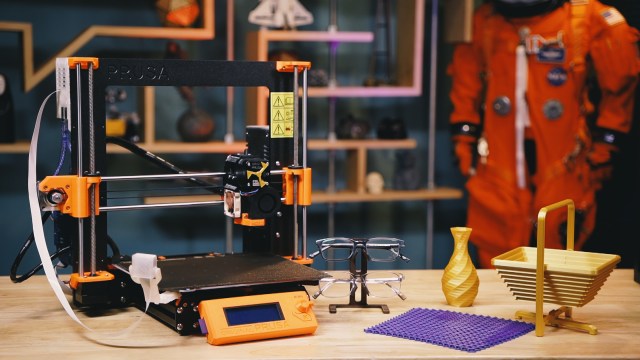
Darrell, aka The Broken Nerd, is in our studio this week and shares his favorite tech from this year! Darrell gives his recommendations for favorite FDM 3D printer, SLA 3D printer, and printer filament. Plus, his new laptop that’s streamlined his workflow!
Tested in 2018: Kishore’s Favorite Things!
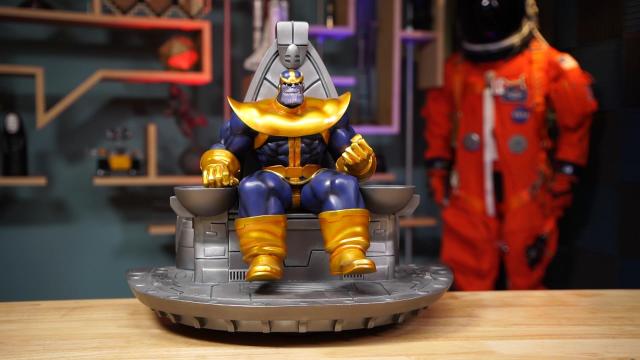
Kishore shares his favorite things of 2018, and no surprise here, he kicks things off with his love for the mad Titan himself, Thanos. There’s also picks for a great science book, tabletop game, home gadget, and Nintendo Labo!
How To Make Flying Holiday Decorations
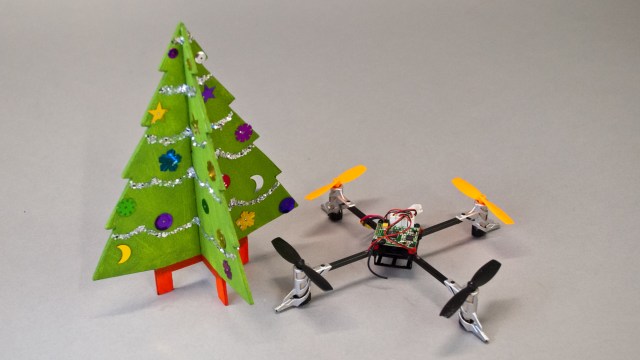
At this time of year, I try to keep a few simple projects in my back pocket for when my kids act bored during their holiday school break. I like things that fly, so my projects tend to lean that way as well. For example, I previously figured out how to repurpose Christmas Cards as indoor gliders. My latest flying holiday craft is just as much fun to make and to fly.
For this year’s project, I dusted off one of my indoor mini-quads and gave it a holiday makeover. It is now a flying Christmas decoration! I’d be willing to bet that many of you have a mini-quad stashed away somewhere. The crafty, decorative parts can be made with common household items. So you probably have everything you need. Here’s how I did it.
A Quick Fix
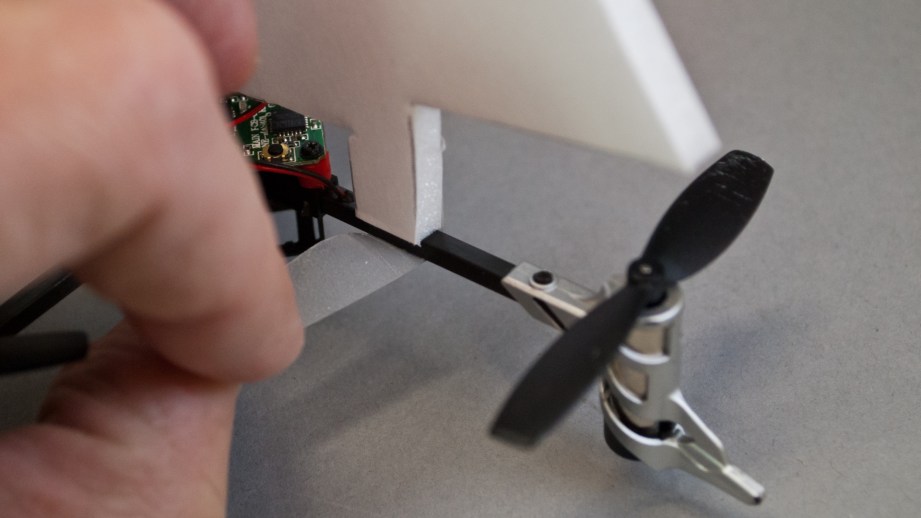
The quad I chose is the Heli-Max 1SQ. This particular quad is no longer available. But that’s not an issue here. Just about any mini-quad you have on hand should work just fine.
I had not flown the 1SQ in quite some time. The airframe was in good shape, but I quickly discovered that neither of my batteries for it would take a charge. This quad is designed to be flown with a single 250mAh LiPo cell. While I didn’t have any direct replacements for the dead batteries, I did find an alternate that works great.
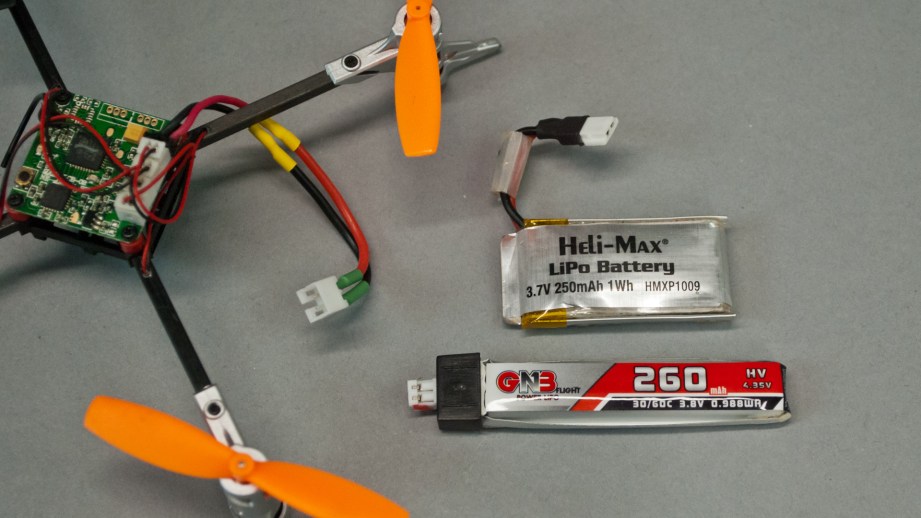
The new battery is a 260mAh LiHV cell, which is basically a LiPo battery that charges to a slightly higher voltage (4.35v vs 4.2v). Despite the drastically different form factor of the newer cell, it fit well in the quad’s battery compartment. I only had to apply a small patch of thin foam padding to give the battery a snug friction fit.
My final hurdle was to reconcile the mismatch of battery connectors between my new power source and the quad. The LiHV cell uses a JST-PH 2.0 connector, which has become common for micro-RC applications. I had to snip off the 1SQ’s stock battery connector and replace it with a matching JST plug on about 1″ (25mm) of additional wire.
Foamboard Prototype
I decided that I wanted to add a profile Christmas tree to the 1SQ. You can create just about any holiday-inspired shape you want. A snowman, wreath, menorah, Santa…choose whatever suits you. The basic process is the same.
To be honest, I wasn’t sure how the quad would react to the additional weight and surface area of a faux tree. So I decided to hash out a quick test article using foam board. With its paper laminate and relatively thick foam, foamboard is on the heavy side for this application. But it is cheap and easy to work with. I figured that if things worked out okay with the foamboard, I would be good to go with lighter materials.
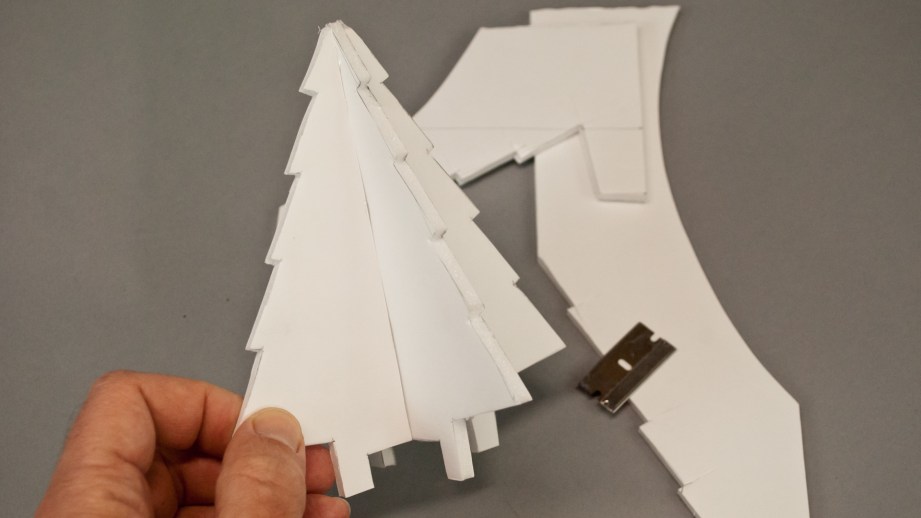
I sketched out my tree profile on the foamboard. It is 5″ (127mm) wide and 6″ (152mm) wide. My only constraints were to keep the tree well clear of the propellers and to accommodate the control board in the center of the quad. I created one complete side profile and two half profiles that I glued together. My complete, but undecorated, 4-legged tree weighed just under 6 grams. I attached it to the arms of the 1SQ with small pieces of tape.
A quick test flight revealed that the 1SQ flew just fine with the tree. It was not quite as peppy since it was hauling extra weight. However, all of the controls responded well and it was easy to fly. That gave me the green light to push forward!
A Fancy Finale
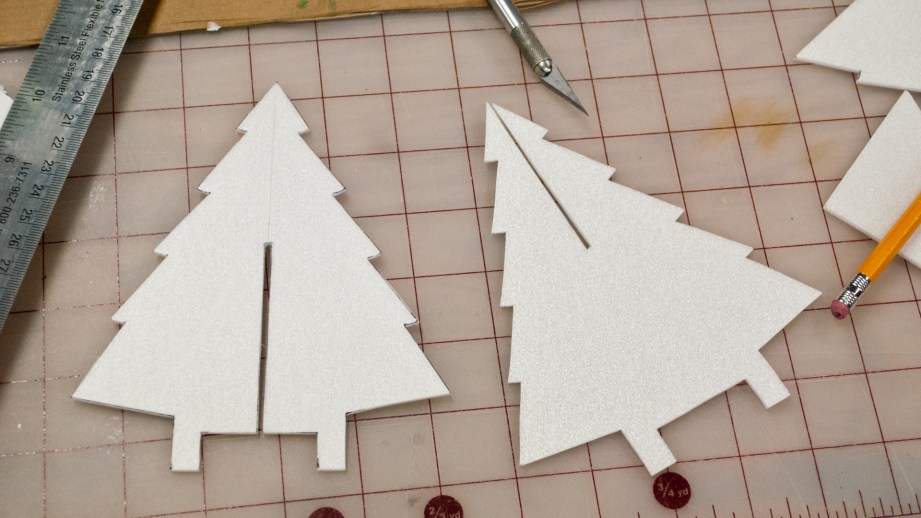
I used 2mm Depron foam for my final version of the tree, just because I have a lot of it in my shop. However, I am certain that a Styrofoam plate or foam takeout container would work just as well. Use whatever you have handy.
This time around, I made the tree in two parts. Both are full profiles. I cut opposing slots along their vertical centerlines so that they could be mated easily.
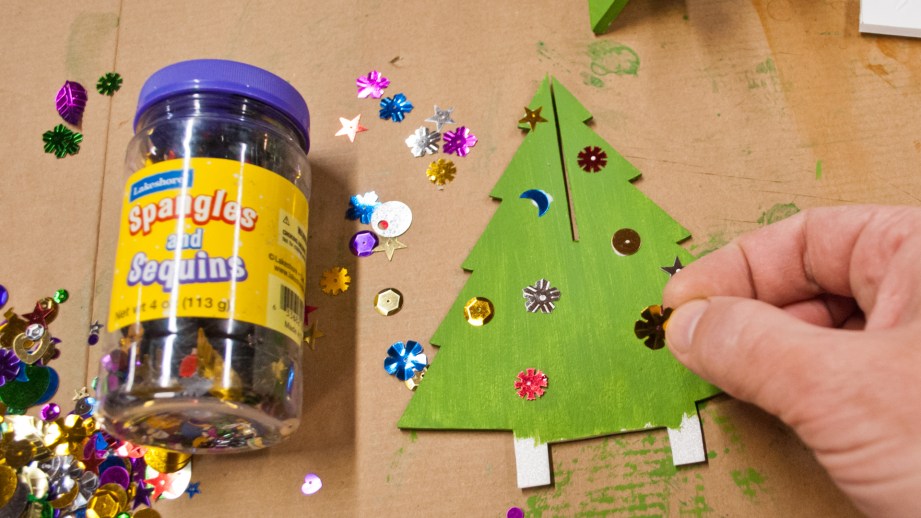
I thought it would be better to do some decorating before joining the two halves of the tree together. My first task was to paint the foam with cheap acrylic craft paint. I had several shades of green to choose from. So, I painted a few sample areas on my prototype tree to decide which color I liked best.
There are a million different ways to decorate a project like this. My original plan was to replicate ornaments by gluing beads onto the foam. As I rummaged through my kids’ craft supplies in search of beads, I came across a container of sequins in various shapes. So I went with those instead. I used common white glue for this and all other aspects of the project.
With the tree parts painted and sequined, it was time to join the two halves and lock them together with glue. I took care to ensure that the parts were perpendicular while the glue dried.
My final decorative step was to add shiny garland. I first applied thin garland-like arcs of glue to one “corner” of the tree at a time. Then, I sprinkled silver glitter over the glue. Despite my visceral loathing of glitter, I am happy with the result.
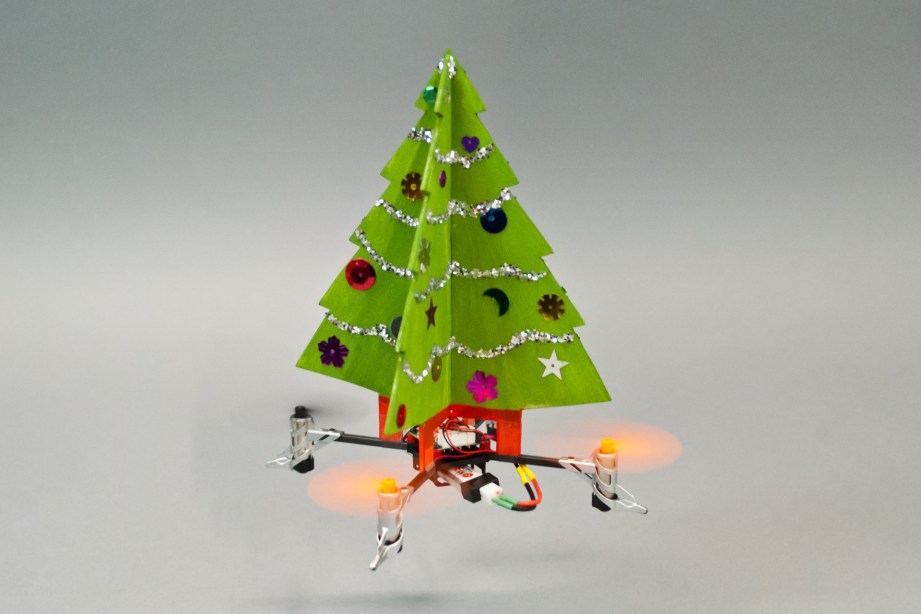
Airborne Cheer
My finished tree weighs just 3 grams. The quad hardly seems to notice it is even there. Best of all, everyone gets a kick out of watching this festive little decoration fly around the living room. The only challenge is determining orientation in flight. Orange propellers on the front are the only visual cues for knowing which side is which. I’m used to it, so it works fine for me. You may want to consider making the color or shape of your adornments asymmetric for additional cues.

Attaching and removing the tree from the 1SQ is super-easy. As with the prototype, I used small strips of tape for this job. You could easily have the whole family create their own quad ornament and swap them out to take turns flying each around. As always, we’d love to see and read about your unique interpretation of this project in the comments section. Happy Holidays!
Terry is a freelance writer living in Buffalo, NY. Visit his website at TerryDunn.org and follow him on Twitter and Facebook. You can also hear Terry talk about RC hobbies as one of the hosts of the RC Roundtable podcast.
Tested in 2018: Jeremy’s Favorite Things!
Jeremy shares four of his favorite things from this year, including a groundbreaking 3D printer, tribute to classic gaming, circuit board design tool, and virtual reality headset.
Tested in 2018: Kayte’s Favorite Things!
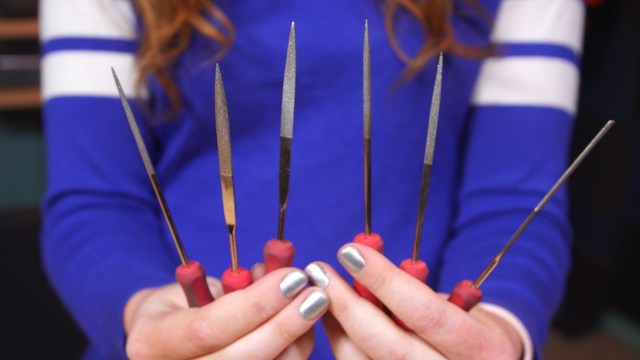
Our resident modelmaker and fabricator Kayte Sabicer–host of our Model Behavior show–shares her favorite tools from the past year, including a life-changing set of scissors, all purpose epoxy, a unique cutting knife, and an app recommendation for audiobook listeners!
Tested in 2018: Gunther’s Favorite Things!

Video producer Gunther Kirsch shares with us a few pieces of production gear he loved using this year, including a new Sony camera and a slider system that he uses to film One Day Builds!
Tested in 2018: Ariel’s Favorite Things!
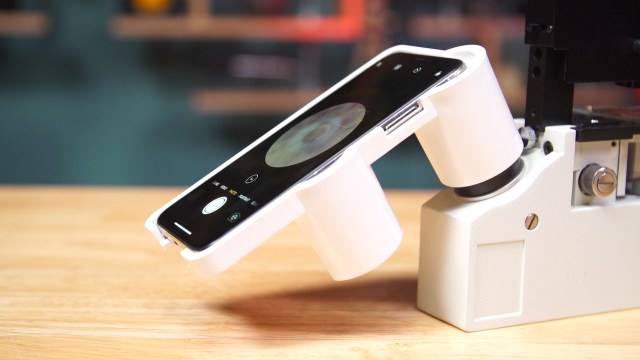
Ariel, host of our Offworld series, shares her favorite things of the year, including the tech and gear she found indispensable on her recent trip to Antarctica. From microscopy gear to repair tools, here’s what made her list!