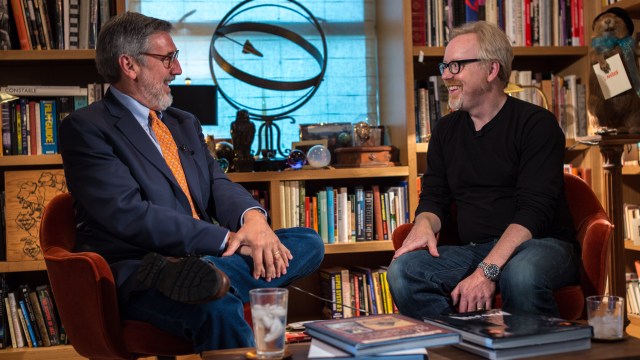
Adam Savage invites friend and director John Landis (Animal House, Blues Brothers, An American Werewolf in London, Trading Places) to The Talking Room for a lively conversation about filmmaking, creature effects, and behind-the-scene stories from his classic movies.
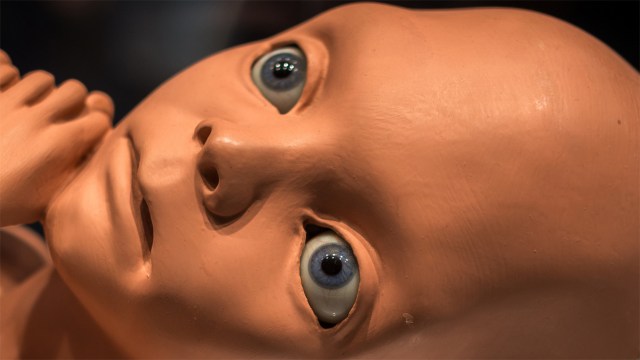
Chris Hadfield Explains How To Poop on the ISS
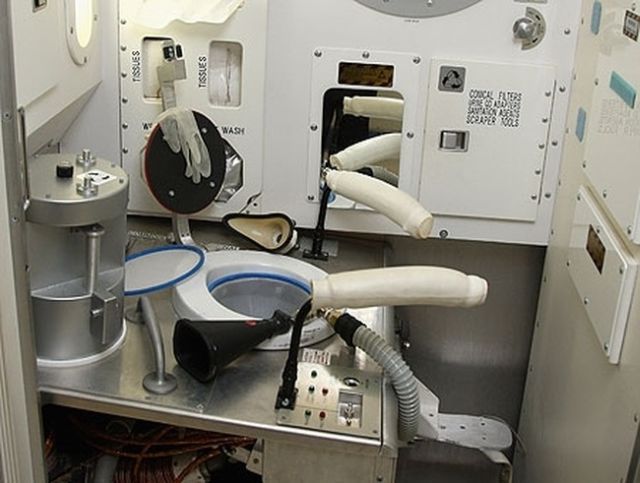
We’ve posted several space toilet videos before, but Chris Hadfield does a great job explaining the whys and whats of space pooping and waste disposal. He doesn’t mention the camera-equipped trainer astronauts use in Houston to learn proper aim though. (via Rallier)
Episode 182 – The Ragecast – 8/22/2013
Comic Books and Graphic Novels – 8/20/2013
Episode 181 – The HyperCast – 8/15/2013
Adam Savage Flash Mob at Comic-Con 2013

Adam gathers dozens of fans and Twitter followers outside Comic-Con to dress up as him with fake beards, hats, and glasses and then leads the group through the San Diego Convention Center.
Tested Visits The Hand Prop Room
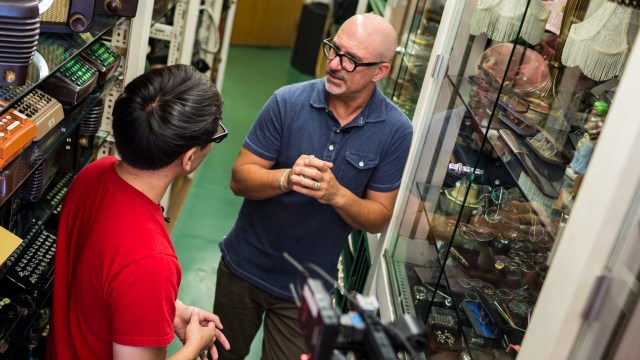
On our way down to Comic-Con, we stopped by a prop rental house in Los Angeles that supplies historical, modern, and science fiction hand props to TV and movie productions. The Hand Prop Room is a treasure trove of found and created objects that evoke the imagery of almost every historical era. And just wait until you see their faux-firearm armory.
Replicating Adam Savage’s ILM Toolbox
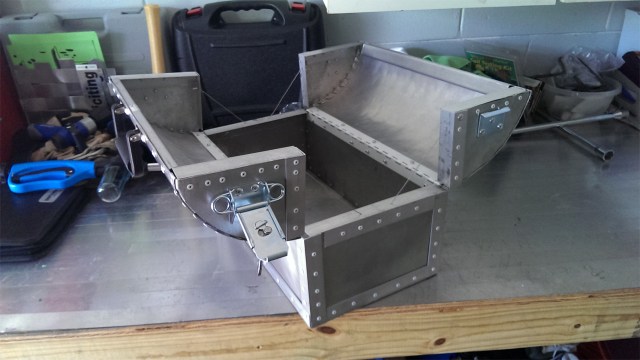
I stumbled onto this thread in the Replica Prop Forum over the weekend. Matt Kerr, a Tested reader, studied posts about Adam’s ILM-era model making toolboxes to replicate his own as a gift for a friend. The finished project turned out wonderfully, and Matt shared the story of his build with me over email.
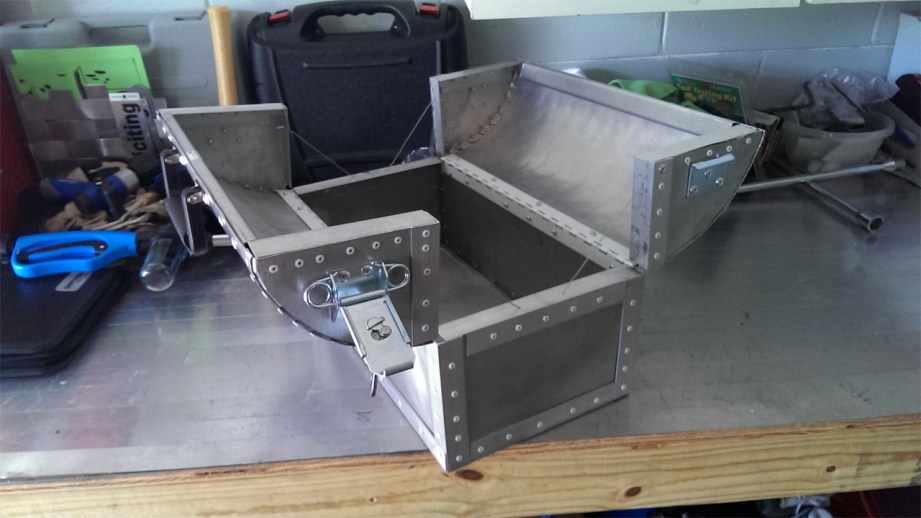
“The project started off easy enough–I picked up some sheet aluminum, angle bar, and rivets. I began by cutting the sheet aluminum to the dimensions of a 17″ x 9″ x 6”, open top box. Next, all the angle bars were cut to length and all parts were assembled creating the “shoebox” or lower half of the toolbox.
Once that was finished I made a paper template for the end caps for the lids. The length and height of the cap was easy enough at 4.5″ x 6″, but the curve was tricky. Once the curve was figured out, I added 1/4″ across it to cut and bend tabs to connect to the skin. With the caps complete, I measured the curve, cut, bent and attached the skin to the end caps with rivets.
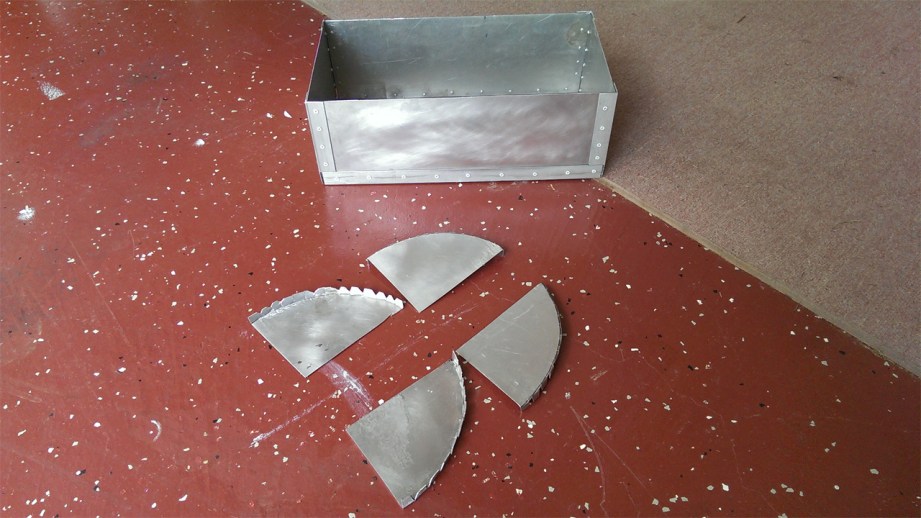
The lids were the most tedious part of the project. After they were finished, the rest of the project went smoothly with the addition of hinges, handles and butterfly latches. Safety wire was used on each side of the lids to keep them from opening further than 90° from the lower box.”
The project, from design to completion, took almost a year, and Matt plans on making more of these boxes and building scissor lifts for them as well. We’re also due to shoot a video showcasing Adam’s original boxes, which currently live in the Cave. In the meantime, Matt shared some basic schematics for his box build for other makers:
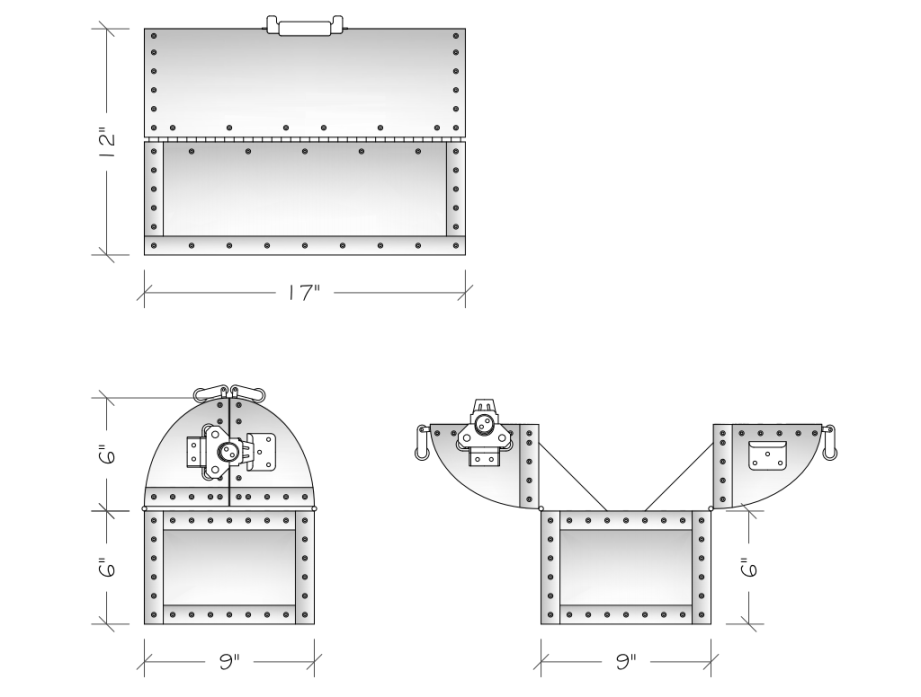
Photos courtesy Matt Kerr
The Volpin Project, Part 15: The Lessons Learned

As someone who is largely self taught in the practice of prop building (and its associated skills of airbrushing, moldmaking, casting, and simple electronics) I learn new lessons with nearly every project. In the case of something insanely complicated like the Halo Needler, I learn a lot of new things. Some of this newfound knowledge comes from screw-ups and some from pretty happy accidents that work in my favor. This final entry into the Needler build log will be all about tips and tricks that emerged from this project, so hopefully anyone looking to emulate this process can avoid similar pitfalls.
Let’s go over the lessons learned in chronological order.
Medium Density Fiberboard vs. Styrene Frames
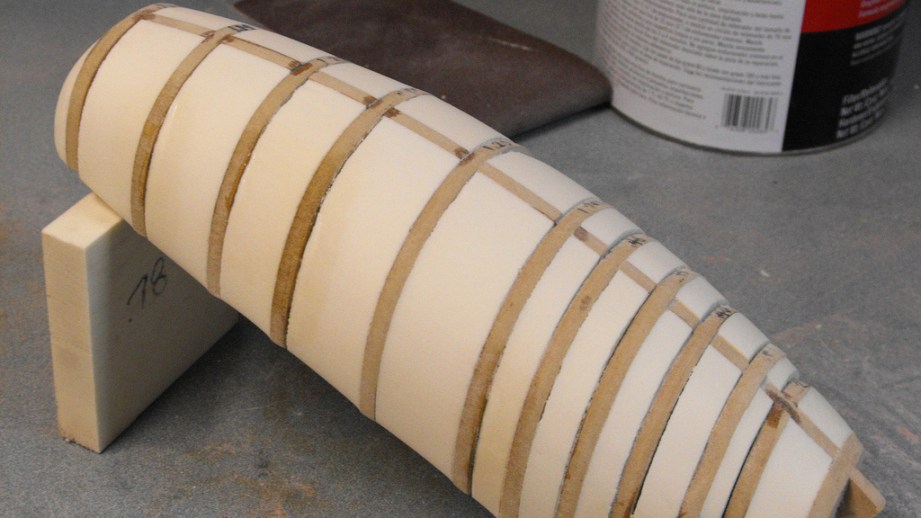
First off, the MDF ribbed sculpting system I put together (as seen above) worked pretty darn well. There can be issues with the MDF ribs if you don’t take care to make sure your shop is a constant temperature and humidity, as the wood will swell and shrink causing the surface of your part to change in frustrating ways as well. The urethane foam here worked wonders as well, though I’d go with a harder density in the future to make the shaping a bit more smooth and possibly use less bondo fixing over-sanding issues.
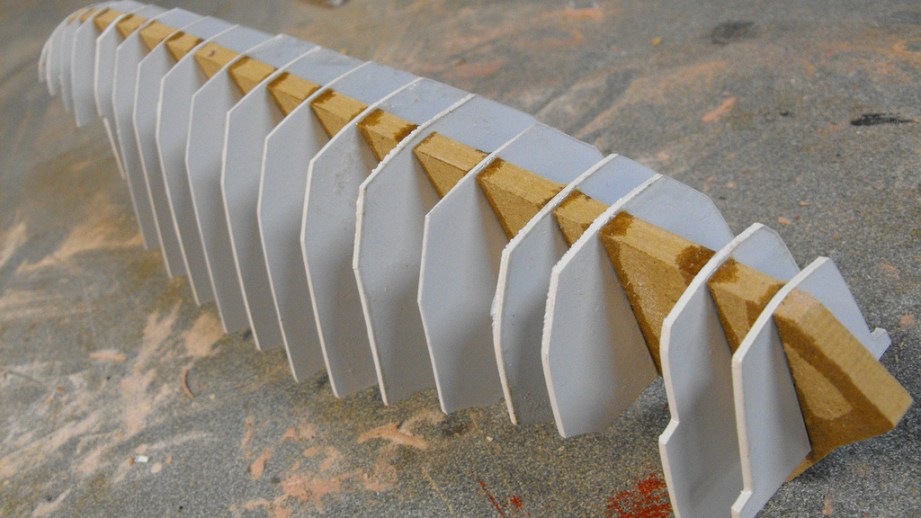
This styrene rib method, however, was mostly useless for building. The styrene ribs were far denser than the surrounding foam or bondo filler that came later, and any time one of them came near the surface of the piece it would create a high spot where the softer material on either side would sand unevenly.
I eventually took a grinding wheel to all of the ribs and skimmed over them with filler, but that took way too much time to correct and I would have been better off sticking with MDF.
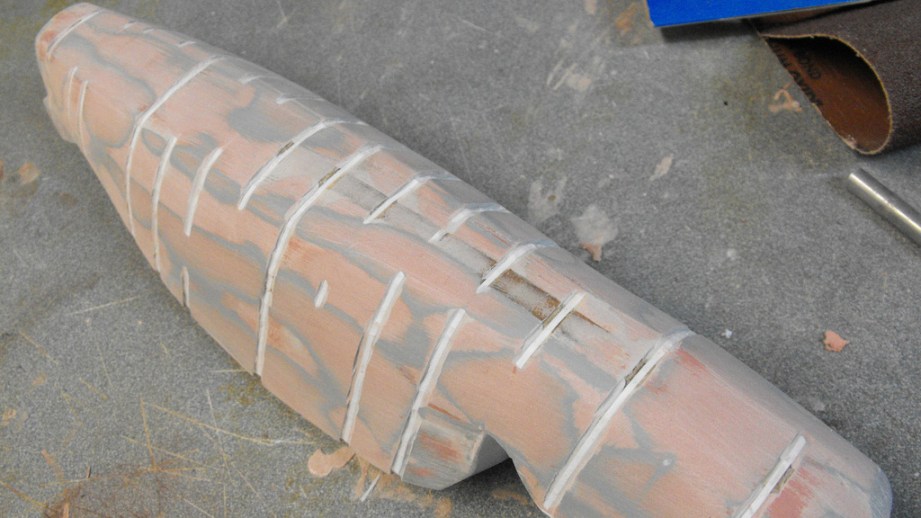
Complex Geometry is a Challenge
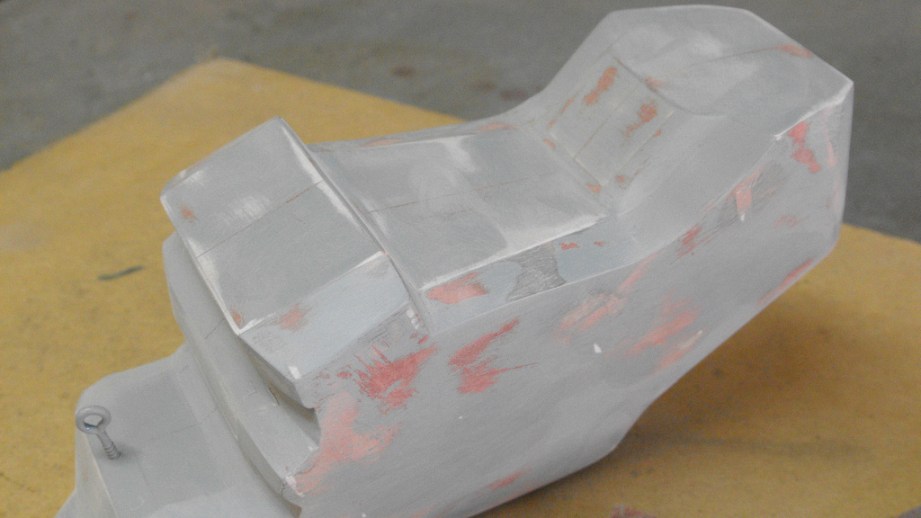
Parts like the one above are a CG weapon designer’s way of saying “I dare you to try to make this silly thing.” I didn’t learn much from sculpting this piece but I just wanted to call out the absolutely maddening geometry on the front of the piece. I got to know my Needler schematics very intimately while shaping this particular piece.
Laser Line Alternative
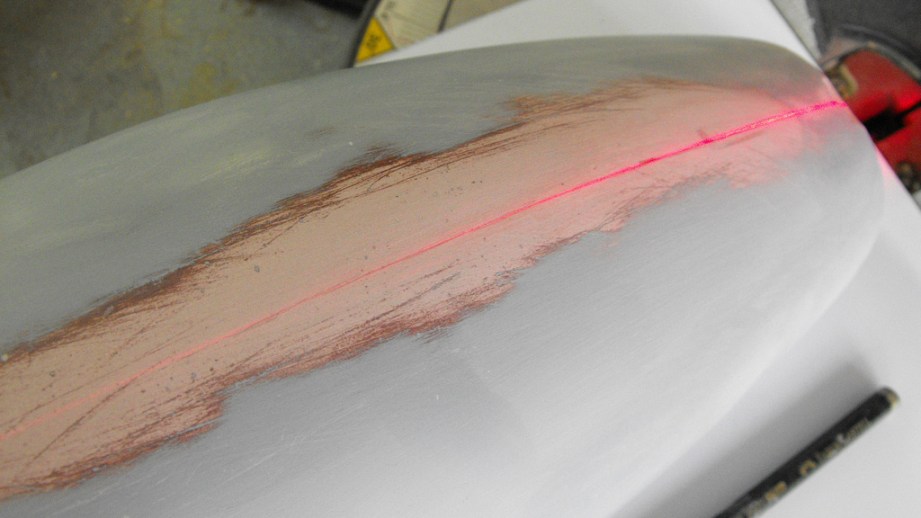
Don’t have a laser line or level? Use the guides on your chop saw to find the center! Really, a laser line would have just been a $15 trip to the hardware store, but don’t knock what works when you’re on a deadline.
PVC Piping and Endcaps for Fitting
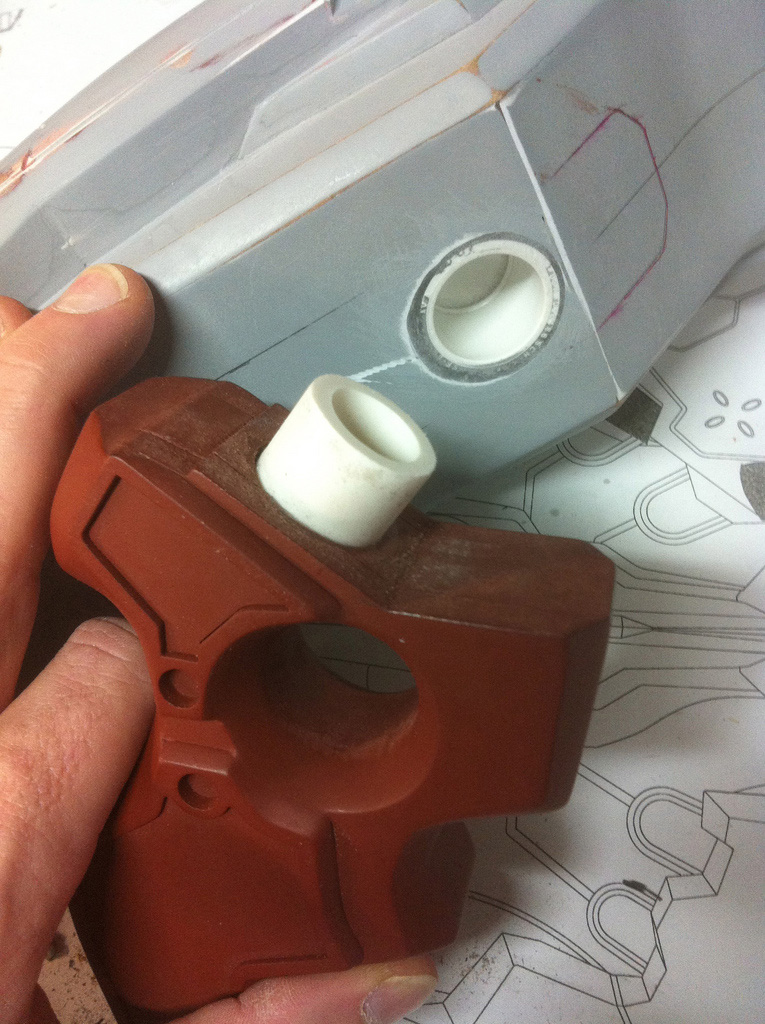
This is the first project I’ve created where all of the associated parts fit together with prominent mounting pegs or slots. Some of these were a hassle to create, but I eventually honed in on a readily available and rock solid solution. ½” PVC endcaps and pipe were used on many intersecting parts to make assembly faster and more rigid. This sped up the final build process considerably, and also allowed me to make dozens of fitment checks and mockups during construction.
Ping Pong Balls Are a Spherical Mess
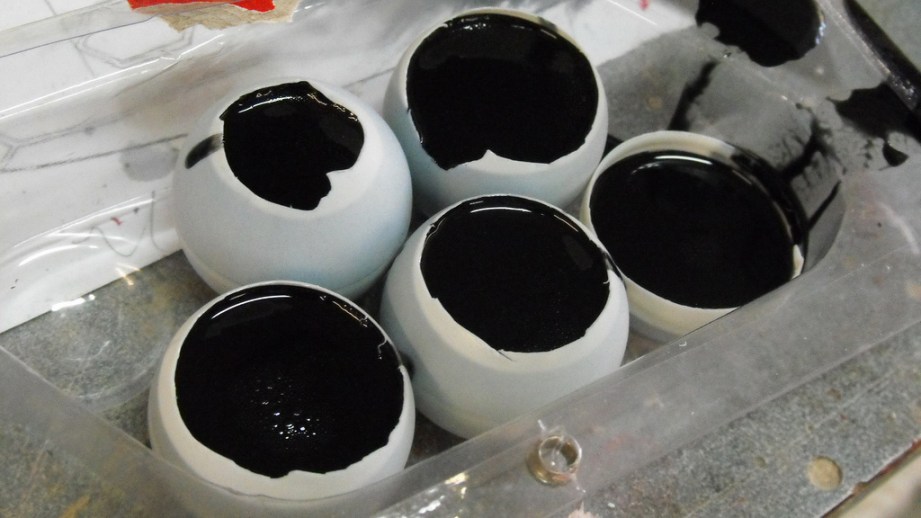
Ping Pong balls stink when you cut them open, and apparently the plastic they’re made from is highly flammable and toxic when sanded or melted. Still, they’re a very quick solution when you need some fancy sphere-type shapes on a complex part.
Let Primer Coats Cure Properly
[Speaking to myself here] Hey, genius. You should know this already, but since you’re in such a rush maybe you need to waste a few ounces of expensive silicone in order to get the message. Let the primer coat on your parts cure for at least 24 hours before attempting to mold them. Off gassing from primer will inhibit platinum cure silicone.
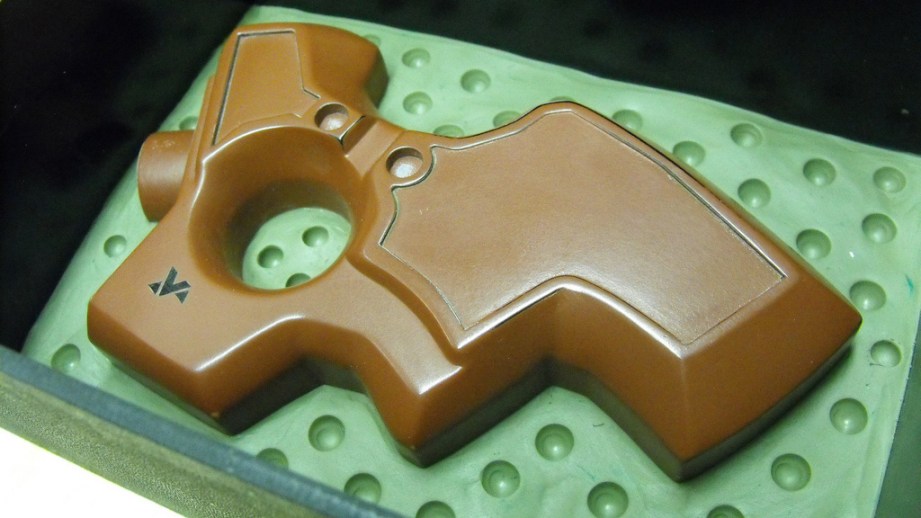
Test Your New Materials

While we’re on the subject, test out new materials before going all in. The green clay in this photo has been used many times in the past without incident, but the small blob of orange toward the front of the part hasn’t been tried with the silicone I chose to use on this project. Turns out it keeps the silicone from curing, which I only learned after pouring the first half of three molds. For those looking for more tech specs, that’s Chavant NSP medium clay and Smooth-On’s Mold Star 30. They don’t like each other.
The Bondo Squish!
Blatantly stolen from my friend Bill Doran over at Punished Props, the “Bondo Squish” method allowed me to get many parts to mesh together with exacting tolerances. Just tape over one part, apply wax or mold release, slather with bondo, then squish the parts together. Once the bondo is partly cured (rigid but you can dig your fingernail into it) pop the outer piece loose and trim up the overflow.
Take Care with Pressure Casting
Pressure casting was a new world for me with this project, and I will say I got very lucky with the pieces I made. A lot of people have frustrating hang ups with clear resin and this can lead to parts that never dry or are cloudy from humidity and heat. If you go the route I did with Smooth-On’s “Crystal Clear,” make sure to read the datasheet about part thickness. By using the proper “202” series resin, I got clean pulls every time.
Strong Dye is Strong
Two drops of this stuff was enough to tint four needles. This is the strongest resin dye I’ve ever used, and judging by how sparingly it should be applied, I’ll have a large amount of it for a long time.
Dusting Your Molds
Remember when I talked about dusting your molds in order to get better pulls? I ran out of baby powder one time and substituted cabosil in its place. Cabosil is a thickening filler for resins that (depending on the amount used) changes consistency from water thin right up to cake icing and everywhere in between. Apparently it also bonds to silicone when applied directly, pulling moisture out of the mold and damaging it quite severely once resin is poured in, effectively fusing the urethane to the mold material. Whoops.
Fun with Sparkfun
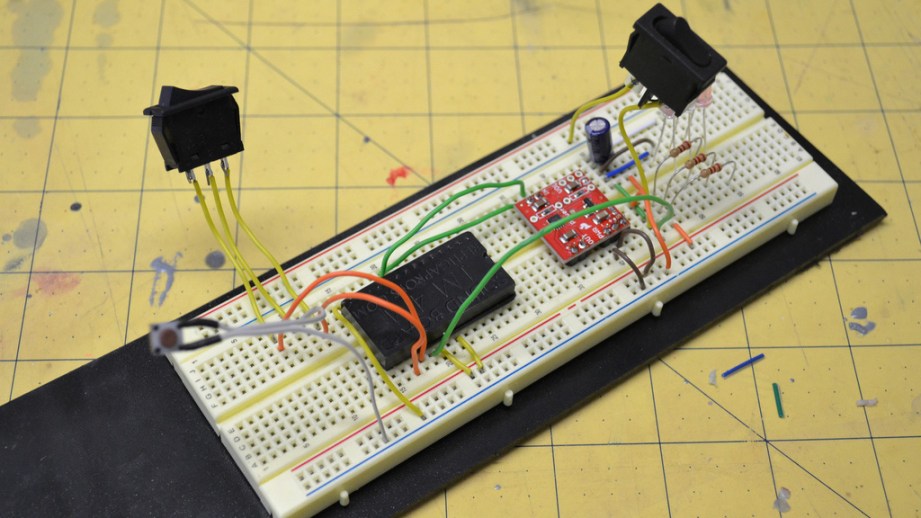
The little mono amplifier from Sparkfun (the red chip on the breadboard there) made all the difference in the world when it came to the sound effects. I’ve put audio electronics in props before but the speakers have been run directly off the sound chip. For something like a static display ship model where you only want a gentile engine hum this would be fine, but adding an amplifier to the circuit gives the Needler firing noises some much needed oomph.
Magnetically Attached Battery Covers
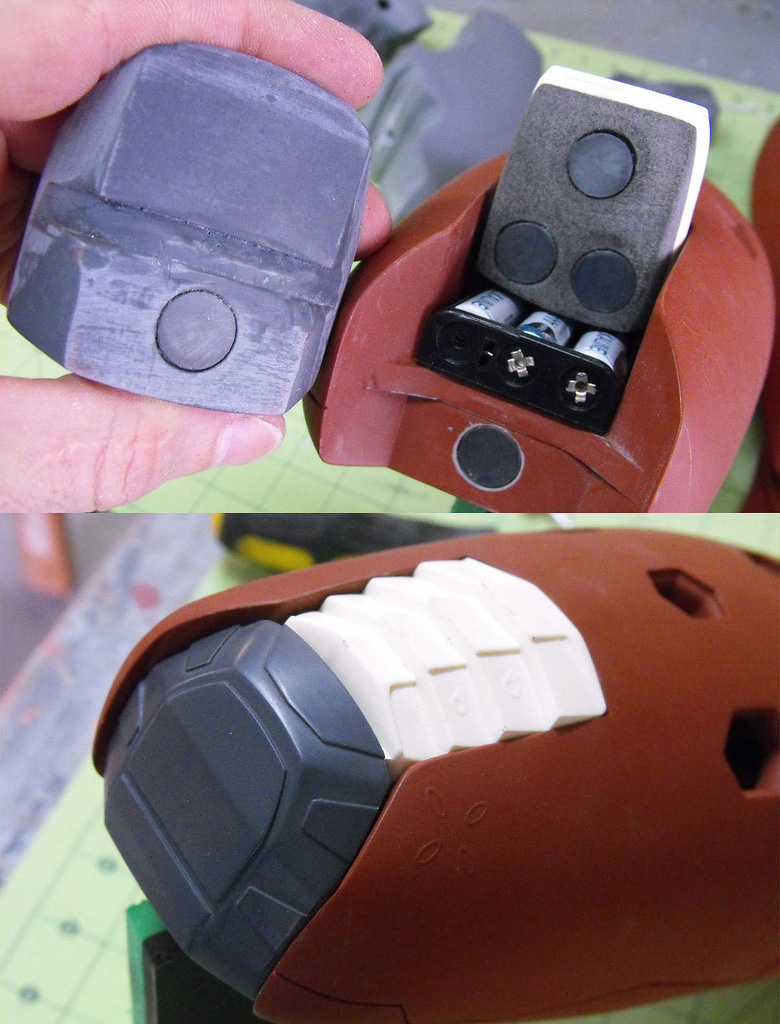
Magnets are awesome. I need to do more stuff like this in future projects instead of trying to blend in pre-existing battery covers and the like.
Test Your Paint on Scraps First
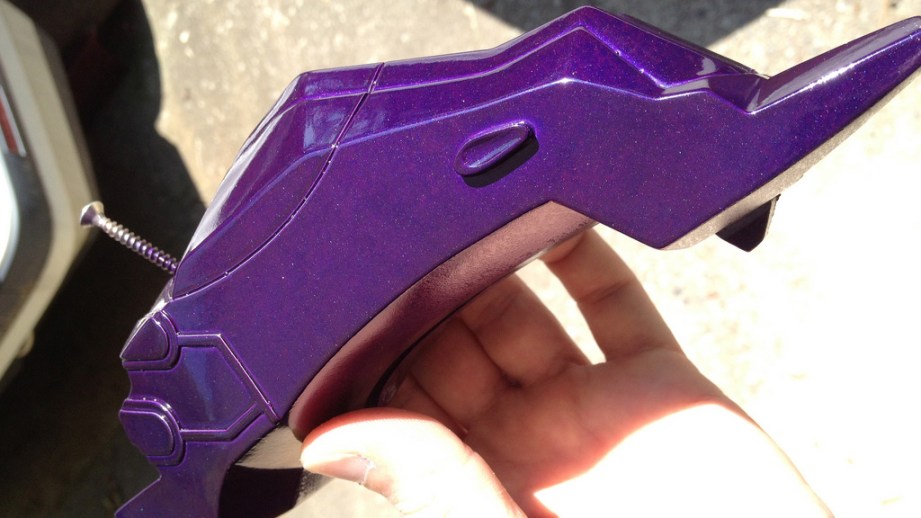
I actually learned this tip a long time ago and remember it well, but it’s a good one so it bears repeating. Test your paint first on scrap parts. Unless you’ve used these exact paints on these exact materials in these exact weather conditions before, something bad is inevitably going to happen. I had 5 or so scrap test pieces that were used before I settled on a mix of purple that I felt looked best, and I actually went through 6 shades/brands of paint before selecting the one I wanted to use. On a related topic, I also now have 5 bottles of purple paint I don’t like and don’t know what to do with.
Getting That Metal Texture
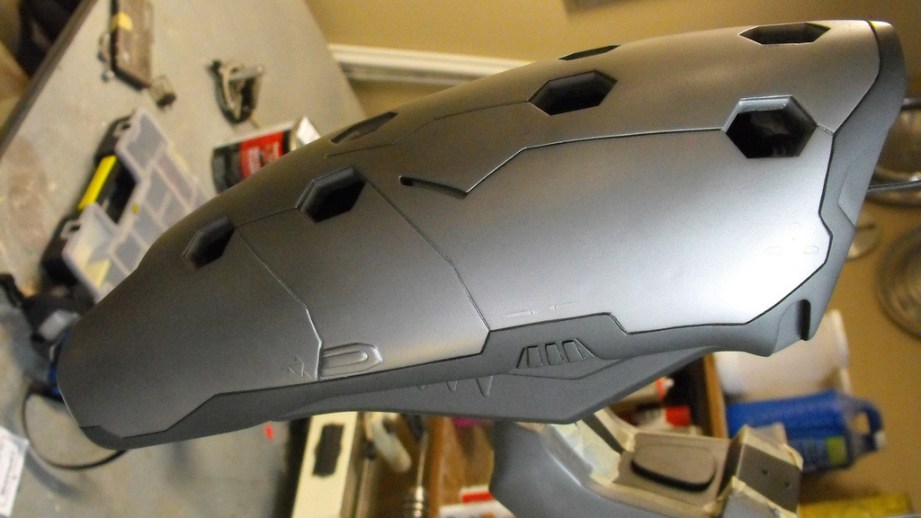
Testor’s buffable metalizer makes for a great undercoat for metallic shades. It’s a lacquer, so be careful what you spray it on top of since lacquers can pull up enamel base coats. The paint can pick up the texture of masking tape if you need to tape off sections to get any sort of dual color look, so you should seal it with clear between coats to avoid this. It’s extremely fragile until clear coated and takes a special Testor’s clear in order to keep its metallic shine.
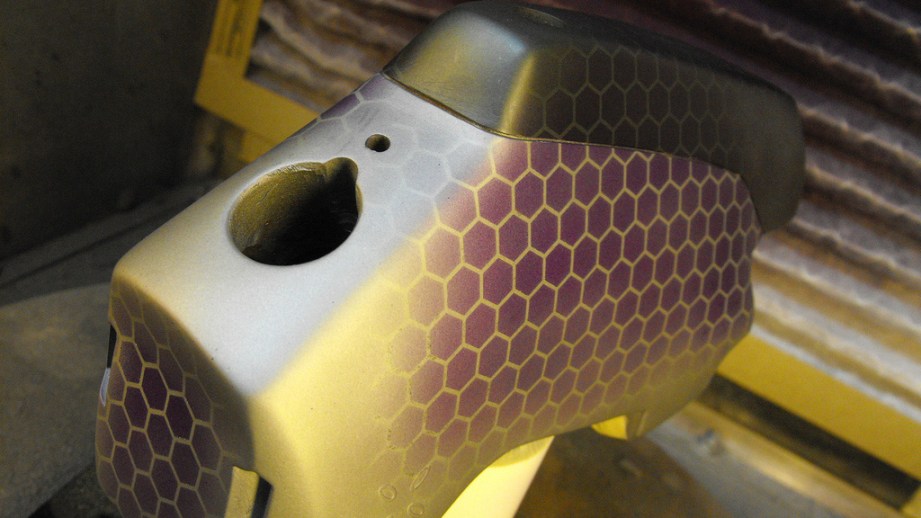
Speaking of its fragility, you can see in the foreground of this shot where the mask has pulled some of the metalizer paint off the surface. This part had a darker coat sprayed first, then it was masked for the lighter silver. The small dots are where the light silver has chipped away revealing the darker coat beneath. This wasn’t an issue for me since the whole thing got a thick coat of purple after this shot was taken, but if you’re going to mask off Testor’s metalizer make sure to use something low tack. The vinyl here was just too adhesive.
Hacking a Spray Can
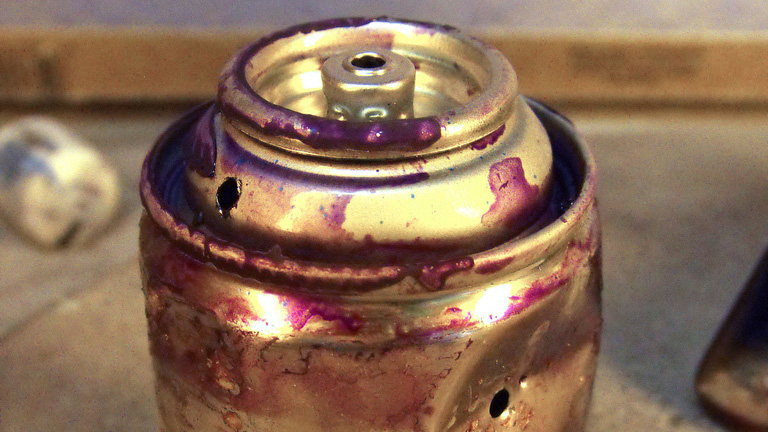
Spray cans kind of suck, especially for clear coats and fine detail. This is an old trick that many people probably know, but for those that don’t, here ya go: Flip your can upside down and stick a clamp on it to hold the nozzle down. This will release all the propellant over time, leaving you with a can of unpressurized paint. Drill two holes in it (one to pour and one to vent while pouring) then dump the paint into a sealed glass container for storage. Now you can mix that shade of paint with any other you’d like and use it in a far more precise airbrush!
IMPORTANT: DO NOT DRILL INTO A PRESSURIZED CAN. I don’t want to have to say that but it’s the internet and I’d rather not be responsible for someone losing an eye or something.
Laser Cut Masking Tape Stencils
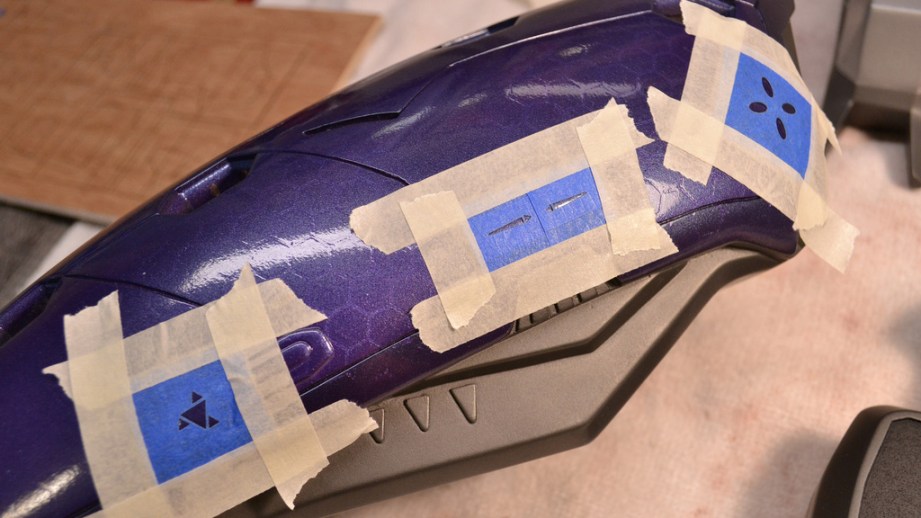
Did you know laser cut masking tape makes for pretty good stencils? You did? Well I didn’t, smarty pants, so it was exciting for me to find out.
For the Love of Airbrushing
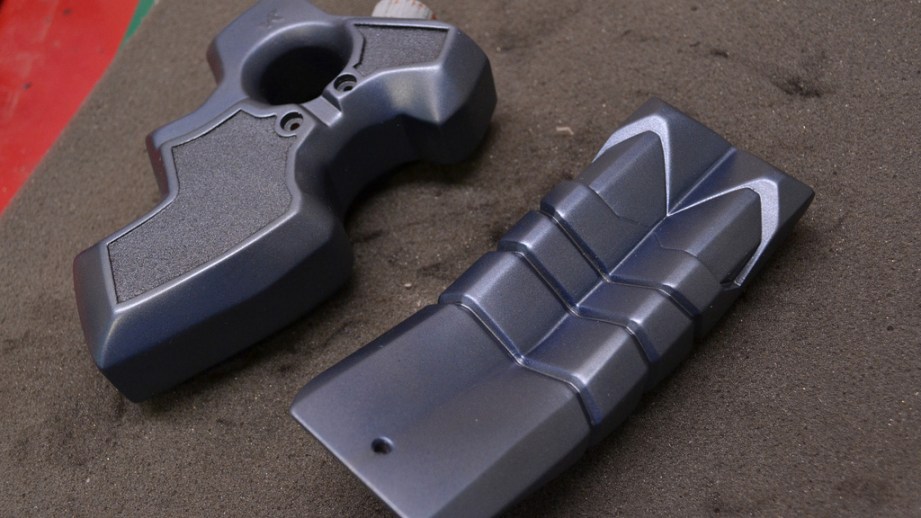
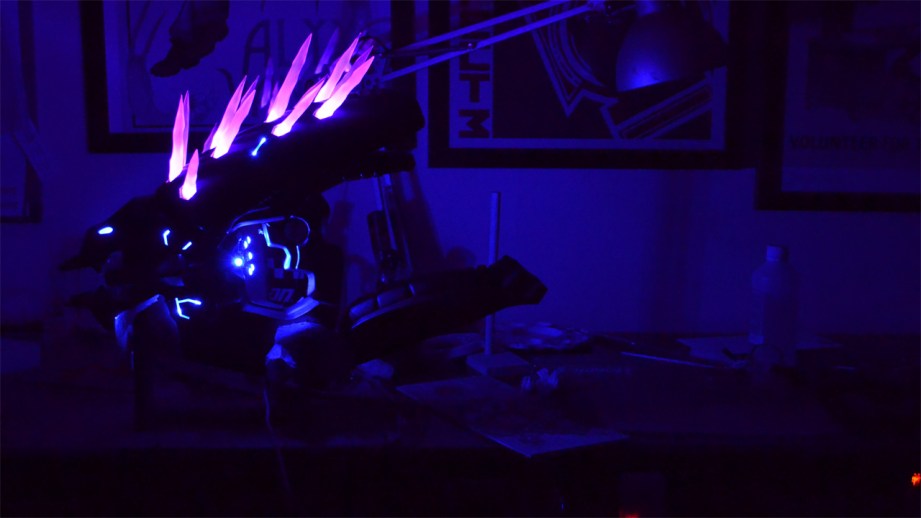
I really got to know my airbrushes a lot better over the course of this project. The parts here have a metallic silver base coat followed by a thinned metallic blue clear. The blue was a metallic brush paint thinned with airbrush medium and matter clearcoat in a 1:2:4 ratio. Prior to this I relied a lot on spray cans for the colors I was after, but the Needler necessitated a lot of custom mixing. I have two airbrushes, an Iwata Eclipse HP-BCS and a Thayer & Chandler from the mid 60’s.
Build Assembly Jigs
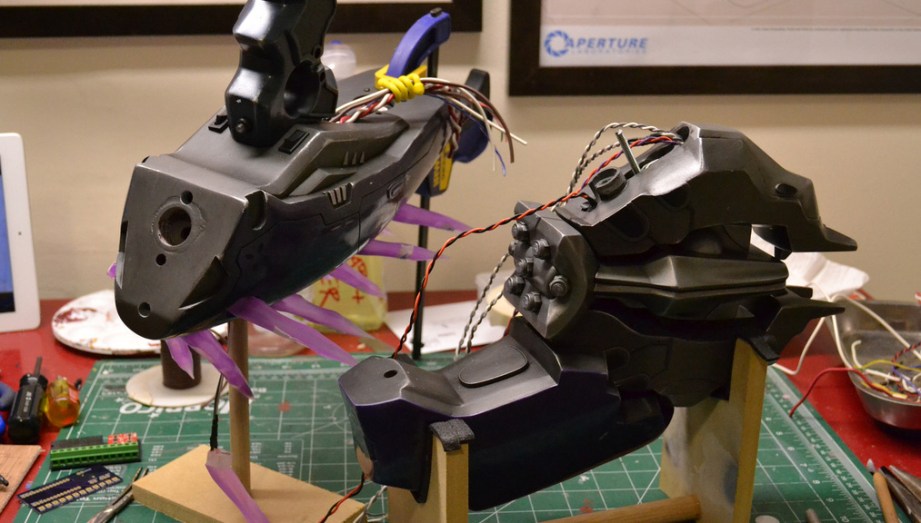
Assembly jigs are the best thing ever. I don’t know why I never had the idea to do this before, but being able to put together an unwieldy shape without having to balance it between your knees or on a precarious pile of workbench flotsam makes the assembly process so much easier. It only take a few minutes to hack together a rigid jig but it will save hours in frustration.
I know people are chomping at the bit to see shots of the final project, and they’ll be here soon (after Dragon*Con!). I hope this last build entry was educational and hopefully you, dear reader, can avoid some of the headaches that kept me awake at night!
The Volpin Project, Part 1: Introductions
The Volpin Project, Part 2: References and Blueprinting
The Volpin Project, Part 3: Selecting Materials
The Volpin Project, Part 4: Taking Shapes
The Volpin Project, Part 5: Bondo Strikes Back
The Volpin Project, Part 6: Details, Accents, Refinements, and Mockups
The Volpin Project, Part 7: Introduction to Moldmaking
The Volpin Project, Part 8: More Complex Moldmaking
The Volpin Project, Part 9: The Casting Process
The Volpin Project, Part 10: Illumination and Audio
The Volpin Project, Part 11: Prepping for Paint
The Volpin Project, Part 12: Finally Time to Paint
The Volpin Project, Part 13: Weathering The Needler
The Volpin Project, Part 14: Putting It All Together