


This week, Will, Norm, and special guest Jeremy Williams discuss the B-wing’s legacy in Star Wars, the rise of the Eurasian beaver, the non-existence of black holes, the sale of Motorola by Google, and how to protect yourself online. All that, plus your questions answered, what we’ve been testing, and fake outtakes. Enjoy!
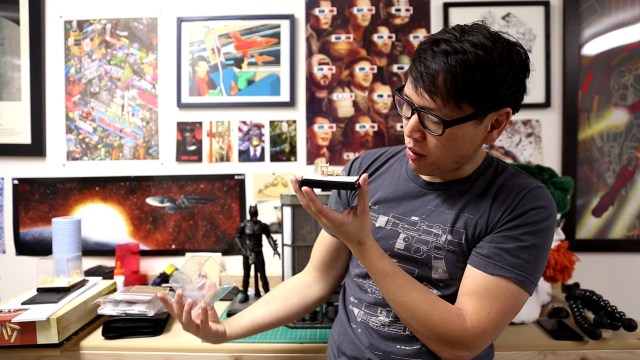
Inside Adam Savage’s Cave: Space Glove Vacuum Chamber
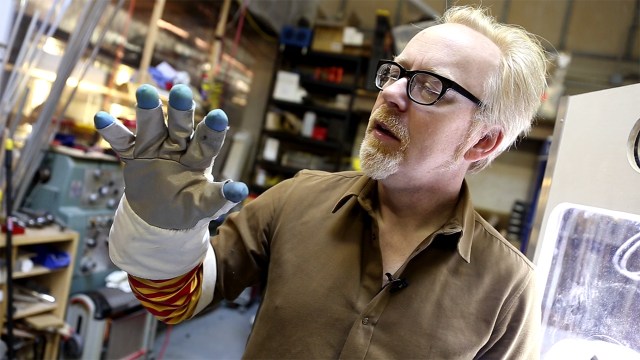
For a friend’s birthday present, Adam recently made this mock vacuum chamber and airtight space glove from scratch, and shows us how it works. The vacuum box is part prop and part puzzle–the user has to manipulate a set of nuts and bolts to complete a circuit and activate a sign. Best birthday present ever!
The Zoidberg Project, Part 7: Sculpting the Details
A lot of sculptors I know agree that the major shapes and forms of a sculpt are more important than the smaller details. You have to get the macro design right before you work on the micro. I think about sculptors like Henry Alvarez who did a ton of the sculptures for Rob Bottin back in the day. If you look at Henry’s sculpt of the Darkness makeup from the movie Legend, there is practically no texture or fine detail. It’s all about the forms. But like with other aspects of art, poor finishing can ruin a sculpture.
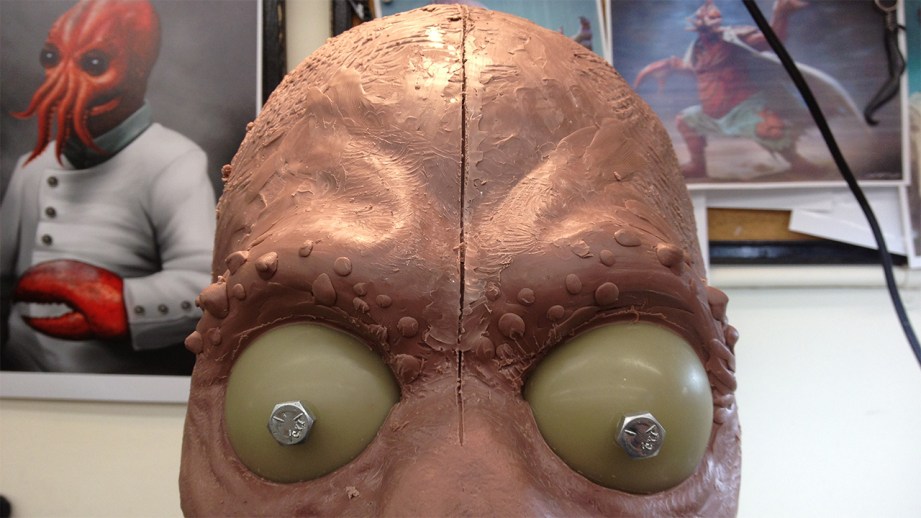
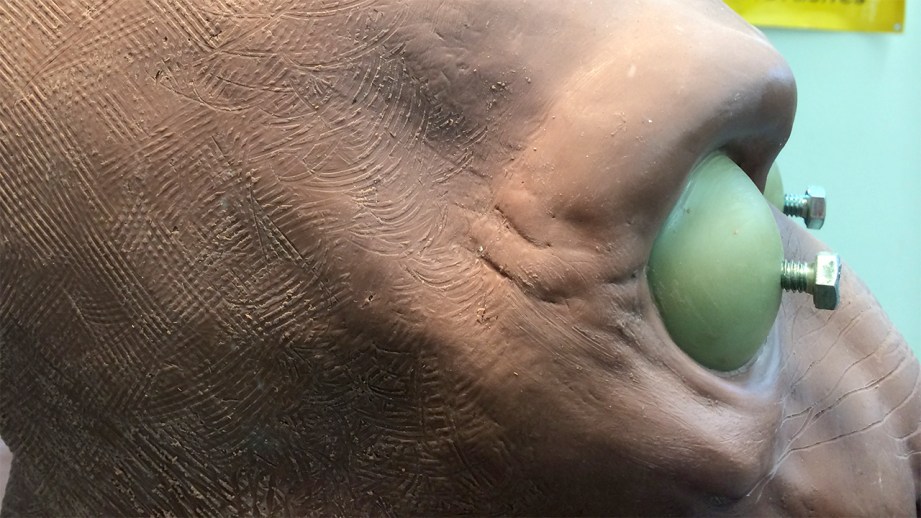
The good news is that I have the form of Zoidberg pretty well-figured out. I landed at more of a smooth and cartoony interpretation of the character than some of the more intricate or monster-y designs that I dug up as reference and inspiration. I’m still trying to incorporate some natural human and animal anatomy–always thinking about that bone, cartilage, or muscle structures might be going on underneath the “skin” of the sculpt.
In some of my photos from past updates, you can see a line carved down the middle of his face–this helps to keep things symmetrical. It’s sometimes difficult to notice if I’m sculpting one side lower or heavier than the other, and I tend to favor my left side (the sculpture’s right side) because I’m predominantly left-handed. I’ve spent a lot of time trying to sculpt and paint ambidextrously, but I still favor my left. Once I get the forms raked out and uniform between those sides, I want to start smoothing out the surface. This happens in a few steps. First I’ll start with larger rakes and move to smaller rakes, eventually moving down to a scotchbrite pad.Then maybe I’ll apply a little bit of naphtha with the scotchbrite pad to get it very smoothed out, or at least good enough for the next step.
In terms of sculpting, I often get asked about what solvents to use with clay. I spoke about WED clay when I was making the arm sculptures, and the solvent for that clay is water (since it’s a water based clay). When I use Chavant, Kleen Klay, or Roma (which are oil-based clays), I will use 99% alcohol as the solvent. And with Monster Clay, which is technically an oil-based clay, but much more like a wax, I use naphtha.
Solvents should be used sparingly, though. When I was starting out, I had the tendency to slurry up all of my sculptures and just scrub everything down. But as I became more aware of my sculpting technique, I use the solvents much less, or only to achieve certain finishes. Sometimes you have to just let the clay do what the clay is going to do.
One other thing you can do with the solvent is make a jar of a slurried clay for detail finishing. Sometimes I’ll use turpenoid or lacquer thinner, and use this slurry to stipple in some detail at the end. This can help fill in lines that look too much like tool marks, or just give a fine bumpy texture as opposed to a slick polished finish. You can also use a small syringe to add raised texture with this slurry. It can end up looking like goosebumps, or whatever else you might honk up. Not all fishing texture has to be a removal of clay, having some texture that is additive is a great way to break things up.
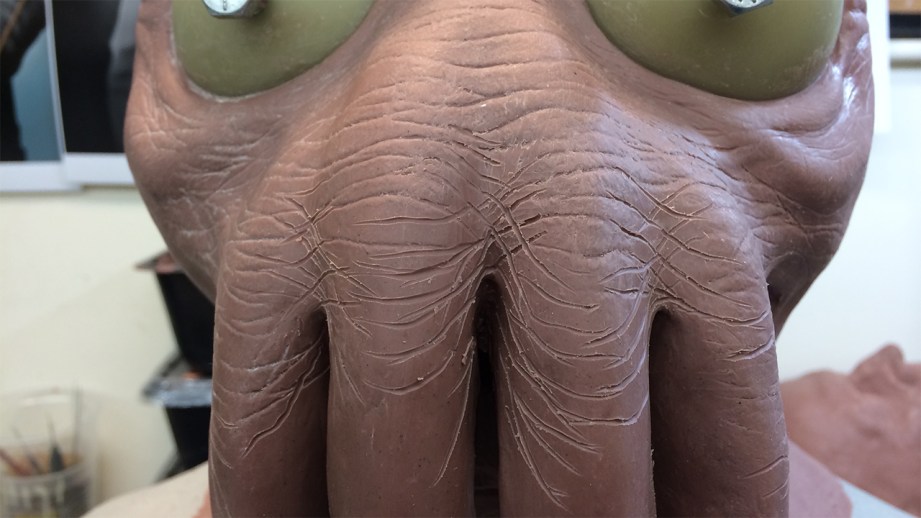
When I get close to the end of sculpting I end up finessing small areas and forms a lot. This involves making sure that transitions and angles of things are correct–in Zoidberg’s case, finding the balance of how much his eye bags should be present. In earlier versions, they are heavier and bonnier, but I think Zoidberg would be a little chunky, so I filled in some of the forms and smoothed them out. I think this eye bag shape is important because it’s definitely visible in the cartoon. Carrying over little things like that are important to translating the character to a three-dimensional form. Hinting at his bean-shaped head was an important balancing act, too. I don’t want to do a literal translation of the character’s cartoon silhouette, so, I just implied some of the shapes.
Adding things like crows-feet around the eyes or the lip texture add some lifelike qualities. I definitely don’t want it to be all smooth shapes.
Some of the conceptual designs that I am looking at for reference have a ton of barnacle texture and bumps–things I don’t want to have on our version of Zoidberg. I sometimes see sculptors load up the texture and detail in their work, and sometimes it ends up being kitchen-sink detail. Overloading the sculpt with texture isn’t my style. Same can go for paint–I’ll have to find a good natural feel to the colors. And with the paint job in mind, I need to be thinking about what will read through the paint and what will be accented or toned down with color. I want the sculpture to stand alone without color, so working under a strong overhead light helps me see what kinds of shadows appear and how the light affects the shapes. That way, when I get to the coloring portion, I don’t have to fudge what I’ve done already. The forms and colors can compliment each other.
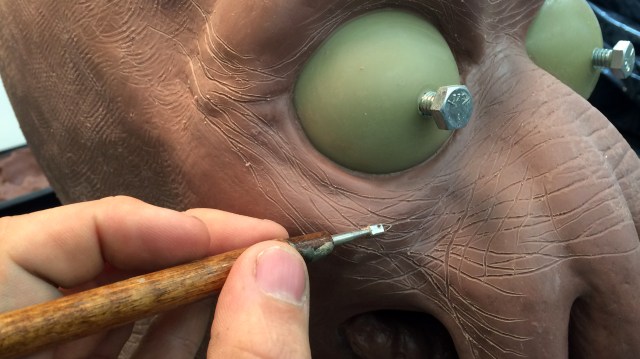
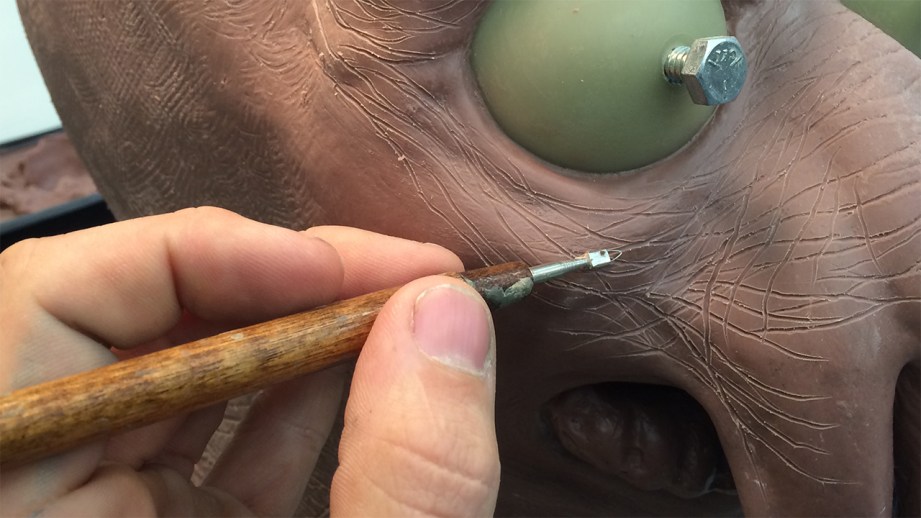
The next thing I have to do is lay in some wrinkles. A mistake I often see with new sculptors is that they just scratch the hell out of their clay in all kinds of directions, and all over. You have to think about the placement and direction of the wrinkles. You have to think about which direction is the skin going to be crinkling and where would a line form, or not form. I also want to be aware of how the foam latex cast is going to want to move and wrinkle on its own. By sculpting wrinkles and forms in certain places, I can control how the final foam mask will bend or crease. Thinking ahead!

Wrinkles often intersect, and if you think of them as stretched out X or Y shapes it will help your sculpt some achieve more realism. Also, I don’t always see wrinkles travel very far without being broken up. Meaning they start and stop often, and it only appears to be one long line when looked at from afar.
I don’t think I will add pore texture, because it don’t think decapods have pores, but I will integrate some raised texture with that clay slurry mentioned earlier. I can also intermittently soften the forms or wrinkles with a little rubber nub tool. This thing can be found in most office supply catalogs as a money or paper counter, and is super helpful when finishing out sculptures. It has little bumps all over it that can help simulate pores or negative bumps shapes, or can just be used as a fine soft rake.
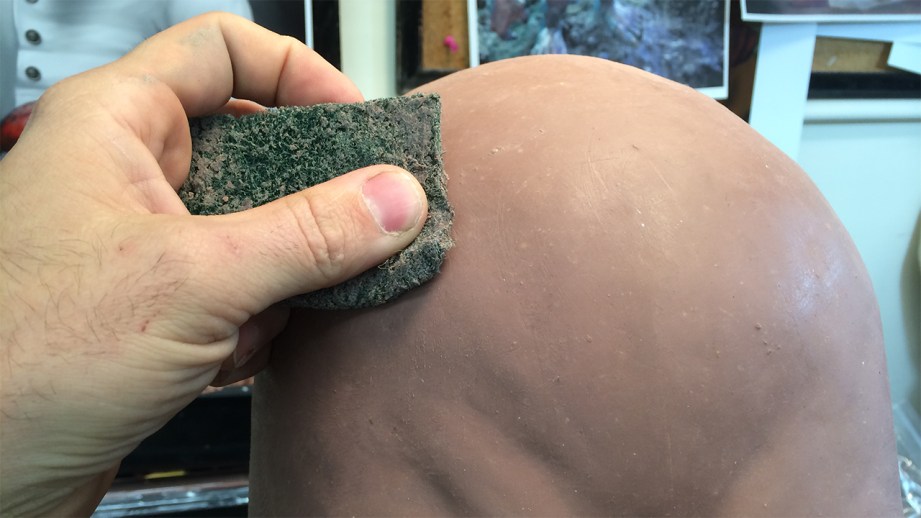
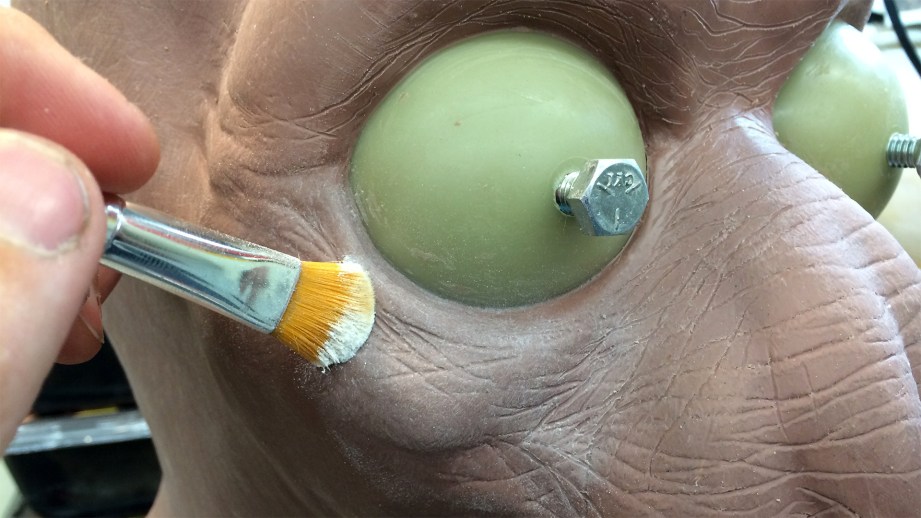
When I’m nearing the finish point, I will take some baby powder and a brush and polish the whole sculpt down. This softens some of the sharp lines and textures without washing it away with a solvent. Getting to that point is easier said than done. Sometimes I can zen-out while cruising to finish a sculpture, and sometimes it’s like pulling teeth to sit still for hours and just finessing one fine detail.
Thanks to Iwata-Medea and Smooth-On for providing materials and sponsoring this project.
Hands-On with Sixense STEM VR Motion-Tracking System
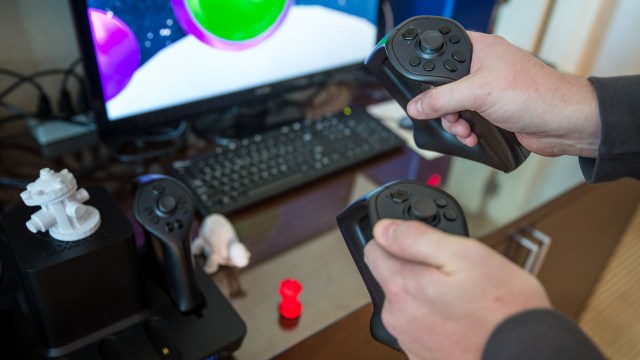
New technologies like the Oculus Rift and the Omni treadmill are renewing interest and faith in virtual reality as a viable platform for gaming, but we still don’t have a good control system for tracking your limbs and body inside a virtual space. The inventors of Razer’s Hydra controller technology have a new motion-tracking system that they think is the solution. We give the STEM system a quick test and learn about its uses in gaming and 3D modelling.
Working With The Gates Foundation – 1/28/2014

This week, Adam, Will, and Norm discuss the video Jamie and Adam helped Bill and Melinda Gates make as part of their foundation’s annual letter. Other topics include: buying concert tickets online, the right way to approach someone you admire, and Will misses the ultimate segue.
Premium: Toys and Stuff in Norm’s Garage
Since I’m working from home today, thought it would be neat to show you my garage workspace, where I tinker with craft projects on weekends while staying off the Internet. In addition to teasing some future Show and Tell projects, here are some random toys and collectibles that I bought over the Winter break.
Episode #198 – Robot Economists – 1/23/2014

One Day Builds: Adam Savage’s Traveling Beaver Box
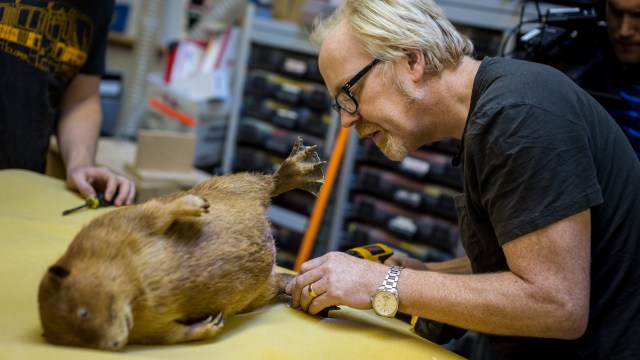
One Day Builds return! This week, Adam constructs a traveling case for Winston, a dashing beaver that’s also the official mascot of The Talking Room. Winston’s box needs to be a very specific size to fit in airplane overhead bins, so a little taxidermy surgery is required. Winston goes under the knife!
Bits to Atoms: An Overview of Today’s 3D Printing Technologies
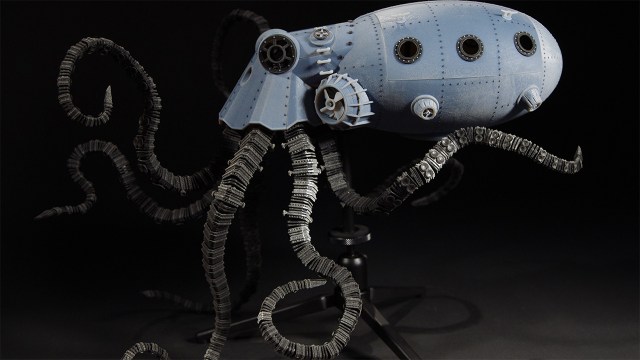
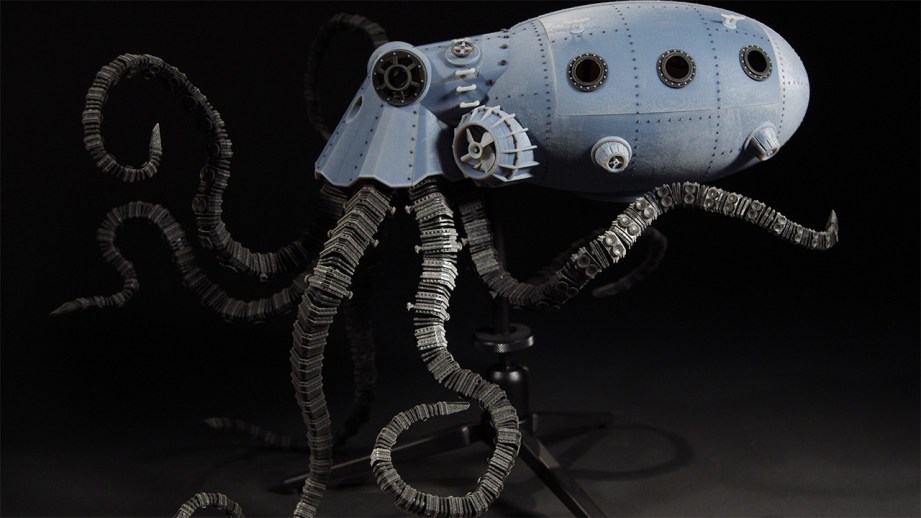
[Norm’s note: If Sean’s name sounds familiar, it may be because you first met him as the winner our first Inventern competition, in which he and the two other awesome finalists flew out to San Francisco to spend a weekend working on Adam’s final build challenge. But we first heard of Sean when he posted photos and videos of his 3D-printed Octopod vehicle project that was his Masters Thesis at NYU. As it turns out, Sean’s expertise is in 3D modeling and printing, and has had experience using various 3D printing technologies and combining rapid prototyping with real-world hardware. Basically, he’s way more knowledgeable than us when it comes to 3D modeling and printing. So I was delighted when Sean agreed to share that knowledge with us and Tested readers. Over the course of this year, Sean will be writing a bi-weekly column on Tested about modern home and professional 3D printing technologies, provide tips on how to get started, and share walkthroughs of his various 3D printing projects. To kick things off, Sean’s first column is a re-introduction to current state of 3D printers.]
Many of you are probably somewhat familiar with 3D printing. Will’s weekly MakerBot Mystery Builds, CES coverage of new printers, and other highlights pop up all the time, but now we are looking to delve deeper into how these new technologies work and are related to each other. For this first column, I want to start fresh with an overview of the 3D printing process and current methods of printing.
Today’s 3D printing is primarily an additive manufacturing technique in which a digital model is translated into a physical object by a machine which ‘draws’ very thin layers of material on top of each other until the object is complete. There is a wide range of machines that print in different ways and materials, including plastic, metal, ceramic, plaster and even rubber.
Up until recently, 3D printing was more commonly referred to as rapid prototyping and/or additive manufacturing. Developed in the 1980’s, it was primarily used in manufacturing industries as a cheaper and faster way to build prototypes. This technology finally reached the consumer-level in the mid-2000’s, mainly due to the hard work of open-source hobby groups such as The RepRap Project. The goal of the Project was to develop and promote an open-source, self-replicating 3D printer and there are many printers based off the RepRap Project. If you buy a kit to assemble, chances are it’s some form of RepRap, in fact MakerBot grew out of the RepRap community. If you want to learn a lot about home 3D printers and possibly build one yourself, this is a great place to start.

The digital model is typically created in either CAD (computer aided design) which is generally used when mechanical parts and precision are needed or a polygon modeler which are typically used for animation and game assets. Examples of CAD programs are AutoCAD, SolidWorks and 123D Design. Some popular polygon modelers are Maya, 3ds Max and Blender. There are advantages and disadvantages to each and many more options which will be covered down the road. The model can even be created by scanning a real object, but regardless of how it’s done, the model is eventually exported as an STL (standard tessellation language) file which simply describes the surface geometry of the model in triangles. The STL should always be processed through a mesh repair program such as netfabb since during construction it is very easy to create a mesh that won’t print properly due to defects in the mesh. Once again, we will talk about this more later.

Once repaired, the STL file has to be ‘sliced’ into the layers that will be drawn by the printer, one at a time, layer-by-layer on top of each other until the object is completed. The STL is brought into a slicing program where you specify how thick each layer should be (resolution, typically in microns), what type of material is to be used, how solid the finished piece should be (solid, hollow, or in-between), how fast it should print and whether support material is to be used. This all varies based on type and brand of the printer and what software is being used. Really big or complicated models can take a long time to slice, particularly on home printers. The slices are turned into gcode, a machine language used for manufacturing on both CNC machines and 3D printers and describes the tool path for printing.
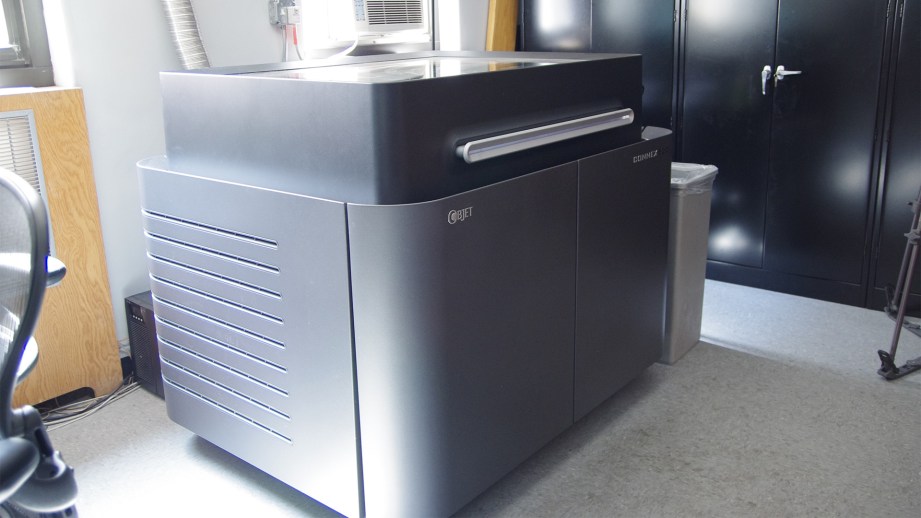
There are a lot of different 3D printing machines out there ranging from kits to mid-priced prosumer home machines, to crazy-expensive industrial machines. I would say that resolution and support material are the two biggest factors dividing printers. Some may argue materials as well but ABS parts that I have printed on my MakerBot are more flexible, stronger and have better longevity than some parts I have printed on the $500,000+ Objet machine. The difference is the Objet can do much higher resolution and support material that allows you to print parts you cannot on a home printer.

For example, let’s say you want to print out a miniature table. If you print it right-side up on a home printer, it will start with the bottom of each leg, build it’s way up to the tabletop and then run into a problem since there is nothing to print the tabletop on. It’s trying to print in empty space and the print will most likely fail. The high-end machine will have some type of support material that it will build up under the tabletop so there is something to print on. The support material is removed once the print is complete.
Now in this case the best thing to do is simply flip the table upside down so it prints the tabletop first and then the legs. This orientation needs no support so it will print fine on the prosumer and save money on the high-end printer. Prosumer printers do have support material made by either printing extra structures to hold up overhangs or using dissolvable materials. Up until recently I would never use support on my home printer since it never worked very well and would put blemishes on the model surface. For dissolvable material you need a machine with dual print heads and relatively mild chemicals to dissolve it. Great improvements have been made on support generation on prosumer printers and I use them more often as of late.

Now that we have covered how it all works, let’s take a look at the different 3D printing technologies in use today. This is terminology I’ll be referring to in future columns, and that acronyms you may read or hear in 3D printing coverage.
FDM – Fused Deposition Modeling
Thermoplastic filament off a spool is heated and extruded through a nozzle and ‘drawn’ onto a print bed. Most home machines are FDM or technically…
FFF – Fused Filament Fabrication
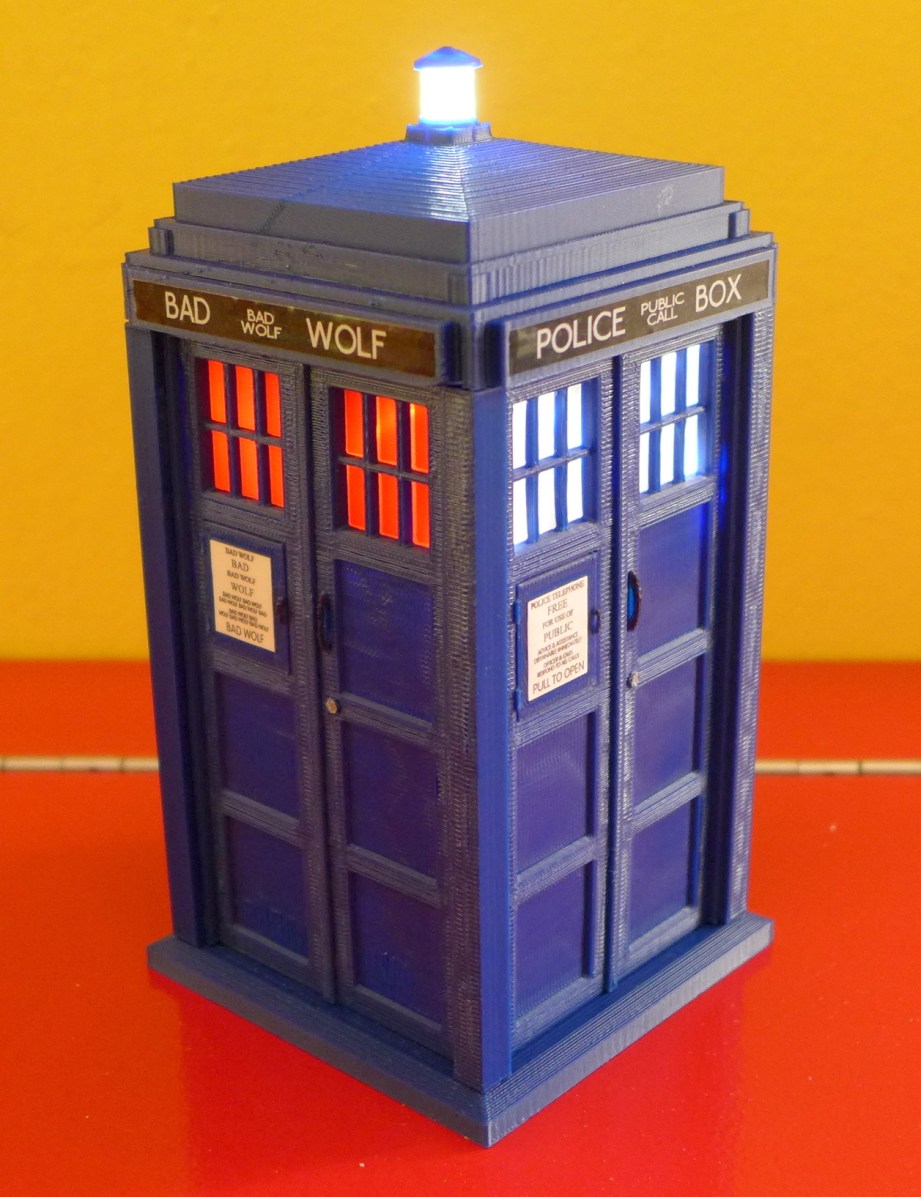
This is the exact same thing as FDM but can’t be called that due to trademarks. MakerBot, Ultimaker, Cube, Solidoodle, are all FFF machines. Most print with PLA (biofilament made with corn or organics, smells like waffles) or ABS (LEGO plastic).
FFF tends to be the affordable printers with very affordable materials. Prints can go up to pretty high resolution and can be very strong. Resolution still can’t match SLA and other high-end printing and supports can be messy to remove and not as effective as other machines.
3DP – Three-Dimensional Printing
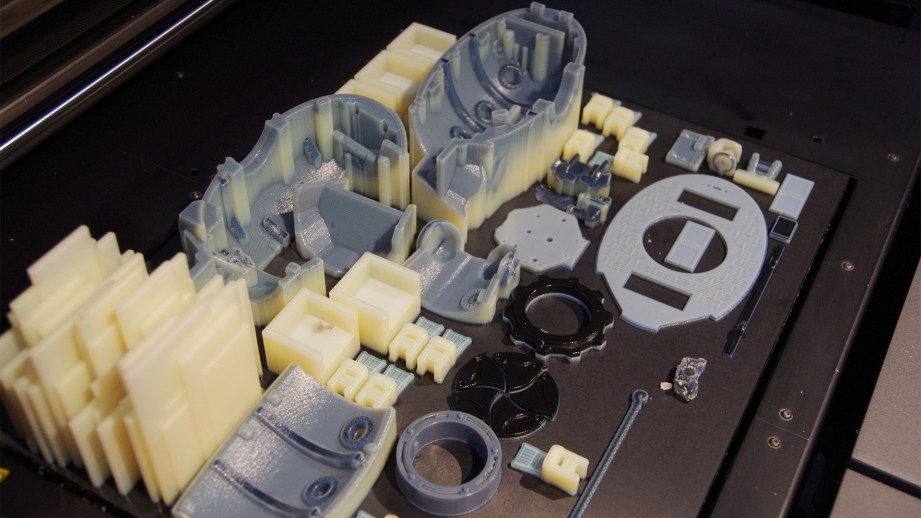
The term for original ZCorp machines which uses a plaster-like powder and a cyanoacrylate (super glue) binder. This type of printer has a print chamber which starts in the up position, a thin layer of plaster powder is laid down and an inkjet head distributes the binder material anywhere the model should be on the print bed. The platform moves down and another layer of powder is distributed and bound. The interesting thing about this method is any powder which is not part of the model acts as the support material. If the model is designed to be hollow, significant savings can be had since any loose support powder can be reclaimed and reused. This is also the only printer that can do full-color, this is what Shapeways uses for Sad Keanu, etc.
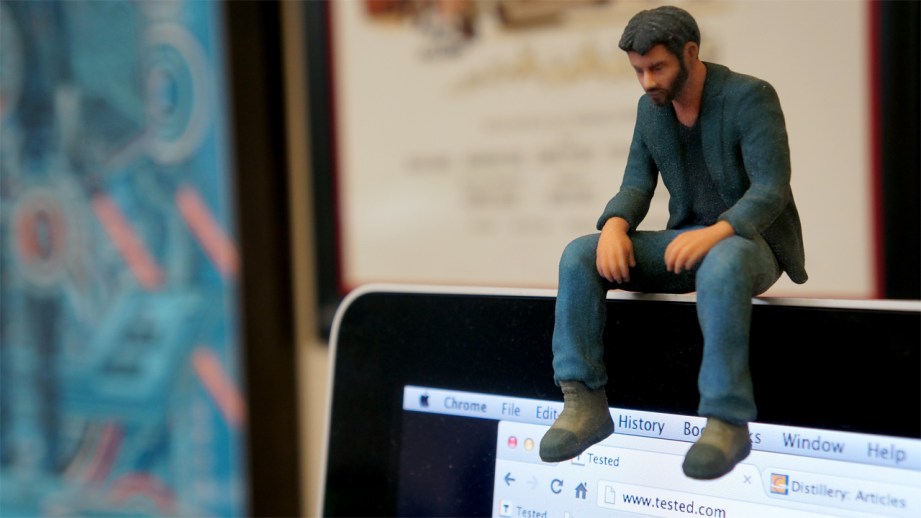
3DP is usually the cheapest pro option, does detail pretty well, but not as good as SLA or SLS but can do full color prints. Finished models are very fragile until they are infiltrated which requires them to be completely dipped in super glue. After infiltration they feel like and have the strength of unfinished ceramic.

CJP – ColorJet Printing
This is what 3DP is now called since 3D Systems bought ZCorp. It’s the same thing, although they have announced a plastics-based machine which can also do full color.
SLA – Stereolithography
The first type of 3D printing developed in the 1980’s by 3D Systems. Uses a laser which ‘draws’ each layer in a vat of liquid resin. Wherever the laser hits the resin it hardens and forms a layer. The object is anchored to a platform which moves in or out of the vat (depending on the printer) as layers are added. Supports are typically small ‘spears’ that can be easily broken off after printing. Some machines require additional UV curing of the model after removal from the vat.
SLA can be very strong and very high resolution but removing all of the support spears can be a giant pain and cause surface blemishes. Most SLA machines are professional versions except for the Form 1 which is a great prosumer machine developed by MIT grads.

SLS – Selective Laser Sintering
The setup is similar to 3DP but uses a laser to fuse a thin layer of plastic, glass, ceramic or metal and loose material still acts as support. Plastics models are ready right out of the printer. Ceramic, metal and glass may need to be fired to further fuse the particles together.
SLS is nice since the support is easy to clean up and most models are ready right out of the printer. Surface finish is still slightly rough like 3DP but can be polished. Details are usually very good and slightly better than 3DP. Plastics are very strong and slightly flexible. This is Shapeways goto tech for most of their prints including the great Strong & Flexible material.
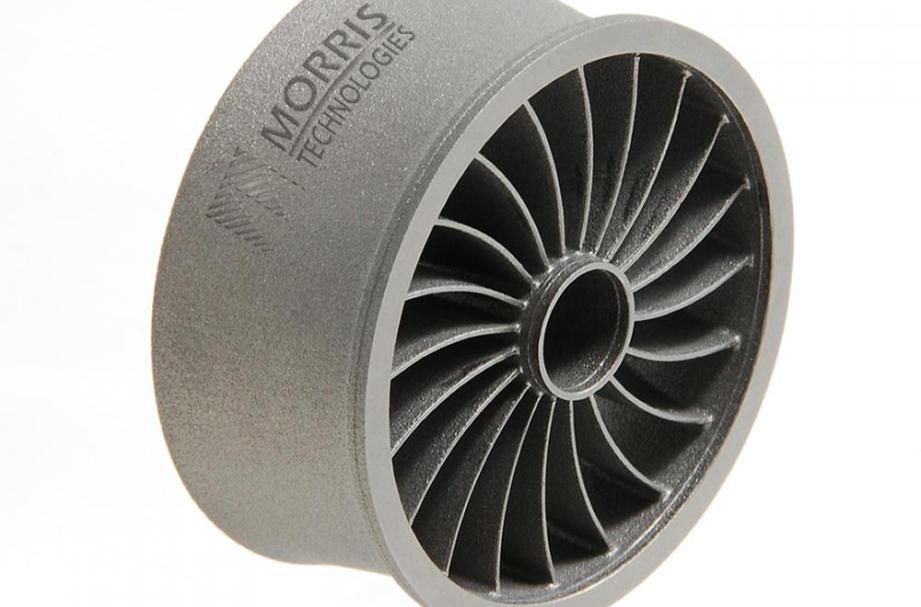
DMS – Direct Metal Sintering
Similar to SLS but directly binds and melts metal powder together for structurally sound and pure parts. I believe this is what NASA was using to make jet nozzles.
PolyJet
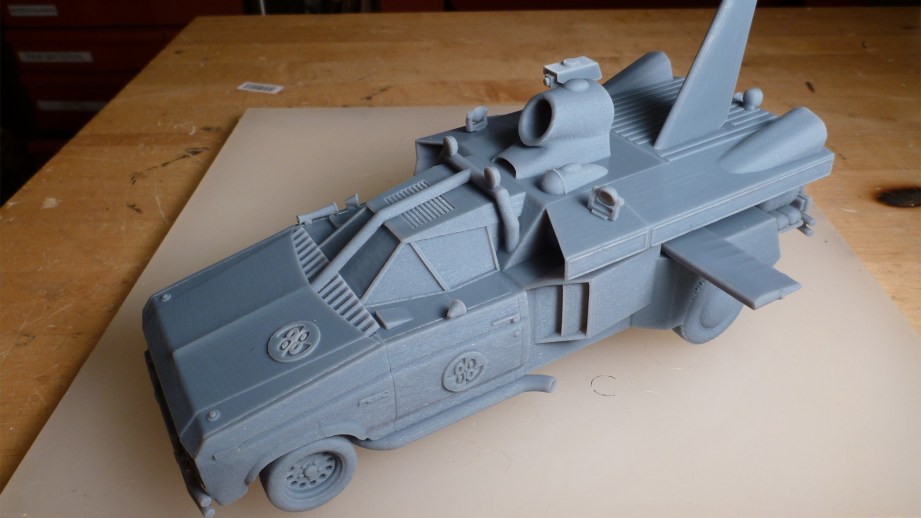
Composite liquids are drawn on print bed with inkjet heads then cured with UV light. Not as messy as most of the other methods but uses a wax-like support material that encases parts that need it. Objet machines were unique in printing multiple materials by using two print cartridges. An Objet Connex 500 can print rubber and plastic at the same time. Or different digital mixes or color and/or hardness at the same time. This is how I made the rubber tentacles for my Octopod and printed rivets and other details right out of the printer.
Polyjet is capable of high resolution, a wide range of materials including rubber and can print overmolds (plastic with rubber modeled to it like your toothbrush). The support material can be a pain to remove, usually starting with a water jet and moving to using mild lye baths, but the end result looks great. Some of the materials do not hold up well over time, but it’s mainly meant for prototypes.
MJP – MultiJet Printing
3D Systems just announced their version of Polyjet which can do the same type of stuff as the Objet. I believe that 3D Systems uses a wax support that melt away when heated. Don’t have any experience with this stuff yet.
Paper
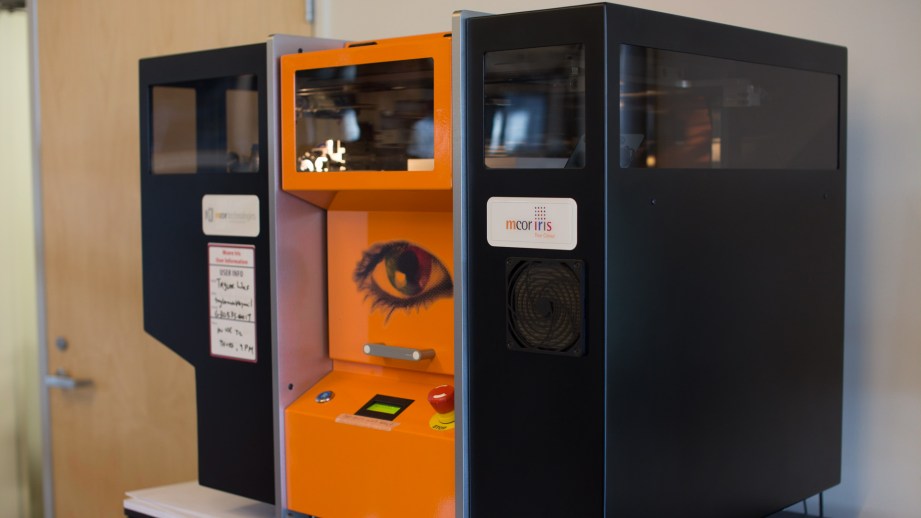
Mcor Technologies uses reams of paper which are laser cut and glued together to make objects. The resolution is dependent on the thickness of paper and full color prints can be done by first printing out each paper layer on a regular printer. Staples is supposed to be offering print services with these in house. I’m skeptical as to how well this will do, although I have seen some prints in person and they were not bad for being paper. Update: please see my full review of the Mcor printer here.
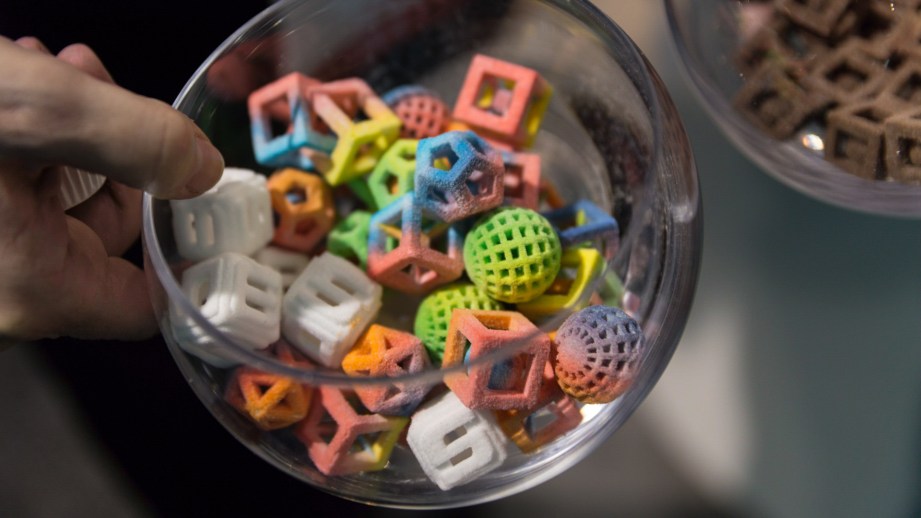
Food
3D Systems has announced the ChefJet which will print in sugar and chocolate. It uses technology similar to 3DP (CJP) and can even do full color in sugar. It lays down a thin layer of ultrafine sugar and binds it with water. For chocolate it lays down a milk/cocoa powder layer and adds cocoa butter to bind it. Pretty cool, but how does it taste? Was Will just being polite?
Hope you enjoyed this overview, we’ll continue to tackle different topics and do some walkthroughs of 3D printing projects over the next few months. And if you have questions about specific 3D printing topics or technologies, please post them in the comments below!
Photos courtesy Sean Charlesworth unless indicated.
Premium: Will Upgrades the MakerBot
We showed it to you in time-lapse last Friday, but watch Will take apart the MakerBot Replicator and upgrade its build platform rails in real-time!