The inflatable robot of Big Hero 6 was based on real soft robotics research, like the ones being experimented with at startup Pneubotics. We chat with Pneubotics CEO Kevin Albert to learn how robots can be designed and built with lightweight and flexible skins that have impressive dexterity and structural strength.
Will, Norm, and special guest Carl Merriam complete their LEGO Minecraft sets and begin a new challenge in this week’s LEGO with Friends! We’re doing a little something different this week, and hope you’ll participate as you watch. Follow along with us by signing up for a Tested Premium Membership here!
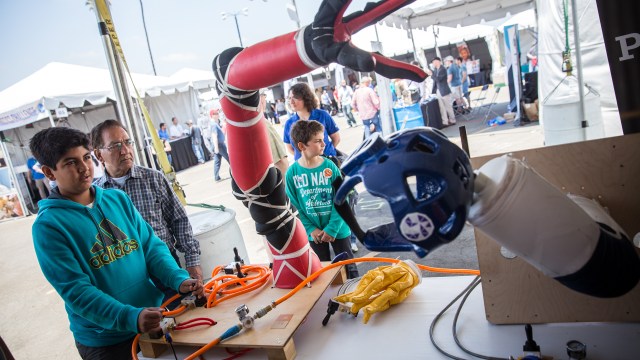
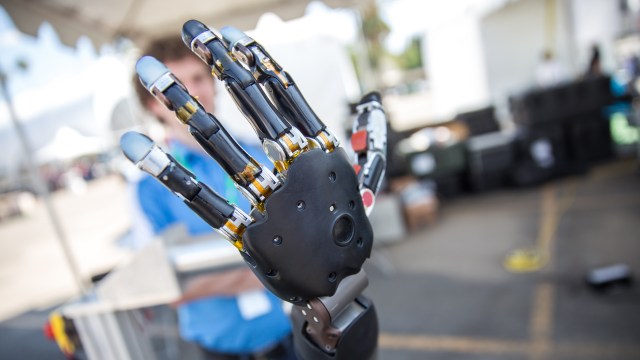
This realistic robot arm and hand was one of the coolest things we saw at the DARPA Robotics Challenge event–it’s a technology that’s already being field tested on patients. We chat with Michael McLoughlin, Chief Engineer at the Johns Hopkins Applied Physics Lab to learn more about the challenges of building a modular prosthetic limb that has the same dexterity as a human hand, and its potential applications.
The final project takes us to the weekend, as Will, Norm, and Frank spend extra time finishing up painting their creatures. Let us know what you think about them, and follow along with us for next week’s LEGO with Friends by signing up for a Tested Premium Membership here! As always, thanks for supporting these videos and projects.
Over the course of this month, Punished Props’ Bill Doran is building a 1:1 scale replica of the alien assault rifle from District 9 to unveil with us at Comic-Con. Bill’s build logs and videos will walk through his design and fabrication process, and his finished piece will be paired with a surprise at SDCC. Place your questions for Bill in the comments below!
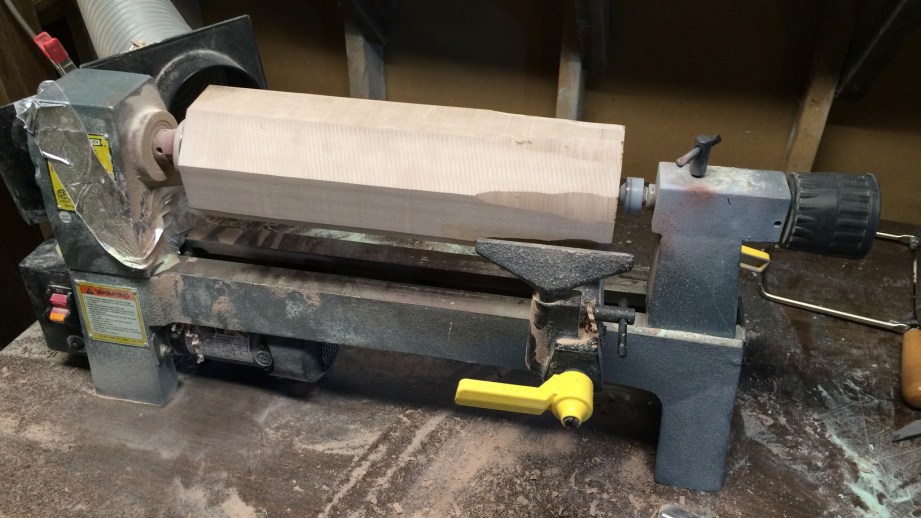
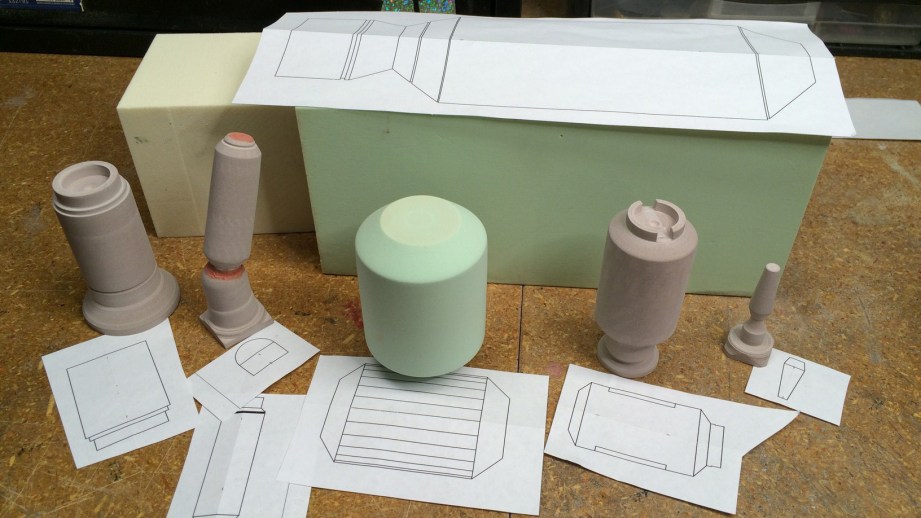
Welcome to the second installment of the District 9 rifle prop build! The project is moving along at a good pace and I’ve made a lot of progress. While the main body of the gun was made mostly in flat layers, there are a bunch of cylindrical pieces and it would be a pain to build them from flat sheets of material. Instead, I opted to bust out my lathe.
Working with Foam
For these pieces, I used a urethane tooling foam called RenShape. It comes in several densities. I ended up using the most dense foam I had. This stuff is so dense that you would think it’s made of rock.
I was also made aware by my pal Harrison Krix that sometimes this kind of foam could cause curing inhibition in platinum cure silicones, so I performed a simple test. I took a small sample of each of the four densities I had on hand and dumped silicone over them all. Sure enough, the two least dense foams caused some inhibition, while the two most dense ones did not. Hence the decision to use the most dense stuff!
Taking Foam to the Lathe
With my foam in hand, I took to getting it cut down to the rough size of each of the cylinders I needed. This is the kind of job where a bandsaw excels.
Then I centered the pieces on my lathe and got to turning! Basically I would turn it down to a tube shape, roughly the widest diameter on that piece, and then start carving in details. Since the foam has a nice homogenous density, it lathes like a champ!
One by one I knocked out all the pieces, turning them down to shape. Some of the pieces were quite tiny and required lots of finesse to shape them without breakage. Others, like the main tube thing under the handle, took up every dimensional inch of my poor mini woodworking lathe.
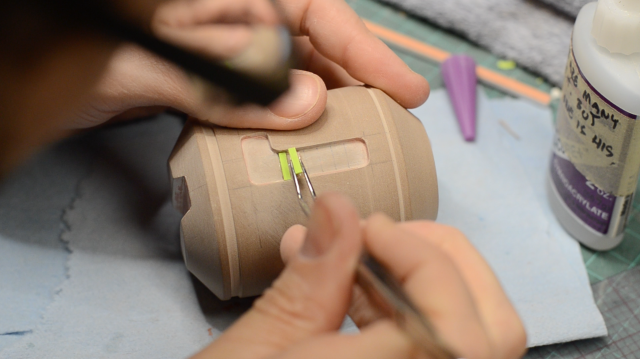
Some of the details on these parts couldn’t be made on the lathe. Instead, they needed to be added by hand. Most of these details were carefully carved in by hand with my Dremel. Other parts could be cut in using the bandsaw.
I also added on some details by gluing down strips of styrene plastic or pieces of acrylic dowel. Each part demanded it’s own set complex modeling skills to achieve a specific look.
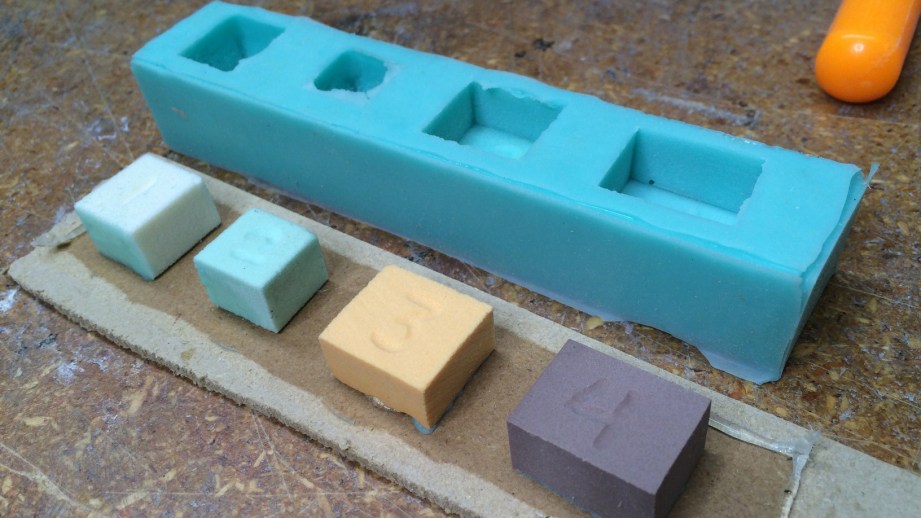
Creating Box Molds
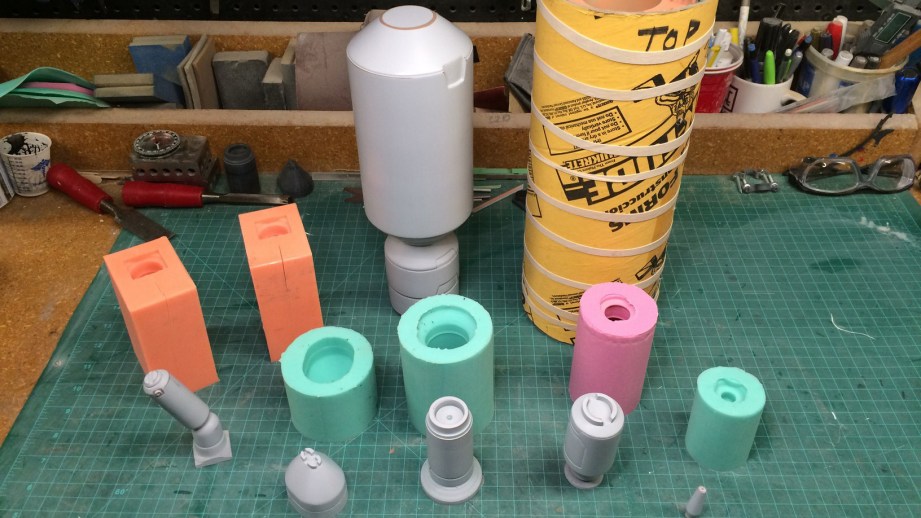
Once these pieces were finished, sanded and primed, they could be molded! This way they could be cast from sturdy plastic resin. There are a number of reasons for doing this:
The cast parts will be more durable than the foam masters.
I need 24 of the tubes that run the length of the barrel. I don’t like lathing that much.
The tube under the handle is huge. Making a mold means I can rotocast it hollow and much lighter.
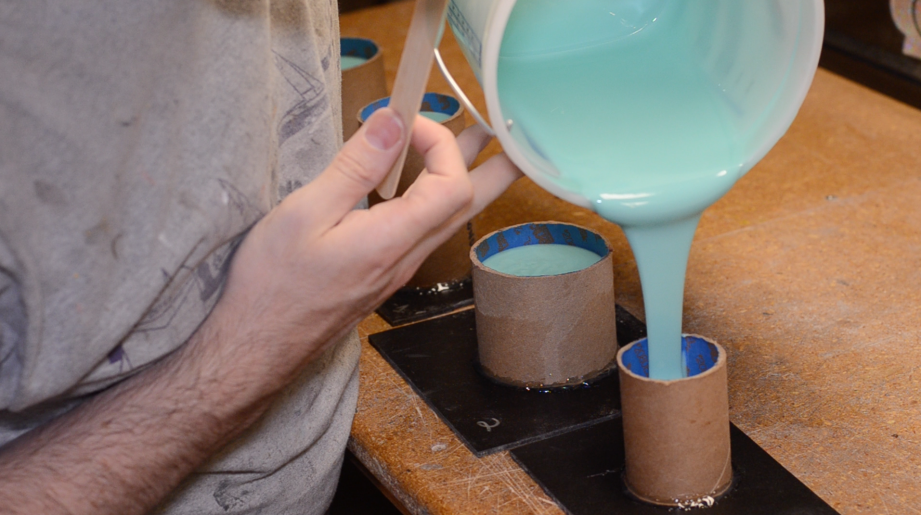
All of these tubular shaped molds were made by gluing their pouring spout ends down to a surface and building a mold box around them. For most of them, I used cardboard tubes to make the mold walls since they were already the perfect shape! Some of the pieces were a little oblong, so I made boxes from foam sheets.
With the pieces all prepped I mixed up some Mold Star 15 silicone, degassed it in my vacuum chamber, and dumped it into the mold boxed. Piece of cake! Just a handful of simple, one-part dump molds like the one Frank made with Norm a while back.
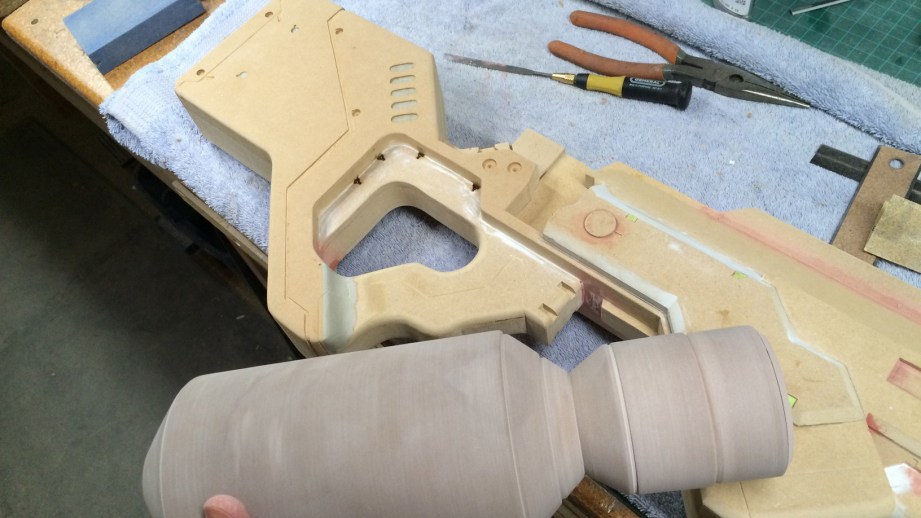
When the silicone cured I popped the masters out and was ready to start casting pieces for the final gun prop!
What about molding the main body? That’s a story for the next installment of this project: matrix molding.
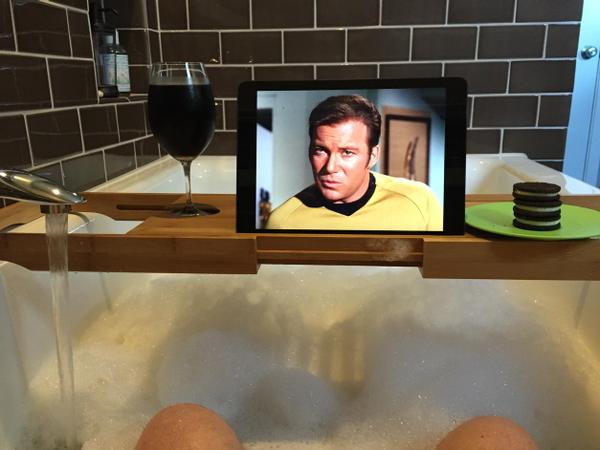
Work on painting the Monterpappa creature kit continues! Will and Norm learn how to layer washes on the model to give it a natural-looking base color, start working on some of the details. These are starting to look pretty good! We also chat about recent summer movies, like Avengers: Age of Ultron. Follow along with us by signing up for a Tested Premium Membership here, and post your painting questions in the comments.
This week, Will, Jeremy, and Gary discuss the Amazon Echo’s official release, Apple and music royalties, the Arkham Knight PC recall, DNA and poop, taxi drivers protesting in Paris, and the newest Spider-Man reboot. Enjoy!
Adam Savage welcomes Astro Teller to The Talking Room! Astro is Google’s ‘Captain of Moonshots’, directing the Google X lab where self-driving cars, smart contact lenses, and other futuristic projects are conceived and made real. Adam sat down with Astro at the Tested Live Show this past October to chat about the benefits of thinking big and failing quickly.
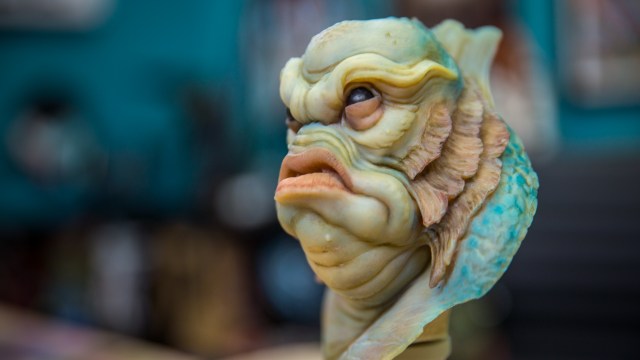
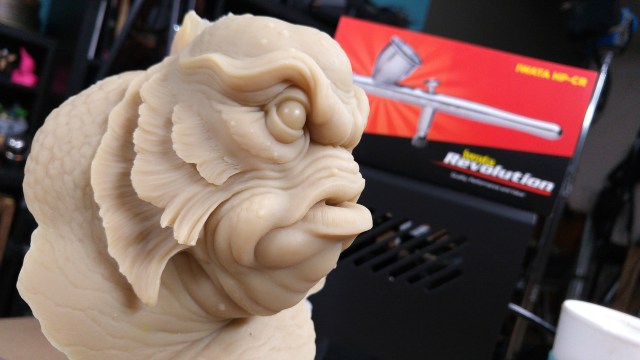
Time to start on the final project! We move on from small monster sculpts to a beautiful creature from sculptor Andy Bergholtz. These are cast in a pigmented translucent resin, and Frank teaches us how to layer on paint to make the most of the material. It’s going to be fun! Follow along with us by signing up for a Tested Premium Membership here!