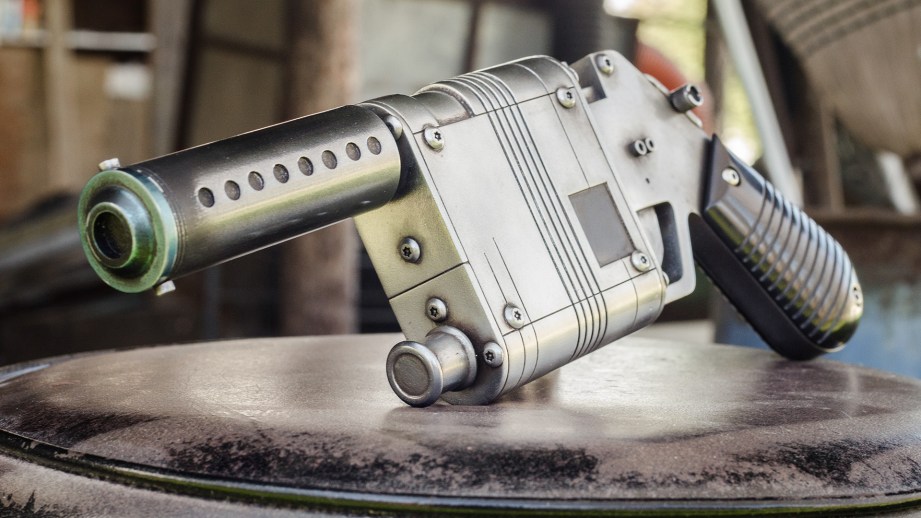
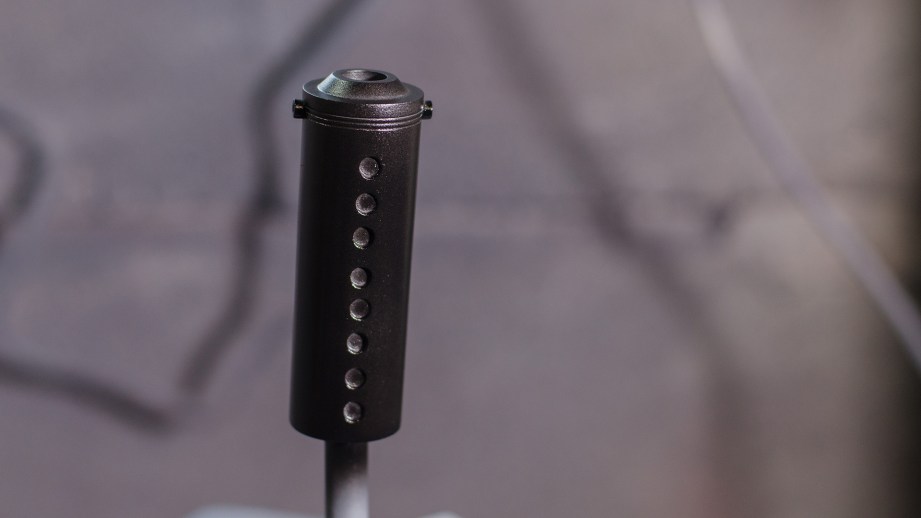
Over the last month or so, I’ve been plugging away at building a replica of Rey’s LPA NN-14 Blaster Pistol from Star Wars: The Force Awakens. I suspect that the prop in the movie was made from a combination of found objects and milled aluminum parts. Mine, on the other hand, was made from scratch and cast with urethane resin parts. This made achieving a similar, convincing metallic finish a bit of a challenge. There are lots of different ways to finish resin parts to look like metal. I could have gotten the pieces chromed or vacuum metalized, but those processes are a bit cost prohibitive. On the other end of the spectrum, I’ve had less than stellar results with rattle can “chrome” paints. So instead I opted for an airbrushed finish!
I’ve dabbled a bit with Alclad II metallic lacquer paints in the past and have been looking for an excuse to get more familiar with them. This project provided the perfect opportunity to expand my paint collection a bit further and do some experimenting. Their paints are generally used together in a set of two or three combined finishes. To get a real metallic “shine” it’s necessary to lay down your metal paint on a glossy black finish. You also want a way to protect that finish once it’s all done. So I went with their glossy black finish, the “polished aluminum” paint, and their Aqua Gloss clear sealant.
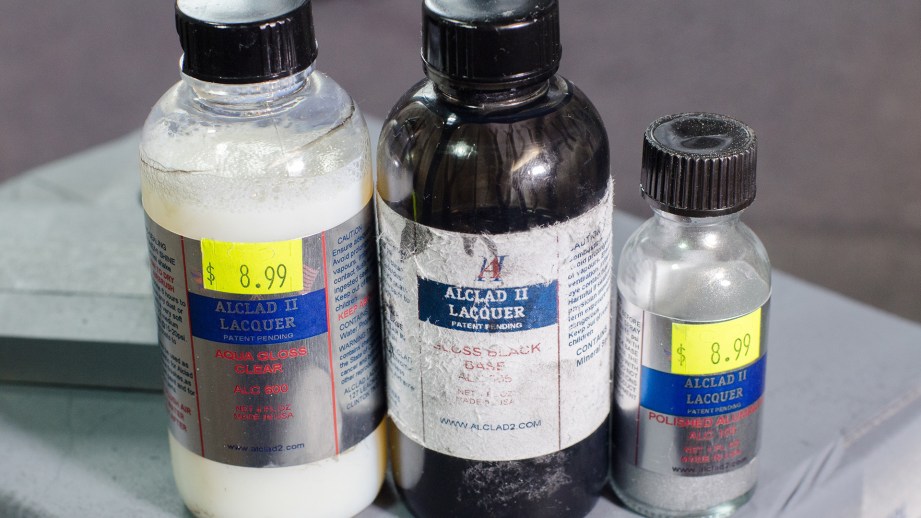
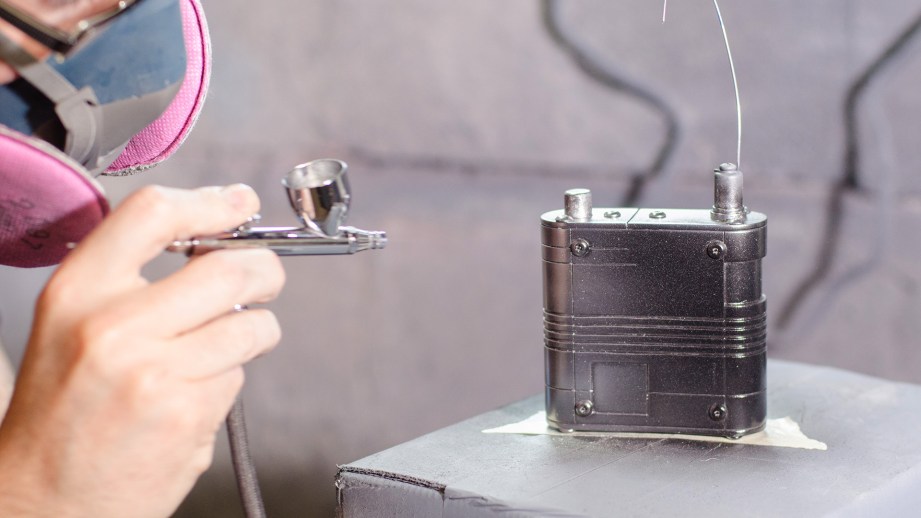
Note: All of this finishing work, aside from the priming, was done with an airbrush. I like my Iwata Eclipse gravity fed brush for this kind of work.
Texture
The thing that’s going to sell an “almost chrome” finish more than anything is the ultimate texture you end up with. You want the surface to be as glass smooth as possible. In my experiments, I found that this was easier said than done.
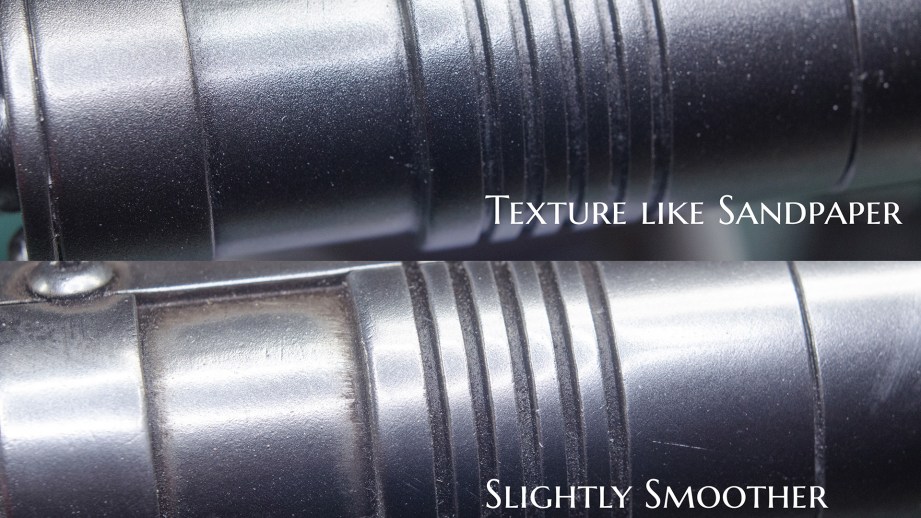
The texture of your piece will have an impact at every step of the finishing process. This means you need to sand the piece down nice and smooth once it comes out of the mold. For the final version of Rey’s blaster, I ended up getting it to a 400 grit level, though I could have pushed it further.
After getting the plastic prepped, everything was primed. I used a rattle can primer for this, but Alclad has some of their own that I want to try the next time I paint one of these guns. I added a couple of light layers of primer paint and it looked pretty good, but I bet I could have sanded it again.
Side note: I tell myself “I bet I could have sanded that at least one more time.” on nearly every one of my prop projects.
Glossy Black Base
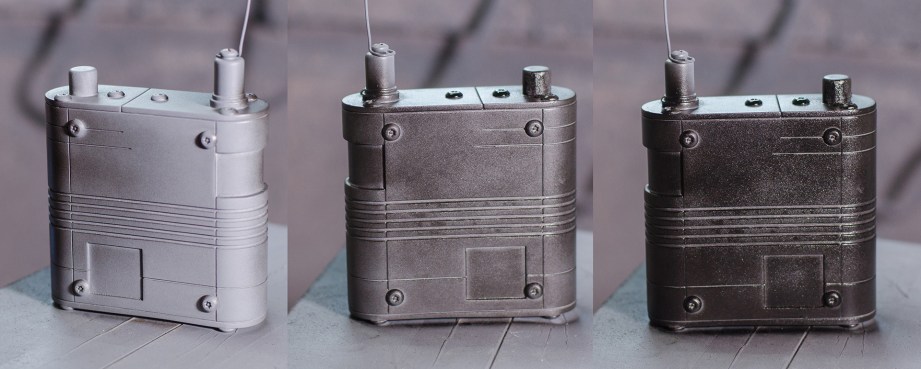
With the surface ready for paint, I started with that shiny gloss black in my airbrush. I didn’t want to drench the surface on the first coat, so I went with a nice, light, even pass. This was a little bit misleading, since the layer didn’t completely cover all of the primer. It looked a little bit like I had just added a whole bunch of unwanted texture, but this progressive method meant each layer would dry much faster.
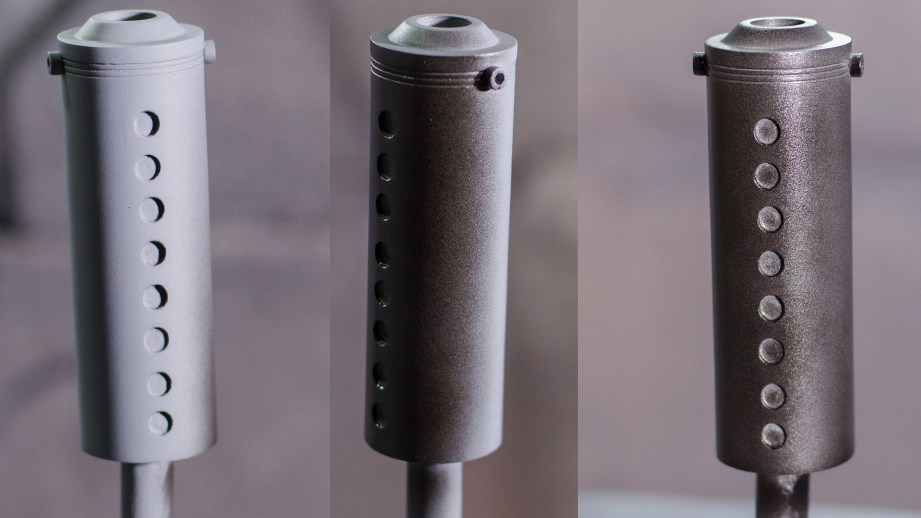
The second layer of black glossy paint could be a bit more aggressive. My goal was to lay down a good amount of coverage without spraying on so much paint that it would sag. You can always add more layers of paint, but it’s a real bummer when you need to remove them.
I ended up adding three good layers of the glossy black paint. They’re lacquers, so they dry pretty quickly. I would give each layer a good 10-15 minutes to dry before adding the next round. I think this is definitely an area where practice would make a big difference in the final outcome. My finish was a little bit inconsistent between pieces.
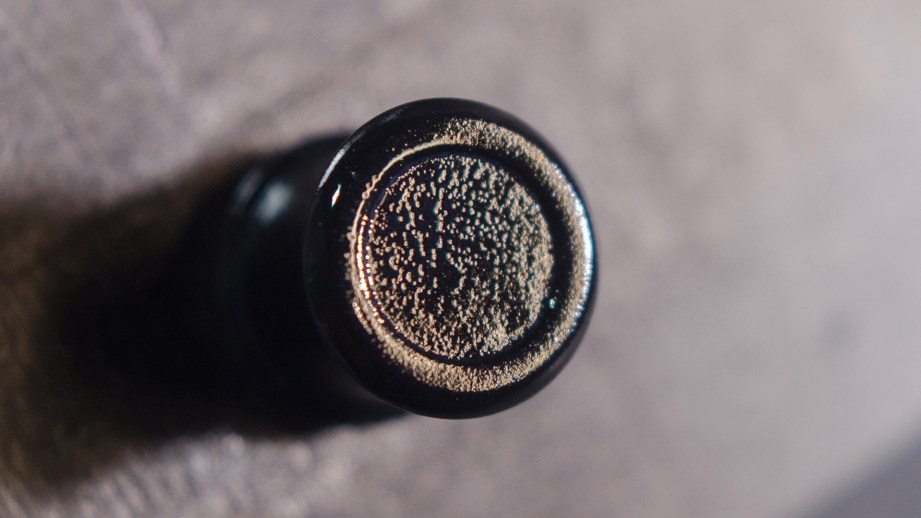
Fisheyes
Speaking of inconsistencies, some of my parts got the dreaded “fisheyes”. These are small pockmarks where the paint avoids filling that particular layer. It has the effect of adding texture where I was trying to remove it. In this case, I think the fisheyes were caused by a combination of my not sanding the primer layer more smooth and my over enthusiastic airbrushing style. Again, this is an area where practice can make a big difference.
Glossy Insurance
Before spraying down my metallic lacquers, I hit everything with a couple layers of Alclad’s Aqua Gloss clear paint. This is meant as a final protective coat for these paints, but it also works marvelously as a base coat to help achieve a more shiny metallic sheen. It’s really thin and looks milky white in the bottle, but dries crystal clear. It also has a blue tint once it’s sprayed onto your black surface, but again, dries clear.
I added two good coats of the gloss clear onto all of my parts. I could tell that some of my pieces weren’t at the texture that was perfectly ideal and the addition of these glossy layers actually helped a little bit. Again though, I really should have sanded it just one more time.
There are lots of factors that can affect how your airbrushed paint interacts with the surface you’re applying it to. Temperature and humidity are two things that can make a big impact on the resulting finish. Since I work in my basement and this job was done in February in Seattle, it was a little bit chilly (63℉) while I worked. This most definitely played a role in the outcome of my paint job.
There are also plenty of other paints you could use to achieve this gloss finish. Catalyzed, clear urethane is a popular one. This is a bit more involved process, requiring an HVLP system. Since the paint cures via a chemical reaction, you can apply a nice, thick layer and it will cure no matter what.
Let’s Get Metal
Before committing to your final, metal paint, now is the time to decide if you’re happy with the texture on your parts. If not, it’s time to let it all dry for a day, then wet sand it down to the desired texture. This is really nitpicky, but if you have a very specific finish you’re trying to achieve, the extra work is worth it.
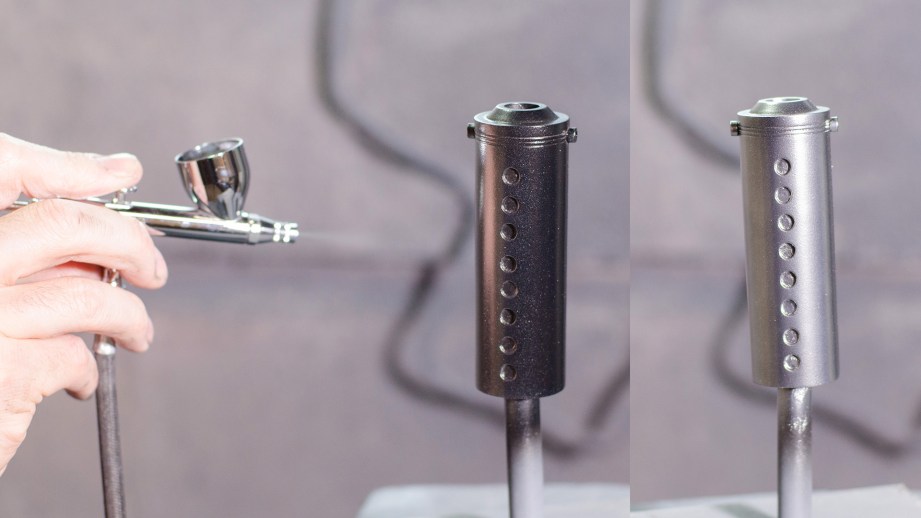
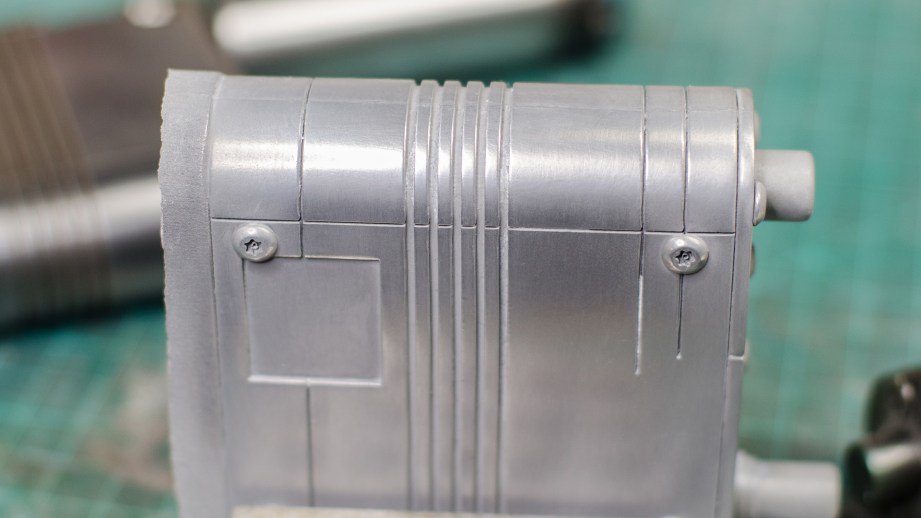
I decided that I was relatively satisfied with my texture, so I moved forward. With a shiny black finish achieved on my space gun parts, I could finally spray on the metal finish. I loaded up my airbrush with the “polished aluminum” Alclad paint and simply sprayed it onto my parts. This is actually the easiest part of the process. The lacquer is very thin and covers very well. One good coat is all you need to get the look you’re after.
This part of the project went very quickly. It’s also really satisfying to see your surface transformed from a dark black piece of plastic into a shiny piece of metal. A little bit of this paint goes a long way, which is great since it’s $9 for a 1oz bottle from my local hobby store.
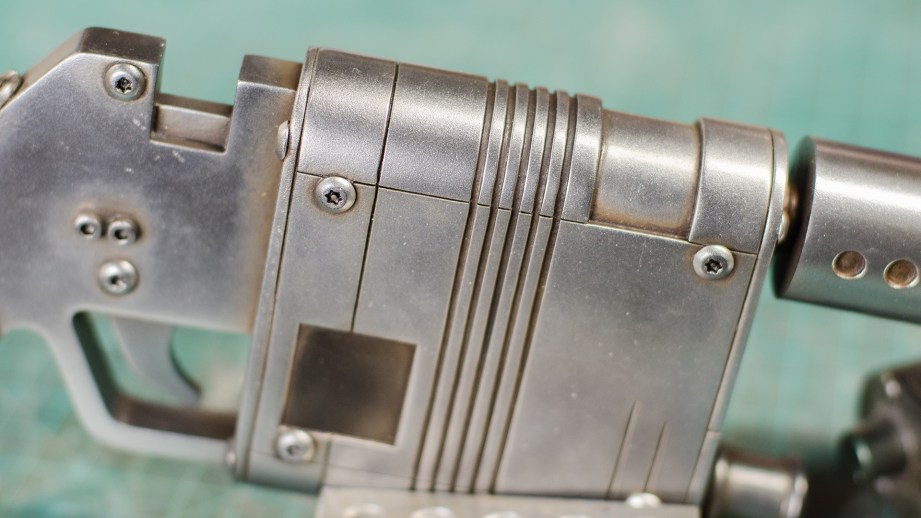
Once the lacquer dried, I could go over the whole surface with more of that Aqua Gloss to seal and protect it. Not only does this give it a little extra shine, but it does a great job of protecting your finish. I found out (the hard way) that the oil paints I used to weather this gun would strip the metallic lacquer right off. The following photo was a test piece that failed miserably. I learned a lot from failure.
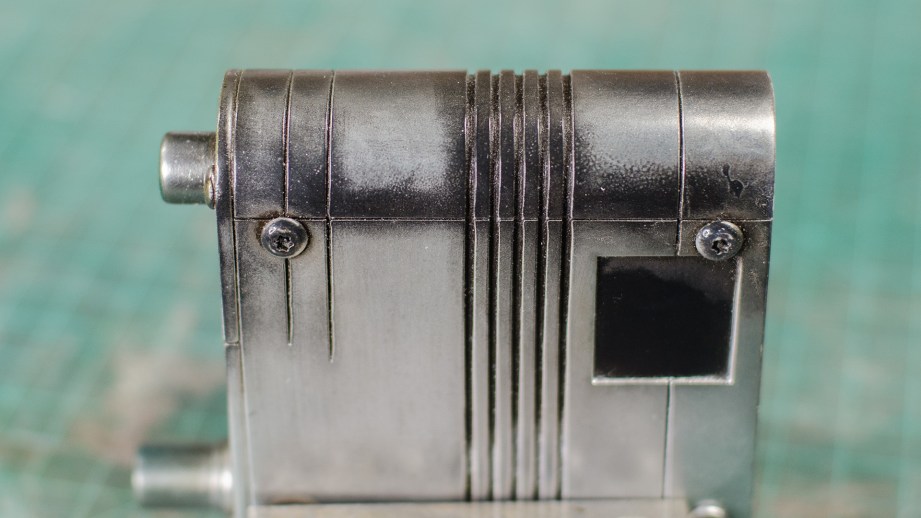
The Aqua Gloss finish completely protected the lacquer below and I was able to weather the gun to my heart’s content!
Reflecting on my Metal Finishes
Overall I’m pretty happy with how the finish turned out on this particular project, but I know I have a lot of room to grow with this particular painting system. Since I made a mold of these gun parts, I can experiment until I’m completely happy with the results. Heck, I might even try to get the parts chromed for real! I’m also planning on trying to “cold cast” all of these parts to get a more authentic aluminum finish. I’ve already done some preliminary tests and the results are promising. Since this surface can be buffed and polished, I can be a lot more aggressive about achieving the texture I desire.
I hope you’ve enjoyed this little foray into metallic finishes for your prop projects. I highly recommend you go out and experiment yourself to see what sort of paint effects you can achieve. Alcald paints are fantastic and they have a wide range of colors and effects available. If you haven’t already, look into molding and casting so that you can pop out plenty of resin copies of whatever it is you’re replicating so that you have lots of pieces for practice. We’ve got a whole series on molding and casting for you to check out on YouTube, too!