Last time, I shared how we tackled the digital design planning for the Fallout 4 Power Armor build. We extracted the game models using NifSkope, prepared them for our build by increasing their detail in Blender, then finally cut them into sections that would fit on our 3D printers in NetFabb. With our first batch of models are ready to produce, it’s time to send them to the machines to create and get them looking nice.
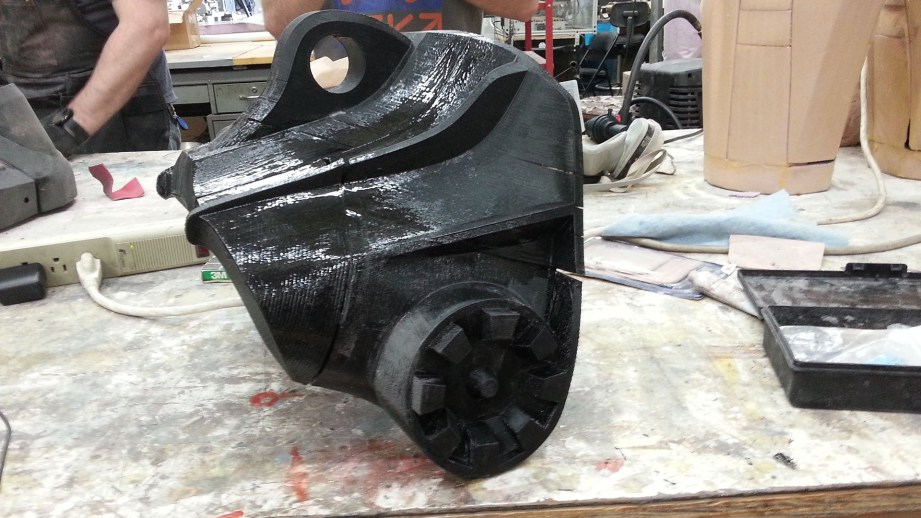
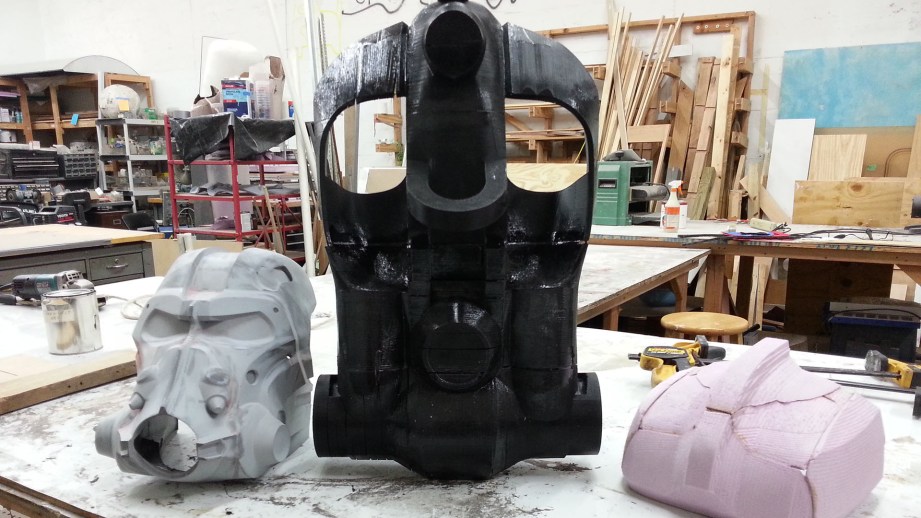
I’ll be using the helmet and the large shoulders to demonstrate the techniques I use to go from raw 3D print to finished master ready for molding. But same process is used whether I’m making something small like a detail piece or a weapon, or the big printed sections of armor. For this build, we’ll be using the 3D printer for the interior “frame” pieces, the large shoulders, and the back armor as well as some of the smaller detail bits throughout the armor like the oversized bolts on the knees and the oil filters under the chest.
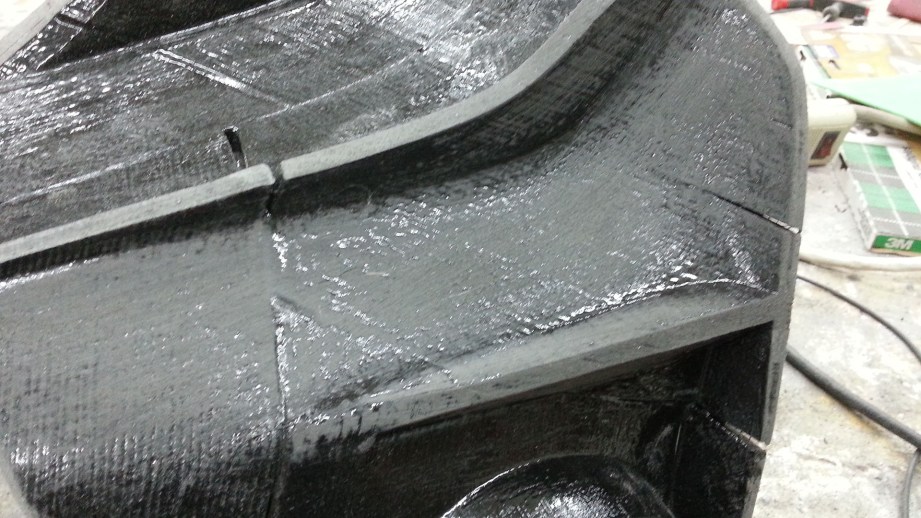
I print exclusively in ABS plastic because of some interesting post processing methods available, specifically being able to use acetone to smooth your prints to reduce or eliminate the print “grain” visible at each layer in the printing process. This is not acetone vapor smoothing, which looks really pretty but softens up all of the hard edges we worked to preserve, but rather a solution mixed up and painted directly on to the part. I’ll create a batch of “ABS juice” to paint the surface with a brush that both fills in the valleys of the print lines like a body filler, and also acts to soften up and smooth down the high points.
The ABS sludge I use is made by mixing 2 parts MEK (methyl ethyl ketone, a powerful solvent) and 1 part acetone, and tossing in some ABS from support material, failed prints, or left over bits on a spool until the soup is the desired viscosity. In a couple hours, the ABS will have dissolved completely, leaving behind a slurry of liquid plastic that is effectively homemade ABS cement. When brushed on to your print, the MEK and acetone act to soften up and break down the surface, bonding the ABS in your piece with the ABS in the sludge. Once the solvents fully evaporate, you have chemically fused your part with the ABS in the mixture, adding to the strength of the piece while filling in the low points of your print lines. The ABS juice is not a coating, like Smooth-On XTC, rather it is chemically bonded to the part itself.
Safety note: You absolutely need to wear a mask with an organic vapor filter when working with MEK. The Freeside member who suggested I try using it said exposure to it can make you cough up blood.
Once the part is smoothed and filled with the ABS goop, the next step is to sand down the surface of any left over high points or surface imperfections. A lot of sections of the armor are large metal panels without much intricate detail, so I start out with a really low grit sandpaper and get aggressive. Take caution when using power tools at this stage since you can easily take off a lot of material without realizing it that will later just need to be filled back in with body filler and wasting some time.
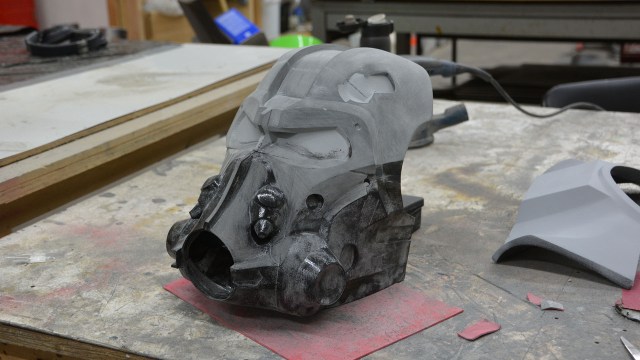
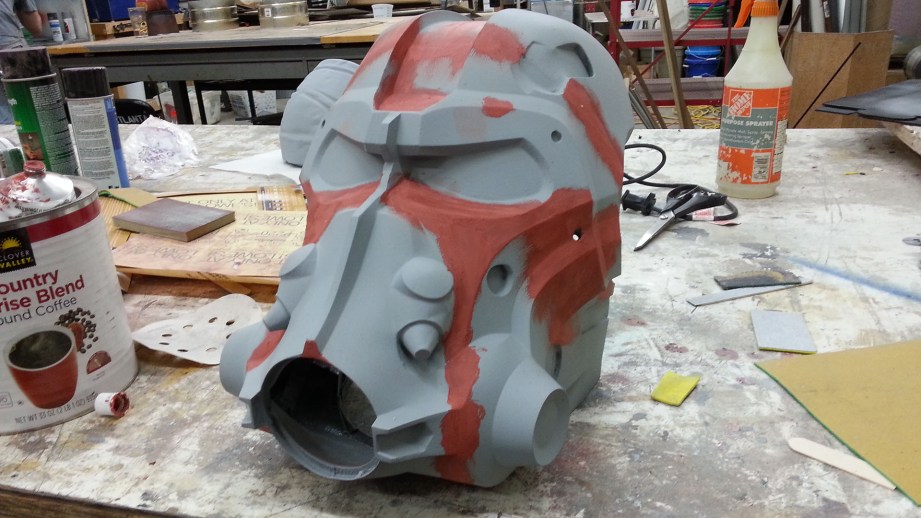
Going back to the helmet, I started out at with a bit higher grit sandpaper and kept a close eye that my sharp edges and small details are staying intact. The helmet has a lot of fine details I wanted to make sure I preserved that could easily get lost in the ABS sludge and low grit sanding steps. Once that is all done, I hit the entire part in a couple coats of high fill primer and start to inspect what areas may need more work to them.
After the primer has fully dried, I will go over all of the remaining imperfections with spot putty, a thin one part resin body filler used for dings and scratches. It is ideal for cleaning up 3D prints as it fills into surface errors well, it dries quickly, and it’s very easy to sand away. For some really small parts, I will coat the whole part in spot putty in lieu of ABS juice. It’s a little wasteful but very quick and effective!
Really egregious areas in the printed part that have voids or other imperfections I’ll fix up using bondo body filler. The back of the helmet ran into a bizarre printing error and a corner of one part didn’t get built properly, so I filled in that whole section with bondo and sanded it flush with the rest of the body. The back of the armor had a few corners of parts lift up which needed filling as well.
Once the spot putty and bondo fully cures, I sand everything back down with some medium grit sandpaper, hit everything with some more primer, and start the process again. This gets repeated as many times as necessary until the piece is looking as flawless as I can get; the helmet alone took a couple weeks of work to get it perfect enough to mold. I like to use alternating colors of primer to help identify the “layers” in my bodywork. Plus you get a really neat looking Fordite pattern when working on really problematic areas.
Finally once the shape and details were perfected, I wetsanded it at 400 grit then 800 grit to give everything a nice shine which will make the cast parts come out of the mold really clean. I didn’t want to get a mirror finish on it since the final part will be beat up and dirtied and rusted, but I try to make the master look pristine and worry about weathering the final cast piece. The neck and shoulder frame sections were the first to be finished, and they’ll be molded very soon.
Why didn’t I 3D print the entire costume? I certainly could have, and in fact my friends Eric Jarman and Mike Vroegop are doing exactly that with their T-60 build. The biggest bottleneck is the sheer time it takes to print something this massive. All in total I have about 600 printing hours on my build – the back armor was over 150 printing hours alone – and my estimates for printing the whole armor are around 2500 hours. The cost of materials is a concern as well, because while 3D printer food isn’t terribly expensive, it still would amount to weeks of near non-stop printing and dozens of spools of filament.
3D printing for props is great for small parts that require high detail, but trying to do something massive like a full suit of armor isn’t really the best application of the technology. For that, I’ll be cutting large sections on the CNC router, which has had it’s own pitfalls and problems to solve. In the next article I’ll cover the process of taking our digital models and cutting it out of foam. Until next time!
Read Part 0, an overview of this costume project, here!
Read Part 1 here