


This week, Will and Norm are joined by Dave Snider to discuss the news from Google’s IO event (yeah, that was an astronomy joke), the end of Netflix’s public API, China’s solution to a delicate problem, and drone news! Enjoy!
Building a Custom Computer Desk, Part 2
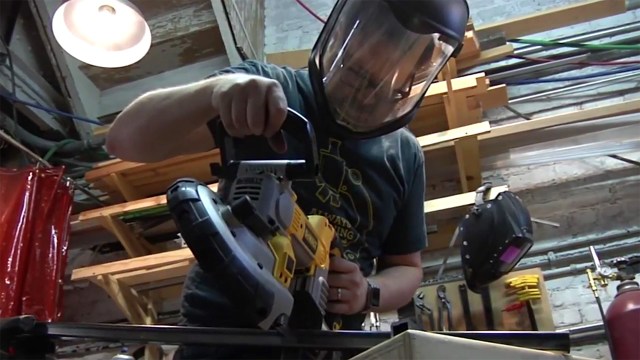
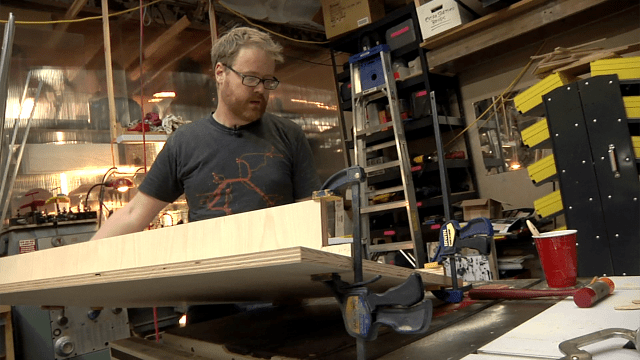
Will’s build of his dream computer desk continues! This week, Will spends time in Adam’s shop assembling the top of the desk with some biscuit joining, using some tips learned from viewers. And before putting together the table legs, Will gets some practice with welding. (This video was brought to you by Premium memberships on Tested. Learn more about how you can support us with memberships!)
Edge of Tomorrow/All You Need Is Kill SPOILERCAST – 6/24/2014

This week, Adam, Will, and Norm discuss the Tom Cruise/Emily Blunt film Edge of Tomorrow, which is based on the Japanese novel All You Need Is Kill, by Hiroshi Sakurazaka. We talk about the differences between the book and the film adaptation, the Trinity problem in action movies, and time-travel plotholes. WARNING: Spoilers abound!
Episode 262 – Fire Pun – 6/19/2014

Making a Life-Size Dragon from Monster Hunter 4 Ultimate!

How do you sculpt a realistic dragon, let alone one that has to be life size? That’s what effects artist Frank Ippolito did for Capcom’s booth at this year’s E3 gaming conference. We visit Frank’s shop before the event to see the in-progress dragon–the Gore Magala from the game Monster Hunter 4 Ultimate–before it’s brought to life and then behold the impressive finished piece on the E3 show floor.
Tested Projects: Building a Custom Computer Desk, Part 1
For his second Tested Project, Will begins the process of building a custom computer desk for his home office. For this ideal desk, he needs a large working surface, outlets for cable management, and boom arms for his monitors. It all starts with the wood. (Support this video series by signing up for Tested Premium memberships!)
Episode 261 – What Does a Panda Feel Like? – 6/12/2014

This week, Will and Norm are joined by Veronica Belmont to discuss E3, the first Oculus-published VR game, Sony’s new Morpheus demos, Control VR’s finger tracking that actually works, safe panda handling, the world’s first smart cup, and why the Turing test is bullshit. Enjoy!
Bits to Atoms: Testing Adobe Photoshop’s 3D Printing Feature
Adobe has been adding 3D functionality to Photoshop over its last few versions, and with this past January’s release they have also implemented 3D printing features. Adobe supplied me with access to Creative Cloud and a credit at the online 3D printing service Shapeways so I could give those new features a try. My experience with processing a 3D model for printing in Photoshop was mixed, with many bumps and hiccups along the way, but I ended up with a fairly nice print by the end. Here’s what 3D printing enthusiasts can expect if they want to integrate Adobe Creative Cloud software in their modeling and printing workflow.
Photoshop CC’s 3D features allow you make or modify 3D models and even texture (paint) them which is particularly nice as it can be a frustrating process with most other pure modeling applications. The new 3D printing module allows you to size the model for printing, choose the level of detail and send it to a local printer or prepare it for online printing through Shapeways. It’s possible to build and modify 3D models purely within Photoshop CC, too. If you’re an Adobe-whiz and very comfortable in the CC suite of apps, this may be a good option as it utilizes familiar tools. With my more traditional modeling background, I actually found it frustrating. But that doesn’t mean it’s bad–it’s just different. If someone were to ask me how they should get started with modeling, I would still recommend more traditional programs, like what we’ve covered before. But for testing and curiosity, I attempted to use Photoshop to process a fairly complicated 3D model for printing.
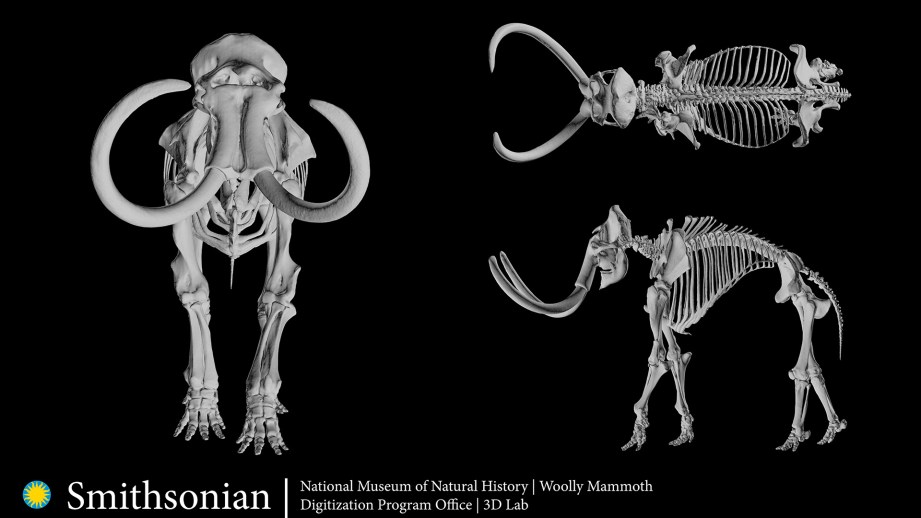
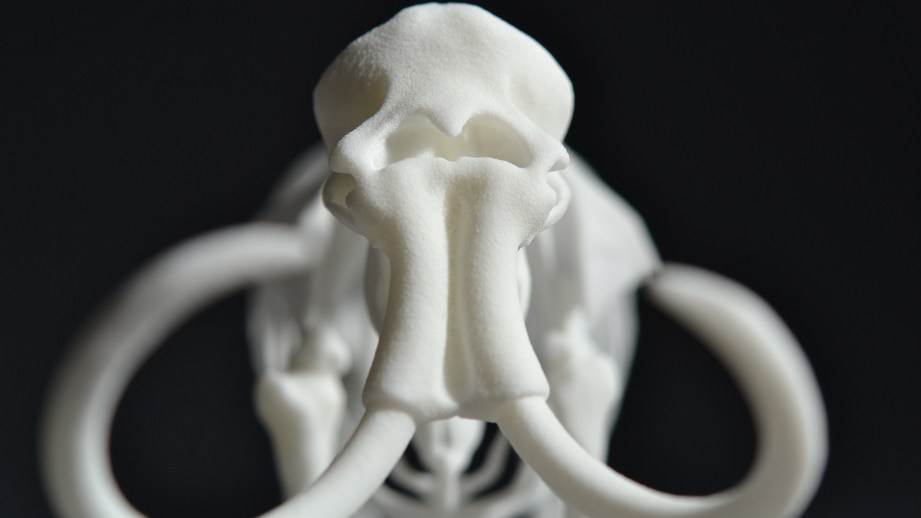
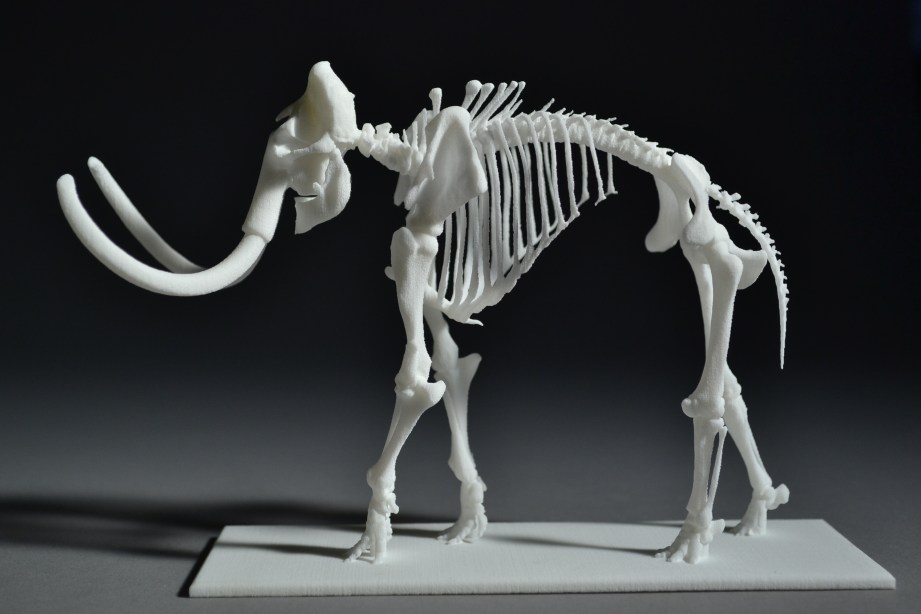
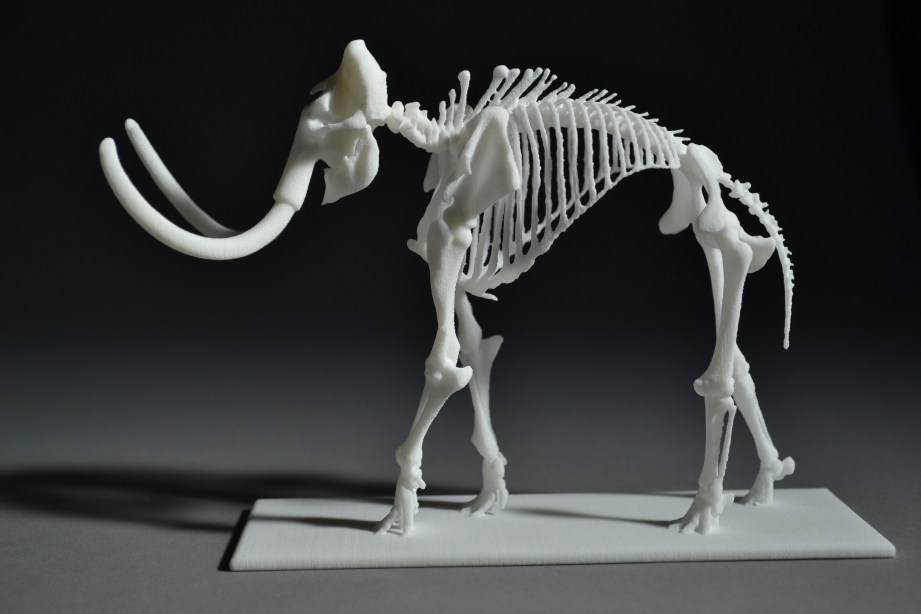
To put Photoshop’s 3D printing feature through its paces I wanted to test it on a model with lots of detail. So I turned to the Smithsonian Institute, which has been releasing high-resolution 3D scans of select pieces from its collection. I chose the wooly mammoth skeleton for its fine surface detail and because Norm and I thought it would be a cool piece to see printed. The Smithsonian is kind enough to provide a print-ready model, meaning it’s been converted to an STL file, unified into one complete shell and run through mesh repair to ensure there are no holes or other problems that would cause the print to fail. (See here for a refresher on 3D print prep.)
The print process for Photoshop CC goes like this:
1. Open 3D file – most common ones are supported – Flash 3D (FL3), Google Earth (KMZ), STL, and OBJ
2. Via menu bar: 3D > 3D Printer Settings–this will open the 3D printing interface with all the settings on the side bar
3. Choose a local printer–installed printers are: 3D Systems Cube, MakerBot (MB) Replicator 2, MB Replicator 2X, Mcor Iris, ZCorp Full Color. In addition, profiles for MB Replicator 1 and Solidoodle can be downloaded from Adobe – not sure why these aren’t installed automatically. Custom printer profiles can be made but this is so complicated that anyone who could actually do this would be using more advanced 3D printing software than Photoshop. However this does give printer manufacturers a way to create their own profiles.
OR
Choose Shapeways print service – this will give you a submenu to choose from the many Shapeways print materials.
OR
Export STL file – to access this option, Local Printer must be selected and STL Export is listed under the Printer menu.
4. Units of measurement can be selected and will be displayed in the viewport which is helpful.
5. Choose level of detail – There are three choices – Low, Medium and High – each choice is followed by a value, such as .07mm for High. This is confusing because it doesn’t really specify what the values mean and neither does the documentation. Normally I would assume it was layer height but the numbers don’t correspond to values I would expect to see.
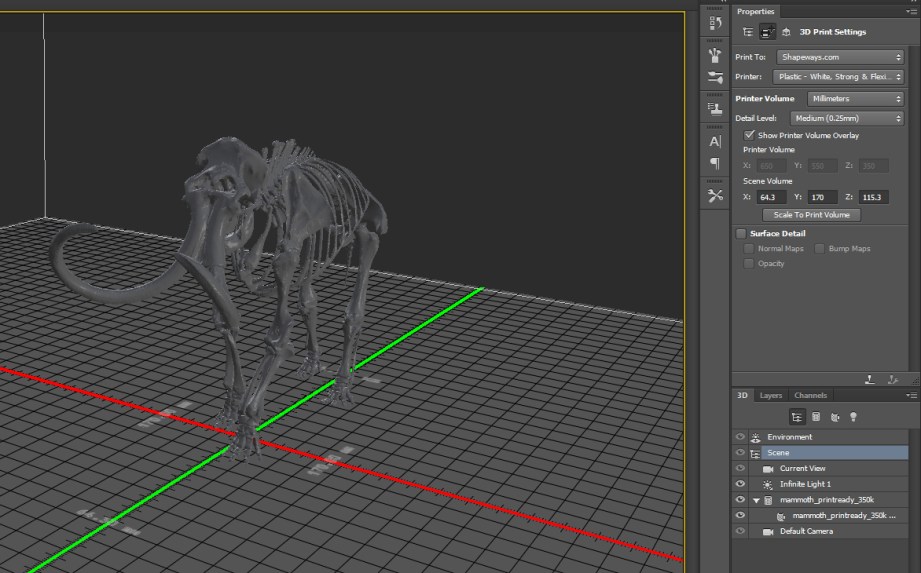
6. Photoshop will show a bounding box representing the print bed to ensure your model fits, this can be turned off via the Show Printer Volume Overlay checkbox, but I would leave it on since it’s a good feature.
7. The size of the model can be adjusted via the Scene Volume box.
8. If using a local printer there is also the option to generate support material and/or a raft.
9. When ready to print, goto menu bar 3D > 3D Print and Photoshop will check the model for problems, perform repairs and output a print file. If using Shapeways you will also get a cost estimate, which is nice.
That’s how it’s supposed to work, but it didn’t go so smoothly for me and my mammoth.
I installed Creative Cloud on my new Windows laptop (1.8G i7 Dual Core, 12G RAM, AMD Radeon 8750M graphics) and ran into immediate problems with Photoshop crashing when the model was loaded or I attempted to process it. To be fair, the Smithsonian model has a very high poly count at two million (2M) faces, which is a lot, but any program that supports 3D printing should be able to handle this. Shapeways does have a restriction of 1M polys max for a model so I realized that I needed to fix this anyway.
Before I tackled that, I decided to try Photoshop on a MacBook Pro (13″, 2.6G i5 Dual Core, 8G RAM, Intel Iris graphics). It took a long time to load the model and a really long time to process it for printing but it did manage to do it after a few crashes. Oddly enough, my PC laptop refused to process the model even after reducing the poly count. Photoshop would freeze every single time, although netfabb, my normal 3D printing prep software, processed the mammoth, no problem.
Curious as to why one laptop would work over the other I installed Photoshop on my PC desktop (2.8G i7 Quad Core, 12G RAM, Nvidia GTX 560 Ti graphics) and there was no 3D printing option at all. I thought I was in the wrong workspace, but nope, I was in the 3D mode and the 3D menu was there, but there was no 3D print options like on the laptops. I checked for updates via the Creative Cloud panel and it said everything was current. After fiddling around some more I discovered that the CC panel had installed Photoshop 14.0 instead of the current 14.2.1 version. The CC panel maintained Photoshop was current and I was only able to get it to update directly through Photoshop. Weird.
I now had my 3D print options back and was able to process the mammoth successfully, but it took forever. At this point I decided to go ahead and reduce the polygon count of the mammoth which was necessary to meet Shapeways’ ‘1M poly max’ requirement and should make a significant difference in processing time. Reducing the polygon count can be referred to as re-meshing or decimation and a program that does it properly will reduce the polygon count in areas that don’t need many, such as flat surfaces, and redistribute the remaining polygons to high-detail areas that need more. I used ZBrush, which is typically used for digital sculpting, but also has an excellent decimation tool. This takes some trial and error but I was able to reduce the polygon count from 2M to 350K while still maintaining all of the mammoth’s fine details–a big difference which should improve processing and stability.
Processing the mammoth to make an STL output file in Photoshop took over 5 minutes, in netfabb it took less than 15 seconds.
I was able to open and process the 350K version of the mammoth with Photoshop using the high-detail setting on all three of my computers and export an STL for printing, but it was really, really slow. I did some comparisons between my normal software, netfabb and Photoshop and the difference was astounding. Processing the mammoth to make an STL output file in Photoshop took over 5 minutes, in netfabb it took less than 15 seconds. Ouch. I tried some other, low-poly models in Photoshop with the same result–a much longer processing time than normal.
But there was an even bigger problem than processing time: the model itself looked terrible. The 350k mammoth from ZBrush looked great, but the mesh was degraded and lumpy after being process through Photoshop. I took the Photoshop model and checked it with netfabb and found the mesh had gone from 1 complete shell to 5 shells and had 24 holes in it. The file exported from Photoshop is supposedly the one that’s all ready for Shapeways and typically they would refuse it with these problems. While running the mammoth through netfabb I also discovered that the polygon count had gone from 350,000 up to almost 1,000,000. What? So not only did Photoshop degrade the mesh, it upped the polygon count to 1M which makes no sense.
So what the heck is going on? I contacted Adobe concerning the crashes, processing time and degraded mesh problems but didn’t get a lot of help. I was referred to an ‘how to make an iPhone case video‘ and the online help neither of which were particularly helpful. The 3D printing online help was vague and didn’t go into depth for most of the features. I was getting the feeling that there were things going on under the hood of this software that weren’t readily apparent. This led to hours of processing different models at different settings and messing around which led to a few conclusions.
- First, the low, medium and high detail settings determine a certain polygon count range. For example, when I processed the 2M mammoth, Photoshop would change the polygon count like this: low detail = 350K polys, medium = 575k and high = 1M. I wasn’t able to figure out any hard and fast rules for the polygon manipulation, but I had another instance where Photoshop took a 3,600 poly model at high detail mode and needlessly increased it to over 444K polys. It also rounded off all sharp edges which fundamentally changed the model and tolerances.
- The STL output often had holes in the mesh and/or took models that were 1 shell and broke them into multiples, all of which was bad for prints. I took known-good models, process through netfabb, and sent them through Photoshop– which changed the poly count, smoothed features and created holes and other mesh problems.
- Photoshop would thicken or modify geometry, seemingly to make it more printable but often these changes were not needed for a successful print.
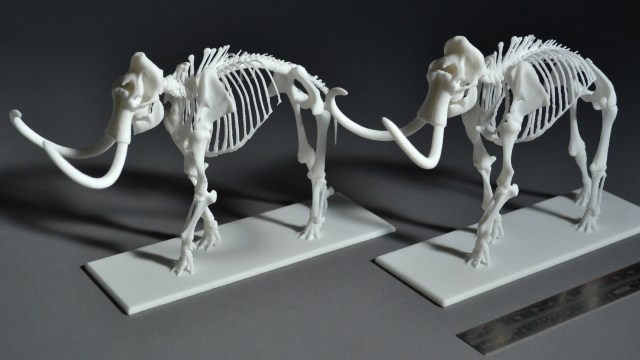
Due to the issues I was having, I decided to print two mammoths: one processed through Photoshop and one by my normal means. I started with the Smithsonian 2M poly mammoth which is technically print-ready since it’s one complete shell and has no holes in the mesh or other problems that would mess up a print. I added a display base so the mammoth could stand on its own and rechecked it to make sure the mesh was good. Photoshop is re-meshing, repairing and exporting an STL with one-click which resulted in a 575K model at medium detail settings. My process was a little more involved:
- Bring 2M poly model into ZBrush and decimate to reduce poly count to 575K to match the Photoshop model.
- Run it through netfabb to verify the mesh and fix any problems.
- Export STL from netfabb.
At this point both models are around 575K polys and should have clean meshes and be ready to print. Let’s see what netfabb says:

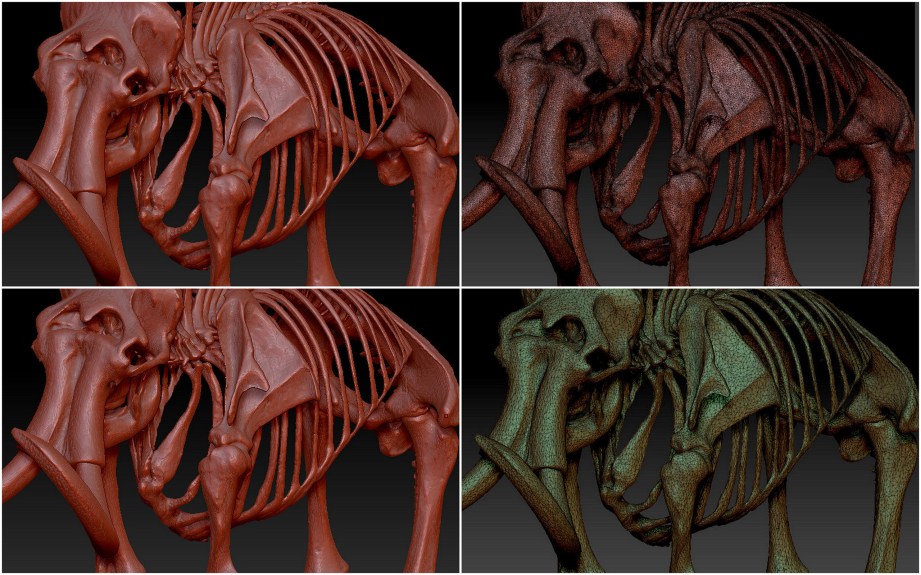
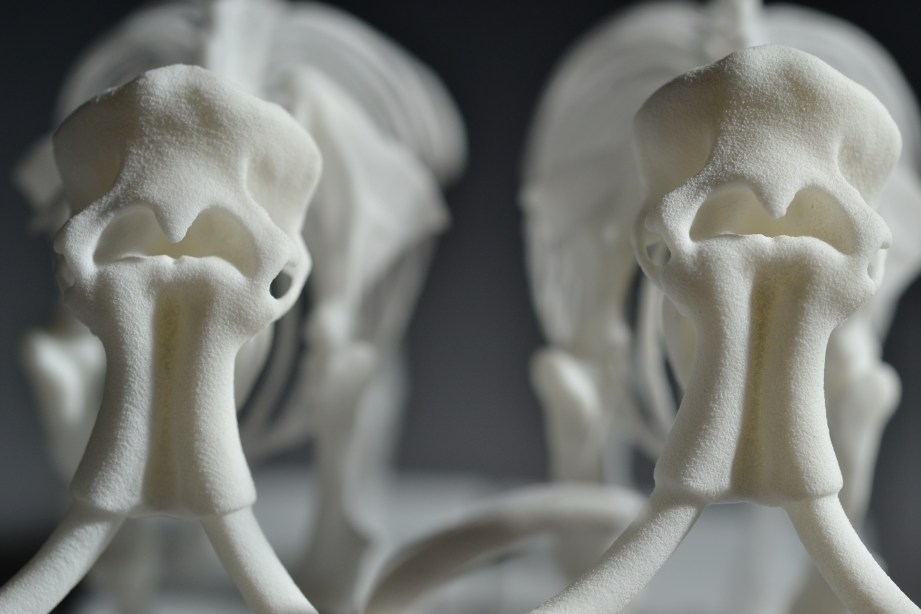
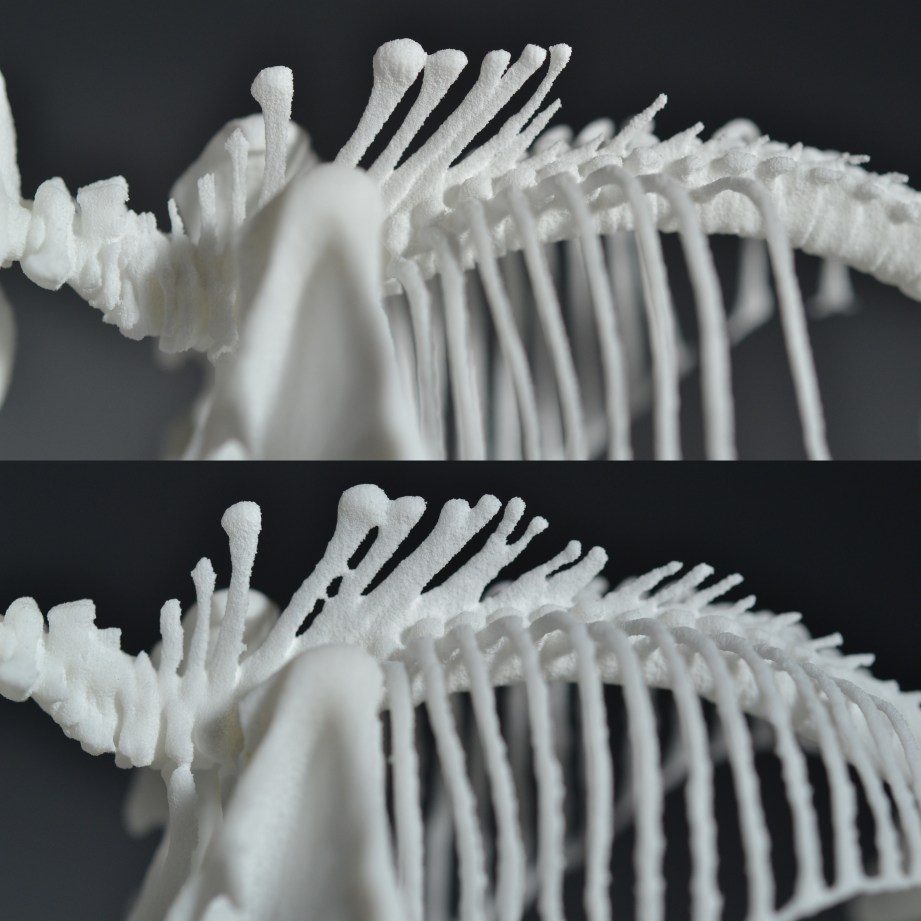
Not looking too good for Photoshop–5 shells and 26 holes, normally not acceptable for printing. Let’s take a look at the meshes:
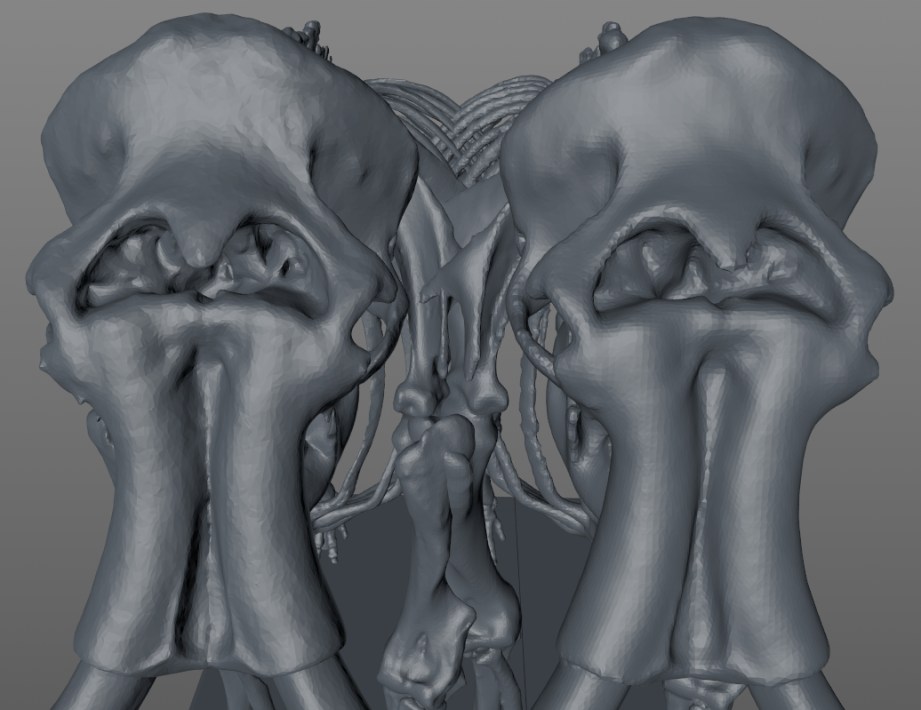
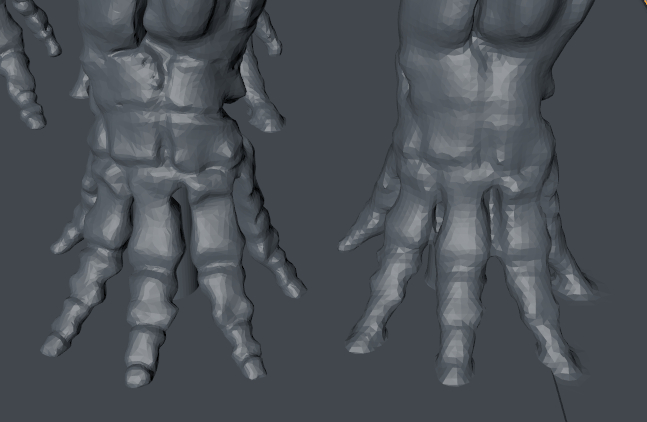
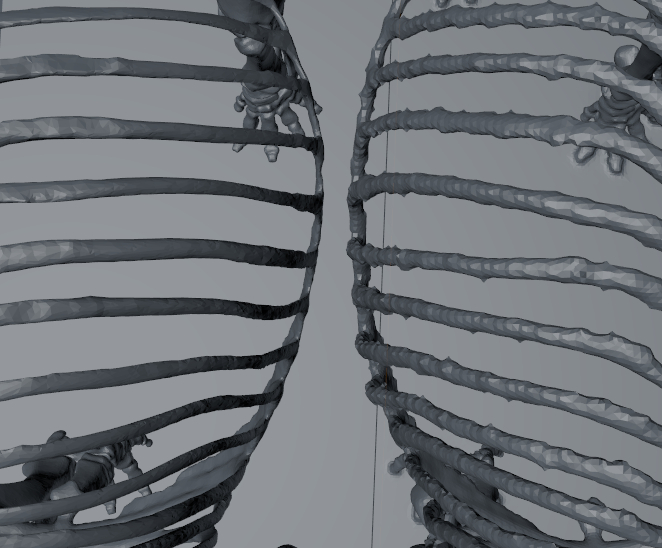
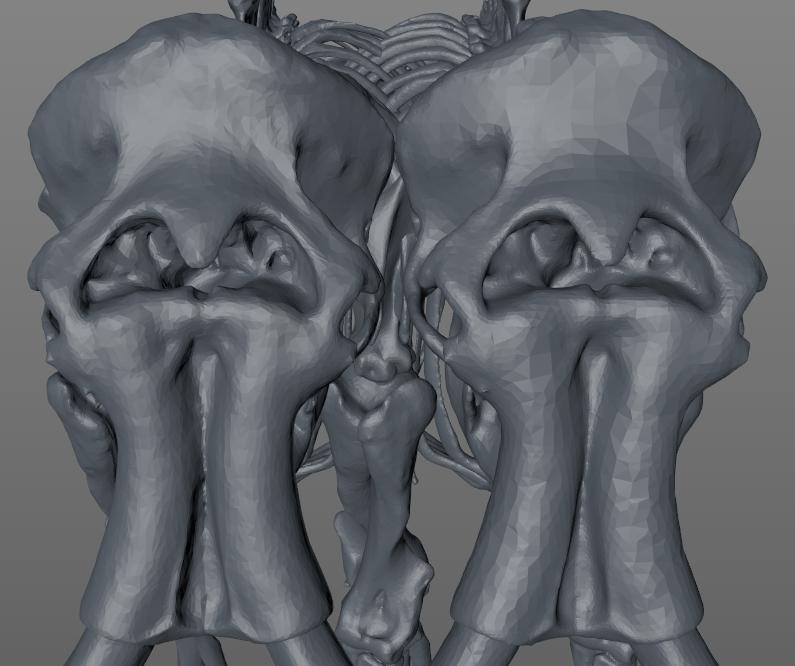
Notice how Photoshop has lost a lot of detail and rounded the edges all over the place–with the ribs being particularly bad, having been inflated. Part of the problem may be the small scale of the mammoths (I could only afford a 6″ long print) since at that size the ribs and other features get so small that they are in danger of breaking when removed from the printer. I thought Photoshop may be automatically thickening parts to make them safe to print so as an experiment, I enlarged the mammoth to fill the entire print bed and the ribs and other features were still deformed after Photoshop processed the model. At such a large scale everything on the mammoth should print without any modifications. In the end, I uploaded it to Shapeways as-is since Adobe is advertising that the output is print-ready.
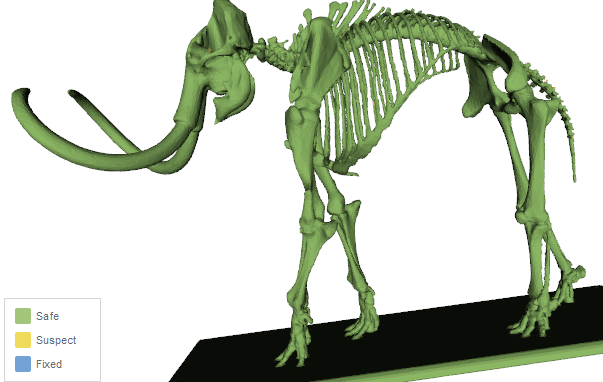
Surprisingly, Shapeways passed the Photoshop model, so there must be some mesh repair that they do as well. I expected to get a thin parts warning on my model due to the ribs and that’s exactly what happened.

Anything yellow indicates a thin part that may break and in the past Shapeways would require you to fix it or they wouldn’t print the model. However, they have recently introduced Print It Anyway which allows you to print a model no matter the chance of failure. This is great for prototypers and getting away with a little more than they normally let you, so I used the option for my model.
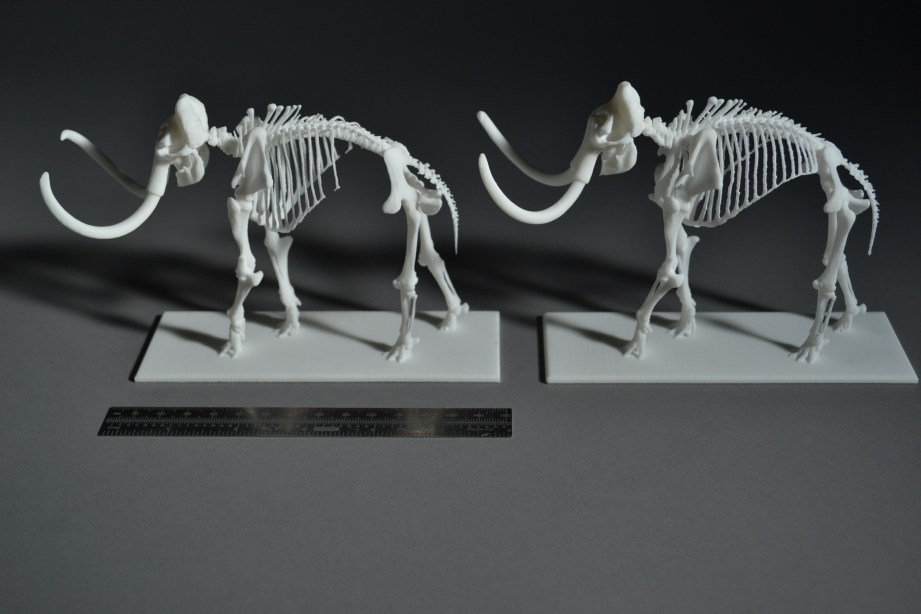
My model ended up with some broken ribs, which I expected. The Photoshop version came through intact and from a distance seems to be the better model. On closer inspection, you can see loss of detail and parts that are melded together.
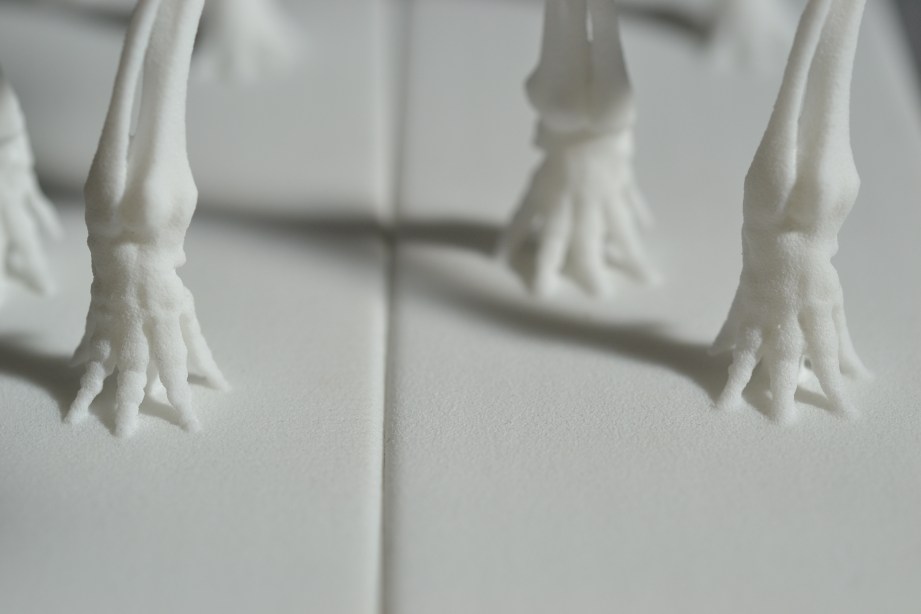
In the end, I managed to get a print out of Photoshop CC that is acceptable and frankly, at this scale you wouldn’t notice the lack of detail. However, if the scale was enlarged or a higher-resolution printer was used, the shortcomings of the Photoshop model would become more apparent.
Adobe is trying to provide a 3D printing function which is user-friendly and idiot-proof, but they have so much going on in the background to ensure a printable model that it does more harm than good. The processing times are abysmal for even low-poly models and the smoothing of features is not acceptable. Finally, the addition of thousand of polygons to models that don’t need them and the destruction of perfectly good meshes is puzzling and the biggest strike against Photoshop CC. I can understand Adobe adding the ability to import and manipulate 3D models in Photoshop but adding 3D printing is a slippery slope that starts to make things very complicated and needs to be done right. I personally feel that they should leave it out of Photoshop but it’s probably here to stay. So they need to do a lot of work and document it better. I can’t say I’d recommend it for even small stuff at this point with so many other, free, options out there that do a better job.
Photos courtesy Sean Charlesworth unless otherwise indicated.
Adam Savage on One of His Biggest Failures

Just as Jamie gave a presentation at this year’s E.G. Conference, Adam attended two years ago to give a riveting speech about one of his past failures. The video of that talk is finally up on E.G.’s site now, embedded here. In the talk, Adam recounts a heartbreaking story he recently referenced in this year’s Maker Faire keynote, about the epic way in which he failed a close friend and how the subsequent coping with that mistake was one of the more formative experiences in his youth.
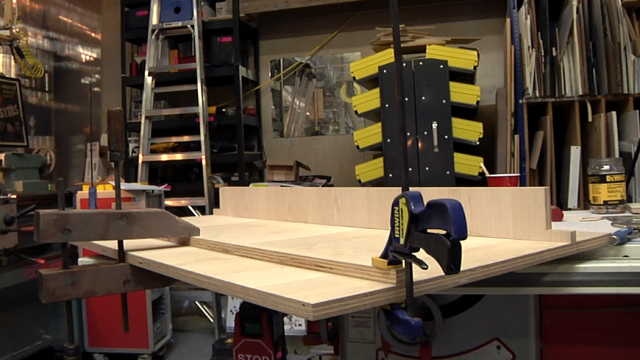
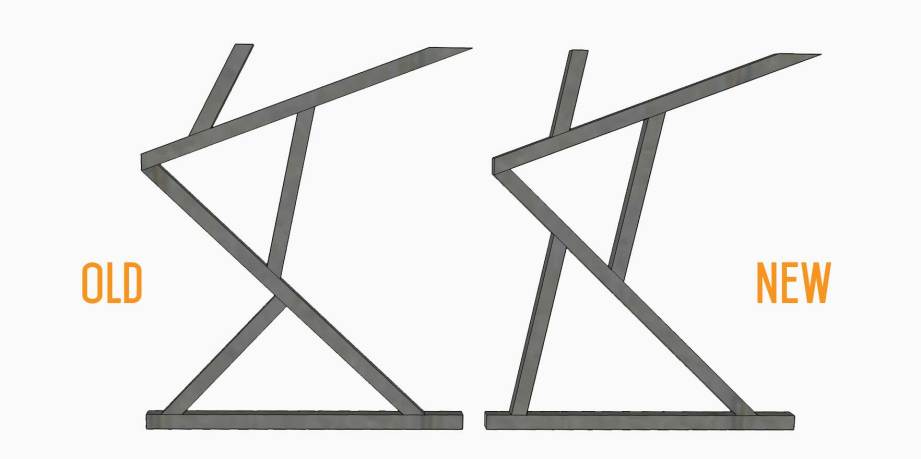
Building the Perfect Desk Part 3 – Beginnings Are Tough
My desk is progressing nicely, thanks for asking. After absorbing last week’s feedback from a bunch of people, I made some modifications to the initial design for my legs and made triple sure I was good with the height of the tray, the desktop, and the overall dimension of the desk. Assuming everything continues to go well, I’m set on the design, I just need to build it.
I started actual construction this week (we’ll have video up on the site in the next week or two) with the wooden top. After consulting a few people, the universal suggestion was to start with the piece I was most comfortable with, which will then serve as a template for the welded steel frame.
After I put together my cut list I realized I could build the entire top out of a single sheet of plywood. I went down to our local hardwood supply shop, MacBeath Hardwood, and picked out a lovely sheet of A/C maple plywood. But I’d forgotten how tough actually making the first cut is. After measuring, remeasuring, squaring everything and spending as much time as I could delaying, I finally made the first cut. While I didn’t get quite as much done as I’d hoped on the first day, I did managed to completely break down the sheet of plywood and get the first few pieces glued, and I did one of the trickier bits of carpentry that will be required. I have a bit more gluing to do next week, when I’m back in the shop, and then it’s on to welding.

So, what are you working on this weekend? Are you working on a project, cooking something, playing board games, or something else? Post your weekend plans in the comments below!