


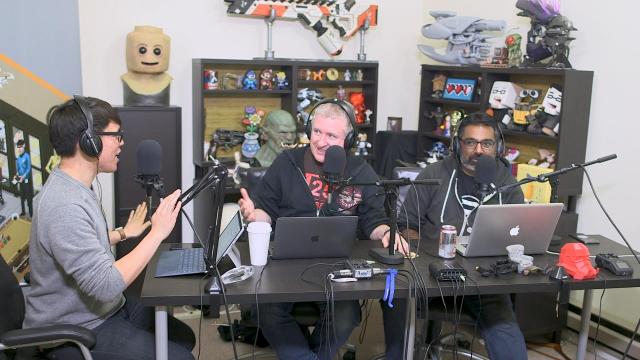
With home 3D printers, laser cutters, and virtual reality headsets, we’re truly living in an awesome future. And that’s before we watched two giant robots beat each other up on a livestream. This week, we talk about the big MegaBots match, Surface Book 2, and Pixel 2 camera reviews. Plus, we pay a visit to Elon’s shower thoughts!
Adam Savage’s New York Comic Con 2017 Panel!
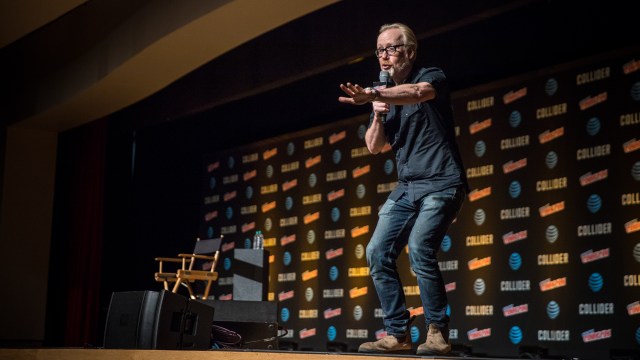
Adam’s full panel from this year’s New York Comic Con, in which he talks about his recent costume walks and build projects. Adam takes some great questions from the crowd for an hour!
Shot by Joey Fameli and edited by Gunther Kirsch
Adam Savage’s Set Tour of the Blade Runner Universe!
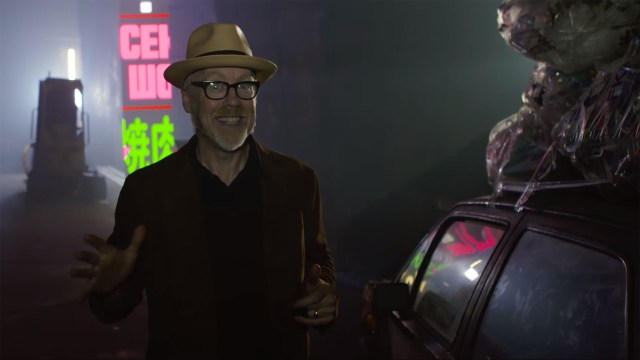
Adam takes us behind the scenes of the filming of the 2048: Nowhere to Run short film that’s part of the official Blade Runner universe. From the static set dressing to the functional props and vehicles, Adam shows how the production builds a believable science fiction world out of the pieces of our own reality.
Supertroopers, Part Deux – Still Untitled: The Adam Savage Project – 10/17/17
Adam raves about a screening of Pixar’s Coco, giving his spoiler-free review. Plus, we hear about Adam’s Star Trek: The Experience auction adventure, a recommendation for a Eyvind Earle art exhibit, and teases for Adam’s upcoming London trip to MC Michael Giacchino’s concert bash! Thanks to Tested’s Ryan Kiser for joining us this week in Will’s absense!
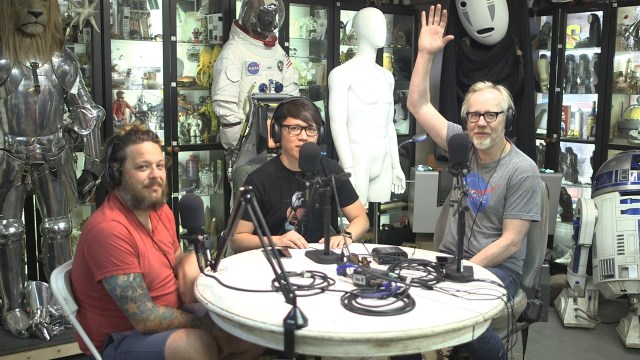
Behind the Scenes with Tested at New York Comic Con 2017!

Join us for a brief look at what our New York Comic Con experience was like this year! From roaming the show floor chatting with cosplayers and geeking out over collectibles to backstage prep for incognito walks with Adam, here’s a taste of Tested’s convention life. Thanks to everyone who said hi at the show!
Science in Progress: Bloodsuckers and Butt Snorkels
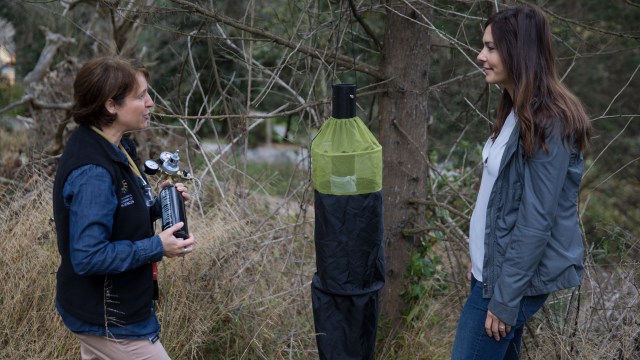
Would the world be better if disease-carrying mosquitos were eradicated? We pose the question to Dr. Shannon Bennett, the Curator of Microbiology at the California Academy of Sciences, and join her for an adventure capturing, farming, and studying these hated bloodsuckers.
The Orville’s Krill Makeup Demo at KNB EFX
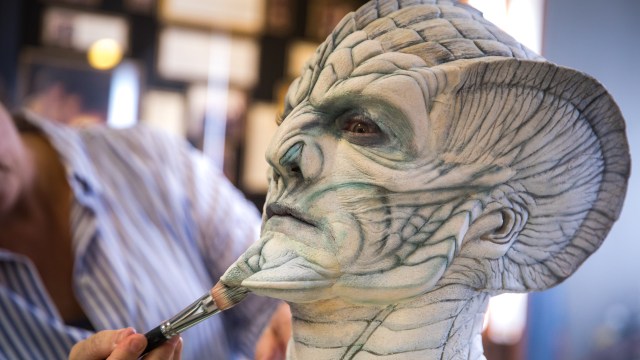
We visit award-winning makeup effects house KNB EFX, the shop where Howard Berger and his team designed the makeups for Seth MacFarlane’s The Orville. Howard and key makeup artist Tami Lane give us a demo of the Krill makeup application they developed for the show, which makes it clear that The Orville’s creators are big science fiction fans.
The Weird and Awesome World of Bootleg Art Toys
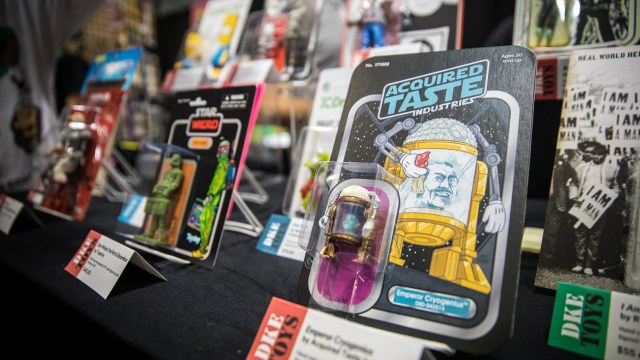
At a few pop culture conventions every year, DKE Toys brings designers and artists together to release a series of limited artist edition toys inspired by the blister pack action figures of our youth. Dov Kelemer chats with us about how the bootleg art toy scene got started and how each artist brings something different and subversive to their resin figures and packaging.
Building Adam’s 2001: A Space Odyssey “Moonwatcher”, Part 1
My passion for the movie 2001: A Space Odyssey launched me into the quest of a career at the age of 16. I wanted to be a filmmaker. I wanted to make things for movies. I wanted to make space ships, creatures, props and more. I started learning everything I could about Kubrick and film making. I started making my own films and, eventually after graduating from school, I got a job at the American Zoetrope with Francis Coppola. George Lucas was there also and was working on the movie version of his short film, “THX11384eb”. This was another film I loved that inspired me.

To make a long story short, in 1974 I moved to LA and started working for the studios as a special effects makeup artist. I met Rick Baker who helped me start my career as a creature maker and Gorilla man. My career exploded and for years I made creatures and makeup effects for films, TV commercials, and TV shows.
I worked on “Star Trek the Motion Picture” where I made Spock’s ears, GhostBusters making creatures and puppeteering them just to name a couple. I made one feature motion picture with Charles Band, “The Day Time Ended” that I wrote and produced. I played an alien in the opening sequence of “Laser Blast” and did all the makeup and props. This lead to a SAG career of playing creatures for films along with my Gorilla suit work I did for many years.
This is just the short story but it all began with 2001, which brings me to this project: Moonwatcher.
I always wanted to make something from 2001. Most of the models have already been done. The helmets and suits by Mike Scott had been done (and they are amazing!). But no one had done Moonwatcher or the Star Child. So I set off to do both.
Adam reached out about the project asking me if he could get in the build. I said yes, of course. So let’s get going here and I’ll show you how I made Moonwatcher based on Stuart Freeborn’s fantastic work 50 years ago.
The first thing was to research. With as much experience as I have had over 40 years with ape suits, I needed to revisit Stuart’s work on the Dawn of Man ape suits. 40 years ago there wasn’t much available on the subject but today with the internet and some of the great books released about the movie there is a treasure trove of info.
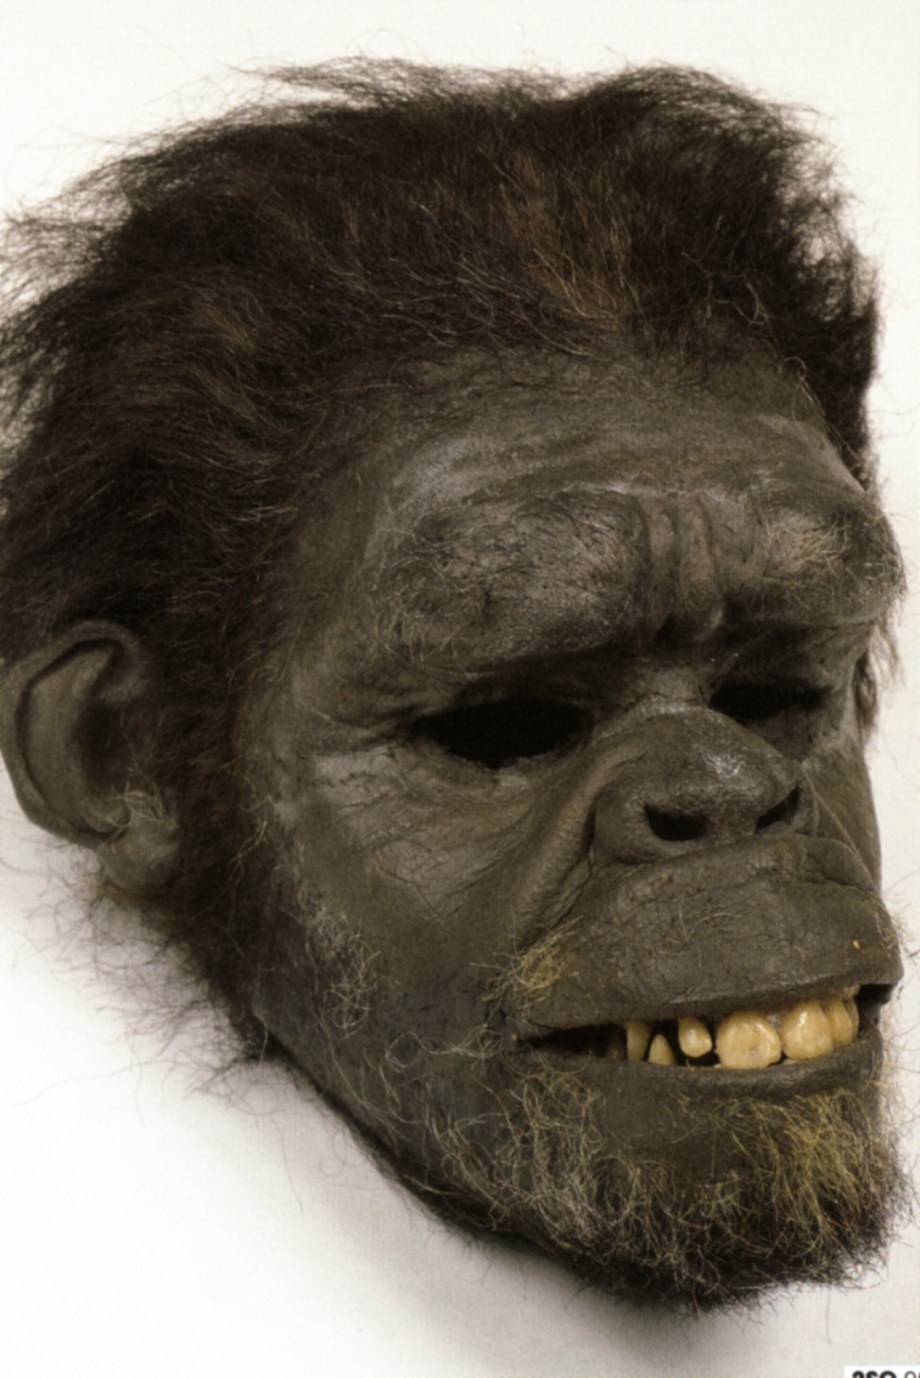
There was an exhibit for Kubrick’s work recently and many people sent me pictures of Moonwatcher. Sadly the head was in bad shape. It was apparent to me that they tried to restore the head as best they could, but it was a pale reflection of the once great work. The sizing was still there but much of the sculptural detail was covered over with latex patching.
Also, the lip mechanism was frozen in the up position distorting the lip and nose. The original masks were made of foam latex. Foam latex has a short shelf life of maybe 10 years or so before it rots. It can last longer if stored properly.
I set out to find pictures taken of the sculptures and foam rubber castings. I also used frame grabs taken from the film. Bob Burns sent me some pictures of a skin that Stuart sent him a few years back that was still in good condition.
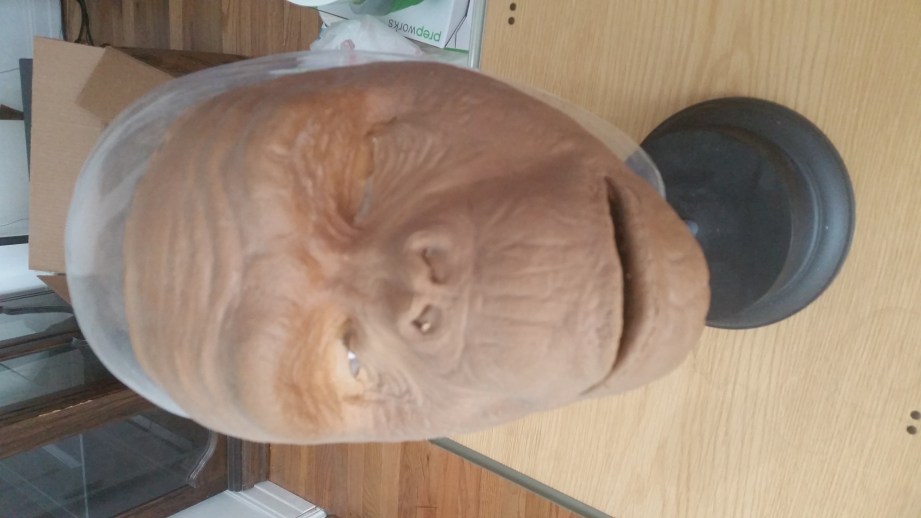
I need to know how the sculptures looked before they were painted and had hair. They needed to be in a neutral position how they were originally sculpted. I was surprised at how rough they were. Well-sculpted but not refined as things are today. I had to match this as best I could to be canon.
Over time, I collected a lot of good info to start the sculpture but one thing that was missing were pictures of the under skull and mechanism to move the lips. An underskull is a fiber glass epoxy supporting structure for the outer skin. This is what allows you to move the lips, hinge the jaw and attach it to a skull cap worn by the actor.
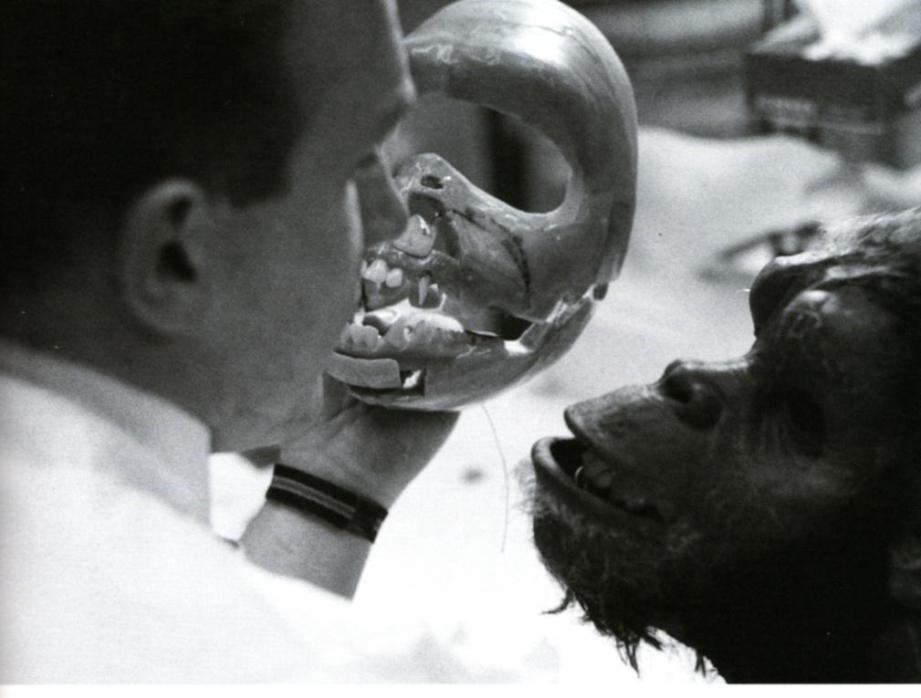
Thanks to Tony Hardy, we found one of the few pictures I had ever seen of the under structure and under skull. Now I had everything I needed to get going.
Sculpting the Skin
I started by taking my life mask that Rob Burman made me two years ago. I used it to make a frontal life mask to replicate what Stuart had in the pictures. A half face life mask flat to the table. I built an angled sculpting stand as he had. I printed out various pictures for reference and started sculpting.
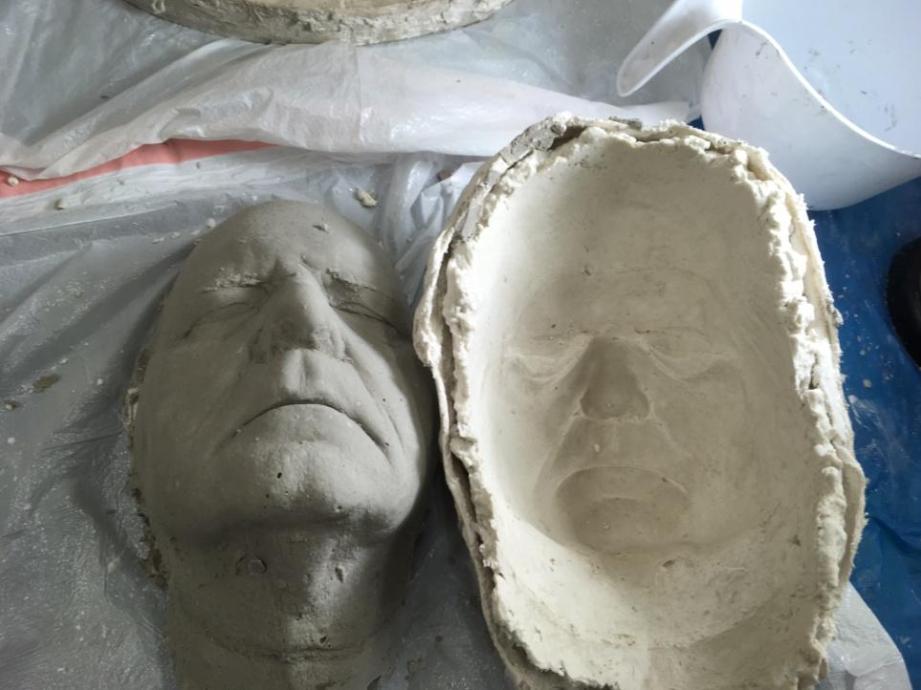
I made an alginate cast off of my full head life mask and made a half face in Ultracal 30. Alginate on the right and backed it up with plaster bandage gauze, old school. I then added more Ultracal 30 and leveled the life cast to a flat surface. It was time to start to live history. Reference pics on the laptop and I’m ready to go.

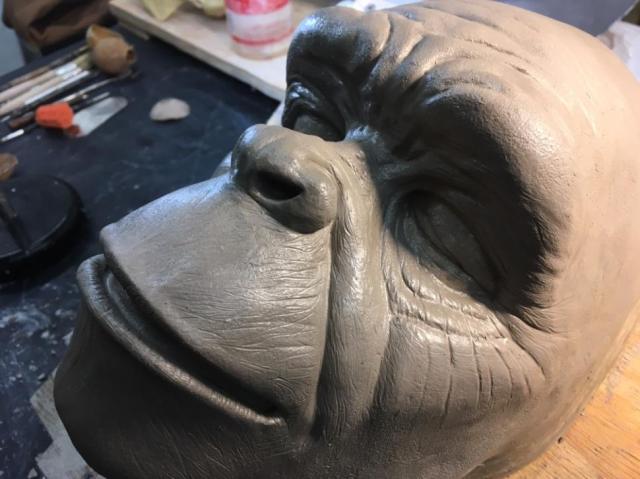
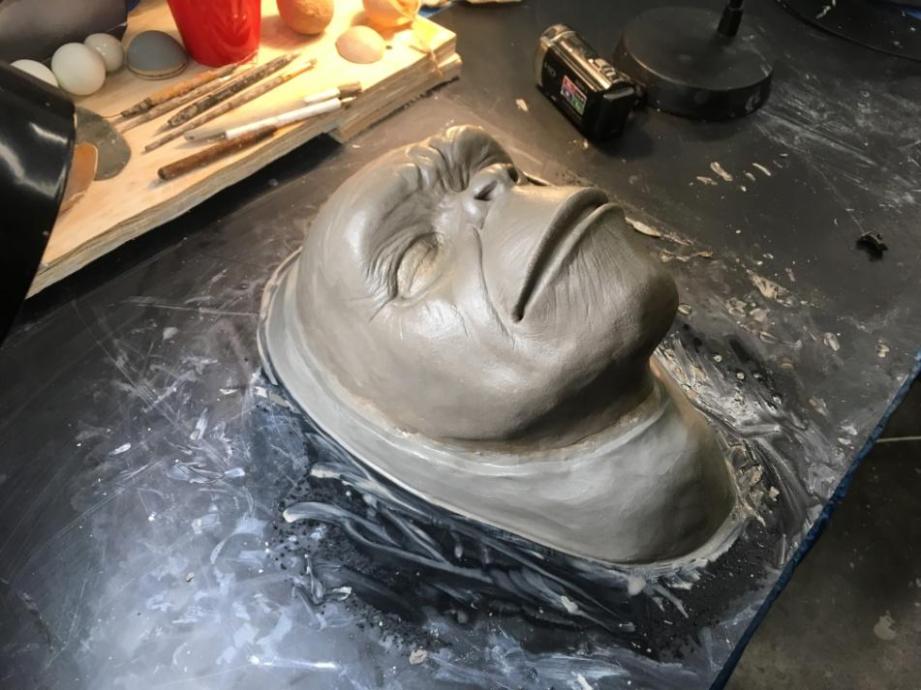
This picture was after about 30 minutes of sculpting with WED EM 217 wet clay. The picture to the right is Stuart Freeborn 50 years ago.
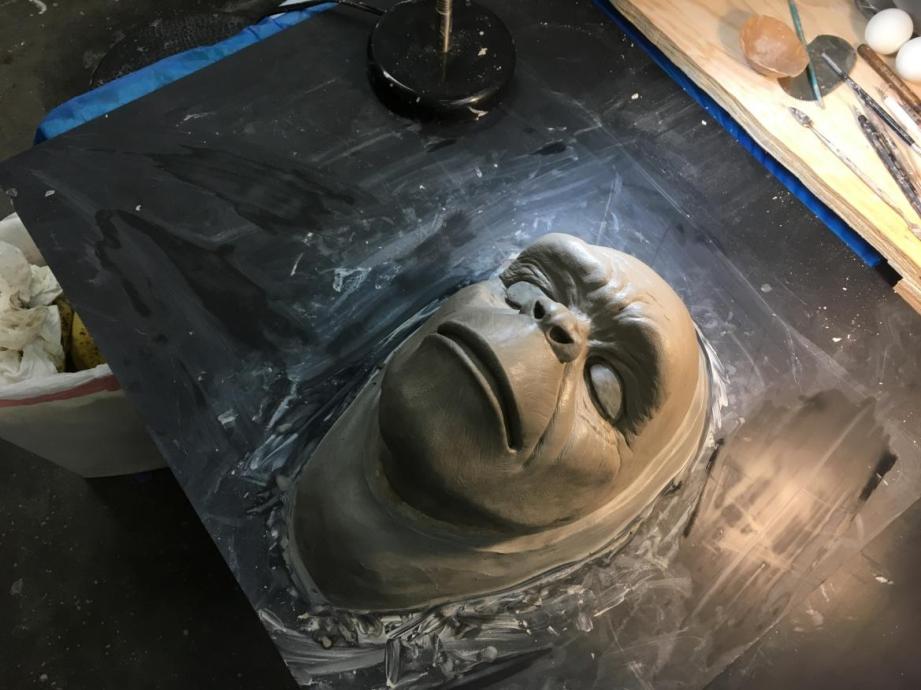
I continued sculpting for about two days going back and forth over the reference pictures and watching bits of the film.

Once I was happy with the sculpture, I coat it with Crystal Clear Krylon and do some even finer detailing. Next step is to mold the sculpture in BJB 1630 two part polyurethane.
Making the Skin Mold
The molds Stuart freeborn made, I can only guess, were Hydracal B 11 or hard plaster back in the mid 60s, that and dental stone were all that were available at that time. The process was to make the molds and later bake foam rubber in them which often would crack and degrade the molds over time. I worked with this technique during my long career enough to know.
I want to use modern materials on this project to preserve the work that I am doing. I also want to replace the foam rubber with modern day prosthetic silicone that over time will not deteriorate like foam rubber.
To mold this sculpture I use two part polyurethane called BJB 1630 to make the skin mold and the eventual core. 1630 is a thickened casting medium that is mixed 50/50 making it easy to use. With 1630 you have a 15 minute working time, long enough to do a gel coat and then back it up with fiber glass and two more layers. You get your mold faster, stronger, and without all the dust.
First thing I do is to place the life mask and sculpture back on a flat surface. I add clay around the base to seal off any possible leaks under the life mask. I also add, what some people call, flash. I was taught by John Chambers and Dick Smith that it is an overflow.
When you cast a skin out of either foam rubber or silicone when closing both parts of the mold you have hydraulic pressure. The less surface area you have in contact with both the positive and the negative mold parts, the easier they will close and open. In addition to that the pressure build up can more quickly travel into the overflow expanse.
Between the clay and the point where the sculpture tapers off into the life mask is about a 3/16th to 1/8th space. This is the contact point of positive and negative parts of the mold.
An important thing to remember is to add a mold release to the areas of the exposed life mask or this 1630 will stick to it and make it almost impossible to open the mold later on. I use simple Vaseline as a release.
The eyes are also clayed up with and overflow. There is just a 1/8 distance between the clay and the sculpture. This creates a very fine blender edge.
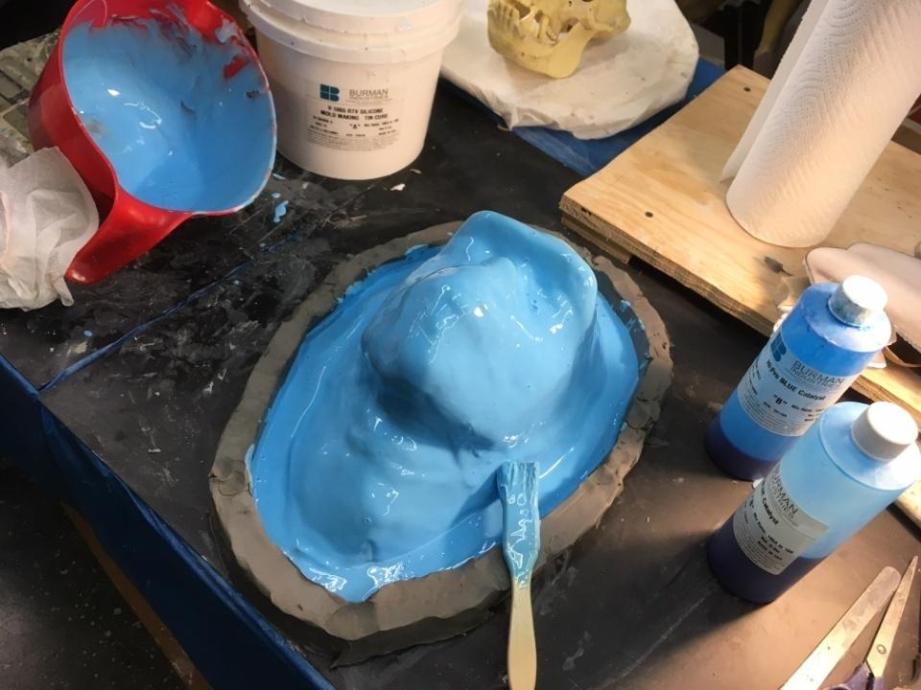
This shows the gel coat being placed on with a disposable brush. BJB 1630’s other advantage is that you will have little if any bubbles in the surface of your mold. You can just see the overflows over the eyes.

The Gel coat is on. At this point it is still moving which means you can keep brushing it up as it slowly thickens for a nice even thickness.
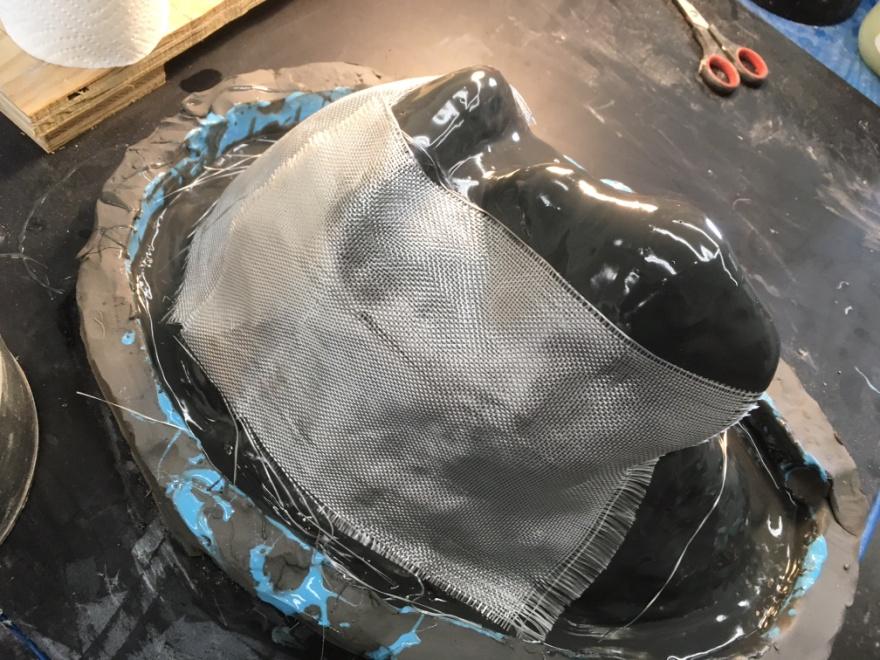
I have now added a second layer of 1630 to the gel coat just as it gels and stopped moving. It’s important to get the next layer on before it fully sets up or it will not bond very well. Next up I started adding fiber glass matt to the wet 1630.
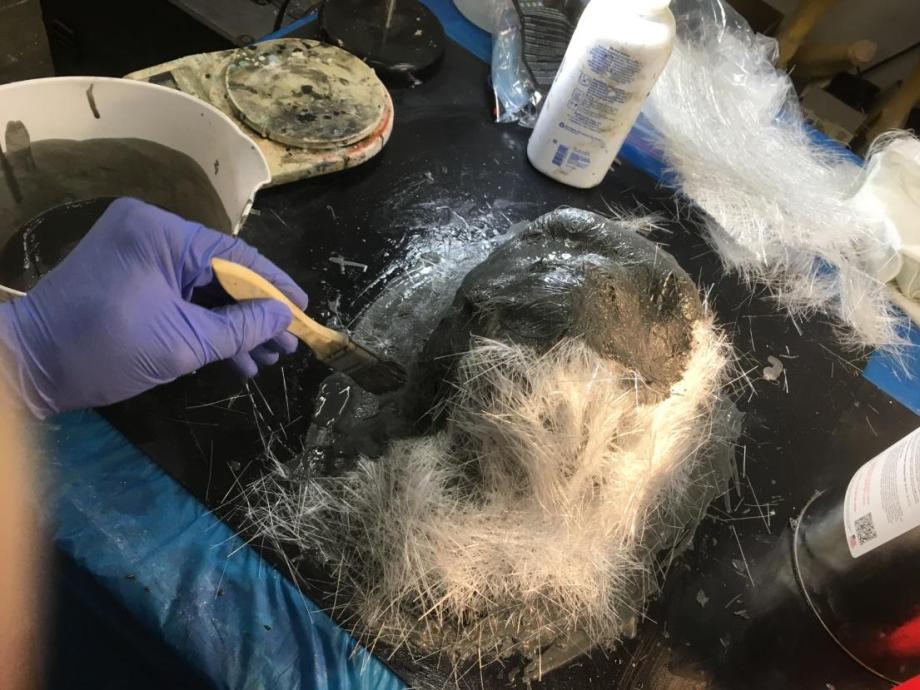
Using another brush I dab the matt down with more 1630 until it lays flat.
I add a third layer of 1630 and fiberglass matt making a good thickness. Oh, did I forget to mention that a 1630 mold is lighter than a stone mold? It is much lighter. And it doesn’t warp.
After a couple of hours sitting, I remove the mold from the surface and cut off the excess material and sand the surface of the mold a bit so as not to receive sharp shards of fiberglass into your hands when handling the mold.
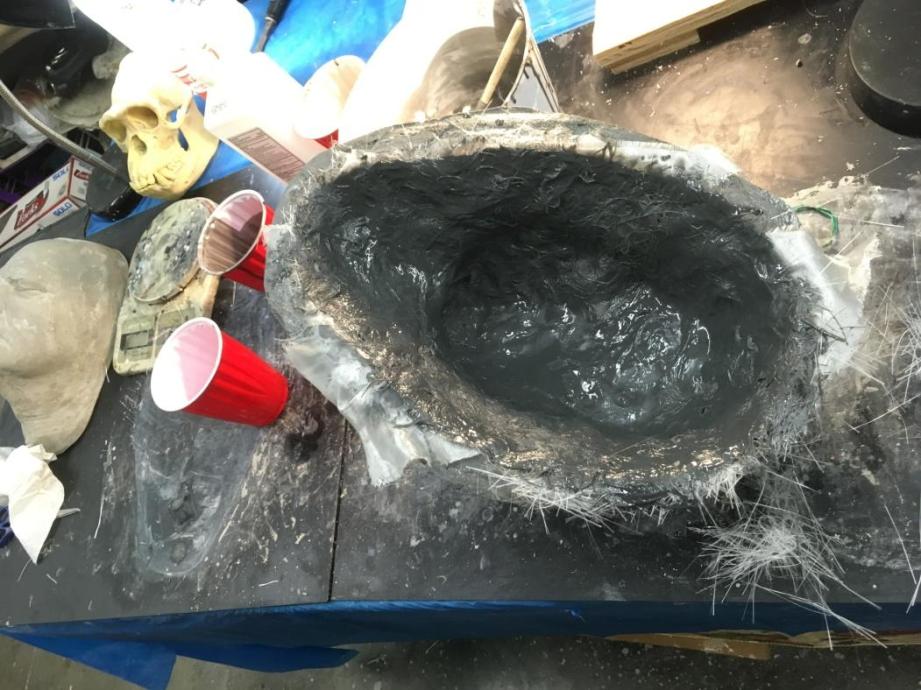
And here is the finished mold. The next step is to open it. I usually wait overnight to do this.
Opening the mold is straight forward enough although sometimes it can be disconcerting. They don’t always open smoothly at first. Again, this one of the reasons that you want to cover with clay any surface area not needed.
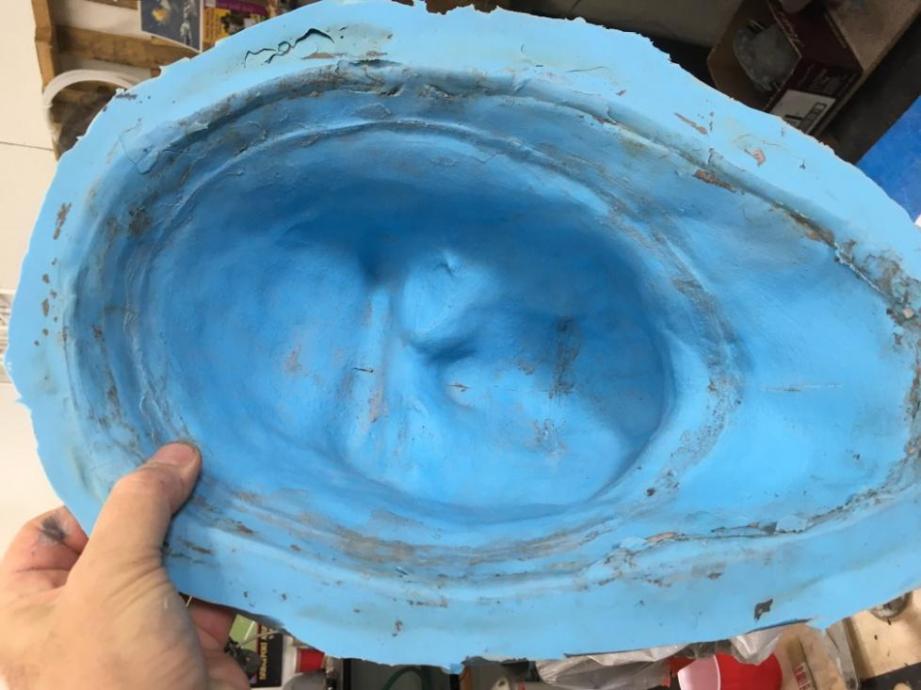
It took a little prying with a thick big screw driver but it came apart. The clay sticks to the inside and the life mask but is easily removed with some wooden sculpting tools. The rest can be removed by placing it in the sink and scrubbed out with a sift brush and running water.
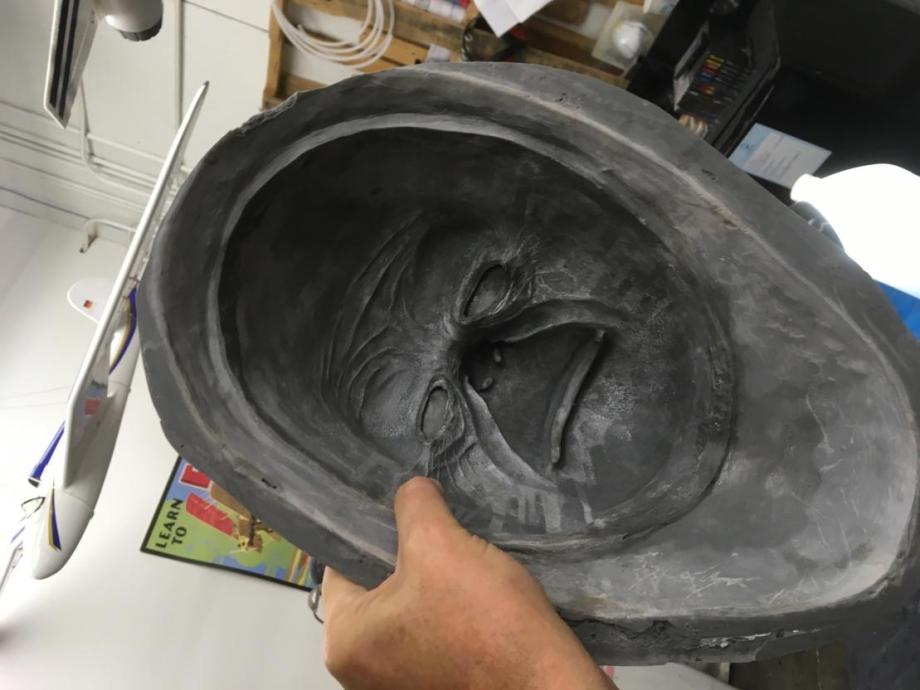
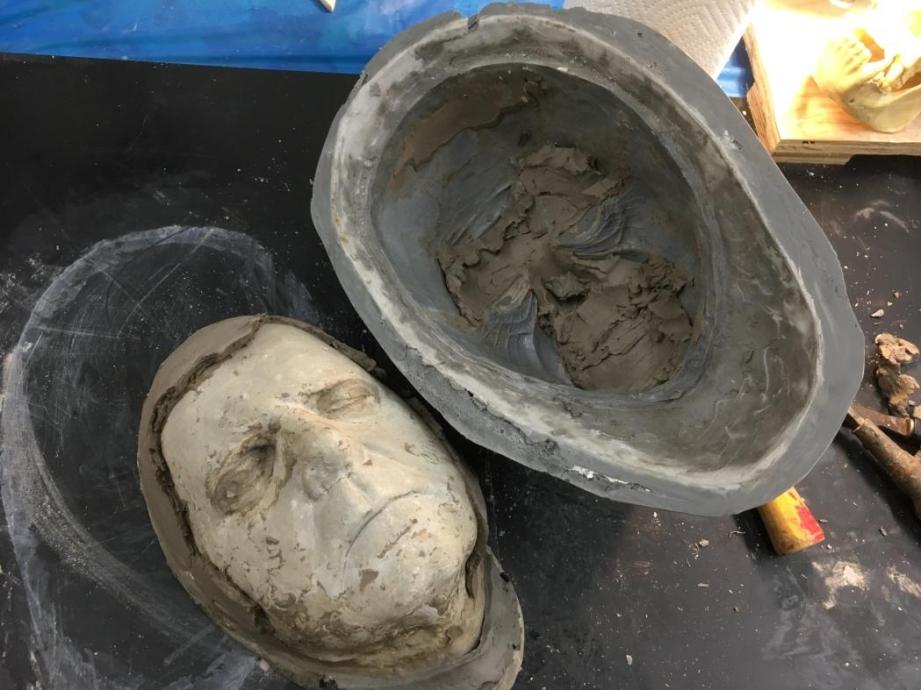
The mold is perfect. Not a single bubble. The next step will be making the core.
The core is difficult to describe in this text. This is where pictures will help a great deal. The core is made in order that we have a way to make an evenly thick skin and a sporting under skull to support it and allow the adding of teeth, hinging the jaw and lip movement. The life mask used to sculpt the skin will be discarded from here on out. If we were to use it for making a skin we would end up with a big Planet of the Apes appliance with a flopping mouth. We don’t want that.
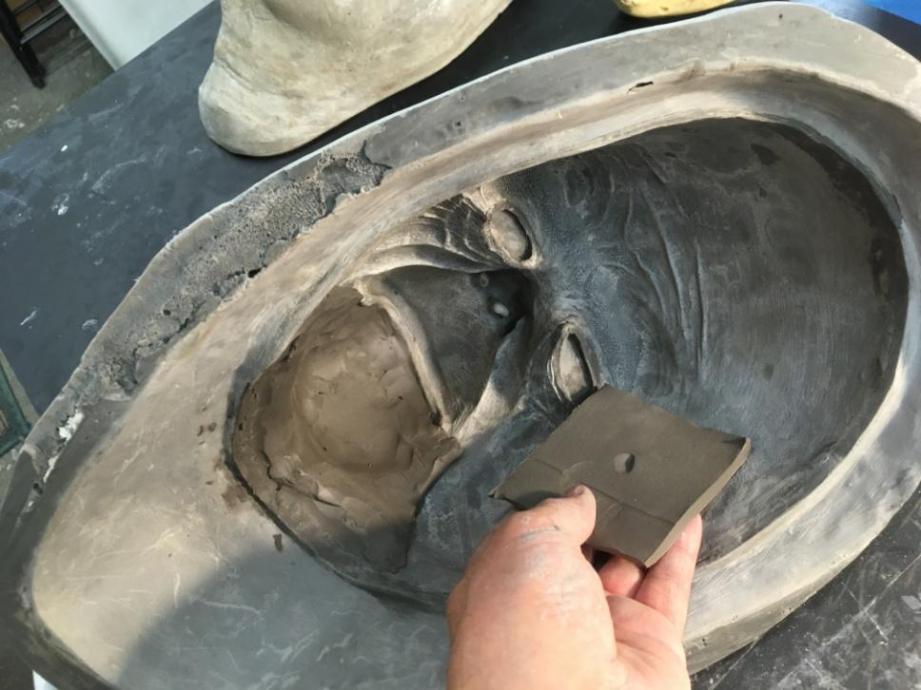
It starts by slicing EM 210 water based clay into 3/16 thicknesses and placing it inside the mold.
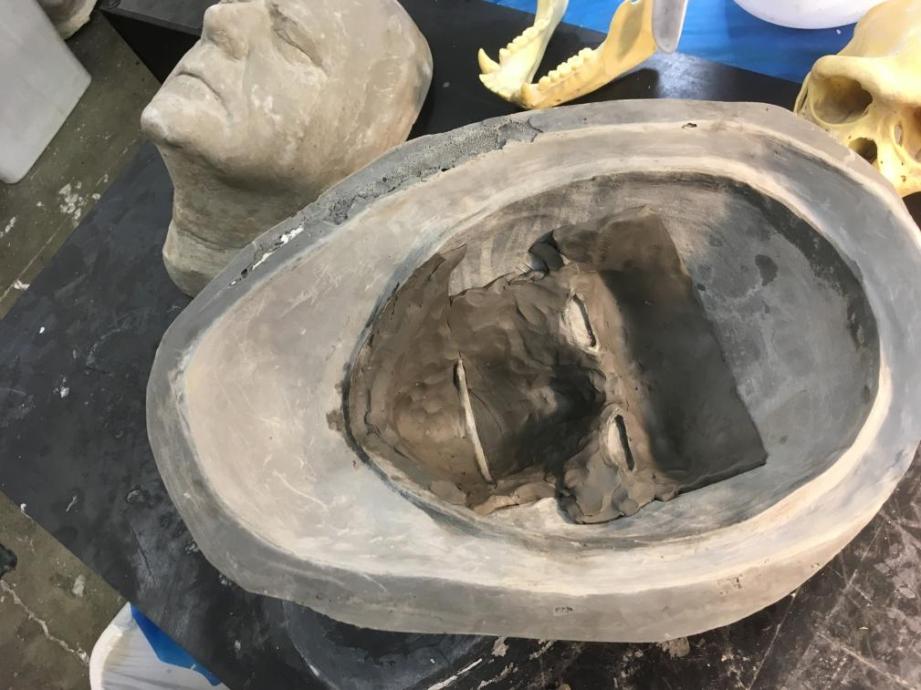
I keep adding clay and blending the sections together until I get a uniform spread. You need to taper it to the contact points for the eyes and the outside edge. Otherwise, you won’t have the blender edges.
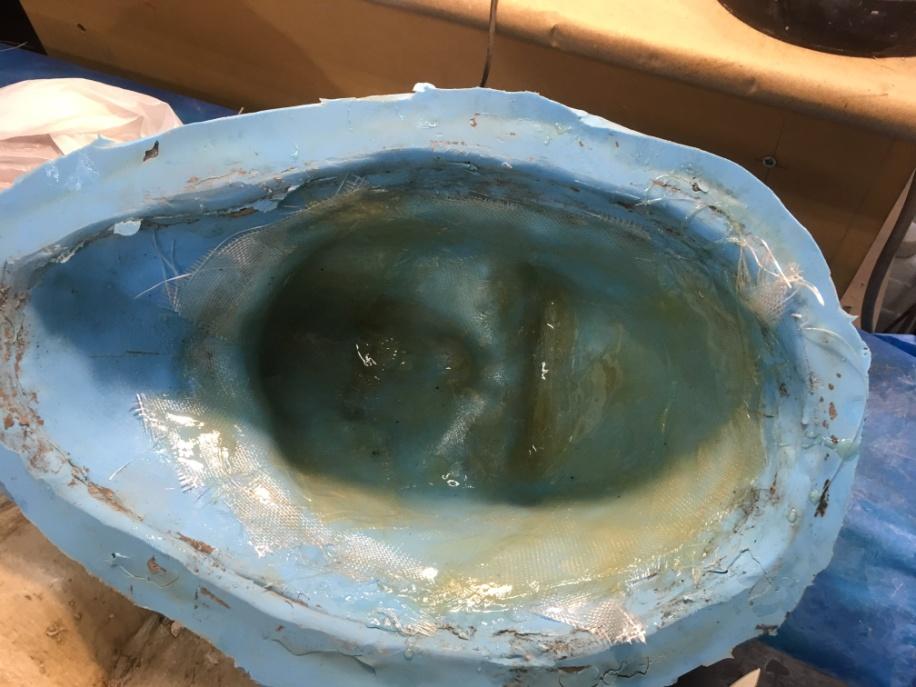
Once this is done, it’s time to mold release the edges and pour more 1630 into the clayed up mold. It helps to coat with Crystal Clear Krylon the surface of the clay which separates the 1630 from the wet clay surface. 1630 does not like to cast up well against water.
We are looking at the core and glass in the mold, time to release it. Like the skin mold, the core gets pried open and the clay cleaned off.
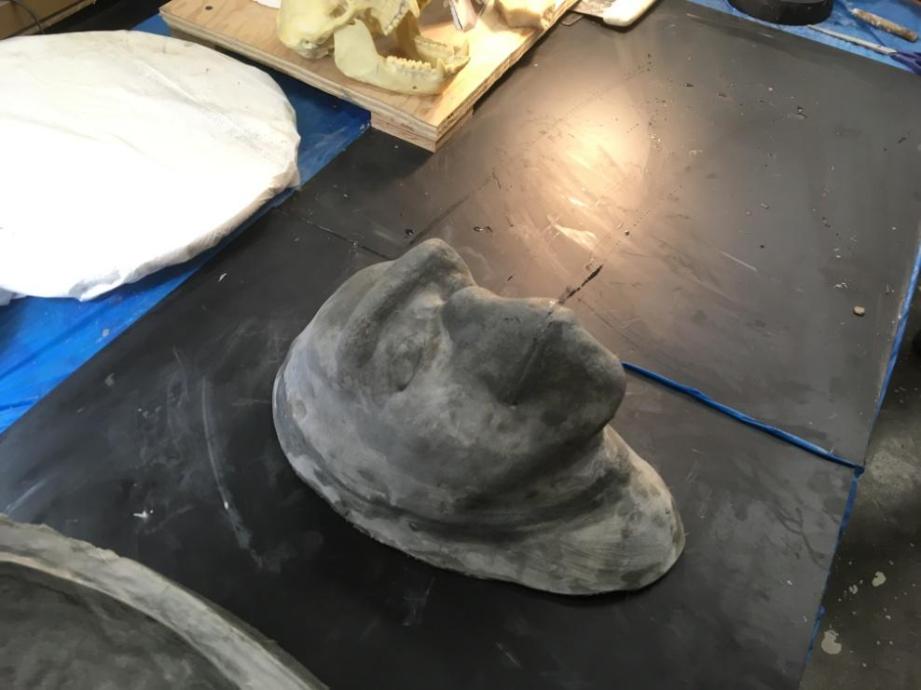
And here is the core. Now we have the ability to make an evenly thick skin out of Gel 10 silicone.
I put a handle on the back of the core using PVC pipe to make it easier to open and close.
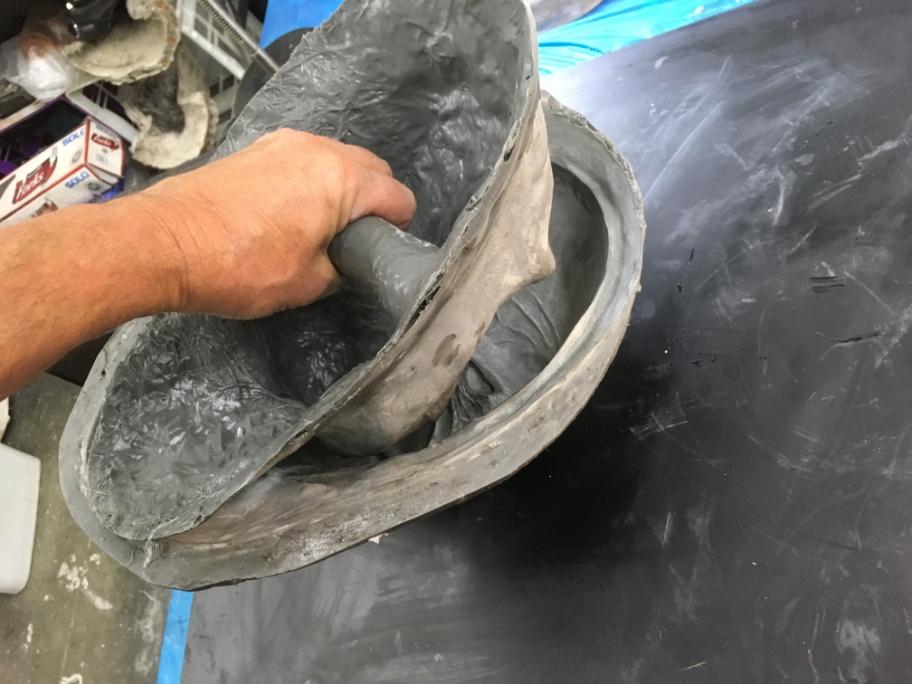
Now that I have the core I need to make a mold of the core in RTV silicone 1065 to facilitate the making of a fiberglass under skull.
Making a under skull mold from the core is essential to making a silicone skin with an opening and closing mouth. It also allows for articulation of the lips. Back when 2001 was made, we didn’t have all the fancy stuff we do today. Things were simple and a simple cable and housing attached to the lower jaw would move the lips.
The first thing I do is to take the core and lay it on a flat surface just as I did with the original sculpture and life mask.
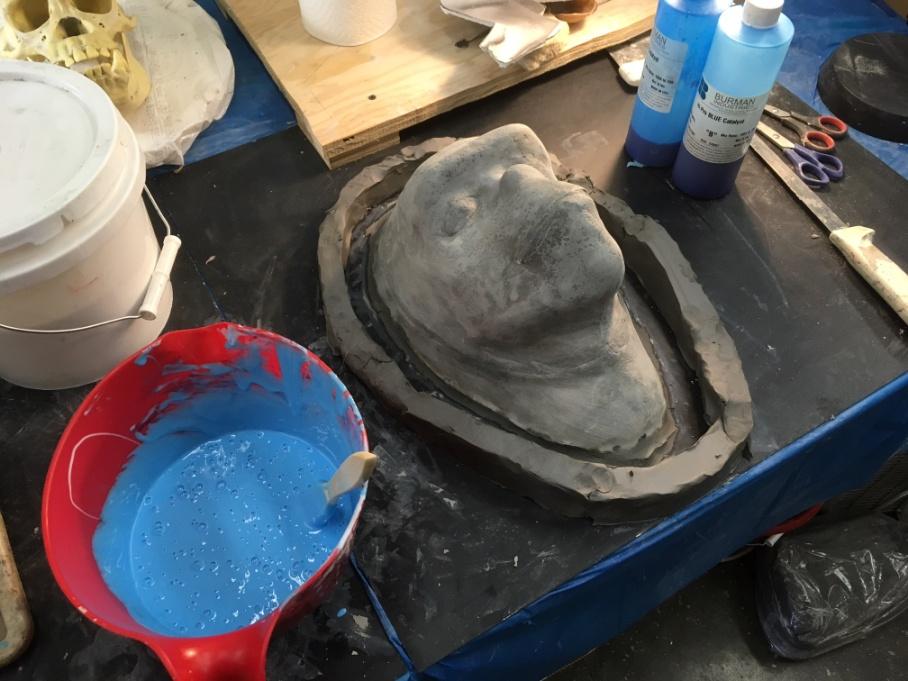
I built a clay wall around the base to capture any run off silicone as brushed up the silicone onto the core.
Similar to working with the 1630 I brush up the silicone and kept doing that until it starts to set up. Once it slows down enough and stops moving, I am ready to make the mother mold out of BJB 1630.
As before, I get a nice thick gel coat on the silicone.
While still tacky I put some 6 oz. Cloth on the gel coat. You can use either cloth or the matt they both work.
Two more layers and I have the mold. This supports the silicone rubber mold so it doesn’t distort.
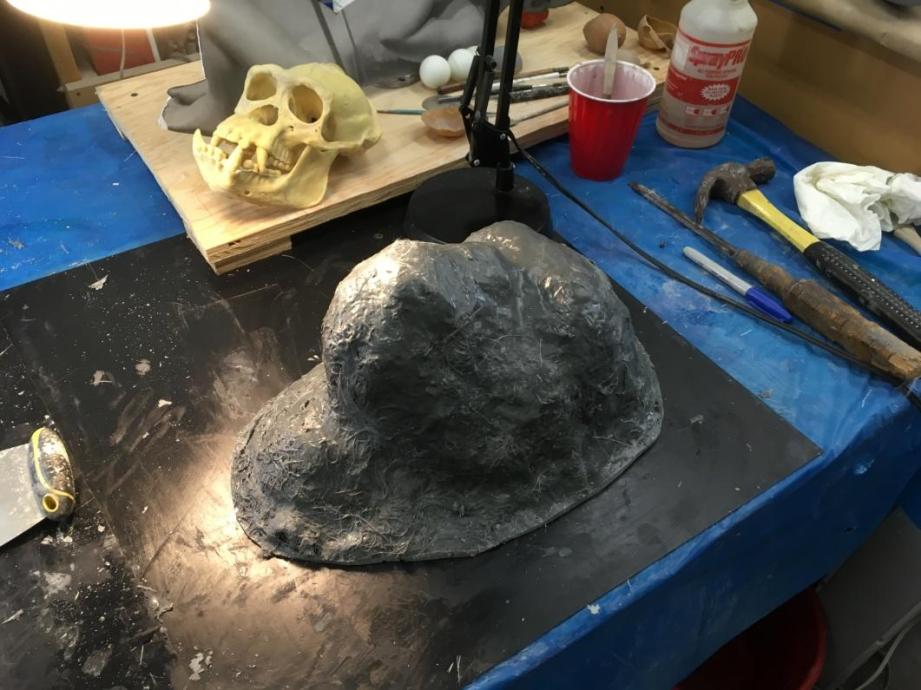
The next day I open it up. The silicone doesn’t stick to anything but itself so it opens with ease. This is what I got and now I was ready to produce and light weight fiber glass epoxy resin under skull.
This is the procedure I typically use. I use West Systems Epoxy and 6 oz. Cloth to make both pieces. It is a simple process to mix the epoxy at a 5-1 ratio and I make up 100 grams of material and brush in a gel coat of sorts immediately followed by adding the cloth while the gel coat was still active.
I only use 3 layers of 6 oz. Cloth which is more than enough for a light weight and flexible under skull. You don’t need it crash helmet thickness. I do this for both the skull cap and the under skull.
I use a stippling method with a disposable brush to wet all the way through the cloth and remove any excess with paper towel. You want the glass to be dry and not shinny wet looking, if you can.
Using the West Systems 205 fats catalyze you’ll have about 20 minutes of working time at 70 degrees room temp and faster, if it’s warmer. I let it sit overnight and in the morning I have a fully cured, non sticky fiber glass part.
For the skull cap I use my full head life mask and build a 1/8 thickness of water base clay over it to account for the eventual padding and felt.
Using the same technique I lay up 2 layers of glass and epoxy and let sit over night.
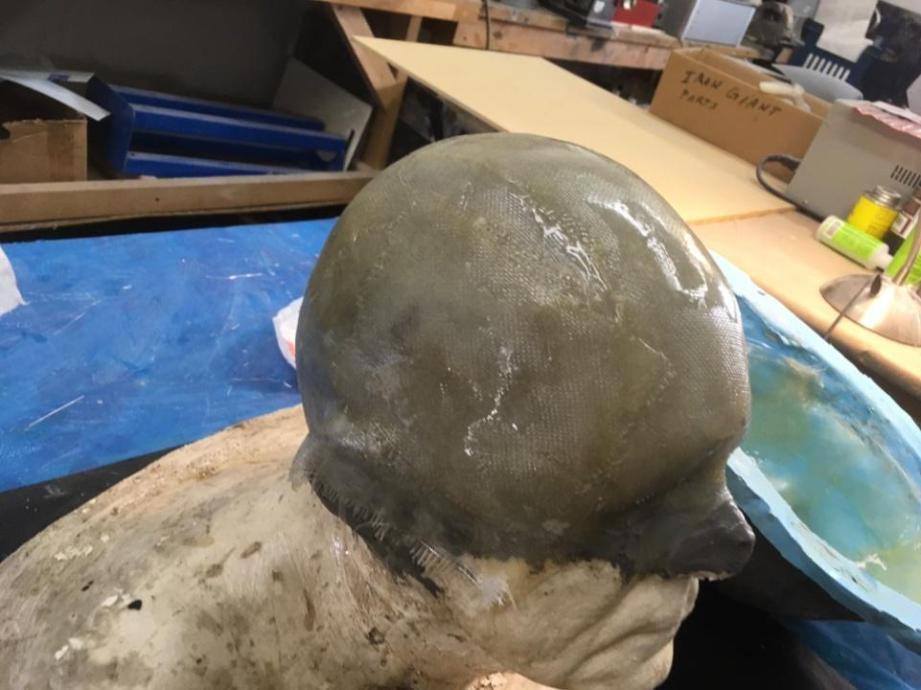
Fiber glass applied up over the clay. I seal it first with Crystal Clear Krylon.
While this all sets up, and until the next day I took a chimpanzee skull I had and sculpted the gums back on it with Chavant clay. I then make a simple 1065 silicone mold from the teeth and gums to make dental acrylic teeth and gums that will be later applied to the under skull. As near as I can tell, Stuart used reshaped chimp teeth for the dawn of man apes and later used the same molds for the Wookie.

I use water based clay to dam up the teeth so I can pour a simple once piece mold of the teeth.
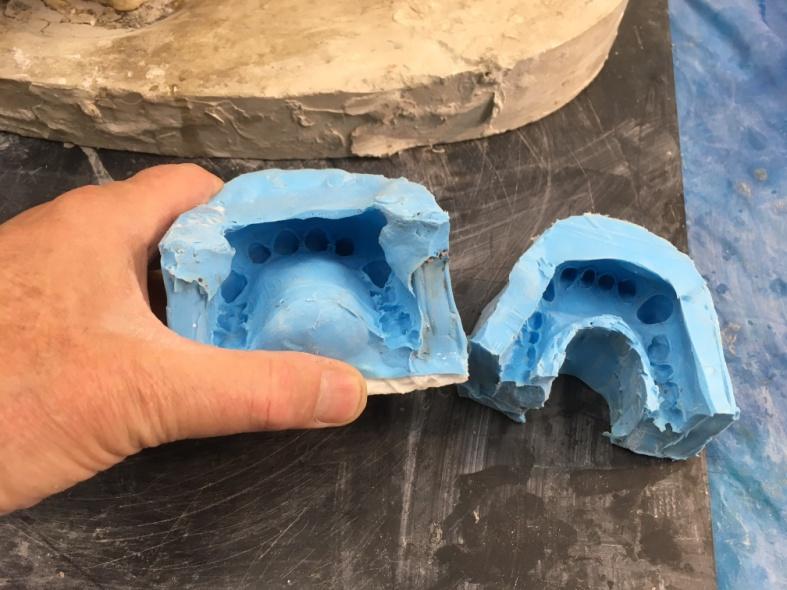
Simple one piece molds.
Next up, I use Chavant clay to sculpt the ears for the head. In my research I found that, as in actual life, no two ears are the same. And on Moonwatcher his left ear was smaller than the right. They were both differently shaped as well. My guess is they had sculptures assigned to various tasks and one was ears. They made different sets, cast them out of latex and they got mixed and matched. Wanting to make my head as cannon as possible I did the same and matched to the pictures of the original head.
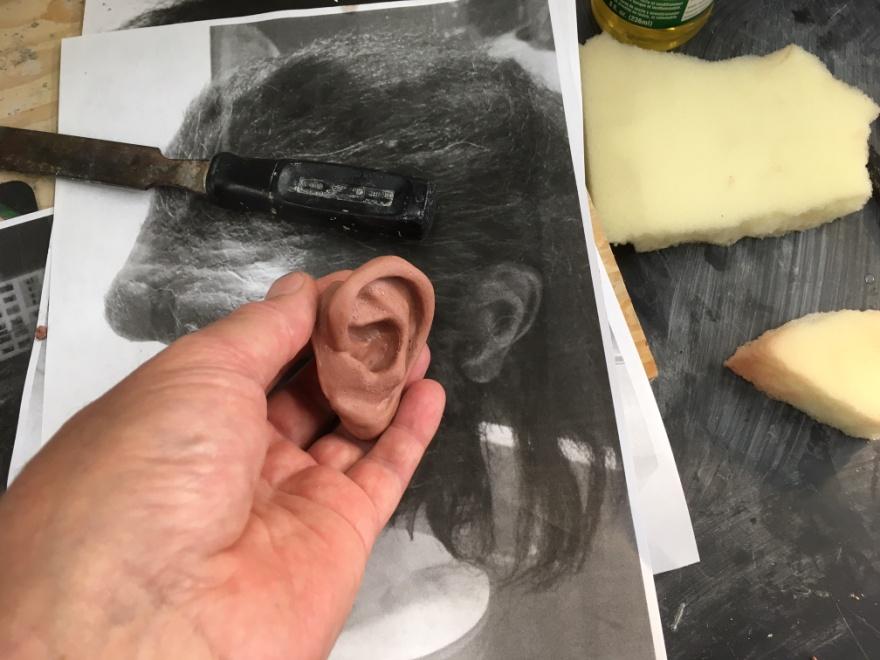
This photo compares the sculpture to the actual Moonwatcher head.
Once I finish the sculptures, I mold them with BJB 1630. I make a one piece mold.
Lastly, I use the chimp skull I sculpt a tongue in Chavant clay and contour it to fit exactly the inside of the mouth. I make a simple one piece mold for that.
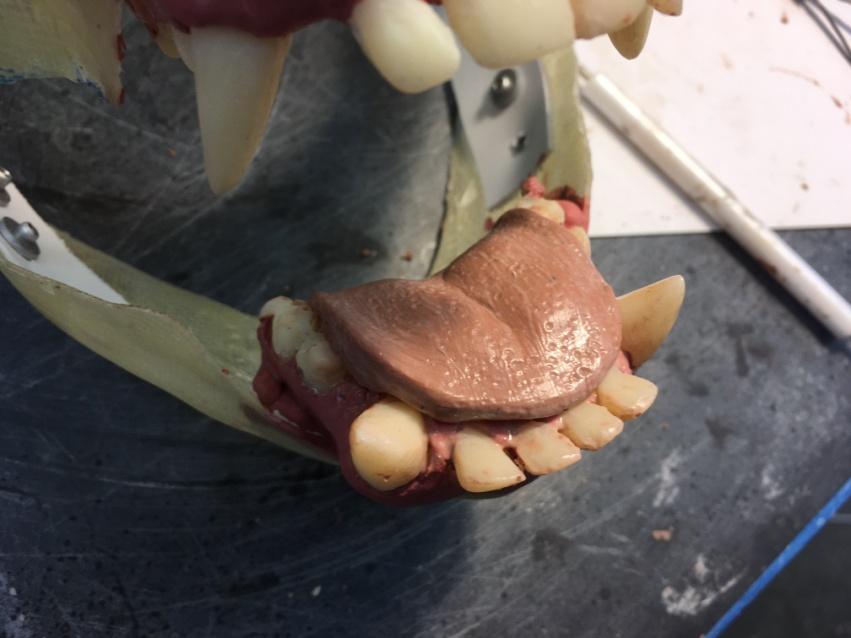
Now I have everything I need to make a complete Moonwatcher head. I have a face mold for the skin, fiber glass under skull and head cap. Teeth, ears, and tongue molds. Let’s put all this stuff together and make Adam’s Moonwatcher head.
Steve Neill is a makeup and effects artist based in Ventura, California. You can find more of his work here.
PROJECTIONS, Episode 26: Oculus Connect 4, Santa Cruz Prototype Hands-On
Lots to talk about this week as Norm and Jeremy head to Oculus Connect 4! At this year’s annual VR conference, Facebook announces two new standalone headsets and big updates to the Rift interface. We go hands-on with the Santa Cruz prototype and share our impressions, along with things we learned in an interview with Oculus’ Nate Mitchell. (Apologies, we were not given permission to film our demo and interview.)