Meet the Maker: Digital Harbor Foundation

This isn’t the first time Adam Savage has called on the Digital Harbor Foundation for help. Tested viewers may recall that it is the Baltimore youth makerspace where he (and Jen Schachter!) assembled the SXSL letters with 50 kids back in 2016.

Luckily for us, they’re always ready to pitch in. Here’s what they did for Project Egress.

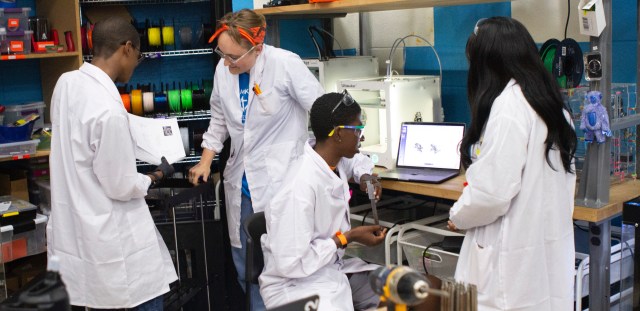
About: The Digital Harbor Foundation is dedicated to fostering learning, creativity, productivity, and community through education. In 2013, we transformed a closed-down Baltimore Rec Center into a Tech Center, where we provide youth-focused technology education programs, work opportunities, and career and college pathways.

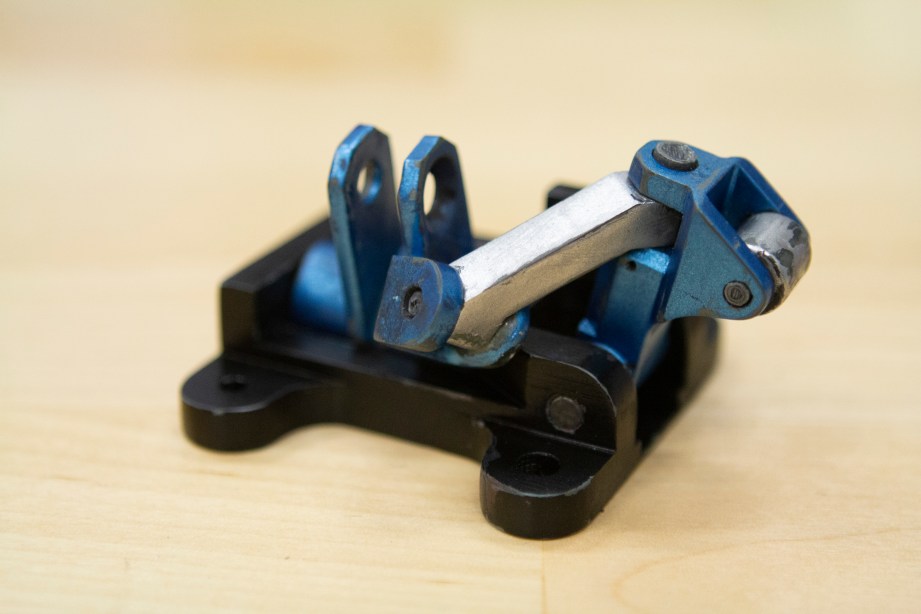
PART #15-G: LEFT HAND LATCH ASSEMBLY G PART #15-G: LEFT HAND LATCH ASSEMBLY G

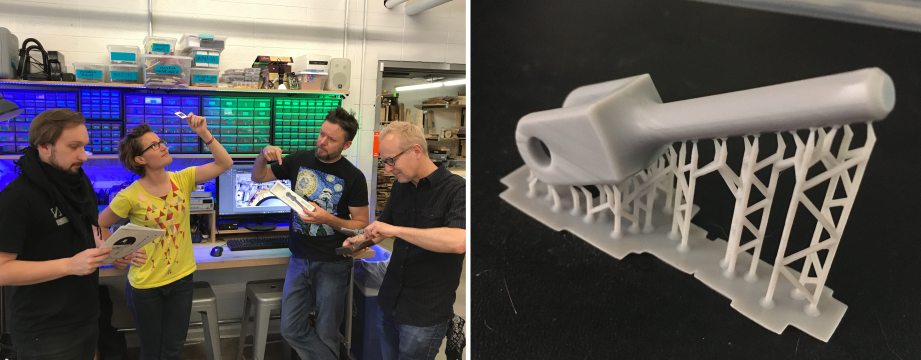
Artist Statement: “At the Digital Harbor Foundation, we’re always excited to get a call from Adam Savage and his team. Word got out quickly and our Print Shop 3D printed the parts in record time.

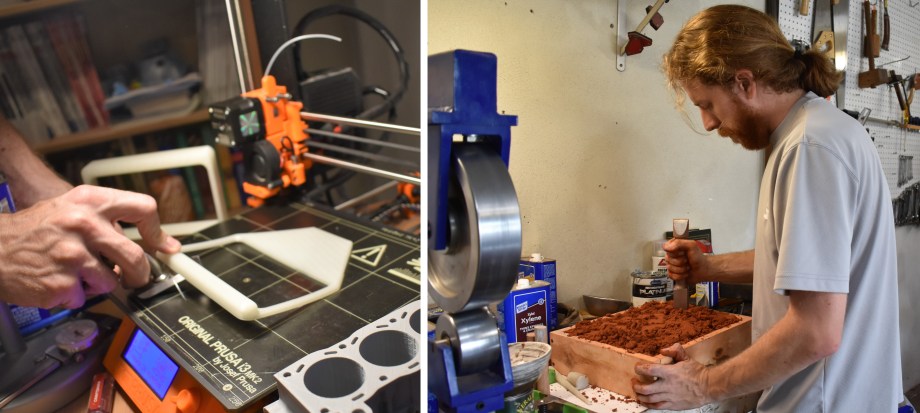
With time on our hands (a rare thing), we wondered how we could spruce them up. I had a plan. I primed the parts and started sanding. I kept sanding, and then I sanded some more. What gaps I couldn’t reach by hand, I filled with epoxy resin and plastic putty. Still, I sanded.

When the parts were smooth and the deadline was nigh, I primed the parts one last time. I used automotive spray paint to coat them. I like the way it levels, resists chipping and gives objects a metallic look. In a former life, I used to do this exact work for newer NASA models.

While this isn’t the first piece of space hardware I’ve fabricated, it is certainly the coolest. My job had always been to make the parts look pristine, brand new and shiny, but I always wanted to rough them up and make them look the way I imagined space travel and alien terrain would pummel them. I was thrilled to beat these parts up after working so hard to get them smooth. It was cathartic, and it started to feel like an artifact, like the real thing. And when it was all put together, it moved! The entire process filled me with joy.”

Follow Digital Harbor Foundation: Website | Instagram | Twitter

Meet the Maker: Jimmy DiResta

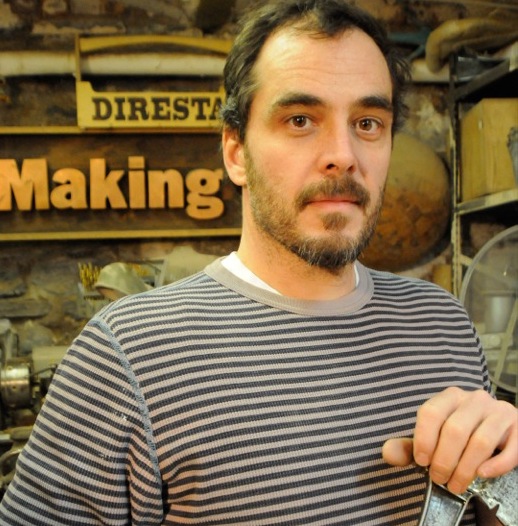
If you watch build videos on YouTube, or the series Making It on NBC, you’re no stranger to Jimmy DiResta’s work.

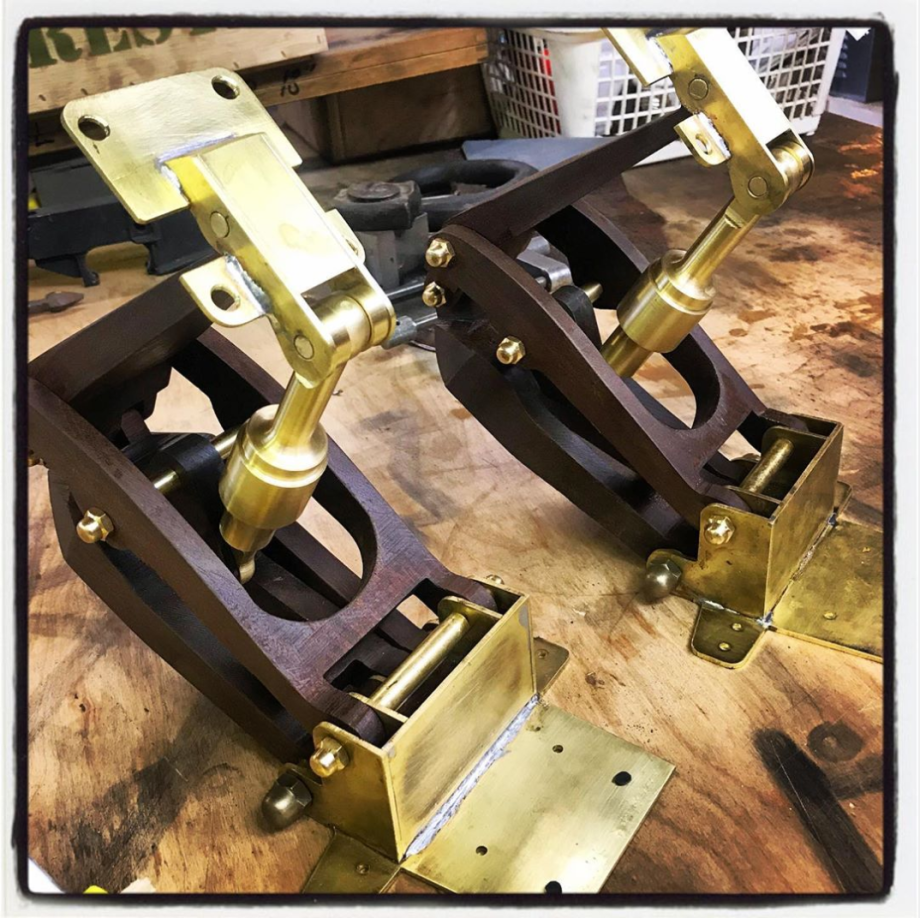
The hinges Jimmy — with help from Kevin Lizotte — made for Project Egress were nothing short of beautiful. Scroll on for the build video (or, you know, just click here)!

Bio: Jimmy DiResta is a designer and master maker known for his ability to fabricate in an impressive array of materials. He’s starred on a number of cable shows and is currently starring as Shop Master on NBC’s new series “Making It,” hosted by Amy Poehler and Nick Offerman. Jimmy’s a well-known maker star on YouTube where he creates regular videos for Make:, Core77, and his own DiResta channel.

PARTS #19-A & 19-B: TOP HINGE ASSEMBLY + BOTTOM HINGE ASSEMBLY PARTS #19-A & 19-B: TOP HINGE ASSEMBLY + BOTTOM HINGE ASSEMBLY

Follow Jimmy: Website | Youtube | Instagram | Facebook | Twitter

Meet the Maker: Ian Charnas

Ian Charnas’ personal work blends art and technology, including projects such as the World’s Largest Twin Musical Tesla Coils and a Magical Mustache Mirror. He applied his creativity and skill to his build (and his video!) for Project Egress.

Continue on to read about Ian and to watch his build video.

Bio: Ian Charnas is a co-founder of Sears think[box], a seven-story Makerspace and Innovation Center at Case Western Reserve University that is free and open to the public. He graduated from Case Western with degrees in both computer and mechanical engineering.

His personal work blends art and technology in creatively-themed exhibits and group projects, including the World’s Largest Twin Musical Tesla Coils, a Magical Mustache Mirror, and a Waterfall Swing.

Explore Ian’s work at https://www.iancharnas.com or in features by Wired, Forbes, NPR, Popular Mechanics, IEEE Spectrum, Boing‐Boing, Make Magazine, PitchFork, and Hack-a-Day.

PART #10: CABIN PURGE PORT ASSEMBLY PART #10: CABIN PURGE PORT ASSEMBLY

Artist statement: “I aim to inspire creativity and the belief that you can do anything. I’ve rallied 53 people in subzero temperatures to open a popup cafe on the frozen waters of Lake Erie, lived for a week in the Nevada desert in a passively-cooled house I designed, and taught children at a New Hampshire summer camp how to make real working boats using only cardboard. I like to bring lots of people into the process.

My sincere hope for these projects is that they will delight you, and that each new invention will expand the boundaries of what we allow ourselves to believe we can achieve together. Even today, there are plenty of new ideas waiting for someone to think of them. Be bold, and believe in yourself.

Follow Ian: Website | Youtube | Twitter

Meet the Maker: Fab Lab NOLA

If Fab Lab NOLA at Delgado Community College sounds familiar, it’s because it was a stop on Adam Savage’s maker tour in 2017. At that time, the students were working on a year-long NASA-funded payload competition that exposed them to real-life aerospace project development, and we got to witness their initial test drop!

They impressed us, and there was no question we’d approach them again with Project Egress.

Bio: New Orleanians change the world through science, technology, engineering, and math. FabLab NOLA at Delgado Community College is an advanced fabrication lab established through a partnership with the Fab Foundation. With a focus on K-12 STEM education and outreach, our goal is to be a hub for educators and makers in New Orleans, provide open access and instruction to makers, and function as a collaborative space for exploration and experimentation.

PART #38: RIGHT SIDE TO BOTTOM BELL CRANK ASSEMBLY PART #38: RIGHT SIDE TO BOTTOM BELL CRANK ASSEMBLY

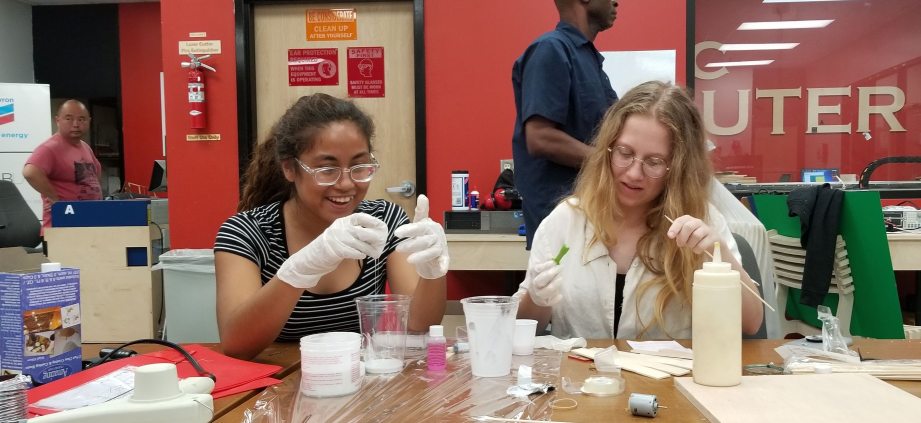
Artist Statement: “We began with a pilot trial. We used Cura to attempt our first model. The pilot print came out pretty well. We were pretty impressed of ourselves. The following couple weeks were a series of trial and error, trying to figure out what unique material we were going to use, how we were going to execute, etc.

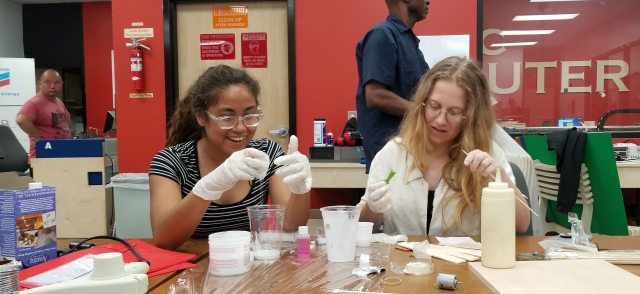
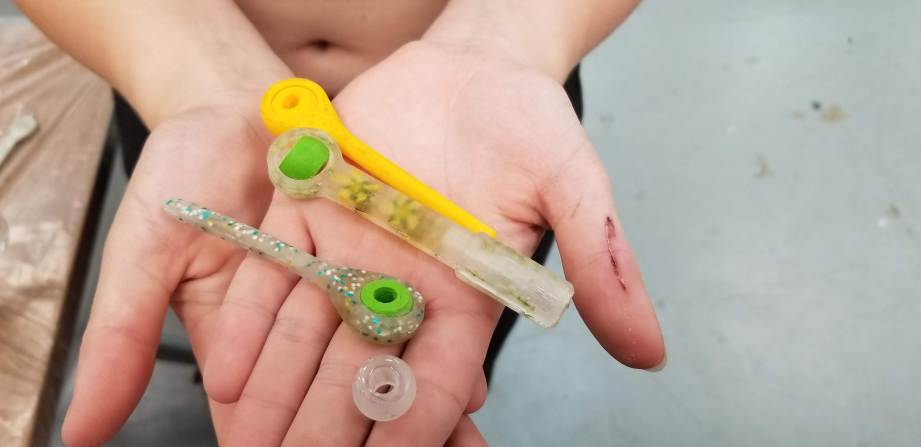
After searching our options, we decided to do flower-filled plus glitter resin casts with 3D printed balls. But first! We had to make molds. And to do that, we had to laser cut some boxes for our molds. Mold making was messy but fun. It took a few molds to get a satisfying result.

We found small flowers on campus to make our casts cute and unique. We had to dry the flowers via microwave. Many, many attempts and experiments came with the resin. What looked best? How do they fit? What is too much? Too little? Finally, after many trials, we designed and assembled a finished project!”

Links: Website

Meet the Maker: Dano Wall

You may know Dano Wall from Project Egress. Or you MAY know him from his Harriet Tubman stamp. If you’re not familiar with that project, related to replacing Andrew Jackson on the $20 bill, read about it here.

Read more about Dano and his Project Egress part below.

Bio: I am an artist and designer living in New York City. I currently work for Adafruit Industries where I help to manufacture and test everything coming out of the Adafruit fabrication department, and publish educational robotics projects to engage children with art, engineering, and programming.

PART #15-F: LEFT HAND LATCH ASSEMBLY F PART #15-F: LEFT HAND LATCH ASSEMBLY F

Follow Dano: Website | Instagram | Twitter

Meet the Maker: Chris Yohe

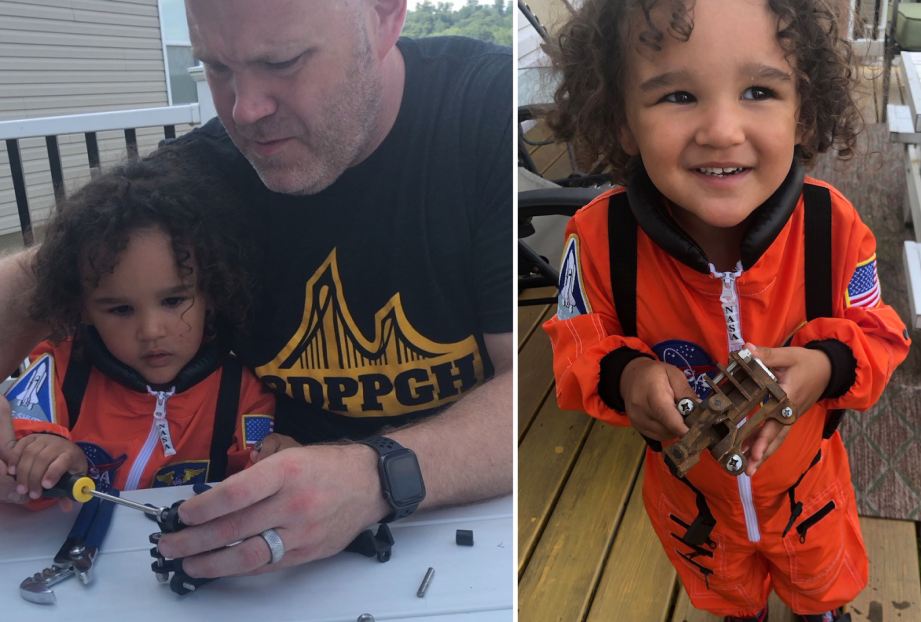
Maker Chris Yohe took an authentic approach to his Project Egress part, using a hydrogen peroxide and vinegar mixture to make his latch look like it had been recovered from the depths of the ocean. Luckily, he had a great helper: his 3-year-old son Noah.

Continue on for Chris’ fascinating and deep description of his process.

Bio: Chris Yohe is a lifelong maker and digital fabricator extraordinaire. The longest running tester on Make:’s Digital Fabrication Testing team he’s been pushing the limits and punishing these machines for about a decade. He co-founded 3DPPGH, Pittsburgh PA’s premiere 3D Printing meetup, now in its fourth year. An evangelist for all kinds of technology., he enjoys sharing the love, wherever it leads him.
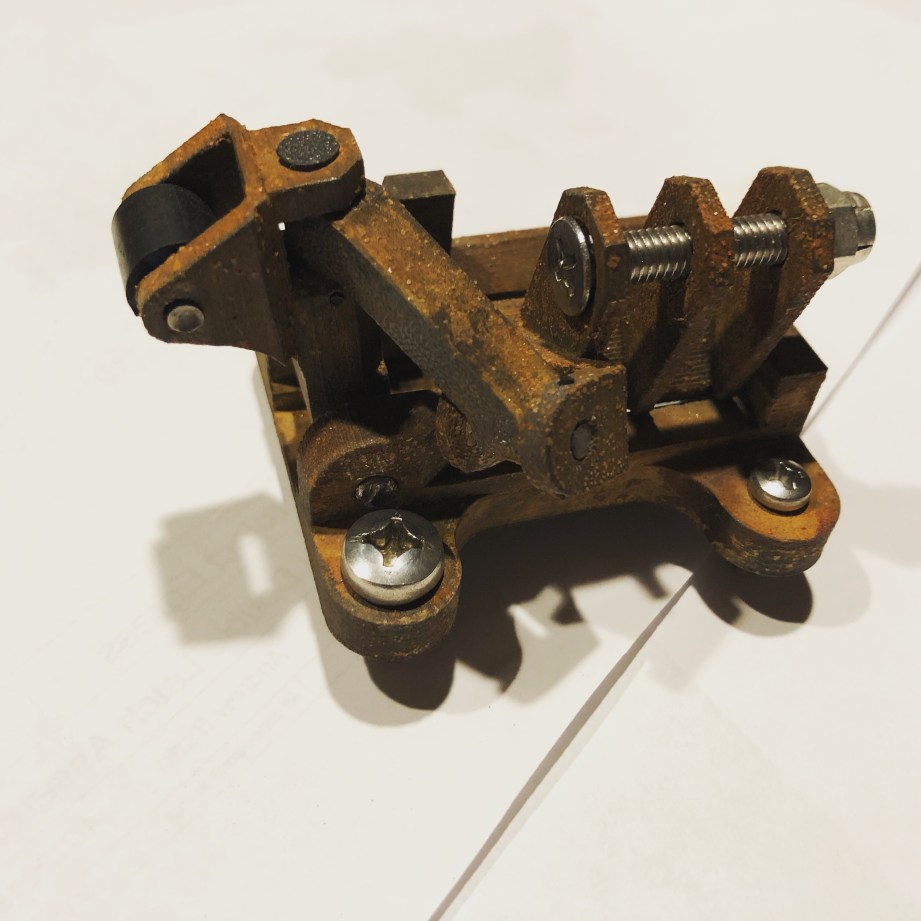
PART #17: RIGHT HAND DOUBLE LATCH ASSEMBLY PART #17: RIGHT HAND DOUBLE LATCH ASSEMBLY

Artist statement: “It’s not every day you get called up to work on a project with Jen Schachter (and, of course, Adam Savage) — both heroes of mine — so when the message came through I knew it was a definite yes. The question is then how to make your part worthy of the bigger whole, and so a little ruminating went towards what would make this little latch stand out.

Being a digital fabrication fanatic, 3D printing is often the go-to starting point for an easy rough draft, but I knew I wanted to incorporate other fabrication techniques. The pieces themselves seemed to lend themselves well to printing, but using other tools such as laser cutters, casting, etc., posed some challenges or weren’t great fits given the pieces.

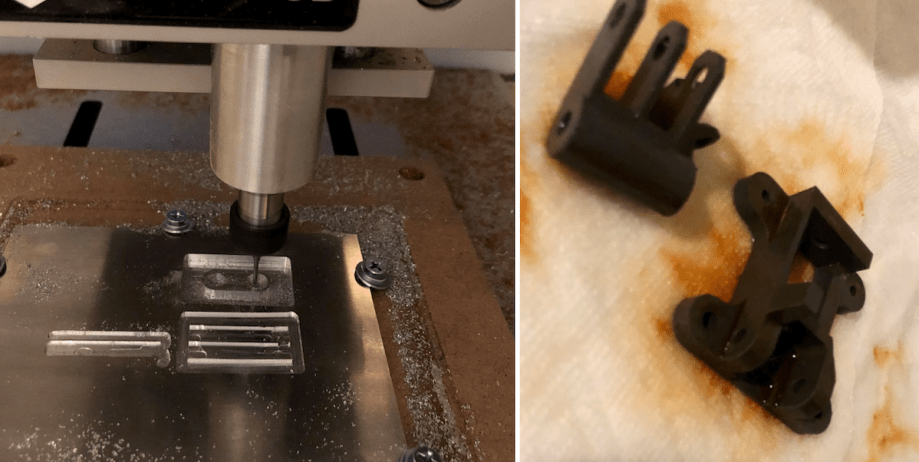
In order to ensure a great result in the given time I settled on a three pronged approach, using unique 3D printing mediums to fabricate the intricate parts of the latch, manually fabricating the pins from stock, then using a CNC Mill to make the pin lock from aluminum and the roller from the standard Delrin.

For the 3D printed parts, ProtoPasta makes my go-to filaments for wow factor and their metal filled PLAs offer an amazing look with a variety of finishing techniques available. I printed the parts from three varieties, their carbon fibre, their stainless steel, and then their magnetic iron, to see the differences.

One of the benefits of these particular filaments is that they really hide the layer lines well, making them much harder to detect before any post processing with a nice matte finish. I chose to print at a low layer height (150 microns) and 60% infill, giving near the strength of solid parts, but saving time, filament, and weight. Hitting the metal filaments with a light sanding and buffing brings out a nice shine and further hides any lines.

Then thinking back towards memories of the space race growing up, visions of splash downs flashed in my mind and I remembered the iron filament could be rusted. Using a hydrogen peroxide and vinegar mixture, I was able in the course of 24 hours to make it look like the latch had been recovered from the depths. A simple process, requiring only a spray bottle and some patience, it really gave some personality to the latch.

While the printing was going on I turned to the tried and true Dremel to make the pins out of some standard stainless steel rod, and got to work machining the pin and roller. The pin lock was by far the more difficult, so I set out machining a couple of test pieces in wood on the Nomad to make sure the design and toolpaths were correct, and test fitted it this way. Much faster to find out it didn’t work in wood than aluminum.

From there it was a matter of some speeds and feeds adjustment (and trial and error) then we had three pin locks made, all nice and shiny. After the parts finished up I had everything I needed to get started with the final fittings. I enlisted the help of my trusty son Noah (already becoming quite the master of hand tools just shy of 3) and we began the process of squeezing and pressing and clamping everything in place.

Once the initial rusted latch was complete, we made a second backup one out of the carbon fibre parts – you never know when that important package will be lost, and they only seem to lose the important ones. One of the major takeaways from the process was the value in having made many spare parts, since in the process of assembly a few of the parts didn’t fit as smoothly as hoped, and a few failures occurred, especially where the tiny locking pins have to pass through multiple parts and line up just right. The other major takeaway is that all the hours spent toiling away and learning all of these tools and techniques are well worth it when you get to work as a small part of such an amazing group of luminaries and leaders.”

Follow Matt: Website | Instagram | Twitter
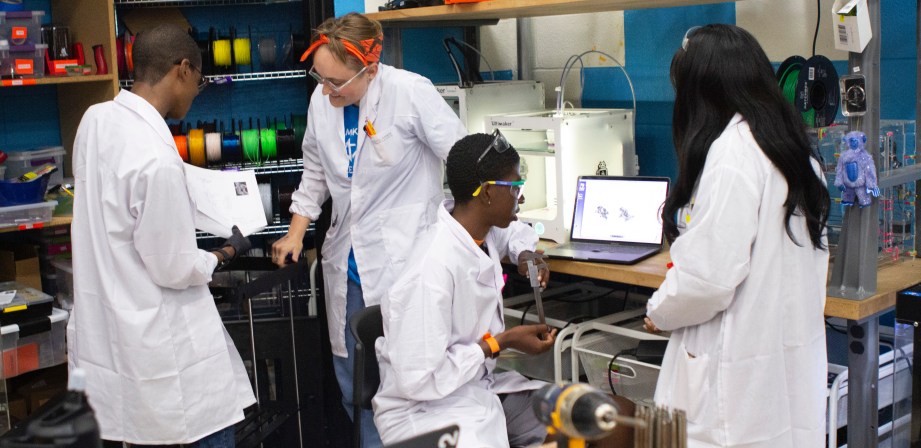
Meet the Maker: Sam Tumolo, New York Hall of Science

For Sam Tumolo, a coordinator in the Maker Space at the New York Hall of Science, Project Egress was a natural extension of her interest in large-scale collaborative projects that showcase different unique forms of making.

Read about Sam, the New York Hall of Science, and the bottom to right side bell crank assembly made for Project Egress!

About: The New York Hall of Science (NYSCI) was founded at the 1964–65 World’s Fair and has evolved into New York’s center for interactive science, serving a half million students, teachers, and families each year.

NYSCI serves schools, families and underserved communities in the New York City area, offering informal, hands-on learning through various products and services that use the “design-make-play” method of bringing delight and play to educating science, technology, engineering and math (STEM).

Bio: Sam Tumolo is a maker interested in exploring the intersections of art, science, and design. Sam is a Coordinator in the Maker Space at the New York Hall of Science, developing educational programs in different forms of making. Sam previously worked in the Tech Studio at the Franklin Institute, where she taught 3D design and developed a youth program focused on designing and fabricating telescopes.

PINK #36: BOTTOM TO RIGHT SIDE BELL CRANK ASSEMBLY PINK #36: BOTTOM TO RIGHT SIDE BELL CRANK ASSEMBLY

Artist Statement: “One of my favorite parts about working in the NYSCI Maker Space is designing collaborative, science-themed installations that engage the community by introducing participants to new tools, materials and processes. These projects allow visitors to feel a unique individualized connection to the museum space, and can help create new connections between our space and our community.

For me, being a part of Project Egress felt like a natural extension of my interest in large-scale collaborative projects that showcase different unique forms of making.

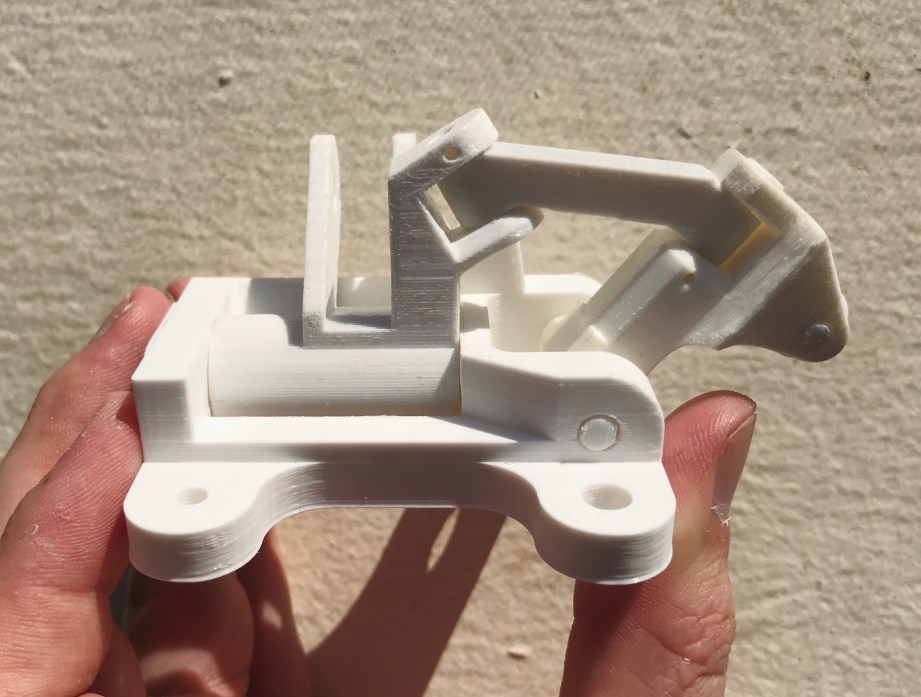
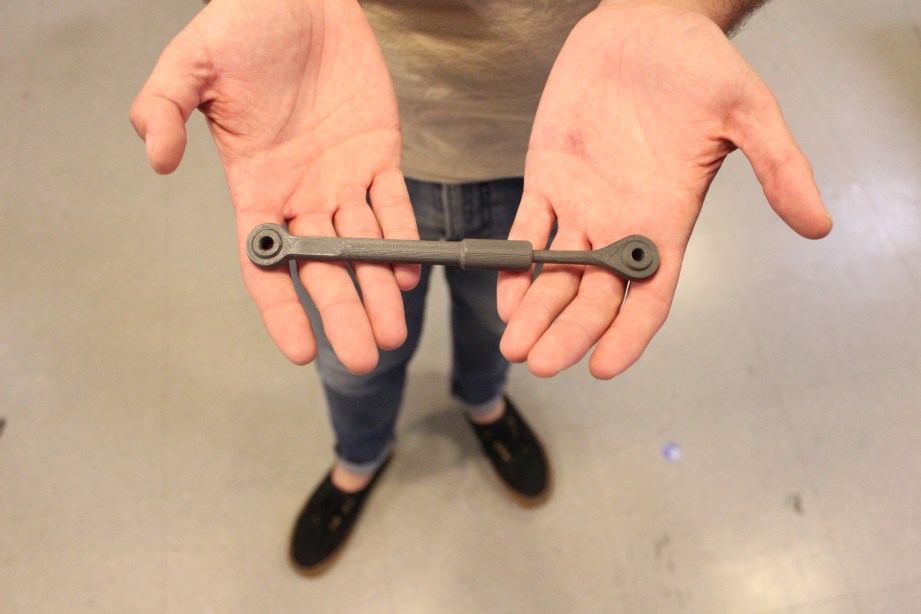
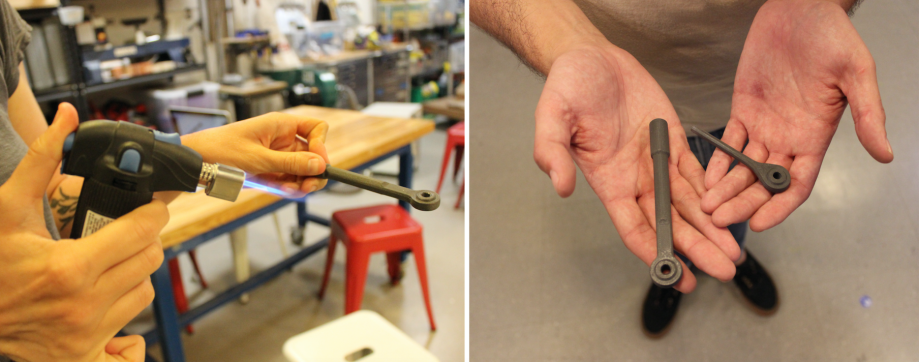
Fabricating the side bell crank was more challenging than expected! Initially we printed the two parts in PLA on a Lulzbot Mini without support material. After this attempt failed, we realized support material was necessary. Since the smaller piece needs to fit through a hole in the larger one, it was important that the tolerances were tight. However once the supports were programmed and the parts re-printed, we saw that the smaller piece was now too wide to fit inside the larger. We then re-printed the piece in magnetic iron PLA and sanded it to fit. Since the sanding caused stress on the plastic and turned it white, we used a blowtorch to correct the discoloration.”

Links: Website | Instagram

Meet the Maker: Theodore Anastasoff

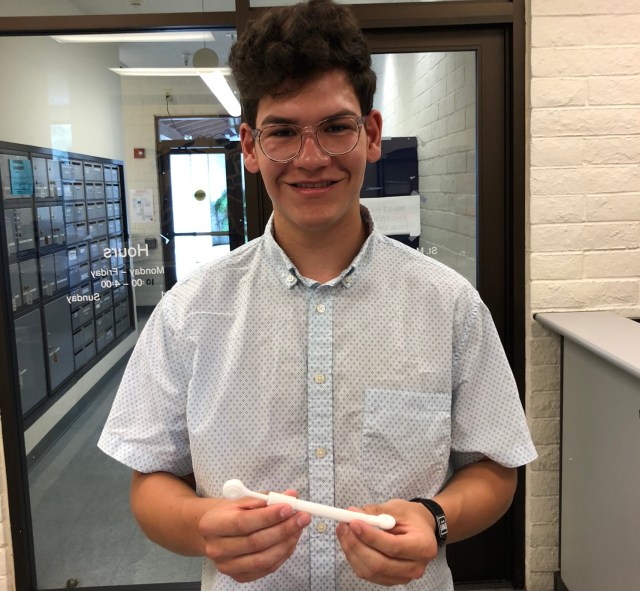
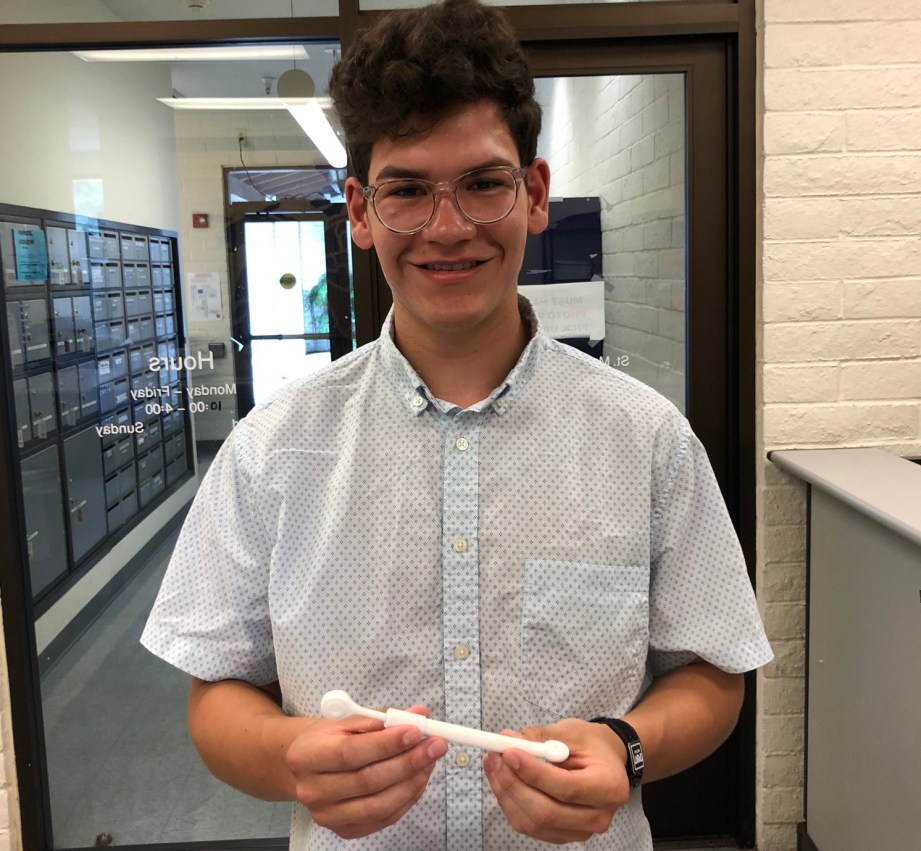
Eighteen-year-old Theodore Anastasoff is studying for a dual-degree in physics and mechanical engineering at Saint Mary’s College. Before working on his part — a gearbox output bottom linkage assembly — he hadn’t 3D modeled since a class three years ago!

Read more about Theo and his role in Project Egress.

Bio: Theo Anastasoff is attending Saint Mary’s College of California to study for a dual-degree program for Physics and Mechanical Engineering. He is an 18 year old with an aspiration to become a skilled engineer by completing projects like Project Egress and building a 1 meter by 1 meter Computer Numerical Control (CNC) Pen Plotter for an independent study for his high school.
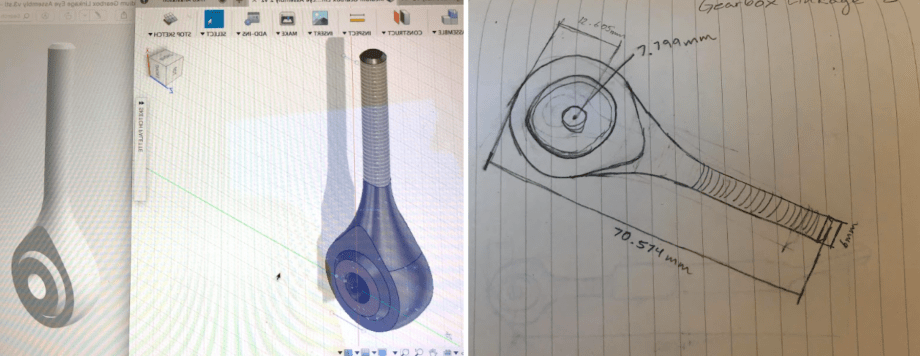
Artist Statement: “When I got the email inviting me to collaborate on the project, I was ecstatic. I hadn’t 3d modeled since the class I took three years ago so I was excited to utilize these old skills I once possessed. We, being the collaborators for the project, have completed the parts needed to build a hatch door for the Apollo 11 Space Command Module in one month and was built by a team of three to four people in roughly five hours.

Through struggles and failures, we have advanced our technology in unfathomable stretches and to witness makers complete the model at the Smithsonian makes me realize the power of the community of builders. To say this is just another project is an understatement, but a monumental event that is branded in the history of America, at least to me.”
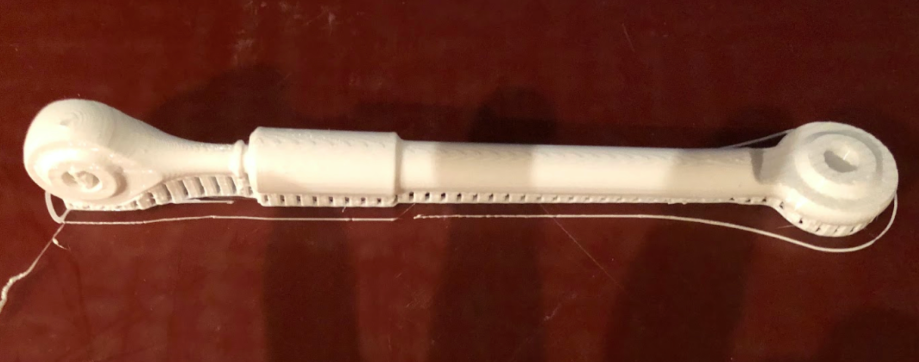
PART #25: GEARBOX OUTPUT BOTTOM LINKAGE ASSEMBLY PART #25: GEARBOX OUTPUT BOTTOM LINKAGE ASSEMBLY

Follow Theo: Instagram

Meet the Maker: Paul’s Garage

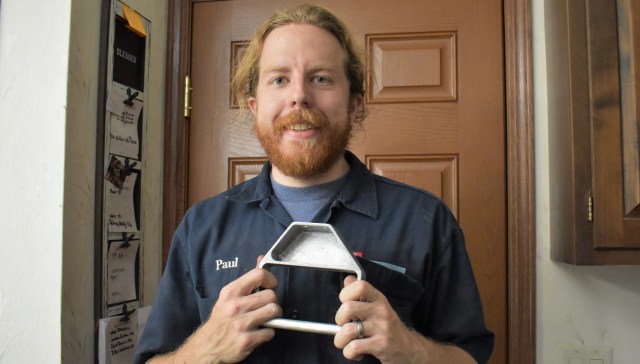
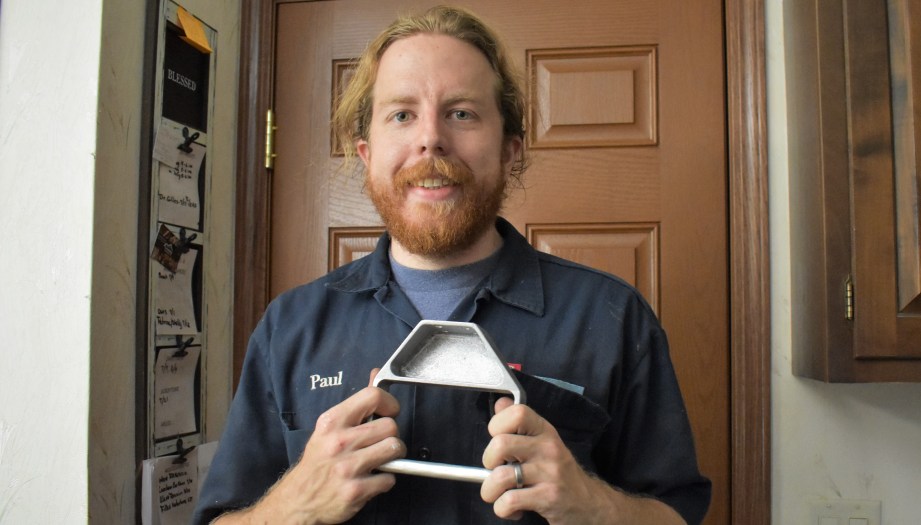
Before passing along his inside handle to Project Egress, YouTuber Paul’s Garage tested its hardiness on multiple household items, including his car. Because: “If it can pull a hatchback, it can open a hatch.”

Paul’s build process is fascinating; read about it below, and then watch his build video.

Artist Statement: “I have been a fan of NASA and space travel since I was young. True living heroes riding giant rockets pushing the limits of engineering and human endurance, blasting off into space beyond the reaches of the clouds, who couldn’t be fascinated?

Unfortunately by the time I was born, the Saturn V was done flying. Between living a standard terrestrial life and watching the occasional rocket launch live stream, I was asked to join with other makers to recreate a part of Apollo 11 equipment. As someone who just makes random ‘maker’ type YouTube videos for fun, I never expected to be involved in this kind of project. I jumped at this opportunity with my inner 6 year old (all makers have one, I’m convinced) screaming wildly inside my brain. I was just given the honor of recreating the inner hatch handle of the lunar command module, and I couldn’t be more excited.

I decided very quickly to cast the part in metal. Melting scrap into new exciting things in my home-brew metal foundry furnace is one of my favorite hobbies, and I thought this handle would look great in aluminum. This process is challenging and uses more steps than you would expect to make a single piece with no moving parts. It can present some unexpected challenges to overcome. As a payoff, however, I get to mess around with fire and melt a bunch of stuff into puddles of shiny liquid as part of the process. So I have that going for me, which is nice.

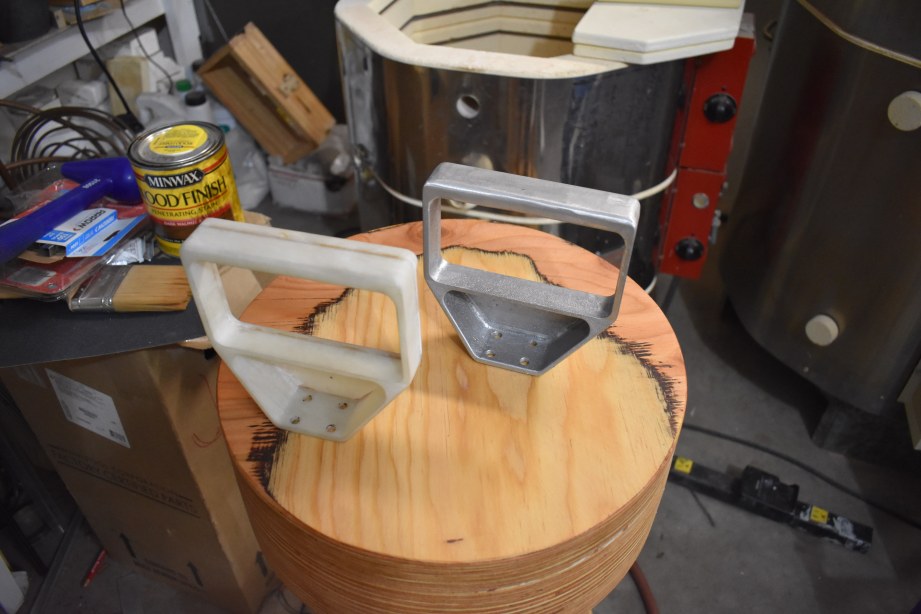
Having been provided with a 3D model of the part by the Project Egress team, I printed a copy in plastic a few percent oversized, and cleaned it up with some sand paper. The FDM printing process results in multiple parallel lines running around the part, and these can act like teeth, holding the part in the sand. These have to be sanded down at least somewhat to prevent this issue from occurring. This is made worse by the part having little to no “draft”, a feature usually found in casting patterns to make removal of the pattern easier. Some lines were left, however. If the layer lines from the 3D print show up in the final casting, I can be reasonably sure the surface finish of the part turned out great. Details like that are tricky.

PART #21: INSIDE HANDLE PART #21: INSIDE HANDLE

With the pattern prepared, I rammed it in a two part sand pattern. To sand cast parts in metal, a pattern must be rammed up in a special kind of sand that sticks together. The two parts are then split, the pattern is removed, and the two parts (called flasks), are put back together. This leaves a hollow spot in the sand where the pattern originally sat. This hole is then filled with face-meltingly-hot molten metal, which then solidifies in the shape of the pattern, creating your part.

The sand I use is oil bonded, called “petrobond”. This is often used as jewelry making sand due to its ability to reproduce fine details and decent surfaces. To further improve surface finish, and to prevent sand from sticking where it shouldn’t, everything is covered in talc, a cheap, readily available parting powder. To get the metal into the hollow cavity left by the pattern, a system of small, smooth runners was formed that is designed to reduce turbulence and keep impurities and entrapped air from entering the mold.

When the part had cooled and was removed from the mold, I decided to have some fun before sending it off. To test out how strong this handle really was, I bolted it to my fridge door. As the closest analogue to a space ship hatch I have in my garage, I’m happy to say the handle worked flawlessly. I then walked around clamping the handle to progressively heavier stuff. My bravery (possibly hubris?) eventually got the best of me, and I bolted it to the back of my little red hatchback. Hatch is in the name, clearly this is a good idea. I grabbed the handle and leaned back, and pulled that car right out of the garage using only this handle! The only thing that broke was my back, the handle was fine. If it can pull a hatchback, it can open a hatch. Mission accomplished.”

Follow Paul’s Garage: Youtube | Instagram

Meet the Maker: BLDG 61

Makerspace BLDG 61 not only built a part for Project Egress. they made it space ready for us via a balloon launch that sent it above 100,000 feet!

Learn more about BLDG 61, and if you’re in Boulder, check them out.

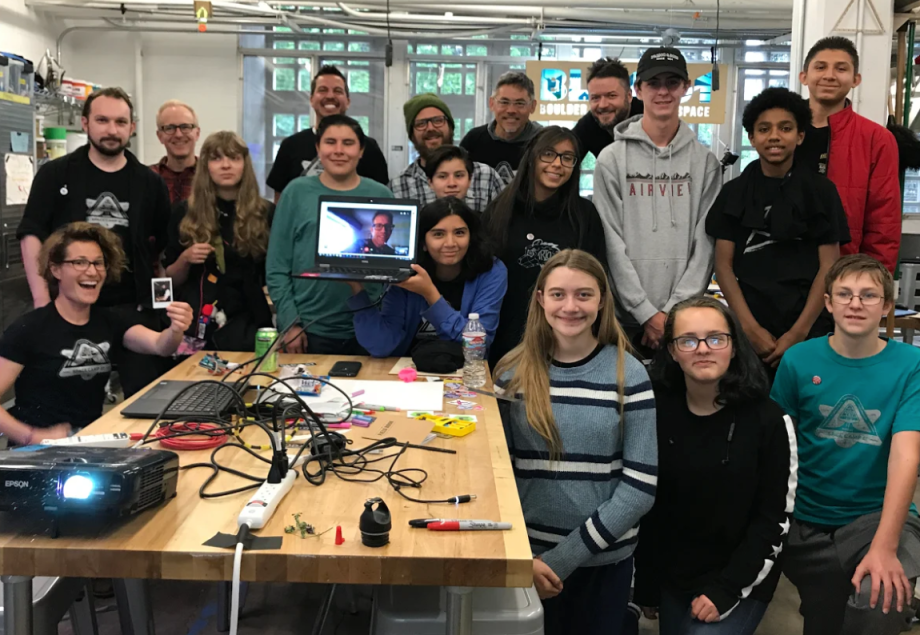
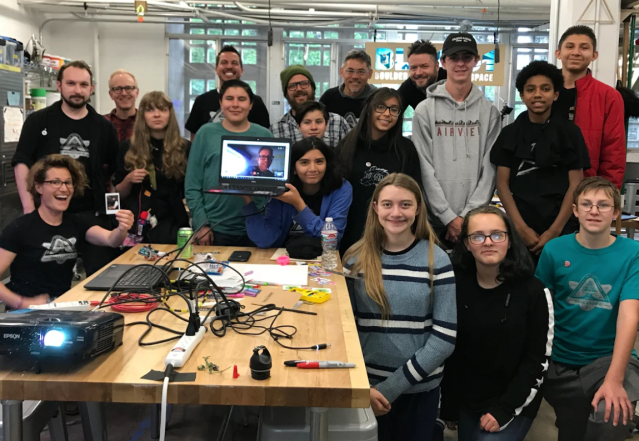
Artist Statement: “BLDG 61 is the Boulder Library Makerspace in Colorado, ruthlessly dedicated to inclusive hands-on learning and cultivating valuable maker experiences in the community. This summer, the BLDG 61 team shot for the moon. We partnered with SparkFun Electronics and Magnitude.io to launch Space Camp 61, a citizen science initiative launching high-altitude balloons equipped with environmental sensors to the edge-of-space with a group of teen engineers.

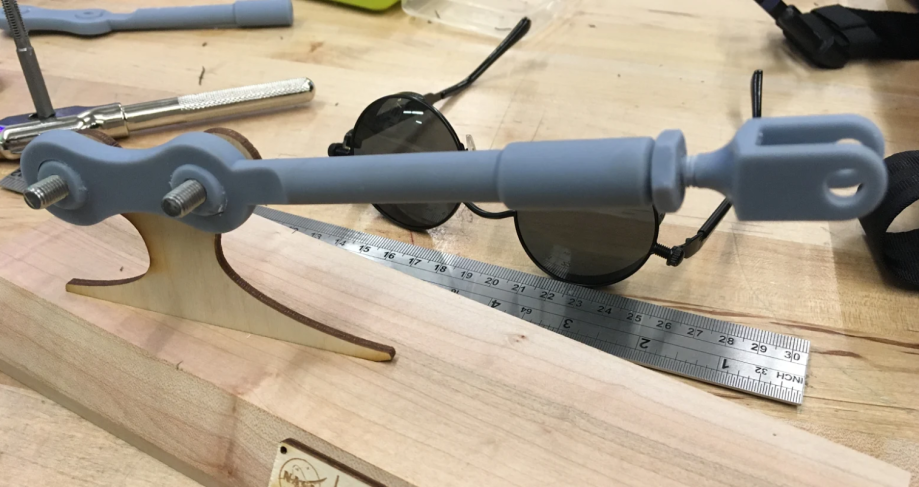
PART #30: TOP 2 LINKAGE ASSEMBLY PART #30: TOP 2 LINKAGE ASSEMBLY

When we were tasked to be a part of Project Egress, we knew these two initiatives needed to merge, and thus we delivered to you Space Tested Part #30. As part of Space Camp 61, we engaged a group of fearless teens (many who are first in family college-bound) to help get Part #30 above 100,000 feet.

On July 6, 2019 over 200 community members of Boulder, Colorado counted down together our 4th balloon launch with Part #30 inside. Our high-altitude balloon hit 103,400′ and experienced a minimum temperature of -58°F. We believe this part is space-ready and finds you in exceptional condition for its next mission.

The fabrication of Part #30 involved over 15 different technologies and processes, and was completed by the BLDG 61 team: Zack Weaver, Adam Watts, Robby Holb, and Janet Hollingsworth.

Teen Engineer Space Test Launch Team: Grissy, Olmeca, Atzin, Tupak, Owen, Ian, Brianna, Ciara, Devenney, Dio, Adrianna.”

Follow BLDG 61: Website | Instagram | Twitter