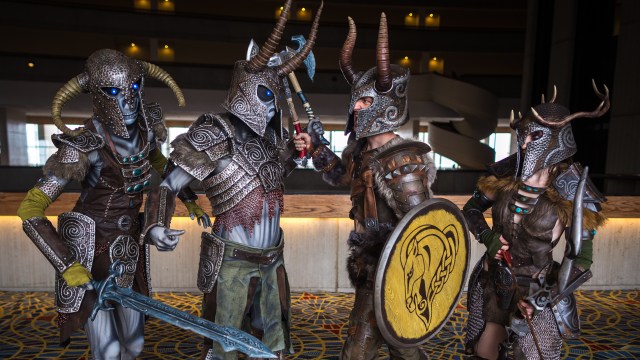
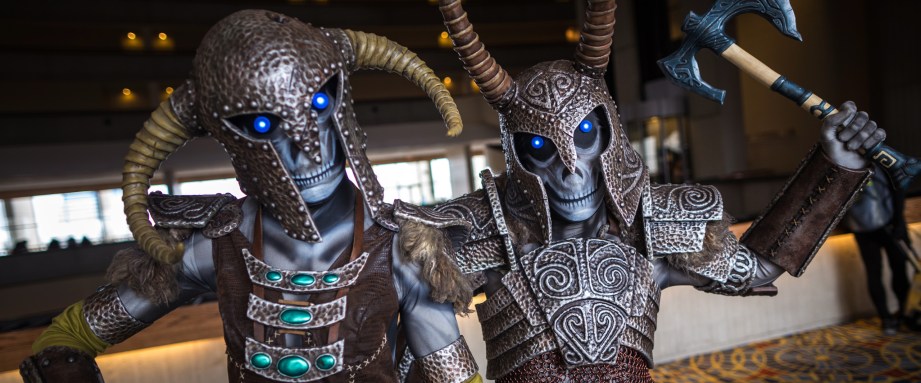
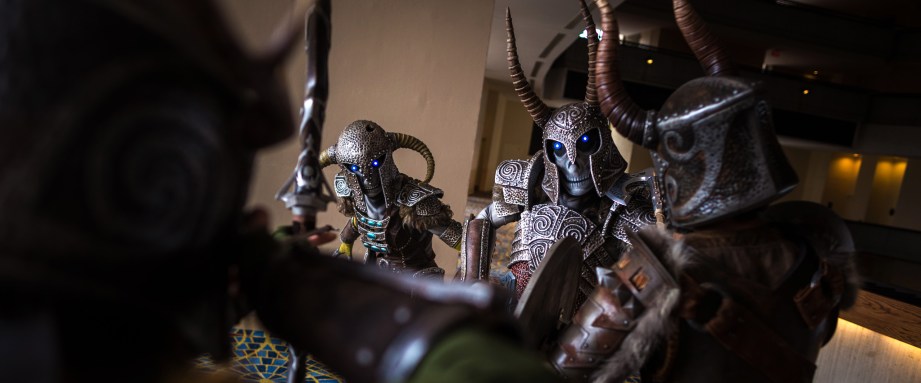
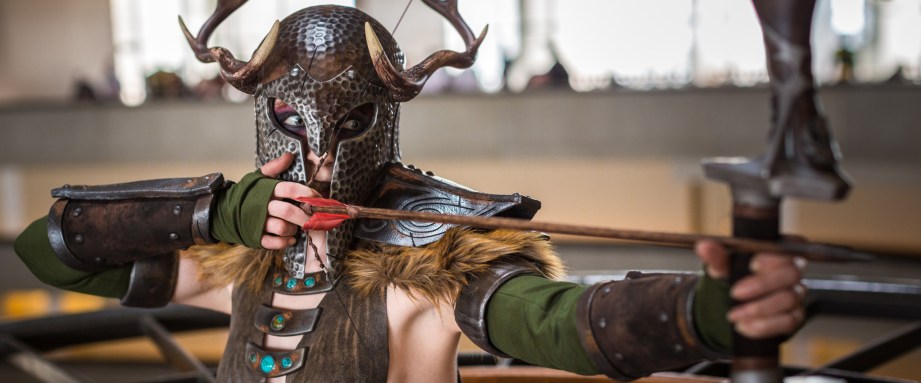
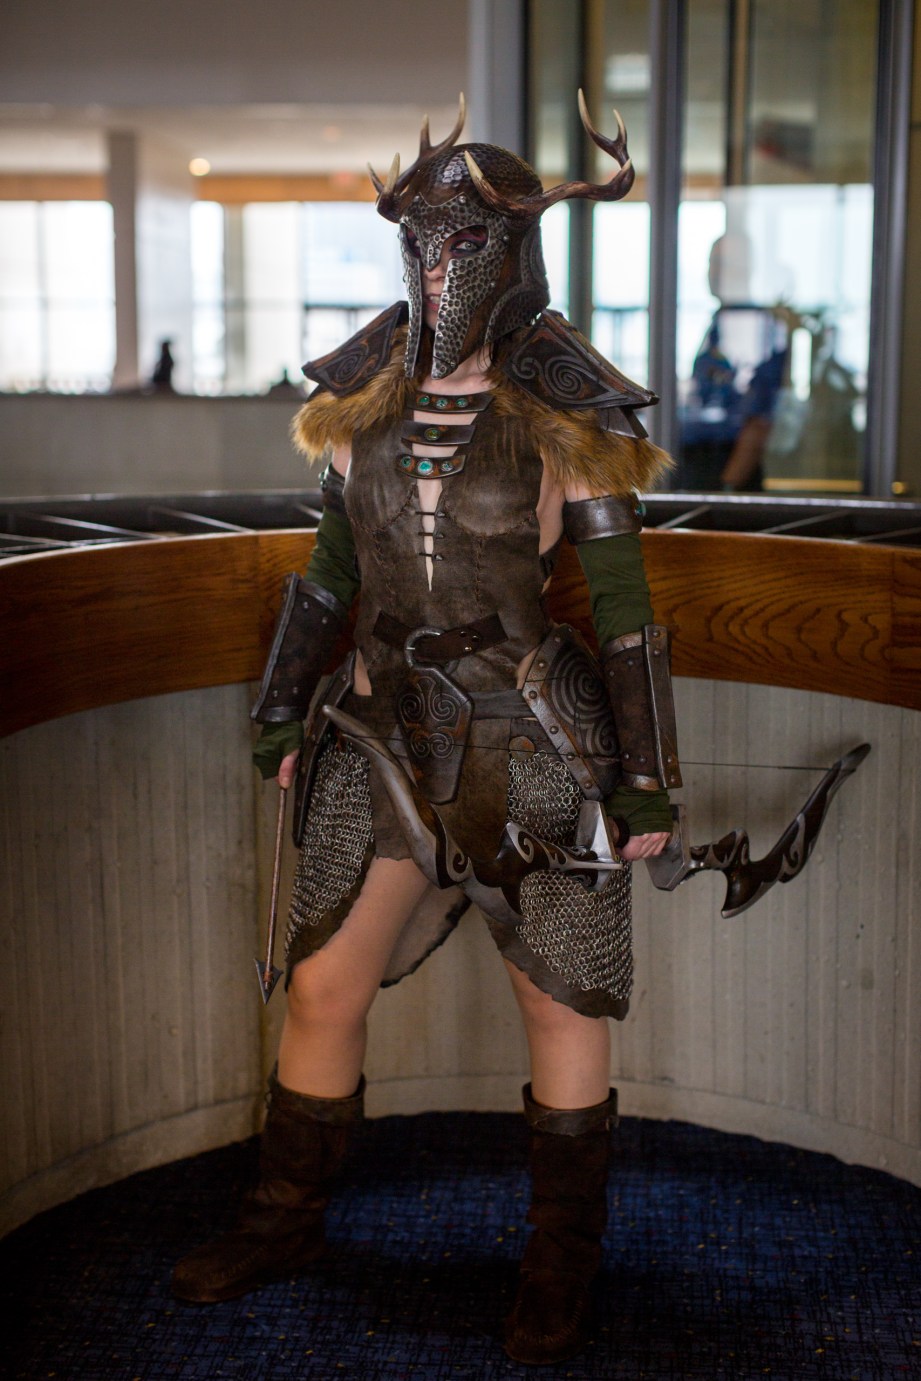
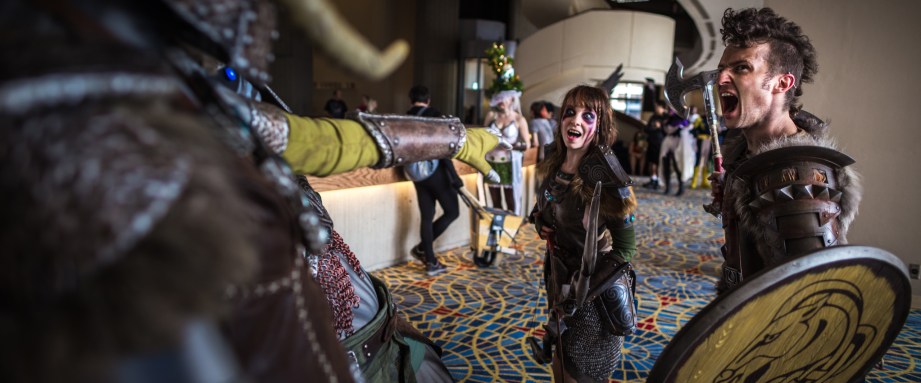
I open the door to a hotel room at one corner of the Atlanta Marriott’s 17th floor. As I walk inside, four heads turn my way, but the eyes that greet mine look not of this world. Glowing blue pupils glare from the horned helms two Draugr Deathlords, and the two Dragonborn warriors peer at me behind warpainted scowls. It’s a sight that in any other situation would have me backing away into the hallway. But what gives me pause isn’t the fact that four creatures from The Elder Scrolls V: Skyrim are adjusting their helmets and examining their battle axes in this bright air-conditioned room, it’s the stunning craftsmanship of their armor.
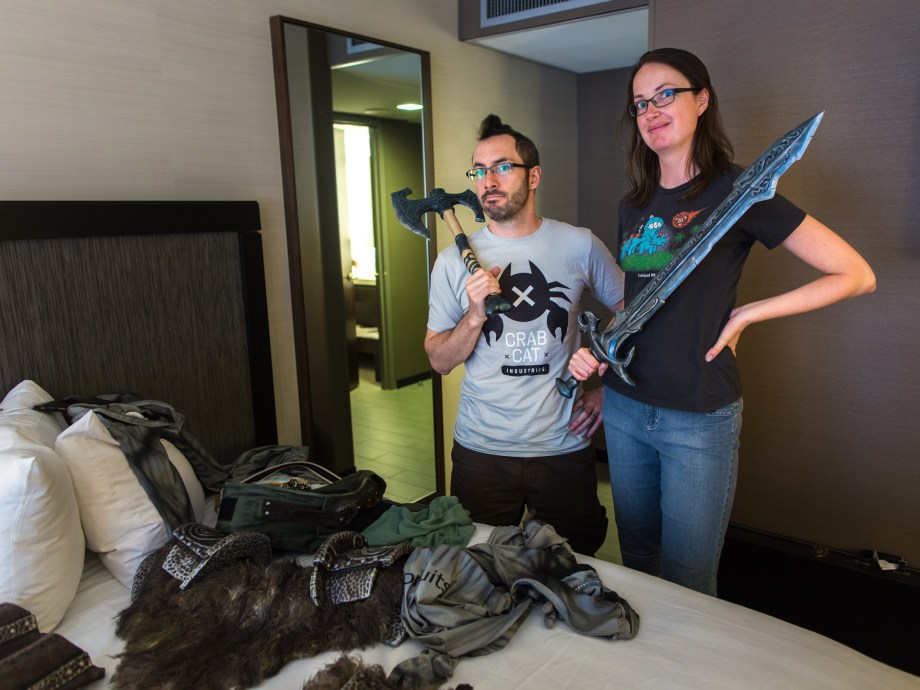
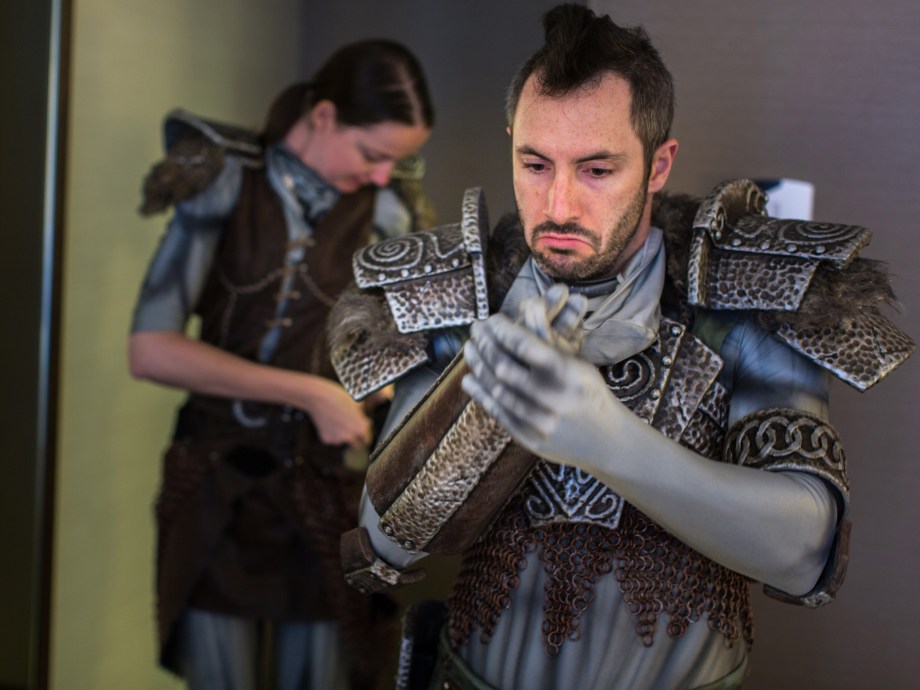
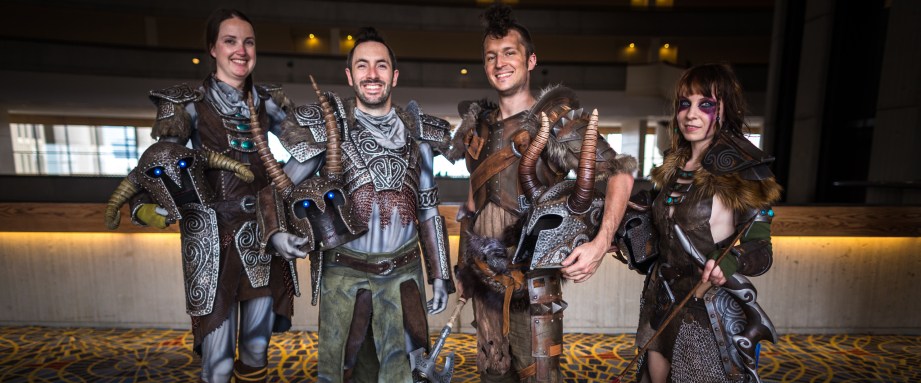
This is Dragon*Con, where some of the best cosplayers from around the country meet every year to show off their work to fellow fans and costumers. And I’m in the room with propmakers Harrison Krix (Volpin Props) and Bill Doran (Punished Props), who, along with their wives, are putting on the final touches of their new costumes before revealing their costumes for the first time on the convention floor.
It just so happens that this year, by sheer coincidence, both Harrison and Bill decided to make the same armor for the convention.
But this is no red carpet faux pas for the two propmakers, friends who first met at a previous year’s Dragon*Con. In fact, once the two discovered about their similar plans ahead of the show, they checked-in on each others’ progress during the armor builds, comparing notes and trading tips to push each other along. What’s interesting isn’t just how their armors visually compare–though one set is an undead version and another is technically Ancient Nord Amor–but how their design approaches and build processes suited the talents of each maker.
I asked Harrison and Bill to share insights about the construction of each of their armor sets, which they’ve written up in their respective build logs.
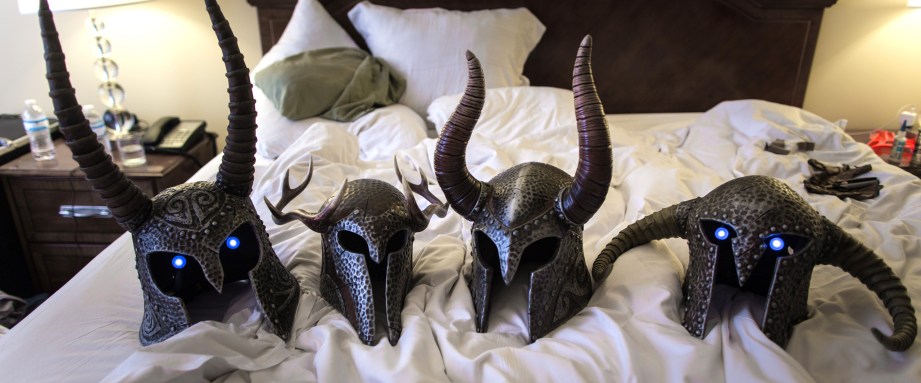
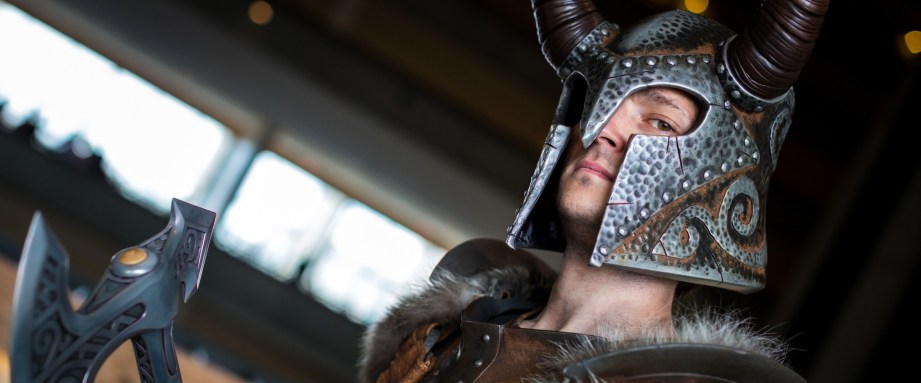
Horned Helms
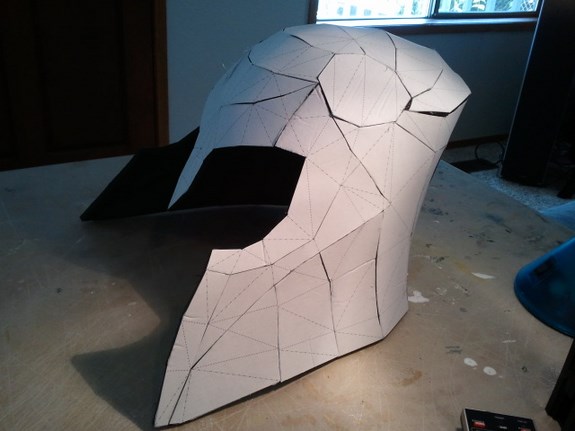
Bill Doran: My wife Brittany did the lion’s share of the work on our helmets and she did an extraordinary job. We went with some ancient Nord buckets to keep our domes safe and scary looking. Brittany’s been doing a lot of things in Pepakura lately, so she wanted to try that out with the helmets, but with a twist. Instead of building them from cardstock, she transferred the design to 6mm EVA craft foam and super glued all of those pieces together.
Once the pieces were assembled, the paper pattern was peeled off and the helmet base was ready to go. At this point, Britt could test fit the helmets and make any adjustments pretty easily.
The horns provided a very unique challenge, but Britt found a really fantastic way to make Pepakura work for her yet again. She back filled the hollow foam horns with expanding foam and then peeled the foam off, leaving horn shaped pieces of foam. Then she wrapped the horns in pieces of overlapping Worbla to simulate the animal horn shapes. The Worbla has a weird texture, so she also had to do a lot of sanding and priming to get it smooth.
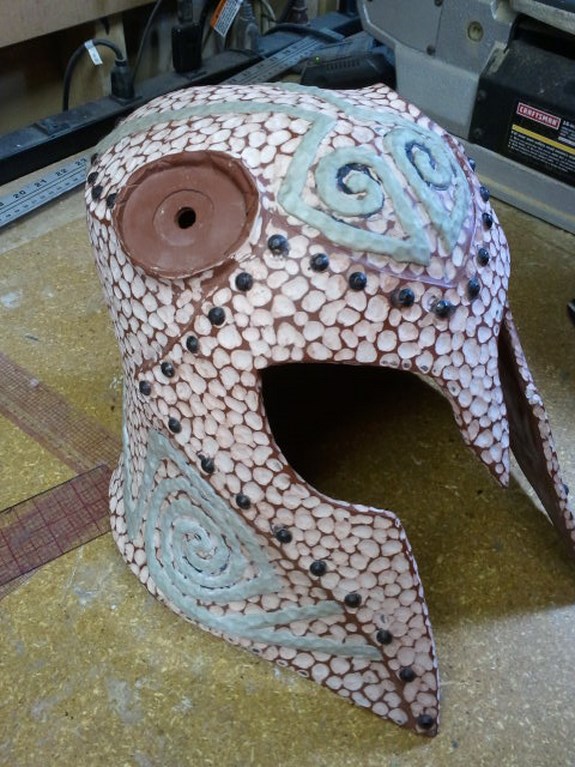
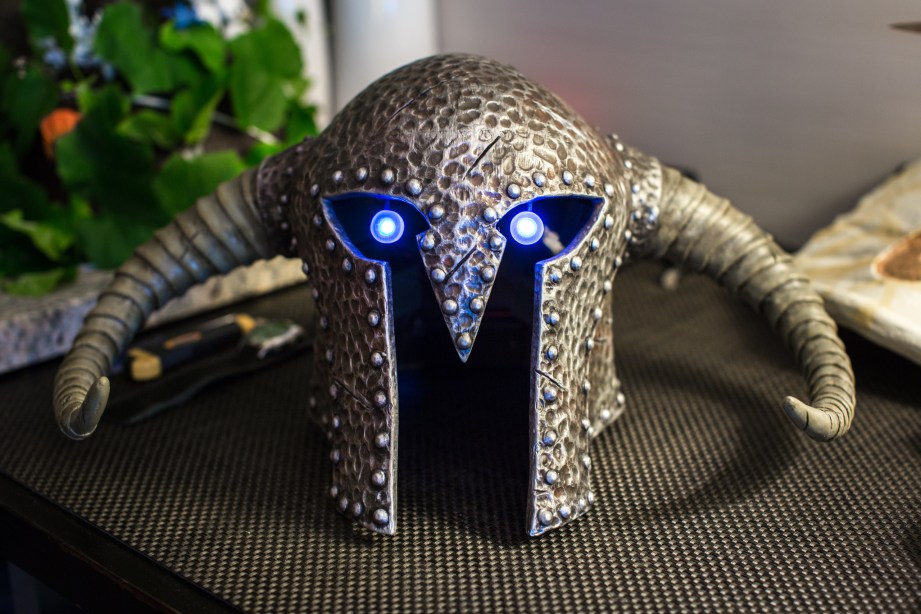
With the forms figured out, Brittany wanted to really simulate that “hammered metal” look, so she went bonkers with a round grinding bit in the Dremel. She also glued down some plastic gem bits to look like rivets around the edges of the helms. One of the helms had some scroll work on it, so she sculpted them using Apoxie Sculpt. Also, air ventilation “damage” holes were added to each helm.
With the horns ready and the helmets shaped out, it was time for them to become one! They were glued in place. For the taller horns we added T-nuts to each horn so that they could be bolted to the helmet and we could take them off for transport.
Lastly I added a pair of 3.2v white surface mount LEDs behind some blue acrylic discs to simulate the creepy blue glowing eyes of the draugr. We also added squishy foam on the inside so that it would fit perfectly on our noggins.
Harrison Krix, from a 2012 build log: I started out with some very nice 3D files ripped from the game, courtesy of a gent who follows my Facebook page and was kind enough to lend a hand with the source imagery. From these, I made a set of 2D blueprints in Adobe Illustrator to pattern the build.
I’ve found a great method scaling blueprints like this to their final dimensions: Print off a 1″ grid onto a sheet of plotter paper, then trim out a space for your subject to stand. Photograph this as close to perpendicular as possible, then import the photograph into an image editor such as Adobe Illustrator. By scaling the image so that the 1″ squares are indeed 1″ in size, you can then import your blueprints over the image and find all the dimensions of your finished part.
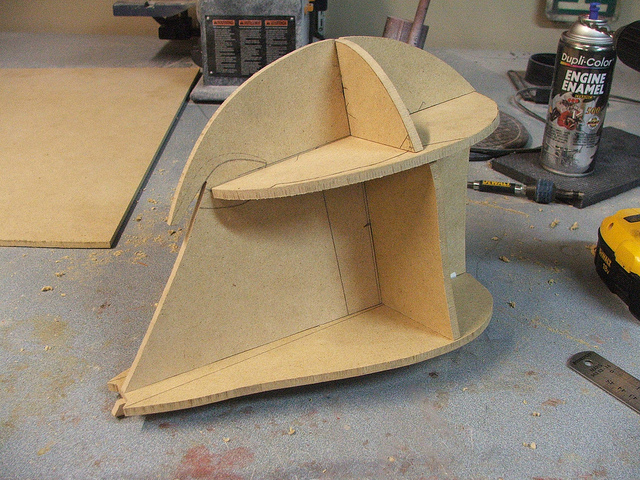
The final dimensioned “slices” were cut from 1/4″ MDF and glued together to make a sculpting frame. Cavities in this frame were filled with polystyrene foam. I used some old water-contaminated casting resin to glue the foam into place, since it can’t be used to make decent casts any longer.
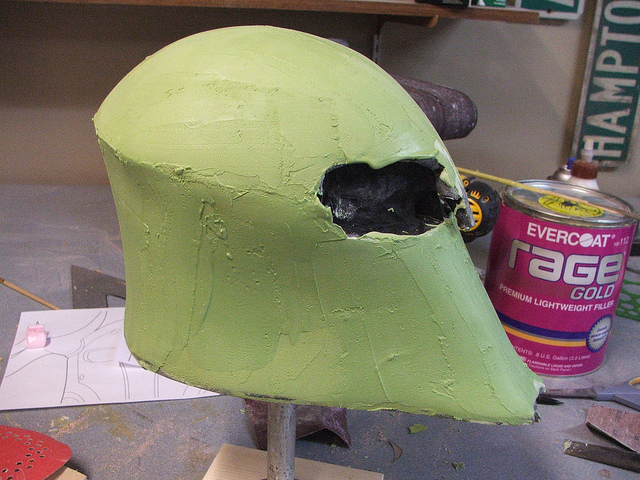
After everything dried, I began shaping the foam with a coping saw, then varying grits of rough sandpaper (50, 100, and 120 mostly) The rough form was then coated in black acrylic paint to seal the foam against the bondo I’d be using in the next stages.
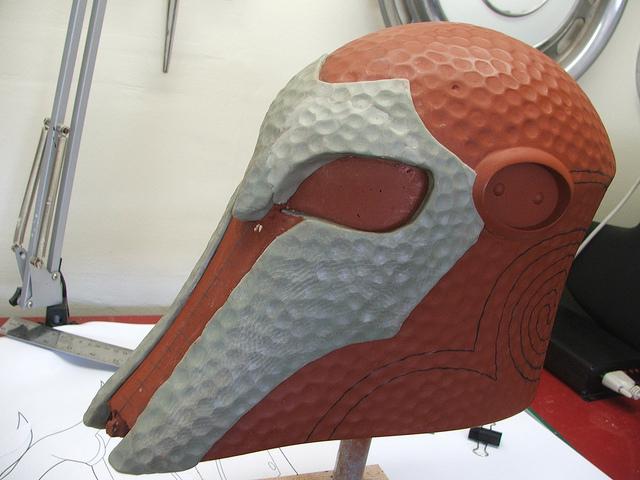
After two coats of acrylic, I started building up the shape with some polyester filler. There was a lot of this shaping, until the final base form was satisfactory. After a coat of filler primer and some 220 grit sanding, it was time to start hammering! Well, okay, not really hammering. The in-game helmet has a pretty drastic hammered finish, but since this piece is thin filler over a foam base, whacking it with a hammer would just result in a lot of cracks and chipped resin. I put a large rounded sanding bit on my dremel and gradually carved out each hammer blow.
Raised areas of the helmet around the eye pieces and the large curled filigree on the side were added with thin layers of Apoxie Sculpt. I used the back side of an engraving tool to replicate hammer marks in the surface while the clay was still uncured.
Battle scars were carved into the helmet with a dremel and a rotary wheel, then the large rivets (furniture tacks) were added to the faceplate. The whole part was painted glossy silver and allowed to cure in prep for moldmaking.
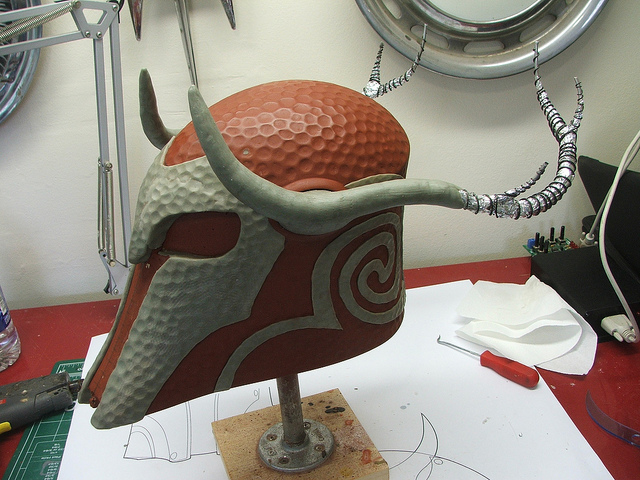
The antlers were a real challenge. After doing some research on modeling maquettes and armatures, I started by making a wire base, which was then wrapped in foil and thin sculpting wire. This makes sculpting the final form easier, cheaper, and lighter as well. Getting the initial shapes symmetrical was an exercise in frustration.
With the base form satisfactory, I skimmed the surface in Apoxie Sculpt. The surface was smoothed somewhat, but the nice thing about working with Apoxie is how well you can sand it once its dry. After curing, I smoothed out the entire antler form. A few more details were added after this smoothing process. I used a dremel with a small ball engraver to carve thin lines along the base and crooks of the antlers, and more Apoxie was added to the antler bases to give them a rough, bony texture.
Bashed-In Body Armor
Bill Doran: I. Love. Foam. Seriously, whenever anyone asks me about how to make armor pieces, I immediately ask them how they feel about EVA foam floor mats. It’s cheap, durable, and versatile! This Draugr armor was no exception.
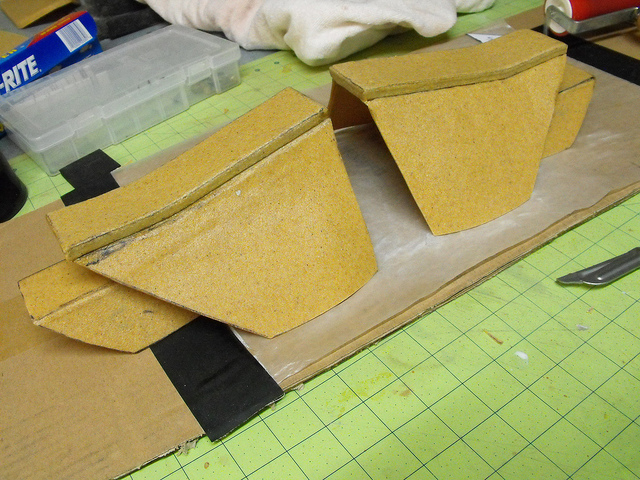
The trickiest part was coming up with appropriately sized templates that fit Britt and I perfectly. I have a plaster torso of myself that I drew the chest pieces onto so that I could figure the shape and size out almost perfectly, making sure to scale it up a little bit to account for the thickness of the foam.
I designed and cut out the templates from cardboard so that they could easily be traced onto the foam floor mats. For mirrored pieces, I could just flip the template over for the other side.
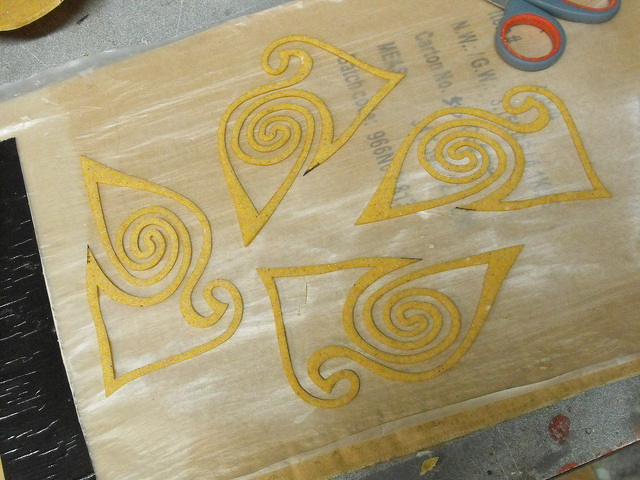
All of the scroll work was done with thinner 2mm and 6mm EVA craft foam. A lot of this was trial and error to get it just right. Whenever I could, I used contact cement to attach the foam pieces. For most of the scroll work, I eventually settled on a process where I laid out the design on paper and then transferred it to the foam by poking holes in the paper through to the foam. Then I cut long strips of 2mm foam and tacked them down with super glue in the pattern of the scroll work.
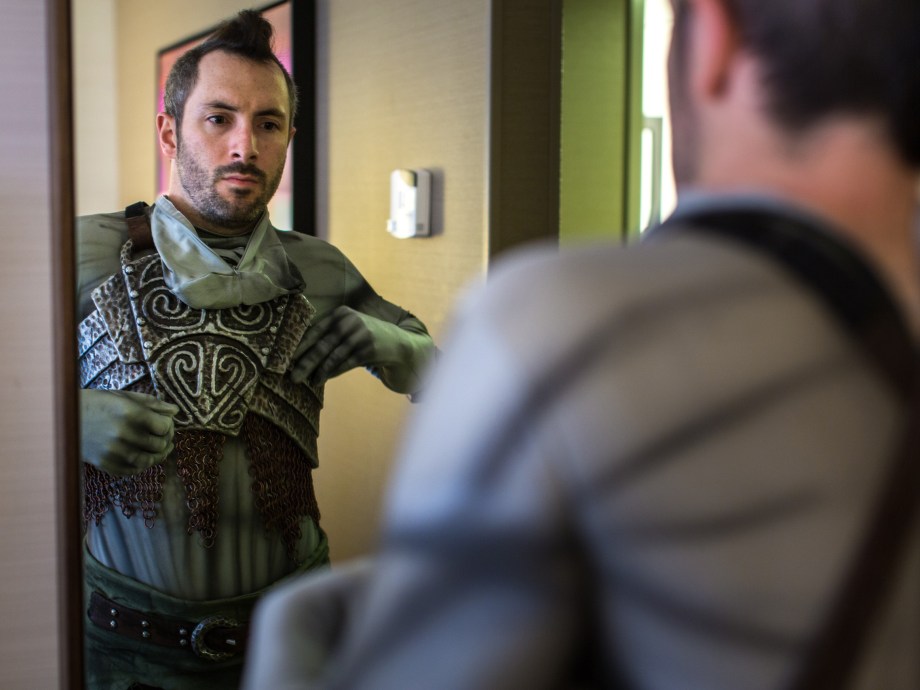
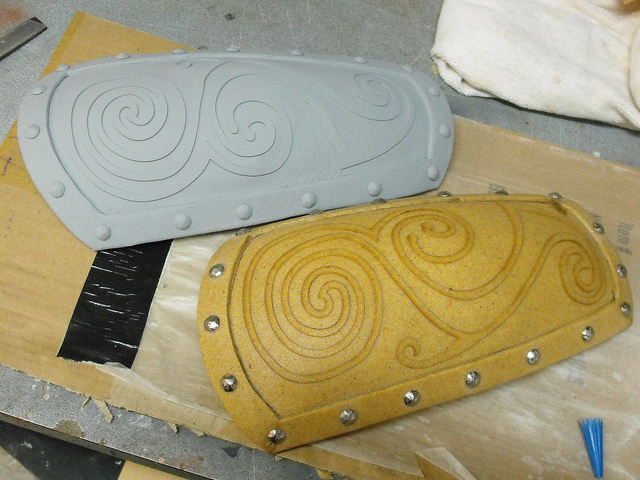
Once we had all of the scroll and detail pieces added to the armor bits, we went over every square inch with a sphere shaped grinding bit in the Dremel to give it all a “hammered” texture, much like the helmets. This took forever and a day, but I am super pleased with the results.
Then every piece of armor got a single coat of SmoothOn’s Epsilon epoxy resin. It’s designed to cover foam and worked really well for this project. Since we didn’t need a smooth finish, we only gave them a single coat, sanded them, and primed them for paint.
Britt had some gems on her chest that she sculpted from an air drying clay and painted up with nail polish.
Both sets of armor had a bunch of metal ring things repeated multiple times, so I sculpted one, molded it, and cast a bunch from cold cast aluminum plastic.
All of the rivets on the armor were decorative furniture tacks. I roughed up their finish in my power drill before hot gluing them into the armor.
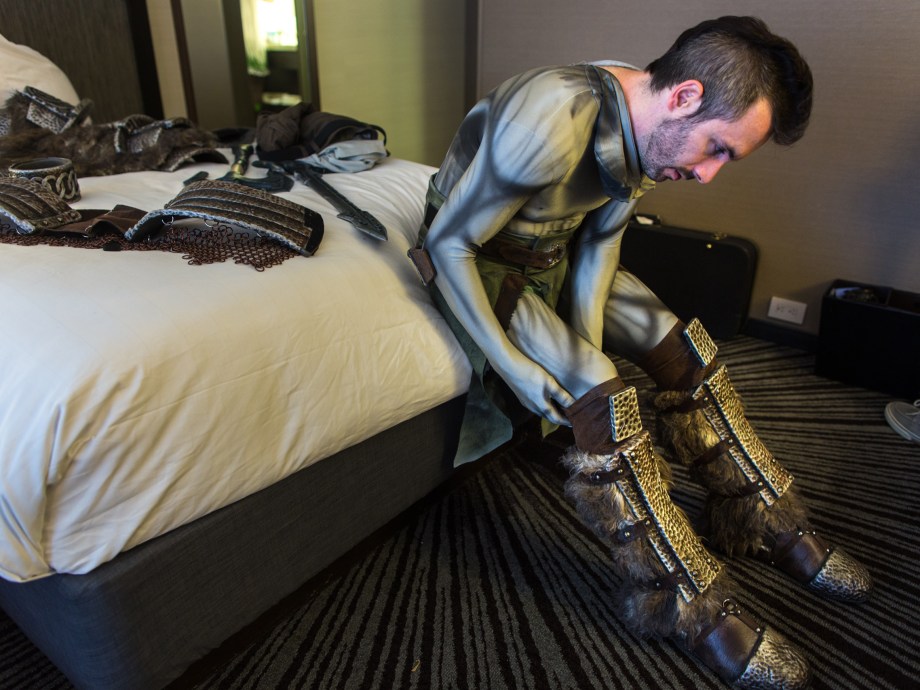
Several parts of the armor for each of us had fur on them, so we got some fake fur, cut it up, and either glued or stitched it to the various parts on the armor. For my shoulder part, I put squishy foam under it to bulk it out a bit.
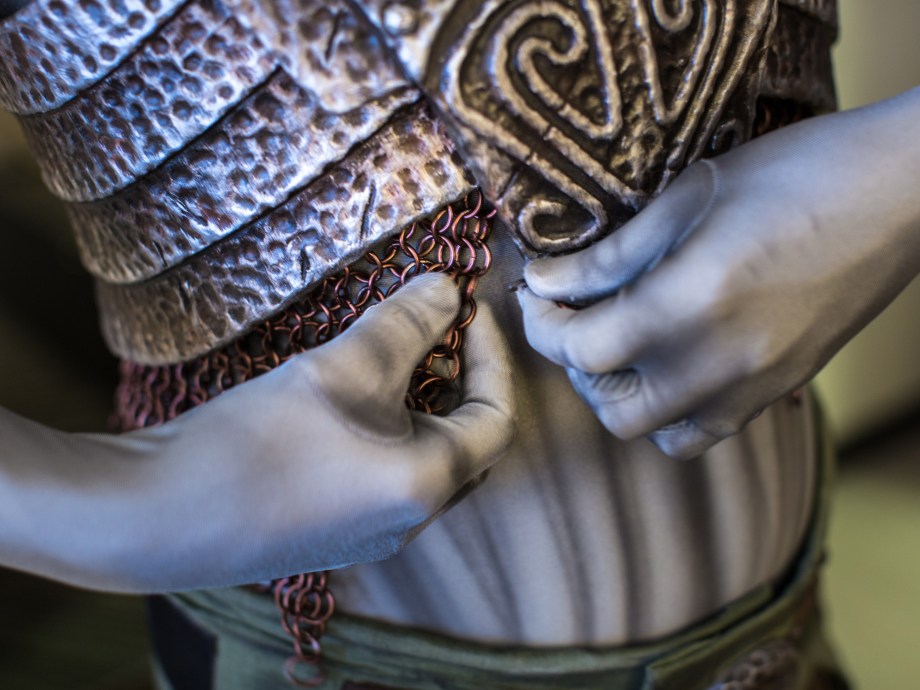
All of the chainmail pieces are actual aluminum rings that Brittany ordered from the Ring Lord and then wove together herself. She got rust colored anodized aluminum rings and then weathered them with sand paper once they were put together. Attaching the chainmail to the foam proved to be a bit tricky. We ended up hot gluing D-rings to the foam and hooking the rings right to them.
We also built in “cell phone pockets” into our hip armor!
Harrison Krix: For my Banded Iron armor made for Dragon*Con 2012, I used Wonderflex, a material that’s been around in the costume hobby for as long as I’ve been involved. It’s versatile and pretty easy to work with, but for this set of Ancient Nord armor I wanted to try out the new hot show in town.
Worbla is the name of the game this time, and anyone who is involved in cosplay and the convention scene has likely heard of it already. One of the most prolific artists to use this stuff is Kamui, a German costumer who makes amazing armor sets from (primarily) the Blizzard universe. I was curious about taking a crack with this stuff myself, and for my wife Emily’s Ancient Nord Armor, I used a roll that I’d gotten from cosplayer Yaya Han to try out.
My approach initially was very similar to my Wonderflex build. Essentially Worbla is a low-melt plastic with embedded wood pulp fibers. The plastic gives it elasticity and adhesion to itself, and the fibers allow it to keep its shape. The downside is that, once heated, it sticks to pretty much everything. I’ve found that ducting tape is a good barrier to this, so I started off with simple cardboard forms wrapped in aluminum tape.
It is possible to shape Worbla without a form, but getting an exact curve will be trickier. For most pieces in this project I made a buck, which in some cases was just a slab of MDF I had laying around.
The hip plates were shaped mostly by hand. Since it takes some time for the material to cool and become rigid, I have found that working next to a bucket of ice water is very handy. Bend your part to the shape you want, then hold it in place while you submerge it in the bucket. The part cools quickly, sets into it’s desired form, then you’re free to heat a new section and tweak the shape as necessary.
Another cool thing I found out about Worbla is that you can cut it with a laser cutting machine! I will say the amount of smoke it puts out is pretty significant (similar to cutting MDF or other woods) so it’s a good idea to clean the mirrors in your machine afterwards. Still, being able to make super intricate shapes like this after tracing the patterns in Illustrator saved me hours of cutting time.
For the “rivets,” I just used furniture tacks from Home Depot, along with a little bit of primer.
The Worbla has a pebbled rough texture that I decided to keep intact for the purposes of this armor. If you’re after smoother stuff you’ll need some sort of filler (gesso, filler primer, spot putty) but after priming these parts I thought the raw Worbla looked great. Wonderflex, by contrast, tends to have a definite woven pattern that doesn’t really match much of anything, which is why my Iron armor requires so much filler.
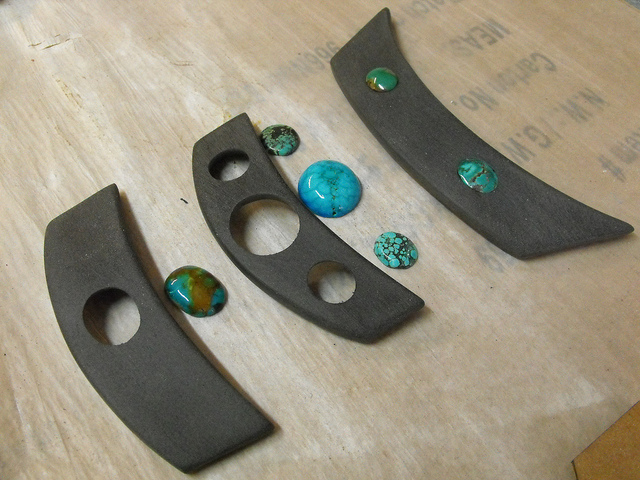
There are a lot of little blue and green stones on this set of armor (I think 13 in total) and my wife was very picky about which ones looked best and just how green or blue they should be. Trouble is, it’s hard to find just the right rock in just the right shape, so I got to learn a lot about lapidary – the process of shaping and polishing stones – in order to get everything just right. Some stones just didn’t have the perfect exact color though, and they got a bit of airbrush clearcoat in blue to tint them to the appropriate shade.
The necklace/chest part of the armor has seven stones set into the plates. I used sintra for the armor itself, and cut out the insets for the stones from the back side so they would sit recessed when finished. The setting itself is made from Apoxie Sculpt; I waxed the front faces of the stones, set them into the plates temporarily, then sculpted the settings around them. After the Apoxie cured I was able to pop the stones out (the wax prevented the Apoxie from curing to them) then clean up the setting with a small set of files.
Now, I can’t sew to save my life, so really the bulk of this costume credit needs to go to Emily for all her hard work on the leather, fur and chain mail.
Bill Doran: This is where Harrison and I deviated from each other a lot in the build process. In fact, we were building them at nearly the same time and kept tossing messages back and forth to compare techniques.
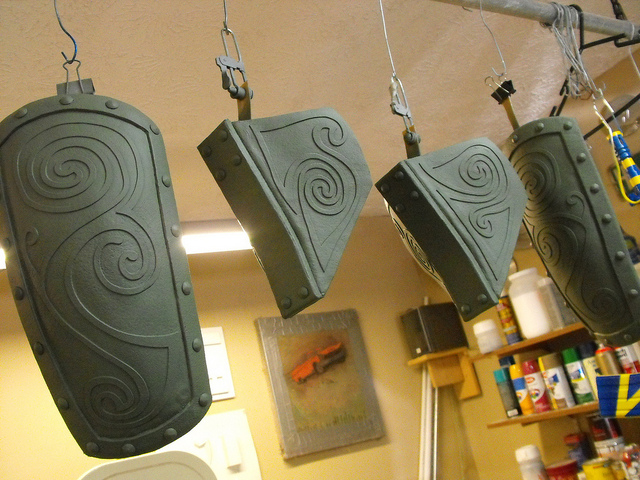
He ended up making most of Emily’s armor from Worbla instead of foam and laser cut most of his scroll work since he has a laser cutter (I will be getting one of my own post-haste). The other major difference in our two techniques was how it was finished. I Dremeled the texture in while Harrison opted for a hammered metal paint to achieve a rough texture. They were both successful, but I’m glad I made ours look super beat up since we’re supposed to be creepy undead creatures and Emily was going for more of the “hero of Skyrim” look.
Harrison also added a “real” rust texture to Emily’s armor (detailed in this tutorial here). I really like the look and feel of this finish, but was strapped for time and materials by the time I got to finishing our armor and just went with good old fashioned paint.
Wicked Weapons
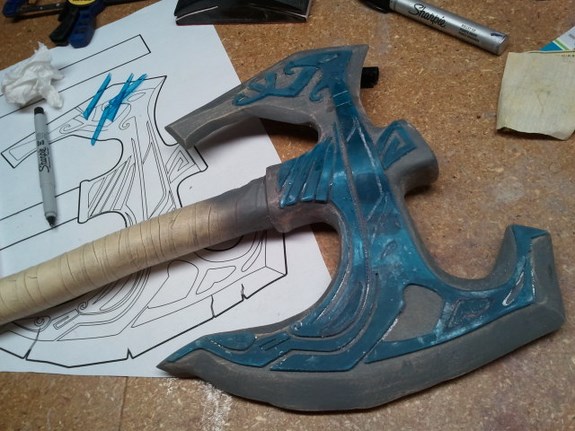
Bill Doran: Every ferocious baddie needs good weapons at their side and our Deathlords were no different. We picked what were some pretty common in-game weapons. While not really amazing stat-wise, the Ancient Nord Weapons look really badass! I wanted an axe and Brittany wanted a sword.
We settled on making them from poplar wood for most of the structural elements. The major pieces were cut out with a scroll saw and then wood glued together.
For the details, we had some acrylic plastic laser cut. The individual pieces were epoxied right onto the wood. This was crazy helpful and quick. If you haven’t tried getting something laser cut, give it a go at a service like Ponoko. Any gaps were filled in with spot putty and sanded down.
Shaping on the edges and handles were done mostly with a drum sander, belt sander, and Dremel. For adding details, especially on the hilt of the sword and handle of the axe, we opted for Apoxie Sculpt. This is a two part epoxy clay that is very nice to work with and cures super solid for sanding.
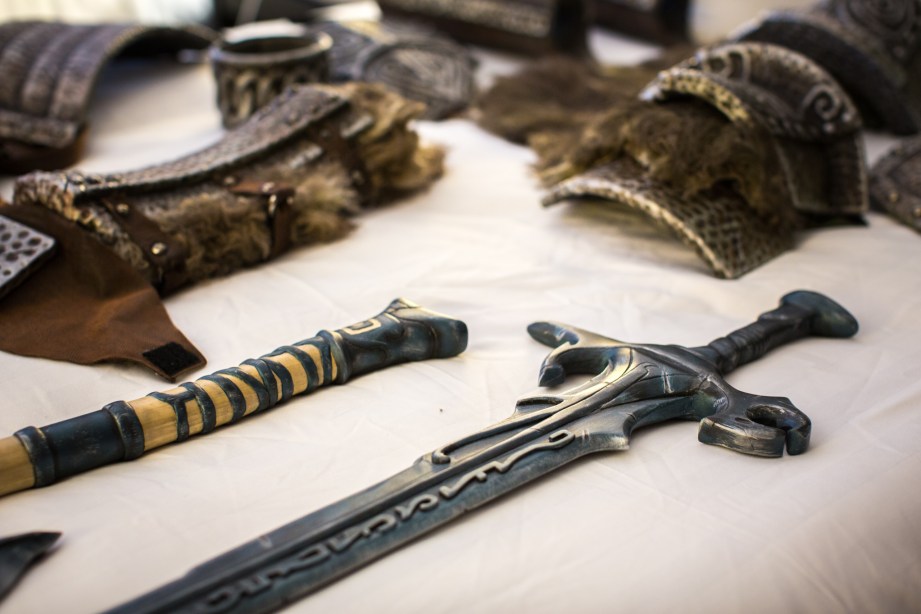
After some priming and sanding, the weapons got some good metallic base coat paint and then were weathered to look like they were in a crypt for a bajillion years!
Harrison Krix, from his Steel Axe page: This piece had to emulate the look of real metal as accurately as possible but still be “convention safe.” All parts are resin cast, using aluminum powder and billet polish in order to get a reflective metallic shine to the axe head, neck and pommel.The finished piece weighs 2.5lbs and measures 26″ long. Leather handle wrap courtesy of God Save the Queen Fashions.
Bill Doran: Harrison chose to go with his Steel Axe and Nightingale bow for Emily. He actually molded and cast the pieces for the axe (I have a kit of it myself, just begging to be finished), but the bow was built very similarly to our sword and axe using wood and Apoxie Sculpt.
Thanks to both Harrison and Bill for allowing me to tag along during their walk through Dragon*Con in costume. For more in-depth notes and many more photos, read Bill’s full build log for his Draugr Deathlord costume here and Harrison’s build log on his Ancient Nord armor here.