


Last week I talked about research, planning, and rounding up supplies and equipment for my Tetris shelves. After a month or so of careful planning, I had all the stuff I needed to get started, you know, actually building the shelves.
This week, we’re going to talk about ripping big sheets of plywood down into the appropriate sizes, I’m going to learn to use a plate joiner and biscuits, and we’ll explore the importance of clamps.
Breaking Down the Plywood Sheets
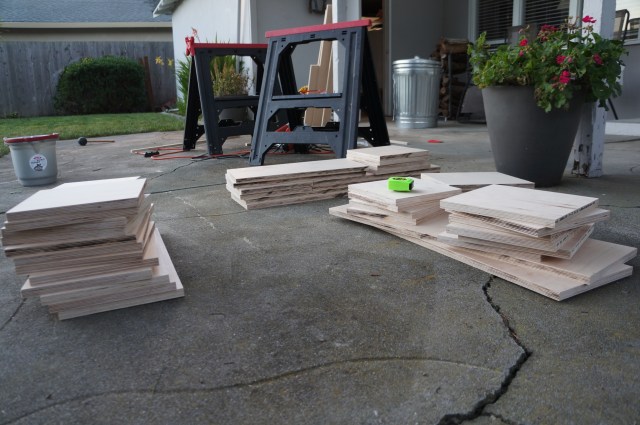
I didn’t fully appreciate the challenge of breaking down big sheets of plywood without a large table surrounding a table saw. I was able to get my 4’x8′ sheets cut down to 4’x4′ sheets that (more or less) fit in my car at the lumber yard, but I ultimately needed boards that are ten inches wide for the shelves. I sketched out each 4’x4′ sheet to make sure I’d actually get all the boards I needed, but I wasn’t sure how I was going to be able to make those cuts safely and accurately.
Breaking down the plywood was a three-step process–first, I had to make some rough cuts using a circular saw to make the sheets manageable on the small table saw I rented. This was actually the scariest part of the whole process, I’m not good enough with a handheld saw to cut a straight enough line on a four foot sheet. To keep my saw on track, I made an improvised guide using a couple of clamps and some scrap lumber I had laying around. By aligning the right edge of the saw with the guide, I was able to make my circular saw cuts much straighter than I would have been able to otherwise. Starting out, I wasn’t sure how accurate and clean these cuts were going to be, so I made sure to leave enough extra wood that I could fix any mistakes later on.
As I was making these cuts, I learned the incredible value of leaving notes to yourself on the materials. After each cut, I labeled each board with it’s original position on my sketches, as well as the boards I expected to get out of the piece and any notes specific to that piece. This helped me avoid making mistakes, and also took the guesswork out of my cuts. To know what I expected to get out of a board, all I had to do was look at my markings and consult my sketches.
Next, I needed to rip the smaller sheets into 10-inch wide boards. I set up the table saw and did a couple of test cuts to ensure that its guide was accurate (it wasn’t). After I started cutting the larger sheets, I quickly realized that the portable table saw wasn’t large enough to handle sheets as large as I was cutting without some extra support. I enlisted a helper to hold the boards level as they came off the saw and from that point on, the rips went very quickly.
I did the final cuts on the miter saw. While I could have used the table saw to do this, I was more comfortable making the precise cuts on the miter saw than the table saw. More importantly, because I’d labeled each piece as I cut it, I was able to cut each piece of shelf as quickly as I could measure and mark my boards.
As planned, I about a quarter sheet of plywood left over after I was done cutting. Before I packed up the tools, I inventoried all my pieces to ensure I had everything I’d need for a complete set of shelves. I also had a couple of pieces that were either marred or a bit short, so I used the leftovers to make replacements for them.
Learning to Use a Plate Joiner
Next up was using the plate joiner to cut slots for biscuits at each joint. I planned on using edge joints with biscuits to add stability and strength to the shelves. From what everyone told me and what I read online, a well constructed, glued joint would actually be stronger than screwing the shelves together or using some other mechanical attachment. I was skeptical, but sometimes you have to trust that the common wisdom is right.
In an edge joint, the narrow edge of the board butts up against the face of the board it will be attached to. To use biscuits, you cut small slots into the facing boards and then insert a small wooden puck into the slot–that puck is the biscuit. Biscuits make it easier to align the boards properly and add more surface area for glue to hold the final joint together. The biscuits also absorb some of the moisture from the glue and swell up, which also helps to make a more secure joint.
Cutting the slots for biscuits can be tricky–they have to line up perfectly and remain tight in order to work well. Luckily, I was able to borrow a plate joiner to help cut the biscuit slots. A plate joiner is a specialized saw that makes it easy to cut the oval-shaped slot for the biscuits into each board so that they’ll align perfectly. With the joiner I borrowed, you can do a variety of different types of cuts to join boards in many different ways.
Once I set up the plate joiner’s guides set up for the type of cuts I needed, cutting slots for biscuits was straightforward. All I had to do was line up the boards where they met, make a line across both pieces of wood, and then line up the joiner’s guide with the line on each piece of wood before cutting. Once everything was marked, it took longer to clamp and unclamp each piece of wood than it did to make the cuts. This sounds more complex than it actually is.
The joiner makes it easy to make these cuts reliably, but there are a few tricks worth noting. I found that the saw made a much better cut if I gave it a moment to get up to speed before plunging the blade into the wood. It’s also super important that you the blade only moves in or out of the wood on a single axis. If the joiner tilts while the saw is running, the slot for the biscuit will be too big, and your joint won’t be as secure. Finally, a large bench vise would have been handy for cutting biscuit slots in the faces of boards. I have a small vice, but it isn’t big enough to hold a 20-inch board without wobbling. I was able to make the necessary cuts by contorting myself, but this definitely wasn’t good for my back.
Gluing and Clamps (Bonus: Learning From Mistakes)
After months of planning and a couple of days of hard work, it was time to finally assemble my first Tetromino. I started with what seemed like the simplest piece–an L. My initial plan was to glue a few corners and clamp them long enough for the glue to set (about 30 minutes, according to the instructions), then move on to the next corner. I bought four corner clamps and figured I had two days of work in front of me.
Using this theory, I assembled the first L. I was extra careful, giving each joint a full hour for the glue to set. The first couple of pieces went together perfectly, but then disaster struck when I tried glue the last piece. I applied the slightest bit of pressure and…
… the whole thing collapsed. I said a naughty word and got back to work.
Luckily, this failure taught me lessons that saved me from even bigger mistakes later on. I immediately realized I needed more clamps–unless I wanted to take a month to finish gluing the shelves, I needed enough clamps to glue an entire piece at a time. With that in mind, I trotted down to my local Home Depot to stock up on corner clamps.
While there, I realized my second mistake. I didn’t actually have any clamps that could hold the joint together while I was securing the corners. Instead of using a tool, I was relying on mere human strength. In this case, the tool I needed was a bar clamp. Since I was already in for $150 worth of corner clamps, I went big on the bar clamp, and got a 33-inch Irwin bar clamp that you can cinch down one handed. Much later, I realized that some of the trickier clamping would have been easier with two of these, but I was able to make do with one.
By buying a big bar clamp and increasing the total number of clamps at my disposal to 16, I was able to glue and assemble one Tetromino every 12-24 hours, all while maximizing the strength of my joints. Yes, I had to cleanup the surfaces where the glue didn’t hold and cut the broken, glued biscuits out of their slots, but if I hadn’t realized that I needed more clamps, it’s likely the shelves would collapsed the first time I put them together.
Seven days later, I had a more or less complete set of Tetromino shelves, and I thought the hard part was done. After all, all that was left was sanding them and cleaning them up so they’d be ready for a quick prime and paint. More on that next week.