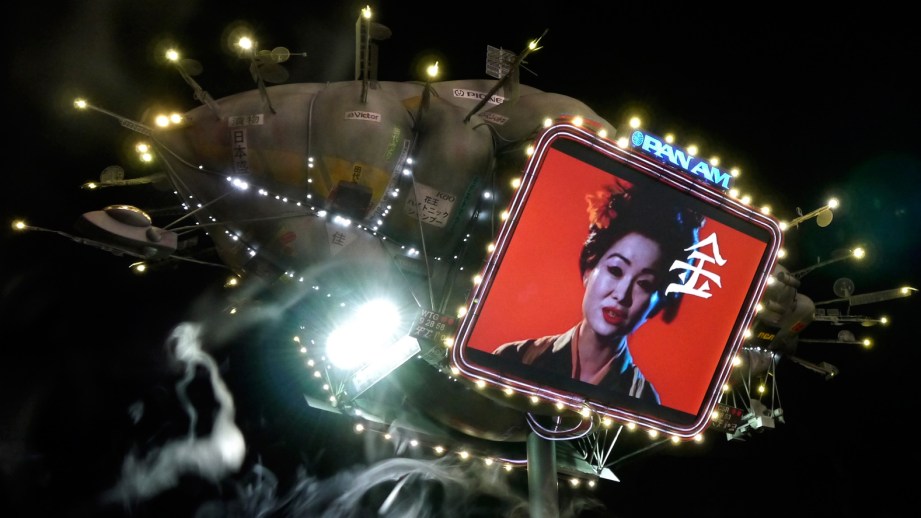
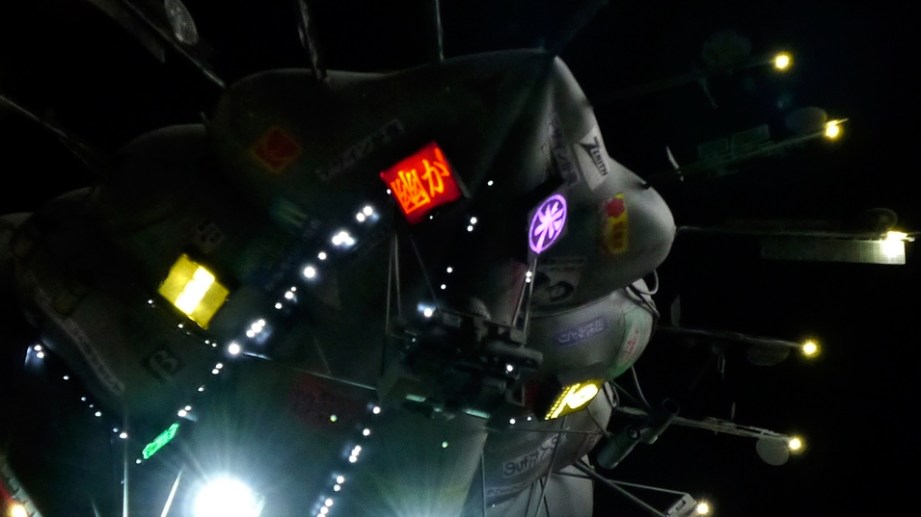
Here’s a prop replica build that even Adam envies. Jason Eaton is a custom kit builder who frequently contributes to the Replica Prop Forum, and reached out to us to share the story of his Blade Runner Offworld Blimp project. Jason, who has worked on licensed replicas from collectible model companies like Master Replicas (no longer in operation) and eFx, spent over three years researching a prop which was only on screen for a few moments in Blade Runner. His replica is 1/2 studio scale, meaning it’s about half the size of the model used for filming, and features dozens of LEDs, four servo-controlled spotlights, and two mounted LCD panels displaying the original video advertisements seen in the movie. Just watch this video of the completed build.
Below, Jason tells us a little bit about his model-making career, how he approaches kit design, and the behind-the-scenes story of his awesome Blade Runner Blimp.
How did you start your model-making career?
I’m 39 now, and I started like most kids in the late 70s and early 80s, cutting my teeth on Star Wars model kits. My parents helped me build that first Millennium Falcon (the one that came with the tiny grain of wheat bulbs) when I was very little, and were always very supportive of my creative pursuits. I started working at 13 at an art store, and stayed there for ten years, so by the time I got my first professional job, I had been able to play with and half-ass-master every art supply under the sun (except encaustic, which bugs me to this day. I need to learn that some time). In my mid-20s, I rediscovered my love of model building, and began thinking that it could be possible to scratch build, or even attempt to recreate the work ILM did. They were my heroes growing up–I wanted to “blow up TIE Fighters” as a job, but I was on the wrong coast, and about 10 years too young to get in on it. When the internet exploded in the late 90s, I suddenly realized I was not alone, and a group of like-minded people banded together and started ID-ing everything under the sun. Hand props were my “gateway drug”, and for me it started on the RPF in 1999.
How did you start designing your own models and garage kits? What were your first custom models?
It was all born from a desire to have designs that were not kits already, or poorly made kits that I knew could be better. I also realized that if I did stuff like that, I could use the profits (if any) to fund more ambitious projects that I didn’t have actual money for. My very first custom model was a kit bash boat I made from a Vulcan Shuttle and other bits, in 1990. A friend and I were making a movie, and there was a scene with a “space boat” exploding. So I loaded this thing up with fireworks, black powder, smoke bombs, and anything else I could get my hands on, and we set it in the water near Annapolis MD, where I lived. It was just an excuse to blow things up and it looked cool. I then kit bashed and scratch built a spaceship of my own design in 1992 for a friend’s movie that never took off, and around 1995 I started customizing Star Wars figures, out of a desire to have ones that Hasbro hadn’t made.
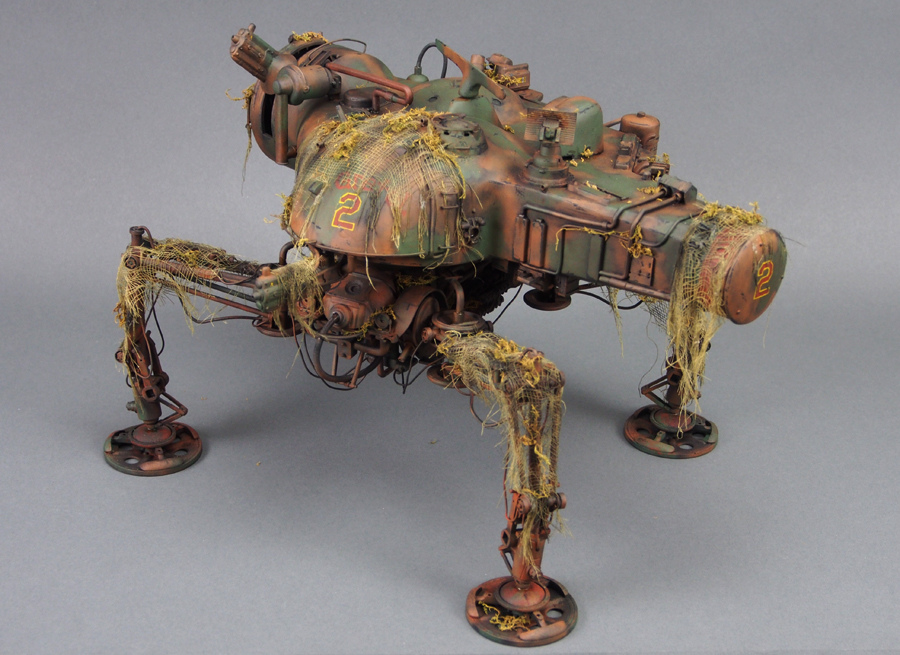
By 1999, with the internet and the RPF, I was buying ILM donor kits here and there, to make Studio Scale replicas. By 2003, I was making friends in Japan who worked in the SF3D/Maschinen Krieger licensed garage kit arena, and by 2006 my wife and I were traveling to Tokyo to sell licensed Ma.K. kits I had mastered!
What’s your process for turning a design into a tangible kit? What materials and tools do you use?
The first thing is gathering reference on the design, which can make or break an interpretation’s “accuracy”. When you make a Studio Scale model, you automatically enter into a locked room with an angry mob of cranky 40-somethings that only exist to point out what you got wrong, so you have to be ready to ignore them. I use every tool I can to get the job done, and every project seems wildly different. I call on my sculpting skills and love to use Apoxie Sculpt, I will use math and scale things to size, and a critical “Rosetta Stone” can always be found in the donor styrene model parts that can be referenced and measured.
How these parts relate to one another and the over-all shapes is a road-map in a build. This is where it gets really fun, and rewarding. I am also fortunate to now have a laser cutter in my studio, so I can draft files and the laser can cut, etch, and accidentally melt all sorts of armatures, sub-structures, and panel lines onto all sorts of materials. I also want to point out that I don’t work alone on a lot of these things, as I can call on many talented friends who can do things I either can’t do as well as they can, or at all. Mostly molding and casting in resin, as I am not set up to pressure cast, and more sophisticated electronic packages.
Let’s start from the beginning of this Blade Runner Blimp build. What were your ambitions and original plan? Did you have to scale anything back or get more ambitious in the process?

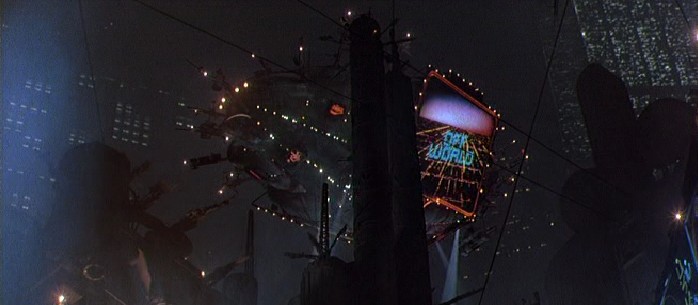
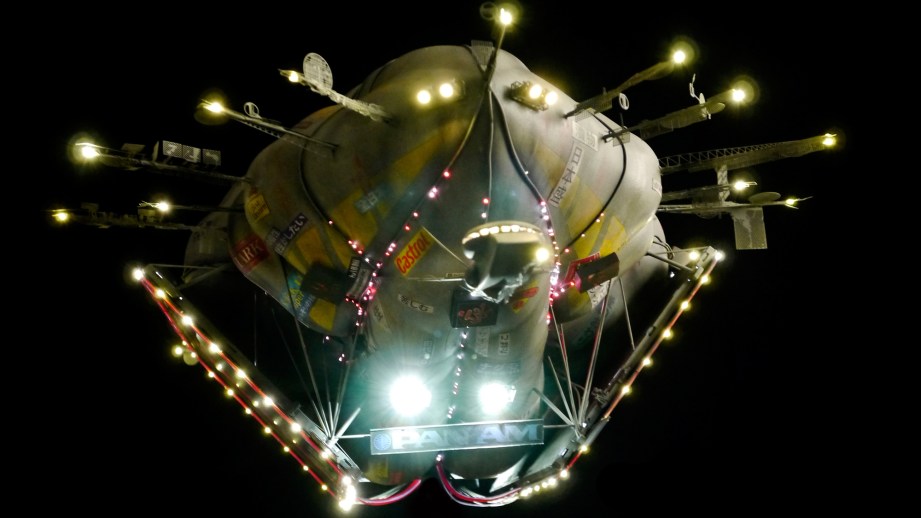
Like a bird that spies a piece of tinsel for it’s nest, I like lights in models. The blimp is like an unholy disco football that made love to a Christmas tree, so it was a “I have to do this” model. Ambition-wise, I realized I could use two of those LCD picture frames that also played MPEG videos on the blimp’s sides, and actually make it “work”! I started with the little reference that existed in 2006, and thought to myself “hey, I’ll figure out the graphics later… maybe recreate the ad with a Japanese friend or something”. I bought the screens and scaled this one very low-resolution photograph from a Christie’s auction where Warner had tried to sell the Blimp (it didn’t sell). The screens scaled the model to about 24″, which made mine a 1/2 Studio Scale replica, according to the text of the auction entry.
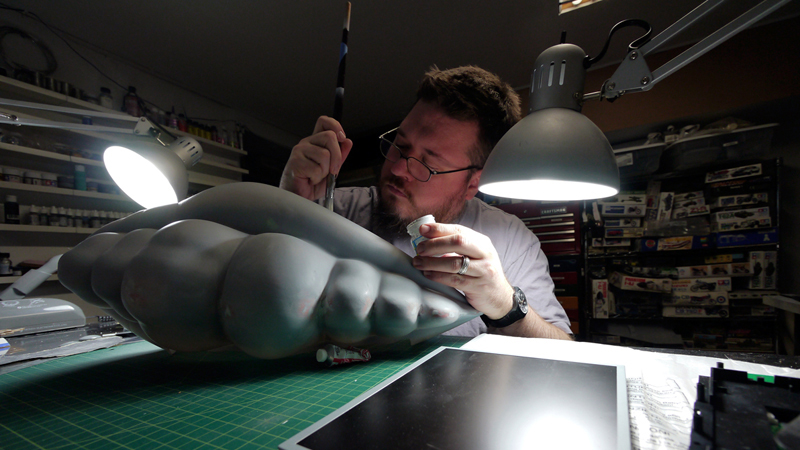
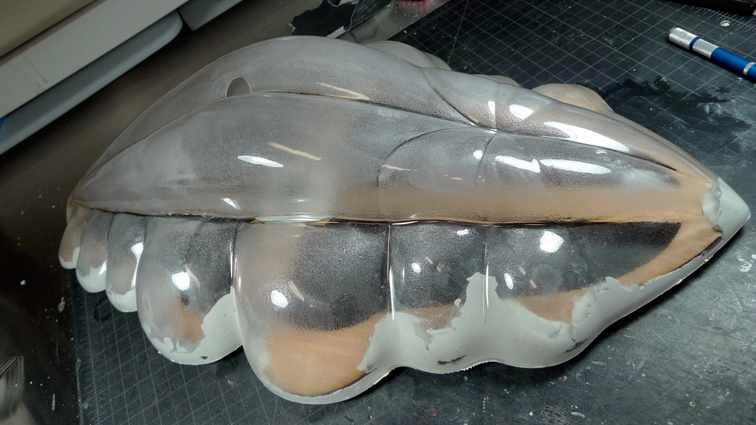
As word spread that I was going to try this, things started falling into place and everything got a little more ambitious. I was going to hand-sculpt the body from foam, but a friend knew a 3D guy that helped me with refining the shape, and I had a buck milled from foam, which was then vacuum formed. When I realized that the Blimp was comprised of a half shell mirrored top and bottom–with an additional half-cap placed on top–this made the most sense. Project creep, man… project creep. Things just get complicated!
Did you study or learn anything about the studio model used for the movie to help with your version?
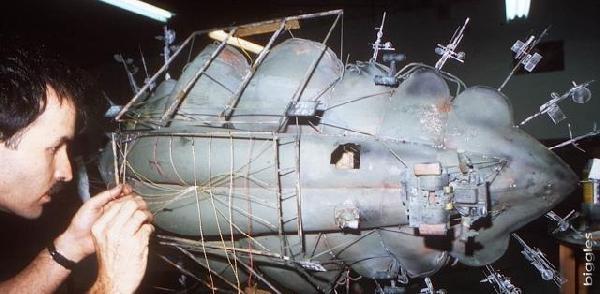
Oh yeah! At some point relatively early on, I was introduced to a fella that had a goldmine of data on the blimp, and was given the photo reference of Bill George building the model, as well as the film’s Offworld Ad and Geisha b-roll footage! Once I had the actual ad, I knew I could make this model look amazing. The photo reference showed the three stages of the Blimp, which was famously tweaked by Ridley Scott.
The original Offworld Blimp had three screens, large turbine engines, was 1/35th scale (a Quad Gun Tractor cab with pilot formed the original gondola), and none of the photoetch antennas or smaller ad boxes. The second stage was the teardown, which was well represented, as the model was converted to a larger scale, with the saucer-shape gondola and photoetch forest around the equator. The final stage, as it appears on film, was not a part of this photo reference in any resolution I could use, so there was a good 60% of the small ad work that was not visible, but I had all of the structural data I needed.
I also was given scans from the original art used to make the photoetch (you can tell they used graphic tape and technical pens to make the art!), and was told about the process Trumbull used to make the model come to life on screen, which were a lot of the same optical techniques used in CE3K, and did not exist practically on the prop. Lucky for me it’s 30 years later, and technology allowed me to make it all work reasonably well in-situ!
What is your lighting setup for the blimp? What about the LCD display?
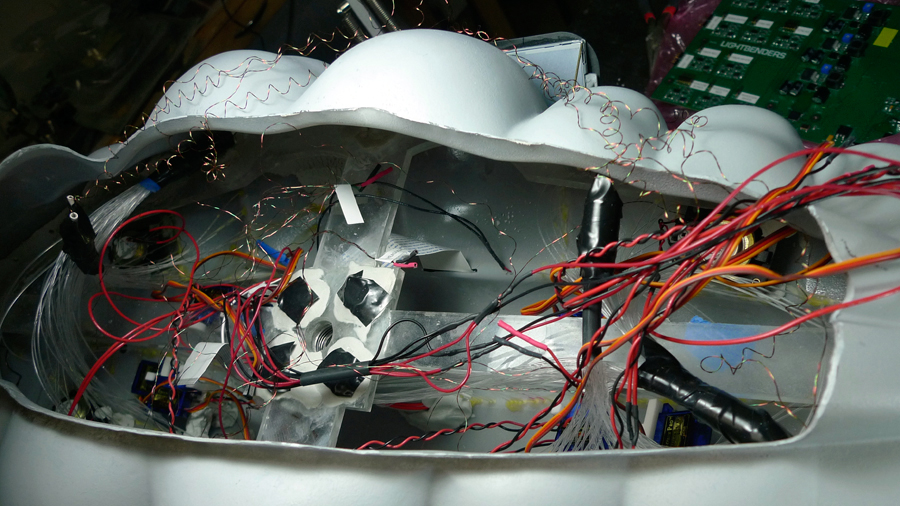
The lights were my specifications, translated into the real world by a very talented man named Dan, who runs Lightbenders. He’s one of those guys I mentioned earlier that can really help model makers at all levels achieve pretty sophisticated things! I know enough about EL sheet and wire and LEDs to make models light up and blimp, but the blimp features four spotlights in the film, raking the ground. This was done with composited lit motorized prisms in the film, so I asked Dan if it were possible to have obnoxiously bright leds randomly swing around in a housing, searchlight-style. He brilliantly designed a dual axis rig that did just that, and it just made sense to have his board drive all of the lights, saving my brain from having to do math, inelegantly. So I had him make a cool setup that drove the four spotlights (with four separate housings he had made at Shapeways), all of the static LEDs, the blinking leds that sit inside the smaller “light box ads”, and he even drove the inverters for the EL wire that simulates the neon bezels around the video screens, as seen in the film.
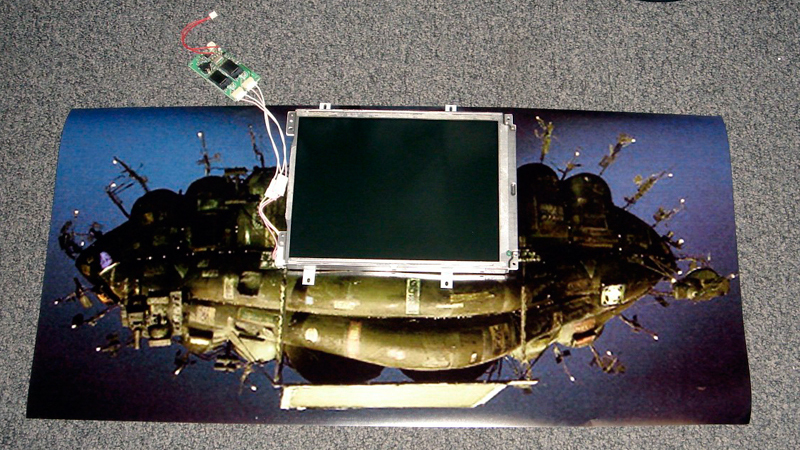
The video screens were the LCD picture frames I had mentioned earlier, stripped down to the bare screen and board(s), with the four speakers (stereo sound for each screen) hiding inside the body of the blimp.
Did you encounter any interesting challenges that you had to overcome during the build?
Every. Damn. Day.
The challenge of getting everything to fit inside the blimp shell was a big one. Being told that the scanned photoetch art would need to be redrawn in vector art (and then interpreted as I was shrinking it by 50%, to avoid blow-outs with too-fine lines) was a rough one, and I spent a good six months on and off, endlessly tracing and interpreting the antennas. The most frustrating thing was seeing the pics that Doug Trumbull released online, via his website, after I had the vacform shells in-hand. There was a dead-profile shot that I had not seen that showed that my interpretation of the front curve was a little off. Nothing bad, but it’s those kinds of things that really frustrate.
However, as I mentioned, I was missing reference on a good 60% of the paper-based ads that were glued to the blimp body itself, and these new pics showed almost everything I needed, so in the end, I am only missing about 10% of the ad references, and those were just made up by me from era-appropriate corporate logos. That was a fun challenge to overcome, as it let me be creative. It’s not completely accurate, but no one knows what it should be!
What are your plans for the blimp now that you’re completed? Any plans for a kit?
Well, I built the one for a client, and have two more in-progress (client build, and my personal Blimp – I get to keep one!). While I’d love to make it a kit, the model is so complicated, I don’t have the time to generate the materials, or hold-hands. Most kit builders are used to turn key kits, and this Blimp is a nightmare of scratch building and expensive components. Plus, I spent hundreds and hundreds of dollars to get photoetch made, and I only have enough for mine, now!
What’s your next project?
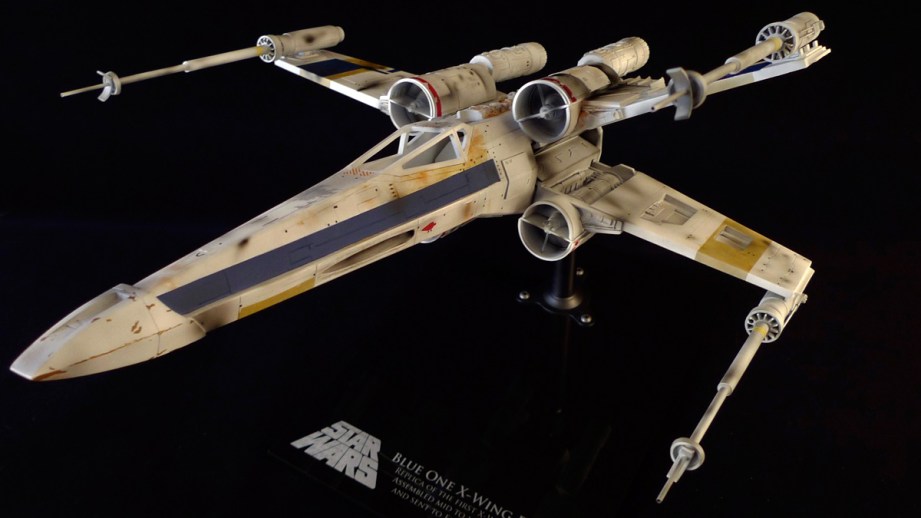
I’m currently building a couple of Studio Scale Probe Droid models–a kit and a complete scratch build (using vacformed shells a friend made available to model builders), which both feature servos, lights, and sounds. I’m laying the ground work for the next Studio Scale Maschinen Krieger model (a master pattern that I hope to get licensed), and there’s a certain six-foot Studio Scale ship from A New Hope that I’ve started amassing donor kits for, so I hope to build that in the next few years. Baby steps!
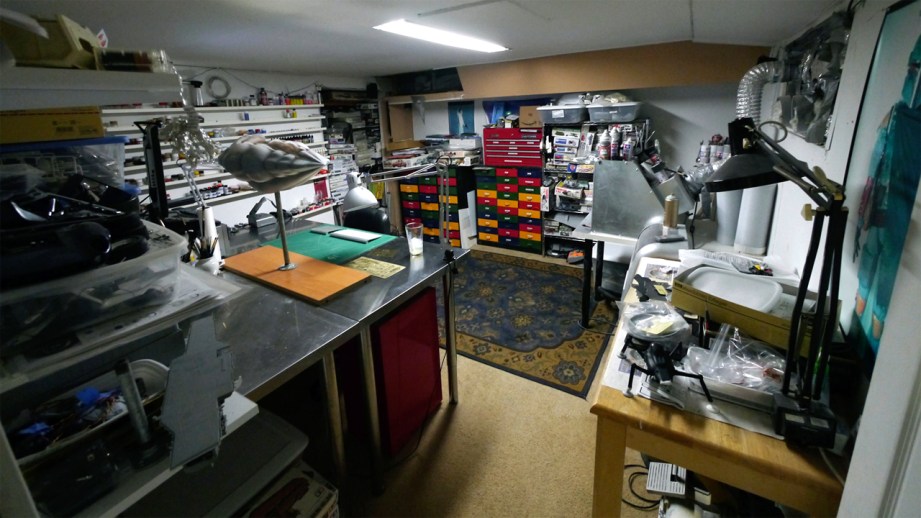
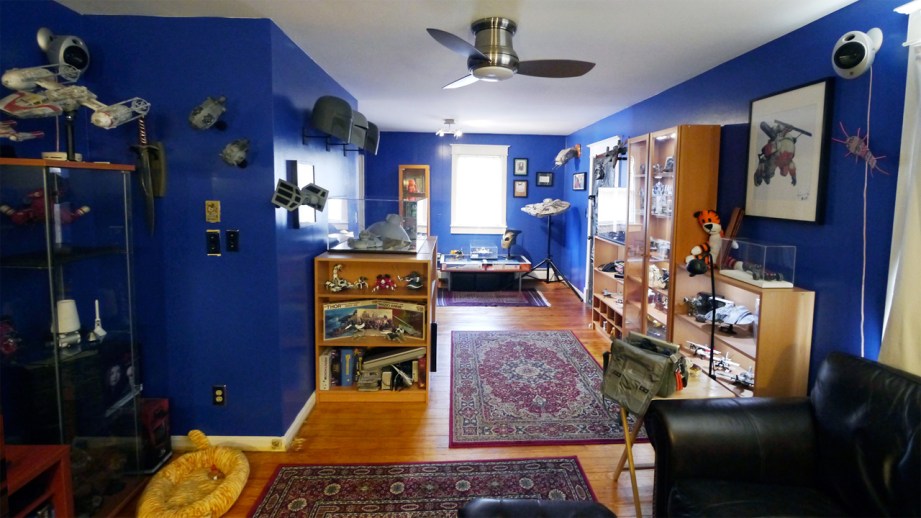
I see you have an impressive prop room. Can you share some highlights and favorites?
Dang, thanks! I always have these awesome things come out of my studio, and then get whisked away to clients, so I feel like the prop room always suffers! If I had to pick a favorite, it would probably be the 1/20 “studio scale” Lunadiver from Maschinen Krieger that I mastered, had cast, and sold at Wonderfest in Japan a couple of years ago. It’s a very organic and strange shape, and the 1/35th Hasegawa kit did not exist when I made the pattern, so I had to work from photographs I had taken of the original, from a previous trip. It was very gratifying to have the designer Kow Yokoyama tell me that I had achieved “the essence of Lunadiver” in my interpretation, so that model sends me over the moon.

Other personal highlights are the Cylon Raider I painted for the Revell box top (they were cool enough to send the paint master back to me after they used it for promotional reasons) so that fulfilled my desire to “see my name on the side of a model box”, some Buffy The Vampire Slayer props I made for Palisades Toys/Factory X, and the Studio Scale replicas Master Replicas made, as I worked on those projects, from the AT-AT to the Millennium Falcon. I did paint master and project spec work on these models, and during the process was paid to travel to the Archives at Skywalker Ranch a half-dozen times back in the mid-2000s, so you can imagine how much of a dream-come-true surreal situation that was!
At the time, Adam Savage had said something to me along the lines of “I built some of the stuff in there, and even I don’t get access!!” so those amazing memories are wrapped up in those models, and simply cannot be beat. Dream come true! I recently did the decal art for eFx’s TIE Fighter, so as soon as I get it, it will be my new favorite “child”. Any time you get to be a part of the official product process, no matter the genre, it’s a really amazing experience. Even the really bad ones are a good story! Also, anything that I have made that isn’t a part of someone else’s intellectual property is something I have a fond affection for. When you make something original, you operate on a different level, and it’s something a lot of people don’t do often enough and probably should.
Thanks so much to Jason for giving us a glimpse into his model-making world. Find more of Jason’s projects on his site, JasonEaton.com!