One of the more prominent names from the prop-building community is Harrison Krix, who builds prop replicas under the moniker Volpin Props. Along with prop makers like our pal Bill Doran (aka Punished Props), Harrison almost exclusively builds replicas of items from video games–futuristic assault rifles from Mass Effect, swords from Soul Calibur, and helmets from Skyrim are just a few projects he’s worked on in the past two and a half years. And of course, there’s that famous Portal Gun replica he made in 2009, way before those mass produced replicas from NECA were even announced.
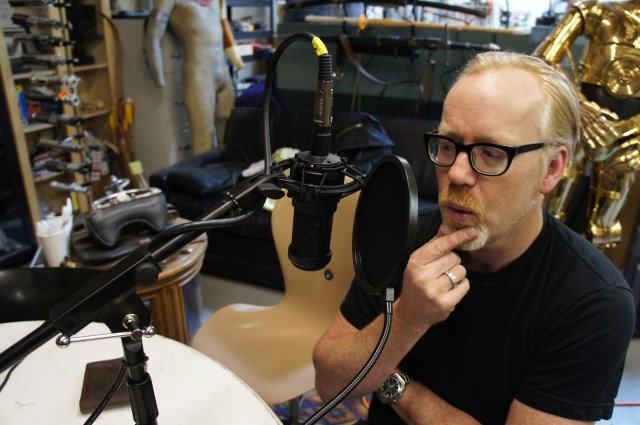
Last September, we invited Harrison to our offices to show off some of his projects, and he amazed us with his chromed and wired Daft Punk helmet. We recently caught up with Harrison to see what he’s been up to in the year since we saw him last and what new toys and tools he’s built for his workshop.
For people who don’t know you, can you give a history lesson on how you got into videogame prop making and made it your full time job?
I guess the short version would be “Halloween.” My wife (then girlfriend) and I were really caught up in playing Zelda back in October 2007, and with Halloween a week away, we realized we didn’t have any costumes. We decided to go as Link and Midna, and split up the work; she did the sewing and I decided to make the props.
I took a few furniture design classes in college, and I’d been building random stuff my whole life. At that time I was actually pretty heavy into the rebuild of a 1975 BMW as well, and I figured if I could build a car, then making some stuff from a videogame would be a snap. I was completely wrong, of course, but I still managed to get it done! The props were just one big learning experience and I learned a whole lot about what not to do, but they got finished and we were a hit at our Halloween party, so all was good. A few friends there told us we should take our costumes to Dragon*Con in 2008, a giant sci-fi convention here in Atlanta.
So we went to Dragon*Con, and WOW the costumes and props there were mindblowing. I came home from that experience with a desire to build everything I saw in the games I was playing.Portal had just came out, and fresh off my massive learning experience with the Zelda props, I decided to try something incredibly complex and really test my completely inadequate abilities. The Portal Gun was my first “real” replica prop, and there were a ton of screw ups, but I was very proud of the result. I tossed a few shots on Flickr and a costuming website called Cosplay.com, and went to bed one night in January 2009 not really thinking much else about it.
The next morning, I had a couple hundred emails. A guy from Gizmodo wanted to talk to me about the project. Kotaku had posted pictures of it on their site. VALVe wanted one for their offices! I figured if people thought I knew what the hell I was doing, I’d better start learning! I set about making a new prop every month or so, and in June 2011 I quit my full time graphic design gig to make videogame props as my full time career. It’s been crazy.
Can you describe your approach to designing a new prop from start to finish? What are the crucial steps and how have they changed since you started?
I found out early on that references and good blueprints are key. I know that seems kind of silly to say but it didn’t really dawn on me until I had a few projects completed. When I made my first Zelda Halloween props, I just sort of winged the shapes. Everything was eyeballed for dimension and proportion and it showed in the finished results. Now, these were Halloween pieces made in a week and they did their job well enough, but they were seriously lacking in accuracy.
When I made the Portal Gun, I based my build off of a set of screenshots someone had posted on a forum of a pepakura file. That’s kind like a photocopy of a photograph of an oil painting when you’re trying to match the colors… ever seen Multiplicity? My blueprints for this project were the third generation Michael Keaton, and I was basing my replica off of those!
Starting with a couple of later projects, I began making my own blueprints in Adobe Illustrator. I don’t have any 3D modeling knowledge, so everything starts out as flat drawings from the side, front, top, etc. These take a while, especially if the prop in question is something that’s not very well known or popular in the gaming world, but the results when making a project are worth the effort. If you consider that every shape, angle, line and seam will need to be proportional and relative to all the ones surrounding it in order to make a convincing replica, the need for quality blueprints makes itself evident. It’s the foundation of the project, and the final result will only be as accurate as your references.
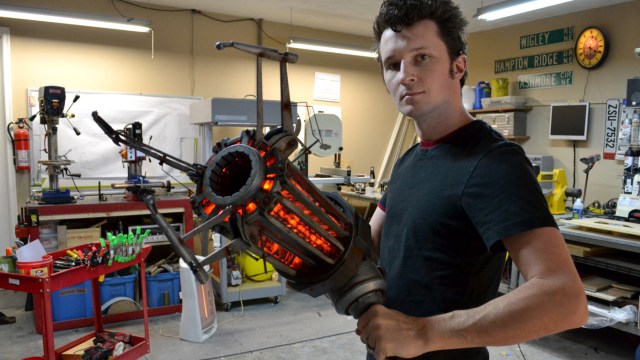
With blueprints finished, there’s a matter of what the prop will be used for and what the budget is. A display-only piece can afford to be a little bit more fragile and intricate than a piece for a film shoot or a prop needed for costuming. Same thing goes for weight–my Gravity Gun clocks in at 12lbs. That doesn’t sound like a lot until you try to hold the thing for anything more than 10 minutes or so, then it starts to get annoying. Does it need to be hollow in order to run a bunch of lights through it? Should this gun have a moving trigger or a magazine release? Does it need to make noise and play sound effects, and how easy will it be to change the batteries? Sort these things out first before you start building! It’s a lot easier to cut a hole in the middle of a prop in the planning stages before you start gluing things together.
From there, I take the project and break it down into smaller components. Some people can look at a big brick of foam or wood or plastic and figure out how to carve their model out of it, but I’ve never been much of a sculptor. For my build technique, I divide the piece into several smaller more manageable chunks. My preference is to work on my props in layers; I’ve heard some 3D modelers call this “slicing.” Whatever the term, I’ve found that it’s easier (for me anyway!) to work additively. A rifle will start off as a one inch thick “spine” of wood or plastic, which will have various other “slices” added to it in areas to build up thickness or dimension as needed. My N7 rifle is a good example of that – I don’t have the fidelity of a CNC mill with my hands and a dremel tool, so recessed lines are actually just two layers of raised panels sitting next to one another that have been blended into the overall shape.
I recently got a small laser cutter, which has made my “sliced” process of making props much easier. My dad also salvaged a roll-fed plotter from the trash bin of a local school (it took some repairs to get up and running again) which has allowed me to print my blueprints fullscale. These 2 things were huge helps in my build technique. I’ve also started molding more parts than I did back when I started making more accurate replicas a few yeas ago. The layering technique works great for the base form, but you end up with something that’s a mishmash of several different materials which tends to be heavy and fragile. A small part built from several pieces acrylic with only glue joints holding them together will be a lot more fragile than the same part cast in solid resin.
About 2 years ago I made a small vacuum former out of an old toaster oven and a shop vac. This was a revolution for my build techniques, and I found myself using the little machine on tons of small accessories for projects. If I needed a curved piece of plastic, I could find the proper diameter PVC pipe and pull a copy in styrene. Same for domed shapes; suddenly everything in my house with a curved surface became a vacuum forming buck. The little machine still works to this day, which is amazing considering the mishmash of scrap parts it was borne from. I stepped up and built a much larger machine earlier this year – a 24×24″ former with it’s own dedicated pump and air tank, and I’ve been able to use a wider variety of plastics in much thicker sheet size as a result. I’ve done a couple projects that are all vacuumformed parts as well, and the weight savings is phenomenal, especially for something like costume armor.
With new tools also comes new techniques and new build ideas. The ability to cut parts on my laser cutter has changed the process, and I do a lot of 2D prototyping on that machine now to mock things up in paper or cardboard before transferring the shapes into something like metal or plastic. I recently bought a small mill which has opened up the ability to work in aluminum, brass, and other softer metals. The planning and build process is always going to change with the new toys, but the beginning and planning stages remain the same – how do I get the most accurate results with the tools I have available? Before I had a laser cutter, I’d use double stick tape on sheets of plastic to cut out identical shapes simultaneously. You don’t need all the fancy tools, just a bit of ingenuity and planning. Everything I make is built in my head first, the workshop stuff is just going through the motions.
Most of your skills are self-taught. But what are the resources that you find yourself visiting when learning new techniques or working with new materials?
I know Adam tosses this out there all the time, but a fantastic forum that many builders visit is the Replica Prop Forum. I joined in 2010 and the forum has exploded since then. More and more builders join each day, and the amount of information there is really staggering. Mostly I stick to the “props” section, but there are also great resources for sculpting, modelmaking, and costuming as well.
Generic as it sounds, I spend a lot of time just Googling or trawling around on YouTube. You’d be amazed how many hundreds of builders out there have a little blogspot account you’ve never seen with the exact trick that will make your project work perfectly. This morning I was researching vacuum degassing chambers for silicone molds. Followed a few links, read some DIY articles, ended up finding a great blog entry about retrofitting a painting pressure chamber for vacuum.
I have recently gotten into a lot of moldmaking and casting, and the guys over at Smooth-On have a world of information compiled about that stuff. Tons of video tutorials, step-by-step processes with great photos and documentation. I haven’t ever taken any classes on moldmaking or casting – my entire knowledge base comes pretty much exclusively from the Smooth-On website!
The other one I’d toss out is Instructables. There’s a lot of information out there–some great, others a little lacking–that can get you pointed in the right direction. It’s all very DIY, much like the RPF, so two people might have wildly different techniques for arriving at the same conclusion (case in point, check out how many DIY CNC machine projects are on there!) but the ideas within the projects are where the true value lies. You might not have any interest whatsoever in making a replica of 9-foot-tall Space Marine armor, but what about how he did that thing with the paint in step 18 of his helmet sculpt? That is how you learn online. Take a little bit of knowledge from everything.
Last year, you showed us a few of your amazing projects, including your Daft Punk helmet and Mass Effect rifles. How has business been since we saw you last? Looks like you’ve been on a helmet kick lately!
Woof, busy! I kind of got into an organic-thing I guess. My first attempt was a Female Draugr helmet from the videogame Skyrim. Admittedly I had a bit to learn, most specifically with making the hammered texture on the piece look less predictable and random. The follow-up to that project, the “Helm of Yngol” also from Skyrim, was a lot more successful. The aesthetic of that game really grabbed me and I ended up making a full set of the armor along with a couple helmets, and an axe and shield. There’s still a lot more I want to make from that universe as well, some of the weapons are “glass” and have a sort of translucent blade which would be an absolute blast to figure out how to make convincingly.
Business has been great though. I switched over to making props full time in July of last year and have, so far, been able to keep myself out of bankruptcy! I’ve had some great corporate clients and built a few things for the release of Mass Effect 3, and also got to participate in a really cool charity project for the Make-a-Wish Foundation at Star Wars Celebration VI. You can tell I was still on the Skyrim kick when I did that helmet – horns and corroded metal and all – but I did manage to sneak some LEDs into the piece too.
The helmets and sculpted pieces were fun, but I’ve kind of met my personal quota with the organic stuff for a little while, so I’ve been switching back into the more geometric world of videogame projectile weapons. I just wrapped up a project for a short film called Nuka Break which takes place in the Fallout universe. There’s a drum-magazine automatic 12 gauge shotgun in the game Fallout 3 called the Terrible Shotgun, and I was able to break in the new milling machine on it just last month. The finishing touches went on it a couple days ago, and it’s headed out to Los Angeles for it’s big Hollywood debut in a few weeks.
How has your workspace evolved in the past year? What new tools or toys have you set up to help with your work?
Well, the newest member of the family is my mill. Its nothing spectacular, just a little bench top hobby piece, but it does let me work with materials I hadn’t been able to try before. A friend of mine also dropped off a huge box of urethane tooling foam a few weeks ago which I’ve been playing around with on the mill and lathe. That stuff is fantastic.
There’s smaller stuff too. Friends of mine chipped in for my birthday and bought me a new lathe to replace my horribly dangerous Craftsman. I did bet the living snot out of that old piece though, so while it might not have been the safest machine in the world, I definitely got my use out of it!
The biggest two additions have been my laser cutter and my large vacformer. The laser cutter is a “desktop” machine, but in reality I had to build a huge cabinet to house the air/water pumps and power supply. I’ve been finding tons of uses for it, and so have my other costuming friends too! I never used to work with acrylic before, but having this thing around means it’s become one of my most used materials lately. Might need to step up to a larger machine in the future as the 9×12″ work area can be a little restrictive, but when you’re building something like the Gravity Gun from Half Life 2, which is built almost entirely from laser cut acrylic, having a home machine beats the heck out of needing to go to a place like Ponoko or Shapeways (not that they don’t do excellent work, but you can’t beat the convenience of laser cutting parts in your bathrobe at 7am when you’ve got a quick deadline!)
The vacformer was a tool built out of necessity, really. One of the first projects I ever had commissioned was a mascot robot head for the website Destructoid. The original was made from masonite board and fiberglass, and was unbelievably heavy and uncomfortable. Version 2 needed to be lighter, but also stronger as well. I decided that vacuum forming the entire piece from .10″ styrene would be best, but my little machine was way too small and didn’t have nearly enough power to do the job.
A few Google searches later, I found a website called build-stuff.com where a gent was selling incredibly detailed (hundreds of pages!) instructions for building a vacuum forming machine. He calls it the “Protoform” and there have been dozens of them built – just check out YouTube for every proud builder’s “first pull” videos (I’ve got one too!)
It took a little over 2 weeks and I eventually had to have my garage re-wired for 220V power in order to run the monster, but the build instructions from build-stuff.com were amazingly detailed and furnished me with a fantastic machine. I modified the plans a fair bit to suit my needs–budget minded, mostly–but the core design remains largely unchanged. I’ve actually finished a full set of armor for a character called Flemeth in the game Dragon Age 2, built entirely from vacuumformed ABS sheets. Three years ago I had never heard of ABS, last year I would have told you I hated working with it because of how difficult it was to sand and glue together. Today, its one of my favorite materials. Funny how things change when you gain the right tools and a little knowledge!
What are some of the pieces that you’ve worked on in the past year that you’re especially proud of? Did you encounter any specific challenges that required creative thinking to overcome?
Around this time last year I decided I was going to make a Gravity Gun from Half Life 2 for the Child’s Play charity dinner in Seattle. I needed a whole lot of precision parts, because this thing is supposed to look like a really complicated piece of tech. Sort of cobbled together and a little rusty, but a precision instrument nonetheless.
I hadn’t ever messed around with laser cutting before, but figured this was a project that could teach me to understand the process a little better. Ultimately, I gained a lot of respect for people that 3D print, CNC mill, or laser cut their projects. There’s a sort of animosity sometimes with builders who think that making a CNC piece is as easy as hitting “print” on a model, and a lot of people scoff at automation as the loss of artistic integrity, but I don’t think I’ve ever spent as much time in blueprint planning as I did when i was laying out the laser files for that Gravity Gun.
I had a 3D file to work with, but all of the layered pieces and parts were drawn by me after looking at that model and inspecting how best to interpret the design and make it actually work in reality. Essentially I had to envision how these parts would stack on top of one another while I was drawing out the shapes in 2D. I had a notebook filled with little scribbles of parts layered on top of one another, drawn in side perspective so I could make sure I wasn’t missing some insert or outer ring or making one part 2mm when it needed to be 3. The final list of parts was something I was very proud to have figured out, even if it was just a scrawled list.
I looked at those blueprints a LOT. I made dozens of paper templates and hand cut them to double check my measurements before sending the off to Ponoko. Cutting 9mm acrylic isn’t cheap, and I didn’t have cash to burn if I got it all wrong! The final tally was something like 120 individual pieces cut from 5 different thicknesses of material, all with registration points and alignment keys to make sure the assembly went as smoothly as possible. It was a huge logistical nightmare, but it paid off in the end. The accuracy and precision I had in those parts just isn’t something I could accomplish building by hand.
Your Daft Punk helmets had some really impressive electronics work. Any plans to return to implementing lights and electronics in your props?
Definitely! I recently stumbled onto a Logan’s Run blaster by another member on the RPF who had quite an impressive electronics package embedded in his gun. There’s a company out in the UK that had an excellent little chip capable of controlling lights and sound for blasters, and I think I’m going to start tossing those into my weapons for a little more realism and interactivity.
Recently, the game Borderlands 2 landed, and that game is FILLED with crazy weapons. Assault rifles that shoot grenades, pistols that fire acid, you name it. There’s a few SMGs in the game that have a side-mounted horizontally oriented drum magazine that spins very fast when the gun is fired, but sort of slows down and coasts to a halt after you release the trigger. Of course, all the weapons are bristling with LEDs and glowing bits too. I think it would be an awesome challenge to get that magazine to spin correctly, but also make it so you can remove it like it does in the game. Lights, sound, motion… I think that’s everything, right? Unless we introduce lasers.
On the note of stuffing all the electronics possible into something, I’ll also be making the Holophoner from Futurama in 2013. I think that thing is going to have a couple hundred LEDs in it and I’d like to to get it to play Fry’s Opera as well if I can find some decent audio files for it…
One of the best things about your work is how well you photograph and document your builds, like on your Flickr page. What’s your approach and thinking behind that? How do you set up your props to be photographed?
I can only take credit for the progress photos, really. The philosophy there is twofold: Firstly, to share what I know and how I work with others. As noted above, I’m sort of a student of the internet. Other builders have come before me, documented their process and shared their insights, and I’ve been educated through their efforts. If I can help someone in the same way, I’ll feel like I’m passing that knowledge along. It was given to me freely and I’m just trying to distribute it and maybe add a little bit of my own perspective here and there if I can.
Secondly, shop shots remind me of what I did to a build 2, 8, 24 months ago. My memory is pretty crap, to be honest, so I take pictures. I have an iPhoto library of nothing but progress photography of props that has to be somewhere in the 20,000 photo range about now. Often times I might come up with a neat solution to a problem I had 2 years ago, but don’t recall it off hand. I don’t keep many of my replicas either, they’ve been sold to clients or donated as they’ve been completed, so the progress photos remind me of how the trigger mechanism inside that one gun worked, or how I mounted those circuit boards inside that one helmet. Without the progress shots, all that info would be lost somewhere in my brain. Probably next to everything from high school.
In a sad turn, my “shop camera” finally passed on a few weeks ago. I had a Fuji Finepix S5200 that shot easily 15,000 of those photos in my progress library, but a lifetime of shop dust and WD-40 overspray finally killed it. Poor guy.
As for the finished pics, most of my really impressive final photography is done by my friend Dan Almasy – its nice to have a fellow nerd friend who’s into gaming and also kicks wholesale ass with a camera.
Dan is generous enough to shoot and edit my work, and even for the props where I’ve done the final photography, I think solid and comprehensive photos of the finished product are essential. I know too many builders who get done with a great prop, then toss it onto a floral print couch and snap a flash photo with a point and shoot. Space guns don’t belong on a floral print couch! I’m not saying everyone needs to go hunt down my buddy Dan, or their closest friend who has the nicest camera, but take the time to shoot your work in front of a neutral or appropriate background. Grab a few drop lights, point them at some sheet styrene or scrap foam core for some reflected light, and grab some well lit photos in front of a drop cloth. You’ll be amazed at how much more impressive your work looks with good photography.
If you’ve put in the time and effort to make this truly awesome replica, you’re only selling your hard work short by not showcasing it properly.
I see you’re selling your digital design files online now. What was the decision behind that? What can someone expect to get with those docs?
Really, those are just little sales to offset the cost of web hosting and such. The files are all vector based PDFs of the blueprints I use in my projects. These can be scaled to whatever proportion you need them without losing resolution, and if you’ve got a copy of a vector editing program, they can be edited as you see fit.
One of the issues that comes from making video game replicas is the problem of resolution. Sometimes rounded shapes will have jagged edges, details will be pixelated or hard to make out in some areas, and there can be a lot of guesswork involved with figuring out small details. If you’re interested in one of the pieces I’ve made, then I’ve taken the guesswork out of the blueprinting phase for you! Sometimes I can spend 2 or 3 days gathering research images before even starting to illustrate a blueprint. There’s a lot of time that goes into accurate references!
For most files, they’re just the illustrations shown on my website. More intricate projects like the Daft Punk Thomas helmet also include the EPS files I used to laser cut the LED holder and frames for the electronics, as well as a PDF for sculpting the glove plates. Other blueprints, like some of the Mass Effect rifles, have a second file of vector shapes that are used as vinyl masks for the decals on the sides of the guns.
Do you see yourself selling kits in the future for original prop designs?
As much as I love building, I’m really a crap designer. If the right partnership comes along and there’s someone out there with a real knack for designing original stuff, I’d totally be down to give it a shot! For now, I find plenty of inspiration in the videogame world, and I’ve been really happy with the designs coming out these past few years. I think it’s just going to get cooler from here on out.
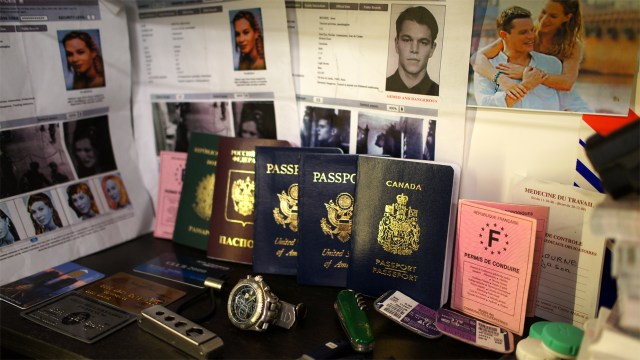
For more of Harrison’s work, check out the Volpin Props website. Look forward to more maker profiles and project spotlights–like this awesome Blade Runner blimp replica–in the coming weeks. And in case you missed it the first time around, here’s our interview with Harrison last year when he visited our office to show off some props:
Photos courtesy Harrison Krix