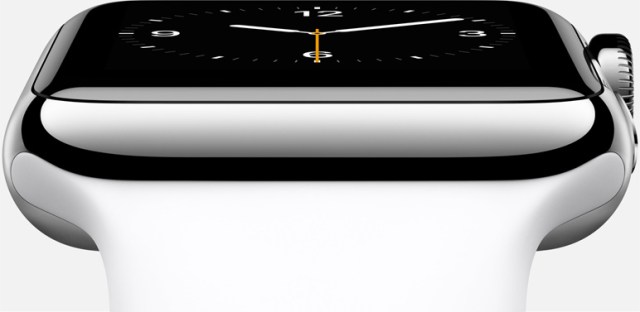
This week, Will, Norm, and Jeremy discuss the Moto X, the Moto 360, and Apple’s announcement of the iPhone 6, Apple Pay, and the Apple Watch. Enjoy!
Boyhood SPOILERCAST – 9/9/2014
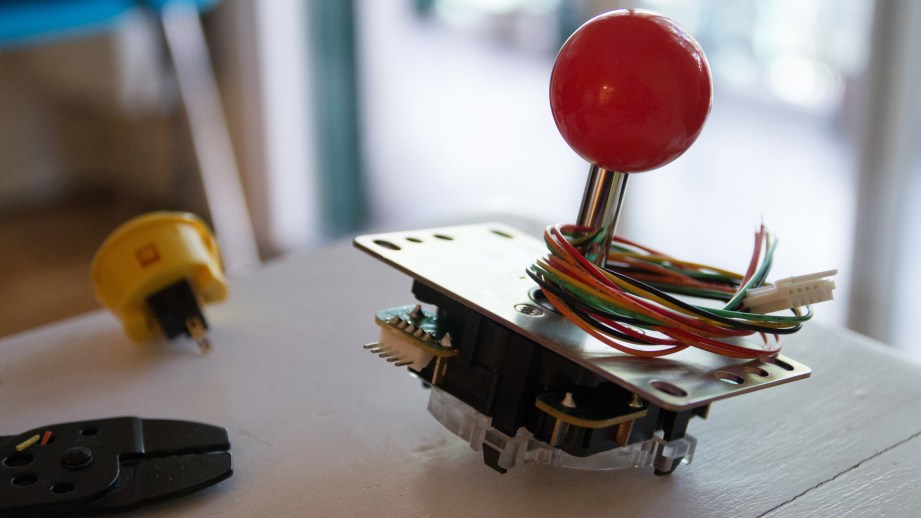
Choosing Buttons and Joysticks for a Custom Arcade Cabinet
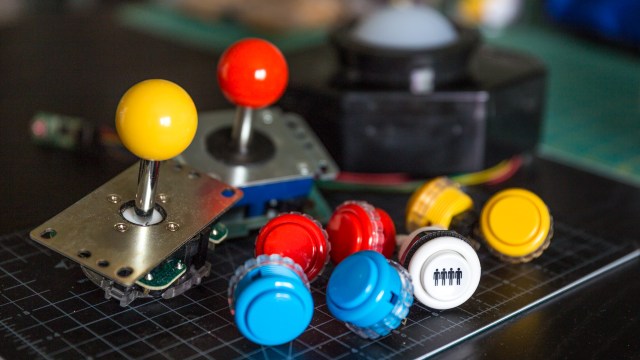
Arcade parts website FocusAttack.com sells 11 varieties of 30mm Japanese arcade buttons, and without some research, it’s hard to spot the minute differences that separate one from another. Some are push-buttons, which install into an arcade panel with a simple snap. Others are screw-buttons, which anchor into a wooden surface. There are also smaller 24mm buttons, and buttons with clear tops or clear rims that can be paired with fancy LED lighting. But most importantly, there is the choice between Sanwa and Seimitsu manufactured buttons, Japan’s two juggernauts of arcade hardware.
When you’re building your own arcade cabinet, you want the best buttons for your games. But wading into the minutia of arcade parts unprepared feels like going up against a world-class Street Fighter player–while you’re clumsily figuring out how to throw a fireball, they’re stringing together moves you didn’t even know existed. There are just as many varieties of joysticks as there are buttons, each with their own nuanced feel.

Knowing the differences between these components enables building an arcade machine for exactly the kinds of games you want to play–or, by mixing and matching hardware, you can create a machine with inputs that are great for a wide swath of arcade genres. For the Tested MAME machine, that’s exactly what we wanted–something perfect for fighting games like Street Fighter, primed for SHMUPs like Ikaruga, and still able to handle classic 80s games like Pac-Man.
Here’s what we learned while researching our arcade controls.
The General Overview: Japan vs. America
There’s an easy high-level way to categorize arcade parts: Japanese and American.
Before we get into the nuances of different models of buttons and joysticks, there’s an easy high-level way to categorize arcade parts: Japanese and American. If you grew up going to arcades in the US or Europe, you’re likely familiar with American arcade parts made by the company Happ. They’re easy to recognize: Happ buttons are concave and have to be pushed in relatively far before they offer that classic arcade click. Happs joysticks typically have elongated cylindrical bat tops, as opposed to the spherical tops of Japanese sticks.
Japanese parts primarily come from two companies: Sanwa and Seimitsu. Each company produces multiple joysticks and buttons, but in general their buttons are flat or slightly convex, require far less pressure to activate, and have slightly larger faces. Their joysticks are also generally looser than Happ sticks, meaning they have more play to them. The round ball tops of Sanwa and Seimitsu sticks can be replaced with bat tops to make their grips more like Happ sticks.

A big factor in choosing the parts for your arcade machine comes from personal preference. If you grew up going to American arcades and using American parts, they’re going to feel more natural at first, but you might be missing out on something better. The website Slagcoin, which contains a wealth of knowledge about joystick parts, outlines some of the differences between Japanese and American designs and offers up a heavily, heavily researched opinion: Japanese parts are better.
“Sanwa and Seimitsu make high-quality parts which will not likely disappoint. Happ/IL is a company that seems centered more on simple, public vending parts with high durability at the sacrifice of precision,” he writes. “I am not exactly a fanboy for Japanese parts, just quality parts. In fact, it is my opinion that many more Americans would compete internationally much stronger in many more games if our country’s standard/common joysticks were of better quality. I would very much like to see Happ/IL or some other company do better.”
The evidence to support that claim is in the nuances of various button and joystick models. Let’s start with joystick technology, the Sanwa, Seimitsu, and Happ options, and which joysticks are best for which games.
Joysticks
“When choosing a joystick, look for freedom of movement, agility in movement, an agreeable restrictor, accuracy of the neutral position, equity of the engage distance in each of the directions, appropriate engage distance, a handle that works well with your hand, a smooth pivot, and general precision in the parts the company uses,” writes Slagcoin.
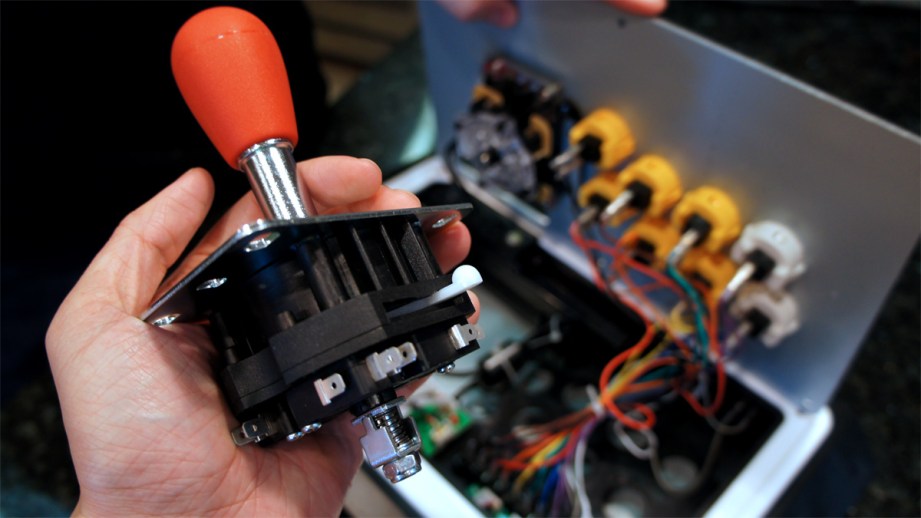
Yikes. That’s a lot of terminology. So what does it all mean? First, quick recap of what we know so far. American Happ joysticks typically have elongated bat tops; to replace them, you usually have to replace the whole joystick shaft. Japanese joysticks typically have round ball tops, which can easily be unscrewed and changed out for bat tops.
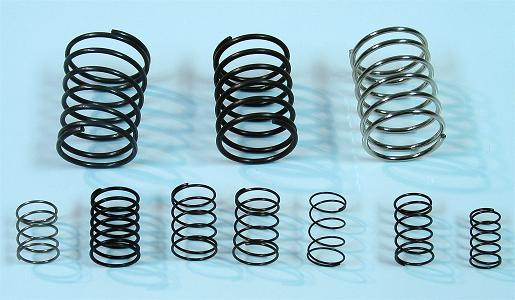
Tension and deflection are two major bits of terminology used to describe how joysticks feel.
Now for the new stuff. Tension and deflection are two major bits of terminology used to describe how joysticks work. Tension refers to the amount of force it takes to move a joystick, which is affected by the spring used inside the joystick. Happ joysticks use strong springs, while Japanese sticks use much smaller and lighter springs (though this varies from model-to-model–more on that in a bit).
When comparing Happ and Japanese sticks, Slagcoin writes “The first reaction will be that the joystick is cheap and flimsy. It takes some time to get familiar with the looseness and understand why it is used.”
Why would you want a looser joystick and a lighter spring? Deflection is a big part of that answer. Deflection refers to the distance the joystick travels when it’s released. For a practical example, imagine you’re playing Street Fighter and holding the joystick down to crouch. If you release the stick, it will snap back towards neutral–and, potentially, deflect upwards with its built up momentum. If it deflects too far, it could register as an input to jump when all you wanted to do was stand out of the crouch. That’s bad.
“Happ/IL shafts, which are made of thick plastic and metal, are substantially heavier than Sanwa and Seimitsu shafts, which are made of thinner metal and very light plastic,” Slagcoin writes. “Even with a heavy spring, Happ/IL shafts bounce around quite a bit, while Sanwa and Seimitsu joysticks tend to have less deflection, varying from model to model.”
That’s one reason why a lot of arcade players prefer Japanese sticks: less deflection, more accuracy. Slagcoin also points out that engage distance and neutral precision varies between sticks. Engage distance refers to how far you have to move the joystick from the neutral dead zone to register movement. A larger or smaller dead zone can be useful in different types of games.
Neutral precision refers to how evenly the stick rests between each direction. Slagcoin writes “When a joystick has a small deadzone and a hard spring, slight inaccuracies in the neutral position can compound erroneous movements, especially on the diagonals. Happ/IL joysticks have a problem in this area of precision…You can…feel how engage distances can vary at different places of rotation. The depth of the Happ/IL shaft complicates this precision problem too. This is the biggest problem with Happ/IL joysticks. You will not notice these problems as much, if at all, in Sanwa and Seimitsu joysticks.”

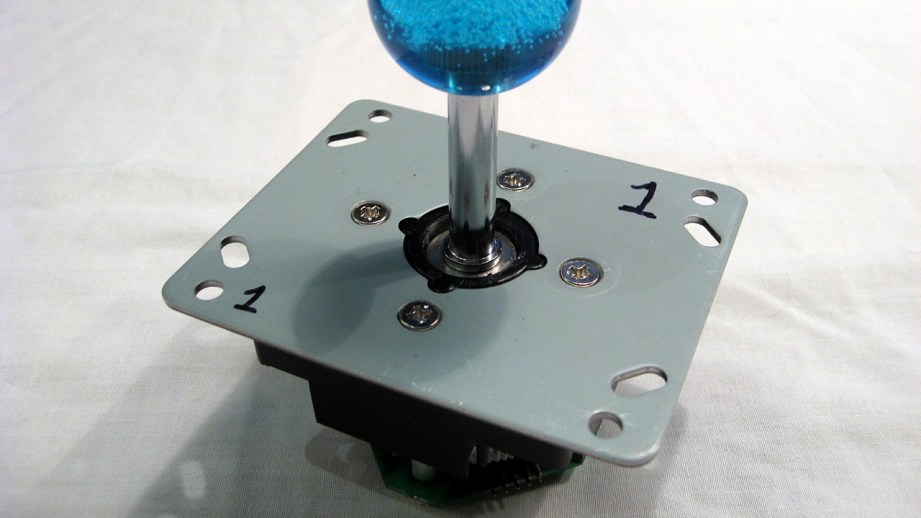
Finally, the big, big differentiator between Japanese and American sticks: restrictor plates or gates. Joystick movements are registered when the bottom of the joystick shaft makes contact with a microswitch (or two microswitches for a diagonal). Japanese joysticks typically come with circular, octagonal, or square restrictor gates, which dictate the outer boundary of the joystick’s movement range and affect the size of the engage zones that will be triggered by movement. Happ sticks only have circular interiors and don’t support interchangeable restrictors.
Some fighting game players swear by the square gate, as it gives diagonals larger engage zones. If you buy a Japanese stick, chances are it will come with a square gate.
Now, onto the joysticks themselves! These aren’t all the joysticks that are out there, but unless you’re already deep into arcade hardware, the right stick for you is probably on this list. The game genres listed below each stick are common, but by no means definitive, player preferences.
Sanwa JLF – This is the Mac Daddy of fighting game joysticks and the most popular joystick model in Japan. Mad Catz’s Tournament Edition Street Fighter IV arcade stick uses the Sanwa JLF. Slagcoin writes that the JLF “is the gamer’s most popular joystick. It is compact and has nicely spaced engages with great general precision.”
Best for: Fighting games.
Sanwa JLW – This is Sanwa’s less-popular joystick model, with a much stronger spring than the JLF. That means it requires more force to engage the stick. Slagcoin also notes that the JLW’s stock gate has very small engage zones for its diagonals.
Best for: 4-way games (Pac-Man, Donkey Kong, etc.). Gamers accustomed to the stiff movement of Happ sticks.
Seimitsu LS-32 – The Seimitsu LS-32 is the second most popular joystick in Japan behind the ubiquitous Sanwa JLF, and it’s a fairly similar stick. The LS-32’s spring makes it a stiffer joystick than the JLF, though not nearly as stiff as a JLW or Happ stick. Slagcoin writes that it has “moderate engage distances for quicker movements.” While it’s a popular stick, Slagcoin does note one drawback with the LS-32: “When the stick is pressed somewhat hard against the gates, the spring adjusts and the stick jumps slightly. This may annoy some players.”
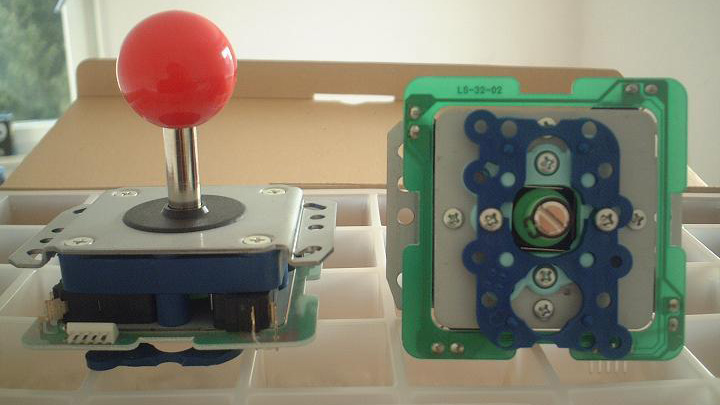
Best for: SHMUPs, most arcade games in general.
Seimitsu LS-40 – This stick is similar to the LS-32, but with even shorter engage distances; it has a smaller dead zone than the LS-32. The LS-40 doesn’t have the jumping issue Seimitsu’s most popular stick. Thanks to its smaller dead zone, it’s also a popular SHMUP stick.
Best for: SHUMPs.
Seimitsu LS-56 – The LS-56 has the strongest spring of any Japanese joystick, though it’s only a tiny bit stiffer than the Sanwa JLW. However, it’s a significantly lighter stick than the Sanwa JLW, and with a longer throw distance (meaning you can move the stick further before it bumps up against the gate).
Best for: Gamers accustomed to the stiff movement of Happ sticks.
Mag-Stik Plus – The Mag-Stik Plus is the only joystick that can be easily switched from 4-way to 8-way operation from the top of the arcade control panel. It’s made by Ultimarc, which makes a variety of modern arcade controls and interfaces. Most joysticks can only be switched between 4/8-way operation from below the control panel by changing the restrictor plate. Lifting up on the Mag-Stick Plus and twisting it 45 degrees will switch its operation. The stick has a very short throw distance, and is mostly considered better for 4-way operation than 8-way.
Best for: 4-way games.
[Editor’s note: Will tested the Mag-Stik plus back in 2012 in this article]
UltraStik 360 – Ultimark calls the UltraStik 360 the most advanced joystick ever made. It’s unusual in that it doesn’t use microswitches to register inputs. Unlike the rest of the joysticks in this section, it’s an analog stick, meant to be register any number of inputs. But the UltraStik can be programmed to behave like a 2-way (think only horizontal or only vertical movement), 4-way, or analog stick. The UltraStik has its own microprocessor. The stick doesn’t have a restrictor plate installed, but Ultimarc sells one, and specialized software allows for customized joystick mapping for directions. Without a restrictor installed, the UltraStik has an extremely long throw compared to a typical 8-way joystick.
Best for: One-size-fits-all customization.

Happ Competition – Happ joysticks, typically outfitted with bat tops, aren’t common in the competitive arcade scene. The Competition’s square actuator makes its diagonals very hittable for fighters, but take much more force to activate than Sanwa or Seimitsu joysticks.
Best for: Fighting games, if you’re a gamer accustomed to the stiff movement of Happ sticks.
Seimitsu makes a variety of other sticks, like the compact LS-33, the LS-55, and LS-58. Happ also makes the Happ Super and Ultimate. Neither Happ sticks are typically recommended over the Competition, and the Seimitsu sticks are niche designs compared to the LS-32 and LS-40.
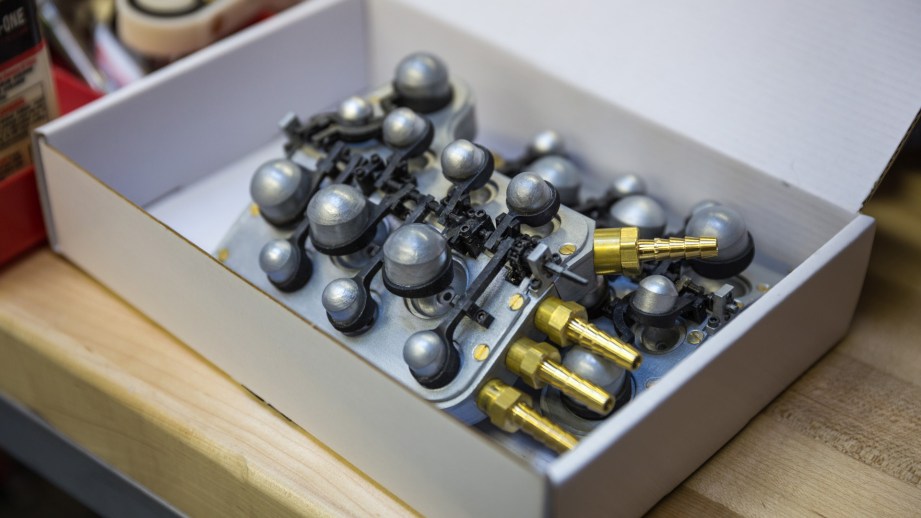
Buttons
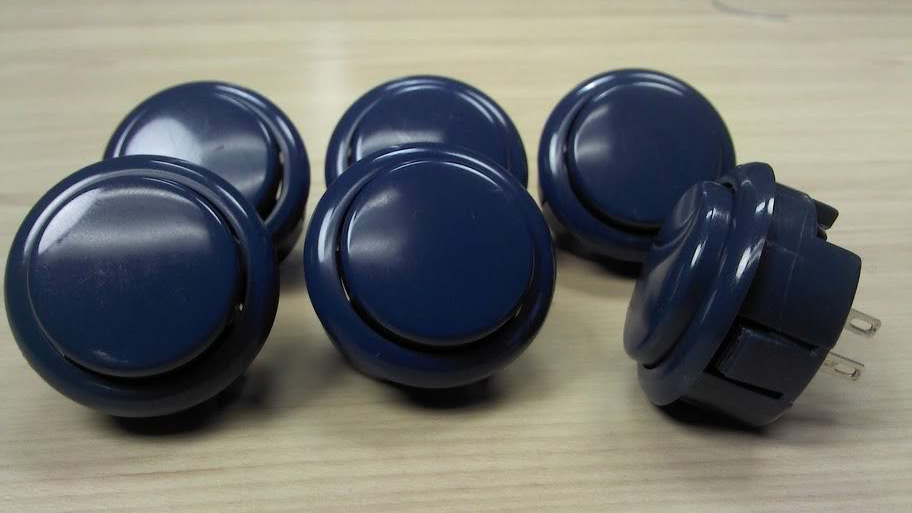
Buttons, in general, are much simpler than joysticks. There’s a big difference between Japanese and American buttons, but only a small difference between Sanwa and Seimitsu buttons themselves. There are, however, two subsets of Sanwa and Seimitsu buttons: snap-in and screw-in buttons. Screw-in buttons are meant for wooden/thicker control panels, while snap-in buttons are easier to install but only work with thin metal panels. Each type of button has its own proponents–some argue that screw-ins can loosen after repeated use and need to be re-tightened, and others argue that snap-ins are more likely to break and are difficult to uninstall or exchange for other buttons.

Seimitsu buttons come in a larger variety of colors than Sanwas (including transparent), but are known for being a hair less sensitive than Sanwas. Both companies offer small 24mm (you probably don’t want these) and 30mm buttons, which are used in the vast majority of arcade machines. Sanwa buttons, in general, are so sensitive that even resting your fingers on them can activate them. Seimitsus require a touch more force.

Happ push-button (horizontal microswitch) – This is the classic, standard, concave button you’ve jammed into an arcade console a million times. Slagcoin points out “Concave buttons can feel a bit awkward because you can bump the edges of the buttons as you move your fingers around.” These buttons have longer engage distances than any Japanese buttons, and require much more pressure to engage. Their horizontal microswitches are also rated poorly for smoothness on Slagcoin, which indicates “how evenly the button moves which is a fairly general evaluation on quality.”
Best for: A satisfying “click,” heavy fingers.
Happ competition – Functionally, the Happ competition buttons are almost identical to their regular pushbuttons. The only significant difference is the Happ competition’s face is convex rather than comcave.
Best for: A satisfying click, heavy fingers.
Sanwa OBSF and OBSC – If there’s a ubiquitous Japanese buttons, this is it. The OBSF is Sanwa’s standard snap-in buttons, and the OBSC is exactly the same–except instead of being solid colored, it’s translucent. The buttons are just slightly convex–almost flat–and come in both 24mm and 30mm sizes.
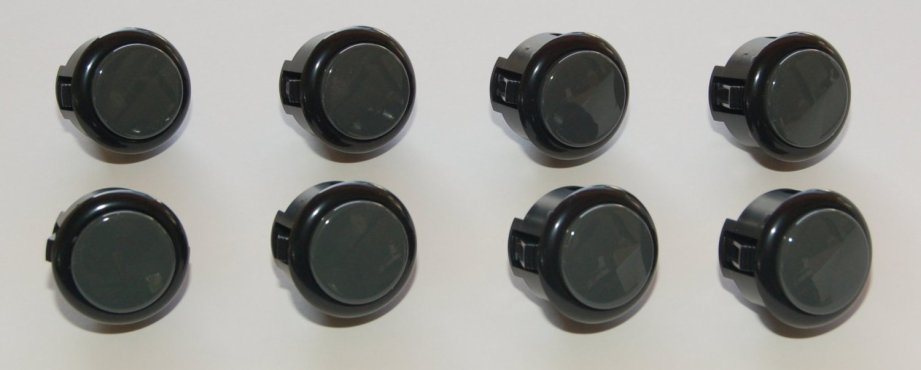
Best for: Fighting games, quick reaction times.
Sanwa OBSN – The OBSN is essentially the screw-in counterpart to the OBSF. The 24mm and 30mm OBSN buttons are going to perform virtually identically to Sanwa’s standard snap-in buttons.
Best for: Fighting games, quick reaction times.
Seimitsu PS-14-G and PS-14-K – Seimitsu’s standard snap-in button is very similar to Sanwa’s, but requires a little more force to activate. Not much, though–they’re just sturdy enough for you to rest your fingers on them without triggering an accidental press. They still don’t have that mechanical “click” impact of a Happ buttons, and have much shorter, faster activation times than Happ buttons. Seimitsu’s G buttons are solid colors, while their K buttons are translucent.
Best for: All games, really.
Seimitsu PS-14-GN, PS-14-GN-C, PS-14-GN-KN, PS-14-KN – Seimitsu’s button naming schemes are confusing jumbles of letters, but all these buttons have one important thing in common: the “N” signifies that they’re screw-ins. As for the differences between them…
The Other Stuff: Trackballs, Spinners, and More
With a joystick and a set of 4 or 6 buttons, you’re set to play almost any arcade game you want. Almost. There are a few games, of course, that require special hardware. Centipede and Millipede need a trackball. A few dozen games use spinners. And while it’s best not to overload an arcade cabinet with features, lest it end up looking like one of these abominations, there might be that one special game you want to dedicate a control panel to playing. Thankfully, there are far fewer of these specialized arcade controls to choose between.
Trackballs work similarly to ball computer mice–as you move the ball, a pair of rollers or sensors inside track the X and Y movements.
First, there’s the trackball. Trackballs work similarly to ball computer mice–as you move the ball, a pair of rollers or sensors inside track the X and Y movements. Old arcade machines like Centipede commonly used 2 1/4-inch trackballs, which is the same size as a standard billiard ball. Some dedicated trackball games, like Golden Tee, use 3-inch trackballs.
Spinners are designed for controlling movement along a single axis, making them useful in games like Pong or Tempest. Simple as spinners are, BYOAC illuminates the complexity of how they works: “Underneath the control panel, the shaft comes down from the knob above. Mounted on the shaft, is an optical encoder wheel- a flat disk with notches cut around the outside edge. These notches pass though a set of infra-red optics, that detect the notches as they spin by. There are two sets of optics, spaced such that they see the notches spin by just a little bit out of sync. The combined signal from both of these optics tells the game which direction the disk is turning, and how fast.”

U-Trak – Ultimarc’s 3-inch trackball is designed to fit into a relatively compact cabinet enclosure, and they call it “the only trackball designed for mounting in a wooden panel with no plate or mounting kit.” It supports a USB adapter or can be connected to a standard arcade control interface.
Ultimarc 2 1/4-inch trackball – The U-Trak is Ultimarc’s premium trackball, and comes with some convenience missing in its smaller model. This trackball needs an extra cable to connect to an arcade control interface, needs a faceplate for the top of the arcade surface, and doesn’t support USB. Even so, it’s still a cheaper trackball than the one Happ sells.
Trackballs and spinners are pretty standard technology, but there are a few rare custom joysticks that you may want to track down. For example, there’s the special 8-way Tron joystick, which has been slavishly recreated by GroovyGameGear. There are analog joysticks commonly used in flight games and rotary joysticks like the ones used in Ikari Warriors. The Build Your Own Arcade Wiki has a great overview of these special controls. If the part you want is really rare, you may end up having to rip it out of an old arcade machine.
And that pretty much covers the control options for arcade cabinets. There are other buttons and sticks out there from other brands, but unless you already know exactly what you want, chances are one of options listed above is perfect for your needs. As many choices as there are, picking out the perfect parts is the fun, easy first step in building an arcade machine. Once we delve deeper into arcade tech, we’ll talk more about hardware, including the control interfaces used to hook up all these inputs and what it takes to output video from a modern PC to a CRT monitor (and why it’s so much better than an LCD!).
Show and Tell: Star Wars Imperial Probe Droid Project
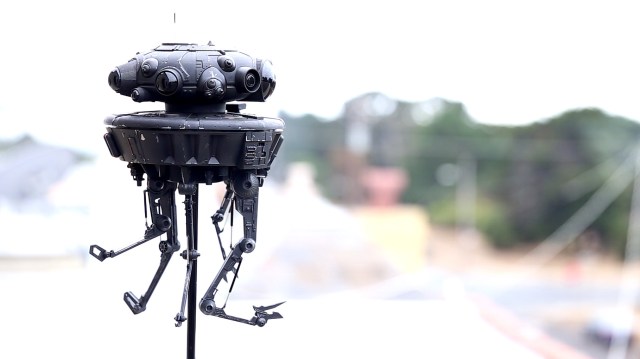
For this week’s Show and Tell, Norm invites you back into his home office to check out two of his new favorite things–both Star Wars themed! The first is a great Death Star rug from Thinkgeek, and the second is a 1/6th scale Imperial Probe Droid model that Norm has upgraded with some minor hacking.
Tested Projects: Building a Custom Arcade Cabinet, Part 3
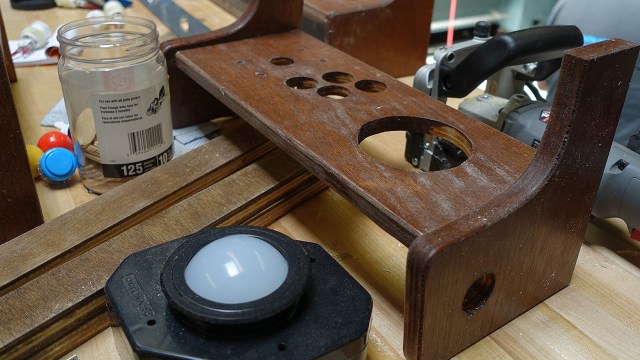
With the top and side panels of the arcade cabinet cut out, we move onto the control boards and the holes needed for all the buttons, joysticks, and other gaming controls. Different types of buttons and sticks for each of the panels require unique mounts, so John Duncan teaches us how to set up a router to cut the right kind of hole for each control scheme. (This video was brought to you by Premium memberships on Tested. Learn more about how you can support us with memberships!)
Video shot and edited by Joey Fameli
Music Library provided by Jingle Punks
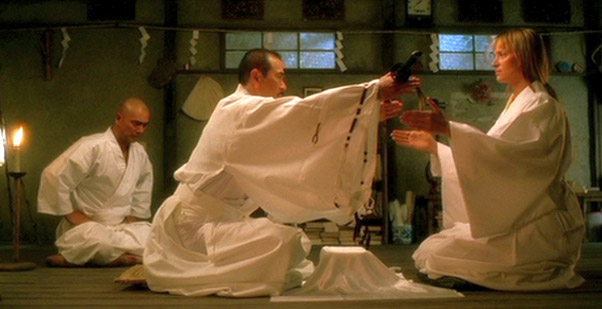
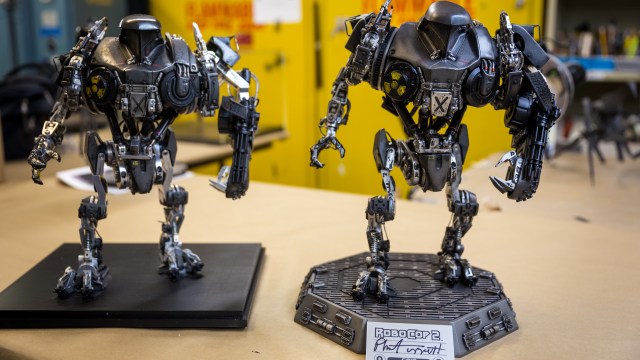
Photo Gallery: Comparing the Cain Replica to the Original


Episode 270 – PAX Prime Report – 9/04/2014
Replicating the Original Robocop 2 Cain Stop-Motion Puppet
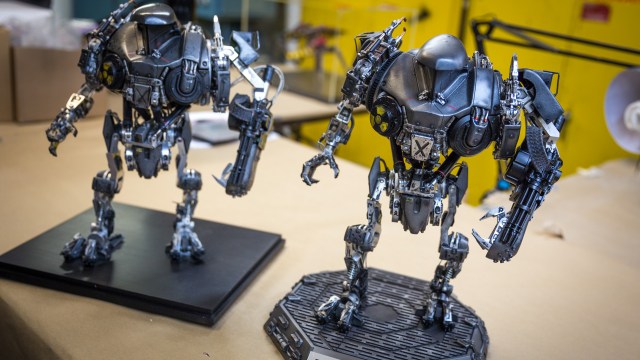
During our visit to Phil Tippett Studio, we had a chance to inspect one of the original stop-motion puppets used to for Robocop 2’s Cain robot. This intricately designed and machined miniature was actually recently disassembled so its hundreds of parts could be molded to create a series of replicas. We chat with Paul Francis of Chronicle Collectibles to geek out over the little details of this amazing puppet and learn about the replication process.
Video Shot by Joey Fameli and Edited by Tyler Winegarner
Bits to Atoms: Building the Millenbaugh Motivator, Part 5
After three months of work, the Millenbaugh Motivator has been completed and the parts have been delivered. As Adam has demonstrated before, finishing is extremely important and he immediately got to work on the Motivator parts in order to detail and finish it along with his Mecha-Hand for Comic-Con. There were some difficulties with the crankshaft due to tight tolerances and the addition of paint, but I’m working on a revised version for him to use later.
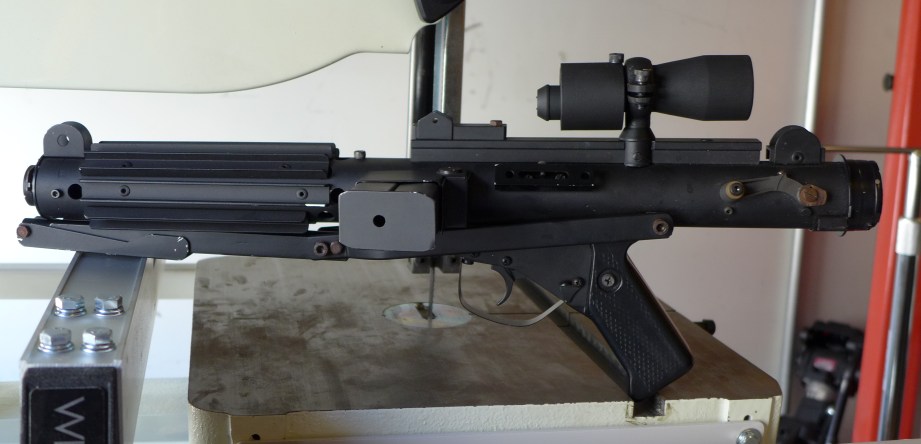
Now that I delivered everything to Adam and am back home, the only thing left to do is the finishing work on my own Motivator! And to be honest, this is the part that I’ve been kind of dreading. This goes way back to when I was a kid and built a lot of models. I would be super meticulous on all the details, get to the very end, and ruin the final paint job–every time. This has stuck with me and almost every time I work on a project, I get to the end and often peter out, leaving it unfinished for long stretches (or sometimes forever). In hindsight, I just didn’t have the right tools or know the right techniques for finishing work. I’d spray paint when it was too humid, too cold, too windy, too dirty, using crappy paint or my really bad airbrush setup. I had a subscription to Fine Scale Modeler magazine and would constantly try higher-level techniques before I understood the basics which almost always ended poorly. In the end, I just thought I was really bad at painting and finishing and it subconsciously kept me from finishing or even starting many projects. I still haven’t fully painted the Stormtrooper Blaster I made five years ago!
I decided to not screw around with the Motivator and just finish it, but I wasn’t sure how. On the trip to San Francisco, I’d hope to do some painting and finishing with Adam but we ran out of time. I did pick his brain about it and we tossed a few options around. Early on, while I was still building the Motivator, Adam was seriously considering metal plating the whole thing and asked me to look into it. I called just about every place in NYC and surrounding area and didn’t have much luck. Coating plastic, or electroplating, is done all the time–it requires the plastic to be coated in a conductive paint, which the metal plating will adhere to. It seemed like most of the places that do this work usually plate metal and they either didn’t do plastic at all or were reluctant to do so and they didn’t really want to do small jobs such as the Motivator. In the end, Adam decided to move on and figure out a different approach.
I had been doing my own research and found ALCLAD, a metal paint system that looked absolutely amazing but required an airbrush setup and skills which I didn’t have. I have never produced a satisfactory metallic finish with spray paint so decided to try Rub ‘n Buff since Adam and The RPF have mentioned it many times. Rub ‘n Buff is a wax-based paste with metal particles suspended in it and, once applied, it can be buffed to a shine, unlike most paints. It’s readily available at just about any art or hobby store, cheap, relatively low-key health-wise and easy to apply (in theory).
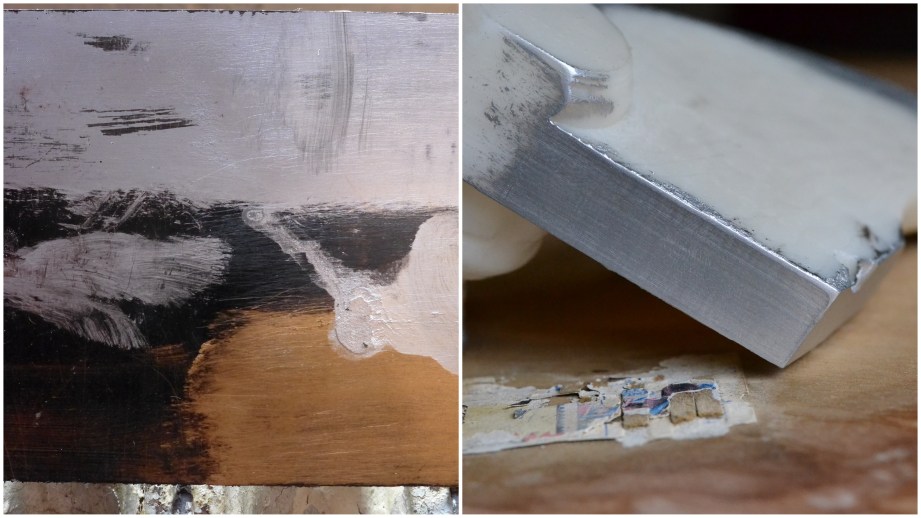
The NYU print lab was kind enough to give me a scrap piece of plastic to experiment on and I also used some of the black ABS I used for the top plates. It seemed simple enough: apply the Rub ‘n Buff, wait a while and then buff it to a shine. I like how it was looking on the black plastic vs. the white–I felt that where the black peaked through made it look more like real, weathered metal. I needed to do a little clean up on the 3D printed parts since there were some ridges from printing–even with high-resolution parts you can get stepping, which is where you can see the layer transitions.
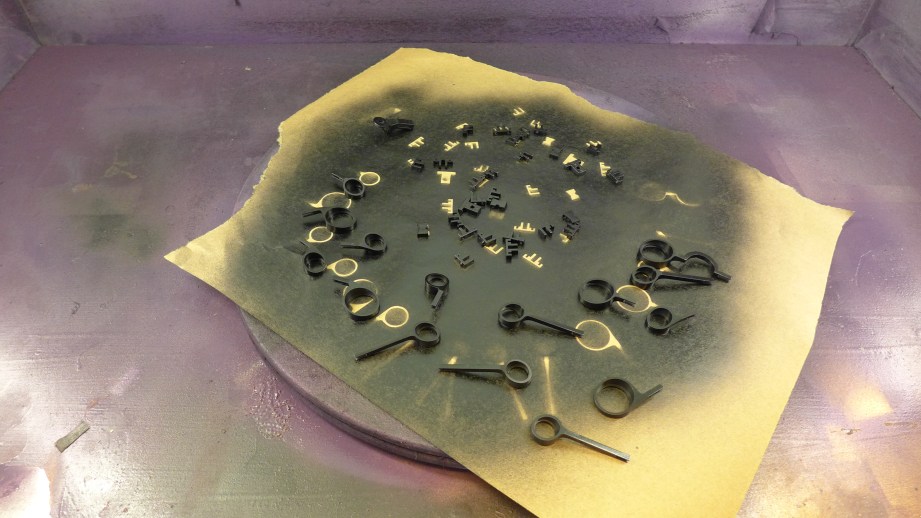
The resin used in the ProJet printer is easily sanded and painted like any other plastic so this wasn’t an issue and only required light sanding. During my tests I also discovered that if I hit the surface lightly with a scotch-brite pad before applying the Rub ‘n Buff it gave it a brushed-metal look. I painted everything with black Krylon Fusion spray paint which is specifically formulated for plastics and requires no priming – turned out great. Next came the silver Rub ‘n Buff – which turned out terrible. I had a bad time with it – either it would not lay down evenly or clumped up in blobs and I really messed it up by trying to put on a second coat. All my tests had turned out ok but they were mostly small patches – covering large areas was not going well. Luckily, the Rub ‘n Buff came off fairly easily with some alcohol but I needed to figure out what I was doing wrong. My technique was to apply it using a small square of cotton rag, let it dry for a while and then buff it to a shine but this wasn’t working on the large parts. Once again, The RPF to the rescue–I found this armor video by Arturo Delgado that made everything clear:
Making armor with Rub ‘n Buff (application at 4:15) Credit: Arturo Delgado
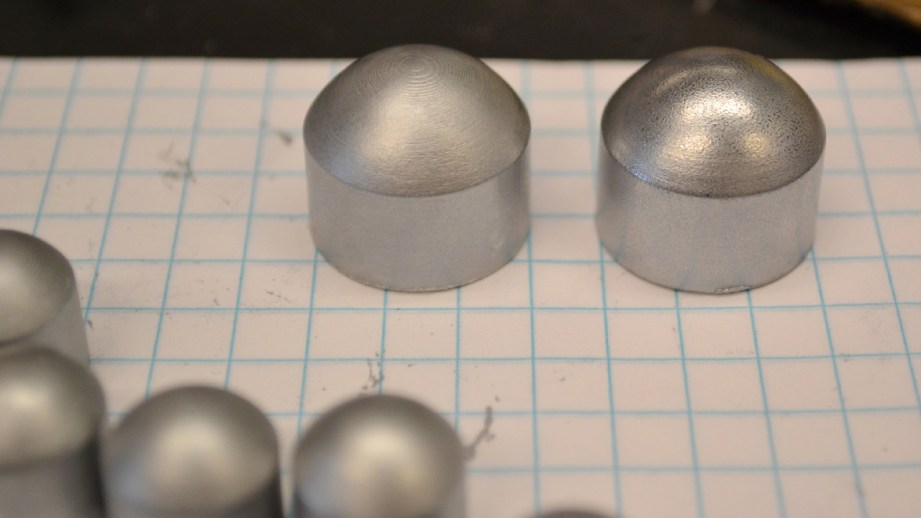
Following the advice from the video, I ditched the rag applicator and literally got my hands dirty by applying the Rub ‘n Buff with my fingers. As messy as this was, it really worked, as it allowed me to apply it in a very thin layer that worked into all the nooks and crannies and body heat and friction melted the wax just enough to make it really stick. It was also important to let it dry for a few hours so the wax could harden in preparation for buffing. I lightly buffed the parts with a cotton rag and it was starting to look really good. I got a little carried away at times and the black paint started to peek through but, as I hoped, it just made it look more like worn metal.
So far so good, the Motivator was looking as close to real metal as I could get it, but now for the part I always put off: weathering. The valve arms had a weathered bronze-look so I started with the black spray paint and then used antique gold Rub ‘n Buff and a small brush to highlight the edges–this turned out great and gave me hope for the rest. I added some green patina as well and planned on using some acrylic paint to add some rust and other grime. Didn’t think this one through; the wax-based Rub ‘n Buff repelled the water-based acrylic paint, just like a newly waxed car. I also tried some enamel paint, which dissolved the Rub ‘n Buff. Oops. Eventually I found that leaving the paint thicker by using less water got it to stick ok and the Motivator was starting to look nice and worn. I also used some india ink for stains and black shoe polish that worked really well to simulate built-up grime and gunk around parts.


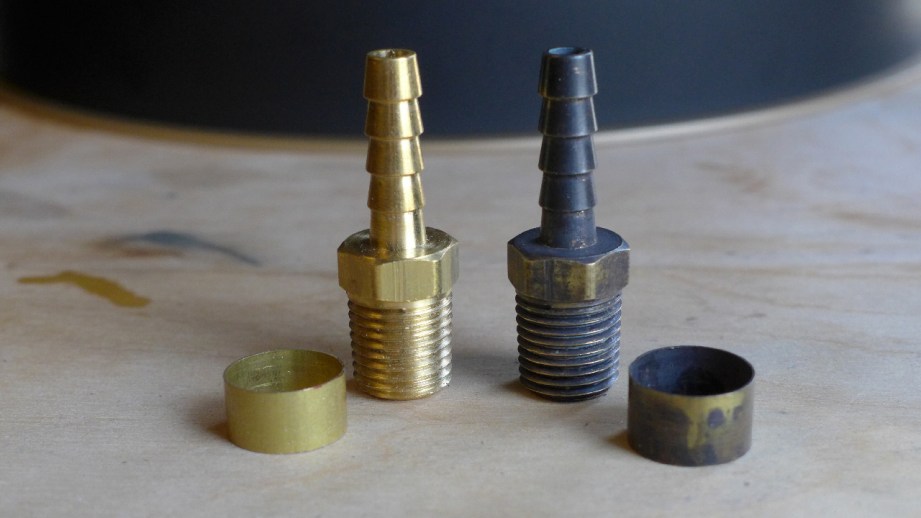
I also needed to weather all the brass parts but wanted to make this look really legit and age it for real. Googling ‘brass weathering techniques’ led me to a Pirate forum of all places where I found thorough instructions–all in pirate-speak. Techniques included soaks in various liquids such as salt water, ammonia and vinegar, but none of these worked very well. I ended up using Birchwood Casey Brass Black, a chemical typically used for blueing and blacking gun metal. This worked amazingly well and produced the exact look I wanted in seconds and after a little steel wool and green patina, it looked perfect.
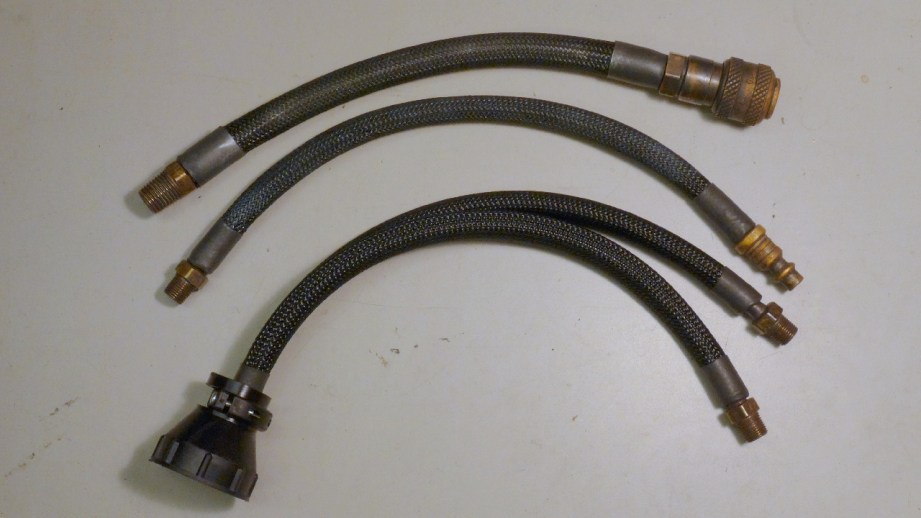
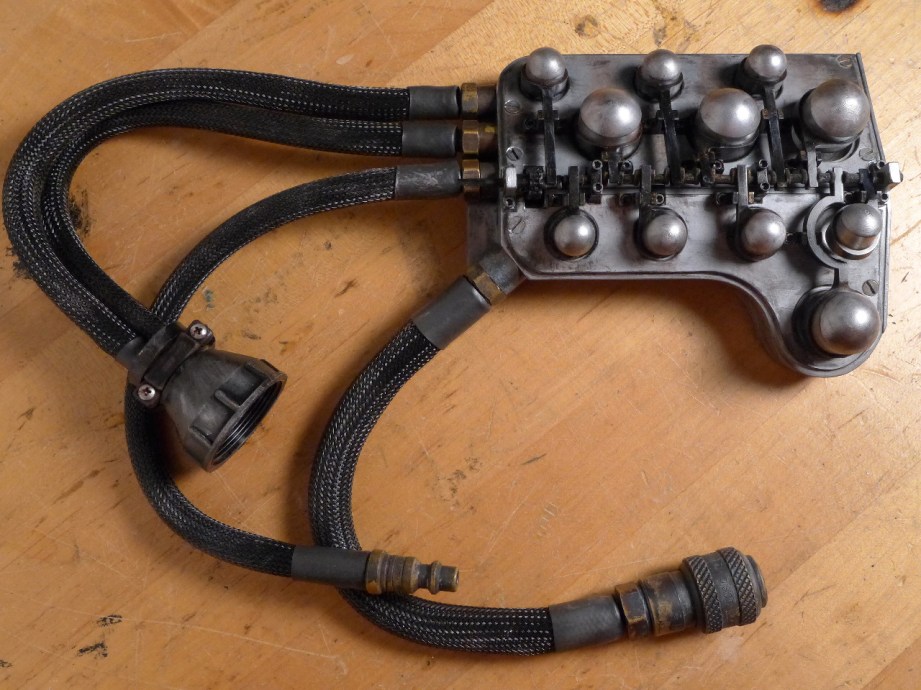
The last detail were the hoses, but I didn’t have all the needed parts. I had already specced the hose barbs that mounted on the block and Adam gave me the large plastic connector for one end and some braided sleeving but I needed the rest. I ended up getting brass air fittings for the other hoses and a super-flexible PVC tubing for the inner hose. Since my Motivator will never be attached to a full Mecha-Hand and probably be displayed in a cabinet, I shortened the hoses to make them more manageable. The problem I ran into was even with the super-flex hoses, I couldn’t pose them and they would tend to spring open and push the Motivator around. I solved this problem by inserting an armature wire in each hose, so they could hold a pose.

Considering that I had never attempted a Rub ‘n Buff finish and with my long history of choking on the finishing work, I am extremely pleased with how this turned out. I also realized that I really like working on ‘used’ items, not only because they look cool, but there’s more leeway on the finishing–although a bad weathering job can be just as ugly as a bad finishing paint job.
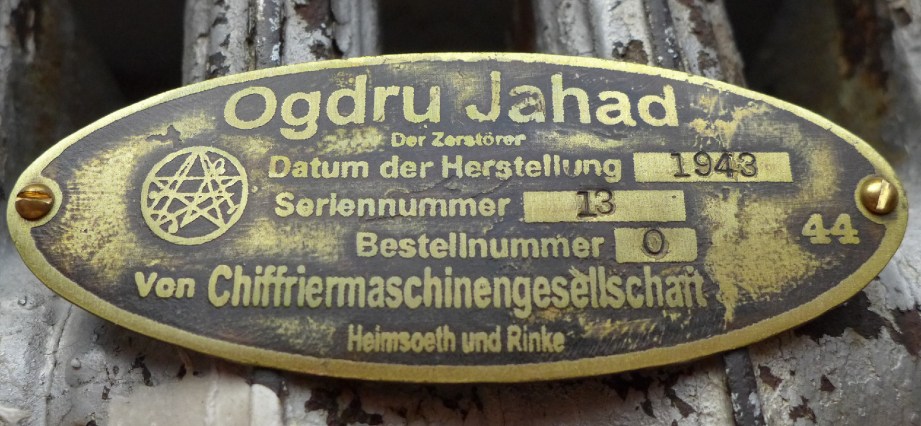
Adam gave me one of the plaques he had made for the Mecha-Hand, which gave me a good idea of how to display my Motivator, sans Mecha-Hand. I need to gather materials and do some work for this display, but it’s gonna be pretty cool. I’ll make sure to post an update whenever I get it finished.
Thanks for coming along on this adventure, you’ve all been very supportive and kind during my work on this project–it’s part of why I like our community so much. I’ll be on hiatus for the next few weeks, but stayed tuned for the next 3D printing article: a Halloween special!
In case you missed the other installments of the Millenbaugh Motivator build recap: