Adam Savage and Simone Giertz Make a Popcorn Machine

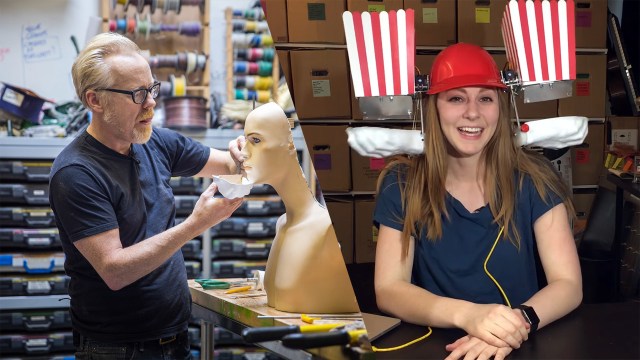
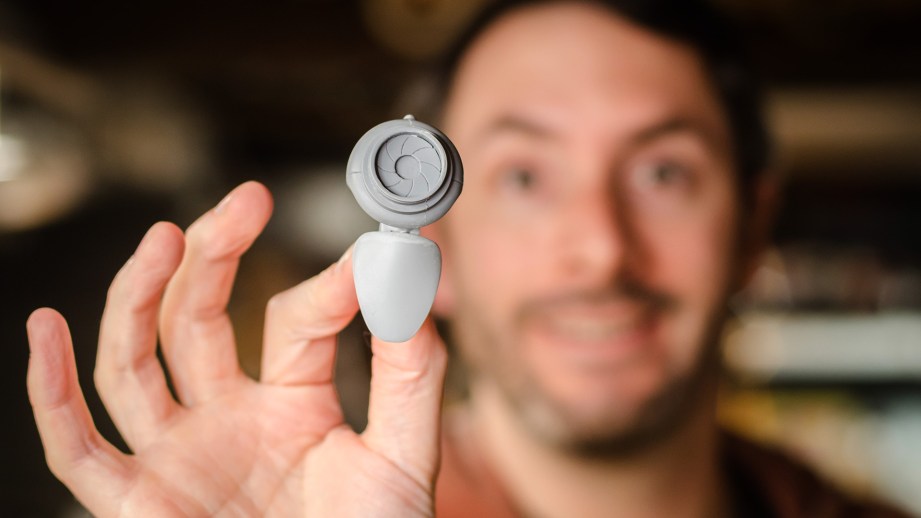
This very special One Day Build is an international collaboration with the newest member of the Tested family! Simone Giertz is an amazing maker who builds mesmerizing robots. To build her latest machine, she chats with Adam from her home in Sweden to design a mechanism to deploy popcorn from a helmet. Adam builds some parts in the cave using his trusty vacuum-form machine!

Shot and edited by Joey Fameli

Adam Savage’s One Day Builds: Filing the Files

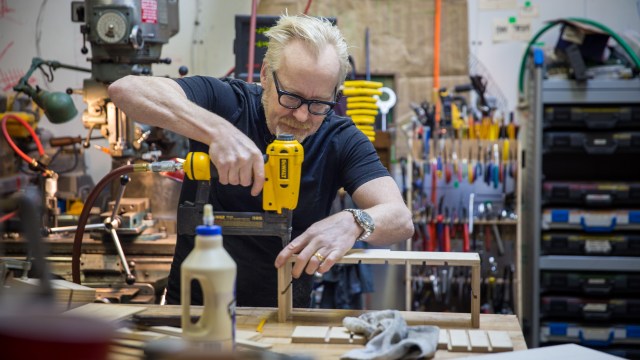
This mini-build is actually a pre-build of sorts. In preparation for an upcoming One Day Build, Adam spends a little time in the morning building a new plywood box to organize his mill file collection. The files are taken out of drawers and put in a new system for first-order retrievability. It’s time to file the files!

Tested: HTC Vive Review

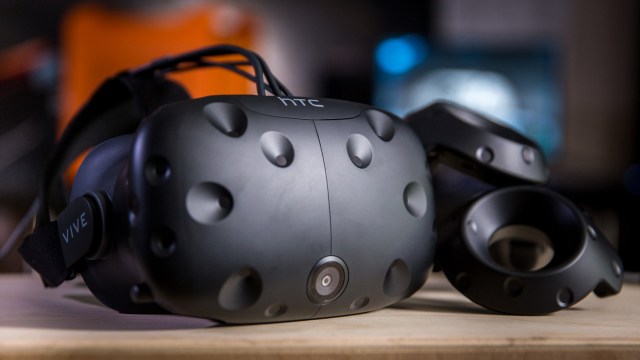
The consumer release of the HTC Vive is finally here! We’ve been testing the Vive Pre for a while and the final headset for about a week, playing VR games with tracked controllers in a roomscale setup. Jeremy and Norm discuss the setup process, ergonomics, comfort features, and launch content for Steam VR. Plus, we play through Valve’s first-party VR game, The Lab!

Molding and Casting Tiny Prop Parts

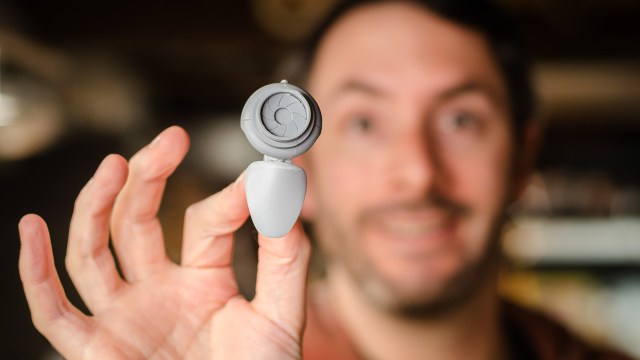
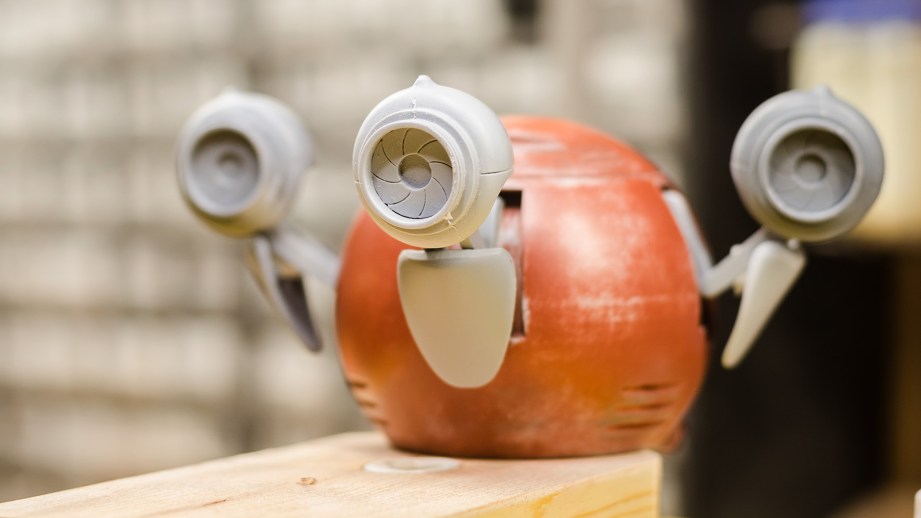
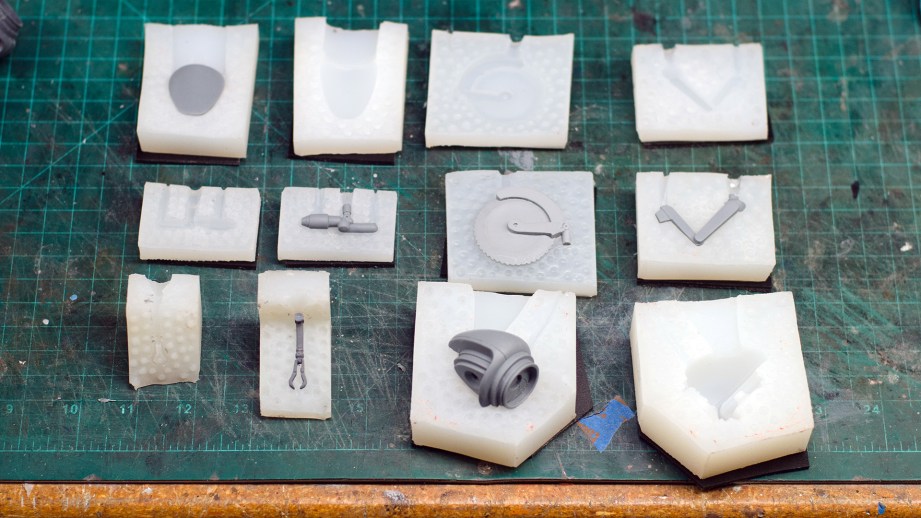
I don’t know about you, but I tend to jump from one project obsession to another. Just as I was getting over my space gun prop obsession I slipped right into a deep fascination with tiny robot models. My current project is a 1:6 scale Mister Handy robot model from Fallout 4. The majority of it is 3D printed, but I’m molding and casting all of the parts for durability and so that I can make multiples of repeated parts like the arms and eyes.

I’ve made a whole bunch of silicone molds in my career. Most of them have been of a moderate scale; roughly space pistol sized. Some of them, on the other hand, have been ridiculously large. For example, the District 9 alien rifle main body mold is over 44″ long and took my wife and me 4 days to build.

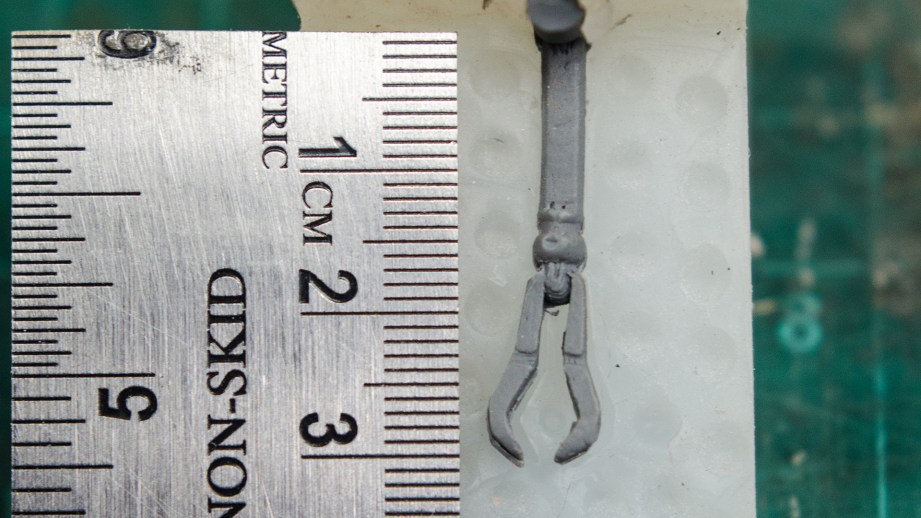
With this latest tiny robot project, I’ve gone in the opposite direction. The molds and pieces for such a small model kit are comically tiny compared to the rifle molds. Some of the parts for this pint sized robot are only a couple of centimeters long! Making gigantic molds and castings is extremely challenging, but I quickly learned with this new project that small molds have their own, different set of hurdles.

Note: For the examples in this build I used Mold Max 30 and Mold Star 20T silicone to make my molds. Mold Max is a good, all purpose silicone and 20T cures super fast (30 minutes) which was really handy for mold experimentation. I cast all of my parts in Smooth Cast 300, tinted gray. This is a great general purpose urethane resin that cures pretty quickly (10 minutes). It also has a relatively low enough viscosity, which helps in capturing the intricate details in my small robot parts.

My Nemesis: Bubbles

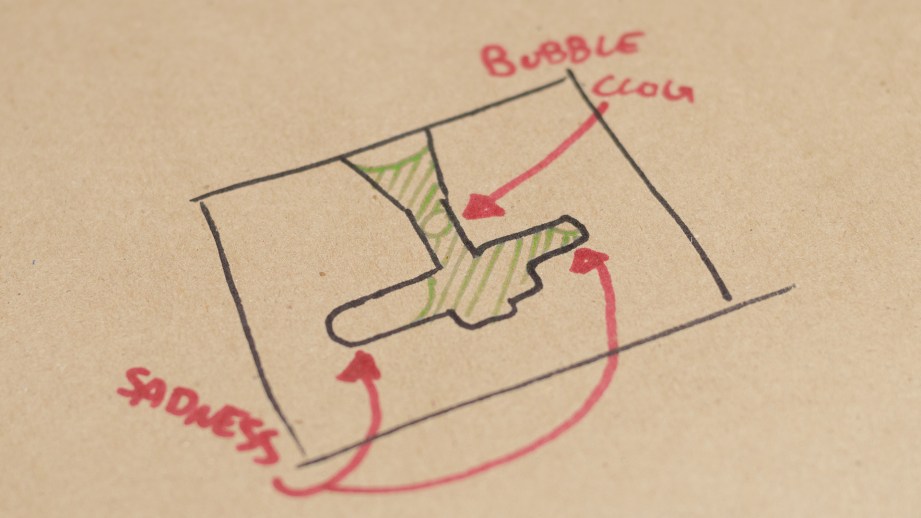
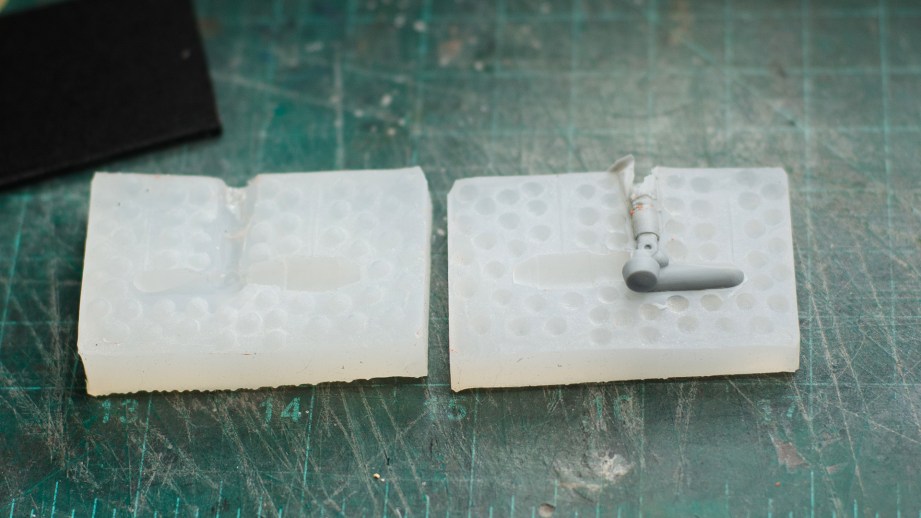
Yes, with every mold you make, big or small, you need to be very aware of the bubbles your castings may trap in the resin. Large molds have a distinct advantage in that the fluid weight from all the resin you pour into them will help force bubbles up and out of the mold cavity, usually through the pouring spout. In a really small silicone mold, that pouring spout is too small and there isn’t enough liquid weight for the air bubbles to escape via that one spout. This causes a clog that won’t allow the resin to completely fill the mold cavity. From the outside the mold appears to be full of resin. The inside, however, is mostly air, shame, and sadness.

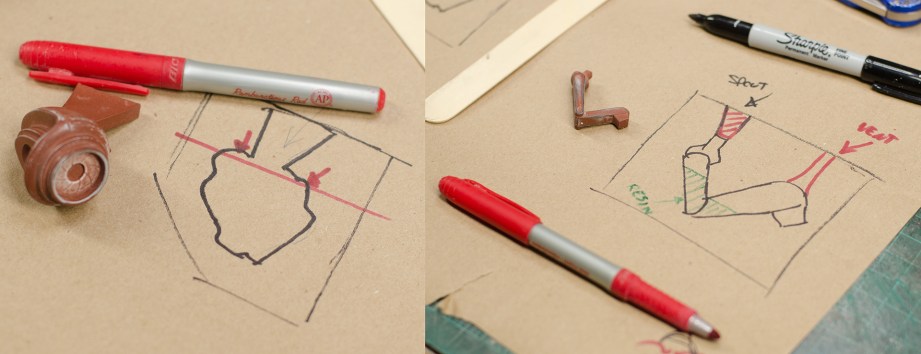
To combat this, molds must be planned and properly vented. This way, when the liquid resin is poured in through the pouring spout, the air can escape through a vent instead of trying to force it’s way back through the tiny spout that you’re clogging with the resin. Planning these molds on paper is a good first step!

By cutting a couple of vents in the appropriate places in your mold you can almost completely negate any trapped air bubbles in your castings!
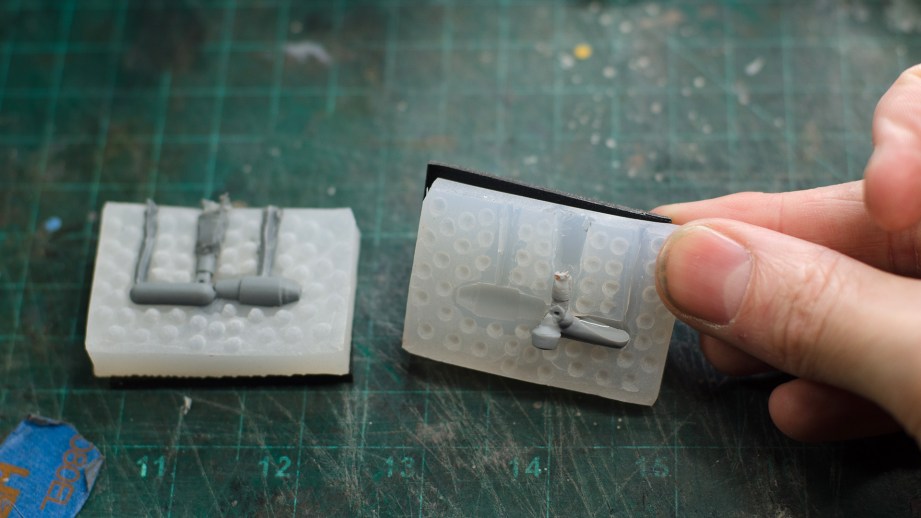
Vent success! Vent success!

Planning Your Vents

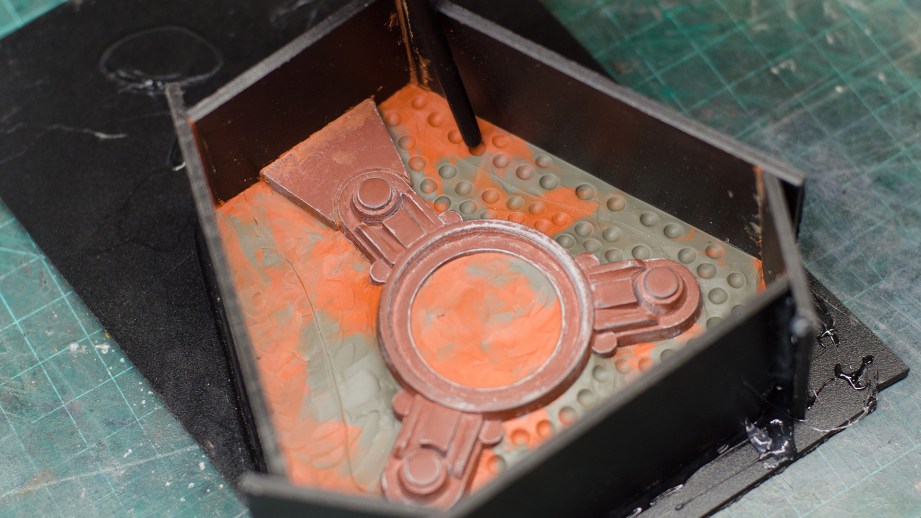
Many times you won’t really know the proper places to add vents, or if you even need them, until after you’ve tried casting a part from your mold. In that case you may just have to get X-Acto happy on your cured silicone mold and carve trenches willy-nilly until you can get a good casting.

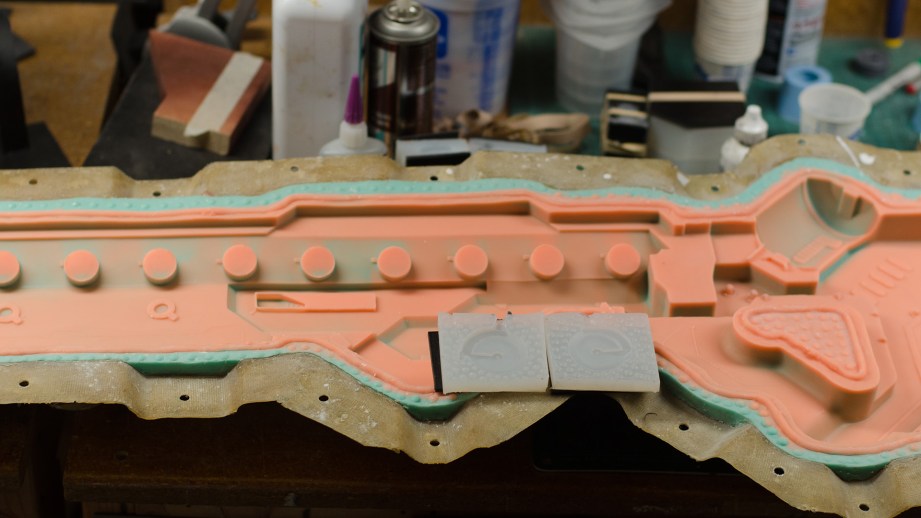
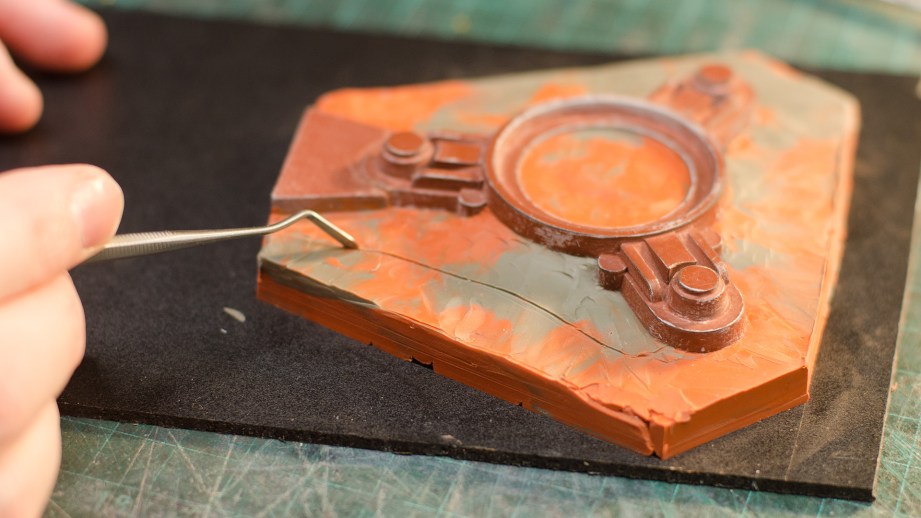
The more mold making you do, however, the more you can anticipate problem areas and plan them ahead of time. I like to draw lines when I’m claying up the first half of my two part molds in the areas where I think I’ll need some vents. This can be extremely handy because you can plan your registration keys around where the vents will be added.

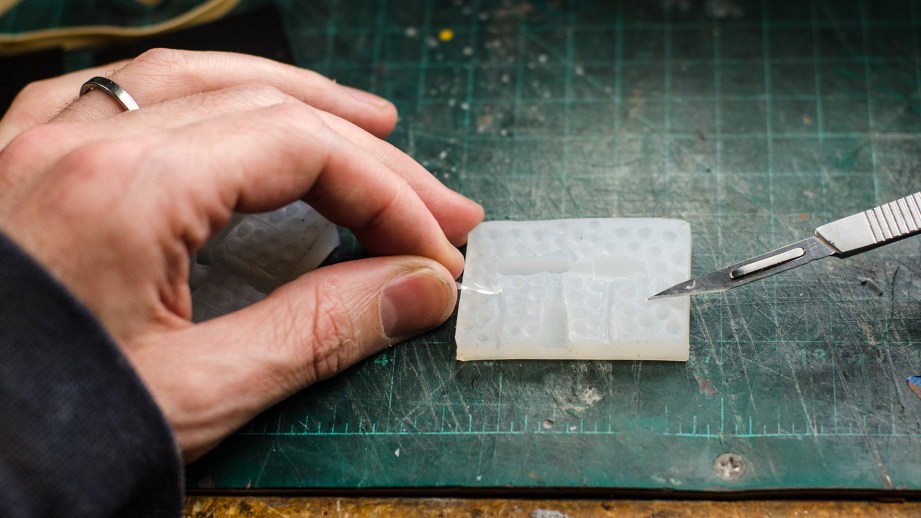
I also don’t try to sculpt in the vents before pouring the silicone. This would be extremely tedious. You would have to leave a thin snake of clay in the vent area. Instead I’ll simply draw the vent area into the clay and pour the two halves of my silicone. Then, using a small tool, I’ll punch in all of my registration keys around the part and my vents.

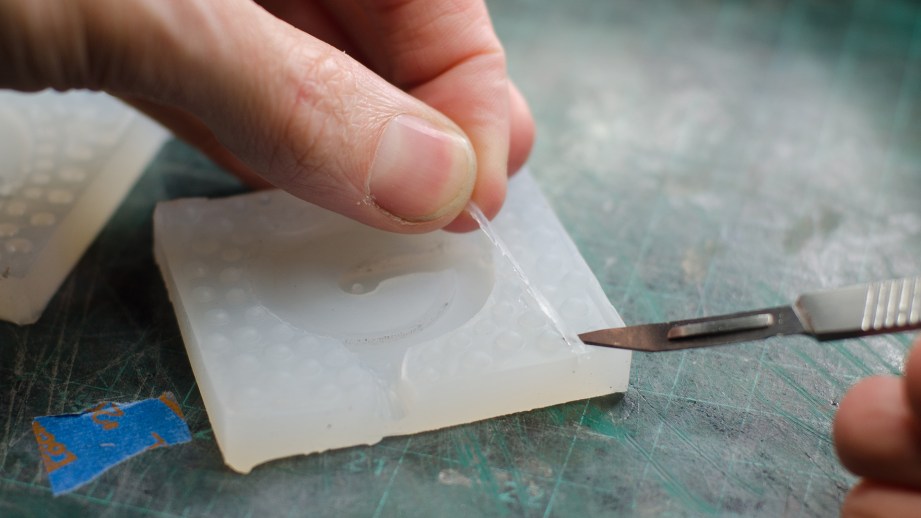
When the mold is done and cured, you can cut a trench in the vent areas with a sharp knife. It doesn’t have to be pretty, these vent sprues will be trimmed away from the final cast piece.

More Bubbles?!

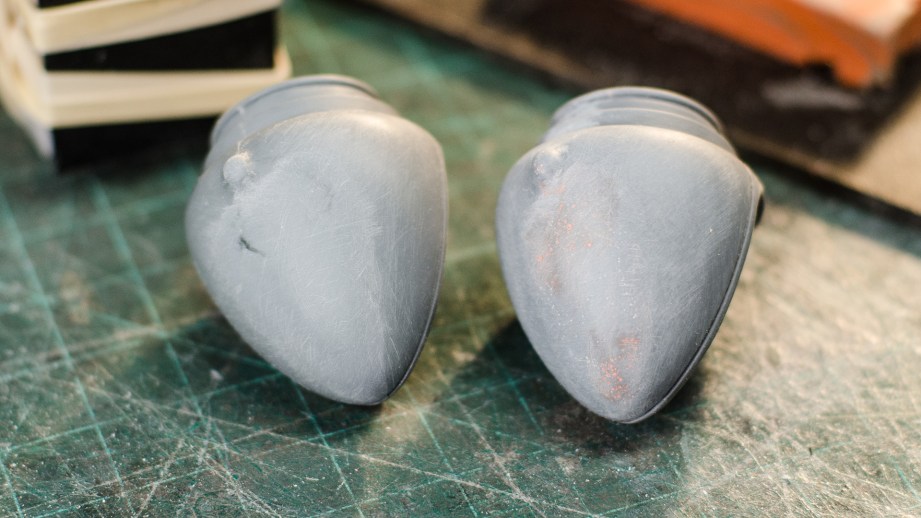
Cutting good vents in your small molds will solve your major bubble problems, but it turns out that air is an extremely devious foe. Despite your best efforts, castings can still have microbubbles lurking just under the surface of your cured resin. These bubbles don’t show themselves until you start sanding your casting for paint!

The above example showcases these microbubbles in fine detail. In the casting on the right, after discovering them during the casting cleanup process, I filled the bubbles with a red spot putty. After sanding the putty down you’ll end up with a perfectly smooth piece, but it would be great if there was a way to avoid these bubbles too.

In fact, the example on the left doesn’t have any of those pesky microbubbles! This was done using a pressure pot. Pressure casting is invaluable for small parts or anything that needs to be cast in a transparent resin. Both cases have a tendency to show off any imperfections in the casting and by compressing those microbubbles, the problem nearly vanishes.

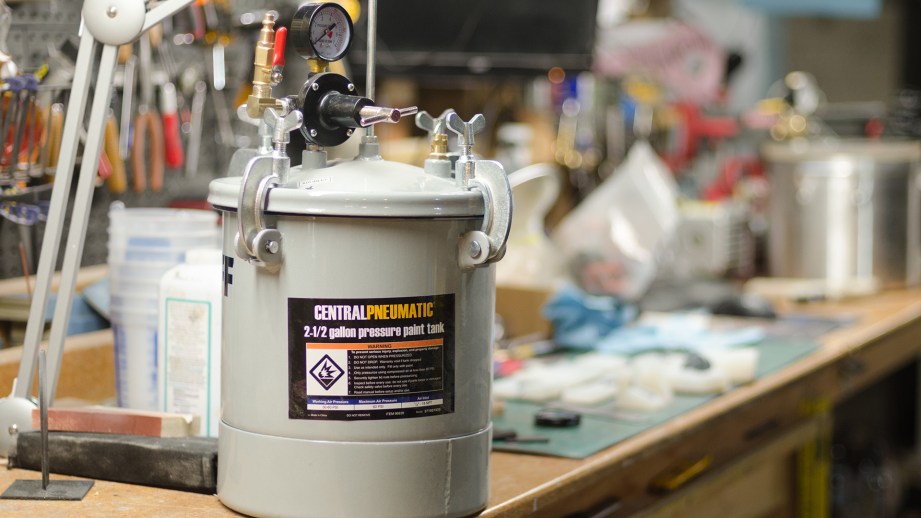
My pressure pot is a commercially available paint pressure tank from Harbor Freight. I had to change up the fittings a little bit to make it work for my purposes and with my air compressor, but the price was right and it gets the job done.

The idea is that, under high pressure, air will compress and liquid will not. When you place your liquid resin laden molds into the pressure pot, seal the lid, and raise the pressure to about 40 PSI, those microbubbles will be compressed to an invisible size. Then you can leave the mold in the tank until it cures into a solid plastic and those little bubbles remain microscopic until doomsday!

These two simple techniques, venting and pressure casting, will help you make tiny molds that are extremely effective at casting flawless resin copies. As always some trial and error is to be expected. Fortunately these wee little castings don’t take up too much resin, so you can be free to experiment to your heart’s content without breaking the bank.

I do hope you give this kind of molding and casting a try. I’ve been having a joyous time making and casting all of these tiny robot parts, giggling like a child the entire time! If you’d like to learn more about silicone mold making, feel free to check out our ongoing molding and casting video series!

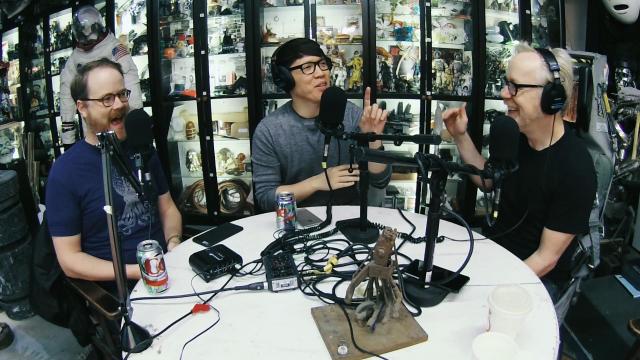
One Hamilton Fact – Still Untitled: The Adam Savage Project – 4/5/16

Adam and Norm return from a few weeks of travel for this catch-up episode of Still Untitled! We hear about Adam’s recent trip to New York, where he attended a Tom Sachs art show and finally got to see Hamilton: The Musical! Plus, we learn about Will’s newly announced VR project, FOO!

3D Mapping The Exploratorium with Matterport!

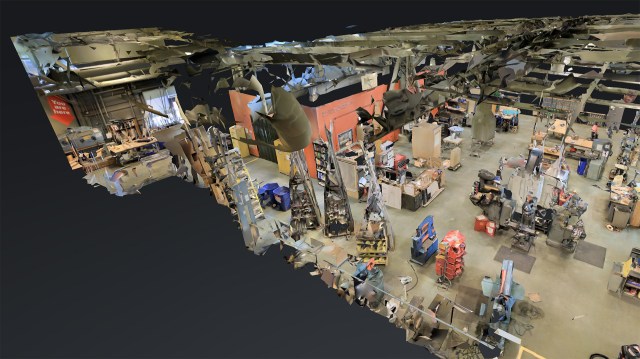
We visit San Francisco’s Exploratorium science museum with Matterport, a company that makes a room scanning camera for creating interactive 3D spaces. Matterport co-founder Matt Bell explains how the camera combines scanned meshes with high-resolution imagery to create a highly detailed model of The Exploratorium’s exhibit workshop. Explore the model here and here! (With special thanks to the Exploratorium, San Francisco, California)

Shot by Joey Fameli, edited by Adam Isaak

Building Fallout 4 T-60 Power Armor, Part 1

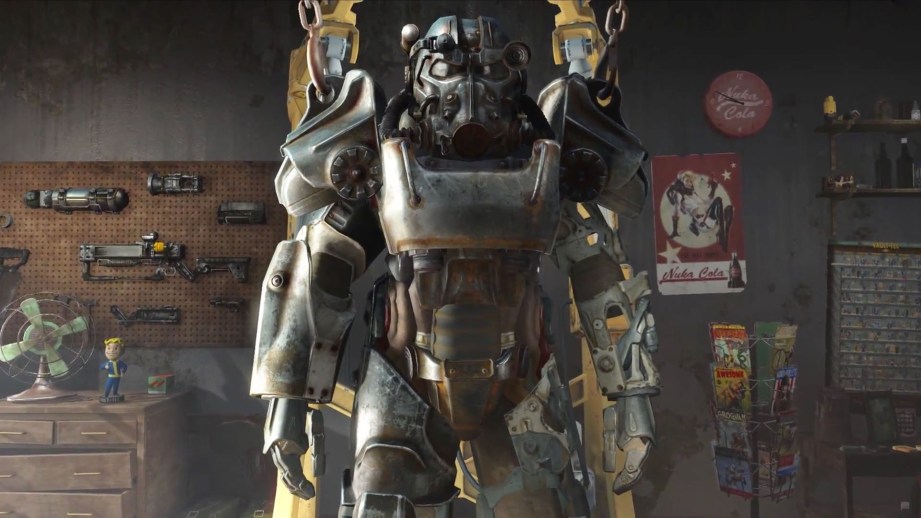
In this post, I’ll be outlining the process of extracting the 3D models for the Power Armor from Fallout 4’s game data and turning them into the blueprint for the rest of the build. Modern games like Fallout 4 have incredibly detailed models in game and are a great base to start from and require very little digital cleanup and remodeling, so when doing props or cosplays from games I try to start from the source.

The process to extract content from the game can be pretty tricky. The exact process for every game will be different, and some games are so locked down that you have to rip the data directly from the video card while it’s being rendered. It pays to do a lot of research because there is almost always some tool that some person or group has developed to assist extracting the content.

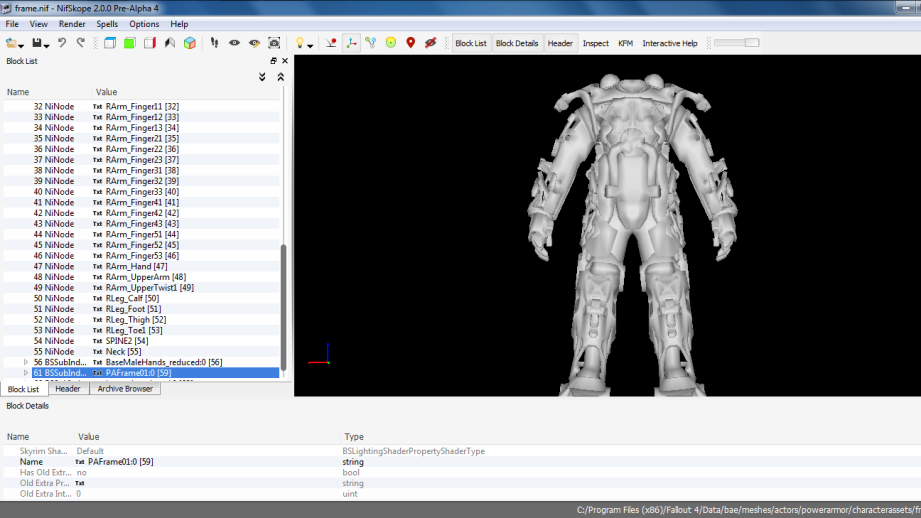
Bethesda Games run on their own proprietary game engine, and the fan community has created a handful of tools you can use to extract the game content. The main programs we use for this are the Bethesda Archive Extractor to extract models and textures from the game’s content archive, and NifSkope which will load the extracted content and convert it into a format we can use. Locating the right assets can often be much easier said than done as there are literally thousands upon thousands of model and texture assets in modern games. After we extract them using BAE and NifSkope converts the models into a useable format, we load those into our 3D modeling suite. Now we can begin the real work!

I often get asked “what 3D modeling program should I use?” There’s no right or wrong answer to this question, so ultimately it comes down to what you are most familiar with, and what exactly you’re trying to create. Generally speaking, if you are wanting mechanical parts or something that moves, then a CAD suite is best suited for the job. If you’re wanting an organic shape, like the Xenomorph skull, then a digital sculpting suite like Zbrush or Sculptris is probably better. We’ll be doing a lot of simple operations, and personally I use Blender for things like this because it’s free, it’s open source, and I’m familiar enough with the interface to be able to do simple tasks quickly. Try not to limit yourself to a single program or toolchain, and use the right tool for the job even when it comes to modeling and CAD software.

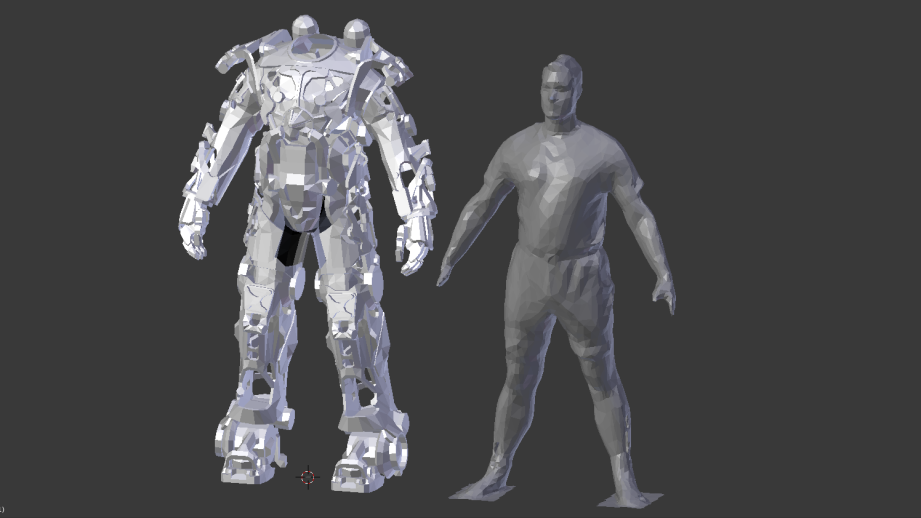
3D models from video games aren’t designed to exist in the real world, and don’t have any scale reference.

Back to the build–it’s time to start figuring out how we’ll be constructing it. You want to avoid the temptation to start 3D printing or CNC routing right away, as something this large and complex requires you to carefully consider not only how to produce the parts and but how you’ll actually be wearing them. 3D models in video games have two major disadvantages. The models are rarely designed to be able to exist in the real world, so you will have objects that intersect and exist inside of each other in ways that are impossible. And they also don’t have any scale reference to them, so you don’t know how big or small to make them without the final product coming out tiny or gigantic.

Solving the problem of intersecting solids is tricky. Often you can join parts together or subtract them from each other so that you can print sections and attach them together once they’re printed. In some cases you may have to fill in gaps in the model’s geometry, or if the models are particularly bad, redesign them entirely. Thankfully the T-60 models are really well designed and most of the models require very little digital cleanup or remodeling work. Some parts are hollow or “non-manifold” but we’ll go over fixing that later.

Solving the issue of scale requires some creativity. For things like weapons, I typically use the width or length of my palm to scale the gun so my hand will fit the grip, thus scaling the whole weapon to be realistically human sized. Way back in 2011 when I was building my Gravity Gun, that’s how I scaled my game reference (and wound up being incredibly close to both Volpin’s and NECA’s versions!). But for full body shapes like armor you either have to do a lot of guess work, or work off of a reference – which is really easy if you setup a basic 3D scanning rig.

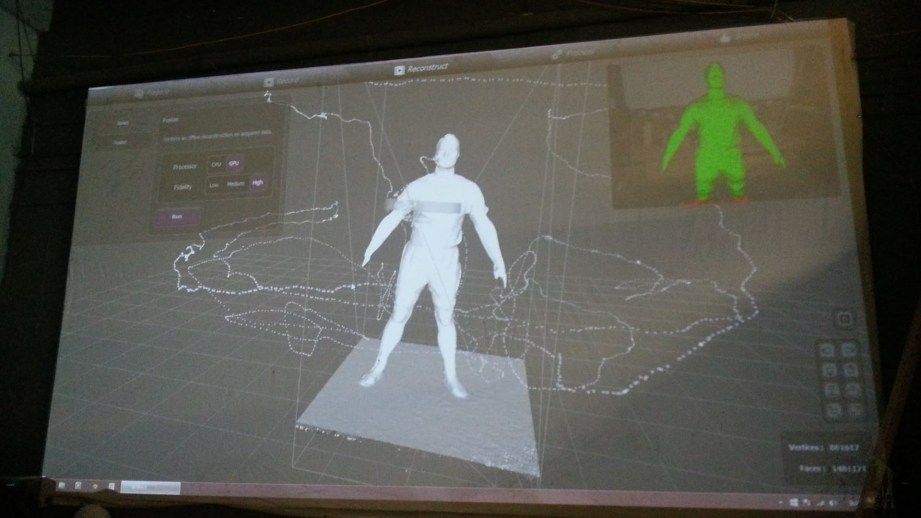
This is Elliott, my friend and assistant on this project. Using an Xbox Kinect we got off Ebay and a piece of software called Scannect, I was able to pull a rough 3D scan of of his body which I could import into Blender and be our life sized reference to scale the whole power armor. Scans from a Kinect won’t give you millimeter accurate details like scanning via photogrammetry, but they are more than suitable for a real world human reference. Once we worked out fitting him into the armor digitally and deciding exactly how big to scale it, we could then start working on the models to make them production ready.

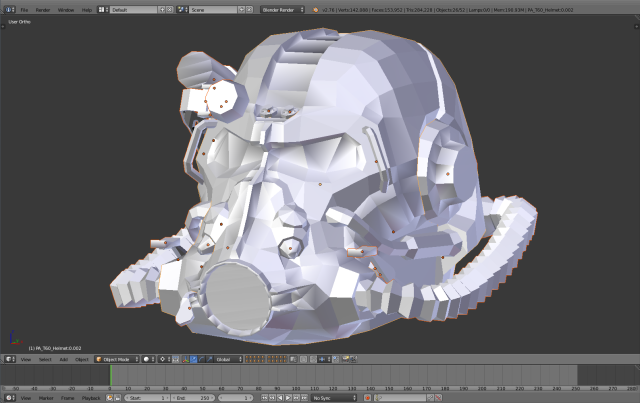
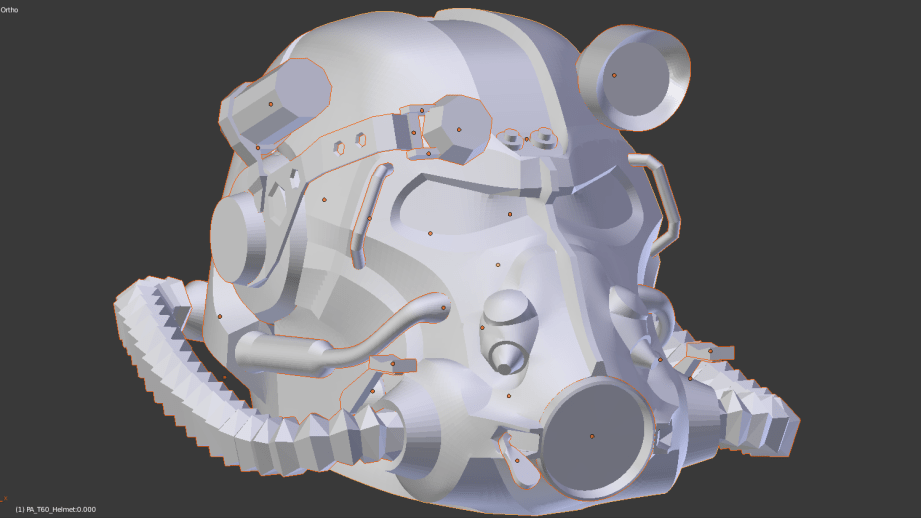
As mentioned in the previous post, we are utilizing three main production methods for the armor – 3D printing, CNC routing, and Pepakura. The models straight from the game are typically suitable straight to Pepakura, and I’ll go over that in detail in a later article. 3D printed and CNC routed parts work from effectively the same models, so prepping for that is the same process. We will need to increase the quality or detail of the models before they are print ready, since trying to print them as-is will make them appear “low poly” and have lots of sharp, polygonal edges. For some things, like the ever popular Bulbasaur planter on Thingiverse, the low poly look works in favor of the finished print. But since we want the armor to appear as realistic as possible, we need soft curves and hard edges where appropriate.

The original low poly model The original low poly model

In most modeling suites this is easy, and Blender is no exception. For any given section of armor, we define sharp edges where they need to be defined, and then perform what’s called a subdivision on the model. This increases the number of polygons and smooths everything out, except for where we defined the hard edges which stay crisp and intact. Defining the sharp edges is crucial, without doing so you end up with a rounded blob that vaguely resembles our part. The result is a high poly and high detail model suitable for printing or CNC.

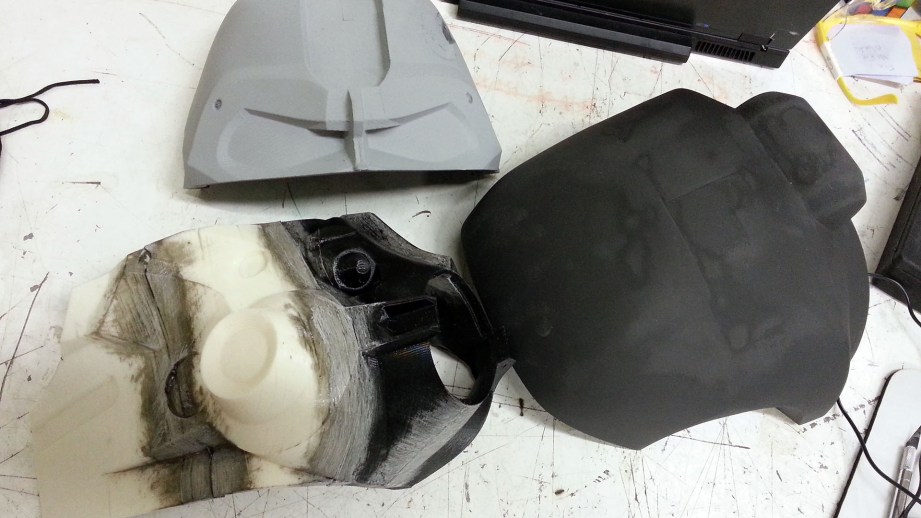
Most video game models are non-manifold, a term 3D printing enthusiasts will be familiar with. This means that the model is hollow and not “water tight” with gaps or missing sections that make it difficult for a printer to determine how the object needs to be fabricated. For models that suffer from this, we can try to patch them up within Blender, or in a free tool like Netfabb. Or we can add a “shell” to the part to give it some thickness. This was done primarily for the helmet, where printing it as a giant solid piece would be a massive waste of printing time and material.

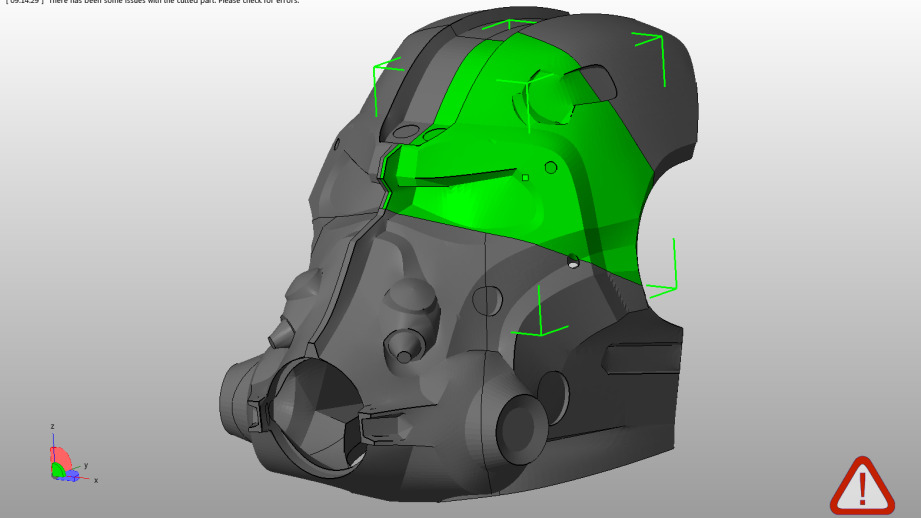
Now that we have our high detail models that are ready to print, we need to chop them up into sections that will actually fit on the printers. There’s a bit of an art form to figuring out how and why to cut certain sections. Most axioms of 3D printing will apply here, like trying to create as few overhangs as possible, making sure the part that touches the build platform will be large enough to grab onto your print bed, and always being mindful of your printer’s printing volume and not creating sections that are too big to fit in your machine. I try to strike a balance between sections that will not be difficult for the printer to create, and not unnecessarily splitting the model into many small sections. This is an instance where a well tuned machine (and well tuned support material settings) can make the difference between an easy printing job and a huge headache.

The helmet was cut into 12 separate pieces for the main body using Netfabb’s cut feature, and all of the bits and details were printed on their own to make cleaning them up and detailing a lot easier. Up next we will go over assembling and cleaning up our prints to make them into the high quality masters for the rest of the project. See you in a couple weeks!
Read Part 0, an overview of this costume project, here!

Tested: Oculus Rift Review

It’s finally here! We’ve been testing the consumer version of the Oculus Rift for the past week, and share our thoughts and impressions of the final hardware and launch software. Norm and Jeremy discuss the most frequently asked questions about the ergonomics, display, screen door effect, tracking range, and how gamepad virtual reality games hold up. The new age of VR begins!

Shot by Joey Fameli, edited by Norman Chan